Changing dated can lights!

My wing is broken.

Poo.

It’s my elbow…it is still boogered. I am trying to “heal” it by resting it but after about a month I’m ready to give up and see what a ortho dude can do for me.

While “resting” I pretty much sit around and look for stuff to do.

Laying on the couch, looking at the ceiling, I began to obsess about my dated can lights

SUPER simple fix and on a scale of 1-10 it is pretty much a 1.

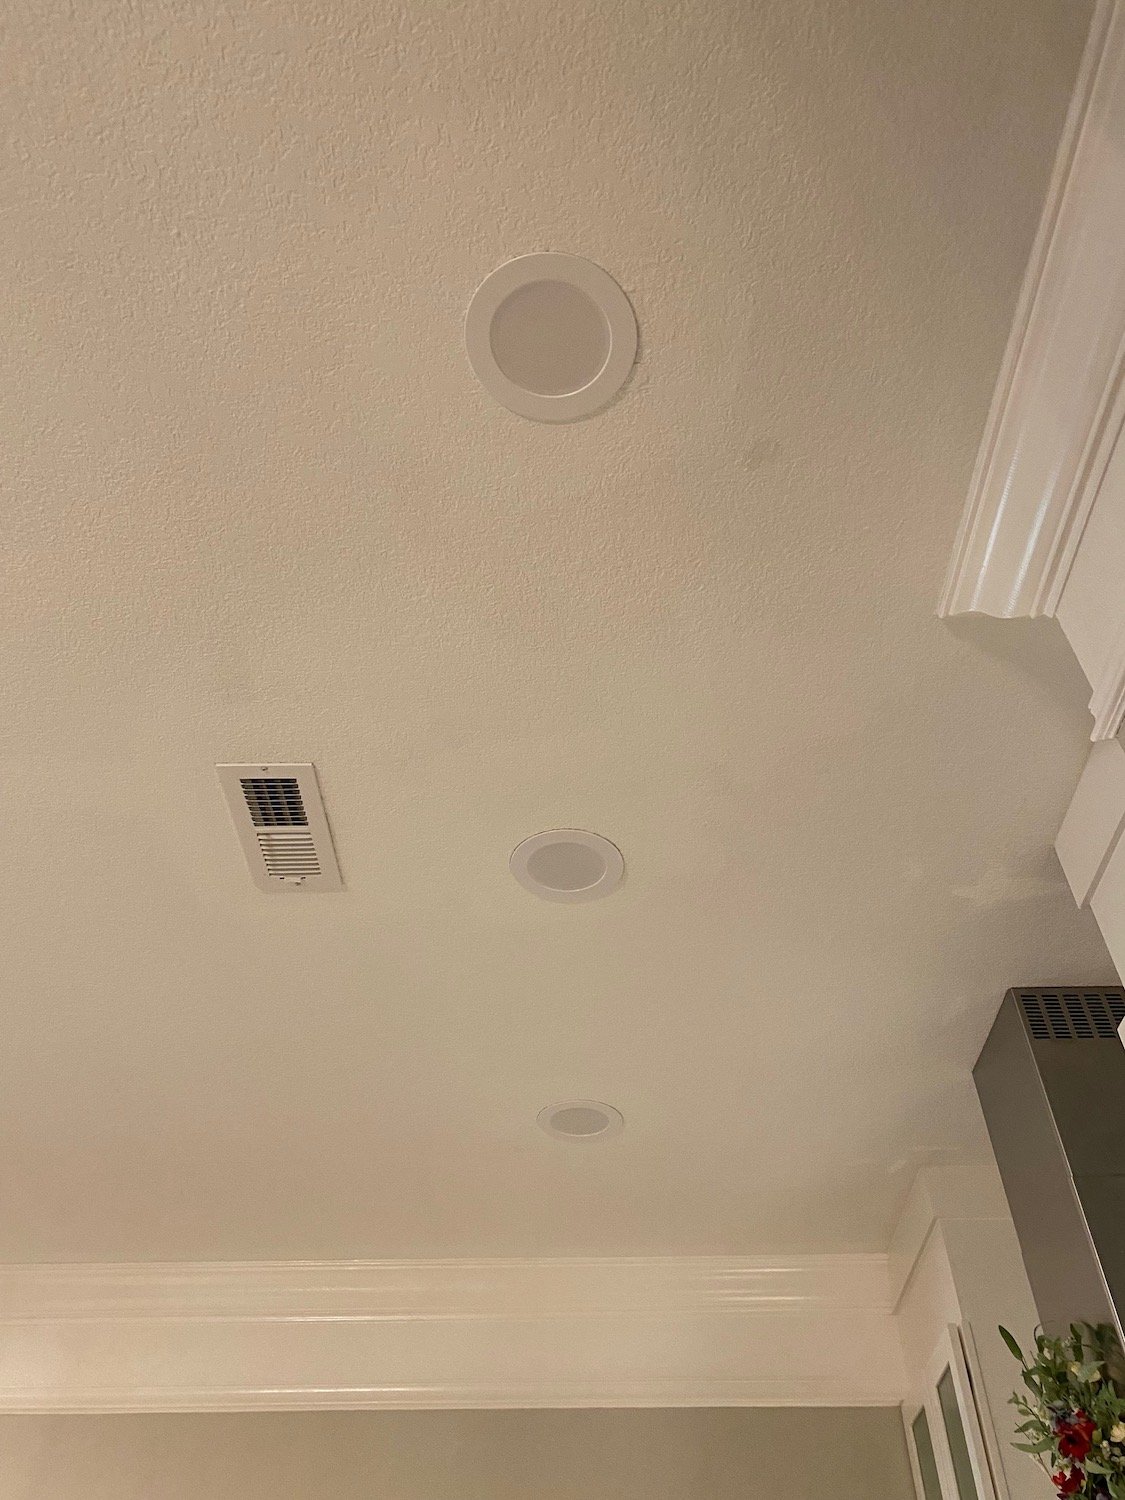
This is what I have….

…an ugly old can light with a bulb. It had obviously been painted over when the prior owner painted the ceiling. I have five in the kitchen, two in the den, four in the living room, two in the bedroom and four in the bathroom…so yes, they annoy me. But truthfully only when I am laying on the couch or in the bed looking at the ceiling.

While they are “dated,” truth be told no one really pays attention to them except of course when a bulb goes out.

This is where I want to say that when “they” say an LED bulb lasts 10 years, “they” lie.

Beside the point…point is, it is cheap and easy to replace these “dated” fixtures.

So off to Lowes I went and THIS is what I found….

When I say it was easy to replace, I am not kidding. The hardest part was climbing up and down the ladder. Just remove the existing bulb and trim piece. The trim piece is usually held in place by little springs or pinch clips.

Then just screw the new fixture into the socket (like a light bulb) then slip the little pinch clips into the existing brackets on the side of the can. Simple!!!!

The fixture has five different light settings on the back…from bright white to soft “yellowish.” I set all my living space lights on a soft setting and the three in my kitchen on a brighter white for task lighting. Perfect.

TIP! If one of these eventually goes out you can’t just replace a bulb. My suggestion is to get an extra 1-2 in case one goes out in the future and this style or brand is no longer available…that way you won’t have to replace multiples if one goes out!

Again, one of the simplest and most impactful DIY projects you can do. Don’t know why I haven’t done this in the last three years.

Oh, yeah, I know why. Rarely do I lay on the couch and look at my ceiling lights.

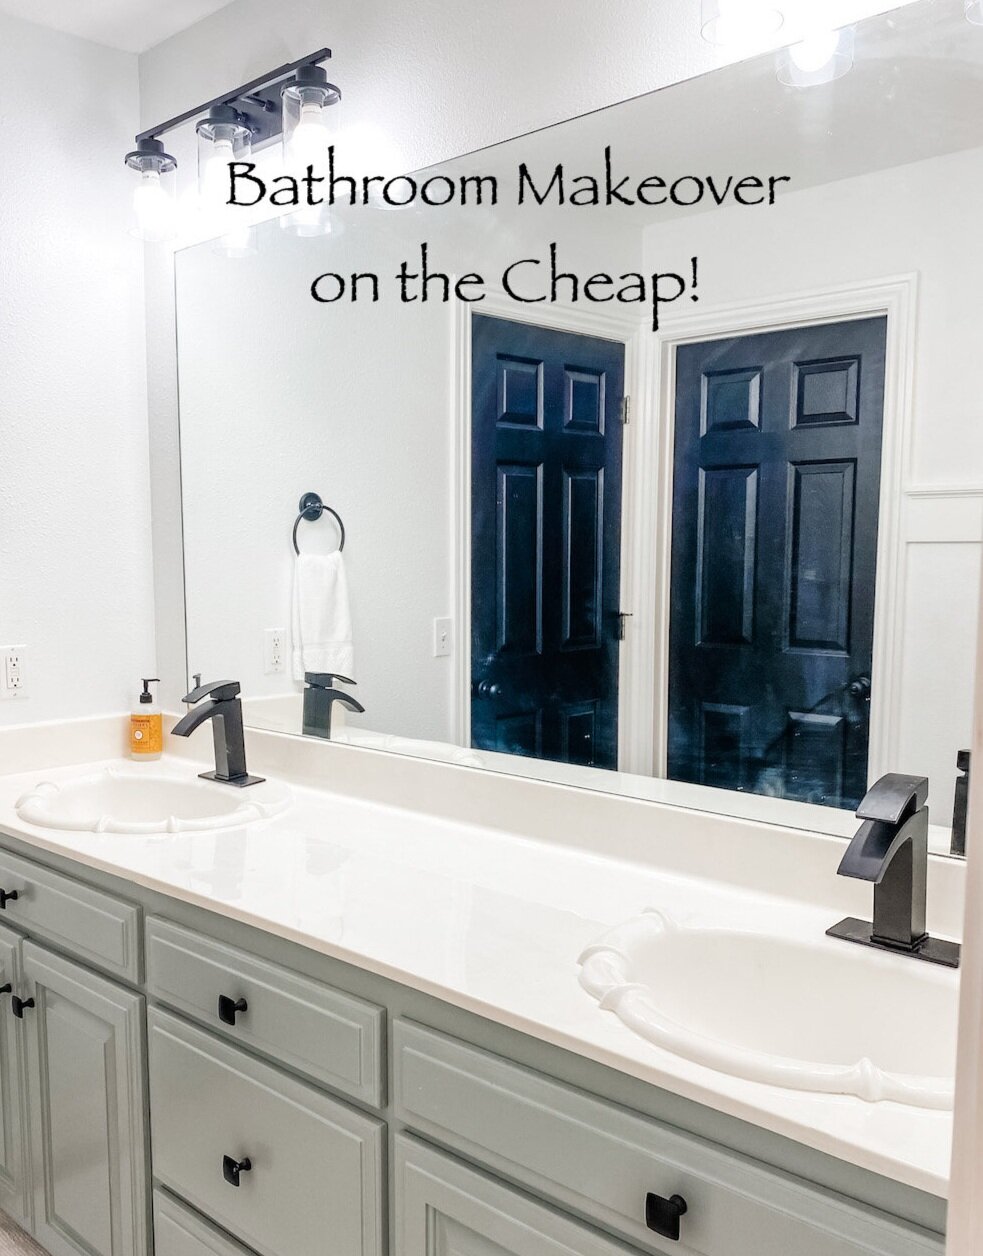
Bathroom makeover on the cheap....

IMG_1880.JPG

I consider myself “apolitical.” In other words, I have an opinion, a personal “ideology,” but I really try to avoid all the political “fodder.” It’s just too depressing, stressful, overwhelming…

It eats into my personal happiness.

But with all that is going on, I found myself sitting on the couch mesmerized by the news ALL DAY FOR AN ENTIRE WEEK!

I was so overwhelmed.

I HAD to get moving and my little morning walk and ride wasn’t cutting it…just too much time left in my day.

So I tackled a project I could not have cared less about lifting a finger or spending a dime on…the guest bath.

It gets used MAYBE 2-3 times a year when the kids come for overnight visits. I threw down a few comfy rugs, stocked it with “guest necessities” (this stuff is important) and hung a nice curtain. I would clean it when I knew we were going to have over night company…other than that…out of sight, out of mind.

The fact that few used it or saw it on a regular bases was just fine by me.

It wasn’t completely offensive.

It was just “blah.” Beige walls, off-white cabinets, dated, boring lighting and fixtures…just blah.

Again, who cares…

But I needed to get moving and put my body in motion. And this was the perfect project. Inside in the AC but away from the TV.

Inspiration…anything “unblah.”

My plan…”unblah” it.

Budget…as little as it takes to “unblah” it.

IMG_1843.jpg
IMG_1844.jpg
IMG_1842.jpg

Usually I am all for finding an inspiration, making a plan, and working with a sound budget. In my opinion, it is the only way to attack a big project like this.

But I need to move and I didn’t have the time or patience to sit and think about this for weeks. I decided my MAIN objective was to use the materials I have on hand and try to make a few changes that would “unblah” the space without breaking the bank.

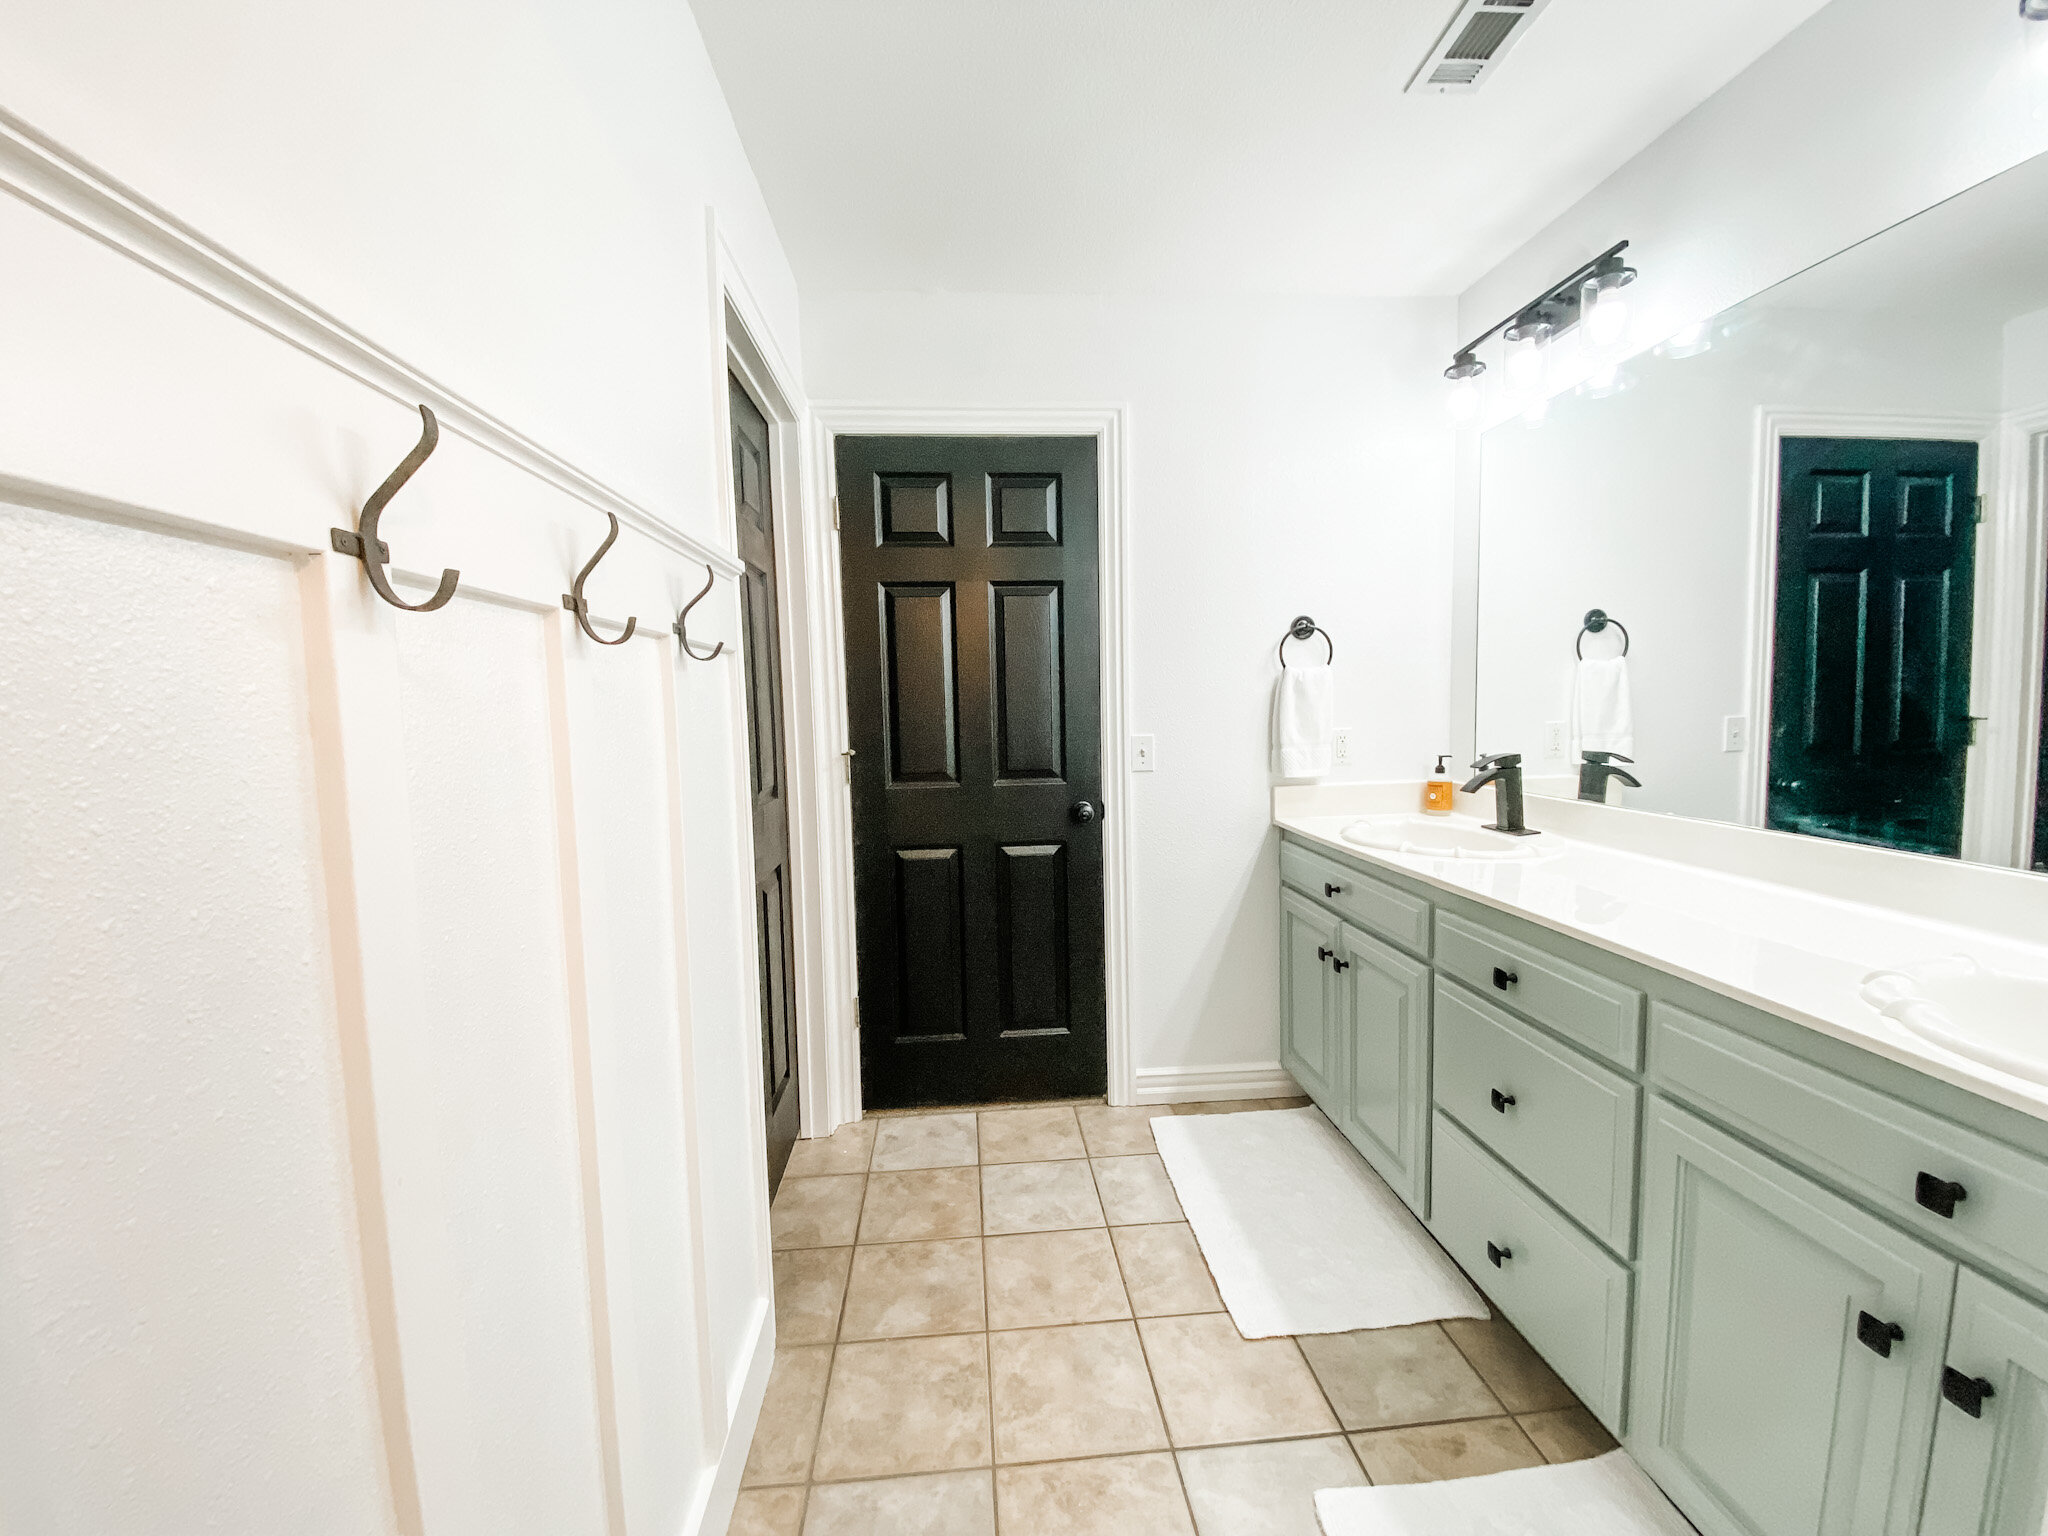
First on the list…get rid of all the gold fixtures. The style wasn’t TOTALLY offensive but they are gold…gold towel and hand towel bars and gold TP holder. I decided to “repurpose” the hand towel holders and TP holder by painting them black. A little primer, a little black paint…both in my stash. Cost…zero.

IMG_1875.JPG

I also replace the faucets…the existing weren’t totally offensive but these were pretty inexpensive on Amazon…less than $50 each.

I removed the towel bar and added a little bit of board and batten with hooks for towels. Similar to my entry….super simple…again look for a tutorial that makes sense to you! Less than $50.

IMG_1886.JPG

I used some leftover trim paint to paint the board and batten and all the trim. Cost…zero.

I painted all the doors in the main part of the house before we moved in…but again, this space got completely ignored! I even ordered black door knobs but never put them on these doors. I used the left over black paint and the knobs I bought over a year ago. Cost today…zero.

The cabinets….I used the leftover paint from my master bath cabinets. Cost…zero.

I did buy new inexpensive hardware. About $4 each so less than $40. (But I could have painted the existing hardware with black paint I had on hand.)

IMG_1880.JPG

The ceiling needed to be painted. Big water spot around the HVAC vent. I sprayed the spot with some Kilz I had on hand and dug out the leftover ceiling paint! Cost….zero.

IMG_1839.jpg
IMG_1869.jpg

The beige walls needed to be “deblahed.” I painted them white…plain ole’ pure white. I only needed about a gallon and my son had some leftover from their house. Cost…zero.

IMG_1881.JPG

I would have loved to change out the 23 year old tops…maybe add a pretty tile backsplash…but the tops aren’t terribly offensive (just a bit dated) so for now they stay. Just added the new faucets.

Three new light fixtures…two vanity lights and a pendant light…again, Amazon. All three for less than $250.

IMG_1884.JPG

I could have repurposed the lights that where there with a little paint but the new were worth the investment.

Again, this space only gets used 2-3 times a years so it’s not like I need something expensive.

The flooring could stand to be changed…but again, this is a room that is rarely used….soooooo…..

The only other thing I would love to do in this room is change out the mirror…or at least frame it. I found THIS tutorial for a wall treatment I absolutely LOVE….

KM_DIYMirrorUpdate_0015.jpg

Not necessarily the gold mirrors…I think I would go with round wood framed. But I love the wood slate treatment and I may eventually tackle that project…someday…maybe when we have another national crisis and I need to focus on something constructive.

Sadly at the rate our country is going, that may be next week.

With all the negative looming over our heads…fires, hurricanes, Afghanistan, Covid, inflation….I can not stress enough how important it is to stay focused on the positives in your life. Believe me when I say I GET IT. It is hard to stay positive when people we love are sick and dying, our retirements are swirling the drain, you can’t meet you monthly financial obligations, the very fabric of our great country is being shredded.

Turn off the tv…shut down your computer….turn your radio dial. I’m not advocating bathing yourself in complete ignorance….just turn off and tune out the onslaught of negativity and focus on something that makes you happy.

The laughter of your children as they play.

The sound of the the crickets and birds on your morning walk around the neighborhood. (Get out and breath fresh air…EVERY DAY)

The babble of a brook in a nature park.

Coffee on the porch early in the morning before the heat and humidity sets in.

A tiny bit of “quiet time.” (Whether you do yoga, meditate, read your bible, just sit and stare…ALWAYS carve out a little bit of quiet, alone time EVERY DAY.)

A stroll down the aisles of Hobby Lobby…fall and Christmas are just around the corner!!!

I’ll admit it…my life isn’t all roses and peach fuzz. Somedays I really struggle to find something positive to focus on. But as I said HERE, you choose your “hard.”

Choose wisely.

ANOTHER laundry room makeover!

One nice thing about blogging is I can go back and know exactly when I did something…case in point, the laundry room.

Here I shared how the laundry room went from this….

…to this….

…in 2014.

I raised the cabinets to the ceiling and painted them. I painted the walls, stenciled the little birdie murals, installed a new light fixture, purged and added a little storage cart. Nothing earth shattering but enough to dress it up a tad.

The most dramatic thing I did to the laundry room was installing reed glass in the door. Here I share a tutorial on how I turned a plain ole’ hollow core door into a really awesome feature!


One thing I debated and am now glad I did not do…put a solid “top” across both the washer and dryer. I worried some day I might go back to a top load washer. Sure enough I did! The shelf is perfect and it is an element I kept!

The only other changes over the last few years was a little kitchen cabinet I removed in one of my kitchen makeovers and put in the laundry room and I moved the sewing machine to a little portable table.

When I painted the walls I was a tad frugal and used some paint I had on hand. I decided to go for broke and actually buy an entire gallon of custom color paint this time. Gasp! I wanted a soft “sagey/greenish” color so I did what I always do…headed to my favorite DIY store, picked up about 15 paint samples and brought them home. Took me all of 2 minutes to pick the perfect shade! Seriously, I think this is the perfect “sagey/green” color…I wish the photos did it justice!

THIS is the process I use for any “makeover”…whether a room or a piece of furniture. Find your inspiration, make a plan and execute the plan.

Inspiration came from cruising Pinterest. As I said in the first makeover, I don’t have the laundry room of my dreams but I have a space I want to be pretty and organized. I knew exactly what I wanted (the plan)…paint, storage, lighting and tile!

First step….PURGE! Empty out the entire space.

Yes, you are going to make a mess…there is just no way around it!!!

My goal is to NOT put back most of the stuff I take out. Now in my case, I am a pretty good “habitual purger” so I have very little “stuff”….but there are always things lurking that have been untouched for years and can go!!!

Next, remove the old light fixture, paint the ceiling (with a flashlight) and install a new fixture. It wasn’t that i disliked the old fixture, but it had fluorescent bulbs that got really hot and one of the three sockets evidently had a short or something because I could never get it to work right. I tried to change out the sockets in the fixture to accommodate LED bulbs, but the wiring was too short and I finally said “FORGET IT” and bought a new fixture.

Remove switch plates, shelving, and stuff on the walls.

Wipe everything down with a damp cloth….don’t paint over dirt!!!

Build storage shelving. I have lived here long enough to know what I need and how I want a space to function.

Caulk the new shelving.

Paint the trim, then walls.

A new shelf…I went with poplar sealed with a clear finish…no stain. I may or may not stain it or paint it in the future…for now, I like this look!

Then a debate. Do I or don’t I stick with my original “plan.”

So my original “plan” called for tile on the wall behind the washer and dryer. I really gravitate towards that look and every time I see a picture of it on Pinterest, I really love it. Yes, that would mean losing the birdies…

HOWEVER, as I have mentioned many times before, NOTHING is “timeless.” And I know me well enough to know that in 5-6-7 years I will not like whatever tile I pick out today…which means that sometime in the future I will have to remove the tile, repair sheetrock and do something else.

NOT something I look forward to. A huge reason why I didn’t put wallpaper in this house 20 years ago, even though it was still a “thing.” I had removed enough wallpaper in my years to know I never wanted to do it again.

So…no tile…for now! I painted the wall and added a little “farmhouse” mirror. The light fixture and the mirror add a touch of “farmhouse fad” without breaking the bank. This is a small room so the mirror is a huge plus!

The storage shelving is THE BOMB!

Love it…it is something I have wanted to do for years! And again, since I have lived in this house for 20 years, I knew exactly what I need. A place for doggy towels, some simple baskets for light bulbs and dust rags and plenty of room for my detergent stockpile! I designed the shelving so I would have the perfect spot for my sewing cart (See how I “upcycled” an old typewriter cart to make a portable sewing table HERE!) At the last minute I added a shelf above the sewing cart so I would have space for a sewing machine if I ever did away with the cart in the future…right now it holds my little coupon box.

Keep in mind that the cart between the washer and dryer I built on the last makeover holds a ton of stuff…dryer sheets, MORE detergent, the iron, spray starch, etc.

The back of the cubby is perfect for storing paints…remember, STORE YOUR TOUCH UP PAINT IN THE HOUSE!!!! Not in the garage or storage building!

Since I now only do laundry for two, my laundry room isn’t near as chaotic as it was when I was raising kids. But whether you do 8 loads a week or 30, there is NO reason to have a disorganized and blah laundry room. Get it organized. Make it a space that is beautiful…it won’t take the sting out of doing laundry but maybe it will make the experience a little more enjoyable.


Another new dining room table and the greatest Mother's Day gift....

ANOTHER dining room table…obviously I have a soft spot for chairs and tables. When I saw this pathetic trestle table at a barn auction a few weeks ago, I just knew she had some serious potential….

The top was in pieces and the finish was crud…but oh the potential. And it wasn’t until I got her home that I discovered her little hidden secret…

She has this super nifty fold out “leaf.”

Just too fricking cool!

In spite of the fact that I have been up to my earballs in work at the apartments, I couldn’t wait to start working on her. The first thing I did was strip all the old finish…HERE is the process I used. This is a tried and true process that makes quick work of a daunting task!

After all the old finish was stripped off I had to glue and clamp the table top back together….

I always make my repairs AFTER I strip but before paint or finish…and I always make sure I make all the necessary repairs. No sense in making it pretty if it is just going to fall apart…glue and clamps!!!

The top was solid (vs. veneers) so the pieces were a tad warped…no biggy…I clamped it as well as I could and then I sanded the joints smooth…starting with the finer grit (220) and working my way down to a rougher grit (150) and then back up to a finer grit, before applying a tung oil finish.

Tung oil finish is my “go to” finish for many reasons…it is super easy to apply, it is super durable and it is super easy to reapply when the finish gets scratched or begins to dull!

So, when all was said and done, this little table will now take her place in the dining room….at least for the time being….it is no secret I swap out tables on a regular bases….here are just a few I have featured over the years…

A Duncan Phyfe….I gave it a little makeover HERE before selling it….

An antique trestle I featured here

An oak farmhouse table featured here…..

The most recent…an antique draw leaf table…

All these tables have one thing in common…they are relatively “compact” but can be expanded to handle Thanksgiving dinner. Basically once a year I need a large table…and these all fit the bill.

The newest little trestle table is compact, expands, and beautiful!

So get ready for a few pictures…..

I just LOVE the new light fixture from Wayfair I featured here….

I love how it can easily be expanded. No more having to find a place to store leaves or hauling them out for one dinner…just slide open the top and fold out the insert…simple (especially after a little WD40)

One huge problem….I REALLY dislike the Duncan Phyfe chairs with it…they just don’t look right…and sadly I know exactly what chairs I want for it and I have had them and sold them a few times over. The good news is I will eventually find what I want….

Until then I bought this little piano bench at the same auction. Again, pretty cruddy…

…but I stripped and oiled the top, scrubbed up the brass feeties and painted the base with my new favorite blue…the same one I used on the buffet (here)

Meh….not really “swooning” over it, but it will serve the purpose for now…until I can find the chairs I want or another pathetic little table catches my eye. I wouldn’t take bets on which happens first!

THE GREATEST MOTHER’S DAY GIFT

This year I received the absolute best Mother’s Day gift!!! Another college graduate.

My youngest daughter, Katie, graduated from the University of Arkansas with a degree in Bio-Engineering.

She is beautiful, smart, and talented…and I could not be prouder.

She, as well as her brother Matt (Masters 2015), are fourth generation Arkansas graduates….my great grandmother graduated in 1920, my grandfather graduated in 1943, and I graduated in 1987.

Brian and I are now 5/5….five kids, five college graduates. And the fact that all five were here for Katie’s big day, which happen to be Mother’s Day weekend, made my day extra special!


Decorating for fall and Mr. Jinx....

Since it is time to decorate for fall and Halloween I thought I would take a minute and formally introduce one of my “rescues.” Mr. Jinx…

All fall decors should include a black cat…right?

I shared pictures of him last year at Christmas…black cats are super tough to photograph. When I look at pictures of him I understand why black is a “slimming” color…he is WAAAAY bigger than this picture reveals. The kids say he is fat…I argue he is just big boned and really fluffy.

Half the time his little fangs are showing…he can’t help it…he has big fangs. Kinda scary looking but super cute when he is stretched out on his back asleep with his little fangs and tongue sticking out…

I have more than a few pictures of him on my Iphone!


Funny story about how I acquired this kitty. He hung around the apartments for months…I knew he wasn’t a feral kitty because he was super friendly. He would rub against your legs and then roll over for a tummy rub. He loves to have his tummy rubbed!

One day I was sitting in my car talking with my manager and mentioned that we should probably take him to the shelter since he was a super friendly and beautiful kitty and someone would certainly adopt him. About that time he jumped in my car and made himself at home on my shoulder.

What was I to do?

Naturally I couldn’t bring him straight home since I didn’t know what I would be exposing my other cats to…so I took him to my vet and had him tested for all kitty diseases. Clean. My vet thought he was about 2 years old and because of his size probably a Maine Coon.

I told the vet to neuter him and give him shots.

At that point I had a small fortune invested in this cat…so I couldn’t very well take him to the shelter.

What was I to do?

Brian was NOT happy that I brought home another cat…

So I told Brian we would foster him. I promptly named him Mr. Jinx…because, well, he’s black…and black cats are suppose to be jinxed right?

This was two weeks before Christmas so with the whole family and their dogs here and all the chaos that goes with the holidays, Mr. Jinx’s nerves kicked in.

Another visit to the vet, a few nights stay, a staggering vet bill…now I REALLY had a small fortune invested in this cat.

What was I to do?

I couldn’t very well just GIVE him away…right?

Brian was still not happy there was another cat in the house (seriously, I only have four…that isn’t TOO many, right?)

But after the holidays, calm was restored and Mr. Jinx settled in…and promptly fell as madly in love with me as I was with him.

Two years later we are still “fostering” him…truth be told, you would have to pry this cat out of my cold, dead hands.

EVERYONE loves Mr. Jinx…even the dogs. He is the coolest, most chill cat I have ever owned…and while Molly was a tough cat to top, he ranks right up there with one of the best cats EVER!

Even Brian has fallen in love with this kitty!

What was he to do…lol!

DECORATING FOR FALL!

It is really tough for me to break out the fall decor when it is still in the 90s every day. But it’s my rule…the week before we leave for our annual trip to Colorado, I decorate for fall.

HOPEFULLY, when we get home it will be a bit cooler. Rarely. Usually I have to put the jeans and Ugg boots back in the depths of the closet for a few more weeks. But the decorating is done and I can sit back and enjoy my favorite time of the year!

Not much changes from year to year…a few years ago I painted these little pumpkins and changed up the window decor…

Refurbished pumpkins, deer antlers, fall picks…nothing fancy! Still like this little vignette so it won’t change this year!

A few weeks ago I changed out the dining room light fixture

I love the new fixture and I love even more that I can still add the fall garland!

I’ve added a few new elements to the den mantel…a tall vase and new candle sticks….

…but the garland and Mr. Owl are still the focal points. The same but different!

The entry…usually void of much because I still haven’t “decorated” it after it’s little makeover…but it’s a great place to infuse a little fall decor…

The seasonal box I featured here…still one of my favorite super simple projects!

I changed out a few pillows and throws….

Even grandmother’s chair got a little pop of fall…

Every year I find pieces of garland, wreaths and picks at the bottom of my storage tubs…I just scatter them here and there for little touches of fall!

Again, little changes, but I love it all the same!

So many don’t decorate for fall because of the cost of buying “stuff.” As I have mentioned before, I usually hit the home decor stores at the end of the season (which seems to be before Halloween these days) and pick up a few things here and there for pennies on the dollar! You may not get to enjoy it for a long time this year, but you will get to enjoy it for years to come!

This is also one reason I strongly recommend sticking with “traditional” vs. “fad” seasonal decor. As much as you might love those teal pumpkin pillows and chevron throws, I promise you won’t love them in a few short years.

I actually bought teal pumpkin pillows this year…

….knowing that I will tire of them quickly. No biggy…they have good forms I know I can reuse in the future!

There is no harm in spending a little money on the latest “fads” but be selective and thrifty. Create small vignettes with the latest trends but don’t blow your entire seasonal budget on it! And check out the blogs and Pinterest…there are thousands of nifty ideas for inexpensive seasonal projects that take little time, effort or money!

Fall may not be “in the air” just yet, but it is certainly “in the house.” Maybe this year it will actually feel like fall outside when we get home!

A new bar top and Wayfair light fixture...

As I mentioned here, change is tough for me...which is why these things haven't changed much in 19 years.

I painted the dining room light years ago (antique bronze to black)...as much as I really didn't love the actual fixture, I loved what I could do with it during the holidays....

One year I removed the little shades and I liked that a bit better, but I still wasn't digging the light fixture itself.

Just too ornate and "heavy."

But I could never find one that would allow me to decorate it for the seasons...until I did!

(As you can see, I still have the Drexel buffet...love the piece...just not the color...waiting on "inspiration.")

The install was super simple...here I share how to install a new light fixture!

Not a huge fan of the Edison bulbs, but I think those can easily be changed out...eventually. For now I can live with them knowing that come fall (right around the corner...yea!) and Christmas, I can still decorate the fixture!

I think it is more of a "farmhouse" look but the nickel accents tie in with the more "modern style" brushed nickel bar lights. So it works for me....

Which brings me to the bar top....

...it wasn't totally offensive, but in my quest to go "light and bright" in my kitchen without painting all my kitchen cabinets, I impulsively ordered a white quartz top.

Truth is, I wasn't really loving it after it was installed. Just too "stark" and soooo white! 

I painted the little support corbels the same color as the trim...more "white." (They were originally black but since I didn't damage them when I removed the old top I just primed them and painted them with the trim paint...BM Swiss Coffee.)

This is what we refer to in the design world as "OMGosh what have I done" moments.

I decided what was really bugging me was the dingy old bar stool seats. They had certainly seen their better days. The bar stools are 18 years old and I still love the style dearly...heavy iron and super sturdy...but the "grey tweed" upholstery just didn't cut it any more!

Choosing fabrics is something I really struggle with...but I know I LOVE the fabric I used on this little chair makeover

Light and bright with just a touch of grey! So I ran out and bought enough fabric to recover the bar stool seats. About 1 1/2 yards for four seat cushions. If you don't know how to figure for fabric, take your measurements with you and they will help you figure it...just make sure you add 2" on each side! (Or better yet, just take a seat with you!)

Pay CLOSE attention to the direction of the fabric. This fabric doesn't APPEAR to have a "right or wrong" way, but it does. I put a pin in the top of each piece so I would know which way to lay the fabric on the seats!

Reupholstering chair seats is a super easy DIY project...probably one of the simplest DIY projects one can tackle! And this easy little project is an excellent way to make a pretty dramatic change in any room without breaking the bank or dragging out the sewing machine! There are thousands of great tutorials online...so again, do your research and find one that makes sense to you and use it!

In this case I had no desire to paint the stools...I like the black iron...but if you want to paint a dining chair or stool, do it after you have removed the seats but BEFORE reattach them. Again, super simple project! Use the KSTP method (kilz, sand, tack, paint...here is a pretty good paint tutorial.)

I removed the seat cushions! In this case, 4 little screws! I also scrubbed down the stools...pretty nasty after 18 years of use!

Then it was just a matter of wrapping the seats with the new fabric...I didn't even remove the old fabric or bother with applying a new underside....and reattaching them.

I guess that might be an issue if you are laying on the floor looking up at the underside.

Here I do share a few helpful tips on upholstering...pretty much applies to the simplest project!

While I had the camera out I played around with a few different "centerpieces" for the bar with knick-knacks I had on hand...

But honestly, with mischievous cats who insist on knocking everything off the bar, we are better off leaving it clutter free! Same with the dining table...too many broken vases and scattered flowers!

A few relatively minor decor changes that made a subtle but significant difference! 

A proper guest room...

I have three empty bedrooms upstairs. Three empty rooms that my heart still feels are "the kid's" rooms. Truthfully, Mitchell hasn't lived in his room in 12 years. Matt has moved home on a few occasions since he graduated, but he just bought a home. Katie is still in college 15 minutes down the road, but she has made it clear that she has no intention of moving home...she will graduate next year and I have no doubt she will set out to set the world on fire.

So while my heart feels those are "the kid's" rooms, I know in my head that it is time.

Time to paint over the big "fail whale" in Katie's room.

(In case you are wondering, those are the photo albums...for the three youngest...I know, I have issues!)

Time to replace the baseball paddle fan in Matt's room. 

Time to purge a few more things in Mitchell's room.

I've made small changes to each room over the years...Katie's room is now our "home gym." But honestly, throwing a weight bench and elliptical machine in a room doesn't really make it a "home gym." 

I have boxed up MOST of Mitchell's plaques, framed certificates and trophies...but it is still "his" room.

Matt took much of his furniture when he moved into his new home, but he left his junior high jersey and his high school diploma and senior picture, so I immediately rearranged the few pieces of furniture (a bed and chest) and put his personal momentos back on the wall. 

But it is time to make some serious changes...and as always I found the little push I needed and a bit of inspiration on another website. J. Cathell ...a site that showed up on my "Bloglovin'" feed. I also found this tutorial at Today's Creative Life that outlined a few essential "must haves" in a proper guest room.

And this super handy checklist here...a great list to make sure I have all the bases covered if I want to create the perfect guest room.

I don't intend to put the bath items in the bedroom...the bathroom is rarely used so I just need to make sure it is organized, clean and stocked with "guest necessities." 

Inspiration...the first step to making a plan for any project, big or small. 

The room featured on the Jess's site is a tad "over the top" for our needs. Truthfully we don't have a lot of guests...the kids come home for the "momdatory" holidays and occasionally my uncle will come for a visit.

Inspiration none-the-less...and a push to get the ball rolling.

A plan...right now the plan is in my head and relatively simple. 

This week I tackled the first step in "the plan." Since Mitchell's room was the most recent makeover, little will change in there. I boxed up a few more things...VHS movies, books, etc. It will still function as a guest room but it will be a room where I can still display the important stuff like diplomas and such.

Katie's room will still be our "home gym" but it needed to be purged and neutralized...in other words, it was time to paint over the fail whale.

Since it is our "home gym" we think we MIGHT eventually move all the diplomas, framed jerseys and trophy's into that room. It has the largest tv so it is also ideal for the grandkid's game room when they visit.

The paint in Matt's room is not bad, but I want to eventually coordinate all the colors in the three rooms. I painted Mitchell's room BM Rivere Pewter but I wanted to go a tad lighter in Katie and Matt's rooms...so the plan was to paint them SW Nuance...the same color I painted my master bedroom. It appears to be a shade lighter than the Revere Pewter. (As you can see, I managed to get Katie's room painted but after two days of painting and purging, I decided Matt's room will just have to wait!) The trim in Katie's room was the original trim color so it was a tad "yellower" than the Swiss Coffee I have used in the rest of the house...so that was painted as well. 

Brian replaced the baseball paddle fan in Matt's room...not a huge deal.

I wasn't thrilled with the amount of light the new fixture put off. I moved a little wicker side table from Mitchell's room and the lamp from Katie's room and I think guests will have sufficient light!

A major "purge fest" in all three rooms...boxed up the keepsakes that will go in the attic and filled four boxes to donate. I made sure the bathroom was free of expired products and used toothbrushes. I gathered up all the spare blankets and pillows and stacked them in the closet.

Purging, paint and a paddle fan. Seems like a small step but those things made the biggest mess, the biggest impact and set the tone for the rest of the plan.

Eventually I want to paint the walls and change the bed frame in the Matt's room (the REAL guest room). I want to replace the chest of drawers with a nice dresser. Eventually incorporate all the little things Jess featured in her guest room makeover...a comfy rug, a chair or bench, new curtains and wall decor, a charging outlet, a cute wifi passcode sign, a jar with little guest necessities, a luggage rack, nice alarm clock and all the little homey nick-nacks that make a guest room comfortable and inviting. 

Truth is the most important elements of any guest room is that it is clean and clutter-free and has a comfortable bed and bedding....I can check that off my list of "things-to-do." The rest of the checklist will come with time and patience.

Thank goodness we are not expecting over night guest anytime soon!


Entry and stairway makeover reveal....

I started my entry way makeover here when I shared the "demo" of the coat closet! I did not realize this "weekend" project would drag out for TWO MONTHS....but that is pretty much the speed I work at around here these days!

Time flies when you are having fun! 

I had intended to post this project last week but Brian had to have shoulder surgery so his care has taken up a bit of my time. (Someone explain to me why a 53 year old man feels the need to bench press 275 pounds...even if he can!) 

Truthfully, it is not fun to demo and construct in a house you are living in. I put up plastic when I did the major sanding on the sheetrock...

... but there always seems to be a little spot here and a little spot there that needs just a little bit of sanding...before you know it it looks like a dust storm has blown through your house! 

Truth be told, this "makeover" actually started YEARS ago when I removed all the carpet from my stairs and put down oak treads and risers. I knew the day would come when I would not want to haul a vacuum cleaner up and down the stairs (that day is here!) so I wanted hardwood stairs!

My house had the typical "rough construction" stairs with pine treads and risers, covered in carpet...you can kind of see how they were constructed, and what I discovered when I pulled the carpet, in this picture....

It really was not that difficult to install new treads and risers. The biggest "hum" was finding that the 2 x 12 tread (the horizontal board you step on) lipped over the riser (the vertical board facing each step) by 1/4". To solve for that, I just applied strips of 1/4" board to the bottom of each riser and then faced them with new oak boards, cut to fit. Most home improvement stores carry prefab oak treads. I cut each to the width I needed, stained and sealed them, applied construction mastic and then nailed them into place. I applied one final coat of poly after I had installed them. Obviously I did a good job, since it took me TWO HOURS just to remove TWO of the stinking things! 

Since I was installing new travertine tile in the entry, I decided now was the time to also make some changes to the newel post and bottom steps. 

As with EVERY project, the first thing I did was "find my inspiration."  That was not difficult since I knew from the minute I laid eyes on Cassidy's stairs on Remodelaholics.com that this was what I wanted....

One of the things I really love about her staircase are the colors...the stain and the paint. Sadly THAT little detail is going to have to wait at my house. My staircase was stained to match the living room floors, which are going to be here a tad longer ...and while it isn't "technically" honey-oak, the "butterscotch oak" isn't really my cup of tea these days. But again, it is going to have to wait for now...the thought of taping and staining and painting everything right now is more than my brain can process! 

This is one of the important keys to remodeling any space...identifying what you can do (physically and financially) NOW to enhance the space...and patience! I knew I wanted the "openness" of the bottom two steps and a larger newel post. Those are things I needed to do before I installed the %$(@# travertine tile (Honestly, don't ask how much it cost. I have NEVER in my life paid THAT much for tile, but I wanted it and it is a small space...so I splurged!)

While I had intended to post a "tutorial" on this project, I realized it is like many home improvements...a puzzle that will probably differ depending on how your home was constructed and what materials were used.

So let's start at the beginning...what WAS there.

A tight entryway that required us to lift anything over 28" wide over the newel post!

A coat closet that was NEVER used and was basically just a dumping ground for anything and everything! Hardwood flooring...NOT a material one should use by an entry door. Over time wet feet will do a real number on it!

An anemic newel post that pretty much screamed 1999!

So were does one begin a sizable project like this? Again, how do you eat an elephant? One bite at a time!

So the first thing I did was demo the coat closet and remove the smaller built in bookcase...gut wrenching details here.

After the closet was gone I had to deal with moving electrical wires...a major chore for me and I would honestly suggest most call a professional. My electrical professional is my son-in-law, but since they live 2 1/2 hours away, this is another project he talked me through over the phone! After all the electrical was moved and I could move around in the space without whacking my head on dangling switch boxes, I removed the existing baseboards and hardwood flooring. 

Easy right? Um, no! First I had to mark and cut a line with my skill saw where the new flooring would meet the existing hardwood. Dust storm number one! Then I had to scrape up all the old flooring and mastic...seriously, I think you could safely attach wings to a plane with that glue! 

Next, I tackled the sheetrock repair and texture...hence the tarp to prevent a MAJOR dust storm! 

Since I was basically "patching" the sheetrock where I had removed the closet walls, I used this process! I can not stress enough how easy sheetrock repair can be if you follow these steps. Since the area I needed to texture was much larger than just a little patch, I used a "sheetrock hopper" to blow texture on the walls. I actually had a painter friend come over and help me with this step since he is a master at using the hopper and could "blend" the old with the new seamlessly! 

Then paint! I can't say it enough...there is a huge plus to knowing the exact formula for your paint. Someday soon I really want to repaint my downstairs....someday! Again, can't wrap my brain around that chore! But knowing exactly what I painted the walls with 8 years ago allowed me to paint the new patched areas and blend it with the "old." 

After the walls were repaired, textured and painted, it was time to tackle the BIG project...the staircase. That had to be done before the new tile could be installed because I was moving the existing newel post that sat at the bottom of the stairs and extending the bottom step, which changed the layout of the flooring. 

The first challenge...matching the existing stain color (as much as I dislike it!)  David, at our local Sherwin Williams, usually does a bang up job of matching existing stain. He did an AWESOME job on my kitchen stain! This time even he struggled. I think the biggest problem is that the original clear coat is poly...and poly "ambers" over time, which deepens the color. I ended up using David's "match" mixed with a premixed stain and final got a decent match. I stained and sealed all the pieces before installing!

The next big head-scratcher for me was figuring the exact angle and method to cut the existing bannister, trim and bottom rails without removing it all. After much hymning and hawing and measuring and drawing, I drug out every power tool in my arsenal and made the cuts! And did a little sanding to get a good tight fit! MAJOR dust storm!

I also had to build a new "base" for the wider bottom step. As I said, it's a "puzzle" and sometimes you just have to measure, figure, plan and execute as you go...when you are meshing new with old it can be a little more challenging than starting from scratch! 

Again, I could post a long drawn out tutorial...but honestly Google and youtube are all you need. You will find much better videos and tutorials than I could ever provide.

And this is pretty much how it sat for another week. Why...because the old adage "measure twice, cut once" only works when your brain computes properly at least once...if it computes improperly BOTH times, you will cut your special order materials wrong and have to wait on them after you reorder them! 

As soon as my special REorders came in and I was able to finish up the two steps and newel post, I installed my travertine tile. Then...it sat...AGAIN!

Why...well because I couldn't decide whether I wanted to add a little trim detail. I contemplated shiplap...maybe a decorative wainscoting...or maybe board and batten.

In the end, I went with the board and batten. I'm not totally swooning over it, but it is a nice little touch (again, find a GOOD tutorial if you plan on adding this...there are hundreds of great ones out there in blogland!)

Soooo....drumroll......get ready for a lot of pictures!

Okay...you may notice that other than a funky rug and the little walnut table, there isn't any "froo-froo" yet. As I have said before, I don't decorate for poops and giggles..."stuff" has to have some meaning or be something I truly love...and so far I haven't found either for this space!

Eventually I also want to change/add lighting... I'll know it when I see it!

I seriously love the travertine tile. I laid it in a "brick pattern." It is a 12x24 tile so I staggered it 8-16-24". I also sealed it both before grout and after, which in my opinion, is a must for travertine! 

I still need to put one more coat of poly on the bottom two steps and the newel post but I am waiting until Matt is gone for a few days so I don't have to worry about anyone going upstairs!

HUGE difference!

While I was making a few entry changes, I thought it was about time to order a new rug for the living room. The old one was only two years old, but with the addition of the new living room chair and post-Cleo-puppy, it was time! I decided to go with simple and neutral this time! 

Aside from the wall paint I want to change, and the "butterscotch oak" I would like to restain, and the new hardwood floors I want to install and the new lighting I think would look good in the entry, I'm pretty darn happy with the changes. 

One upside to the "dust storms" this project created was it forced me to "purge" ALL my bookcases, even the ones in the den and my room....dust goes EVERYWHERE when you project! I had to pull all the books to clean so I decided it was time to get rid of 30 years of collecting! I saved two collections of my favorite authors (most notably my autographed John Grisham collection...thank you Matt!) and a few of my favorite books, but over 150 hardback books will soon be finding a new home...right now they are packed in egg boxes in my dining room! Now most of my shelves are scantly decorated with antique books, framed photos and a few family heirlooms!

Ahhhhh....room to breathe.....


Just another week in paradise....

Me: I lost my truck key but I have the VIN number and need a new one cut.

Dealer Dude: Okay, the key is $177.

Me: I expected it to be pretty pricey.

Dealer Dude: After we cut the key you will have to bring the truck in so we can program it.

Me: Will the key start the truck?

Dealer Dude: No

Me: Then how do I get the truck here to program the key?

Dealer Dude: You will have to have it towed in.

Me: So I have pay to have it TOWED? 

Dealer Dude: Yes, and there will be a $60 charge to program it.

Me: So I have to pay $177 for the key, the cost to tow the truck AND $60 to program it.

Dealer Dude: Yes

Me: (Not something I want to admit saying on my blog.)

Suffice it to say, I had no transportation Wednesday and sat around waiting on Waste Management to call me back to see if MAYBE I inadvertently dropped my keys in the recycle bin that was picked up first thing in the morning. I finally conceded and called a guy to come to my home and cut a new key. Fortunately, I decided to take one more walk around the yard. And there they were...on the brick ledge right where I had laid them. A day of frustration !

I would also like to add that while I have always prided myself in keeping a clean house, I pray no one ever looks under the furniture. N.A.S.T.Y!

My life.

On the upside, I made good progress on my entry. And just for the sake of healing time, I am grateful the travertine tile and new stair treads will not be in until next week! 

Sheetrock repair is done and all the paint is done. The switches may have to wait until Thanksgiving when my SIL comes...makes my brain hurt just looking at all those wires!

I am still debating whether I will just put down new trim or if I want to go all out and add wainscoting or board and batten. I can't decided and since it is the last thing to be done, I think I will wait until the new flooring is down and the stairway is reconstructed before I decide on trim and lighting.

I have finished several pieces lately, and even managed to remember to take a few before AND after pictures...so I will share those in the next few weeks. Until then, I am going to enjoy a weekend with ALL my babies....Sarah is coming in for her birthday and Mitchell is headed home for a short visit! 

Updating a little chandelier...

I am almost embarrassed to admit where I got this ugly little brass chandelier....

Out of the back of a strangers pick up truck at the dump. Seriously...I was paying out at the local dump and this guy drove up in a truck loaded with trash. Sitting on top was this light fixture. So I asked him if I could have it...and he said SURE! 

Geez...I have become one of "those" people who dig through other people's trash! Crazy cat lady, annoying coupon lady...and now this...(shaking head in disgust)

Whatever...I wasn't sure what exactly I was going to do with it but I knew it could be "updated" if I could just find the right inspiration. I knew I was going to paint the dated brass, so I decided to start there until I could figure out exactly what I wanted to do with the fixture!

Originally I primed it with metal primer, then started painting it with plain ole' off white spray paint. (Remember, when you aren't sure what to do with something, take it to "base neutral.")

And that is when a little DIY project turned into a total disaster. Yes, it happens. Even to me. Even though I shook the spray paint can per the instructions, it still started spraying all "clumpy." I don't know how to describe it, but rather than a nice smooth finish, it was all grainy and rough....AAAAGGGGGHHHHH! 

Made me so mad I tossed the fixture in the back of the garage and said "SCREW IT." (Yes, I curse at innate objects!) I knew I was going to have to completely sand it down and considering the "ornateness" of it, I knew it would be a royal pain. My "vision" was just a heap of "mess." 

Then I saw this on Pinterest...

Andrea at  "Personally Andrea" took a plain ole' chandelier and dolled it up a bit by using jute twine to wrap the ugly little plastic tubes. 

Hum....just the "inspiration" I needed to dig the "ruined" chandelier out of the back of the garage and give it another shot! 

I sanded down the "grainy" finish, reprimed where needed and then painted it in my current favorite teal spray paint! (This time I shook the crud out of the can AND test sprayed it!) 

Covering the ugly plastic tubes is super easy. Andrea used tape, but I used hot glue. I ran a little line of hot glue along the tube as I wrapped it in the jute twine.

WORD OF WARNING!!! Hot glue is HOT...and the plastic sleeves are a tad flimsy so use the glue sparingly or you will actually melt the little tube which will make it impossible to slip back onto the light. (Lesson learned the hard way...fortunately Lowe's sells replacement socket covers for under $3 a pair!)  

I think painting the fixture in black or oil-rubbed bronze would have made it a little more "formal." But I was going for "fun" and "hip" and a little more casual! 

I liked the look so well I decided to do the same to my dining room fixture using the plastic covers I purchased at Lowes!

I found some glittery gold fabric/paper kinda looking stuff at the craft store that I am going to use to cover new socket covers for the Christmas holiday!  I will share that later when I do my Christmas decorating! 

Don't turn your nose up at the dated brass fixtures...as I have shared many times fixtures, lamps and fans are super simple to update with a little paint.

And of course a little inspiration! Thanks Andrea!