Starting a holiday tradition...

It is never too late.

Time flies.

Before you know it, decades have passed and that little thing you started doing 20-30-40 years ago is now a treasured tradition that will be passed down for generations.

Even if you didn’t realize it at the time…it was just something you did every year.

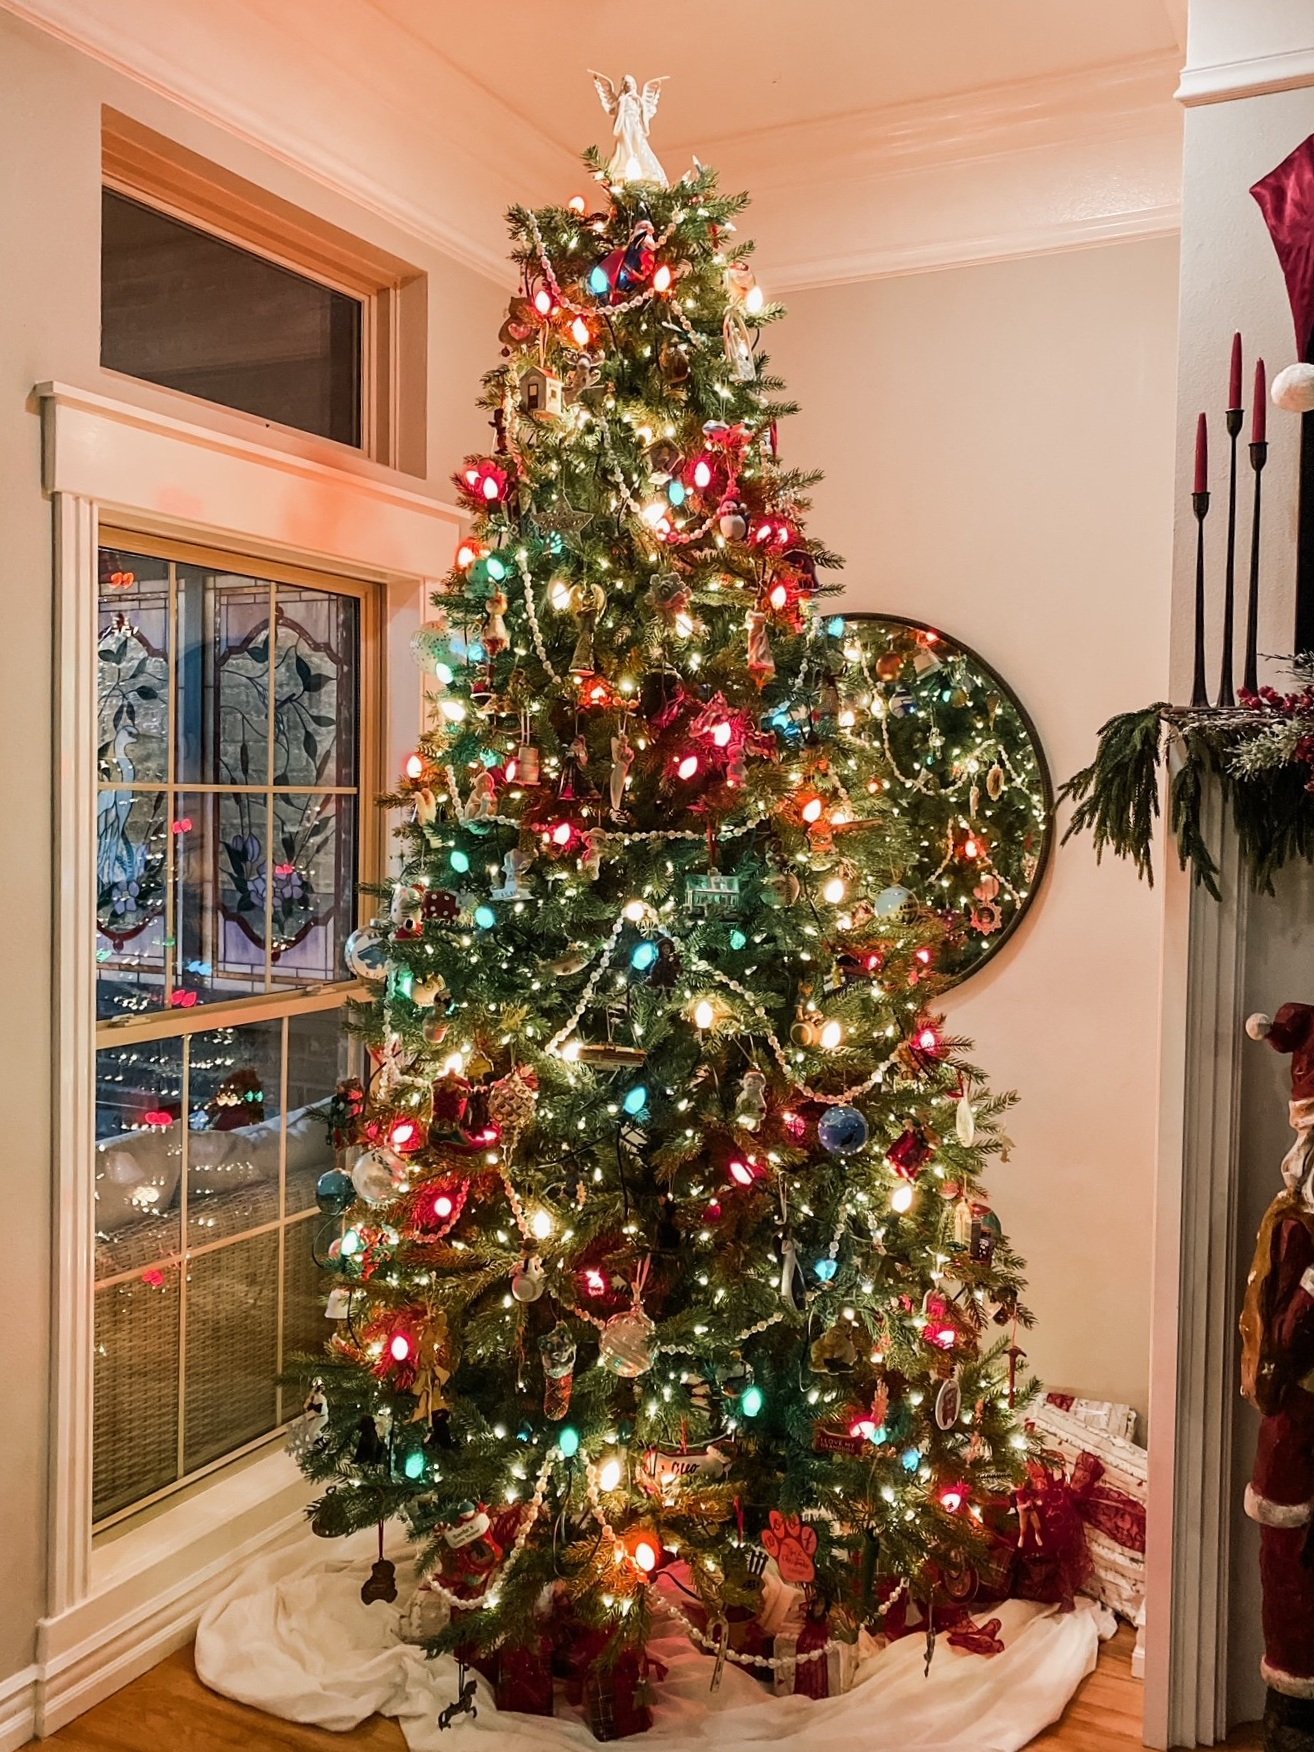
I’ve shared this story before…when my oldest (now 42) was a baby, my mother started giving her a few precious ornaments every Christmars. She did the same for the boys when they were babies (now 34 and 35) and again with my baby (now 26). After 40+ years of giving my 4 children a couple of special ornaments every year, my tree is bursting with heirloom treasures.

There are the wooden ornaments she gave them from her and my dad’s trip to Yellowstone…

The ornament from the year Katie and I went to New York

College graduation….

Our trip to Georgetown, Colorado….

A Lenox moose representing the year Katie shot her first deer….

Every single ornament on my tree has a special meaning….ornaments representing every milestone in our lives and souvenirs from our travels and my parent’s travels.

Even after giving Sarah all her ornaments, I still have a tree full. And now that my children are growing and creating their own homes with their own trees, they have begun the “tradition” of gifting me with ornaments with special meaning. Once all my kids have their own trees to decorate, mine will still have special ornaments from my travels and my children.

My mom is no longer here but I have carried on this little tradition she started 42 years ago. Every year I give each of my kids and grandkids an ornament from our travels or one representing something special in their lives. Baby’s first year, college graduation, a cruise to Alaska…..anything and everything special and memorable is represented on our Christmas trees.

It is never too late to start a “tradition.” We do PJs and ornaments.

What tradition will you start this year? Remember, every “tradition” starts somewhere with someone…give your children, grandchildren and great grandchildren a tradition to charish!

Piece by piece...

I had a friend on Facebook ask where she could find much of my decor because we share a style.

Funny…as I walk around this house I see so many pieces I have cobbled together over the years. Pieces I bought at auctions and refinished. Some at flea markets. Some I bought new and tired of over time so I gave them a little facelift. Pieces I inherited. ( I am actually kind of shocked at how many pieces there are and how little I paid for them originally!)

Every room in this house has pieces I have refinished, refurbished or rehabbed.

My bedroom….

Twenty years ago I bought an entire bedroom set…bed, dresser, highboy and two night stands. Paid a small fortune for the matchy-matchy set so I couldn’t bring myself to get rid of it. Over the years I finally gave up the bed and dresser and the highboy and nightstands have had little facelifts. The furniture and our master bedroom got a full makeover HERE.

Before….

After….

My office…

I bought this desk at a junk shop YEARS ago…I think I paid $25 for it.

Still love it although it could use a little refresh!

The china display cabinet in the dining room. This is a prime example of a piece that is not my professed style but I absolutely love it all the same…LOVE!

I had a vision in my mind’s eye of what I wanted and I knew this piece could be exactly what I wanted with a little time and effort….

It took a bit more time and effort than I anticipated but it really is one of my favorite pieces.

I have several pieces in the living room I have rehabbed over the years.

This AMAZING coffee table I picked up at an auction for $22!

I sometimes wish I had a round coffee table but I love this piece so much I just can’t bring myself to part with it!

Several Lane Acclaim tables I have picked up here and there and refinished.

My grandmother’s little mid century chair has had two little makeovers. The teal chair is one I bought off Marketplace years ago and reupholstered….

My breakfast nook has several pieces as well.

The table….

The little china cabinet was a fun and relatively easy project….

They seem to work well together after their little facelifts….

There are so many more pieces I have curated and rehabbed over the years. Side tables, benches, chairs, dressers…every room has pieces I have refinished, painted or reupholstered.

It took years for me to collect all these pieces, bring them back to life and create a home I love with pieces that have purpose and meaning.

Most of the links are to the original rehabs where I share what I did…unfortunately I am NOT a good teacher so often I direct you to search the internet for good tutorials on how to repair, refinish and paint pieces. Find a tutorial that makes sense to you and begin curating your home one piece at a time.

It doesn’t happen over night! And it seems to be never ending…

Preserving pictures from old negatives...

Again, I am probably the last person on earth to discover this, but I thought I would share just incase ONE person is as clueless as I have been.

I love old photos. I am the keeper of all the family archive photos and documents.

When it comes to my immediate family photos, I have always developed and printed every roll of film, printed every single digital picture (phones and cameras,) labeled the back of every picture and put each into photo albums for each kiddo.

When I bought my first digital camera in 2004, I would print EVERY picture I took, label them and put them in each kid’s individual album. Then I would make a back up copy onto a CD, and in recent years, a jump drive. All labeled by year and stored in my fireproof safe….

Even now, every year I print every picture on my phone, label them and store them. Then I copy the entire year onto a jump drive.

From birth to adulthood (when I had to snatch pictures off their social media), I have them all…THOUSANDS.

Unfortunately,I have never been able to find a good way to wrangle the boxes and envelopes of negatives…THOUSANDS!!!

Granted, all the pictures have been printed and stored, but I could never bring myself to dispose of the actual negatives….you know, those flimsy brown strips (for you youngins who don’t know what a negative is). I mean, what if the house burns down and the albums go up in flames. Keep in mind the negatives have been stored in a cedar trunk in the guest room so not sure what I would do if the entire house went up, but that is another issue.

One day last year I stumble on this nifty little gadget….

I found it here on Amazon.

It really works exactly like it says it does…you run each negative through the machine, punch a button and it sends the photo to a SM card that can then been transferred to your computer, then stored to a jump drive.

There may be one out there that lets you save it directly to a jump drive but I couldn’t find one at the time.

The photos are top notch quality…and even better when you consider that the machine allows you to make minor edits to the photo before you save it. It works on 135, 110, 126mm negatives.

It took a few days of sitting and scanning but it was worth every minute. By the time I was finished I had every “pre-digital” photo stored onto a jump drive.

I gave each of the kids a jump drive of their photos….great stocking stuffers! While they have all these pictures in their albums, most kids (anyone under the age of 40) will probably never sit down and go through a picture album…but they will pop a jump drive into their computer and look at old baby pictures.

Which is exactly what my youngest daughter did…”How did you get anything done the first 6 years of my life…I was so cute, oh my god!”

Yep…she was.

I had almost forgotten how incredibly precious they all were…until I got to spend a few days looking at, and preserving, all their old pictures.

Now my next big archival chore. Transferring all the photos on CDs onto jump drives…because evidently, in spite of what they told us, those too can degrade over time…so now I am transferring thousands of photos on CDs to my computer so I can put them onto jump drives.

We have 4 computers and three ipads in this house and not one has a CD drive…that should tell you something!

Fall tablescape...

I have some hard fast rules for decorating for the holidays. Fall decor goes up the week before we leave for vacation…usually the last week in September. Christmas goes up the weekend after Thanksgiving.

It’s the rules.

This past week I broke the rules.

It wasn’t really my fault. I got an At Home magazine in the mail. It had a really pretty picture of a fall tablescape and I was compelled to immediately go buy MORE fall stuff for my formal dining room. I blame it all on their devious advertising.

I went upstairs and dug around in my stash of heirloom china. I also pulled out the fall box marked “formal dining” …then I decorated my dining room.

I used my china and added little glass pumpkins, some amber stemless wine glasses and green place mats from At Home and straw placemats from Amazon

I picked up a few fall table runners but they didn’t make the cut.

i stuck a few little fall doo-dads in the china cabinet…

I made the center piece last year…fall candles, pumpkins, fall picks and some cotton stems in a round tray.

LOVE!

(You can check our the china cabinet makeover HERE!)

My son insists we use this room during our Sunday dinners. Since this china has to be hand washed, I have no doubt it won’t actually get used…we will just have to sit in the other dining room or move this fancy stuff out of the way…but it sure looks pretty.

For those who advocate using the fine china for every day use and not just for “formal”….you obviously have never had to hand wash dishes after feeding your entire family.

Right now we are having to hand wash everything anyway…our TWO YEAR OLD dishwasher isn’t working. I have no idea why…I’ve googled…could be one of four things. But after having to buy a new washing machine because we couldn’t get a simple part, we decided we would just buy a new dishwasher rather than pay $150 to have a repair main come out and tell us we can’t get a part we need. A brand new one was installed Tuesday.

So back to fall decorating. I love it and every year as soon as the temp drops below 80 degrees, I get the itch to start digging out the pumpkins and fall wreaths. But like every year, the temps climbed back into the 90s this week so now I haven the dining room decked out but the rest will have to wait a few more weeks.

That is okay! I will just enjoy the glorious summer flowers! And they are glorious this year!!

The never ending project....

Six months ago I shared a project I was working on …quilts. Sewing…UGH!!!!

As I pointed out in the original post, it was for a good cause…a way to show off the years of Christmas PJs my family wears every Christmas.

I finally finished the first SIX quilts I tackled.

Four are throws that are being given to my daughter-in-laws and my grandsons for their birthdays. I know they should probably be Christmas gifts but I want them to have them for the Christmas season. I also made a twin size and a full size for the upstairs bunk room.

This past week I added shelving and organized our spare room closet so that Brian can move all his “stuff” out of the guest room closet and into the spare room closet. While in the process I finally decided to organize the boxes of leftover fabric from the massive quilt project.

Well, low and behold, I had enough panels to make a throw for Katie…might as well whip that up…

…and Sarah wanted pillows…I didn’t have any panels for those so of course I had to whip those up as well…

…and I wanted a pillow using some scrap green velvet I found…whip that up. Two days of “whipping” and I am WHIPPED!!!

But I managed to use up a good bit of my leftover scraps and get everything organized. I still have a bunch of plaid pieces left I may do something with…someday!

It has been a few weeks of “giving what you have.”

One neighbor wanted a counter top over her washer and dryer…done!

Another wanted a walnut mantel… (similar to mine)

…and a storage divider for her baking sheets…

Done and done.

And of course I have a long list of things I want to get done before we head out on vacation in a few weeks. So little by little I am chipping away at the list on my refrigerator.

No, the closets and the sewing projects weren’t on the list.

That reminds me, I need to add them to the list so I can check them off!

The wardrobe reveal....

Last week I shared the wardrobe cabinet I planned to refinish and convert to a display cabinet….HERE.

Definitely lacking in soooo may respects. But I had a pretty good idea of what I wanted to do with it.

These “inspiration” pictures have been on my computer for over a year, just waiting on the perfect piece to transform!

The last one is probably my favorite…a Pinterest find. It was the one that influenced me the most, as you will see.

So the plan…remove the panels in the door and add glass. Remove all the shelves and add glass shelving. Lighten the back of the inside. Strip the doors and drawers and apply tung oil. Paint the rest of the outside of the cabinet black. Replace the hardware. Add a light.

So of course the first step is to deconstruct and then begin the stripping process on the doors, drawers and inside back panel.

What a chore!!!! I think someone, at some point, had applied at least 20 coats of poly. The 1/2 acetone, 1/2 lacquer thinner process I shared HERE, wasn’t cutting it. I applied Citristrip and wrapped everything in plastic wrap…that seemed to do the trick for 80% of the finish…then I was able to sand off the rest since this was mostly solid, then clean it up with the 1/2 and 1/2 mixture. Remember, you don’t want to vigorously sand veneer because it can be super thin and you can end up sanding right through it. I started with an 80 grit then finished with a 220 grit. Then I hand sanded it with 220 to get it butter smooth.

I knew this piece was old (which is why I know the poly was NOT the original finish) and that was confirmed when I checked out the underside of one of the drawers.

It was signed and dated…most likely by the person who constructed it…August 11, 1914…wow!

The other thing I discovered was the mortise and tenon peg joint. So super cool. Normally drawers are constructed using dovetail joints. This was unusual to find, but probably not unusual for the times.

I removed the doors to make it easier to work on the inside as well as make it easier to strip them. Remember to ALWAYS reenforce screw holes when you remove the screws. Not hard at all. Just take a match stick, dip it in wood glue, then insert the stick in the hole and break it off.

This will ensure that when you go to reinsert the screw, it won’t be loose or “wonky.”

I stripped the inside back panel then sanded it down. I tried lightening it with oxalic acid but it still seemed a tad to dark and a bit yellow. So I ended up applying a whitewash. Just a little white paint mixed with water, brush it on, wipe it off…like a stain. I can still see the character and grain of the wood but it lightens the interior considerably.

There was a tiny bit of veneer on the base of the cabinet and one side was in pretty rough shape. My original plan was to remove all the old veneer and apply a new piece. I planned to paint the outside of the cabinet so it didn’t matter that it would be different than the other side.

Problem was, when I went to remove the loose veneer, some of it was SUPER stuck…as in it was NOT coming off.

Soooo, punt.

I scraped off all that I could then I used wood filler to get a smooth surface.

This picture is after the 1st coat.

The whole process took a lot of time and patience. Fill, let it dry, sand…apply some more, let it dry, sand. It probably took 3-4 applications to get the side perfectly smooth and ready for paint.

REMEMBER, paint will NOT cover poorly patched or repaired areas…if anything it will highlight it. So take your time and do it right!

After patching, puttying and caulking, I primed the entire outside of the cabinet with primer, sanded it smooth with 220 grit paper and then wiped it down with a tack cloth.

I then spay painted it with a flat black paint. Remember, light coats…2-3.

The paint I used SAID it was primer and paint in one. As you may know, I do not trust that and will ALWAYS apply a good primer before paint…always.

I stripped the drawers and doors (using this process) and I used my new favorite tung oil finish to seal them.

I added new shelving support using some leftover walnut I had from my office feature wall project. I wanted good solid support since it would be holding glass shelves and china…glue and nails!

(This is solid natural walnut…no stain…just an oil finish!)

I moved it in the house before I added the glass or hung the doors…just made it lighter and easier to move…okay, RELATIVELY easy…this sucker is big!

So, my original plan was to put it in my office. But it covered too much of the feature wall I worked so hard on. I moved the Drexel server into the office and put this cabinet in the dining room.

The final touch was the hardware. My original plan was to find some simple tear drop hardware. While looking, I found these precious little ginko leaf designs on Etsy.

Back story…years ago when my kids were little we lived in a house that had a HUGE old ginko in the court yard. I have the loved these trees ever since. Kind of quirky but with a story.

I added a LED light inside the cabinet…simple!

Now I have a place to display more of our family china.

Rather than fill it with all the china I have stored away I selected a few serving pieces of each set. I like to use antique books as risers so I picked a few up at a local flea market.

The only things I purchased were the candle lantern and a fake plant. I know, fake plants are suppose to be “faux pas” these days…I don’t care…I can’t keep a real one alive and it looks lovely.

I love to decorate this room for every holiday so I can’t wait to doll this piece up for fall in a month or so…then Christmas.

I think it will be just stunning!

WHY DO I DO THIS TO MYSELF!!!

If you have ever checked out my “About Me” page you may note the annual pictures of our family in our Christmas PJs. No pictures of the last two years because Brian and I had Covid in 2020 and then Sarah had it this past year…so no family Christmas celebration for two years in a row. I still got everyone matching PJs but no family picture…poooo!

Anywho, I have always wanted to make a quit out of all the different plaid PJs. I have put it off because, well, I hate sewing. Hate is not a word I use often, but I really hate sewing. I wasn’t really sure why. I’m pretty good at it. I love the end results…whether it be a decorative pillow, reupholstered chair, or a custom formal dress.

I just know that every time I sew, I find myself growling and gritting my teeth.

I finally realized why I hate it so much after two weeks of working on this latest project!

It hurts…my back hurts, my neck hurts, my teeth hurt, my head hurts. Most likely the result of my horrible posture and hours of sitting.

The latest project? A PJ quilt…or rather quiltS! As in, I am up to three quilts and two throws.

Why…well, we have a full and twin bed upstairs in the bunk room and I really want some cute Christmasy quilts. Then I decided if I was going to make two for upstairs, I need to make a queen size one for the guest room. And of course the grandsons had different PJs than the adults so I thought it would be neat to make throws for them out of their little PJs.

And then of course I need to make something for the daughter-in-laws…they both want throws…and Sarah wants pillows…

AND BEFORE I KNOW IT ONE TINY SEWING PROJECT HAS TURNED INTO A FRICKING NIGHTMARE!!!

So be it…like I always say, the best way to eat an elephant is one bite at a time. So every morning I take 4 ibuprofen and start chomping away.

As with any DIY project I first had to find my “inspiration.” I knew I wanted quilts, but I also know I don’t want to do a tedious piece mill quilt. When I was in college, I worked for a lady who made applique’ baby quilts…so I know how to do that.

So I went searching and found this….

…I love it and it is something I can do with my skill set…applique’ trees made out of the flannel PJ’s on flannel panels.

I am not going to go into a long tutorial on “how to make a quilt”…as I have said time and again, I am not good at tutorials and there are THOUSANDS of tutorials out there on how to make all kinds of different quilts. Find one that makes sense to YOU!!!! I’m just here to “inspire” you!

So my next step was to gather up all the PJs we have. I sent out a message to all the family to gather up their old PJs and send them to me….

These are just a handful!

We have had this tradition for over 20 years but most of the older ones are long gone. I was able to gather about 15 different plaids from years past. The little guys (my two grandsons) had to wear different PJs up until about 4 years ago and my daughter actually had some of their older PJs stored away….SCORE!!!

I decided (based on some complicated math and chintzy fabric widths) to make the panels 10 1/2” x 10 1/2”. For the little guy’s throws the panels are 9 1/2” x 9 1/2”.

Easy peasy, right?

OH MY GOSH!!!! WHAT HAVE I DONE TO MYSELF!

The queen size quilt requires 72 panels, the full size 56 and the twin 48. The two throws will take 24 each…and each panel has THREE trees! That is a total of 672 trees…so not only did I have to cut out 224 panels, but then I had to cut out 672 trees and 672 tree stumps…and then I had to applique’ three trees and stumps on each panel.

THIS product has been an absolute life saver for me!!!!

Back in the day you would have to iron on a fusible backing. With this stuff, I just cut out the trees on the webbing, peeled one side, stick it on the fabric, then cut it out. Then I peeled the other side, and stuck the tree onto the panel. This stuff allowed me to peel the tree off and reposition it if needed. Not easy to do with iron on fusible backing.

I did use an iron on fusible webbing on the back of each panel…flannel is “stretchy” and this made sewing the trees on a bit easier. It is a “tear away” webbing so when I am done I can just tear away the backing and have a nice soft panel!

Actually, I stuck all the little trunks on the panels, sewed those on with a satin stitch, then went back and added the trees.

Again, it is waaaay more complicated than I make it sound, but this is the end result….

A total of 176 big panels and 48 panels for the little guys.

It only took me two weeks and a big bottle of ibuprofen.

Soooo, now I wait for the flannel I ordered for the stripes that will go between each panel. I got the cute white flannel with little stars for the panels from a local craft store but I read reviews on their flannel and it didn’t score high marks. So I decided to buy a different brand from a different source for the stripes and backing. It was a bit more expensive, but if you are going to put in this kind of time and money, I say go with the best. I want these quilts to last a looooong time!!!!

I decided to go with plain ole’ red…very Christmasy. My plan is to connect each panel with 1 1/2” red stripes and back the quilt with red or maybe another plaid flannel…then bind it with a red and white striped fabric…kind of “candy canish.”

Truthfully, I am grateful for the time off while waiting on the flannel. I need the break!

I am very fortunate. My daughter’s boyfriend’s mother quilts and he knows how to do the top stitch quilting…so he has agreed to do that for me. That is an expensive part of this project so I am grateful he is willing to do it!

AGAIN….find a tutorial that makes sense to you for the type of quilt you want to make. My quilt is a tad more complicated because of the applique’ work, but you can do a simple patch work quilt if you have no other skill than the ability to sew a straight stitch! Don’t let the complicated and beautiful quilt projects intimidate you…they are amazing and I envy the women who have that ability, but you can make a simple keepsake without all the fuss!

I have seen keepsake quilts made out of baby cloths, old jeans and athletic tshirts. My neighbor saw this and decided it would be a great way to preserve a bunch of her father’s old flannel shirts she kept.

This is definitely a “labor of love.”

It is also a prime example of doing something I dislike because I know I will love the end result!

Board and Batten in the breakfast room...

This is a simple project I have wanted to complete from day one.

Board and batten in the breakfast room.

As I have said before, there are TONS of board and batten designs and tutorials on the webisphere. Watch videos, read blogs, search Pinterest…find a design you love and a tutorial that makes the most sense to you.

So here is a little before and after.

Before….

Not totally offensive but lacks a little “character.”

After….

Simple project for me since I have done this a time or two. (Check out the guest bath, the entry in the Lankford house and the Bogey house. )

You might notice another little change…the china hutch.

Originally I had the awesome mid century Drexel buffet but I thought I would change it up a bit. I read somewhere china hutches are making a comeback. I can see why…pretty and functional.

Eventually I would like to add some art on each side of the hutch…maybe some botanicals.

My original plan for this piece was to repair it, paint it and sell it but honestly, I kind of like the look in this room. I FINALLY have a place to display some of my heirloom china that has been boxed up and in storage for a year and a half!

Before…

After….

Next week I will share the steps I took to give this piece a little facelift! Not difficult and as you can see it made a HUGE difference!

Until then….

Merry Christmas!

So little has changed since last year so I decided to link back to a few post from last year….

Here you can check out the “Kitchen Reveal.” Lots of Christmas decor!

Here I shared my “funky bow” obsession….still love them and even made a few more this year. I have made a few for every “holiday” throughout the year!

The only real change is in the “all-season” room. I shared a few changes HERE.

I didn’t decorate this space last year for Christmas because…well, I just didn’t.

On October 1st, I lost my uncle to cancer. We called him “GUS”…because he was our Great Uncle Sam…one of the greatest. He was the 3rd of 5 siblings we have lost in the last year and a half, including my mom, his sister.

They are Stewarts….my Uncle Bob wore his Stewart plaid tie for Uncle Sam’s memorial service and the church decorated all the tables at the reception with Stewart plaid.

So in honor of the Stewart family I decided to decorate this room in Stewart plaid.

Precious. I have always loved Stewart plaid. A simple pre-lit tree with Stewart plaid ribbon and red and green ornaments.

A few plaid pillows and a throw.

Touches here and there in a room that has always honored members of my family.

Two cute little lanterns with remote controlled candles…fun!

I love that you can see the BIG tree through this window!

Here I shared the beautiful stained glass made by my mom and dad and the cool table made from wood salvaged from the building my dad worked in most of his adult life.

So it is fitting that this room honor the “Stewart” family.

Merry Christmas to you and your family. Our family has been hit AGAIN this year with Covid, so AGAIN we will have a “different” Christmas.

But it is still the MOST WONDERFUL TIME OF THE YEAR!

I will be taking a few weeks off but I will have a lot to share in the new year!

Merry Christmas and Happy New Year!!!

Making a table or bench top...

One tool I wanted for years was a “biscuit joiner.”

Screen Shot 2021-08-11 at 4.43.53 AM.png

One of the many things I love about my kids….when I ask for a specific tool for Chirstmas/birthday/Mom’s Day, they listen. So several years ago I got a biscuit joiner for Christmas!

This little tool has allowed me to make a few things I otherwise wouldn’t have been able to make. It allows me to join together several boards to make a larger board. A necessity if you want to make benches or table tops.

Let me give you a few examples….

The first was this bench….

I was able to join together the three 1”x6” boards and the ends to make a strong top.

Brandon and Taylor wanted a plain pine table and bench for their new house. I guess they could have spent a fortune like we did for a custom made table but that isn’t really an option for a young couple.

So we went to Lowes, picked out some straight, nice boards with good grain and used the biscuit joiner, glue and clamps to create a table top and bench top.

IMG_1329.jpg

After some serious construction, a LOT of sanding, a polycrylic clear coat, and some nifty bases, they have an AMAZING table and bench!

IMG_1146.jpeg
IMG_1148.jpeg
IMG_1149.jpeg

Last year I went looking for some shelving…I found one I absolutely LOVE. It was from the same company that built our dining table so I knew the quality would be amazing….but the price tag was just a tad too steep!

I love everything about this shelving unit….the look, the style, the quality.

So I went looking for a less expensive option. I found one I thought was okay on Overstock.

Waaaay less expensive…and for obvious reasons. The frame is metal vs welded steel and the shelving material is MDF vs. beefy solid wood.

The look and style is very similar…almost identical sizing…but the MDF shelving HAD to go. I knew immediately I wanted to replace them with solid walnut.

It has only taken five months to get around to this project.

The biscuit joiner was a life saver.

Walnut is a pretty expensive wood…and finding pieces wide enough for the needed 12” shelving was pretty much impossible (without a serious outlay of cash.) What I did find were 7”ish board we ran through my son’s table saw and joined together….

IMG_1740.jpg

Using a biscuit joiner is NOT difficult…just take your time and follow the directions.

One little trick I did learn was how to mark the joints so they lined up perfectly. Just put your two boards together then run a mark across the joint….

IMG_1742.jpg

Then just line the joiner up with the mark and plunge away…the joints will line up perfectly!

Always dry fit everything to make sure it all lines up perfectly before you apply glue….

Apply glue and clamp….

IMG_1745.jpg

Joiners are NOT difficult to use. Just follow the directions and watch lots of YouTube tutorials.

I sanded each piece with 220 grit sand paper, tack cloth and sealer.

I used Waterlox as a sealer…no stain…same stuff I used on my kitchen cabinets and I have been extremely pleased with it!

BEFORE

BEFORE

AFTER

AFTER

BEFORE

BEFORE

AFTER

AFTER

BEFORE

BEFORE

AFTER

AFTER

I was able to take a shelving unit fit for a dorm room and turn it into a beautiful accent piece!

LOVE!