A CUTE GARDEN BENCH...

I saw a precious little “mud bench” on Instagram….

Cute as a bug’s ear. Only one problem…I don’t have any grandgirls…just boys. Two are too old to appreciate something like this and one isn’t old enough to sit up by himself sooooo……

What to do?

As I mentioned before there is a precious little girl next door….I borrowed her to bake Christmas cookies!

She will be 8 this summer. She LOVES to make mud pies and has a raised vegetable garden. She had a little make shift “mud table” in her back yard so I knew she would love something like this!

They were on vacation a few weeks ago so it was the perfect time to build and stage a little surprise…so off to Lowe’s to TRY to find some decent wood. Not an easy task these days!

The inspiration bench looks like it is made out of regular wood and painted. I built mine out of treated wood so it would weather well. Unfortunately that means I have to wait a few months to paint it or stain it…no biggy.

For this bench I needed the following lumber (all treated):

2-4x4x6

5-2x4x6

5-1x4x10

2-8’ deck boards (they are around 3/4” x 5 1/2”)

1-1x2x8

1 plastic storage bin with a lid

I used a skill saw, chop saw, a kreg jig and my screw driver.

Remember, 2x4s are actually 1 1/2 x 3 1/2”….and 1” thick boards are actually only 3/4” thick…it’s a racket! The lengths are what they say they are….

I had all the screws and hardware so no need to buy any but you will want 2 1/2” Kreg jig screws and 1 1/2” and 2” deck screws…and some random hooks!

I decided to make the entire bench about 29-30” tall, 4’ wide and about 2’ deep. I think it may be a tad tall for a little one so I built a little “walk bench” for the front of it until she grows a tad.

I can pretty much construct something like this in my head, but if you are a novice, make sure you draw everything out on paper using the actual measurements of the lumber. Or better yet find a plan online THAT MAKES SENSE TO YOU!

The first thing I did was cut the 4x4x6s down to 4-29” pieces for the legs (remember the top will be about 3/4” thick). I used a skill saw to cut them down.

I used the 2x4x6 for the front/back frames and the side frames. The width will be 48” wide so the front frame is 48”, less 1” so the top can hang over by about 1/2” on each side, less 7”(two side posts/legs…remember they are actually 3 1/2” wide) …so the front and back frame pieces are 40”. For the sides…24” less 1” (for the overhang) less 7” (for the posts)…those are 16”. You will cut 4 of each length…2 for the top frame and 2 for the bottom.

To attach the front and side frames to the posts/legs I used my Kreg jig…love that thing. A little glue and then two screws on each end.

Just a reminder…ALWAYS attach boards with the “cup side” down…this applies to any project. To find the “cup” look at the grain at the end of the board. In other words you want the “hump” of the grain to face out. This is important to pay attention to when selecting wood…if the side that will face out is all scarred or knotted you will want to pass.

I put a frame at the top and also 2” from the bottom of the posts/legs so I could add a bottom shelf.

After I got the frame constructed using glue and the Kreg screws, I attached 47 1/2” 2x4 boards cut in 1/2, 3/4” from the top of the bottom front and back frames, on the inside…I did that so I could use 1”x4” boards as the shelving for the bottom. I just laid the 1x4s on the cut down boards then attached them with screws.

I made the top back by attaching two 2x4 boards vertically to the back frame, then attached 3 1x4x48” boards across them with screws. I laid a 1x4x48” board on top for a little shelf and trimmed it with a 1x2. Not on the inspiration bench but something that was simple to add and gave me a space for plants and such.

For the top I used deck boards. I used my jig saw to cut out a hole for the storage bin with a lid so she would have a little “sink” to mix her mud pies!

I made sure to leave gaps between the boards like you would for decking so water could run off.

As I said, we can’t paint or stain it just yet since it is all treated wood but it was super fun to stage…some cute little containers for little plants, some plastic bins for her pots and pans (all from the Dollar Store!)…a few hooks for more pots and spoons. Even a hook on the side for a little watering can.

My neighbor has a Cricket so she made a little sign so everyone will know it is her bench!

CUTE AS A BUG’S EAR!!!

I love it, she LOVES it, and the entire neighborhood loves it and now all want their own garden bench.

Super simple to make and it will not be hard to customize it if someone wants one bigger or even smaller!

I’ll let you know how the mud pies turn out!


"Mud room" bench....

This is a project you see a lot on Pinterest and it is a super simple and functional use of normally wasted space.

Case in point…my daughter-in-law’s sister’s (Laura) house….

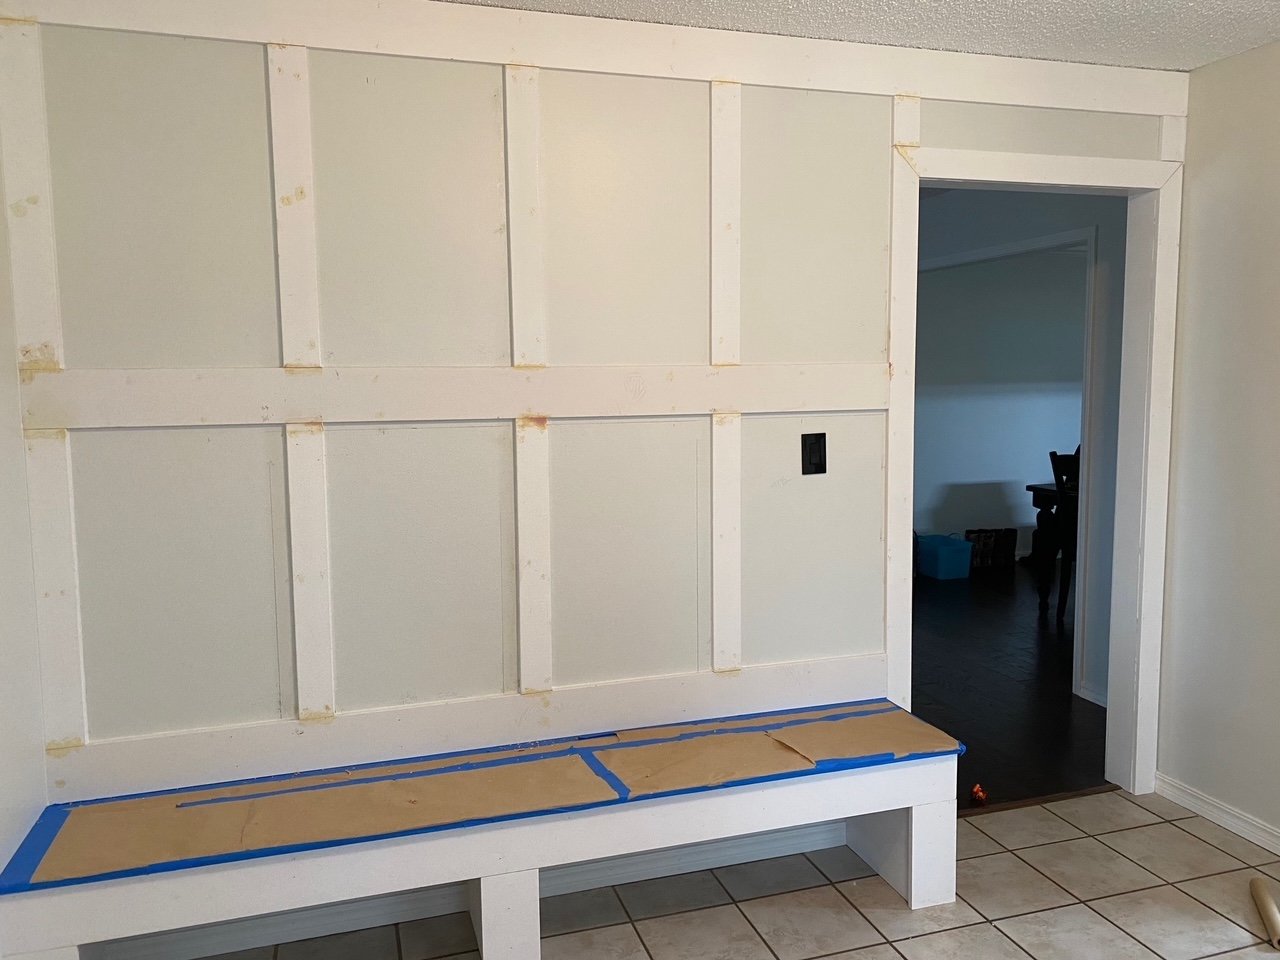
This room is next to her kitchen…designed to be the “breakfast room” space but is really used as a thoroughfare from the garage into the house and has become a general “drop zone catch all. “ With two small kiddos, it could be the perfect “craft room” and drop zone but as you can see there was no form or functionality to the space.

So she sent me this “inspiration” photo.

A functional and organized space for shoes, backpacks, coats, etc.

Heck, I can build that!

She likes the board and batten look of my entry more than the “panelling” look in her inspiration photo. No biggy. Remember what I have said before…the key to any project is first, your inspiration…..second, your plan and third, the execution.

So we had the inspiration…just a few tweeks and we had a plan…

Now it was time to execute!

I have said before I am not a “how to” kinda person…I am a “YOU CAN DO IT” kinda person. So find a tutorial for installing board and batten and building a bench that makes sense to you and works for your space.

First up…the bench. I had to off center the middle support because of an outlet but it was pretty basic stuff…2x4s, construction mastic and wood screws. Again, find a tutorial that makes sense to you! (Even I look at tutorials sometimes and say WTH!)

I build the legs of the bench out of 2x4s then clad them with plywood. Simple.

I used 1x6 pre-primed pine to trim out the front of the bench. MDF will “swell” if it gets wet so you can use it on wall treatments but I highly recommend using a solid wood product on anything adjacent to the floor.

I always use pre-primed or prime and sand before I install to avoid having to prime and sand inside the house!

I used 3 1x6 lengths of oak for the bench top. You can also use pine…MUCH cheaper but Laura liked the look of the oak. I used a rooter on the edges, just a hair, so when I joined them together they look more “plankish” than solid.

I built the bench top, using a biscuit joiner, in the garage… no stain just 3 coats of polycrylic, and then installed it before I moved on to the wall treatment.

For the board and batten wall treatment I used preprimed MDF.

I usually install the horizontal pieces first…making sure they are perfectly level. Then I go back and add the vertical boards. Putty all the nail holes and seams and make sure you caulk EVERY joint and crack…sand it all super smooth.

REMEMBER if you can feel it you are going to see it after paint…so sand and feel with your hands! Sometimes it can take 2-3 coats of joint filler to get good coverage.

We covered the wood bench top and painted with a brush and roller…three coats!

GORG!!!!

We added cute little hooks Laura picked out!

I was still loading tools and the littlest (3 y.o.) was already claiming all the hooks for his back pack and Hulk costume and mask! Probably should have added more hooks…lol!

Props to Laura…I really believe the vision and inspiration are the most important keys to any successful DIY project.

She did good and I have no doubt this little area will now serve her family well!

Where have I been?

I know…I have been MIA for over a month.

When I first started this blog, I posted every day. That was just too difficult so I started posting twice a week. That was even taxing so I started posting once a week.

And now here we are…over a month later.

Truth be told, the holidays are a super busy time for me.

All the decorating, baking, entertaining.

And of course the sitting and staring at the Christmas tree. I do that A LOT. The season is just so short since I have a hard fast rule to NOT decorate for Christmas until after Thanksgiving…I want to soak it all in.

I get up every morning and turn on all the Christmas lights and they stay on until I go to bed. I don’t even want to tell you what my electric bill is that month…wowza!

This year I added ANOTHER decorated tree in my bedroom…I’ll have to share that next year. I featured my new black and white tree in my office HERE . Now I am one step closer to having my dream of having a decorated Christmas tree in every room. Upside…it is AMAZING…down side….what a chore to take it all down!

The MOST WONDERFUL TIME OF THE YEAR is in the books and time to move into the new year.

First up…a baby shower for my daughter in law.

Everything was beautiful and of course hosting this special event gave me a reason to do a super deep clean on my house.

Breath….

Now on to something that has been bugging me for several months.

The living room rug.

I bought a new rug before Christmas. I loved the old rug….

But after a few years and a puppy, it was ready to go. Rolled it up and hauled it to the trash can.

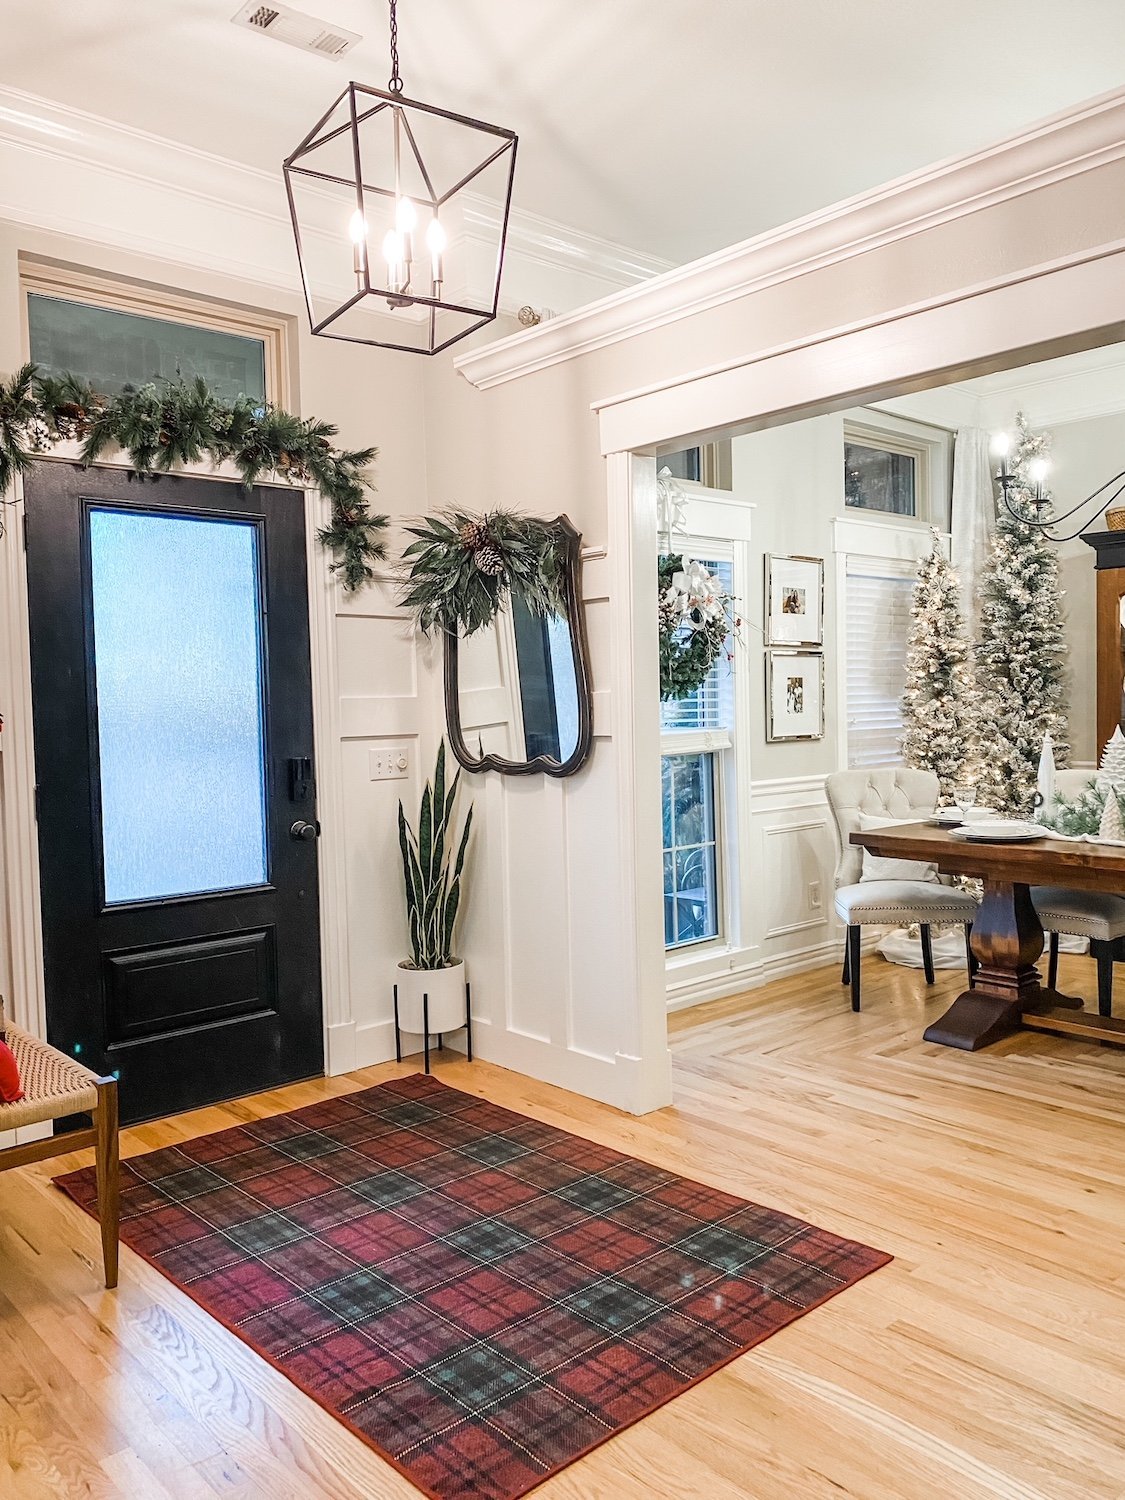
I tried a holiday Ruggable rug in my entry this year….

…I loved this rug…very durable and at the end of the season I picked it up and threw it in the washing machine! Sweet!

So I decided to try a washable rug in my living room. I couldn’t find one I liked on Ruggable so I checked out Tumble, another washable rug.

I found one I thought I liked, ordered it and put it down.

I didn’t even take pictures of it because I knew the minute I rolled it out it was all wrong!

Do you ever have one of those “design choices” that you get all done, stand back and go ICK!?

Yeah…that was my reaction to this rug!

It is a beautiful rug. And with 3 cats and 2 dogs, and a slew of granddoggies, I love the fact that I can pick it up and throw it in the washing machine.

But it just didn’t work.

The problem was the color…the rug is what I call a “cool” color and everything in my living room is “warm.”

I don’t have a problem mixing “cool” and “warm” decor….if it is done right.

But this just wasn’t right. All this rug did was make my couch look dingy and dirty…and it is not either.

Sooooooo…..what to do, what to do?

First, I do what I always do…I let it be for awhile. I live with it.

A few weeks later…I still dislike it immensely.

I couldn’t send it back because I had “let it be” for a few months and by then…well, life. Rolled it up, tore the bed apart and put it down in my bedroom.

I’m not swooning over it but I’m not growling at it every time I walk through the room… (yes, it looks lavender…but it is actually kind of a taupy/grey/blue kinda color…which makes it appear lavender)

So now I had to find a new living room rug…OH MY GOSH!!!! I can do a lot of things but choose a rug is not something I do well.

I went to 6 different stores…found a few I loved but not enough to justify the price. I know me…in a year I will tire of it and I will want something different. Rugs and pillows are something that is easy to change so I try to keep the cost on those in the reasonable range.

A $3000 rug in a house full of critters and traffic is probably not reasonable.

Finally settled on a new rug…

Meh…again, not swooning but …. (again, it APPEARS browninsh but it is more of a warm grey/copper/blueish color)

So, on to the new year.

So far I only have a few projects online.

A “mudroom” bench and storage for my daughter-in-law’s sister.

She found her inspiration…..

I took measurements, I drew up a plan, and made a material list.

We were going to start that project this week but we got 5” of snow Tuesday so that got pushed to next week.

Definite share when I get it done!

My neighbor wants to redo her pantry like I did mine (shared HERE). She has some family obligations for the next few weeks, so that is on hold.

We are only a few months away from potting, mulching and planting! But as I said, snow…and cold…sooooo….

So I am doing what I always do in January and February….I am hibernating.

I need these few weeks to decompress…and breath!


Lessons in DIY....

One of the things I love about this house is the irrigation system…no more dragging hoses and sprinklers around the yard all summer.

In theory.

The system has been severely neglect for years so it has been a total rework. We finally got the two zones (there are four) working for the bulk of the front and back yard.

As usual, I did what I always do when I want to learn something new. I hover. Followed the irrigation guy around watching every move he made (for a $100 an hour I figure I should get a lesson).

I googled how irrigation systems work and how to repair and replace malfunctioning and broken heads.

I installed the Zone 3 drip system for the flower beds. Yay me!

Now I think I am an expert and thought I could tackle Zone 2 which wasn’t working at all.

Zone 2, the zone on the north side of the yard, has been a total bust. I knew there HAD to be a break in the main water line some where, I just couldn’t find it.

I am tenacious…the darn thing was broken and come hell or high water I was going to fix it.

After WEEKS of digging around and tracing lines, I found not ONE, not TWO, but THREE breaks in the water lines…..curses!

Needless to say my newly sodded yard looks like it has been hit with mortar shells.

IMG_1689.jpg

The first two breaks were relatively easy fixes….the third has been a total booger. It took three full days and at least 6 or 7 trips to Lowe’s…I repaired the same spot SIX times before I finally got it right…I think…I hope…unless one of the connections broke loose again when I covered it with dirt.

Today’s lesson on DIY. As I have said before, my daddy didn’t have time to teach me EVERYTHING I need to know about DIY. But what he did teach me was a valuable lesson. If you want something fixed, repaired, built, or changed, be willing to do the research and put in the time and muscle to do what needs to be done.

I didn’t have a clue about irrigation systems. Zip, zero, zilch. But I am not about to pay someone $100 an hour to do something as simple as change out busted heads. So I learned…and am still learning

The water line repairs….that’s another story. This was one of those times when after 3 days of crawling around in the mud and AT LEAST six trips to Lowe’s, I began to wonder if it was time to call in a professional.

I suspect it would take them all of about an hour to do what took me three days!

DIY lesson number two….know your limitations.

That’s a tough one for me.

I do get to share one little project I managed to complete while I was waiting on water line repairs to dry.

Years ago I bought these old metal wheels at an auction. Thought I might sell them but never have so they just sat in the yard with no real purpose.

This is the picture I took to post on Facebook Marketplace eons ago….

28336456_10213705878788595_1856686047250220767_o.jpg

I’m not really a “yard ornament” kinda person so the fact that I had these big ole metal wheels just sitting in my yard was, well, just not my jamb.

I moved them to the new house and set them in the back corner of the yard and thought MAYBE I could find something to do with them…..eventually.

Now I do like “sitting” areas….and the more I looked at these wheels, the more I thought, “Hum, just MAYBE I can figure out a way to turn this into some kind of bench or something.”

So last week Brian and I went out to this ratty little old “hobby mill” and picked up a live edge board, brought it home, power washed it and made a bench…I really like how it looks tucked away in the back corner of the flower garden.

IMG_1691.jpg

(The concrete “bench” in the forefront of the photo was there when we bought the house…we were told it was part of the old farmhouse that sat here originally…that sucker isn’t going anywhere! Makes a great place for squirrel food in the winter!)

IMG_1693.jpg
IMG_1694.jpg

Presto, bingo! Now instead of having some big ole’ honkin’ metal wheels in my yard that cause me confusion and grief, I have this nifty one of a kind bench in my back flower garden.

I haven’t decided whether to seal it or leave it natural.

LOVE!

We picked up another piece of milled wood just in case we needed another piece…I decided to use it to make a another bench. The concrete bases were from a bench in my Mother’s yard. It use to have a concrete top but someone (who I shall not name since it might embarrass my oldest daughter) sat on it and busted it. So these bases have just been sitting around waiting for inspiration.

I think I will seal these boards. I love how you can see the mill marks and a sealant will really make those “pop” like it did on this old wood I used to make a table.

IMG_1696.jpg
IMG_1697.jpg

Irrigation system is (fingers crossed) fixed and I managed to get a few little projects complete.

Makes for a good week!

static1.squarespace.png

Screened porch reveal...

IMG_1545.JPG

SO. MUCH. RAIN! But that is spring in the Ozarks. We are again fortunate that we haven’t had severe weather…just some flooding here and there.

So much rain my poor plants are screaming ENOUGH ALREADY! They are really struggling. But soon the summer heat and dry will set in and I will be watering every day. This amazing house had an irrigation system but it had been severely neglected for years. It took a bit of time and money but I have 2/3 of the system up and running so HOPEFULLY when it is time to water I can do most of it with a flip of a switch. I still have a few porch plants that will need to be watered but its waaaay better than dragging a hose and sprinkler around the yard.

Totally off subject other than to say I have been forced to work on a few indoor projects. Those usually entail my LEAST favorite DIY chore, sewing, but if you want pretty (without a serious financial payout), it is an evil necessity!

The screened porch was no exception…there were a few sewing projects. Pooh.

So my inspiration (okay, kick in the rear) came from another blogger…Tasha. LOVE her screened porch she revealed HERE. Awesome space and if I had a large screened porch and a large family, it would be perfect. But I have a small space and it’s just us and the critters. We often joke….we have this huge house but usually all three cats and the dog manage to crowd in…we can literally take up 10 square feet.

Regardless of the space, you want it comfortable and inviting….this space was neither. It was basically where we “threw” a bunch of overflow outdoor stuff when we moved in and have neglected it since. Other than eating out here at the little table on nice evenings, it had been pretty neglected.

The little table and chairs were an auction score and over the years they sat outside and the black paint chipped. Pretty sad looking. It may be kind of “old fashion” looking, but we really do enjoying sitting at this little table for dinner and in the mornings drinking coffee.

IMG_1438.jpg

The wicker chairs were on our porch at the old house…I think they were originally rockers but over the years the wood rotted and I removed the rocker part.

The round rug was originally my son’s and he didn’t want it so we put it out here.

My intent has been to turn the iron frame between the chairs into an outdoor side table. I think it is an old aquarium stand I salvaged from an apartment years ago.

You may notice the fan and light were pretty pathetic…so that replacement is a MUST

IMG_1440.jpg

The “kitty corner.” They LOVE the old wicker chair that use to be my smoking chair on my back porch. I haven’t smoked in almost 10 years if that gives you an idea of how long that thing has been around. It was pretty nasty and honestly needed to go!

IMG_1442.jpg

Even in a small space, it is important to “make a plan.” Tasha gives some excellent tips for designing a space like this, or any space for that matter.

1) If you have a large space, create zones. I didn’t really have a large space, but I do want it to serve several purposes. Eating, reading, and cat lounging (they are indoor kitties so they LOVE this outdoor space)

2) Make your space USEABLE! That was the motivation for this makeover…useable and comfortable.

3) Add as much ambient light as possible. New fan and light and I do want to eventually add a lamp on the little side table but honestly we rarely sit out there after dark so I’m in no hurry to find a suitable lamp.

4) Add plants! Unfortunately I don’t do well with indoor plants. I did have a HUGE peace lily in the all season room I divided so I put that in here…I tried adding a fuchsia but it took all of about three days for all the pretty pink blooms to drop so it went outside and I ended up adding a little potted planter of outdoor flowers. Maybe they will fair better since I am a master of most outdoor plants!

5) Bring in pops of color! Now that I can do…although if you look around you may notice I don’t do that on a large scale in my decor. But in my plan for this space I knew exactly what I wanted to do,

Pink flamingos.

Okay, so here is how that all started. Years ago Brian bought two vintage pink flamingo knick-knacks at an auction.

IMG_1552.jpg

For some reason that has become a “thing” in our house…possibly because it is so rare for him to buy something other than guns, pocket knives and coins…lol! One Christmas Mom bought him a pink flamingo ornament. Somehow we ended up with pink flamingo metal ornaments in our yard. I bought him some flamingo socks…it just went on and on.

And honestly, I like pink and green.

So my plan for this space…

1) New cushions and pillows for the chairs. Perfect way to bring in the flamingos and A LOT of color.

2) FINALLY paint the ratty iron aquarium frame and make a top for it.

3) Paint the little table and chairs.

4) Years ago I acquired the iron frame to an old train bench from my mom. It had sat on their front porch for YEARS. Eventually the wood rotted and my intent was to rebuild it with new wood. This little porch is the perfect place for it…and it is time!

5) Add some plants here and there.

The reading area…

IMG_1541.JPG

I made new cushions and pillows for the chairs.

A new “funky bow” for the Home Sweet Home sign that hangs on the wood frame that use to hang in our old guest bath.

IMG_1546.JPG

I painted the little iron base and made a wood top out of some scraps I had on hand.

A few little knick knacks. The driftwood is a piece we picked up off a frozen pond in Georgetown, CO almost twenty years ago! A picture of my precious kiddos.

IMG_1547.JPG

A new paddle fan and light…a must!

IMG_1545 2.JPG

I painted the little chair and table. I had to sand it a bit to remove a bunch of chipping paint, primed it all with metal primer, then sprayed it with spray paint.

IMG_1540.JPG

I had this old pewter compote for years and really didn’t have a clue what to do with it.

IMG_1538.JPG

I saw a picture on Pinterest where someone had turned one into a little flower thingy….

IMG_1539.JPG

...gives it a purpose.

I bought little vintage flamingo salt and pepper shakers off Ebay.

I bought a little rug off Etsy…

…and a little flamingo flag….(note the pathetic fuchsia)

IMG_1526.jpg

Hopefully the impatiens will fair better…..

My favorite project was the railroad bench. Primarily because it was a family heirloom and partly because the darn thing has been sitting around for years! It was time…

New wood and good for another few decades.

Somewhere there is a picture of four of my parent’s grandsons sitting on this bench when it was on their front porch. My boys were preschoolers then. Crazy.

IMG_1545 2.JPG

All in all I am pretty pleased with how it turned out.

It certainly isn’t anything as elaborate as Tasha’s but it serves our purposes!

I really didn’t spend a ton of money but the investment was worth every penny. It has been the perfect place to sit and read during the rainy, dreary days.

And of course the cats LOVE it!!!

Another rainy day project…swapping out the front porch decor for Memorial day and 4th of July.

IMG_1549.JPG

Just a few patriotic pillows and the wreath I shared HERE.

We are officially ready for summer. If it ever stops raining……

static1.squarespace.png

Board and Batten Entry....

IMG_1171.JPG

The entry…the one place in your home EVERY guest will see. They may not see your awesome pantry…or even your darling guest bath or amazing kitchen, but when you open the door they will see your entry.

It is one reason I really stressed about what to do with this space. I wanted it to be warm and welcoming, and while it is a big space, there is very little “wall space” to allow for big credenzas or entry storage. I really don’t need either since we usually enter from the garage into the laundry room…great “drop zone” for our packages, coats, purses, shoes, etc….but I like the look of both in entry spaces!

Of course the first course of business was replacing the dated door, window and light fixture….relatively easy fixes and something I did before we moved in!

IMG_6549.jpg
This was after the window was replaced but before the door, light fixture and flooring!

This was after the window was replaced but before the door, light fixture and flooring!

I debated on the board and batten for some time…

IMG_0580.jpg

I just felt it needed a little “something.”

It only took me 16 years to get the entry in my last house the way I wanted it…I feel like I am moving at warp speed on this one…lol!

At one point I tried a larger rug…but I didn’t like it…I honestly like the little dinky rug that is probably too small for the space. This is a prime example of doing what I LOVE vs. doing what the “design experts” tell me I am suppose to do.

A hint of trouble came when winter hit and we needed a place for visitors coats…other than putting them in the closet in the office, there really was no place to hang them.

Coat racks are a bit out dated and just hanging a wall mount coat rack didn’t trip my trigger.

Board and batten allowed me to put a few hooks on the wall.

IMG_1172.jpg


But that led to a little problem with the table. I LOVED the little walnut table, but you can’t hang coats above a table.

IMG_1084.JPG

Again, it is NOT my style HOWEVER it was my grandparent’s and it is walnut…heirloom and walnut…my two favorite elements.

Truthfully I like the look of an entry table…but I really need the hanging space so I went looking for a simple bench.

And I found it….

IMG_1172.JPG

I LOVE this bench I found on Etsy. Not the least expensive bench out there (and I paid a tad more for walnut) but the quality and craftsmanship made it worth the investment.

Since the table is a family heirloom I didn’t want to get rid of it. The little wickerish bedside table in the guest room had no sentimental value so it got hauled to the bunk room and the table is now a bedside table in the guest room…perfect!

I love the look and feel of this entry now…warm, inviting, functional.

IMG_1173.JPG

I am currently playing around with the dining room table.

When it was set the other way, facing the living room….

….there was no room on the only large wall for a buffet or credenza.

So I have turned the table the “other” way, which gives me room for a buffet or credenza along the wall…

IMG_1176.JPG

But I am not sure I like it “that way.” So it will sit while I ponder.

That is just how I roll…sometimes I have to sit and ponder, like whether to put up board and batten or whether I should turn my table a different way. Sometimes I know almost immediately I am not going to like it. Prime example, the “river rock” I put in a flower bed for drainage. I knew immediately I did not like the white rock I put down originally!

So out came the white rock and I found some that I liked better…

IMG_1174.JPG

Sometimes it is okay to sit and “ponder.” I have learned that the more I really think about something, the more I tend to like it long term. When I just jump right in and start on a project without really visualizing it, living with it in my mind for a while, I tend to not like it as well. And that is a waste of time, energy and money!

Until next time….

Master bath reveal!

I KNOW! I have been MIA for a while now….there is just soooo much going on right now that I can not share! I promise, in due time.

In the meantime, AGAIN, I want to revisit one of my all time favorite “makeovers.”

I revealed my master bath makeover almost two years ago and I can honestly say I STILL love this bathroom. Love it! I don’t missed the tub at all and the walk-in shower is still my favorite addition to this house!

Head over to this post and check out the transformation and MAYBE next week I’ll have something new to share!

Another new dining room table and the greatest Mother's Day gift....

ANOTHER dining room table…obviously I have a soft spot for chairs and tables. When I saw this pathetic trestle table at a barn auction a few weeks ago, I just knew she had some serious potential….

The top was in pieces and the finish was crud…but oh the potential. And it wasn’t until I got her home that I discovered her little hidden secret…

She has this super nifty fold out “leaf.”

Just too fricking cool!

In spite of the fact that I have been up to my earballs in work at the apartments, I couldn’t wait to start working on her. The first thing I did was strip all the old finish…HERE is the process I used. This is a tried and true process that makes quick work of a daunting task!

After all the old finish was stripped off I had to glue and clamp the table top back together….

I always make my repairs AFTER I strip but before paint or finish…and I always make sure I make all the necessary repairs. No sense in making it pretty if it is just going to fall apart…glue and clamps!!!

The top was solid (vs. veneers) so the pieces were a tad warped…no biggy…I clamped it as well as I could and then I sanded the joints smooth…starting with the finer grit (220) and working my way down to a rougher grit (150) and then back up to a finer grit, before applying a tung oil finish.

Tung oil finish is my “go to” finish for many reasons…it is super easy to apply, it is super durable and it is super easy to reapply when the finish gets scratched or begins to dull!

So, when all was said and done, this little table will now take her place in the dining room….at least for the time being….it is no secret I swap out tables on a regular bases….here are just a few I have featured over the years…

A Duncan Phyfe….I gave it a little makeover HERE before selling it….

An antique trestle I featured here

An oak farmhouse table featured here…..

The most recent…an antique draw leaf table…

All these tables have one thing in common…they are relatively “compact” but can be expanded to handle Thanksgiving dinner. Basically once a year I need a large table…and these all fit the bill.

The newest little trestle table is compact, expands, and beautiful!

So get ready for a few pictures…..

I just LOVE the new light fixture from Wayfair I featured here….

I love how it can easily be expanded. No more having to find a place to store leaves or hauling them out for one dinner…just slide open the top and fold out the insert…simple (especially after a little WD40)

One huge problem….I REALLY dislike the Duncan Phyfe chairs with it…they just don’t look right…and sadly I know exactly what chairs I want for it and I have had them and sold them a few times over. The good news is I will eventually find what I want….

Until then I bought this little piano bench at the same auction. Again, pretty cruddy…

…but I stripped and oiled the top, scrubbed up the brass feeties and painted the base with my new favorite blue…the same one I used on the buffet (here)

Meh….not really “swooning” over it, but it will serve the purpose for now…until I can find the chairs I want or another pathetic little table catches my eye. I wouldn’t take bets on which happens first!

THE GREATEST MOTHER’S DAY GIFT

This year I received the absolute best Mother’s Day gift!!! Another college graduate.

My youngest daughter, Katie, graduated from the University of Arkansas with a degree in Bio-Engineering.

She is beautiful, smart, and talented…and I could not be prouder.

She, as well as her brother Matt (Masters 2015), are fourth generation Arkansas graduates….my great grandmother graduated in 1920, my grandfather graduated in 1943, and I graduated in 1987.

Brian and I are now 5/5….five kids, five college graduates. And the fact that all five were here for Katie’s big day, which happen to be Mother’s Day weekend, made my day extra special!


Pretty in Pink...

If you “came of age” in the 80’s chances are you saw a John Hughes film. If you haven’t, you are missing out! “Pretty in Pink” was one of my favorites! Check them out…you won’t be disappointed and I can’t think of one that isn’t “kid friendly.”

Which brings me to pink…a color I have always loved but have never really used in my home decor. I must have gotten a “pink bug” because all of a sudden I can’t seem to get enough of it….and since next week is Valentine’s Day, this is a great time to infuse a little pink into my home decor under the guise of “decorating for the holiday.”

I found this little bench in 410 Vintage…the tag said it is walnut but I really think it is mahogany. I used this process to refinish the frame and recovered the seat with the same pink velvet I used for the club chair pillow (makeover here).

Several years ago I refinished a little piano bench to set by the closet so I would have a place to sit and put my shoes on.

In one of my “purging” marathons I moved it out but in all honesty I kinda missed it…so this little bench is a perfect little replacement!

I love my office…a simple room that is really multi purpose…a “thoroughfare” from the living spaces to the master bedroom, a “dressing room,” and of course, an office.

I featured the desk here.

I have seen a few desks over the years that peaked my interest but I still love this desk…it is perfect! Prime example of “buy what you TRULY LOVE and you will never tire of it!”

My office chair looks a lot like a Marcel Gascoin C-chair….I can’t find a picture of this exact chair so I don’t know for certain! Again, I don’t buy pieces like this for their potential value…but because I LOVE them.

I bought it years ago and share it’s little makeover here. Again, still love it!

I have replaced the dresser several times over the years but I LOVE this one! Shared the makeover here and while I loved the dresser that was here before, this one is MORE better!

The little bookcase…just adorbs!

I digress…off to the living room … I found the cutest pink pillows…

…and a yummy smelling pink candle!

The little white pillow was kind of plain so I decided to add some cute pink pom-poms I made out of “furry” yarn. I just tacked them on so they can easily be taken off when I tire of the pink.

The pink pillows will go well with the little bit of Easter decorating I do!

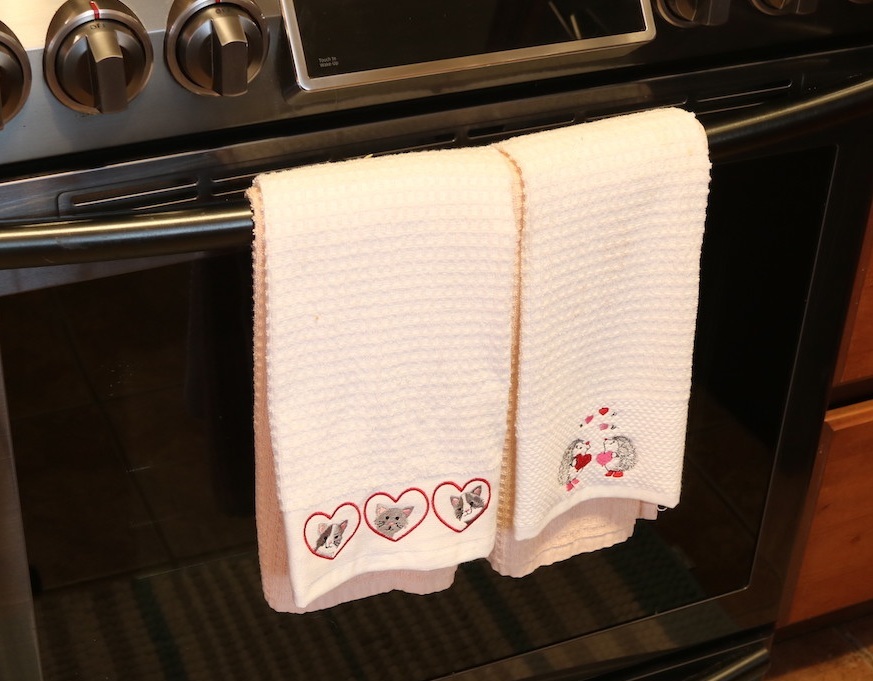
While digging around TJMaxx for pink pillows and candles I found a few other things I thought would be fun for the holiday….cute hedgehog mugs and fun little Valentine’s hand towels!

You don’t have to (or need to) spend a lot of money dressing your home for Valentine’s Day…but it is fun to infuse a little fun and color into an otherwise “drab” time of year!

Funny…I was wearing my pink tennis shoes and a pink vest when I was buying all this pink stuff…the check out lady remarked that I sure must like my pink…lol!

Turns out, I really do! It is so dreary and “wintery” outside and the pink just seems to brighten things up a bit!

I have some leftover pink velvet from the bench makeover…just enough for a few more pink pillows! Now if I can just being myself to sew them…eck!

Twofer...

What is a twofer...well, in this case it was one chest of drawers made into two...twofer-the-price-of-one.

Clever, huh?

The chest was obviously "dated" and too tall...

....but it appeared to be three separate sections. I pulled the drawers out and did some sloothing and found that it was indeed three sections stacked on top of each other, secured with screws. No biggy! I just removed the screws attaching the top two drawer section and presto-bingo, I had two chests...one with four drawers and one with two.

The top had a little boo-boo...a little "wood sculpting" and it was good as new.

I wish I had taken a picture of the finished repair, but honestly I forgot all about it it! Just know that it takes a little wood putty and patience to "sculpt" a repair....but not impossible!

I removed the hardware on the sides and puttied the holes.

I removed all the drawer hardware and puttied the holes I knew I wouldn't use with the new hardware

I chalk painted and distressed the four drawer chest and replaced the dated hardware with nice cup pulls.

I am a "hoarder" of legs so I took a set I had stocked away and attached it to the two drawer section.

I KSTPed (kilz, sand, tack cloth and paint) the two drawer section and painted it with a high gloss white lacquer....simple new hardware!

Twofer....