Another pondless water feature...

I love my swing…

It is one of my “happy places.”
But as I was hobbling back to the house after expanding my back floor bed….

…I realized it was missing something really special.
A water feature!
I shared HERE how I added two pondless water features next to the front porch and by the screened porch.

Relatively simple little features but I wanted something bigger next to the swing.
I would love to have an open “pond” but again, too many leaves….so another pondless feature it is…but this time BIGGER!
First thing…find some inspiration. Pinterest never fails. This is one of many I found (again, didn’t keep the link, just the pic…sorry!)

One of the first hurdles is electricity…the water pump has to have electricity. No biggy for me because I have minimal electrical skills. But if you do not, and there isn’t a power source close by, you may have to hire an electrician.
In my case I have power on the other side of the swing at the house. I ran romex through PVC underground from one side of the swing to the house. I ran the romex underground through PVC because I created a flower bed along the back of the swing and I knew that over time I would be digging around in it and don’t want to risk nicking romex. Then I added a plug (similar to THIS) to the end of the romex. I connected the other end to an exterior electric outlet attached to the back of the swing pergola.


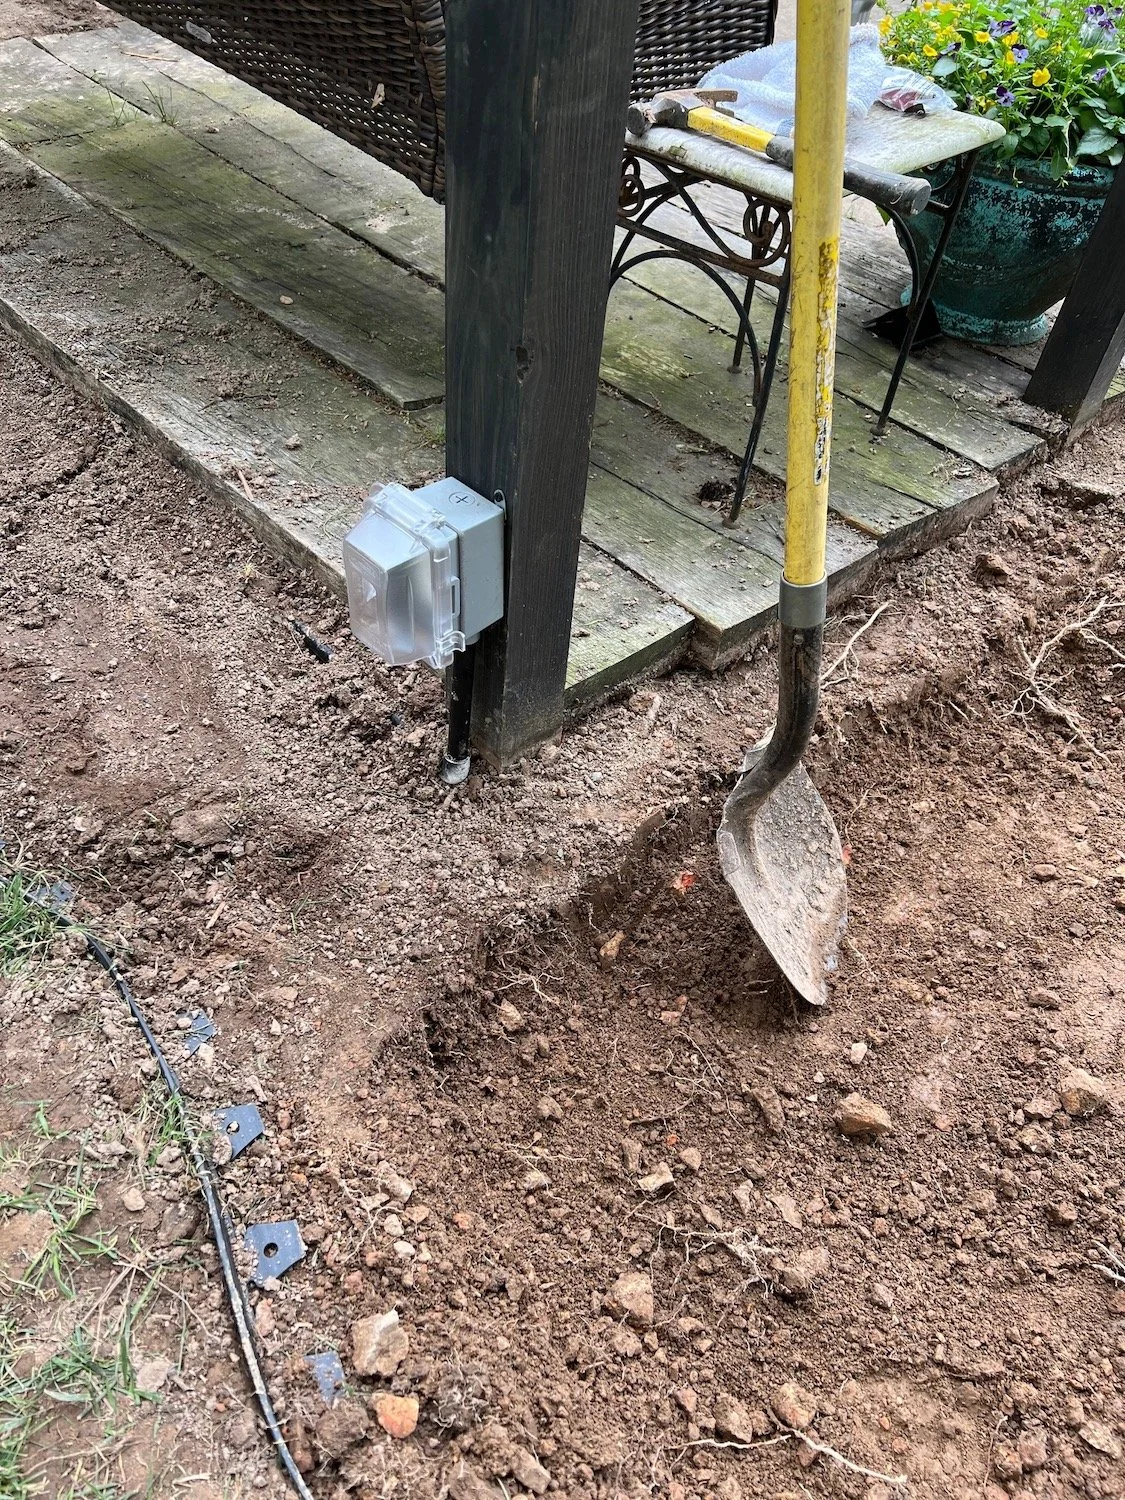
TIP: ALWAYS put romex that will be under ground in conduit. They make a conduit specifically for electrical wiring. It is usually double the cost of plain ole’ PVC. I use plain ole” PVC.
I bought a larger tank at the livestock store. One with a bigger diameter so I could use bigger rocks and build a bigger feature. (I use livestock tubs…less expensive, better size selection and actually sturdier!)
I found a livestock tub that was about 5’ x 3’ which was the perfect size to fill the area next to the swing.
Marked the area where I wanted to put the tub and started digging. (I make this sound easy…it was not…I honestly believe we live on a rock quarry!)
CURSES! Right smack dab in the middle of my planned placement I ran into an irrigation line! Since it was a main line I really didn’t want to mess with relocating it!
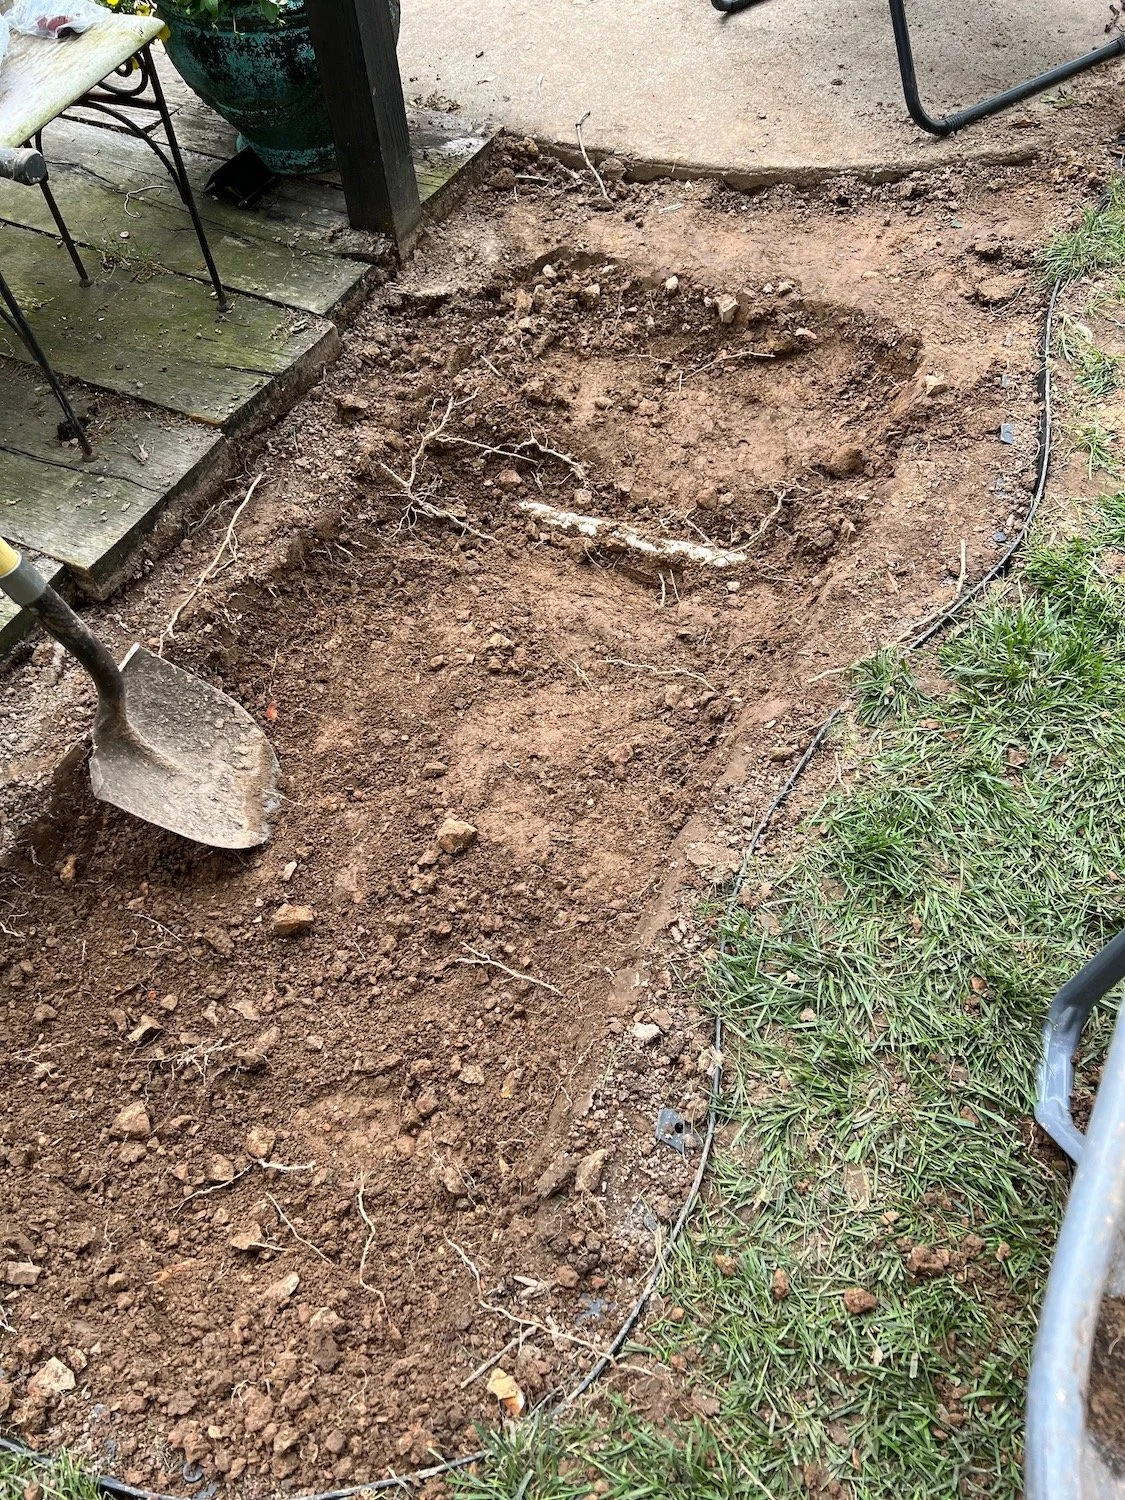
This is when I had to stop and punt…in other words, best laid plans got tossed!
I relied heavily on THIS great tutorial…it is one I found that was most similar to what I was trying to accomplish.

I used a pond liner rather than a tub. A pond liner will give you flexibility on size and shape. I found a really good quality one HERE. More expensive than a livestock tub and more expensive than the pond liners at places like Lowes and Home Depot. However, this one is 45 mil thick which is double what you can buy at the big box stores. I figure if I am going to go to all the time and expense of building this thing, I want it to last. The thicker liner reduces the chances of tears or punctures.
Without the limitations of a specific tub size, I could dig the hole any size I wanted…I ended up digging a “two level” hole to work around the irrigation line.
One change from the tutorial…I don’t ever like to use wood under ground if at all possible. Eventually it will break down. So I used some scrap treated plywood to create a rigid box, then lined it with styrofoam board. They say it takes 500 years for styrofoam to decompose. I figure by that time the ground around the liner will have settle and compacted well.

In the picture you may note I did not “frame” the upper part of the reservoir…I went back later and added a “frame.”
I added the frame, then added the sand on the bottom so that it would hold the frame in place and create a nice “cushion” for the liner!
I dug out around the form about 4” deep and 8-10” around it and added small pea gravel…kind of creates a little “french drain” around the pond. This keeps dirt and silt from washing into the reservoir if there is heavy rain. The rock is 1-2” below the frame.
I used my taper to make sure the pea gravel and sand was compacted well.
I liked the way the tutorial used the cinder blocks for additional support. I used THIS metal gate as a grate and reinforced it with 1/2” rebar to set the rocks on.
After I laid the liner in the hole, I filled the pond with water to get the liner to kind of “form” to the bottom and sides.

I reset the cinder blocks, measured to make sure they were the right height and level, then placed the grate and rebar.
If the cinder blocks are too high or too low to support the grate level, you can easily reach under the liner and remove or add sand as needed. You may have to drain the pond to do this but make sure you refill it…the weight of the water will “fit” the liner to the space.
I use a shop vac to drain the water when needed.

I trimmed the liner back, topped the liner with more pea gravel, put the pump down in the water, reset the grate and rebar and then covered it all with THIS galvanized mesh. This will keep any smaller decorative rocks from falling into the reservoir.

I waited to cut the access hole for the pump until after I got the larger rocks set…I wanted to make sure I would have access to the pump without moving the large rocks.
I set the pump down into the reservoir and I ran 1/2” water line from the pump to above the grate. I knew I wanted both a waterfall and a bubble rock so I actually split the water line into two lines. I connected one line from the pump to this splitter, then connected a 1/2” line to one side, and another to the other.

Two water lines from one pump!
I made one major change from the original water features. Since I had plenty of room in this larger reservoir, I put the pump in one of THESE filter boxes….

I had a pump in my water feature at the other house in one of these. I found that the actual pump (THIS one) was less likely to clog and loose pressure when it is in a filter system box. (BTW, you will want to get a water pump for YOUR needs….the size of your feature and the flow you want)
I picked up a variety of rocks at the rock store…some flagstone, native stone, and smaller decorative rock…then I started playing with it.
This is where a little creativity and some serious muscle come in handy. Again, I knew I wanted a waterfall feature as well as a bubble rock.
I ran the water tubing through the back of the rocks for the waterfall but I had to drill a hole for the bubble rock. Not a biggy…I just used a 3/8” masonry bit…takes a little time and muscle but it is doable.
Only after I got the majority of the larger rocks placed did I cut an access into the grate with a metal grinder. I didn’t want to have to move large rocks to get to the pump. (I have learned the hard way to make the access big enough that you don’t shred your arm when you have to stick your hand down into the reservoir.)
After I cut the access I covered the hole with the wire mesh.

Once the big stones were set in place, I adjusted everything to make sure that all the water flowed back into the reservoir. This can take some time…even days. You have to watch the water level and make adjustments as needed.
TIP: When you get rock, pick up some slivers of flagstone to use as shims!
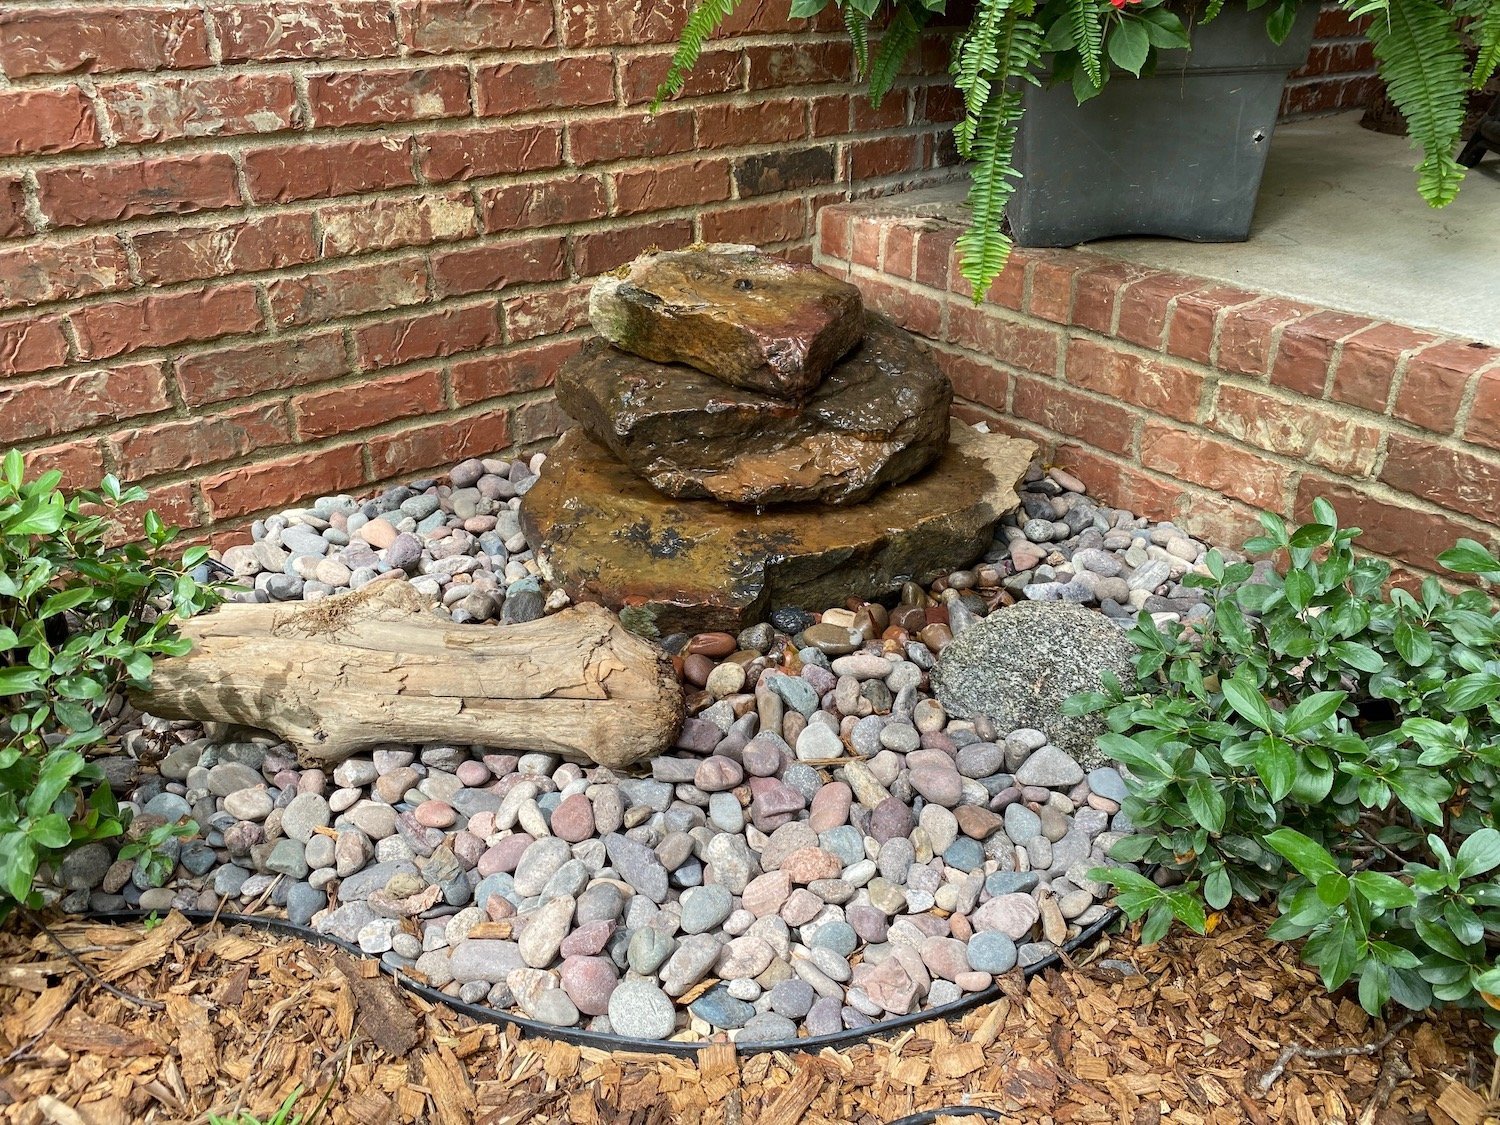
After all the adjustments, I sucked out all the water and cleaned the pond well and then I filled it with fresh water. Placed all the decorative rocks….added some plants!
After some more adjusting this is the initial placement I came up with….


It may take a few days of adjusting to make sure that all the water is flowing back into the reservoir. This is super important because you don’t want to have to be constantly filling it! Watch and wait.
Honestly, I wouldn’t even put rock over the access hole until you are certain that it is all flowing properly!
As you can see in my final pictures, I actually removed all the small rock from the top of the access and placed a few larger pieces of flagstone. Now instead of moving a bazillion little rocks, I just pick up a few larger rocks to access the system…much easier! Just make sure that any water that flows onto those rocks, flows back into the reservoir!
A few weeks after I got the feature running, I decided to create a little “walk” around the swing and feature. It ties into the walk I had added between the house and the swing….


I added a little flower bed behind the swing so I would have space to put hosta splits next spring. Unfortunately three of my hostas were getting stomped by dogs so I went ahead and moved them here…now I only have room for 2-3 hostas next year. Curses, I will have to build another bed!


I added outdoor lights behind the fountain so that at night the lights shine through the waterfall….so pretty. Unfortunately, my photography skills don’t allow for a good picture…trust me, it’s pretty!
I love this little space! The sound of the water is so soothing.
While the project itself takes a little muscle (digging, moving rock) it is certainly a doable little project. Maybe a hair more extensive than these water features. If you feel intimidated by the scale of this feature, maybe start with smaller ones first!
You don’t have to pay thousands to get a pretty water feature in your yard…and in my opinion it should go down as a mental health expense. All in all this one probably cost me less than $1000.
Nothing more soothing than a relaxing evening in the porch swing next to a water feature!
BTW, in one of the Facebook groups I am on someone was commenting about how much of a hassle a pond is to clean and maintain. It would be soooo easy to turn an open pond into a pondless feature. After all, the hard work of digging a hole is already done!!!!
These little pondless features are relatively easy to maintain. I drain them before the first freeze, cover them with plastic and then in the spring I just remove the plastic, clean out the reservoir, fill it with fresh water and fire it back up. So much easier to maintain than my open pond that had to be drained and cleaned several times a year!
Just a thought!

