Utility screen....

I shared last time that I have been going from one project to another.
This past week I finished up a whopper of a project but I will share that another time.
I shared HERE something I have been “growling” at since we moved in…and it only got worse with the addition of the “wart.”
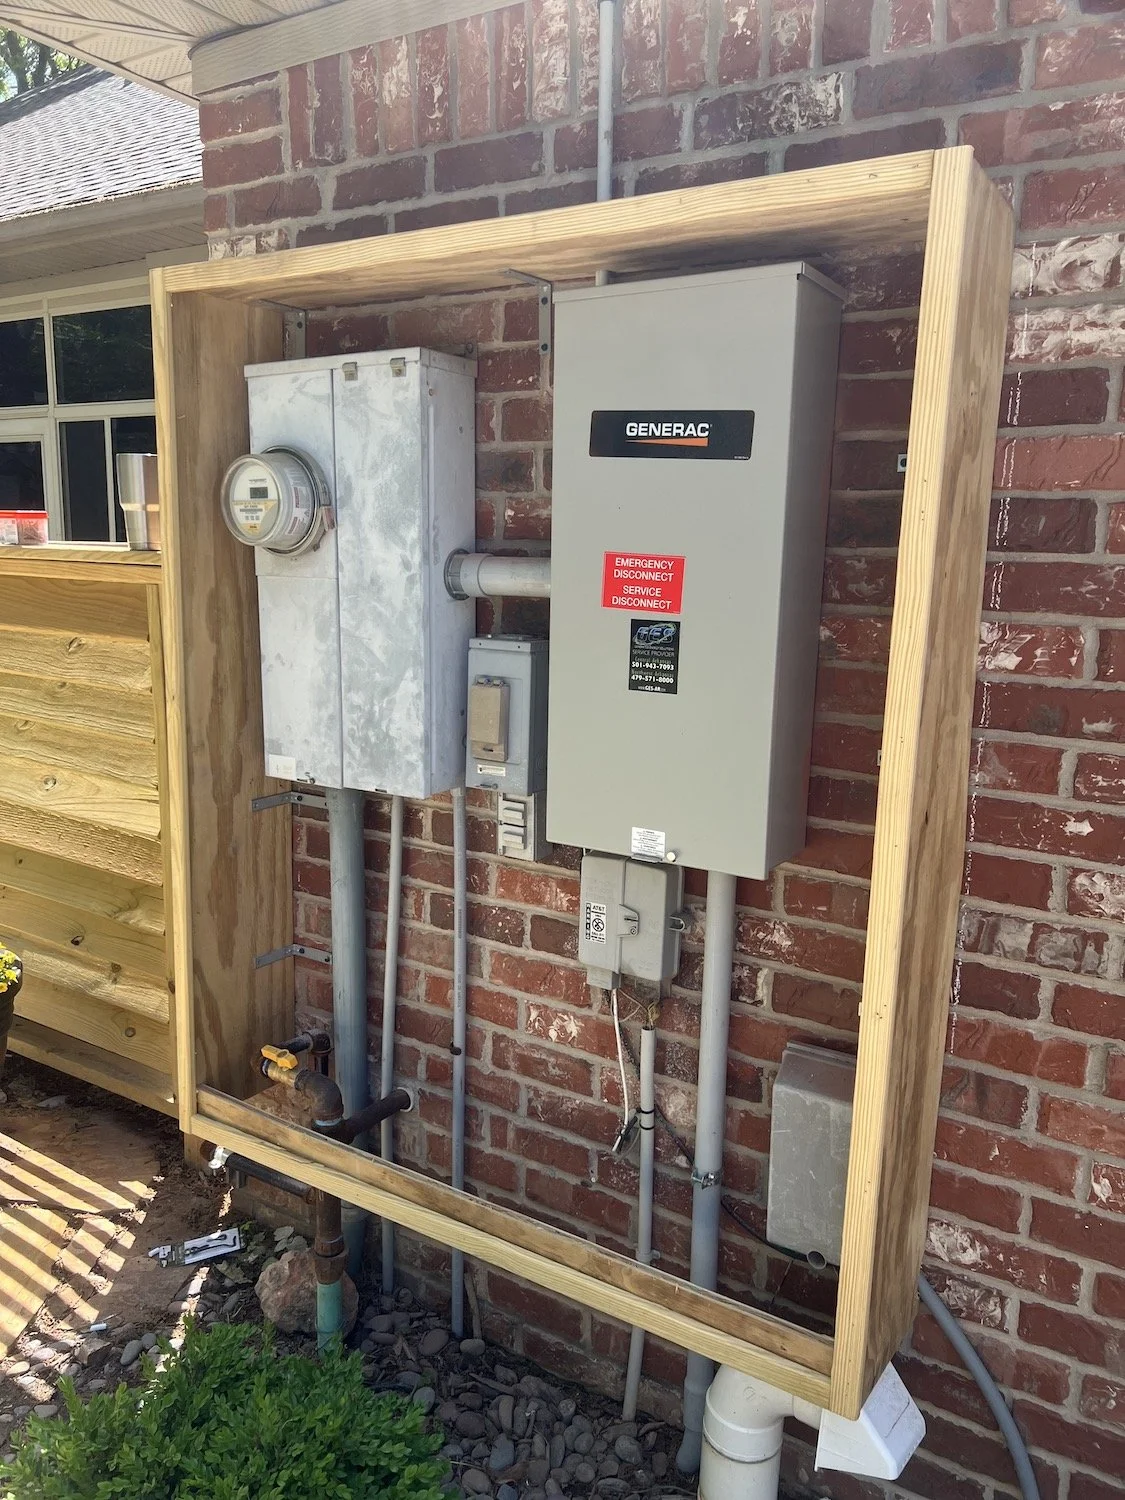
This mess…..

All these utility connections on the back of the house were just a big cluster. When we added the generator they had to add another control box and that just made it worse. There are electric panels, gas lines, phone and cable boxes, a breaker for the shop and of course the drier vent.
I feel like I was able to improve this area with the addition of the wart screen and the flagstone, so I decided to finally tackle a screening for all the utility panels and lines.
Both screens were constructed with treated lumber and that needs to cure for a time before I can stain it. Hopefully they will both be cured enough later this summer. I want to match the pergola swing.

I did what I always do…looked to Pinterest for a little “inspiration,” took measurements, drew up a tentative plan, made a material list…then off to the store I went.
Since the entire thing was going to be fairly large and heavy and we need to have access, I decided to construct a “cabinet” type enclosure.
I used 3/4” plywood, ripped down, because it was lighter weight than 2xs and I could customize the depth.
I also needed to have operable doors in the event we need to access the generator shut off quickly.
If you think there would be little need to access your utility stuff you can always built a solid panel and attach it to the “box” with screws. That would allow you access if necessary!
I built the box out of treated plywood, making sure it was perfectly square. I used my Kreg jig and screws, as well as glue, to make it is super sturdy.
I attached heavy duty steel L brackets to the brick with concrete screws.. I placed three brackets along the top (making sure they were level) and 3 brackets on each side…that way I could just “hang” the box onto the brackets, then attach the box to the bracket using exterior screws.

I left the bottom open primary for circulation. Notice I didn’t go all the way to the ground with it. The dryer vent is still exposed allowing for easy access so it can be cleaned a few times a year.
After the “box” was hung and secure, I used treated 1 x 2s to create the “face” of the cabinet.
I measured the width of the cabinet box and divided that in two to get the dimensions for the doors.
Now this is where my “blogability” fell apart. From this point forward I completely forgot to take instructional photos.
So I’ll try my best to explain how I made the doors.
I created a channel on 2x2 treated boards, 3/4” deep and wide…a “dado” as they call it….on my son’s table saw. I used them to built the frame of the doors.
You want to make sure the doors are super square!
Then I laid 1x6” treated boards into the dado (channel) in a diagonal pattern…just to give the doors a little “interest.” I used treated 1x6s and used a rooter to give them a little “edge” rather than using the heavier deck boards…just because they are lighter! I attached them to the door frame with glue and Kreg screws.
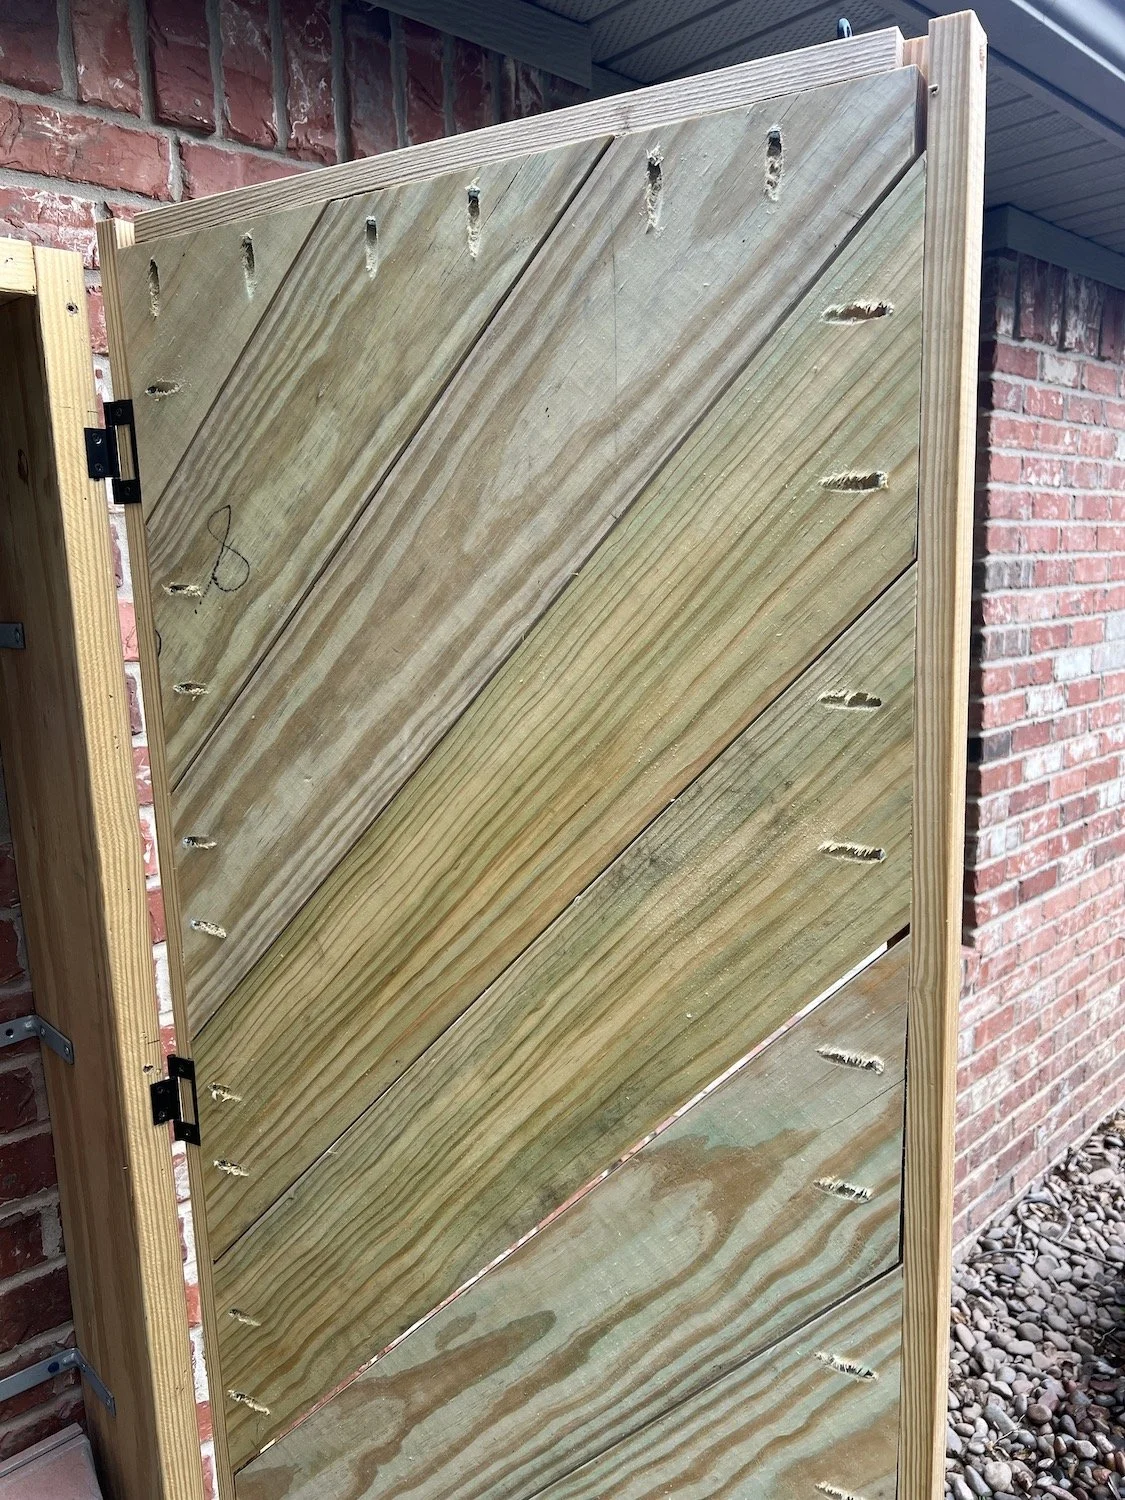
I used three non-mortise hinges to attach each door to the cabinet face frame and I used hooks on the top of the doors to secure them.


Make sure all your hardware and screws are suitable for exterior use.
Also, remember, glue is your friend. So even if you are using screws, you still want to use a good glue on all your joints, even on outdoor projects.
Also remember that stain will not penetrate glue residue…so make sure you get the glue off of any area you will eventually stain or sand it well after it has dried.
Another thing to consider when using treated wood in a project. You may notice in the first picture of the doors the “joints” between the 1x4s are pretty tight. But as the wood dries out it will shrink a tad and it will “gap.” I don’t mind on the decorative door panels…and truthfully once it is stained black you won’t even notice it. But it is something to keep in mind and certainly a good reason to use glue and screw to secure treated wood when you don’t want it to gap!

Now I wait. Again, you want treated wood to have time to dry out before you apply a stain or finish. A good way to test treated wood to see if it is “stain ready” is to spray it with water…if it beads up at all it is still not ready to absorb a stain or finish. Give it time!
Next week I will share another major project I completed last week. It is the reason I am sitting in my swing with an ice pack on my knee and back!
Until then….

