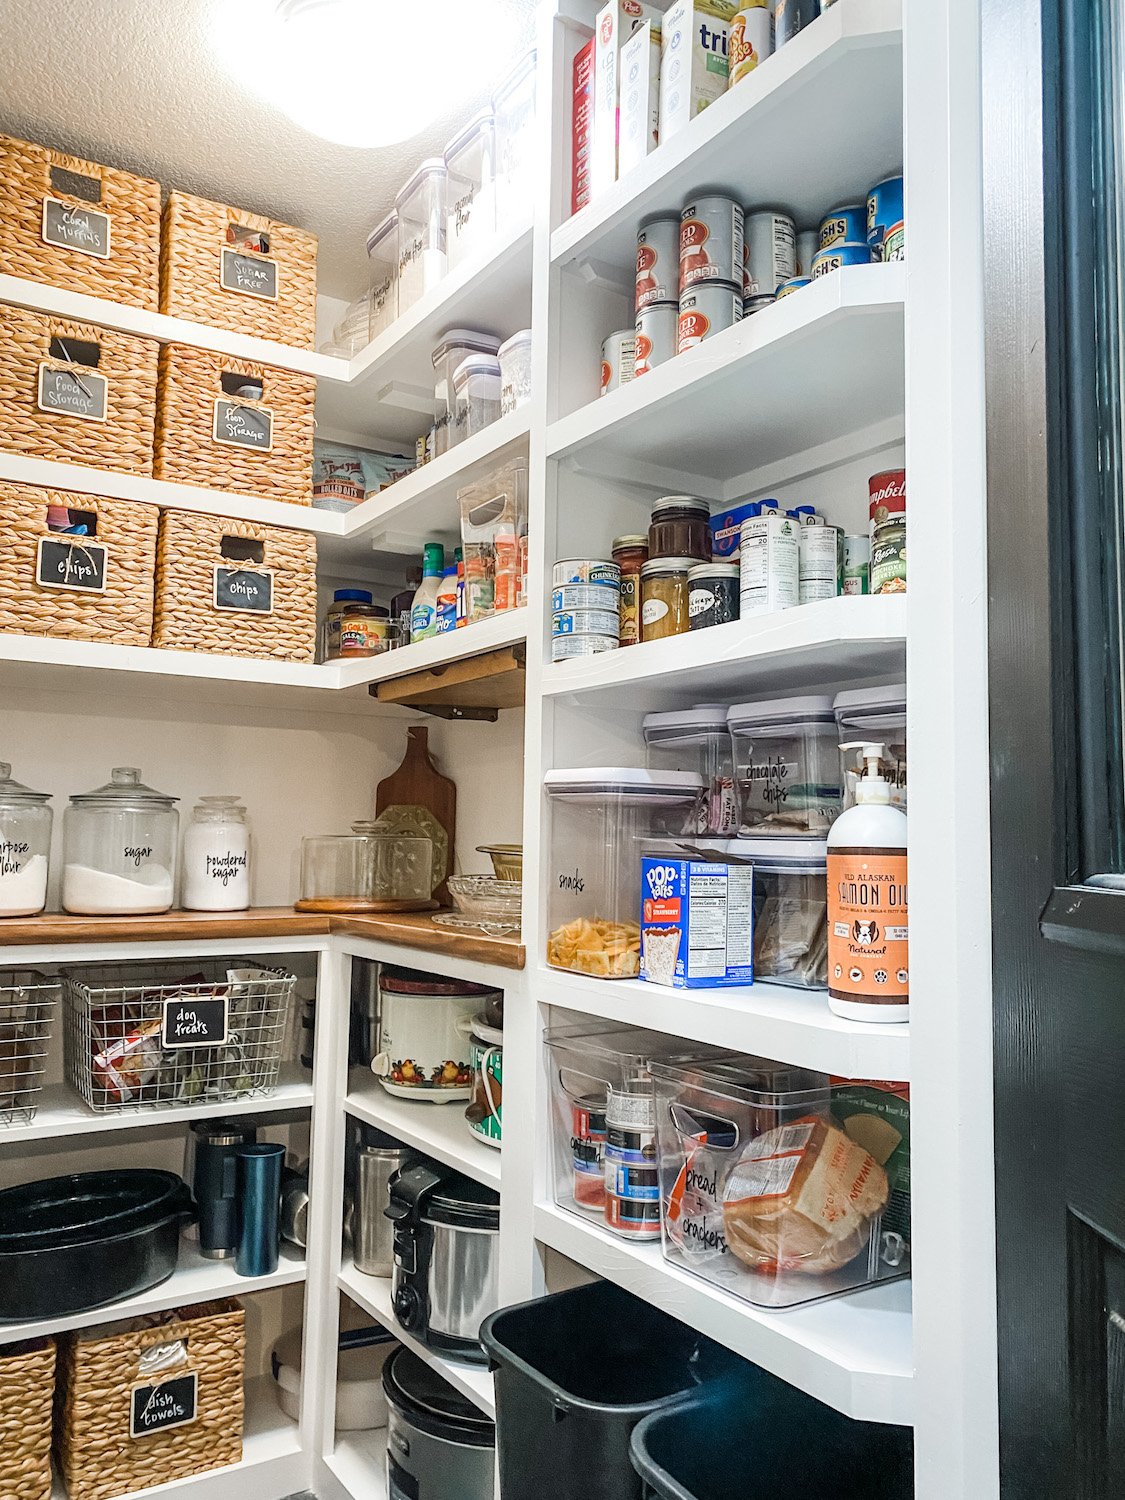
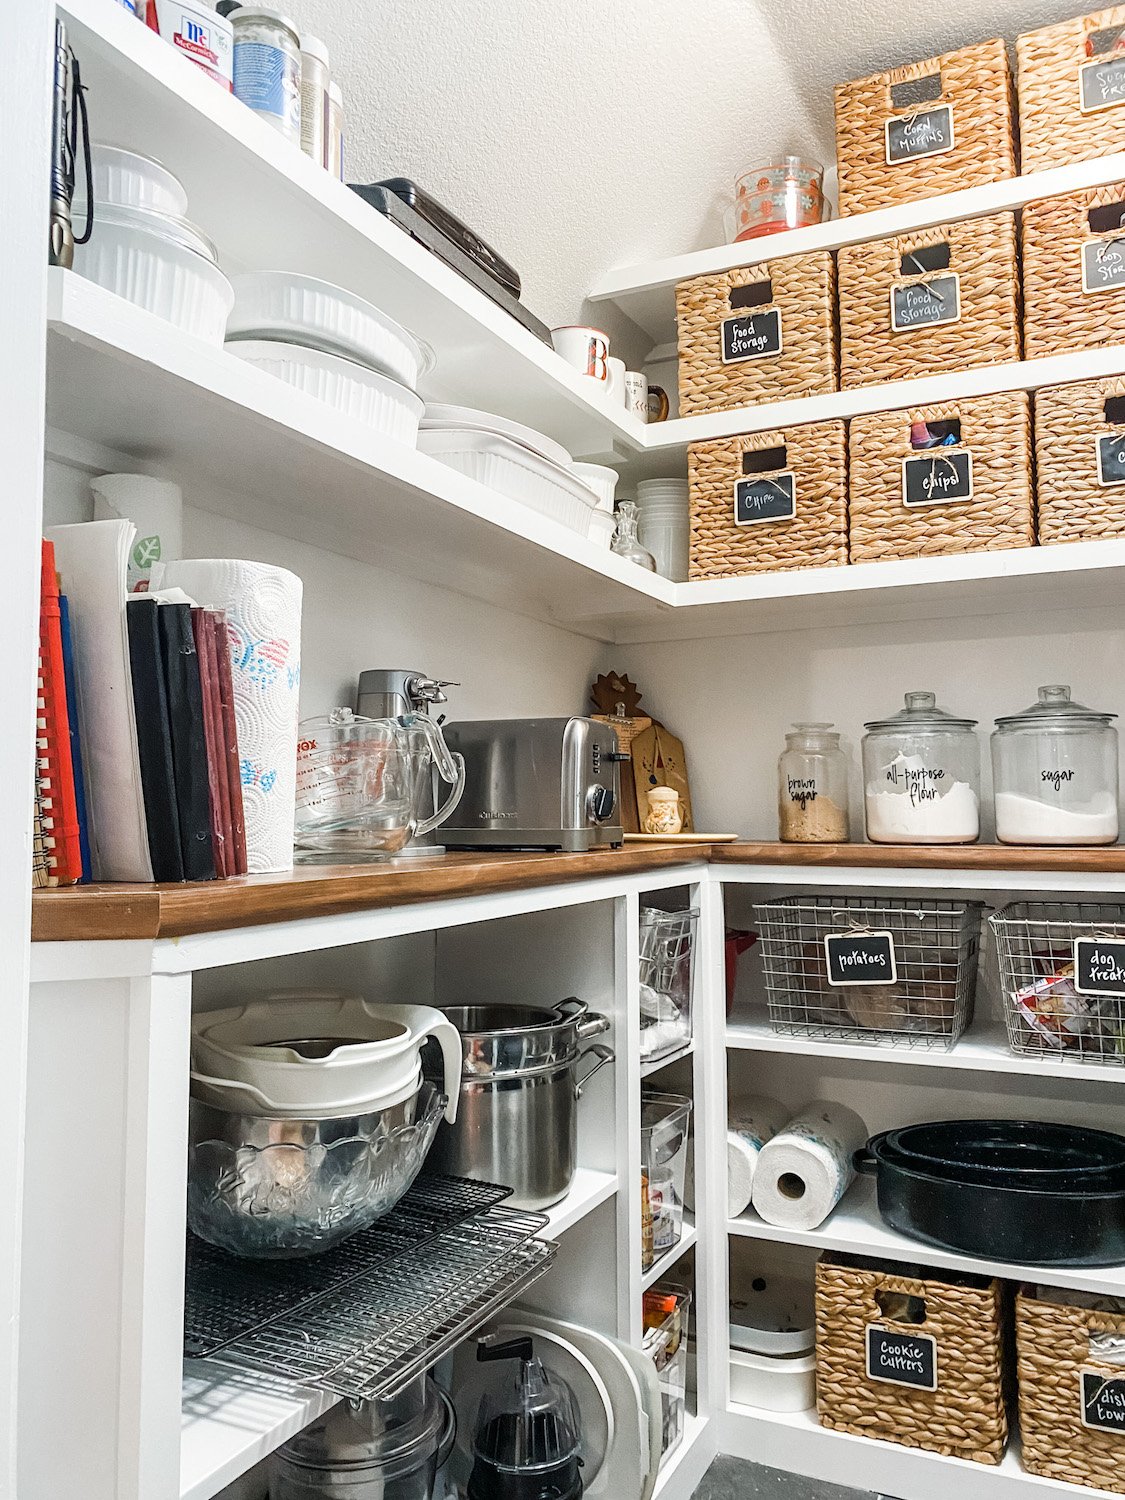
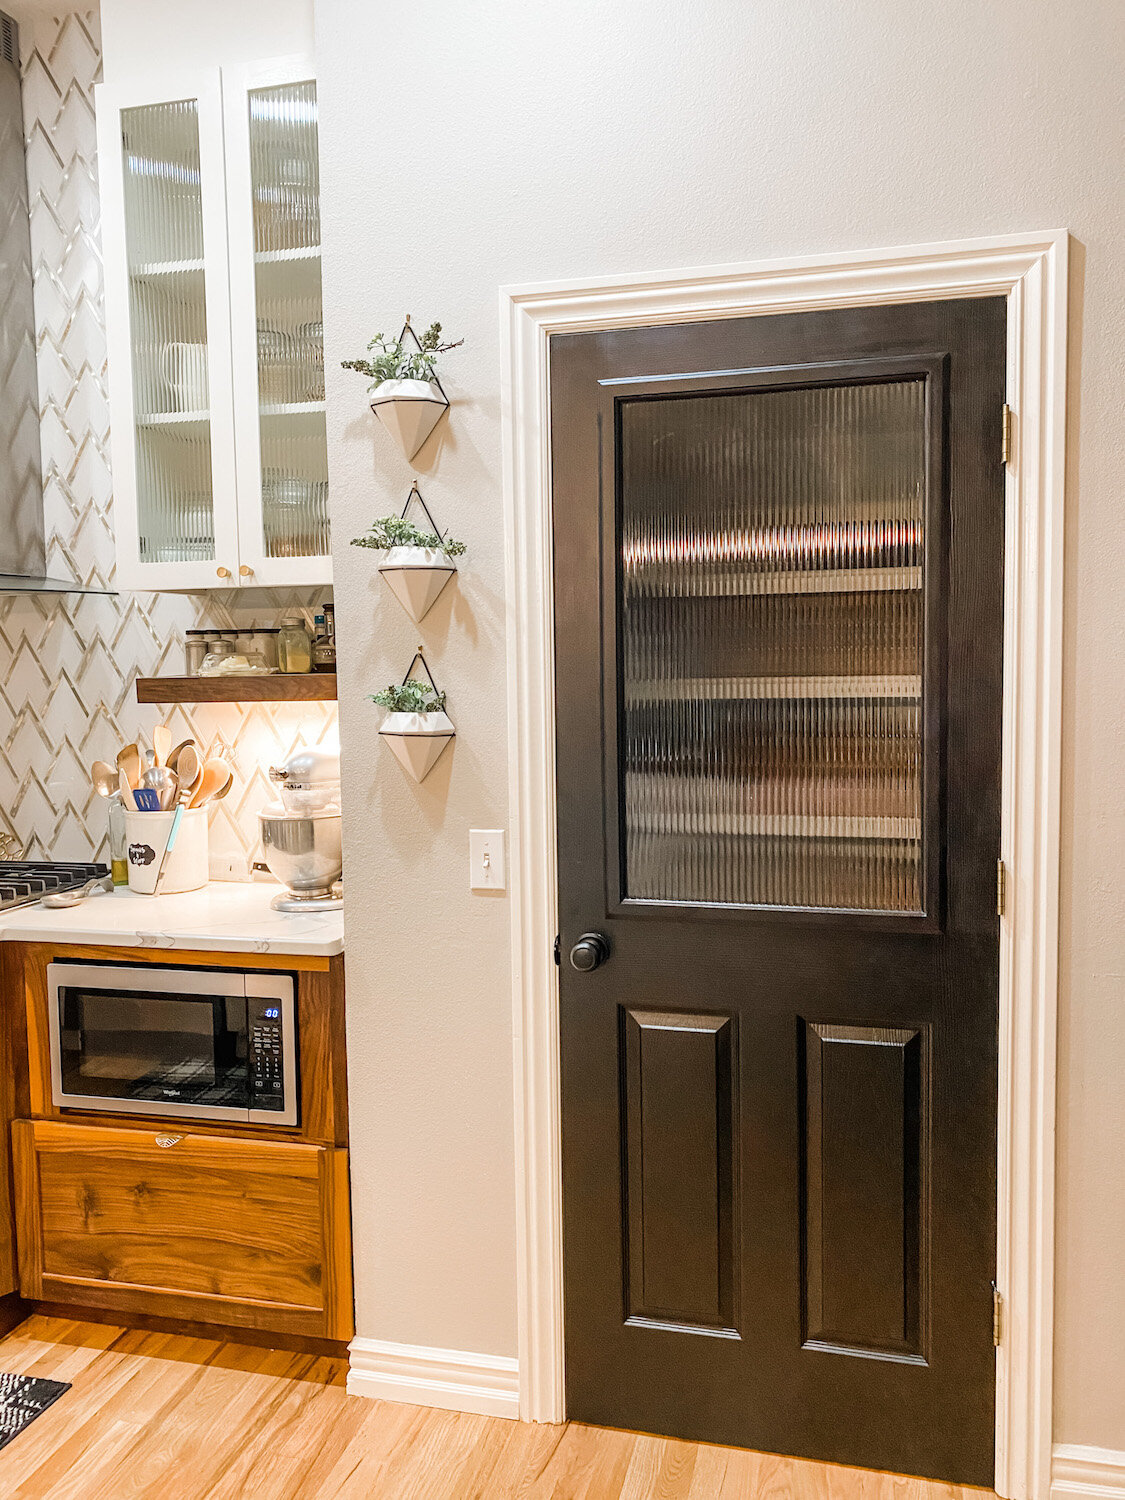
Another pantry makeover....

There was a time when I loved DIY projects and was constantly working on something…everything from room makeovers to furniture rehab.

Unfortunately the time came when my back and fingers just couldn’t take the daily beating. And truthfully I’ve pretty much done everything to this house that can be done. Except the yard…I’m still out there designing and planting and digging…when it is not 100+ out!

One of my favorite DIY projects are pantry makeovers and those I can’t resist.

HERE I shared my pantry.

HERE I shared the pantry I revamped for my son and daughter in law.

Some serious reconfigurations can make a huge difference in the functionality of the space.

My stepson and daughter in law have talked about giving their walk in pantry a makeover for years…actually since they bought the house.

Over time, it became a disorganized disaster….

The shelving was the typical “builder grade” shelving…bull-nosed MDF spaced a good 16-18” apart which leaves a ton of wasted space. Few pantry items need more than 14” head room and a great majority of it just need 10-12”. Just by reconfiguring the shelf layout you can often gain at least 2-3 additional shelves.

Okay in all fairness and in her defense she has a very rambunctious 17 month old and a 2 week old, 5 week premature baby.

So she is a little preoccupied.

Which is all the more reason to get this space in order. With a growing family, having an organized pantry is just a must.

So when they announced a few weeks ago that they were finally ready to get serious about revamping their pantry I jumped on the opportunity to go to work!!!!

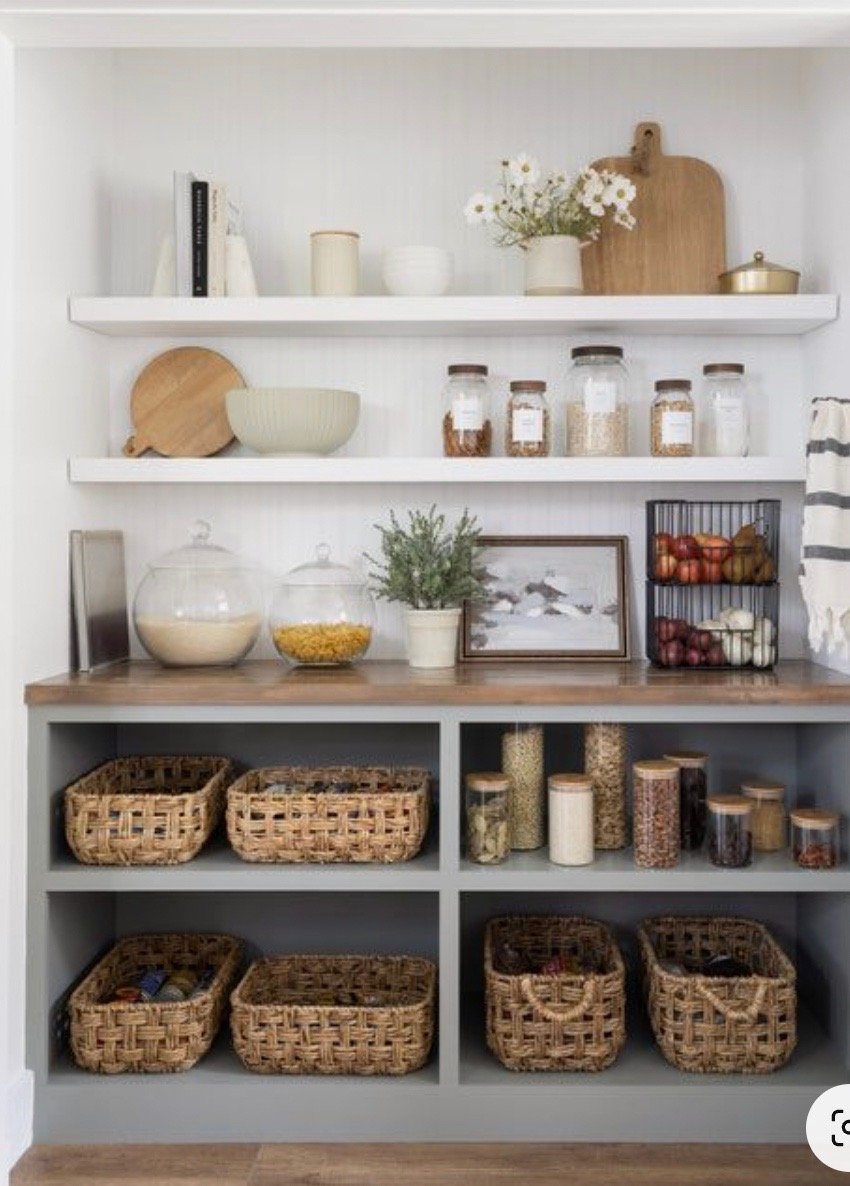
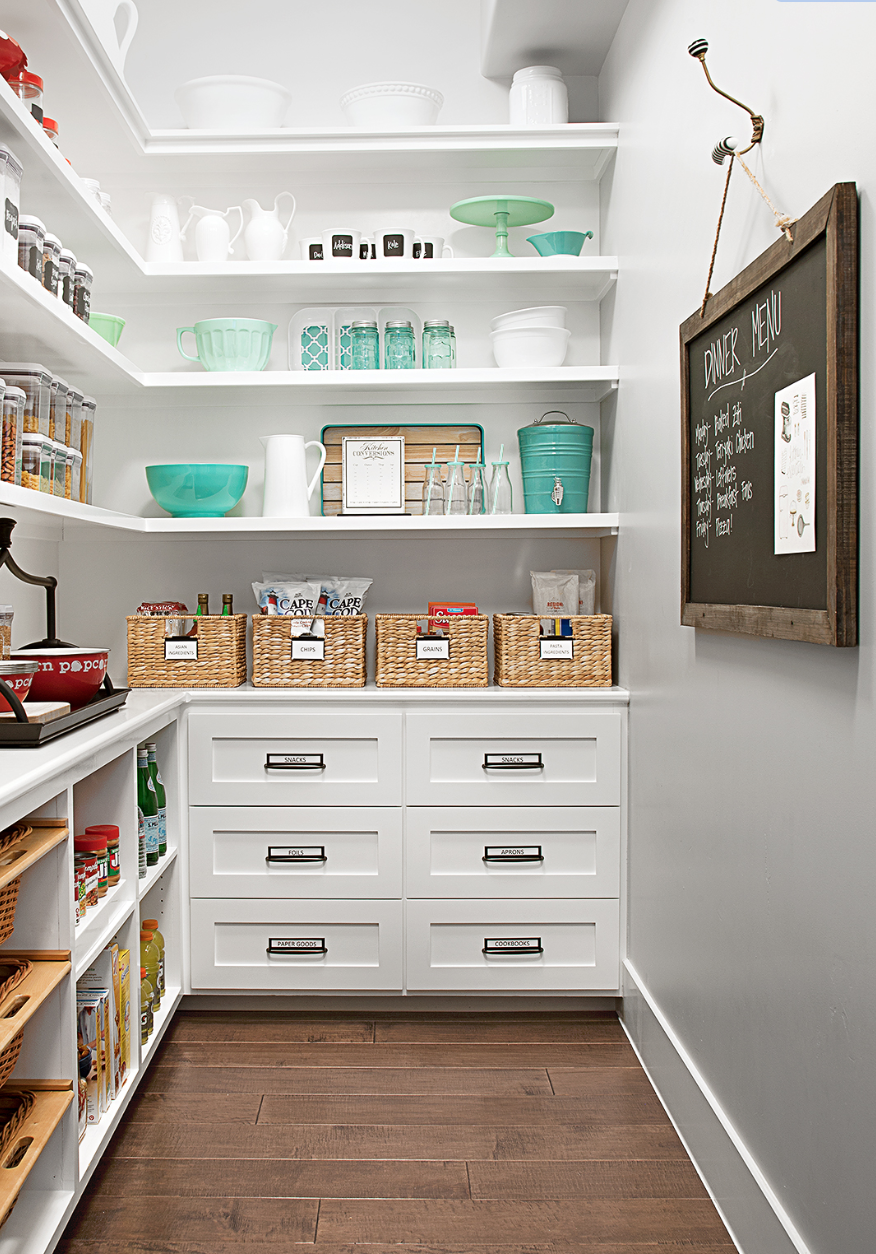
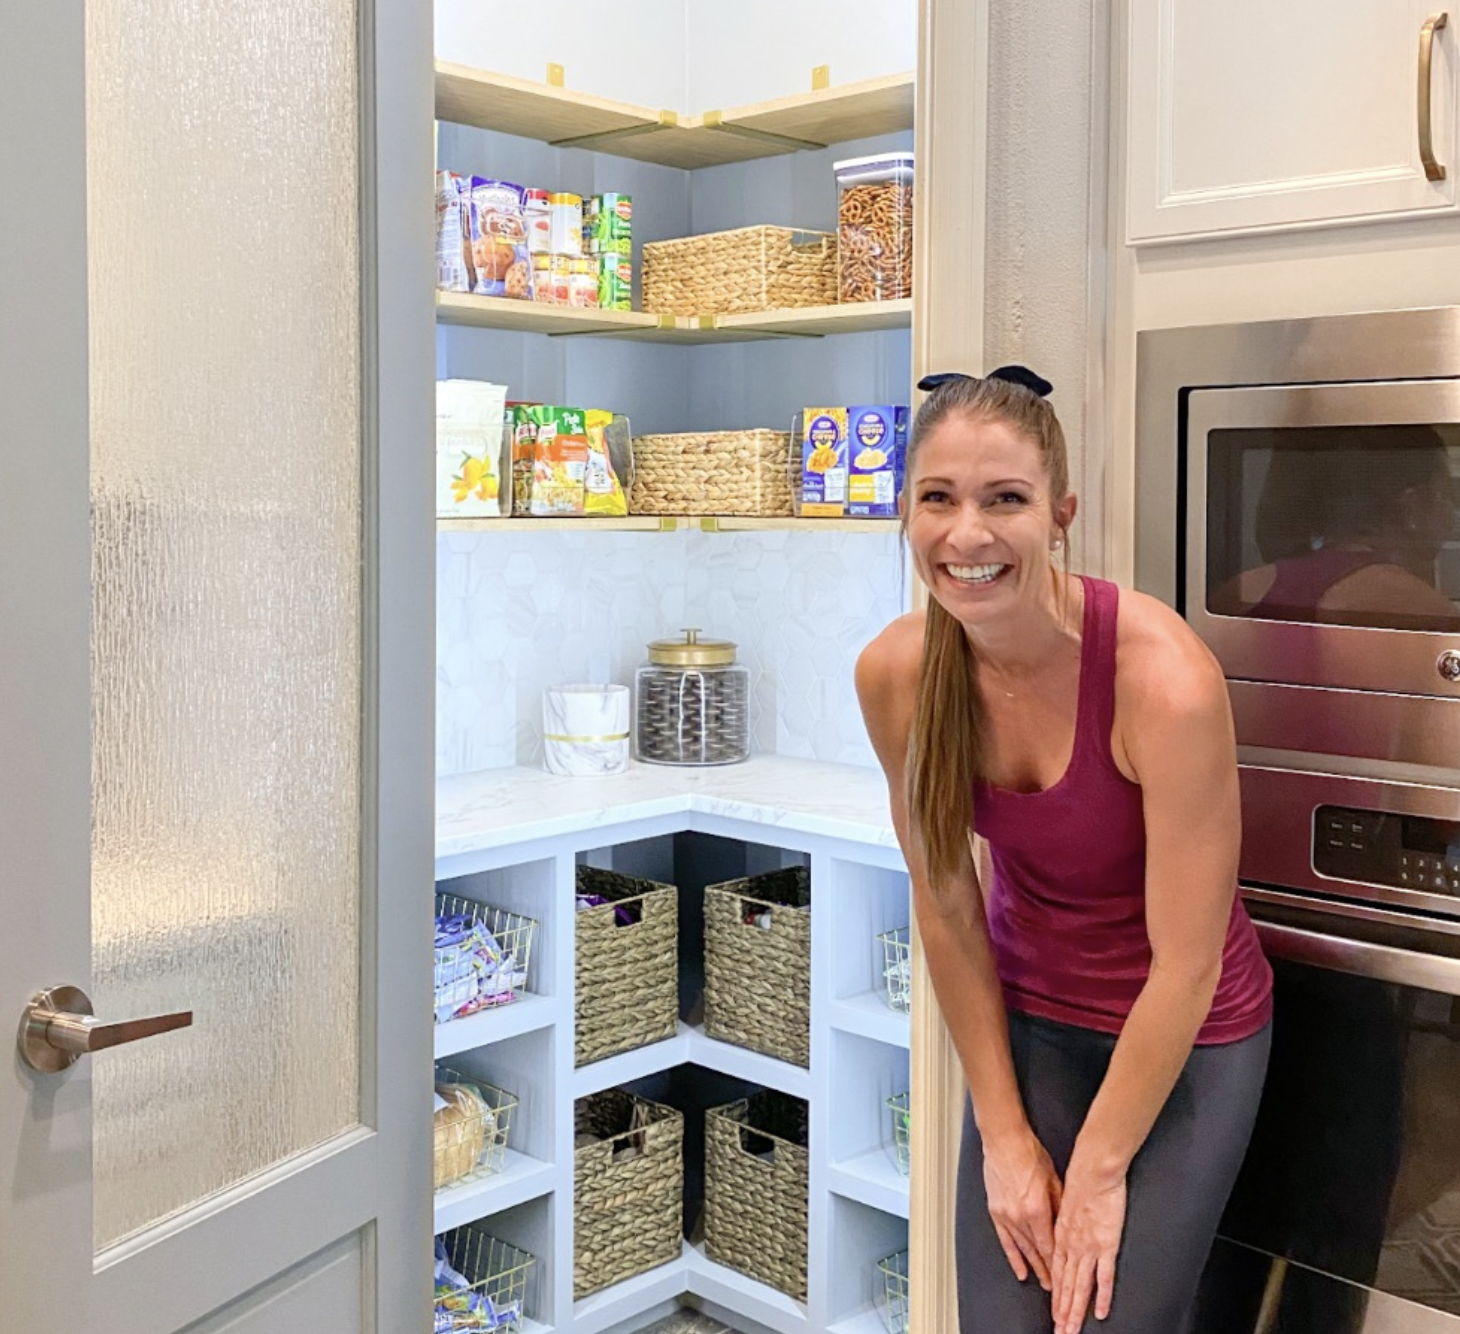
First things first…find your inspiration. I did what I always do…searched “pantry” on Pinterest. Here are a few that caught my eye…. (again, no links…I cut and paste pictures and put them in an “inspiration” folder on my computer.)

Of course it all had to be approved by the home owner. (I hate it when other people think they should have an opinion…lol!)

Fortunately, she liked many of the same looks I liked.

The most appealing thing in all the inspiration photos is the appliance tower. LOVE!

She loves the counter top look with natural wood tops. She loves the look of the floating shelves in the last picture…but she wants natural wood shelving and will paint the base black. I think it will look awesome!

So time to roll up my sleeves and go to work.

First up…take measurements and make a plan….

My plan is to make the cabinet and shelving across from the door “pretty.” This is where she would like a black base cabinet and natural wood floating shelves. They always have the door to the pantry open so we think it would be perfect to make it aesthetically appealing….pretty.

The shelving and the cabinets to the left will be “utilitarian.” A place for all their “food stuffs.” And then of course the coveted appliance tower to the left of the door. Since they have 10’ ceilings we were able to add a ton of shelving space just by reconfiguring the spacing of the shelving.

While this paper plan may make absolutely NO sense to anyone but me, it is what I need to figure out how I can reconfigure the space and what materials I will need.

After I got plan approval from my daughter in law, Brian and I went to Lowes and bought all the materials and had my son precut all the plywood for shelving and base cabinets with his table saw.

The construction of the shelving and bases will be very similar to what Lindsay did in her pantry space. She has a great tutorial for building everything so again, I am not going to reinvent the wheel. As I always say, find a tutorial that makes sense to you and use it.

Day 1….demo!!! I had my DIL empty the entire pantry and my stepson and I went to town with sledge hammers and crowbars and took out everything from top to bottom!

When you remove the existing shelving you may find sheetrock damage and you will notice that you have “lines” where the existing trim (shelf supports) was…primarily because the trim was caulked then the walls are painted…and the walls behind the trim are raw. So you will need to skim those areas with sheetrock mud, sand smooth, then spray with canned wall texture. If you don’t do this, you WILL see the lines where the old shelving was…so do it right… fix the walls, then repaint the walls before installing the new shelving.

TIP: If I am going to paint the shelving I usually paint the walls and shelves the same color…it makes it easier to paint the shelving without having to tape everything off. I use a different grade on the cabinets and shelving vs. the walls, but the same color.

I always prime and sand all the new wood before I cut and intall it…that way I don’t have to do major sanding in the house.

Right now I am still priming, cutting and installing so we have a few more days of work!

Hopefully I will have a big reveal in a week or so!!!!

Where in the world have I been?

I can’t even believe I have not posted since February. Seems like so much has been going on…baby showers, trips, projects…so much!

When last I posted THREE MONTHS AGO I was working on this project…hiding the wart!

I started out by building a “screen” around the “wart.” My original plan was to lay the flagstone first, then build the screen. Honestly, building the screen first worked out much better!

I decided to go with the “louver” look (see HERE for a link to a really good tutorial) so I built two inserts to go between the post I set. They have to be removable so we can service the generator once a year. Built the inserts then attached them to the post with carriage bolts. Threw down a few inches of sand and thats where I left off for a few months….

I needed to give the sand a little time to “level” and pack down…and I also had to get ready for a very special day for my very special son and daughter-in-law! Their baby shower….

Again I was honored to make their cake and desserts…so much fun.

Then it was off for our spring vacation. Brian had to attend a conference in Vegas so I flew to Vegas the last day of his conference, we rented a car and toured the five national parks and one state park in souther Utah. Again, I am not a travel blogger….but if you have never seen these AMAZING National Parks…just go! They will take your breath away!

I can assure you that no photo I took…or have ever seen…does them justice.

Then home for a ton of projects.

Refinishing an antique dresser for the nursery….

I used THIS process and I promise it is hands down the best process for refinishing any piece of furniture…regardless of the existing finish!

I built new shelving in my workshop…..

Not as fancy as some I have seen on the webisphere but functional for my purposes!

I finally laid flagstone around the wart screen and now I am waiting a few months to stain the screen black to match the pergola swing….

New drawers for under the bar storage cabinets. …

I have no idea why I didn’t have my cabinet guy do this when he built these cabinets. I store all my seasonal dishes and service ware under here and it really was a pain to have to shuffle things around to get to the stuff in the back. LOVE!!!!

Now that the weather is warming, I have been planting…nothing new except I decided the flower bed I added last year wasn’t big enough…so I am making it bigger!

I have moved the edging out, weedeated all the existing grass down to the nub, sprayed it with Round Up and next week I will fill it with compost and mulch. I already have a few plants in mind for this space but honestly I need some space to split hostas again next year!

While I wait for grass to die, this is the next project I am contemplating..

A screen around these gawd awful utility things. They have bugged me since day one and with the addition of the “wart controls” to the right, it has gotten worse.

My “plan” is to build a box kinda thing around them and face it out with hinged doors so that it can all be accessed if needed. I want to build it out of treated wood then stain it black to match the swing and the wart screen.

That’s the plan…we will see.

As you can see, it is never ending! Unfortunately, as I have said many times, I am a baaaad blogger. I rarely think of what I do as being “content worthy.” But hopefully the changes I make will inspire you to roll up your sleeves and make changes to your home.

I don’t do good tutorials but there are TONS out there on the blogesphere…anything you want to learn to do can be found on the web!

As I have said before…my daddy didn’t teach me how to build a wart screen, or build cabinet drawers, or bake a cake….what he taught me is how to figure out how to do something I want done.

Will you make mistakes….ABSOLUTELY! I still do and I have been doing this stuff for a lifetime!

So…GO FOR IT!!!

Because until you are willing to roll up your sleeves and dive into whatever you think you want to try or change in your life, you will never be able to ….


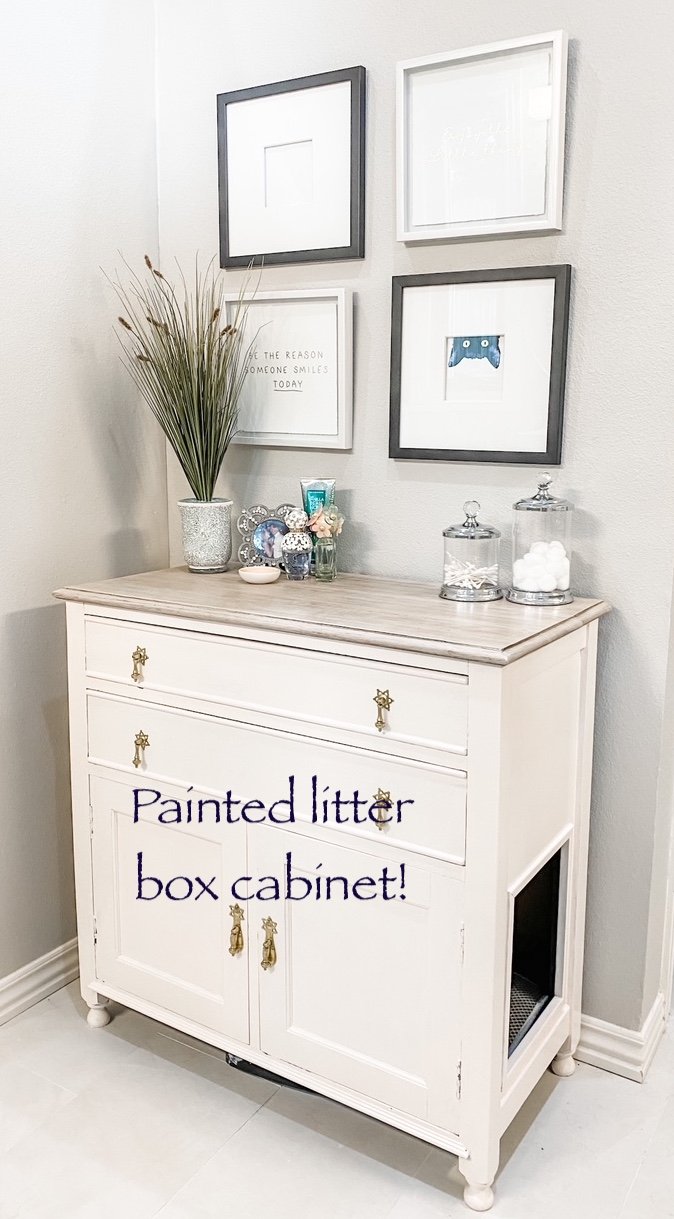
Painted bathroom litter cabinet...

I keep a list of projects I want to do on my refrigerator. Repair the irrigation line on the norths side of the house, wainscoting in the dining room, paint the trim, trim tops of windows and doors, paint the bathroom cabinet, add a flower bed around the backflow…and on and on it goes.

When something gets done, it gets marked off…when I think of something I want to do, I add it to the list!

It keeps me focused on what I want to get accomplished…eventually! And being able to check a project off my list feels amazing! (Sometimes if I do something that wasn’t on the list, I add it just so I can mark it off)

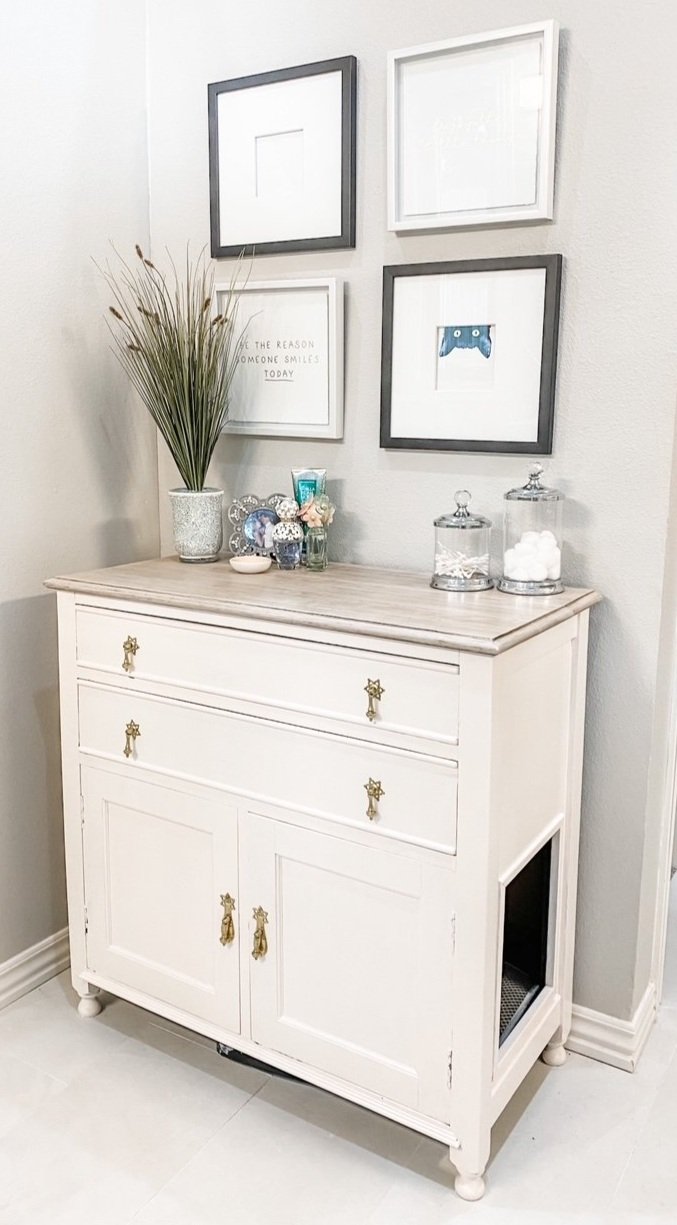
I’ve managed to get a few things done this week. The flower bed around the backflow is done. The dining room wainscoting is done (will share next week) and the littler box cabinet in the master bath has been painted.

Why did the litter box cabinet in the master bath need to be painted since I just painted it you ask?

Last year I painted the bathroom cabinets and in my opinion the two kind of clash…so it has bothered me for the last year.

So I wanted to paint the litter box cabinet but couldn’t decide on a color.

Last week I was cleaning out some drawers and found a little dish my daughter in law got me as a gift. I have no idea why it was stuck in a drawer, but it was my “inspiration” for the cabinet.

I have three cats…I would have more if Brian would tolerate it. My children know me well.

Anyway, I love pink. When I finally decorated my home office, I added a tiny bit of pink. I try not to over-saturate my house with pink because there is a guy living here, but I do like to throw it in there from time to time.

Pink…

Since I had already done all the sanding and repair and priming and all the other fun prep work before I painted it the first time (HERE I did a fairly decent tutorial for turning a cabinet into a littler box), all I did this time was remove the hardware, scuff the finish with 220 grit paper, tape off the inside and rolled and brushed on my new favorite paint…the BM waterborne alkyd.

Better than my “go to” white…not as stark as black. Shined up the brass hardware again and walla!

Love!

Check. One thing down, a dozen more to go! But that is okay…being able to check one thing off the list feels amazing!

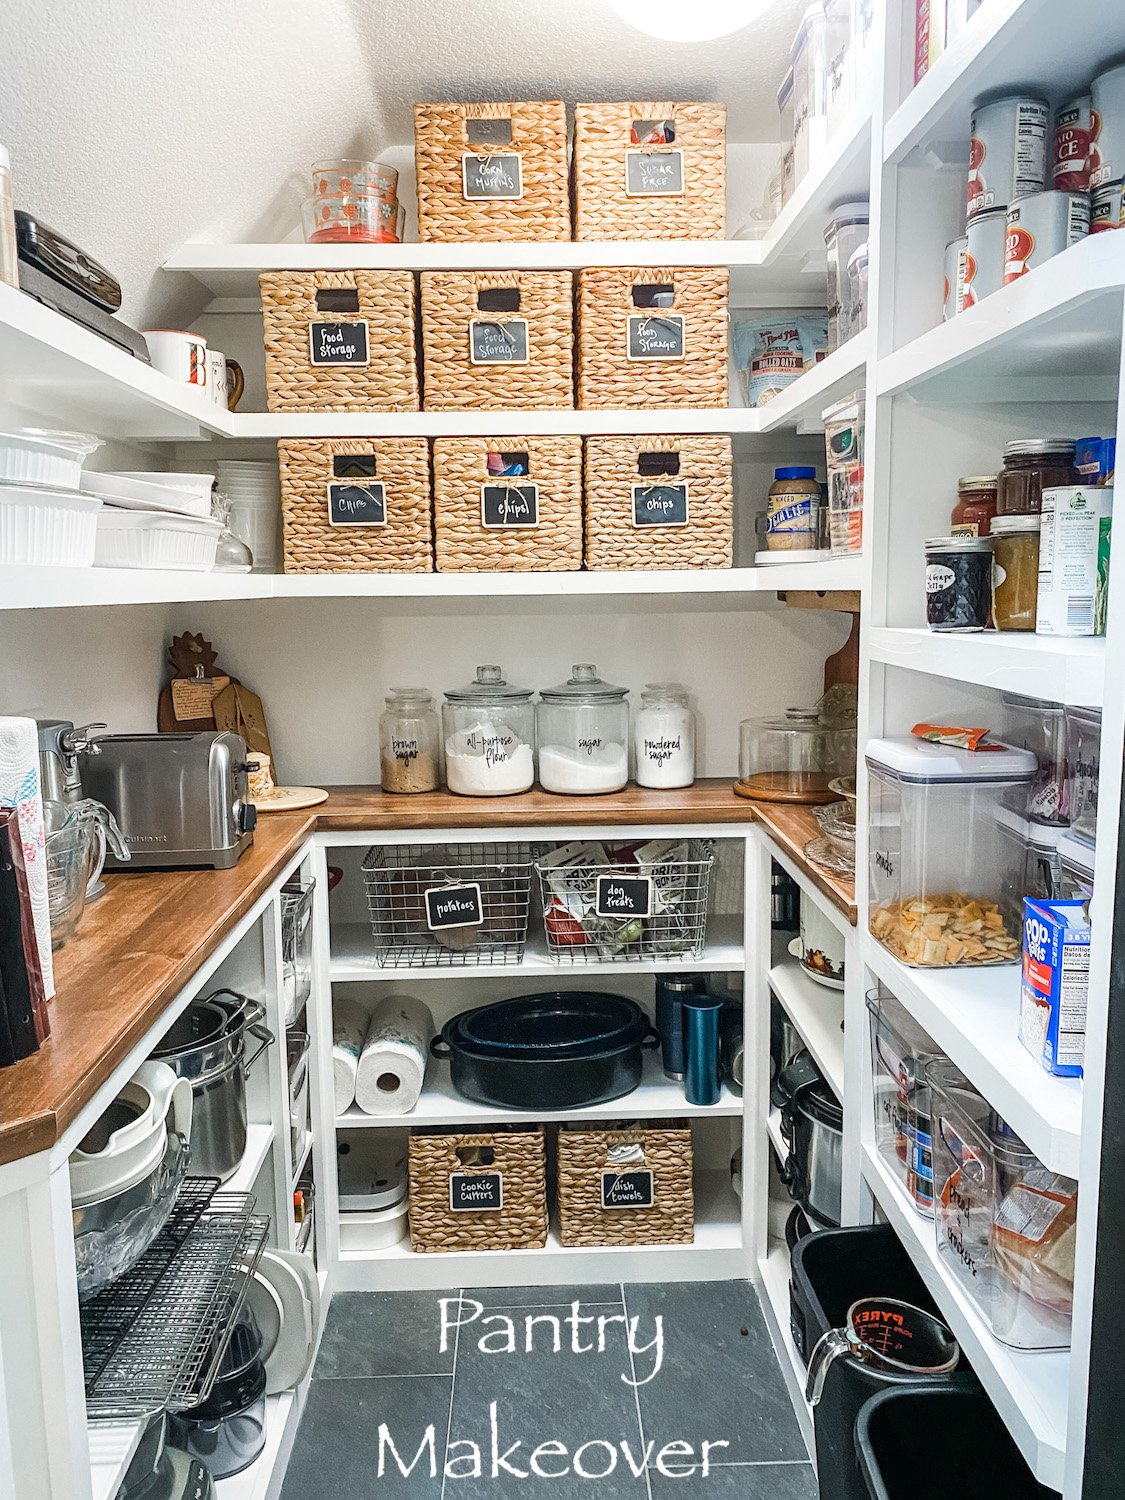
The Pantry Makeover....

It has only been a little over a year since I “froo-frooed” my kitchen pantry. I love it and have found all the little storage elements I added to be very helpful. I have managed to keep it fairly organized.

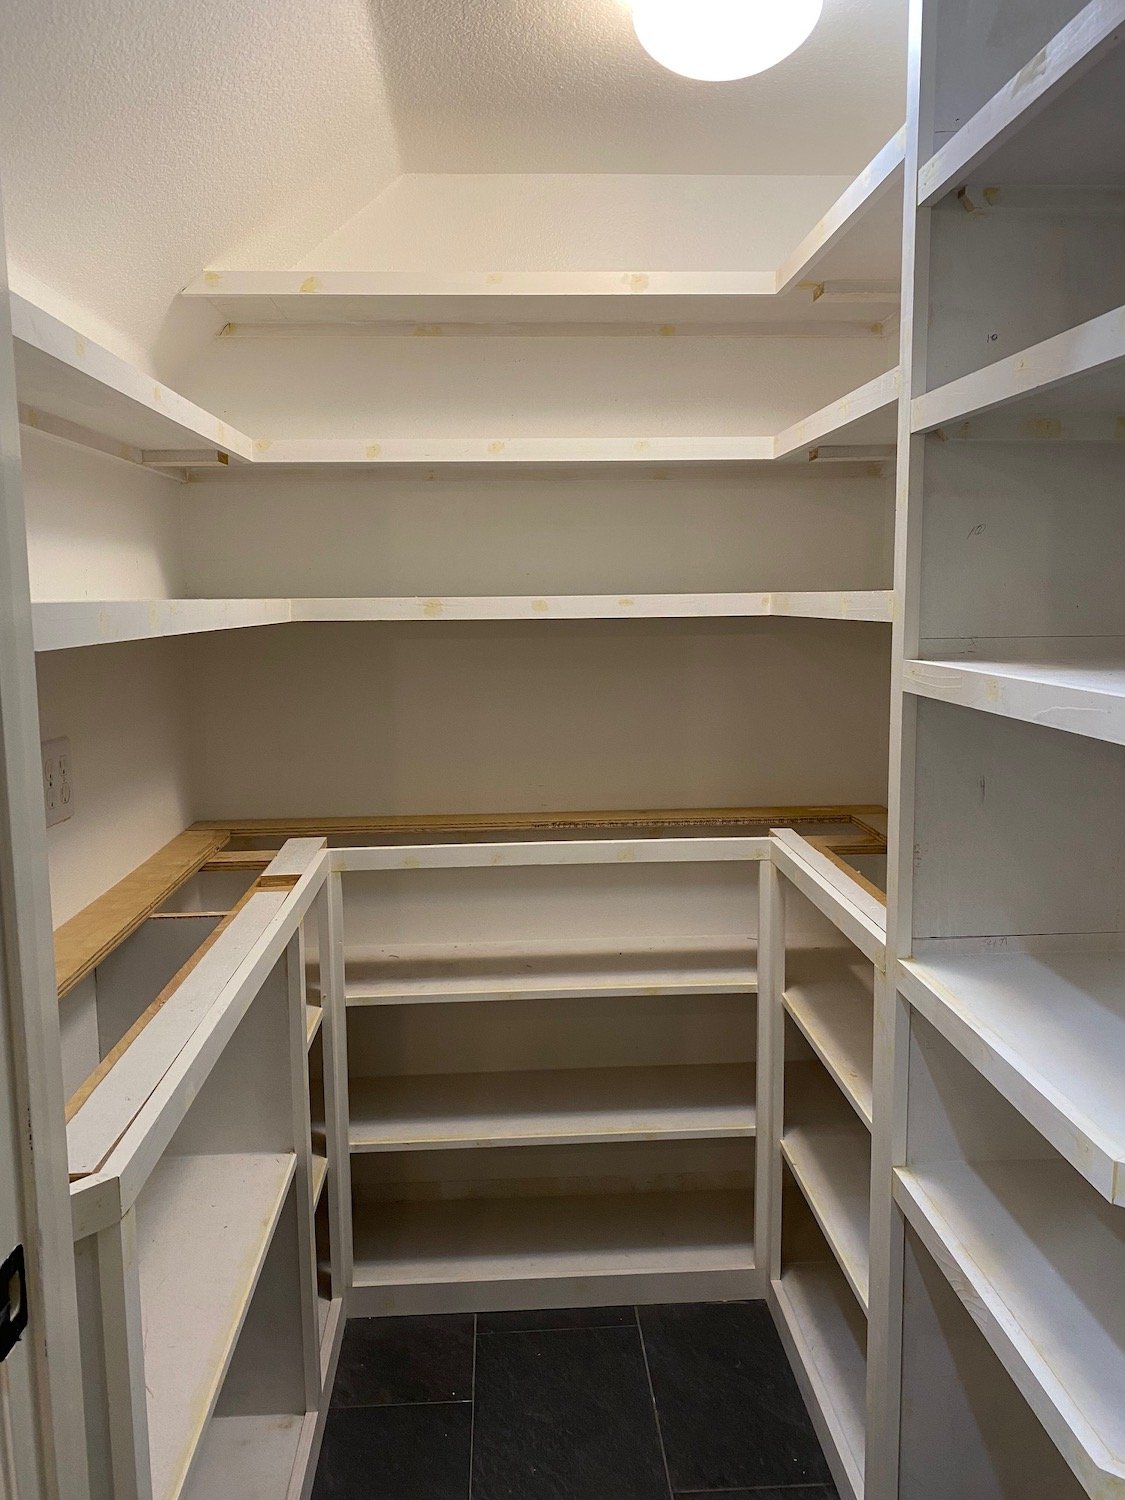
After living with this space for a few years, it is time to reconfigure it and install new flooring.

First things first….find my inspiration. Same song, second verse…cruise the blogisphere and Pinterest and see what trips my trigger.

Once I had an idea of what I WANT, it was time to take some measurements and draw everything out on graph paper…inspiration + space = ”the plan.” Drawing the space to scale gives me the ability to play around with the elements I think I want on paper before I start sawing and nailing. It also gives me important measurements for cabinets, flooring and shelf material.

I wanted base cabinets to hide rarely used appliances (food processor, grinder, etc), dutch ovens, crock pots, etc.

I wanted a cute counter top for the flour/sugar jars, toaster and can opener.

Lauren’s pantry was most similar to my layout so I looked closely at what she did….

Like Lauren, I knew I wanted to use 12” wall cabinets as the bases. However, I decided to build my shelves a tad differently.

I liked the look of the shelving featured HERE….

Unfortunately I couldn’t find any wall cabinets to use as base cabinets…at least none that are affordable. It’s a pantry. With the cost of materials THROUGH THE ROOF I have to be conscience of the cost of this little project.

I wasn’t real keen on open base cabinets but Lindsey built some really awesome bases

She posted a great tutorial on building these base cabinets…pretty much exactly the way I built mine!

So all this got worked into “the plan.” Again, a fluid plan, but a plan none the less.

First up…the flooring. The flooring was the original tile and I decided to use the same tile I used in the laundry room. Tiling over the tile in the laundry room worked well so I decided to do that again.

I wanted to reset the shelving and build some additional “shelf towers” so I removed all the existing shelving….

I wanted a new light fixture so I found one I kind of liked. HOWEVER, it came with Edison bulbs. Kind of important since you can see the bulbs through the glass but I just don’t like the light…just too “yellow.”

One morning I woke up thinking “I really don’t like that light.” So I got up, took down the new one and put the old one back up. Again, it’s a pantry…functional is more important that pretty sometimes. Maybe I’ll eventually find something that is both pretty and functional…way down the bottom of the list at this point.

BTW, in case you want to see what “projecting” looks like around here….

I patched and painted the walls white (my new fav, BM Chantilly Lace), grouted the floor tile, then started building the base cabinets and adding the new shelves. I preprimed and sanded all the material so all I had to do after it was assembled was caulk and putty holes. A light sanding, wipe with tack cloth and it was ready for paint. Prepriming and sanding BEFORE you cut and install will save you a MAJOR dust storm in the house.

AGAIN, I am not going to go into a long drawn out tutorial…just so many great tutorials out there.

Some people go to the lake during Memorial Day weekend. I build shelves.

The countertop. I like wood since it is not an actual food prep space.

If I wanted to splurge I would have built walnut counters or even a butcher block. But again…it’s a pantry!

The question then is if I go with a less expensive wood do I stain it with a dark stain or just leave it natural.

SOURCE

I love the dark stain but I worry it is running it’s course. But you know what, I don’t care. I love the darker stain and since the walls and cabinets are white, dark it is! I decided to use the pine “project board” from Lowes, stain with a “brown mahogany” and then apply a couple of coats of polycrylic. (Remember, polyurethane has a tendency to yellow over time)

Floors done, walls painted, cabinets and shelves built and painted, top on. Now the hard part…letting it all sit and cure before I load everything back in. IT IS IMPORTANT PEOPLE!!!! Let your paint and finishes cure before you go all decor-crazy on it…otherwise you will scar and scuff and will have wasted all your time and money!

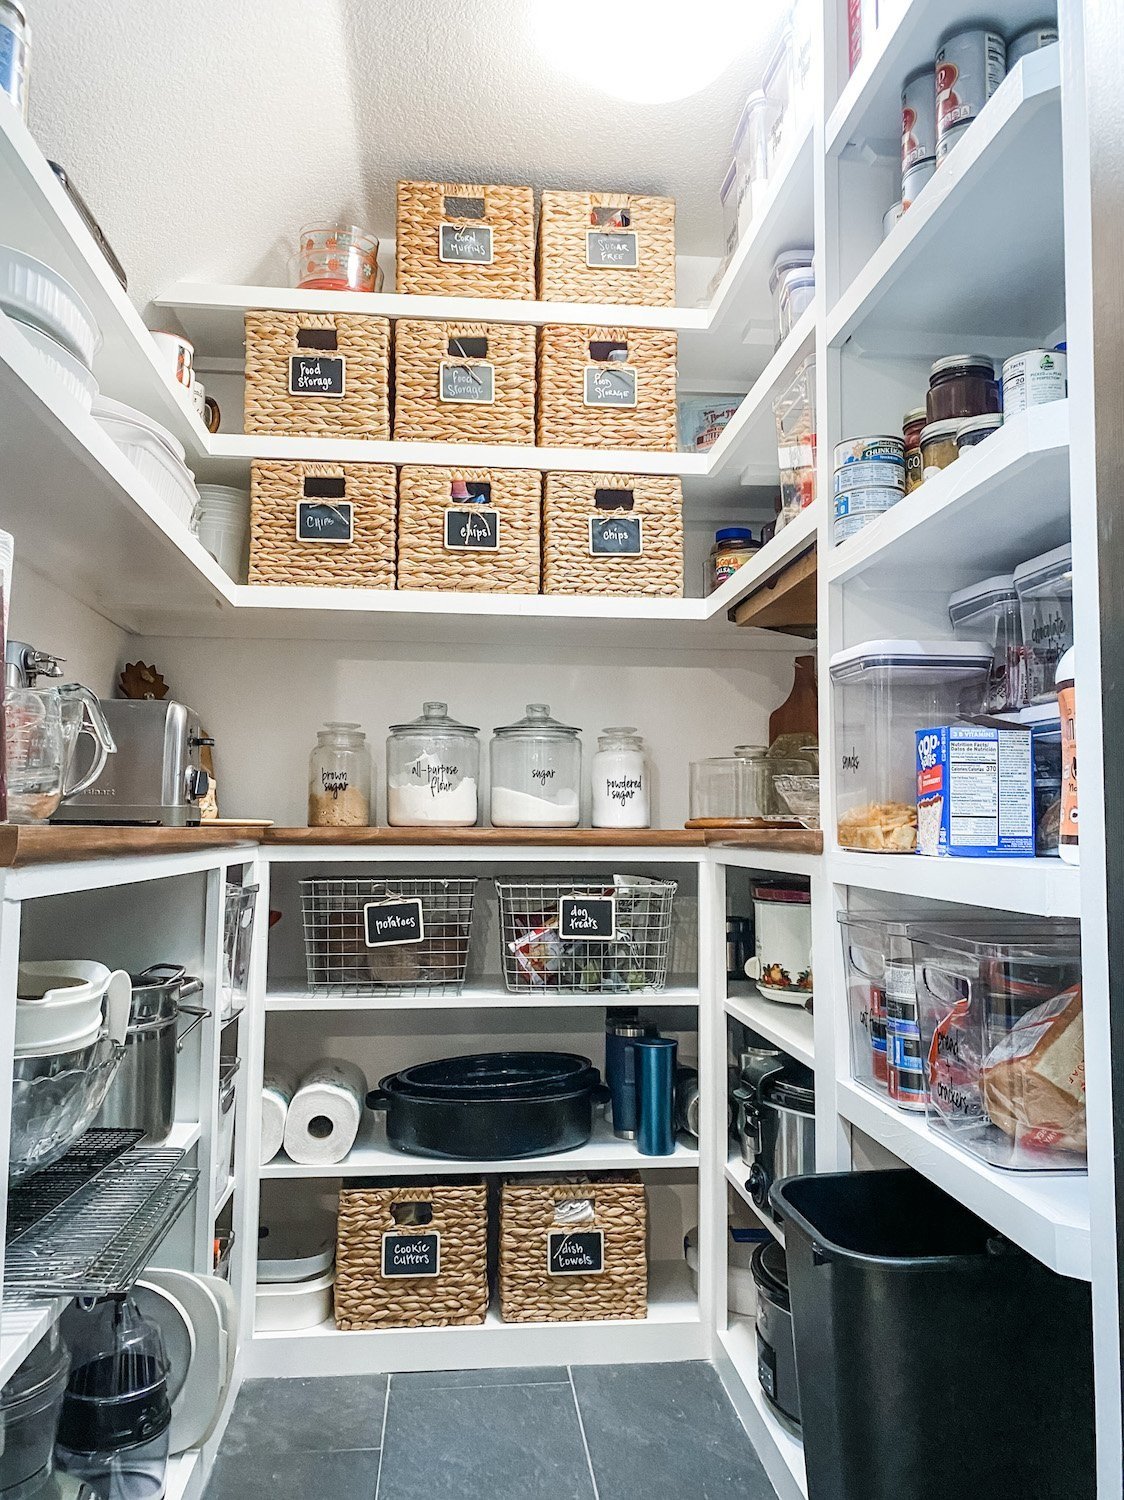
You may notice I actually gained a couple of shelves on the right and middle walls just by reconfiguring them. I also changed the upper shelves on the left to 10” and 8” deep shelves instead of the 12” that were there. I didn’t need the depth and it seemed to “open” up the space a tad.

I could have carried the top all the way around on the right and still had dog and cat food storage under it…but I needed a few shelves 14” tall so I decided to do a separate “shelf tower.” Perfect for taller items like the stacked storage containers, cereal boxes and wine bottles. All the other shelves have a 10” clearance which is ample tall enough for most of my stuff.

Right side….

Left side…

I love that we added an outlet in this pantry…perfect for the toaster and can opener so they don’t take up real estate in the kitchen.

I think my Kitchen Aide mixer would look cute in here but I like it on my kitchen counter. If it were in here I would have to haul it back and forth to the kitchen…it’s too heavy and I’m too old!

I was a bit bummed that I couldn’t originally find cabinets with doors but honestly I like this look better! While dutch ovens and crock pots aren’t really display worthy, the open shelves keep the room from feeling so small and claustrophobic. Believe it or not this space is only 5 x 5. Tiny but mighty!

I have no doubt that at some point I will add a backsplash…not sure whether it will be tile or wallpaper or something else…but something to give the space a little color and character. Right now I am worn out just getting to this point!

Last year I added glass to the pantry door. I LOVE it and I’m glad that is one chore I don’t have to do now!

The important thing I want to share is that reworking a space can make a huge difference. I now have a pretty pantry that works beautifully as an extension of my kitchen. Remember, I don’t have a lot of upper cabinet storage in my kitchen so this pantry is super important!

On a scale of 1-10? For me, not difficult because I have the tools and the know-how. For a novice DIYer, probably an 8. But there are a ton of tutorials out there for how to build simple shelving or how to use old cabinets to create a space like this. The first thing you have to do is find “inspiration” for the space you actually have and work from there. It is doable…YOU CAN DO IT!!!!!

On a blog board I am on someone said she was afraid to do something like this because she was afraid to mess up.

Don’t be afraid to “mess up.” That is how you learn…watch tutorials and read blogs. There are so many great resources at your fingertips these days.

Use them…and JUST DO IT!

All-season room reveal...again!

Last week I shared the new cabinet I bought for the all-season room and the changes I made to it to turn it into a giant litter box. Brian was a tad miffed that I would buy something only to hack it up for the kitties, but if you have ever had a litter box and all the mess that goes with it, you certainly understand my attempts to corral it.

The litter box is hidden away and the critter food is stored in the drawers!

One week later, it is working perfectly!

The outdoor couch I bought for this space arrived Friday night. I am always amazed that such a large piece can fit into a relatively small box…until I unpack it and start putting it together. Geez!

If I have learned anything in 57 years it is FOLLOW THE DIRECTIONS. While they may not make sense, they make sense. When they say “hand tighten only,” hand tighten.

It is in place and I love it!

It’s not near as plush and comfy as our living room couch but it is an “outdoor couch” so I didn’t expect it to be.

I was a tad concerned about the fact that it is a “canvas white” and the cushion covers weren’t zippered for easy removal in a house full of critters. Our new puppy (oh yes, we got a new puppy! To tired to share that news just yet!) managed to christen it within the first 10 minutes…muddy paws. Fortunately it cleaned easily!

The coffee table LOOKS like teak wood, but it is actually metal. Kind of chintzy if you ask me so eventually I want to get something a little better quality and much smaller…it is just too big for the space.

I am still debating the height of the kitty cabinet…I THINK I want to cut it down but I am living with it for the time being. One day the bug may hit me and I will drag it outside and hack on it some more!

For now I have a space perfect for watching the leaves and snow fall. In the winter I put out corn and bird seed so this will be the perfect spot for critter watching as well.

A few months ago I put a kitty door in one of the windows between the living room and the all-season room so the cats can could come and go without having to leave the door open.

Since this has turned into the “cat room” they will LOVE watching the critters. And no, the cats never go outside so the critters are safe.

Hopefully we will use the space now that the changes have been made…the cats certainly do!

All-season room revamp...

I seriously love this room….

…it stays cool in the summer and relatively warm in the winter. I honestly thought we would spend a great deal of time here.

But we don’t.

When we want to sit “outside” for dinner or drink our coffee in the morning, we always sit on the screened porch.

The “all-season” room has become a place for the litter box and a dumping ground for all my outdoor critter food and seeds.

The rest of the room was still good, but again, we just never used the space like I thought we would.

So I am making a change….

Last week I ordered an outdoor couch. It should be here this week. I moved the big “bar table” to the screened porch, and I decided to corral the critter mess.

I searched Craigslist, flea markets and Marketplace trying to find a credenza/buffet/cabinet type thing I could convert into a storage/“kitty cabinet”….kind of like the one I made for our master bathroom.

I found this….

I like the “style” well enough in this space, but I am not sure about scale…seems kind of tallish so I may eventually cut it down and eliminate the void space. I think it is meant to be a tv cabinet and that space is for Blueray players or such. Who knows. Again, I kind of like the style for this space, I knew I could convert it for the kitty box and the drawers would give me storage for bird seed and critter food.

I decided to leave the bottom right drawer intact and just set the litter box in it. It fit perfectly after I cut the height down a bit and I can easily pull the drawer out to clean out the box. I trimmed the side of the drawer down just a tad using a jig saw. I used a skill saw and jig saw to cut a hole in the side for access….

To give the kitties “head room” I had to remove the guts of the drawer above this one and then glue the drawer front back onto the cabinet…so it’s not really a drawer, it just looks like one.

TIP: To glue the drawer front back onto the cabinet, I applied wood glue all around the edges and put a blob of hot glue on each corner. The hot glue quickly sets up to hold the drawer front in place while the wood glue dries.

Again, not sure about the scale of the cabinet but all in all I am pretty happy with it. It sure beats the mess that was there.

Hopefully the new couch will be here this week and we can get the room completed. Again.

Sometimes you have to live in a space for a time before you know what you REALLY need.

Until next week…..

Painted bathroom cabinets...

As I mentioned in the first two reveals of my master bathroom (HERE and HERE), it is one of those ever evolving rooms.

This is where we last left off…

…the addition of the operable windows. I can not express how much I love these.

The cabinets….not so much. They are actually kind of an off-white-yellowed-ick kind of color. And the hardware was pretty blah and cheapo. Cheapo is great if it has just a tiny bit of character, but these didn’t.

I debated changing out the drawers and doors to mission style doors but honestly I don’t want to spend the money on them right now. Someday I may do some major magic on these cabinets but for right now I just want to give the room a more “polished” look.

Paint…hum. An inexpensive way to give a space a little facelift.

So the debate raged…white or color…and if color, what color.

You would think as much as I do this kind of thing paint color would be no big deal for me.

WRONG!

This is just a few of the paint samples I brought home.

This is the trick to finding the right paint color. Go to the store and pick up every sample you THINK you might like…then take them home and look at them in your light. You would be surprised at how much a paint color can change in different lighting. If you still find yourself drawn to 2-3 colors, buy sample pots…they are well worth the investment. Also, if you are torn between a light color and just a tad darker, go light. First, the bigger the area, the darker a paint will look. Second, if you still think you want darker you can always go back and have them mix it the darker shade. Once you have the darker shade mixed, you really can’t do much more than buy another gallon.

I finally landed on one I think I kinda sorta like. I ordered simple brushed nickel hexagon hardware…inexpensive but with a tiny bit of character.

IMG_1656.JPG
IMG_1657.JPG

The two vanities took all of about 1/10th of a gallon of paint. I should have bought a quart but custom colors tend to be a smidge off in the quarts.

All in all I’m not UNHAPPY with it, but not sure I am over the moon thrilled. For the time and money you can’t beat slapping a coat of paint on a wall or a piece of furniture or cabinets to change the entire look.

Now, I want to share my latest “find.” I am, as I have said before, “old school.” Primer and oil-based on furniture, trim and cabinets and latex on walls.

I have experimented with a relatively new (to me) product and I have decided I kind of like it.

It is a “hybrid” paint….will go over latex OR oil-based without the need to strip or prime. I do knock off the shine and any rough spots just a tad with 220 grit sandpaper and wipe it all down with tack cloth, but other than that it takes very little prep. And the super cool thing is it doesn’t matter if the old paint is oil-based or latex…usually that matters A LOT. This hybrid paint needs no additive, brushes on super easy, “levels” beautifully (which is great if you are brushing or rolling on wood), cleans up with soap and water and so far seems super durable.

The only problem I have with it is it seems to be a tad thinner than most paints and you need to watch carefully for drips and runs…but because it levels so nicely they are easy to manage!

Both Sherwin Williams and Benjamin Moore carry it and I have used both…with great results.

So if you are not sure what type of paint your trim/cabinet/furniture is and you don’t want to go to all the trouble of priming, try this product. So far, so good.

So that’s that for this bathroom…for now. I really don’t have any more MAJOR changes I want to make in there. But knowing me, I’ll find something. This week my project has been my utility room. A necessary change that I will share next time….

static1.squarespace.png

Master bathroom windows...FINALLY!!!

IMG_1509.JPG

At last!

This isn’t the first master bath reveal and it won’t be the last.

This room is one of those “processes” that will take time, money and a lot of of “humming.”

By that I mean I’m still not sure what i want to do with the cabinets. But I knew from day one I wanted operable windows in this room. Why I didn’t do it when I did the major remodel before we moved in is beyond me.

I had the perfect spot….

IMG_0455.jpg

On either side of my vanity mirror. This wall is adjacent to the back yard and over looks the flower garden I put in under the humungus oak trees.

I learned in my last home that an operable window in the master bath is a MUST!

It is the mustiest, stuffiest room in the house and there are just times when you need to throw open a window and let the fresh air in!

Adding a window will entail cutting sheetrock, removing brick, framing and in my case moving both plumbing and electrical.

Like every major project, the best way to start is to just start…and in this case that meant cutting two big ole’ holes in the wall.

That was when I discovered the plumbing in the left opening. Okay, no biggy. I can manage that. I didn’t discover the electrical issues in the right window until I removed the insulation a few days before my windows arrived. CURSES!!!!

Again, no biggy for me. Just a few junction boxes, new wiring , relocate a light fixture…. blah, blah, blah. Fortunately I have a few basic skills (and a SIL electrician on speed dial) so I was able to do what needed to be done. But If I were without those skills and planning a “little remodel” like this, I would certainly budget for professionals. If you don’t need them, kudos…but be financially prepared.

IMG_1509 2.JPG
IMG_1507.JPG

They let in a ton of natural light!!!! (This is with NO lights)

IMG_1506.JPG

I can not even express how much I love these windows.

I thought adding a window in my laundry room was the best decision I made in this house. Hum…may be a tie! The extra light and ventilation in both is a must!

Even through the screens, I love the view of the back flower garden!

IMG_1512.jpg
IMG_1504.jpg

Now on to the next head scratching project. The bathroom cabinets. It may be difficult to tell in the photos but they are kind of a blah off-white.

I have contemplated refacing the fronts and replacing the doors and finishing it all in a light stain. I like the “concept” but when I searched Pinterest I kind of don’t care much for the look.

This is just a few examples of a bazillion I have put in my “inspiration” file….

a5a48166a2fd9000b6bf16011990d19d.jpg
fce0f15bf4f9aa2fd15d91ab2e960d5c.jpg

I like, but I don’t love.

I kind of like the look of a color…

8bcf39527809249718d4f65e500c4114.jpg
75df4049c026a2d7d83548afdc2e15ca.jpg

Again, liking but not sure I am loving. (And again I can not give proper credit because I stole them from Pinterest and dropped them in my inspiration file…my sincerest apologies!!!)

As much as I dislike the thought of the “sterile” look of all white in this bathroom, I think in reality I would really like it.

So right now I am leaning towards painting the cabinets a brighter white and definitely replacing the hardware.

That is the nice thing about paint… if I eventually find a color that really trips my trigger, it’s just another gallon of paint, a couple of hours of time and a back ache.

Until next week…

static1.squarespace.png

Adding glass to an interior door...

IMG_1434.JPG

As I mentioned before there are certain things that made this house instantly feel like home.

Like my master bath….

IMG_0439.jpg

Almost identical to the master bath in my last house.

IMG_4031.jpg

Same backsplash, floor tile, vessel sink, shower tile…right down to the same ole’ shower curtain and rugs. And I am waiting on windows that are pretty much identical to the window I had in my old bathroom. Still not sure what I want to do with the cabinets but I have always liked the stained and open shelving look of the last house…

….who knows. I may do a little cabinet makeover at some point.

My black doors….

after.png

Loved them in the old house, love them here…it was one of the first things I did to make this house feel more like my home.

IMG_0716.jpg

The entry…

IMG_1171.jpg

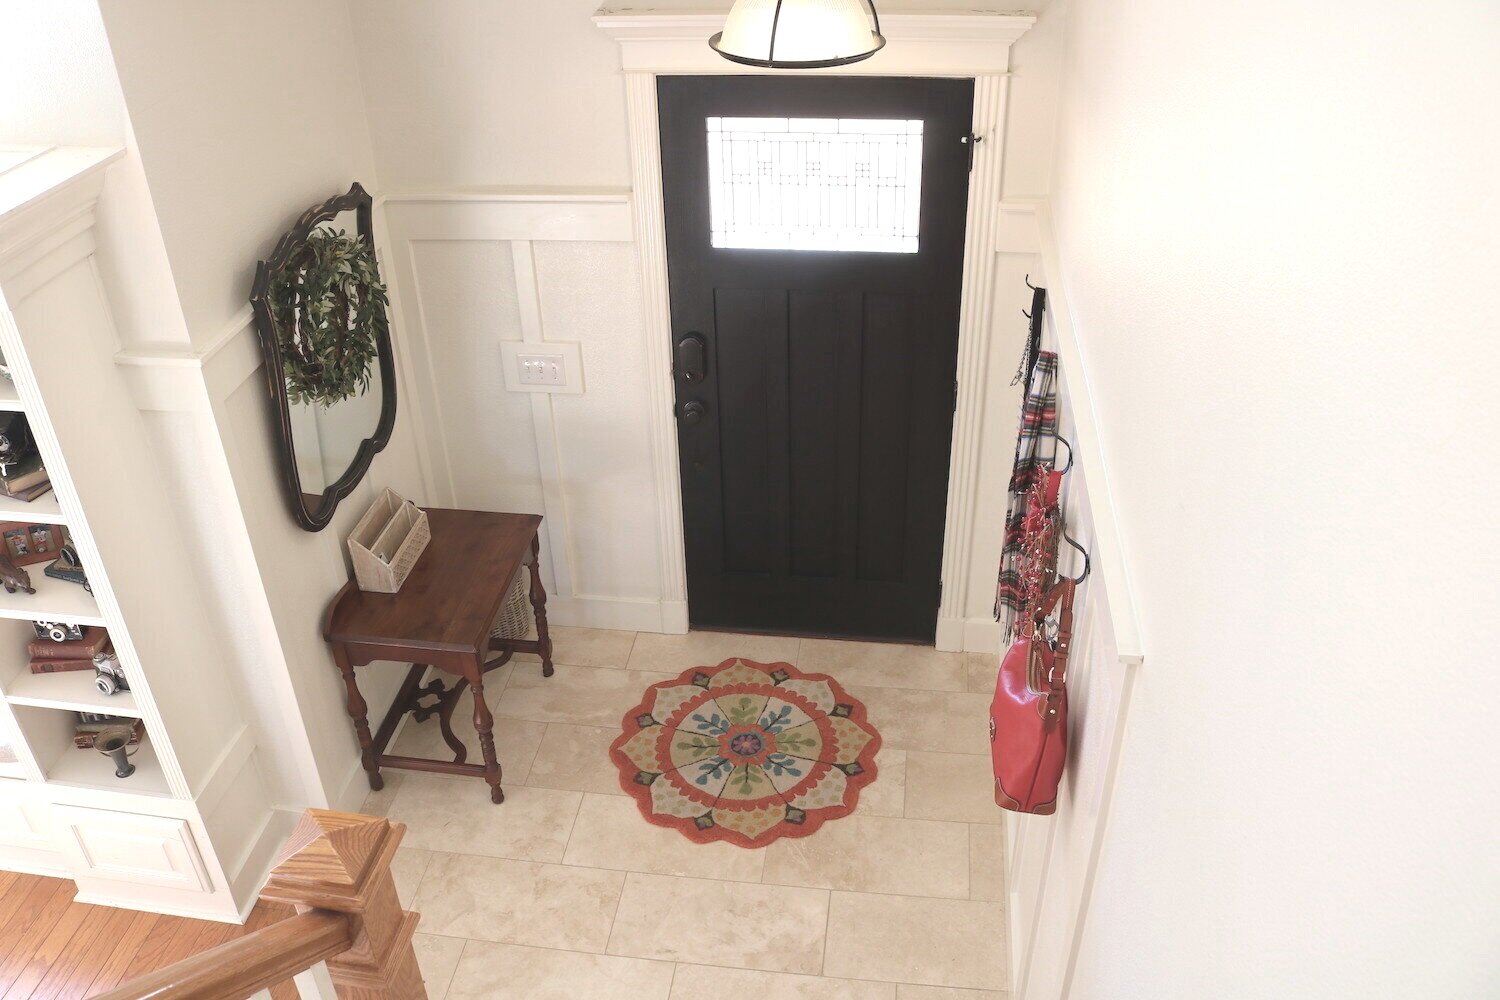
Same board and batten, same mirror and wreath, same rug…black door…

IMG_5981.jpg

I like what I like…and these are just a few of the design elements I really loved in my old house.

Then there are the paint colors, plants, shelving….sooooo much more!

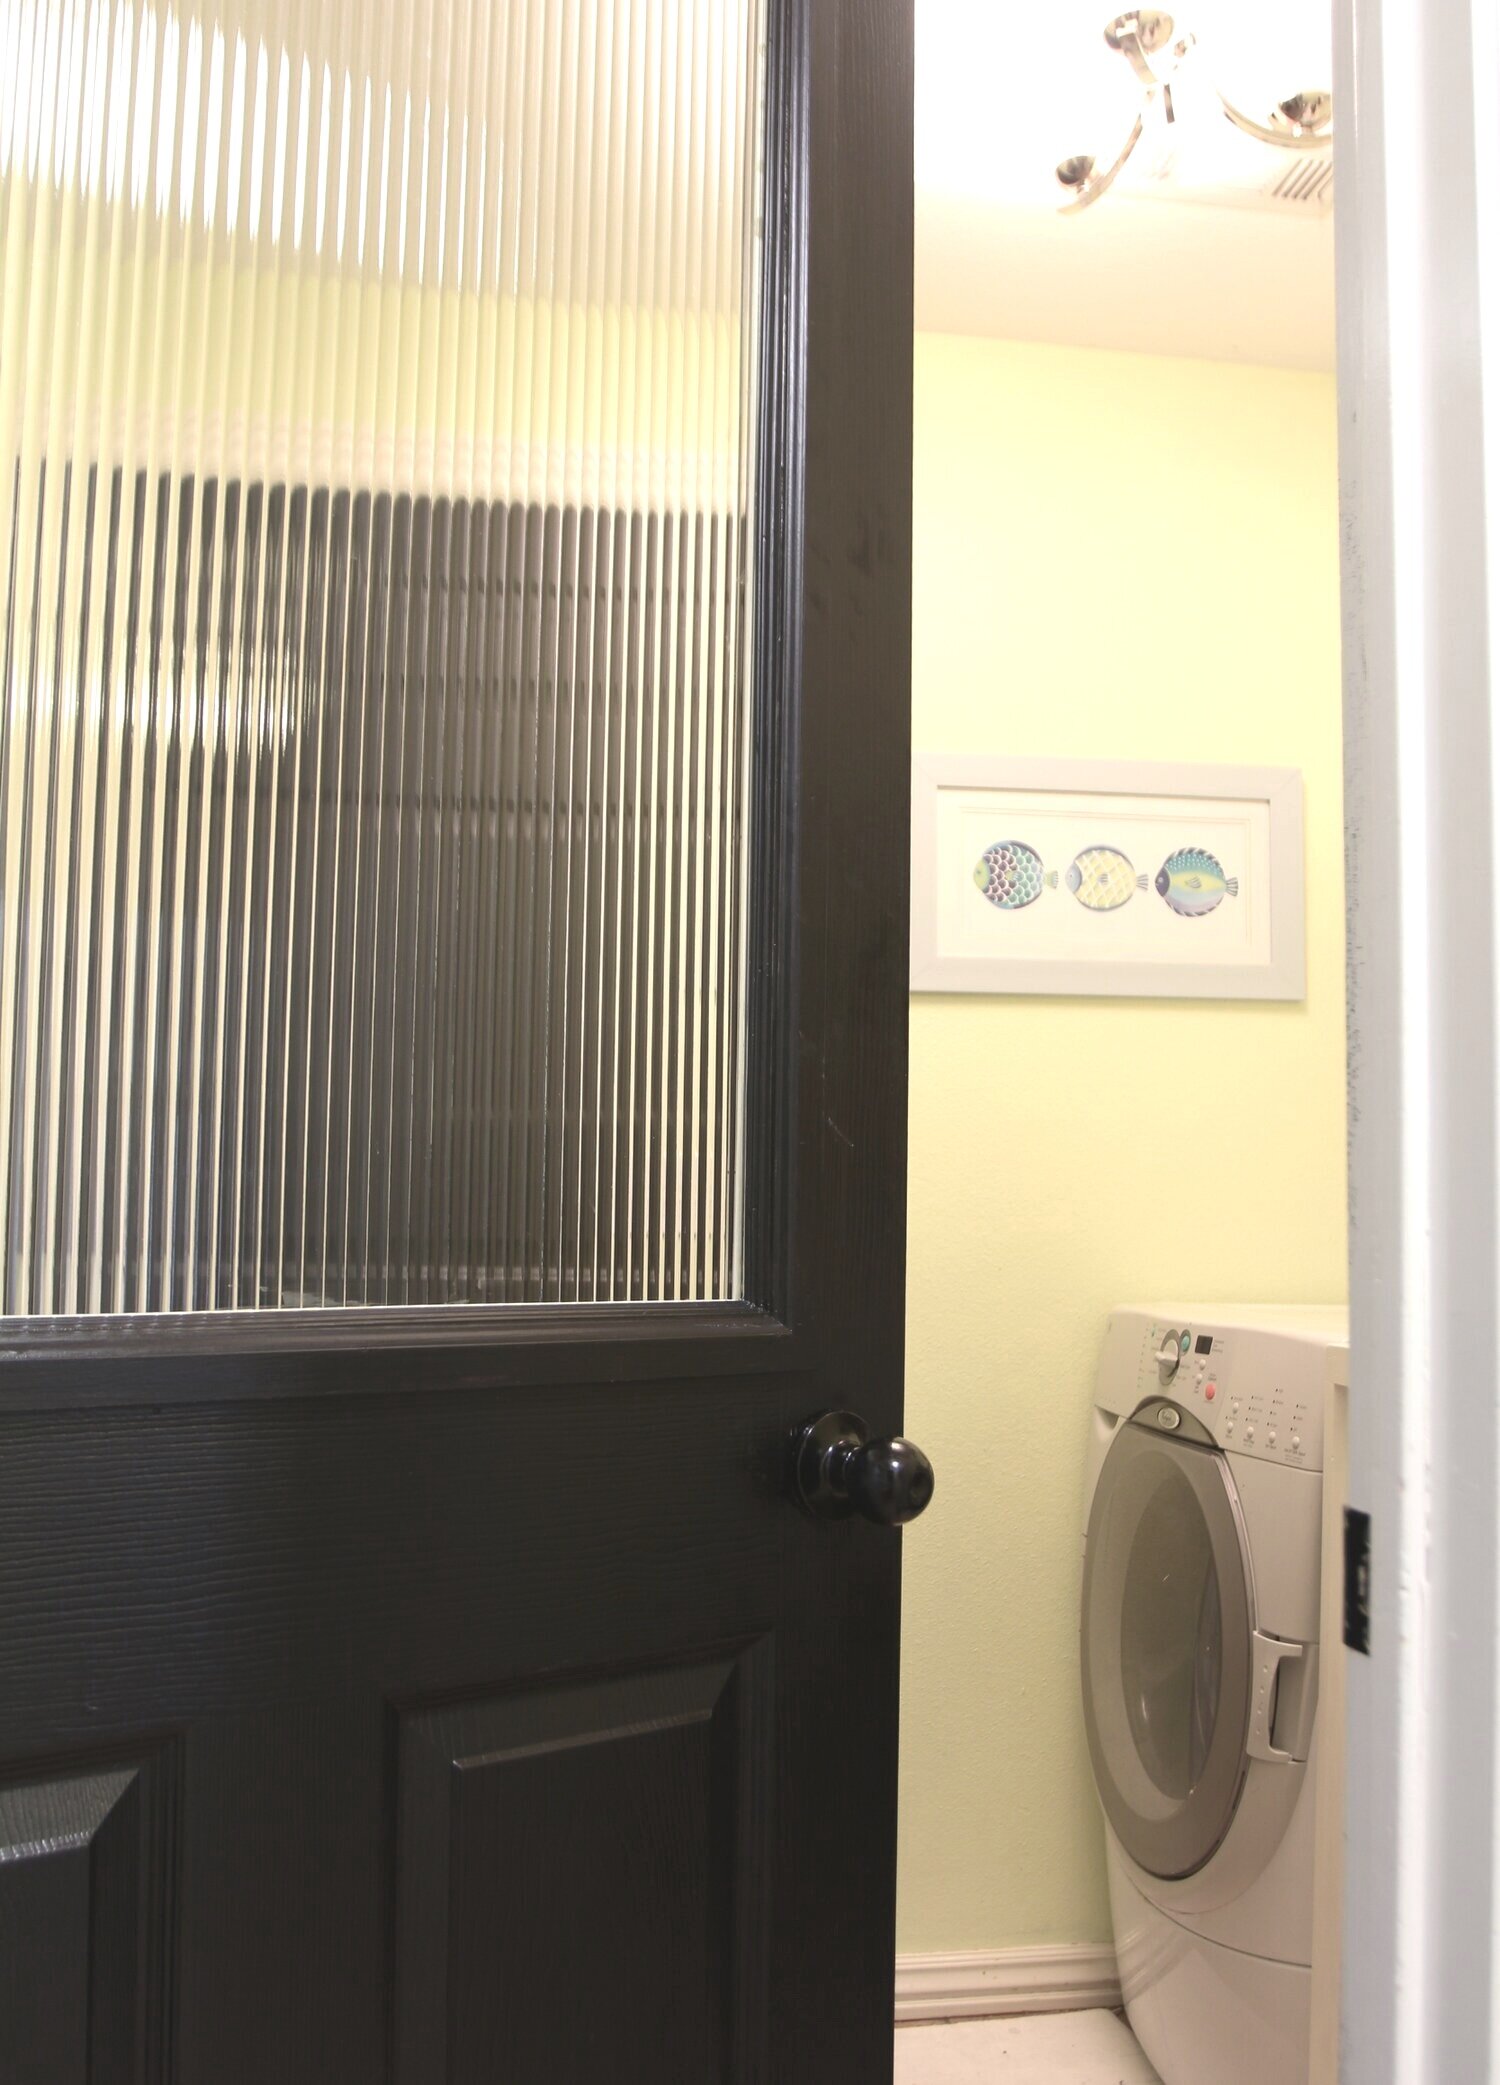
One project I did at the old house that I always loved was the reeded glass door in my laundry room…

IMG_5030-1.jpg

I absolutely loved this project and it was one time I actually posted a pretty good tutorial. Mainly because when I went looking for a tutorial, I couldn’t find one!

I have known from day one I wanted another door like this in my new house. I debated whether to do it with the pantry door or laundry room door.

I finally decided to start with the pantry door….

IMG_1005.jpg

Primary because I used the reeded glass in the upper cabinets and I thought it would look good to have matching glass in the pantry door.

IMG_1434.JPG
IMG_1435.JPG
IMG_1432.JPG

I LOVE it! I love this pantry and the door is just the cherry on top! Eventually I may do the laundry room door as well because then the light from the window in the laundry room can filter into the breakfast room. For now I am perfectly content with the one door.

This is a MUCH less expensive option than purchasing a new glass door…and you get the option to choose the type of glass you want vs. having to get whatever “frosted” glass is in the door you purchase. And it is seriously NOT a difficult project to complete.

YOU CAN DO IT!!!!

DIY and Cinderella...

At this moment I am sitting in my “all-season” room drinking my coffee and watching it rain.

IMG_0254.jpg

Heaven.

There is so much I love about this house and honestly, I can’t t think of a thing I don’t. We have spent a great deal of time the past few weeks working outdoors and many of our neighbors have stopped to tell us how wonderful it is looking. (Probably more a testament to how badly the place looked to begin with.)

Making a home beautiful after years of neglect, for me, is like the Cinderella story. Abused, neglected, mistreated…until someone who cares comes along and waves a magic wand and makes everything beautiful again.

Simple analogy…seriously, who waves a magic wand and makes a home beautiful. Truth is, it takes a lot of work to turn an abused and neglected home or piece of furniture into something beautiful and useful.

My blog friend Cristina shared a chair she recently transformed. Abused, neglected, dated and something no one really wants in their home anymore was completely transformed into a piece of furniture fit for a ball!

A super simple project for someone like her and me and not so difficult that someone with minimal DIY skills couldn’t tackle. The hardest part would be the sanding and staining, but just a simple KSTP treatment (Kilz, sand, tack, paint (search on this site for examples) would completely transform this simple chair. How cute would it be paint lavender for a little girl’s room. Or bright royal blue for a little boy’s room. (Yes I am a “gender snob”…raised 4 kids like that and they are killing it…so get over it)

After sitting and watching it rain for a few hours I finally decided to tackle the trim and cabinets in the laundry room. As I mention I am painting all the trim a whiter-white…BM Chantilly Lace. Not so “yellow”…just a pure white.

I have drug my feet on the laundry room because I really dreaded painting the cabinets. But I did and they are now done. All except the new hardware and that should be here next week. The only other thing I want to do in that room now is replace the dated ceramic tile. That chore is WAAAAY down the bottom of the list.

Still waiting on the master bath windows. Built a dining table and bench for Brandon and Taylor’s new house…just waiting on the legs we ordered. Waiting on a few final touches before I FINALLY share my shop transformation. The glass for the pantry door should be here today. In other words, lots going on to share…just nothing quite ready.

Cinderella may have transformed with the wave of a wand…unfortunately most DIY projects take a little more time and patience. But the result is often the same…magical!

static1.squarespace.png