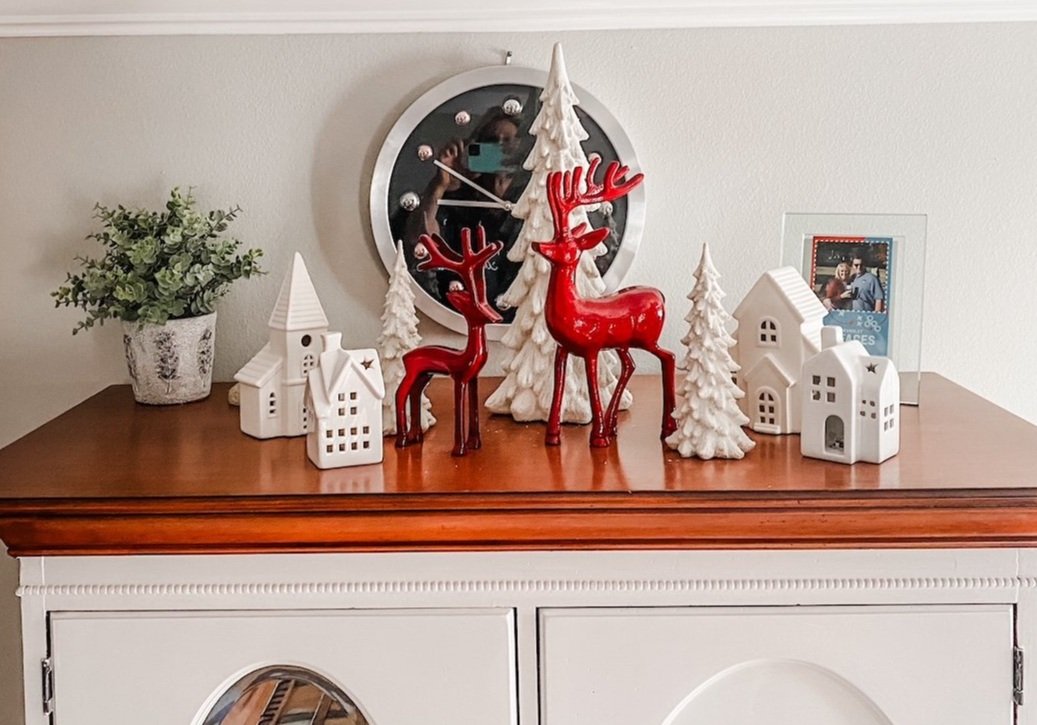
Another Christmas....

Ever year I feature my Christmas decor…every year I think not much has changed.

But it does change…a tad here and there.

Last year I shared a few little changes…same this year…a few things here and there.

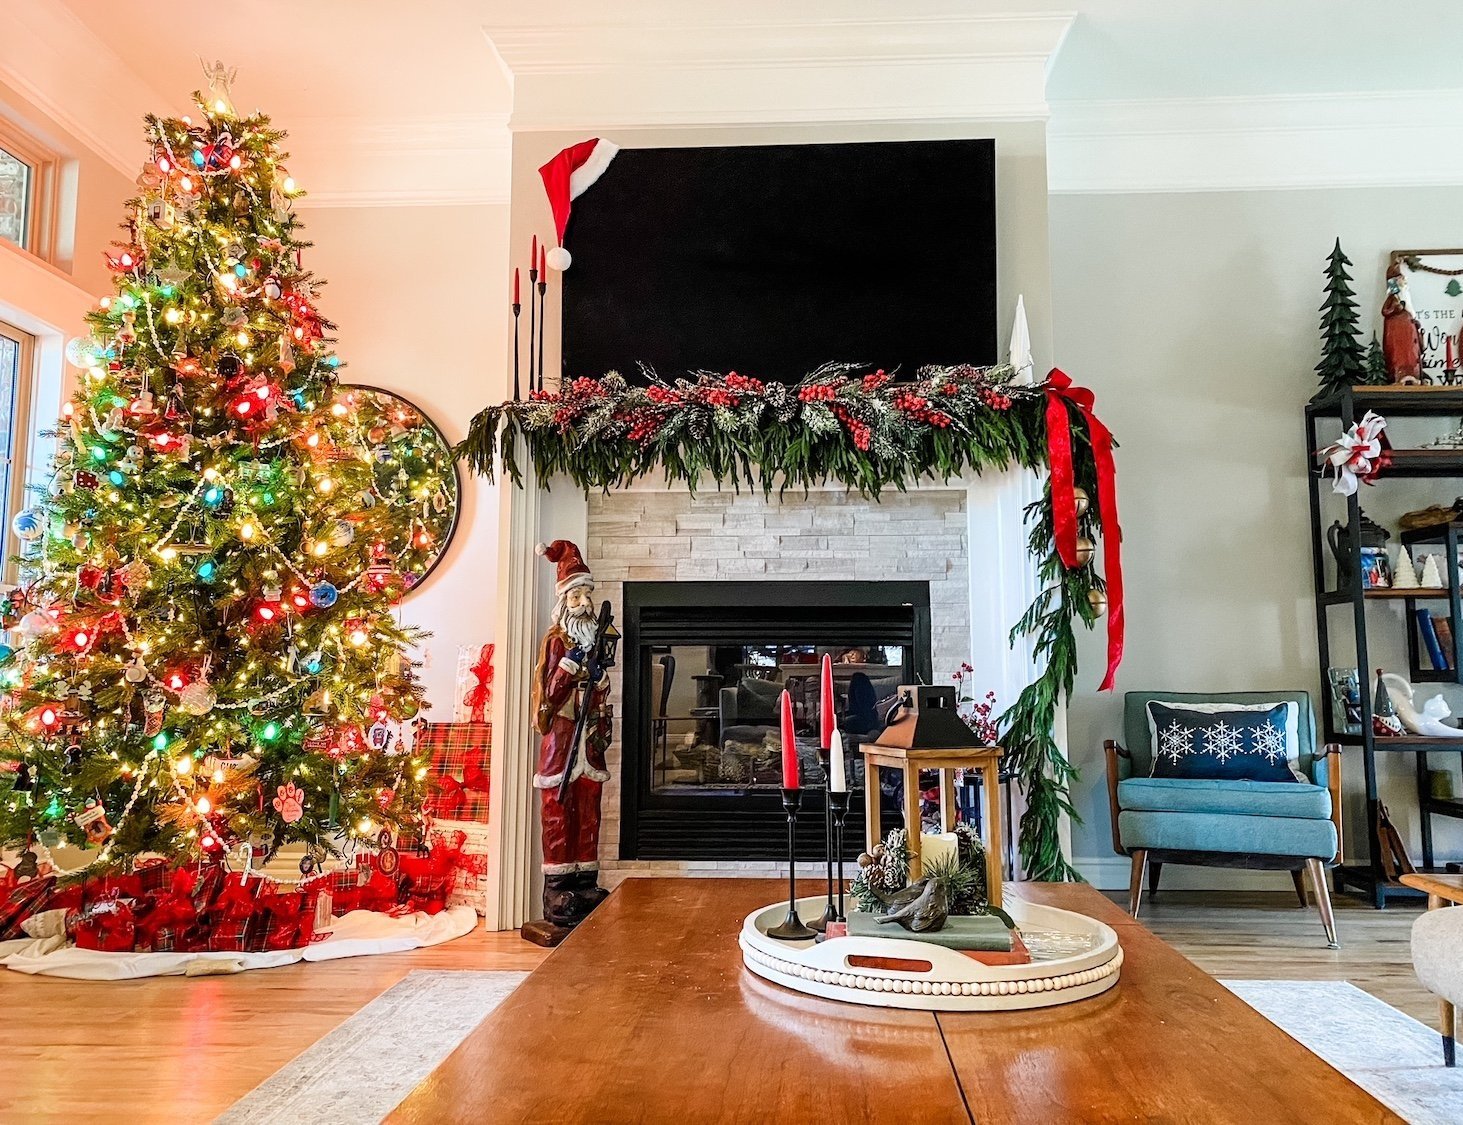
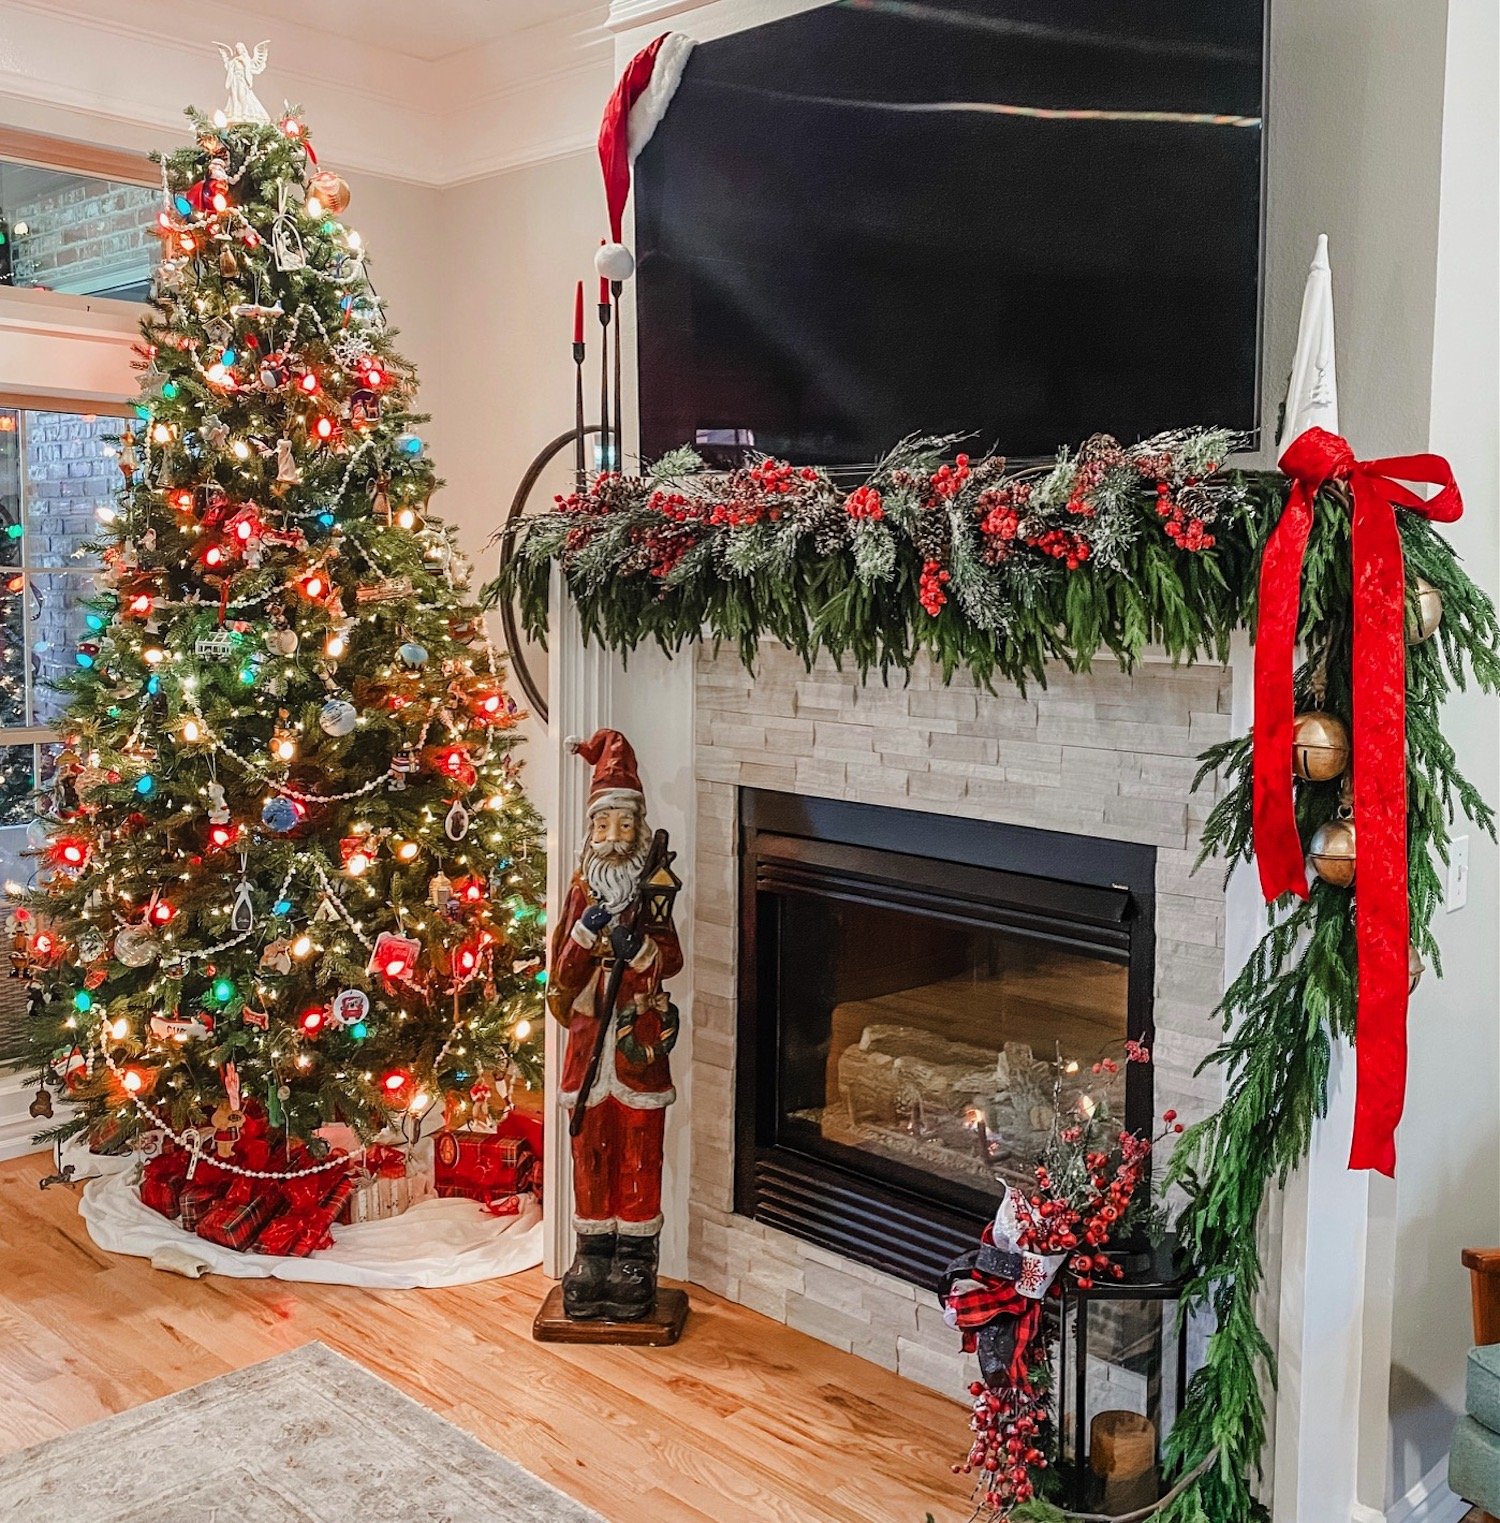
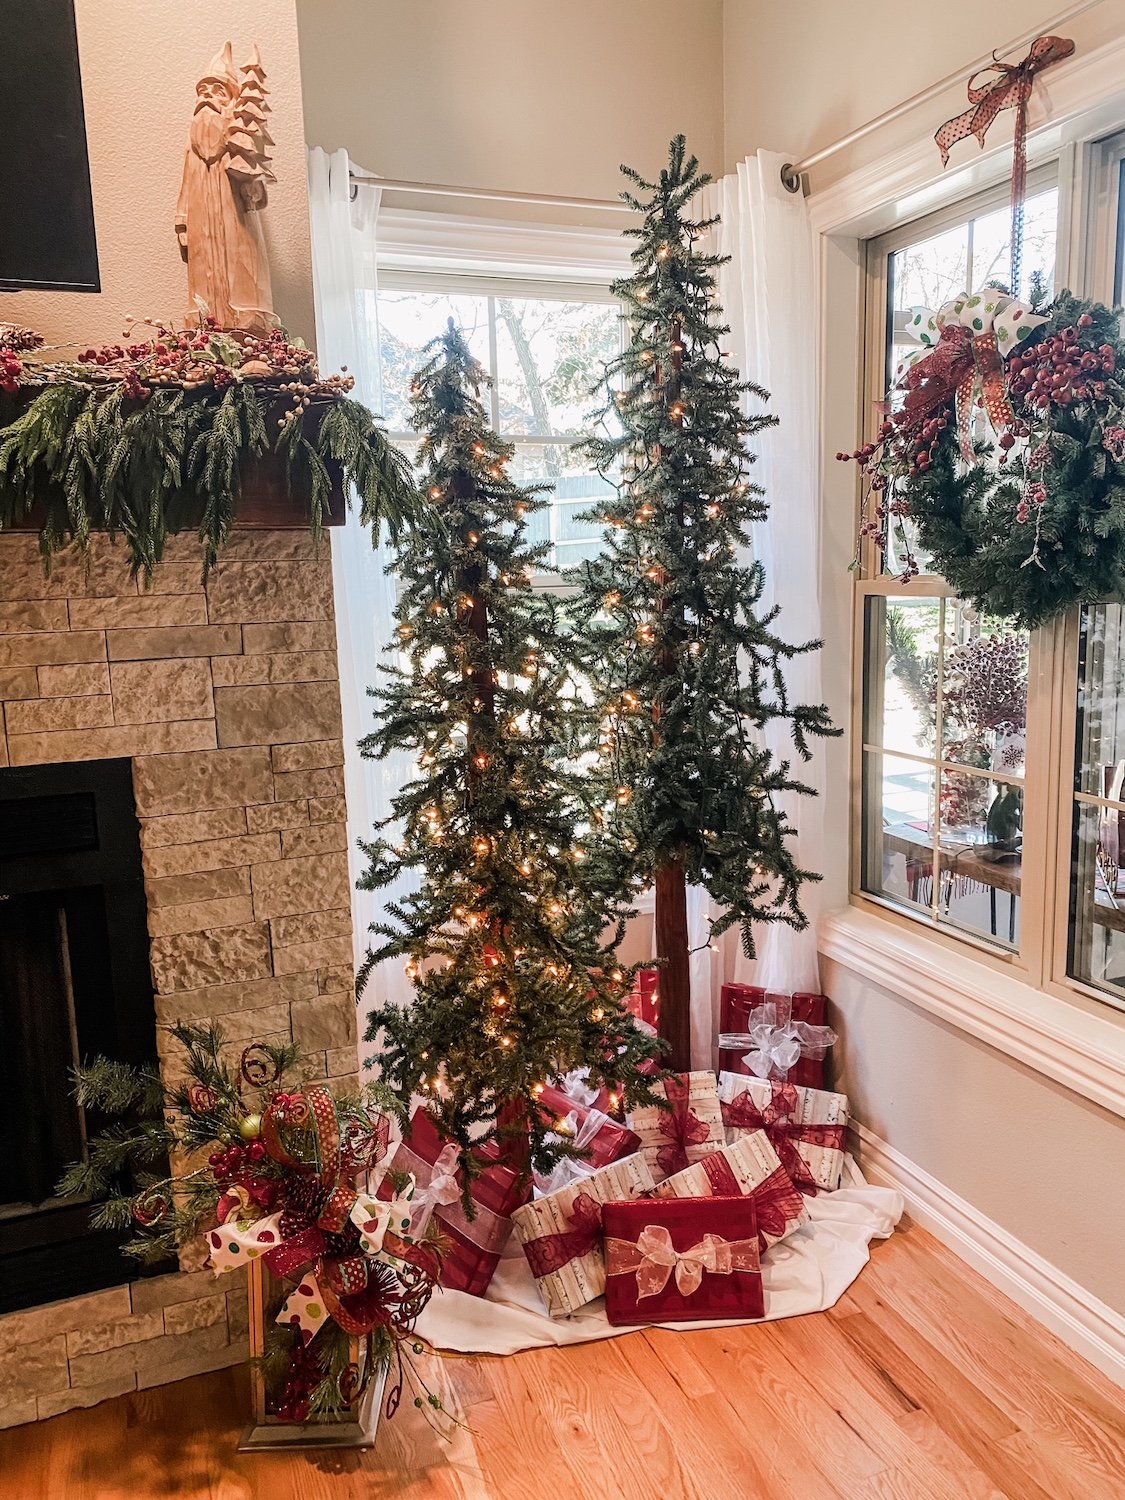
So what did I change this year? Probably the biggest change is the mantel decor….

Last year THIS soft touch garland was ALL the rage…everyone wanted it. Which is why it was sold out and on Ebay for mega bucks. So I waited until after Christmas and bought it when it was back in stock. Problem was, I forgot I bought it, several times, and by the time I brought down all my Christmas decor I had 10 strands of it along with three soft touch wreaths I have NO idea what to do with!

No biggy…while it is a beautiful garland, you really have to layer it to get a good thickness. On my living room mantel I have 4 5’ strands and 1 15’ strand.

In the den I layered 5 5’ strands….

I used Command hooks about every 1-1 1'/2’ and floral wire to secure it.

I added a red velvet ribbon and these awesome bells….

I would love to link to the bells but as usual I have NO idea where I got them. I know I ordered them but from where? Not a clue!

Last year I layered the berry picks on the mantel…this year I layered them on top of the garland…just plain ole’ picks you can get at Hobby Lobby…four on each mantel.

Another new addition is this wood Santa….

I know WHO influenced me to buy it but have no idea WHERE he came from. I follow a couple of great ladies on Instagram…Deb and Danelle…and as influencers go they get me every time. Their style isn’t necessarily my style but they feature elements I love. Truthfully I think that is where the bell inspiration came from!

What drew me to this Santa was his “girth.” He’a skinny.

Okay, so here is the deal…ALL my Santas are skinny. I have NO idea what that is all about but it seems like every time I am drawn to a Santa he is on the anorexic side.

I kid you not.

Another element I added to my decor this year are the cabinets wreaths….

For several years I have wanted to add “mini” wreaths to my upper cabinets. I finally found am inspiration for what I wanted, but honestly, when I put it all together they came out a hair too big. Hardly “mini.”

So be it…maybe next year I’ll try again…for this year it is what it is….

The precious train!

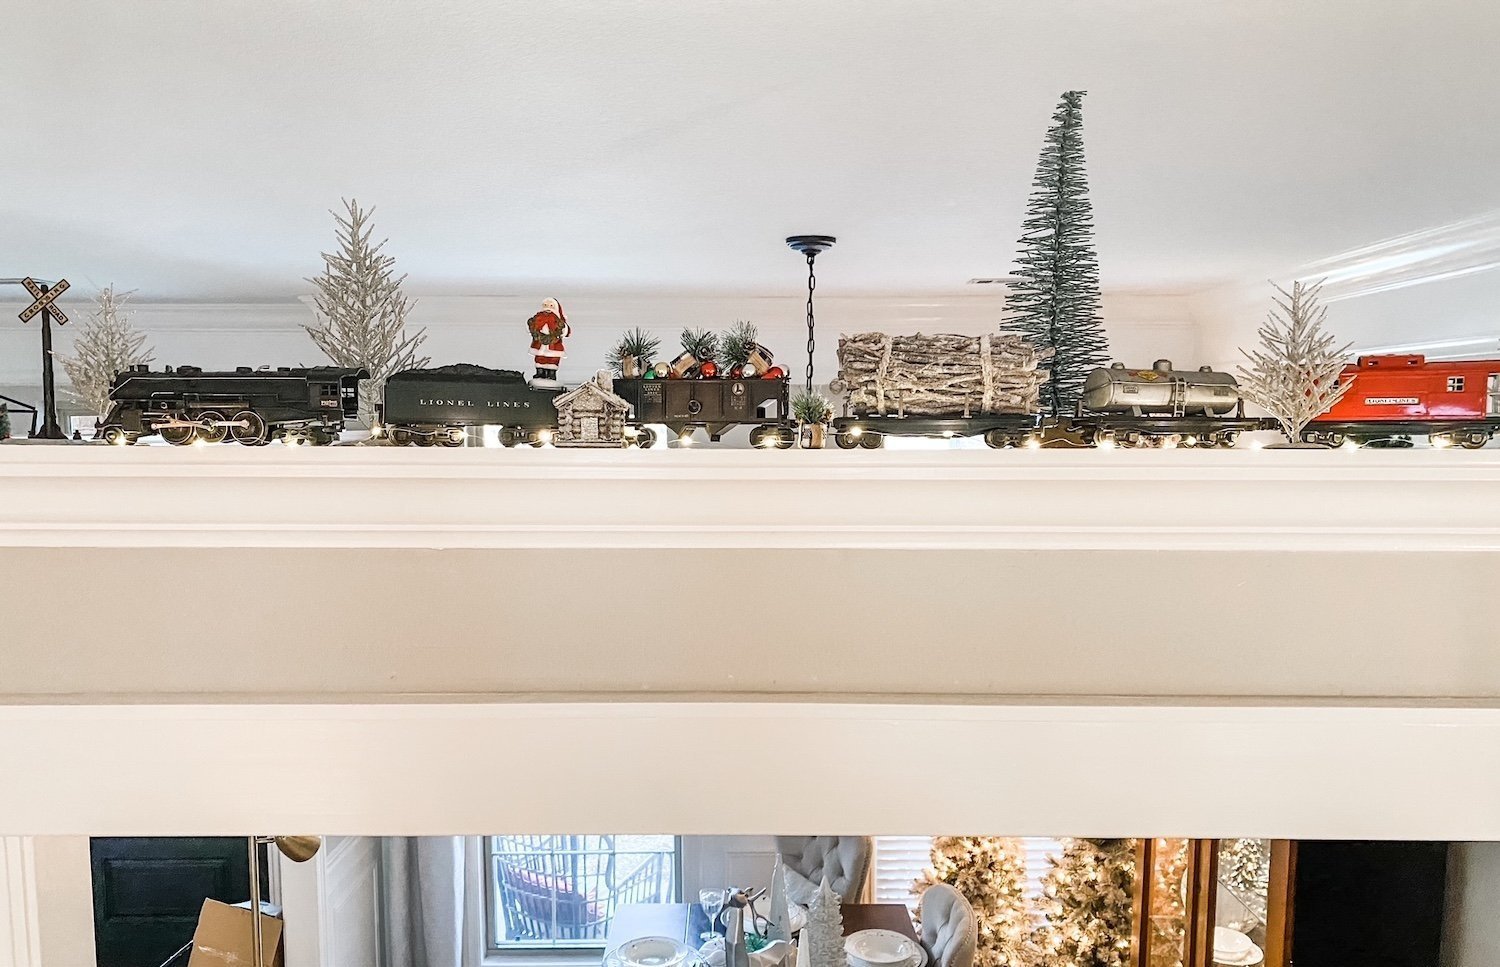
This train was a gift from Brian’s grandfather to his dad in the 40’s…it was used then. Last year we displayed it above the dining room. This year we got it up and running and put it around the tree in the office.

We didn’t put it around the main tree in the living room because 1) too many gifts under that tree and 2) the SLIGHTEST bump derails it and the living room is a high traffic area.

Not sure Callum is really old enough to appreciate it but I sure love it!!!!

And now the pièce de résistance…the final tree in my life long dream of having a tree in every room!!!

For years I swore if I had the time AND the money, I would put a tree in every room of my house. Last year the goal was complete.

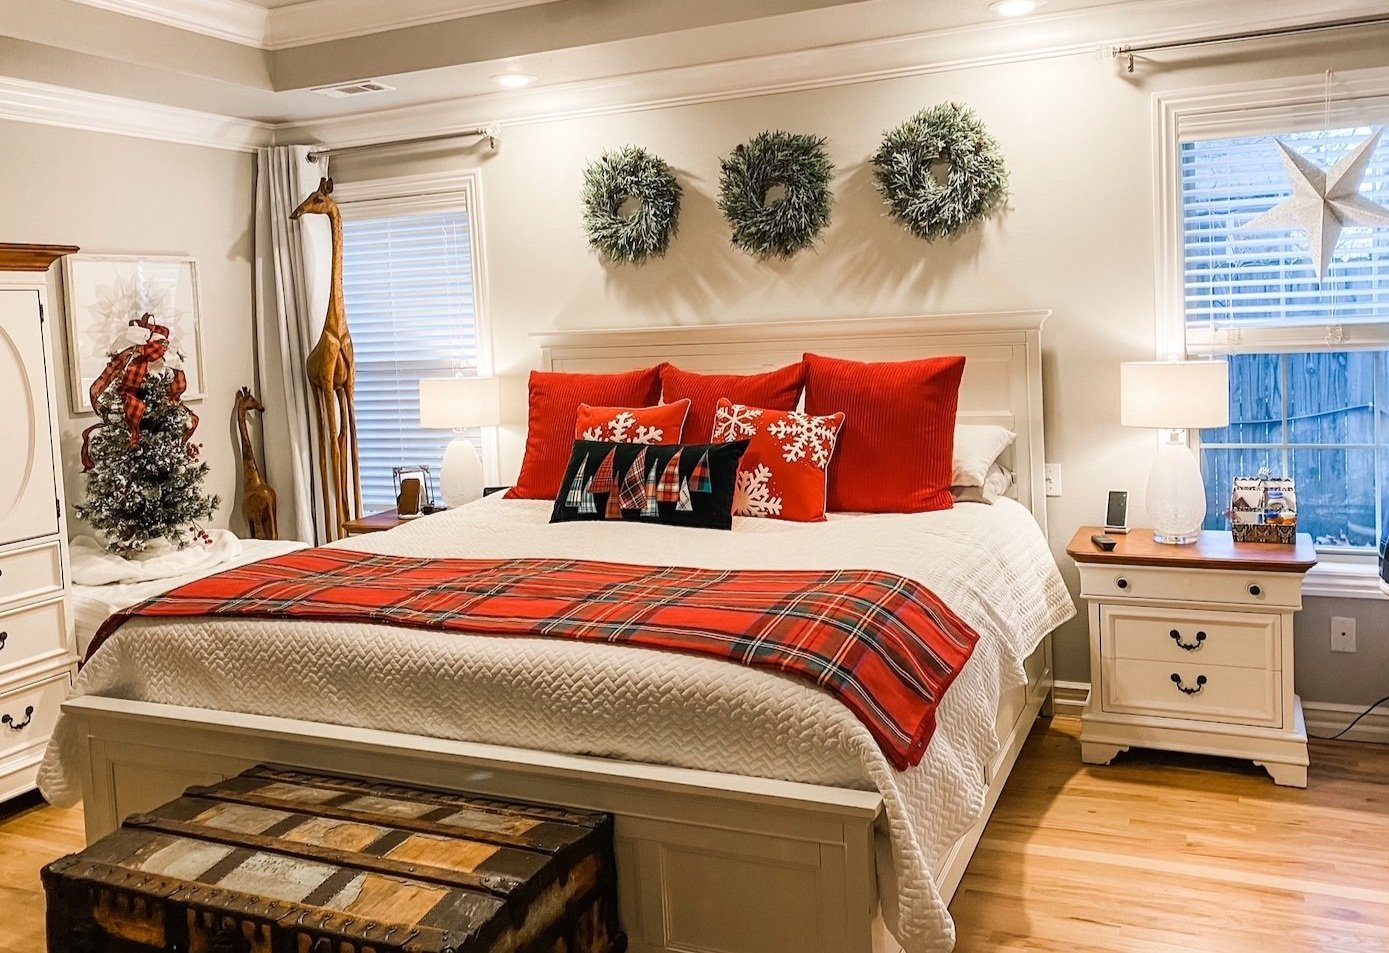
The master bedroom tree!

I added a few little knick knacks on the highboy. Just a few little things from Home Goods…nothing fancy.

The office….

The wreath is new…a tad over powering. Again, I tend to “go big” and then I’m not so thrilled with the result. Meh…next year I’ll change it!

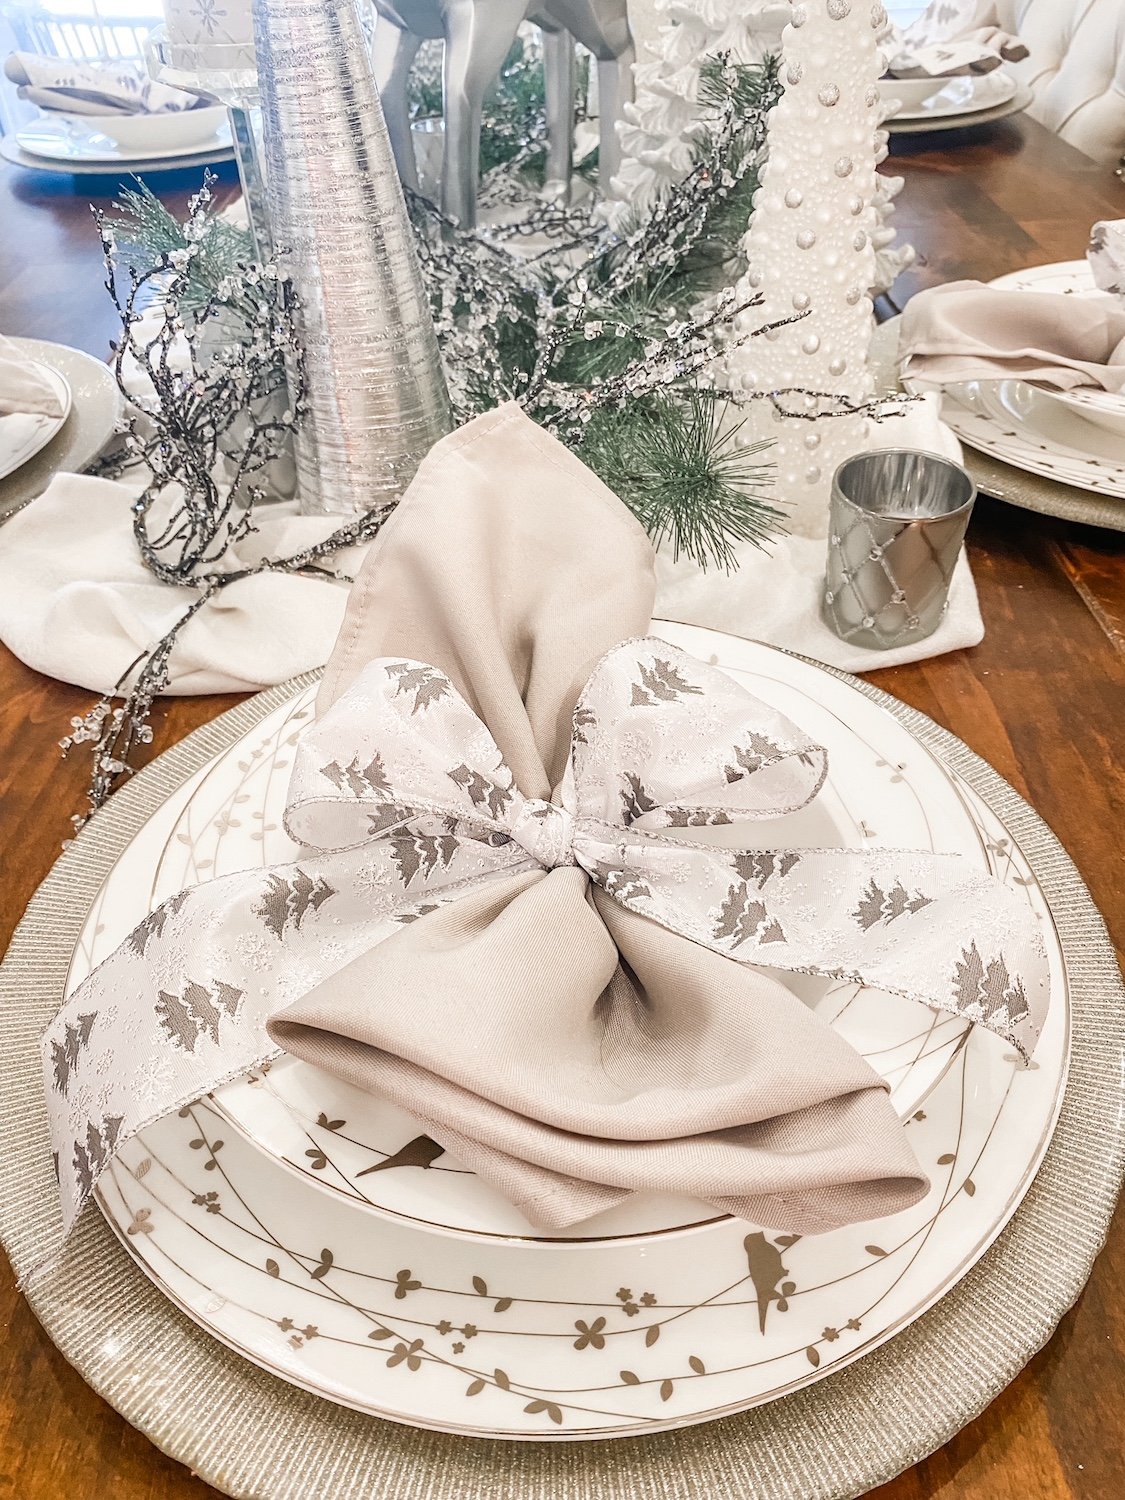
The dining room….

This is always one of my favorite rooms to decorate.. I love the neutrals even though I am drawn to all the vibrant holiday colors in the other rooms.

I like to keep the place settings out even though we don’t usually use these dishes because they have to be hand washed. Simple but elegant.

The sunroom….

I have shared this room before. It is my “Stewart plaid” room in honor of my “Stewart family.” Love it and I am always looking for more Stewart plaid elements to put in here. This year my sweet friend Carrie brought me this precious decoration from Italy!

The den…

The breakfast room….

Not all the trees have decorations…some just have lights. That’s okay. They are still pretty and the four that are decorated take enough time!

The entry…

Little has changed here…added some little wooden trees and a Christmas sign on the trim…another PJ pillow. Love the view into the office!

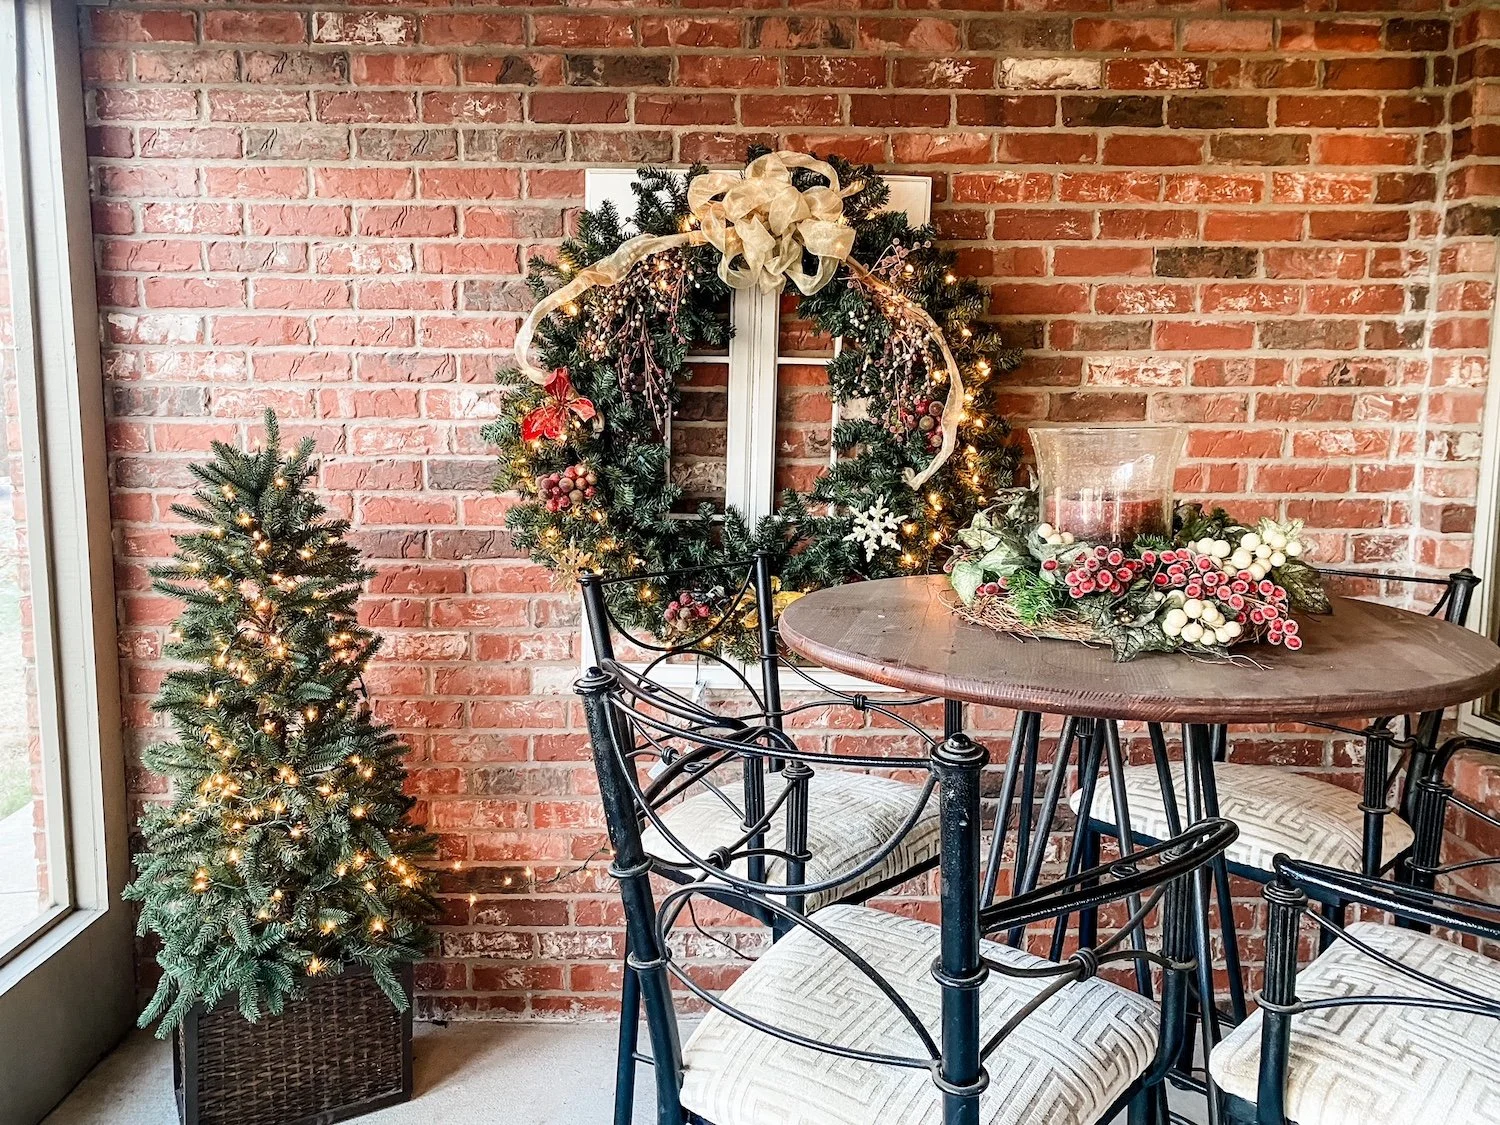
The screened porch….

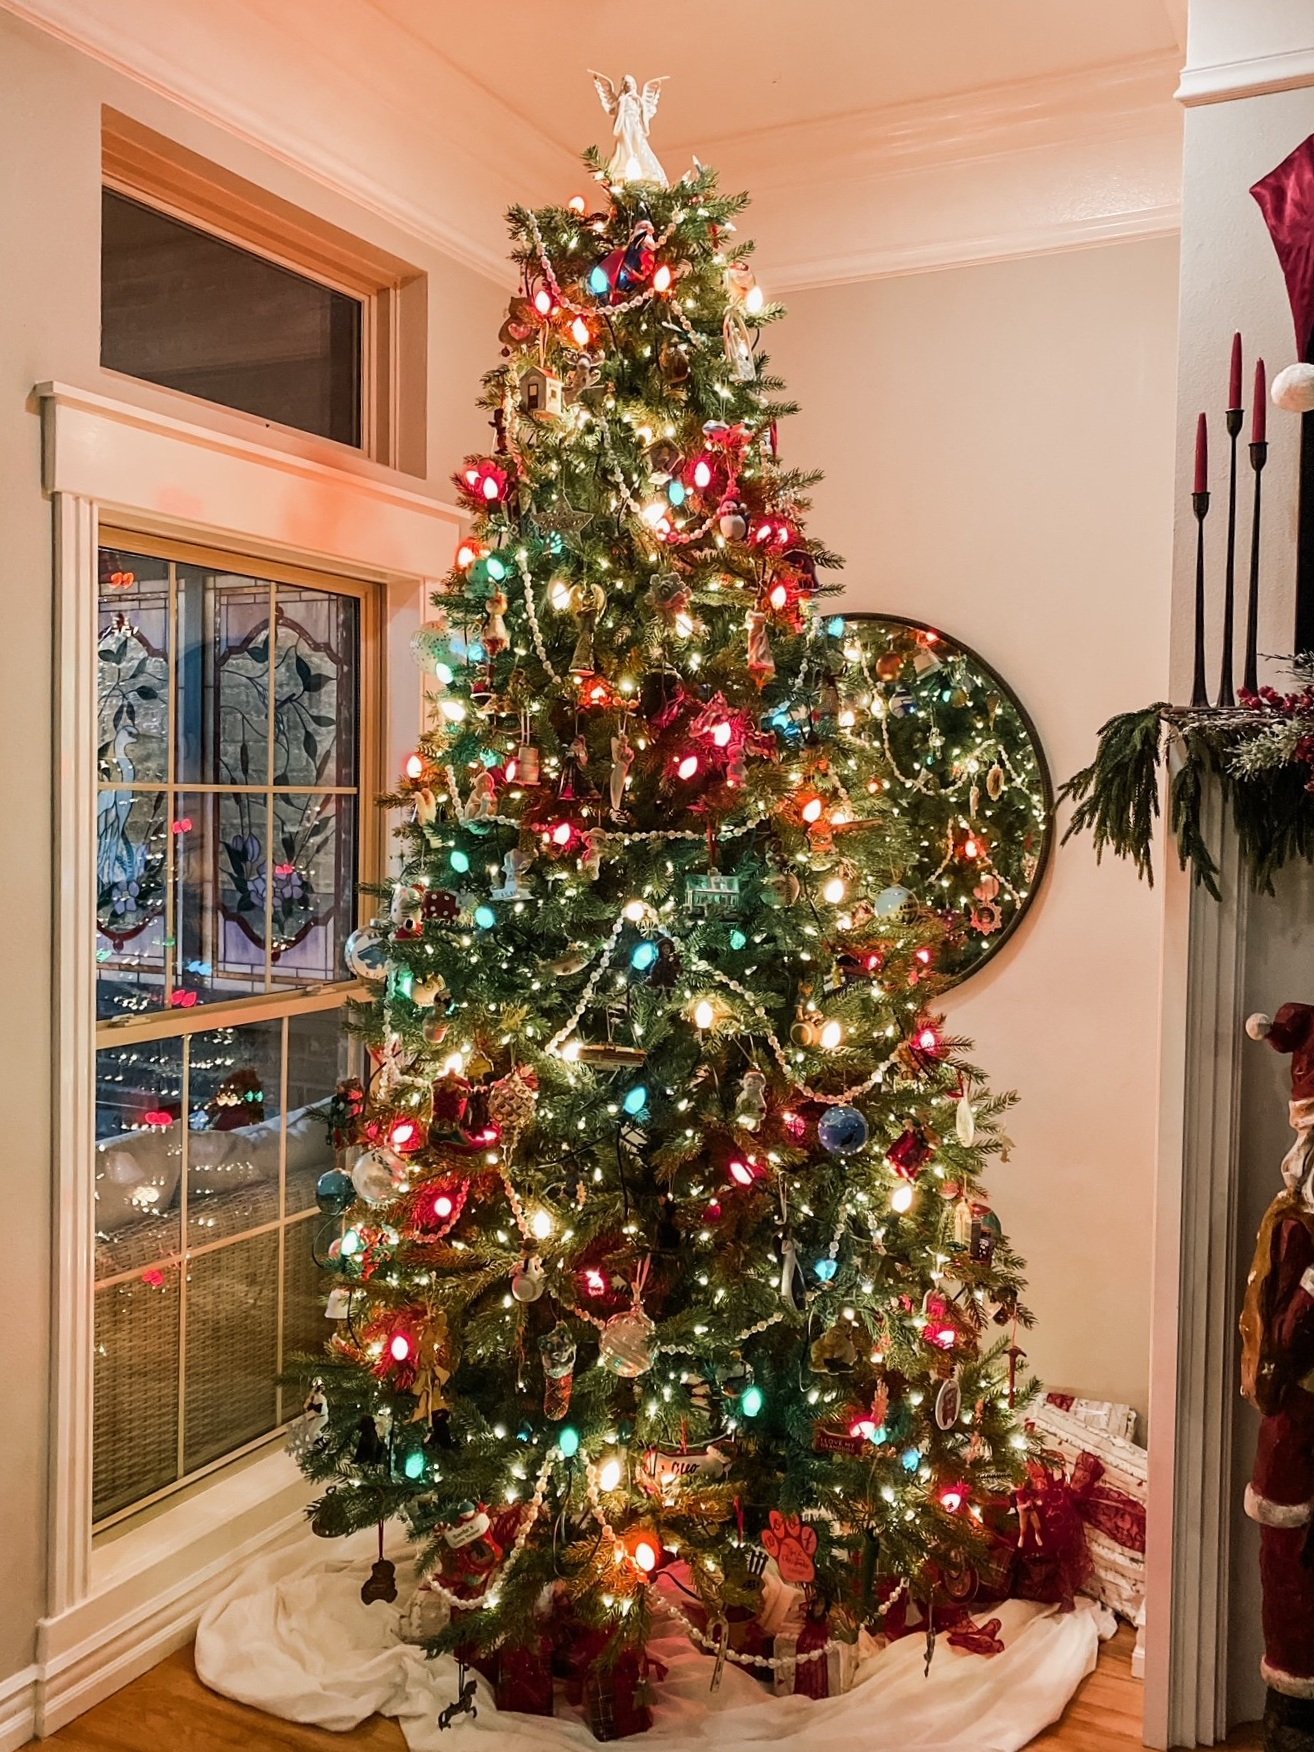
And of course the main tree in the living room….

All these trees are connected to remotes (THIS is one I use and LOVE) and are turned on every day. I don’t even want to tell you what my electric bill is for the month of December. Suffice it to say it is cheaper to cool this 3500 s.f. house than to light it up…lol!!!

But I love it and as long as I am physically able to do it, I will. Then I may hire it done!

I love this holiday and it seems that year after year I do indeed add something new. I hope something I did will inspire you to add a little more to your home.

Starting a holiday tradition...

It is never too late.

Time flies.

Before you know it, decades have passed and that little thing you started doing 20-30-40 years ago is now a treasured tradition that will be passed down for generations.

Even if you didn’t realize it at the time…it was just something you did every year.

I’ve shared this story before…when my oldest (now 42) was a baby, my mother started giving her a few precious ornaments every Christmars. She did the same for the boys when they were babies (now 34 and 35) and again with my baby (now 26). After 40+ years of giving my 4 children a couple of special ornaments every year, my tree is bursting with heirloom treasures.

There are the wooden ornaments she gave them from her and my dad’s trip to Yellowstone…

The ornament from the year Katie and I went to New York

College graduation….

Our trip to Georgetown, Colorado….

A Lenox moose representing the year Katie shot her first deer….

Every single ornament on my tree has a special meaning….ornaments representing every milestone in our lives and souvenirs from our travels and my parent’s travels.

Even after giving Sarah all her ornaments, I still have a tree full. And now that my children are growing and creating their own homes with their own trees, they have begun the “tradition” of gifting me with ornaments with special meaning. Once all my kids have their own trees to decorate, mine will still have special ornaments from my travels and my children.

My mom is no longer here but I have carried on this little tradition she started 42 years ago. Every year I give each of my kids and grandkids an ornament from our travels or one representing something special in their lives. Baby’s first year, college graduation, a cruise to Alaska…..anything and everything special and memorable is represented on our Christmas trees.

It is never too late to start a “tradition.” We do PJs and ornaments.

What tradition will you start this year? Remember, every “tradition” starts somewhere with someone…give your children, grandchildren and great grandchildren a tradition to charish!

Getting ready for the holidays!

It’s been a minute.

I really haven’t had too much going on project-wise…little to share. I guess I could have shared the new water line I ran from my seasonal meter out front to the back yard. Or maybe the repairs I made to a neighbor’s kitchen island or garbage disposal. Could have shared the cute cupcakes the little girl next door and I made and delivered to our neighbors.

I could share the Alaskan cruise we went on in September. I’m not a travel blogger…just go! I promise you won’t be disappointed.

But seriously, no major projects. I have a few in the thinking/planning stage I will share in the coming months. One will be a room makeover for a very special “delivery” coming in May! Stay tuned!

So for now I will just share what is coming this weekend….CHRISTMAS!!!!!!

Yep…for the first time ever I am actually doing a little Christmas decorating BEFORE Thanksgiving!

Why? Well, it has been a lifelong dream to have a tree in every room of my house…and last year I finally achieved that dream.

It started with the “black and white” Christmas tree I put up in the office….I share that HERE.

This year we are going to set up the vintage train set around this tree.

Callum, our youngest grandson, will be 10 months old and he will LOVE it! This is the train set Brian’s grandfather gave his dad when he was a little boy…so Callum will be the 4th generation to enjoy!

The Stewart plaid tree is one I added to the sunroom two years ago…..I shared it HERE!

And for the first time ever, I decorated the master bedroom for the holidays….

What I didn’t share is the large red and white tree I added to this room later in the season.

So with these new additions, as well as ALL the Christmas decor through out the house, I just don’t think I can get it all done the weekend after Thanksgiving….the main tree in the living room takes an entire day!

So for the first time ever I am breaking my hard fast cardinal rule of NO CHRISTMAS BEFORE THANKSGIVING! I love fall decor and I really want to enjoy it for as long as I can. So I have decided to decorate the office, master bedroom and sunroom for Christmas since those rooms don’t have a lot of fall decor!

So stay tuned…at some point in the next few weeks I will share all the holiday decor….again. Little changes from year to year but it is my hope that something I do, and have done for years, may catch your eye and give you a little “Christmas inspiration!”

Happy Thanksgiving!

Stone step and front yard makeover reveal....

HERE I shared the start of this little project!

The stone steps were a major part of this little makeover…and in all honesty the hard part. Moving these stone steps into place took some serious planning, preparation and muscle.

Now all it needed was a little topsoil and sod!

No biggy right?

WRONG!!!!!

The retaining wall was there for a reason…to keep the yard from having a severe slope and prevent serious erosion.

This was day one…

…after new soil and sod three years ago….

So it was super important to make sure that after I removed the retaining wall the grade was gradual.

First I used the leftover backfill to create a solid base where we removed the block retaining wall.

Then LOTS of topsoil and some very careful grading….

I used quality shifted top soil and made sure it was well compacted and level before putting down sod. After I installed the sod I noticed a few “low” spots, so I pulled back the sod and added a little soil.

This yard is primarily shade so I used fescue sod which is what we had put down three years ago. Fescue is a pretty grass but it does require shade and annual reseeding, unlike bermuda.

So…how did it all turn out….

I LOVE it! Love it!

By spring the new sod will bed down and seamlessly blend into the existing lawn!

Still debating what to plant to the right of the steps where I expanded the flower bed, but that will come in time. Maybe another dogwood…maybe a few azaleas.

It may appear as if the steps go “nowhere” but the seasonal water is a hair in front of them…I use the steps all the time!

My original plan included cladding the landscaping blocks to the right of the steps and behind the shade bed with native stone. Truthfully, I don’t even notice them now and I really think I will just leave it be for the time being.

Right now I am just focused on the sod….lots of water and a little bit of sun. So far, so good!

Fall is literally right around the corner so in the next few weeks the leaves will start falling…hoping the sod will be rooted and ready!

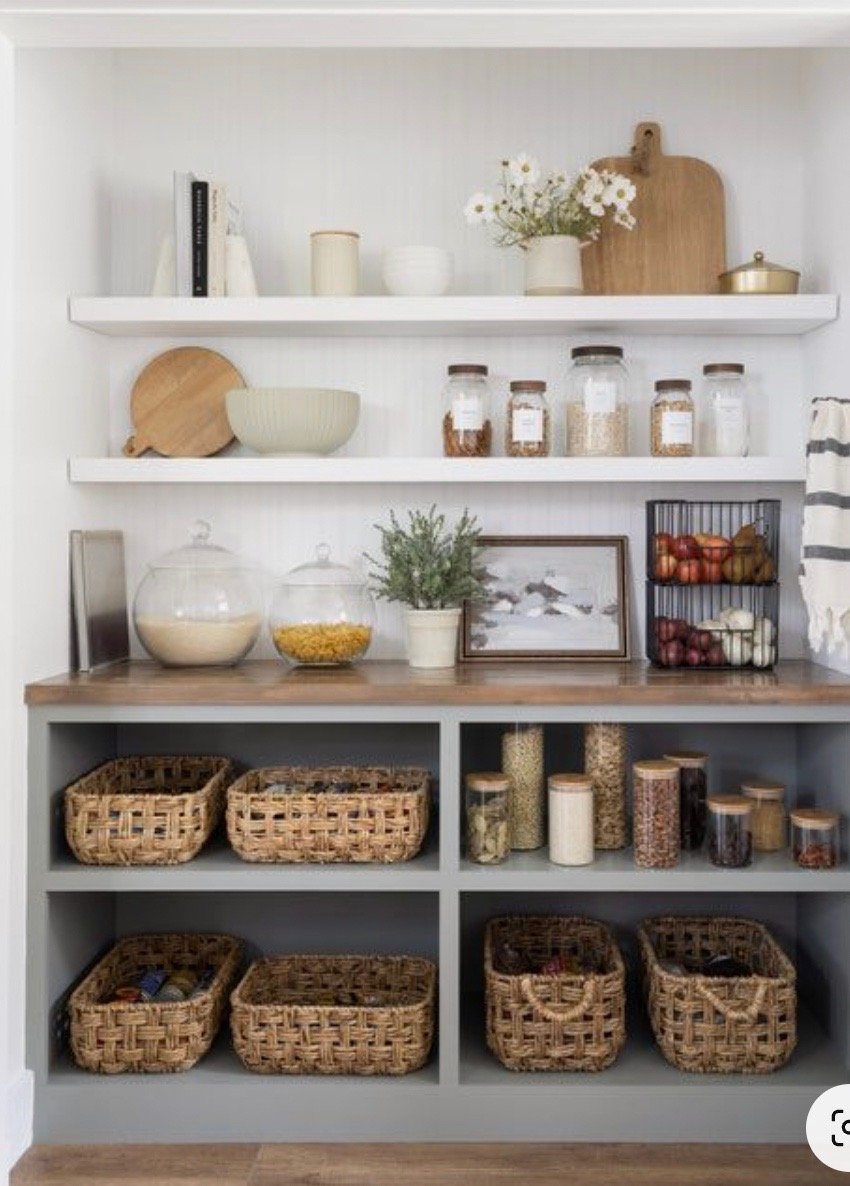
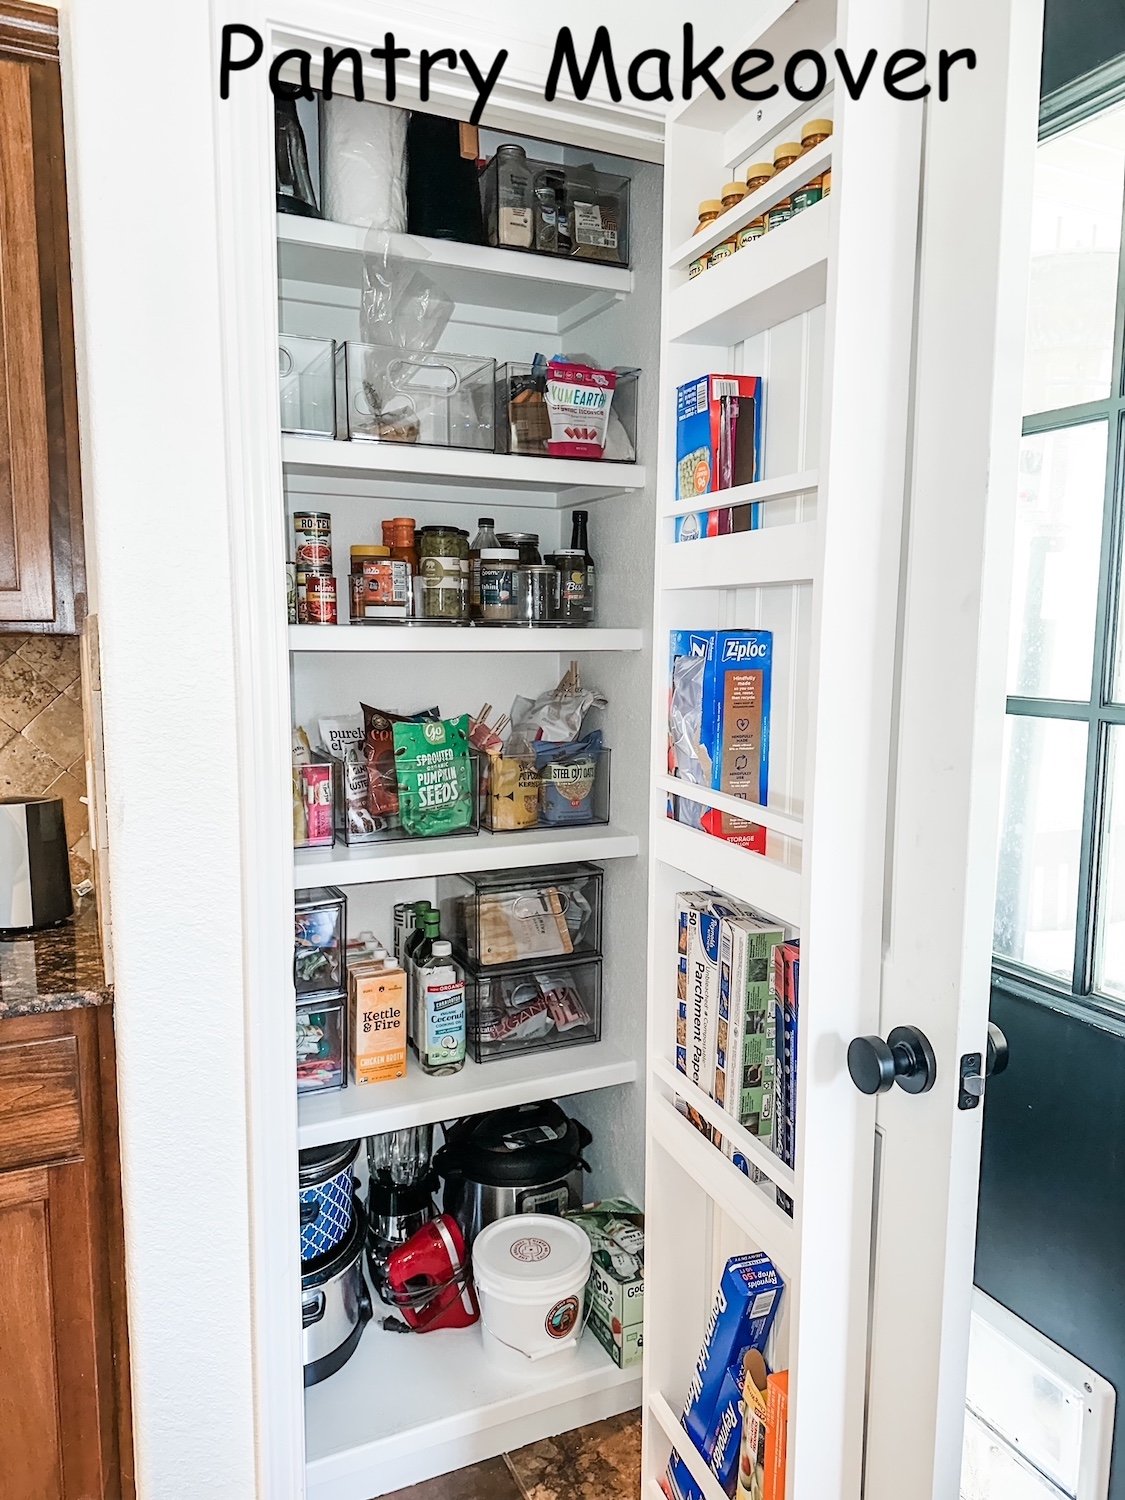
A small pantry makeover....

I love pantry projects…HERE I shared mine!

There is no shortage of inspiration on Pinterest for pantry makeovers…you will find one for every possible size and configuration!

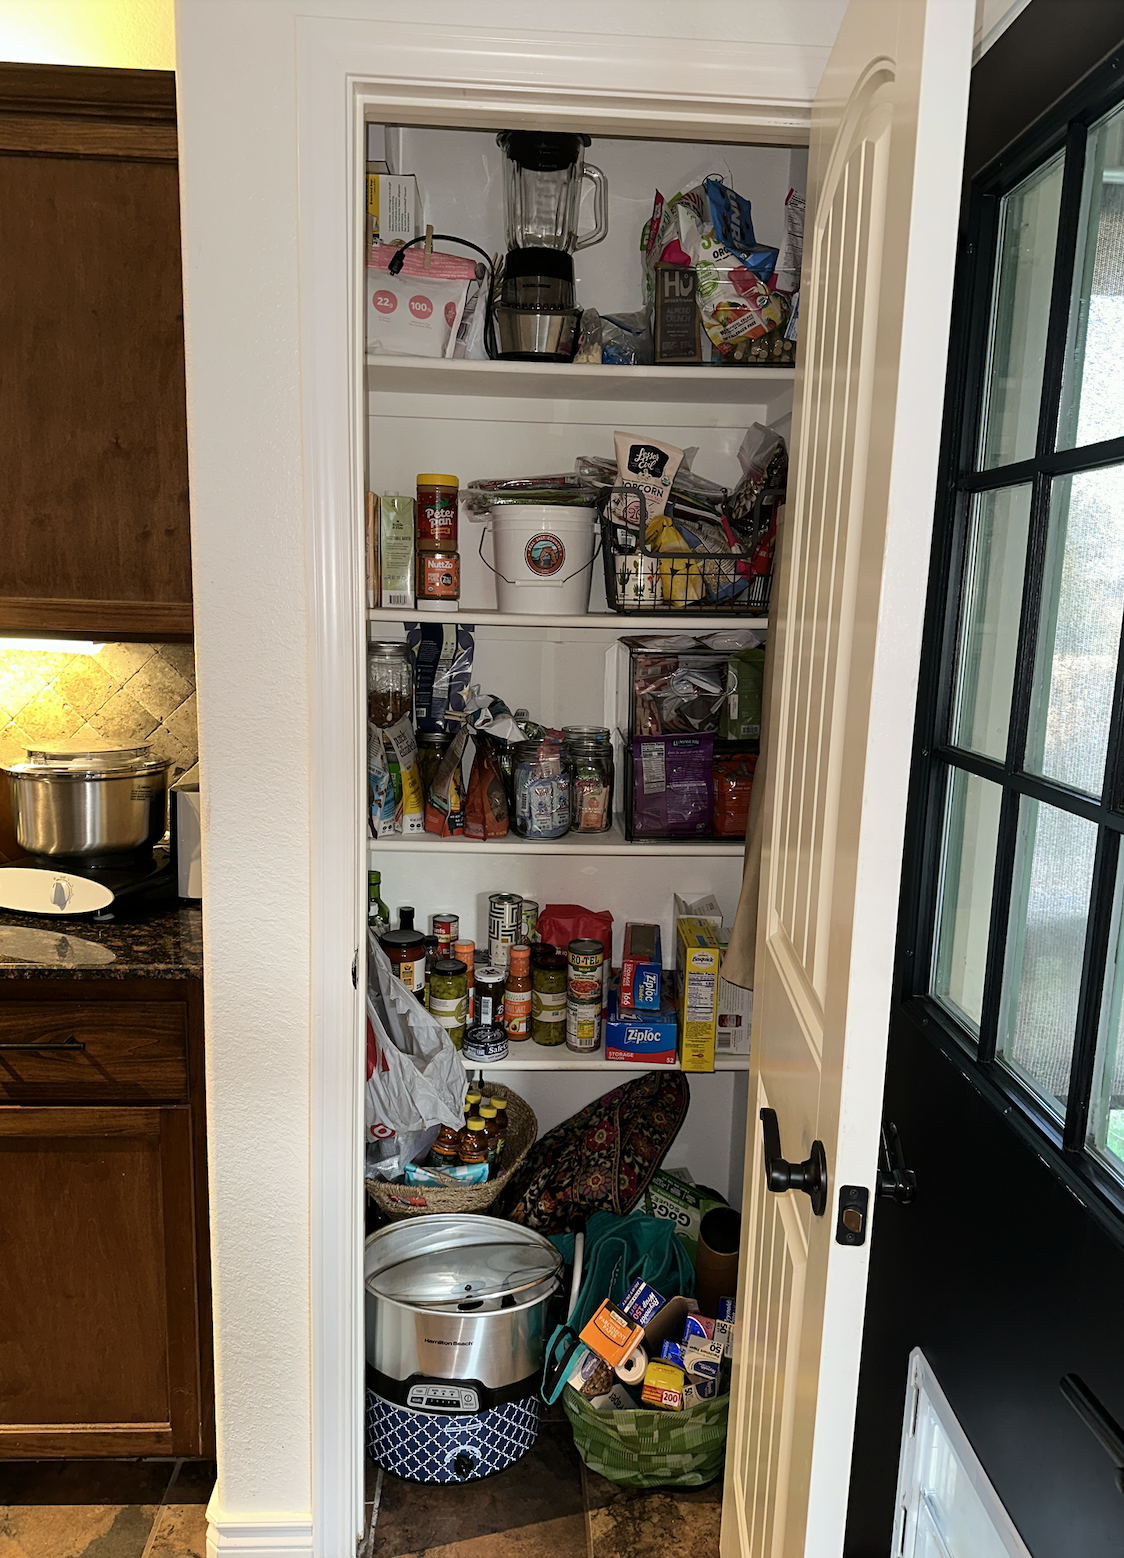
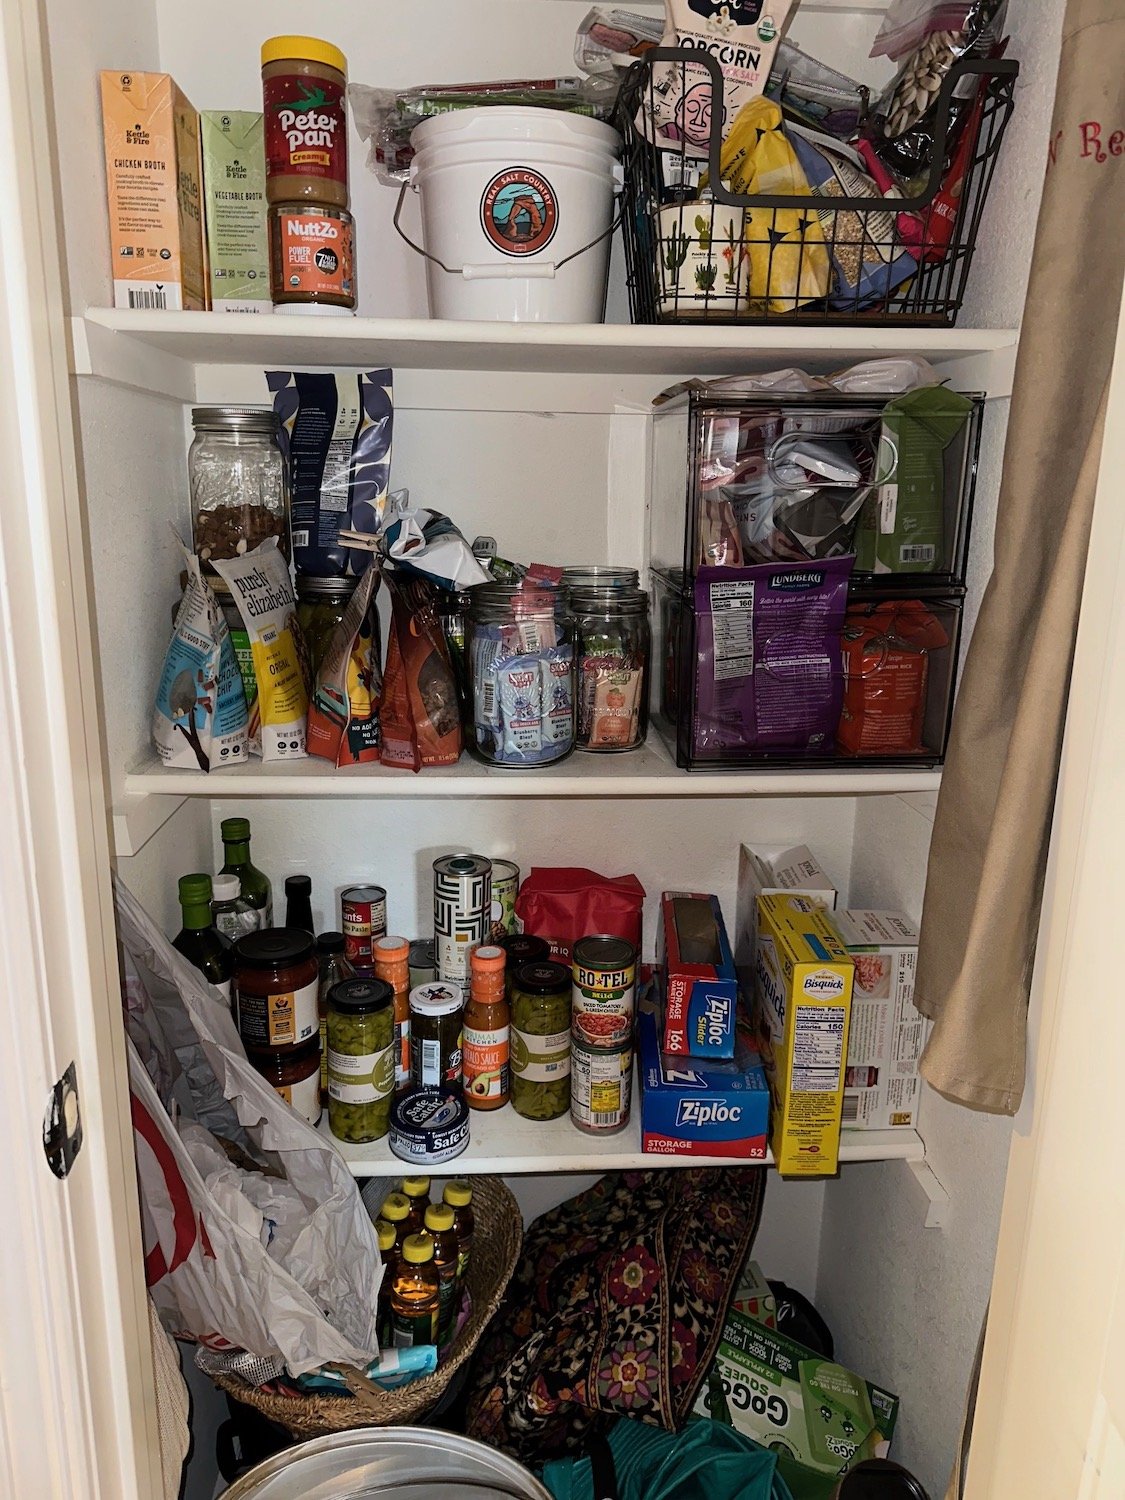
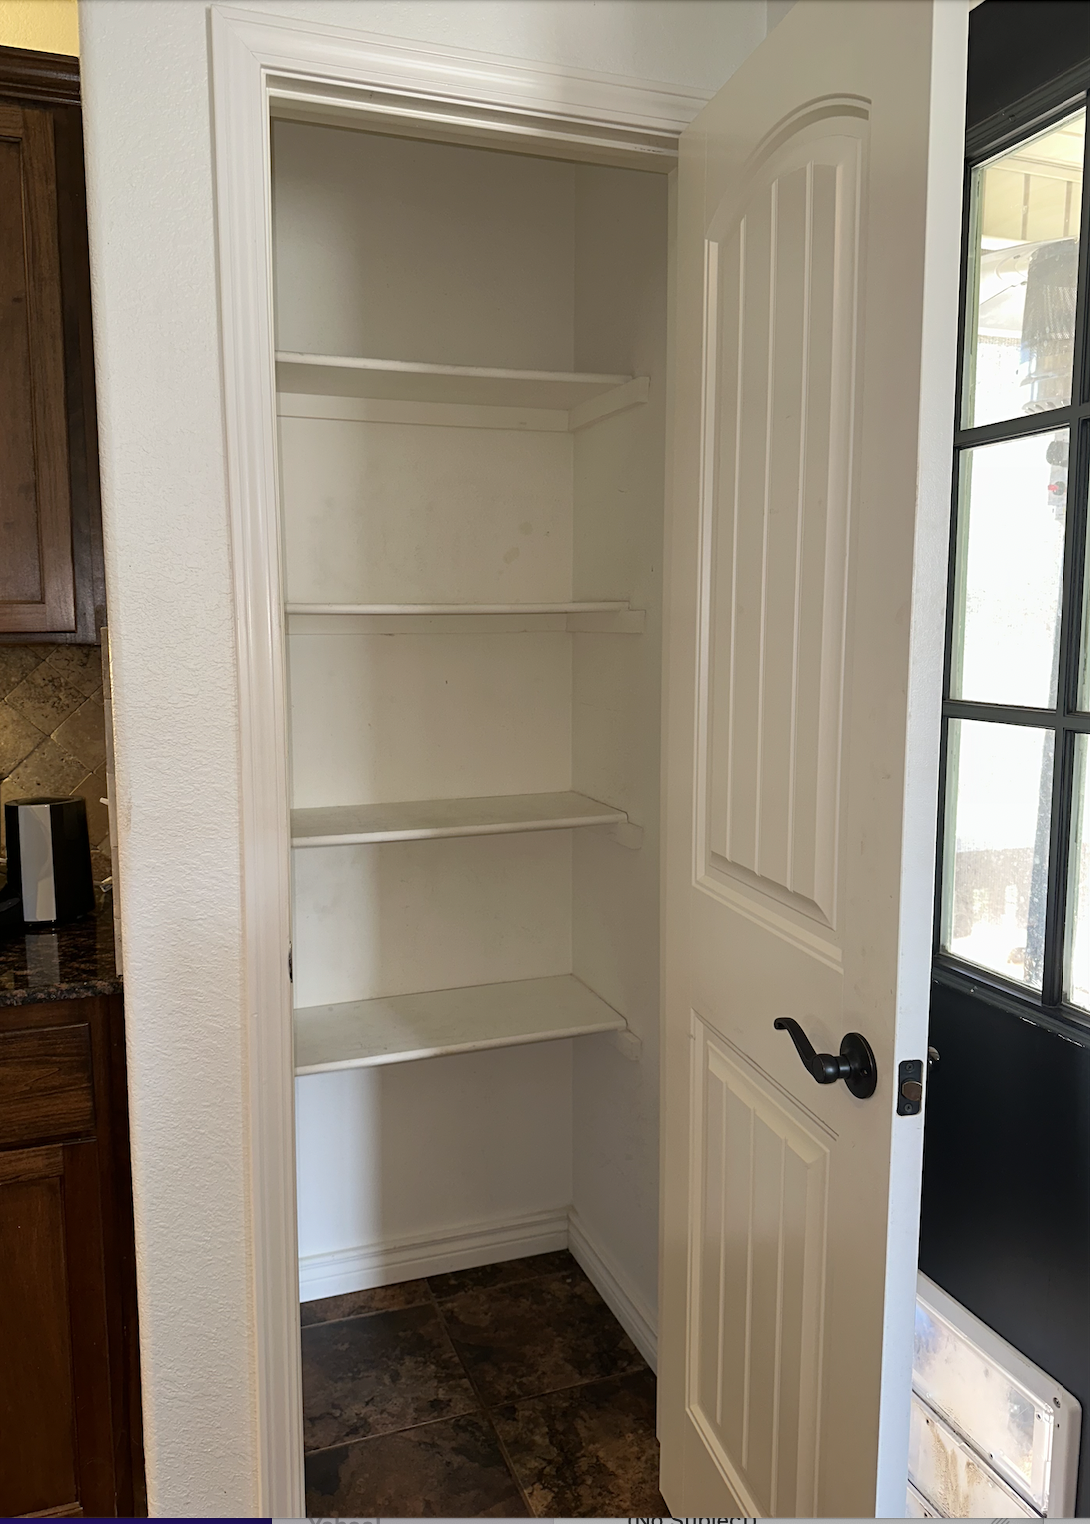
My son and daughter-in-law, Hannah, have a great kitchen but a small pantry with typical poorly designed shelving placement…it was a MESS!

Soooo much wasted space!

For months we discussed giving it a little makeover, but they really wanted a house that is a tad bigger on a few acres further south. So there was a chance they would not be staying in this house.

Several months ago they found one, made an offer, got it accepted and were all set to rent their current home!

So the pantry project got nixed.

Unfortunately, the deal fell through because of a boundary dispute.

Hannah was bummed. (She had already started packing!)

So the pantry project was back on and a few weeks ago we tackled it!

The first thing we did was empty everything that was in the pantry and took measurements.

After emptying the pantry, we “demoed” EVERYTHING…shelving, supports, trim.

I usually repair and paint the walls, install the new shelving, caulk, putty, lightly sand, then paint the shelving. All the shelving is already primed and sanded before I install it so that I don’t have to do any heavy sanding in the house.

When designing the shelving placement in a pantry it is super important that you identify EVERYTHING you may want to store in the space and then measure it.

If you think you want baskets, bins or jars, figure out what will go in what and how many will fit in your space BEFORE you go buy them…or at the very least keep your receipt!

Take measurements of EVERYTHING!

These measurements are important because you can then design your shelving placement based on how tall everything is. You don’t want a bunch of wasted space.

Case in point…can goods stacked two high are less than 9” tall…why would you dedicate a shelf with 12” clearance for canned goods. Paper towels are generally 12” tall…why dedicate a 15” shelf for them.

Add up 3-4 shelves that are 3-4” taller than they need to be and next thing you know you have lost an entire shelf…critical storage space for a small pantry!

In this case we gained an entire shelf. Crock pots and the insta pot are stored low because they are heavy…the extra coffee pot and extra paper towels are stored up high.

We built a shelf 4” off the floor…not necessary for actual storage but they have a dog and her hair inevitably blew under the door and ended up all over everything that was sitting on the floor.

I made the shelving out of 1/2” plywood, the bullnose and supports out of pre-primed 1x2s. All the shelves were 14” deep, except the top…it was 12” deep.

We also built a door shelf system that is perfect for aluminum foil, plastic wrap, storage bags, etc. (HERE I shared one I made for my house on Lankford…I built two for this house! One is in the garage and the other is used for my cake pans and baking supplies.)

You can buy wire door storage system but building one allowed us to place shelves as needed for specific items.

The end result is amazing! Neat, clean and organized!

I am a big fan of clear plastic bins vs. baskets. I use both since there is some stuff I don’t want to see that can be stored in pretty baskets (open chip bags, storage containers, etc) but the baskets are labeled. (Again, check out my pantry HERE!)

She loved it so much she tackled her kitchen cabinets and organized them with storage bins and jars.

Organizing a space (whether it be a pantry, closet or drawer) not only frees up space, but I have learned that if a space is pretty, clean and organized I tend to want to keep it that way.

When everything has a place and everything is where it belongs it makes my life so much easier!

(HERE I share my trips and tricks to getting and staying organized!)

And remember, you don’t have to take on a big DIY project to get a space cleaned and organized…and not every space in your house needs to be done in a day, a week or a month.

Commit to take one space a month…or even every other month….purge, clean, organize. I think once you get started and realize how much easier it makes your life, you will want to keep organizing every space in your house…just like Hannah!

I may not be around for several weeks…this is our vacation month and this year we are going to take a VERY special vacations! Can’t wait to share!


The den window reveal!

From day one…three years. That is how long I have wanted to put a window in this room!

It was a cave. There are windows and a door on one wall but they are covered by the enclosed sunroom so the natural light is seriously defused. (HERE I swore I was through with major projecting on the house…HA!)

I crave natural light. This house has TONS of windows, but the majority are adjacent to a sunporch, screened porch and covered front porch. All which I am grateful for…I just wanted a hair more light in the den.

My original thought was to put a window on both sides of the fireplace. Unfortunately, the guest room closet extends out behind the bookcase to the left of the fireplace…so that is a no-go. That’s okay…I need the built in bookcase. (HERE you can check out how I refaced the fireplace!)

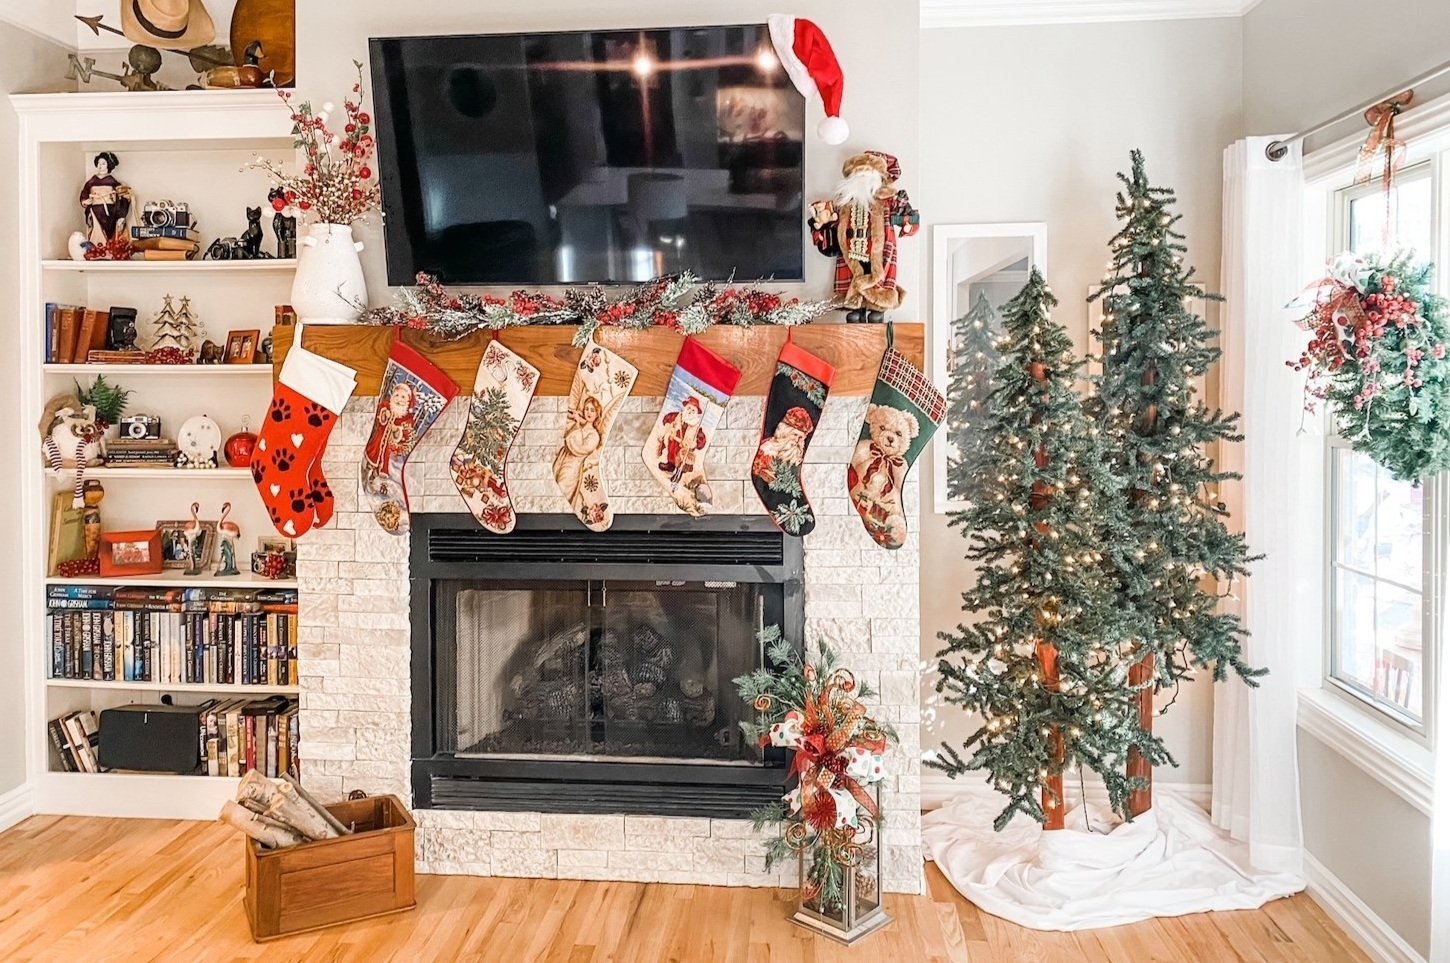
(Obviously I did not take “before pics” and the only picture I have of this space is from Christmas!)

A window on the right of the fireplace is doable….for someone like me with a bit of experience. Personally, I don’t think this is a “novice DIYer” project. If you are hell-bent, watch TONS of tutorials first and be prepared with a stand-by sheetrocker, framer, electrician, trim carpenter and brick/siding expert just in case you find yourself in over your head.

Even then, if you don’t have a basic understanding of how a home is constructed, I wouldn’t even attempt it. (HERE I posted a little bit about framing for a door or window)

Also, I highly suggest you check your local codes. You may need to pull a permit to modify framing.

As you can see from the post when I modified the laundry room opening I knew I was going to have to put in a header and maybe a few extra studs. Since I was only installing a 32” window, I figured I could just get by with a 2x4 or 2x6 (at the most) header.

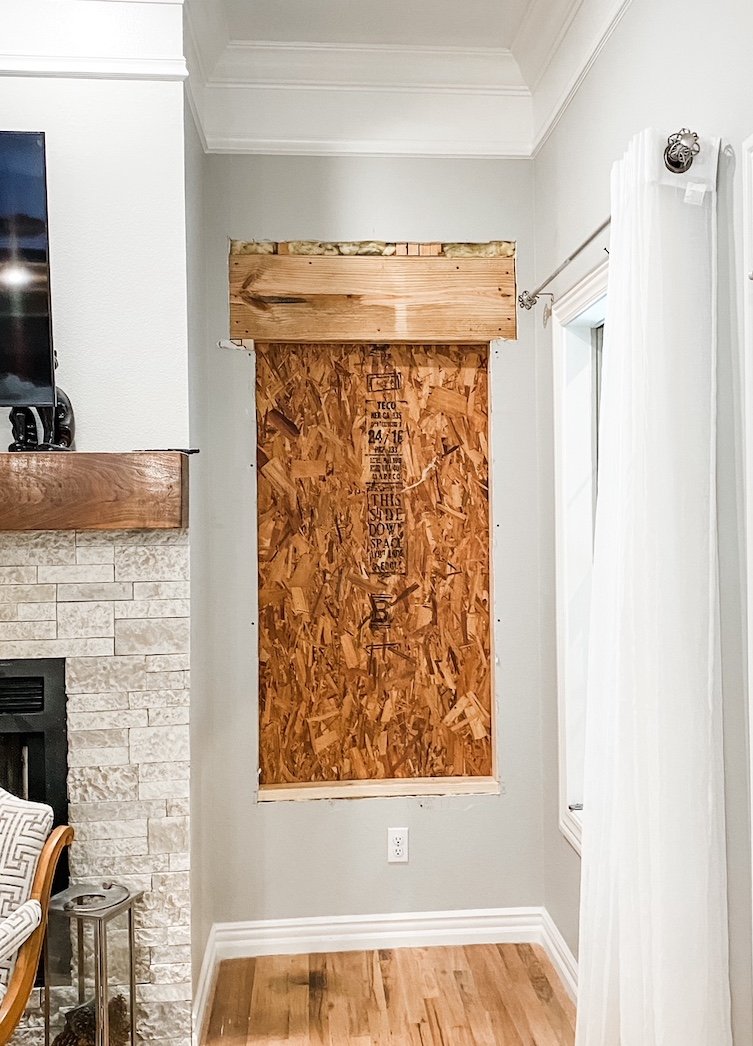
Nope. When I opened the wall I found a support that was FOUR 2x4 sandwiched together…have no idea what that was all about. I went into the attic to see if maybe they loaded the roof rafters or something onto that area…not as far as I could tell. But what is there is there and I wasn’t about to assume it was just over kill.

Which meant I needed to put in a 12” header which meant I had to move the exterior light to make room for a bigger header, cut out way more sheetrock than I anticipated and add more stud supports.

CURSES!

All that being said, again it is doable. So if like me, you just HAVE to have a window (or even a door), go for it!!!

And go for it I did.

Again, I am not really a tutorial kinda person…there are tons out there, why reinvent the wheel. And honestly, every project will be different depending on what is behind the sheetrock.

Case in point.

After all this “rough in” framing was done, I drilled through the corners of the opening (using a wood bit to drill through the plywood and a masonry bit to drill through the brick) and marked where the actual opening would be.

My brick guy then came and cut out the existing brick 3” from the mark where the actual window opening would be….

You can see in this picture where I had to move the existing exterior light!

While I was waiting on the brick guy I was able to get the sheetrock repair done…HERE I shared a little tip about sanding sheetrock in the house!

When the window finally came in, I cut out the plywood…MAN OH MAN!!!!

If it weren’t 100 degrees out I would have just left a big ole’ hole in the wall.

There are TONS of tutorials on how to properly install a window…read them and follow them to a T. Find one that makes sense to you!

After the window was installed, trim and paint! The brick guy came back and installed a window “casing” with new brick around the window ….

This house is 23 years old so I can’t find the exact brick to match but I found one that was pretty close! (HERE I shared how I used this “good enough” brick on my shop!) This is why he cut the brick 3” around the actual rough in opening.

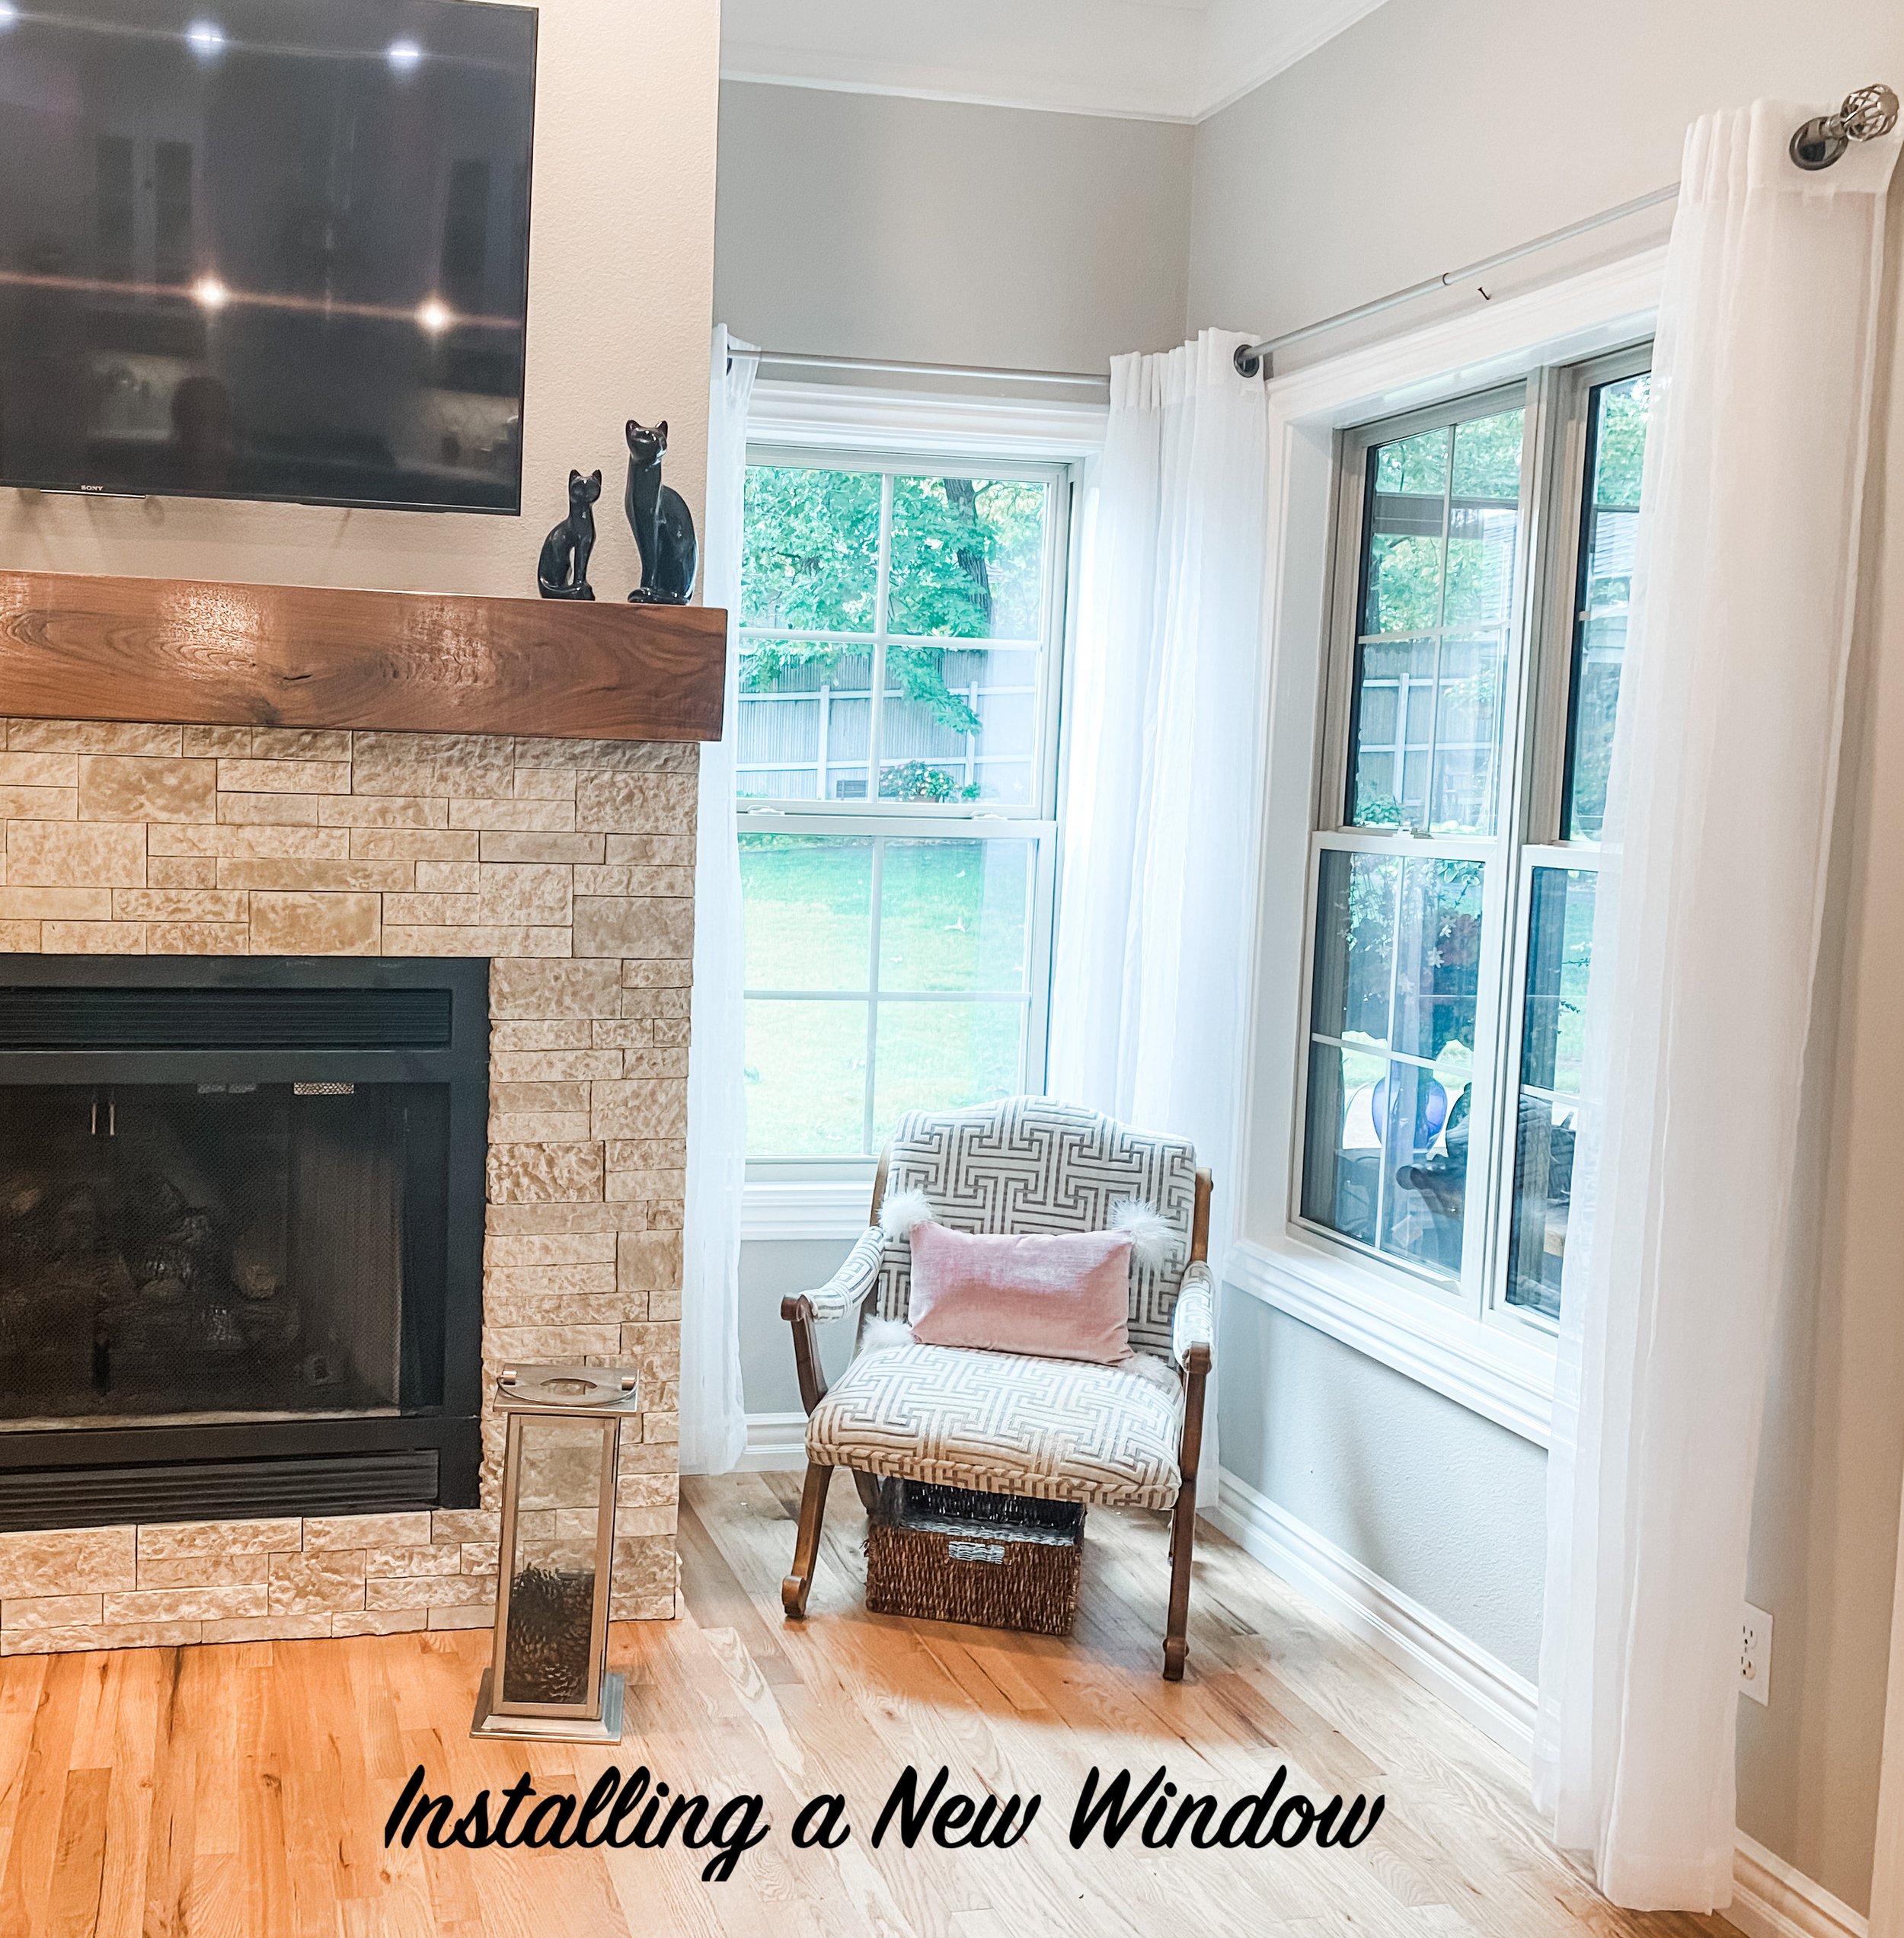
What a difference this little project made!

I LOVE IT!

Fortunately I originally bought matching sheers for the breakfast window and the den window. I couldn’t find sheers that matched them so I took the sheers from the breakfast window and used them for the new window and bought new for the breakfast window.

I love all the the wonderful light and the view of my flowerbeds! Blooming dogwoods in the spring and fall foliage in the few months!

Lovely!

How to sand sheetrock without a big mess!

My recent big project is one I have been eyeballing since day one.

Windows in the den next to the fireplace.

(Naturally I neglected to take a “before” picture so this is the only one I could find of the space…Christmas!)

My original plan was to remove the bookcase to the left of the fireplace but I discovered that the closet in the guest bedroom extends out so that part of the exterior wall is partially covered by that guest closet….poo.

So the only option was to leave the bookcase, which I honestly need, and just add a window to the right of the fireplace.

Why?

Well first, I love natural light…one thing I love about this house is the abundance of exterior windows.

The only problem is MOST are adjacent to a covered patio, a sunroom and a screened porch. So MOST of the natural light is seriously filtered.

Great for heating and cooling, not so great if you like natural light.

The den has windows and an exterior door, unfortunately both are on the wall adjacent to the sunporch.

Nice windows, but again the light is seriously defused. So the den was basically a cave.

ANYWHO, I wanted a window in the den…for light and for fresh air.

So, I busted out the sheetrock, removed the exterior brick, moved some electrical outlets and fixtures and framed in for a new window.

Sounds so simple. It was NOT!

First, you never know what is behind your sheetrock. In my case there was serious framing. Then there was the electric outlets and exterior light fixture. Of course insulation and brick and Lord I can’t even remember it all.

One a scale of 1-10 this is a 10 DIY project. For me, not that huge of a deal because I know electrical, I understand basic framing and I have a great brick guy. But for your average Joe, my suggestion is hire it done! And expect to pay dearly.

But even this old dog can learn a new trick. I saw this suggestion somewhere on the interweb but have no idea when or where. I had never tried it but because of some serious sanding needed on the sheetrock I decided to give it a shot!

Just duct tape your palm sander to a shop vac…then turn the shop vac on while running the sander.

(Palm smacking forehead!)

Boy did it work! I would say 95% of the sheetrock dust went into the Shopvac vs. all over every piece of furniture in my house.

A FEW TIPS.

Make sure the holes on the sand paper line up with the holes on the sander…that is where the dust goes.

Tape well between the sander and the Shopvac hose to prevent dust from creeping out. I used duct tape.

Make sure your Shopvac has a clean (preferably new) filter.

I have never used an electric sander on sheetrock in the house before…just waaaaay too much dust. This time, due to circumstances I won’t go in to, I knew a light hand sanding wasn’t going to cut it. Hooking the sander to the shop vac was a game changer!

Adding a window, whether you have brick or siding exterior, is doable. Just know that it is not a project for a novice DIYer!

Next time I’ll share the transformation! HUGE difference!


Changing dated can lights!

My wing is broken.

Poo.

It’s my elbow…it is still boogered. I am trying to “heal” it by resting it but after about a month I’m ready to give up and see what a ortho dude can do for me.

While “resting” I pretty much sit around and look for stuff to do.

Laying on the couch, looking at the ceiling, I began to obsess about my dated can lights

SUPER simple fix and on a scale of 1-10 it is pretty much a 1.

This is what I have….

…an ugly old can light with a bulb. It had obviously been painted over when the prior owner painted the ceiling. I have five in the kitchen, two in the den, four in the living room, two in the bedroom and four in the bathroom…so yes, they annoy me. But truthfully only when I am laying on the couch or in the bed looking at the ceiling.

While they are “dated,” truth be told no one really pays attention to them except of course when a bulb goes out.

This is where I want to say that when “they” say an LED bulb lasts 10 years, “they” lie.

Beside the point…point is, it is cheap and easy to replace these “dated” fixtures.

So off to Lowes I went and THIS is what I found….

When I say it was easy to replace, I am not kidding. The hardest part was climbing up and down the ladder. Just remove the existing bulb and trim piece. The trim piece is usually held in place by little springs or pinch clips.

Then just screw the new fixture into the socket (like a light bulb) then slip the little pinch clips into the existing brackets on the side of the can. Simple!!!!

The fixture has five different light settings on the back…from bright white to soft “yellowish.” I set all my living space lights on a soft setting and the three in my kitchen on a brighter white for task lighting. Perfect.

TIP! If one of these eventually goes out you can’t just replace a bulb. My suggestion is to get an extra 1-2 in case one goes out in the future and this style or brand is no longer available…that way you won’t have to replace multiples if one goes out!

Again, one of the simplest and most impactful DIY projects you can do. Don’t know why I haven’t done this in the last three years.

Oh, yeah, I know why. Rarely do I lay on the couch and look at my ceiling lights.

We've come a long way baby...

So often I share the inside of this house and all the work we have done. This week I finished up another landscape project and realized I have never shared how far we have come OUTSIDE!

I didn’t even comprehend the amount of work we had done outside until I looked it up on Zillow again. The pictures are from when we bought the house three years ago. Sooooo much has changed…both inside and out!

The landscaping was basically a blank slate. I pulled out a few shrubs here and there, moved some azaleas, cut down an overgrown tree in a flower bed and pulled up some edging. But basically it didn’t have a lot of landscaping. I guess the lady who owned it for over twenty years before us really didn’t do a lot.

Fine by me…just that much less to demo!

So let’s start with the front…and keep in mind I didn’t do any “editing” on the pictures i took so you can see how things really look around here. Shade and all!

Before….

The first picture is the Zillow listing. The last two are the street views from Google Earth.

You can probably tell from the Zillow picture and the Google street view pictures…clever photography and heavy editing can really make a difference!

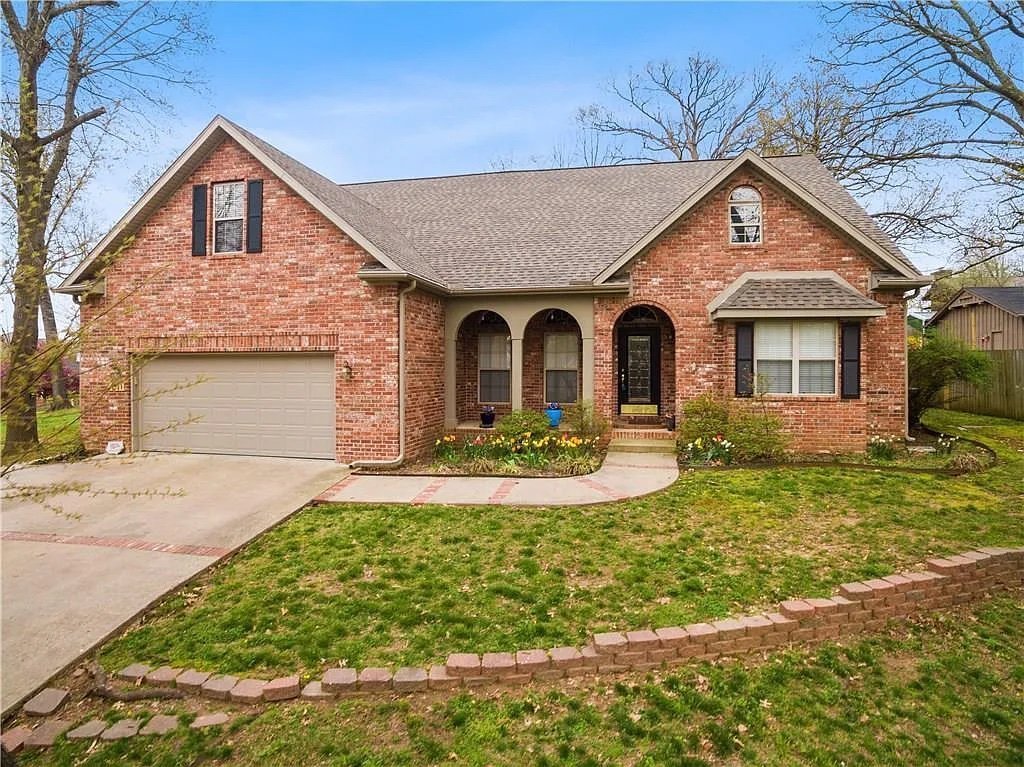
On the house I removed the ugly wood arch things to open up the front porch, changed out the front door, replaced the dated light fixtures, added some minor detailing on the garage door and changed out the arch transom windows.

Trimmed up all the overgrown trees…a must for aesthetics but also for safety…a big dead limb can do a lot of damage.

Removed a few flower beds and then composted and mulched the others.

We brought in new top soil and sodded the entire front yard with fescue. I removed some blocks from the block retaining wall. I really wanted to created a new retaining wall with native stone but that is another project for another time.

I moved four large azaleas that were planted by the front entrance to the side yard where I created a shade garden.

Nothing was going to grow under these trees and it features a huge dogwood …the space really needed to be highlighted! The azaleas and dogwoods are spectacular in the spring!

I planted new plants in the flower beds to the left and right of the entry. Again I am transitioning to perennials so I planted small boxwoods, chokeberries, tick seed, lirope and Stella D lilies…and of course a few potted hostas.

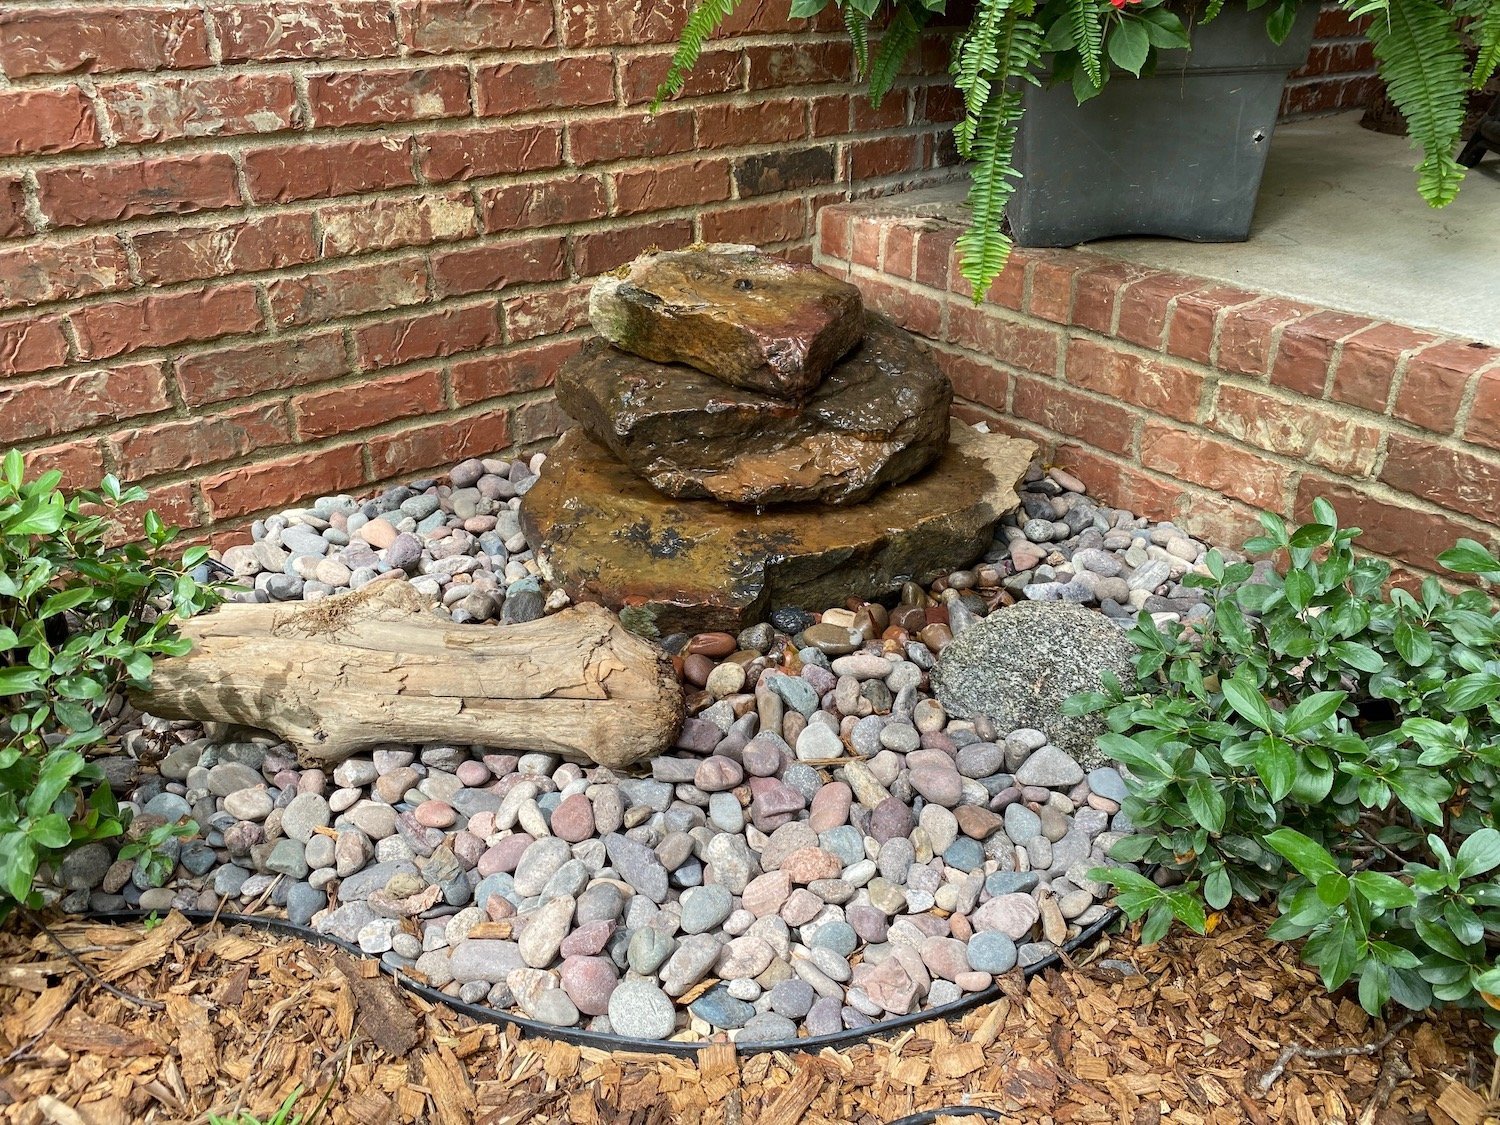
The bed on the left is filled with beautiful daffodils and tulips in the spring…I left those. (This is where I added a simple water feature…stay tuned and I’ll share how easy it is!)

I fill in with a few colorful annuals and I have a few pots I add ferns and impatiens to every year.

Dressed up the beds on the north side of the house with a little rock and planted a few easy plants…hydrangeas, lirope and some astilbe.

Prime example of why you should really research plants…originally I planted some Stella D lilies here and they did not get enough sun. This side yard only gets a little morning sun which is perfect for the hydrangeas and astilbe.

A few weeks ago I finished a little makeover on the side yard where grass would not grow. I added a little flagstone, some decorative rock around the air conditioner, planted some lirope my neighbor was thinning out in her yard, planted a redbud and added a little birdbath.

When I was at the livestock store picking up supplies for my water feature project, they had their azaleas 50% off. I snagged a few and planted one here and two in the side shade bed incase the older ones eventually croak!

The entire back yard slopes towards the house and to each side. This side of the yard gets a pretty heavy water shed because of a downspout. It is one reason this side of the front and back yard would not grow grass. I have to be VERY careful about any changes I make.

HERE I shared the changes I made to the side yard behind the fence.

The back yard has probably had the most dramatic changes.

These are the “before” pics from Zillow…when we bought the house….

If you are wondering what that big concrete bench thingy is, we don’t know. It was there and it is HUGE so it’s not going any where. We have been told it is part of the old farm house that was once here before this area was developed.

One of the first things we did was take out the shrubs along the back of the house and cut out the old pawpaw tree. I loath to cut down any tree but this one was just too big for the space and was on the siding and roof. We replaced it with a little Japanese Maple and someday I MIGHT figure out what I want to do with this bed. In the meantime, potted flowers will have to do!

We added a little rock and planted smaller boxwoods long the back.

I’ve never been a big fan of rock beds…I always preferred mulch. The ease of these beds the last few years has really made me a fan. Truthfully it is easy to plant in and of course pretty much maintenance free.

I added the large flower bed in the corner when we first moved in. Again, it was NOT going to grow grass under the humungus trees. I knew I was going to grow mostly in pots so I put the edging down around the trees along the “shade line,” applied some Roundup on what little grass was there, then just topped everything with about 4” of compost.

(Feel free to be envious of my spectacular wind chimes. I showed them to Brian last spring at a local garden shop…he remembered and gave them to me last Christmas. The man is amazing!)

I have always heard you should be very cautious around oak trees so as to not “smoother” their root system. We have a HUGE white oak and several large red oaks. I made sure to keep the compost and mulch thin around the base of the trees. When I plant in the bed, I dig a big hole then add a mixture of garden soil and compost before planting the plant…that way I didn’t have to amend the soil in the entire bed. With all the rocks and roots in this area it would have been dang near impossible. And again, I didn’t want to do anything to disturb the tree root systems.

HERE I shared the pathway I made with my grandad’s old grind stones.

I shared HERE the extension of this little back bed. Just what little digging I had to do for the edging and planting destroyed my elbow (don’t ask, I don’t know!)

Around this entire back bed is my next “want to” project. I “want to” extend the entire bed about 4-5’, add a flagstone walk and more plants…in other words make the entire thing bigger. Hum…maybe someday when I don’t have a bum elbow.

I shared HERE the construction of the swing…and HERE when I stained it.

HERE I shared my shop and the changes I made to it to make it more appealing. The inside is still a shop full of tools, supplies and garden stuff…but the outside had to be dolled up!

I added this bed last fall for the hostas. I split off the potted hostas this year! Everyone of these hostas are splits!

Two years ago I added a little “pergola shed” onto the back of the shop for Brian’s zero turn mower and our larger garden tools (shovels, racks, wagon, etc.) Everything else goes inside the shop.

We didn’t completely sod the back yard but over the last few years I have sodded and seeded here and there…it is a work in progress. Someday I hope to have a perfect back lawn. With the shade and sun combo it is a struggle.

I was fortunate this yard had an irrigation system. It had been neglected for years so it took several years and some back breaking days to get everything repaired and in working order but it has been worth every effort. I don’t know that I could keep everything alive without it!

I keep thinking that SOMEDAY I will get it all done and then I can just sit around my park-like setting and enjoy. But truth is, I like working in the yard…I like digging in the dirt…I like planting new plants.

There are days I just walk around with my coffee and enjoy. But in my mind I am always looking for new ways to get my hands dirty.

It is my therapy.

Piece by piece...

I had a friend on Facebook ask where she could find much of my decor because we share a style.

Funny…as I walk around this house I see so many pieces I have cobbled together over the years. Pieces I bought at auctions and refinished. Some at flea markets. Some I bought new and tired of over time so I gave them a little facelift. Pieces I inherited. ( I am actually kind of shocked at how many pieces there are and how little I paid for them originally!)

Every room in this house has pieces I have refinished, refurbished or rehabbed.

My bedroom….

Twenty years ago I bought an entire bedroom set…bed, dresser, highboy and two night stands. Paid a small fortune for the matchy-matchy set so I couldn’t bring myself to get rid of it. Over the years I finally gave up the bed and dresser and the highboy and nightstands have had little facelifts. The furniture and our master bedroom got a full makeover HERE.

Before….

After….

My office…

I bought this desk at a junk shop YEARS ago…I think I paid $25 for it.

Still love it although it could use a little refresh!

The china display cabinet in the dining room. This is a prime example of a piece that is not my professed style but I absolutely love it all the same…LOVE!

I had a vision in my mind’s eye of what I wanted and I knew this piece could be exactly what I wanted with a little time and effort….

It took a bit more time and effort than I anticipated but it really is one of my favorite pieces.

I have several pieces in the living room I have rehabbed over the years.

This AMAZING coffee table I picked up at an auction for $22!

I sometimes wish I had a round coffee table but I love this piece so much I just can’t bring myself to part with it!

Several Lane Acclaim tables I have picked up here and there and refinished.

My grandmother’s little mid century chair has had two little makeovers. The teal chair is one I bought off Marketplace years ago and reupholstered….

My breakfast nook has several pieces as well.

The table….

The little china cabinet was a fun and relatively easy project….

They seem to work well together after their little facelifts….

There are so many more pieces I have curated and rehabbed over the years. Side tables, benches, chairs, dressers…every room has pieces I have refinished, painted or reupholstered.

It took years for me to collect all these pieces, bring them back to life and create a home I love with pieces that have purpose and meaning.

Most of the links are to the original rehabs where I share what I did…unfortunately I am NOT a good teacher so often I direct you to search the internet for good tutorials on how to repair, refinish and paint pieces. Find a tutorial that makes sense to you and begin curating your home one piece at a time.

It doesn’t happen over night! And it seems to be never ending…