Just taking a moment to be thankful.....

Ahhhhhh, I feel MUCH better today. 

First, I woke to the sound of thunder and rain....LOVE IT!  It is the end of July and the weather has been awesome.  Rain here and there and wonderful temperatures!  We still have August to get through, but July has been a really mild month!  

I had a major busy weekend projecting in my garage full of projects....refinishing a table, painting an old chair, sewing pillows, making nifty little things out of old windows...lots of projects to share in the upcoming weeks! 

Saturday my on-site manager had to have emergency surgery and naturally 3 tenants moved over the weekend....not one vacancy all month and suddenly I have three empty (and very dirty) apartments to deal with!  She usually cleans while I repair and paint...so now I'm doing it ALL.  

Usually I get kind of cranky when my "work" wears me out and interferes with my "play" time...and as taxing as some projects are, it is indeed my "play" time...because it is what I WANT to do!

But all is well, because the poison ivy is almost gone, I am tapering off the prednisone so I'm not so "weird," and busy weeks like this remind me how grateful I am to God for my health and the fact that he does indeed make sure I have everything I NEED! 

So next time you wake up growling because of all you have to do, just take a minute to thank God that you have the ability to do what you need to do! 

It's like I tell my kids...life is about doing what you really don't want to do, so you can do the things you DO want to do! 
 

Comment
Share

Decorsteals.com....AWESOME!

If you haven't discovered this great website (decorsteals.com) take time to check them out.  

I purchased the linen grain sack material I used to cover this little foot stool from the site.  

If you sign up for their email alerts, they will send you their "daily deals."  They have awesome prices on some very nifty pieces!   

This weekend I ordered two awesome little galvanized steel caddies... 

I also ordered some little chalkboard stands and a beautiful bird feeder...can't wait to get them!  

The deals usually only last for a day so you will want to sign for the email alerts so you can see what is being offered!  Shipping is always $5 per item, so the cost is reasonable! And they take Paypal so buying is (unfortunately) very easy if you have a Paypal account! 

You can also "like" them on facebook and their daily deals will show up on your news feed.   

It is a great way to find some truly interesting decor elements!   

Comment
Share

Little stool before and after....

P.S.Y.C.H. 

Actually, I am the one psyched...or rather psychotic.  I am so annoyed right now.  It doesn't help that I have poison ivy IN MY EYE and after three days of fighting it with drops and topical ointment, (which I KNEW wouldn't work because when I get poison ivy I have to treat it as if it is a terminal disease!) I am now taking massive doses of prednisone which makes me anxious, cranky and just generally weird!  Which might all explain why, after a day of taking tons of "before and after" pictures, I didn't notice that my camera said "NO CF CARD."  In other words, all the "before" pictures I took of the little foot stool, the light fixtures, the shelves at my booth....EVERYTHING...nothing.  I got nothing here!   

Sooooo, let me try to share this nifty little foot stool WITHOUT a fricking before picture!. 

As usual, it was pretty rough.  When I delivered MaryAnn and Kenny their chairs (here), she gave it to me, so I don't want to insult her by saying it was "nasty." (Although, it kinda was.)  Old nobby, worn fabric and the little feet were pretty beat up.  To her credit she bought it for her doggy so he could get up in the bed.  They had two labs, and they were their babies! They lost both several years ago, so anything that is a reminder of Ozzy or Harley is pretty rough on them....so it came home with me.

I have been following decorsteals.com.  I found them through missmustardseed.com and I love their stuff.   When I saw the grain sack fabric, I knew it would be perfect for this little footstool!.

And it is!!!! 


It is hard to see the texture in the pictures, but it has a really nifty soft "vintage" texture. I wanted the blue stripes but they were out, so I got the red.  It is more a "reddish brown" but it looks awesome with the little feet I stripped and stained.  When I was cleaning out my storage building a few weeks ago, I found a can of "Rosewood" stain.  Kind of a reddish brown color... a cross between mahogany and walnut....really beautiful, rich color and perfect for these little feet! 

So there you go....an awesome "before and after" with no before!  So as usual, just trust me...huge improvement!  

As for the light fixtures and bookcase, just forget it...heck, I think they look awesome, but I can't see anything right now, so who knows. 

And if there are typos in this post, deal with it.  When I can see again I will be mortified, but for now I am too cranky to care! 

Hate is not an emotion I allow myself to harbor...but I really do strongly dislike poison ivy..... 

Garage sale treasures...

Another man's trash can be your treasure.  But like all treasures, you have to hunt for them. 

Not only do I love going to auctions, I really enjoy going to garage sales.  I usually scout the paper on Thursday evening and see which sales will be up and running early Friday morning.  That gives me time to hit the garage sales by 7 a.m. and still get some work done!  I don't find a whole lot...after all, there is a reason someone else is selling a bunch of their stuff for a quarter. But I can usually find one or two little trinkets. 

Last week I hit about 5 sales and only bought a few little things....

Some little strainers, two white tea pots and a creamer and a nasty little box.... 

The stoneware and strainers were cleaned up and put in my flea booth...they are wonderful and someone will love them!   

But the little box is for me... 

I had all my paint brushes, big and small, in a little wood holder I got in a box of stuff at an auction.  It was pretty full and when I saw this nasty little box with the holes in it I thought it would be perfect for all my little brushes! 

Not painted to my taste, so I painted it with light green chalk paint, hit it with a little sand paper, and then sealed it with a clear poly. 

When I sanded the new paint, the little dots from the flowers came through...I thought it was kind of cool looking...kind of like little nail heads or something!   So I left it....

When my youngest son decided to move out of the dorm and into a townhouse, we furnished his living room and kitchen entirely from garage sales.  It took all summer to track down everything he needed, but I spent very little for a whooooole lot! 

Some Friday or Saturday morning, grab a cup of coffee and hit the circuit early.  It is a fun and relaxing thing to do (don't take kids!) and you will meet a lot of neat people.

You may even find a few little treasures! 

Comment
Share

Old wood level made new....

Recently I featured an old gun I refinished and repurposed as a wall hanger (here) ...

I loved working on this project and I really liked the final results...and evidently so did someone else because it sold in just a few days! 

So I look at things a little differently now...what can I do with THAT to make it useful again? 

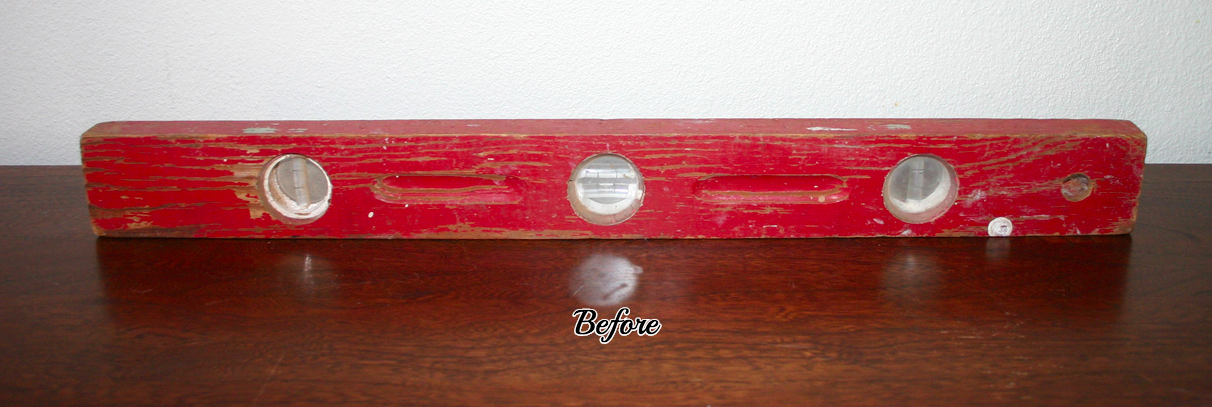
When I spied this old beat up wood level at an auction, I decided it would be perfect for "repurposing."

IMG_9583.JPG

It really didn't take much to give this piece a new life!  I liked the color and it already had the old "chippy and worn" look that is all the rave right now. I didn't have to do anything but clean it up and add a few hooks.....

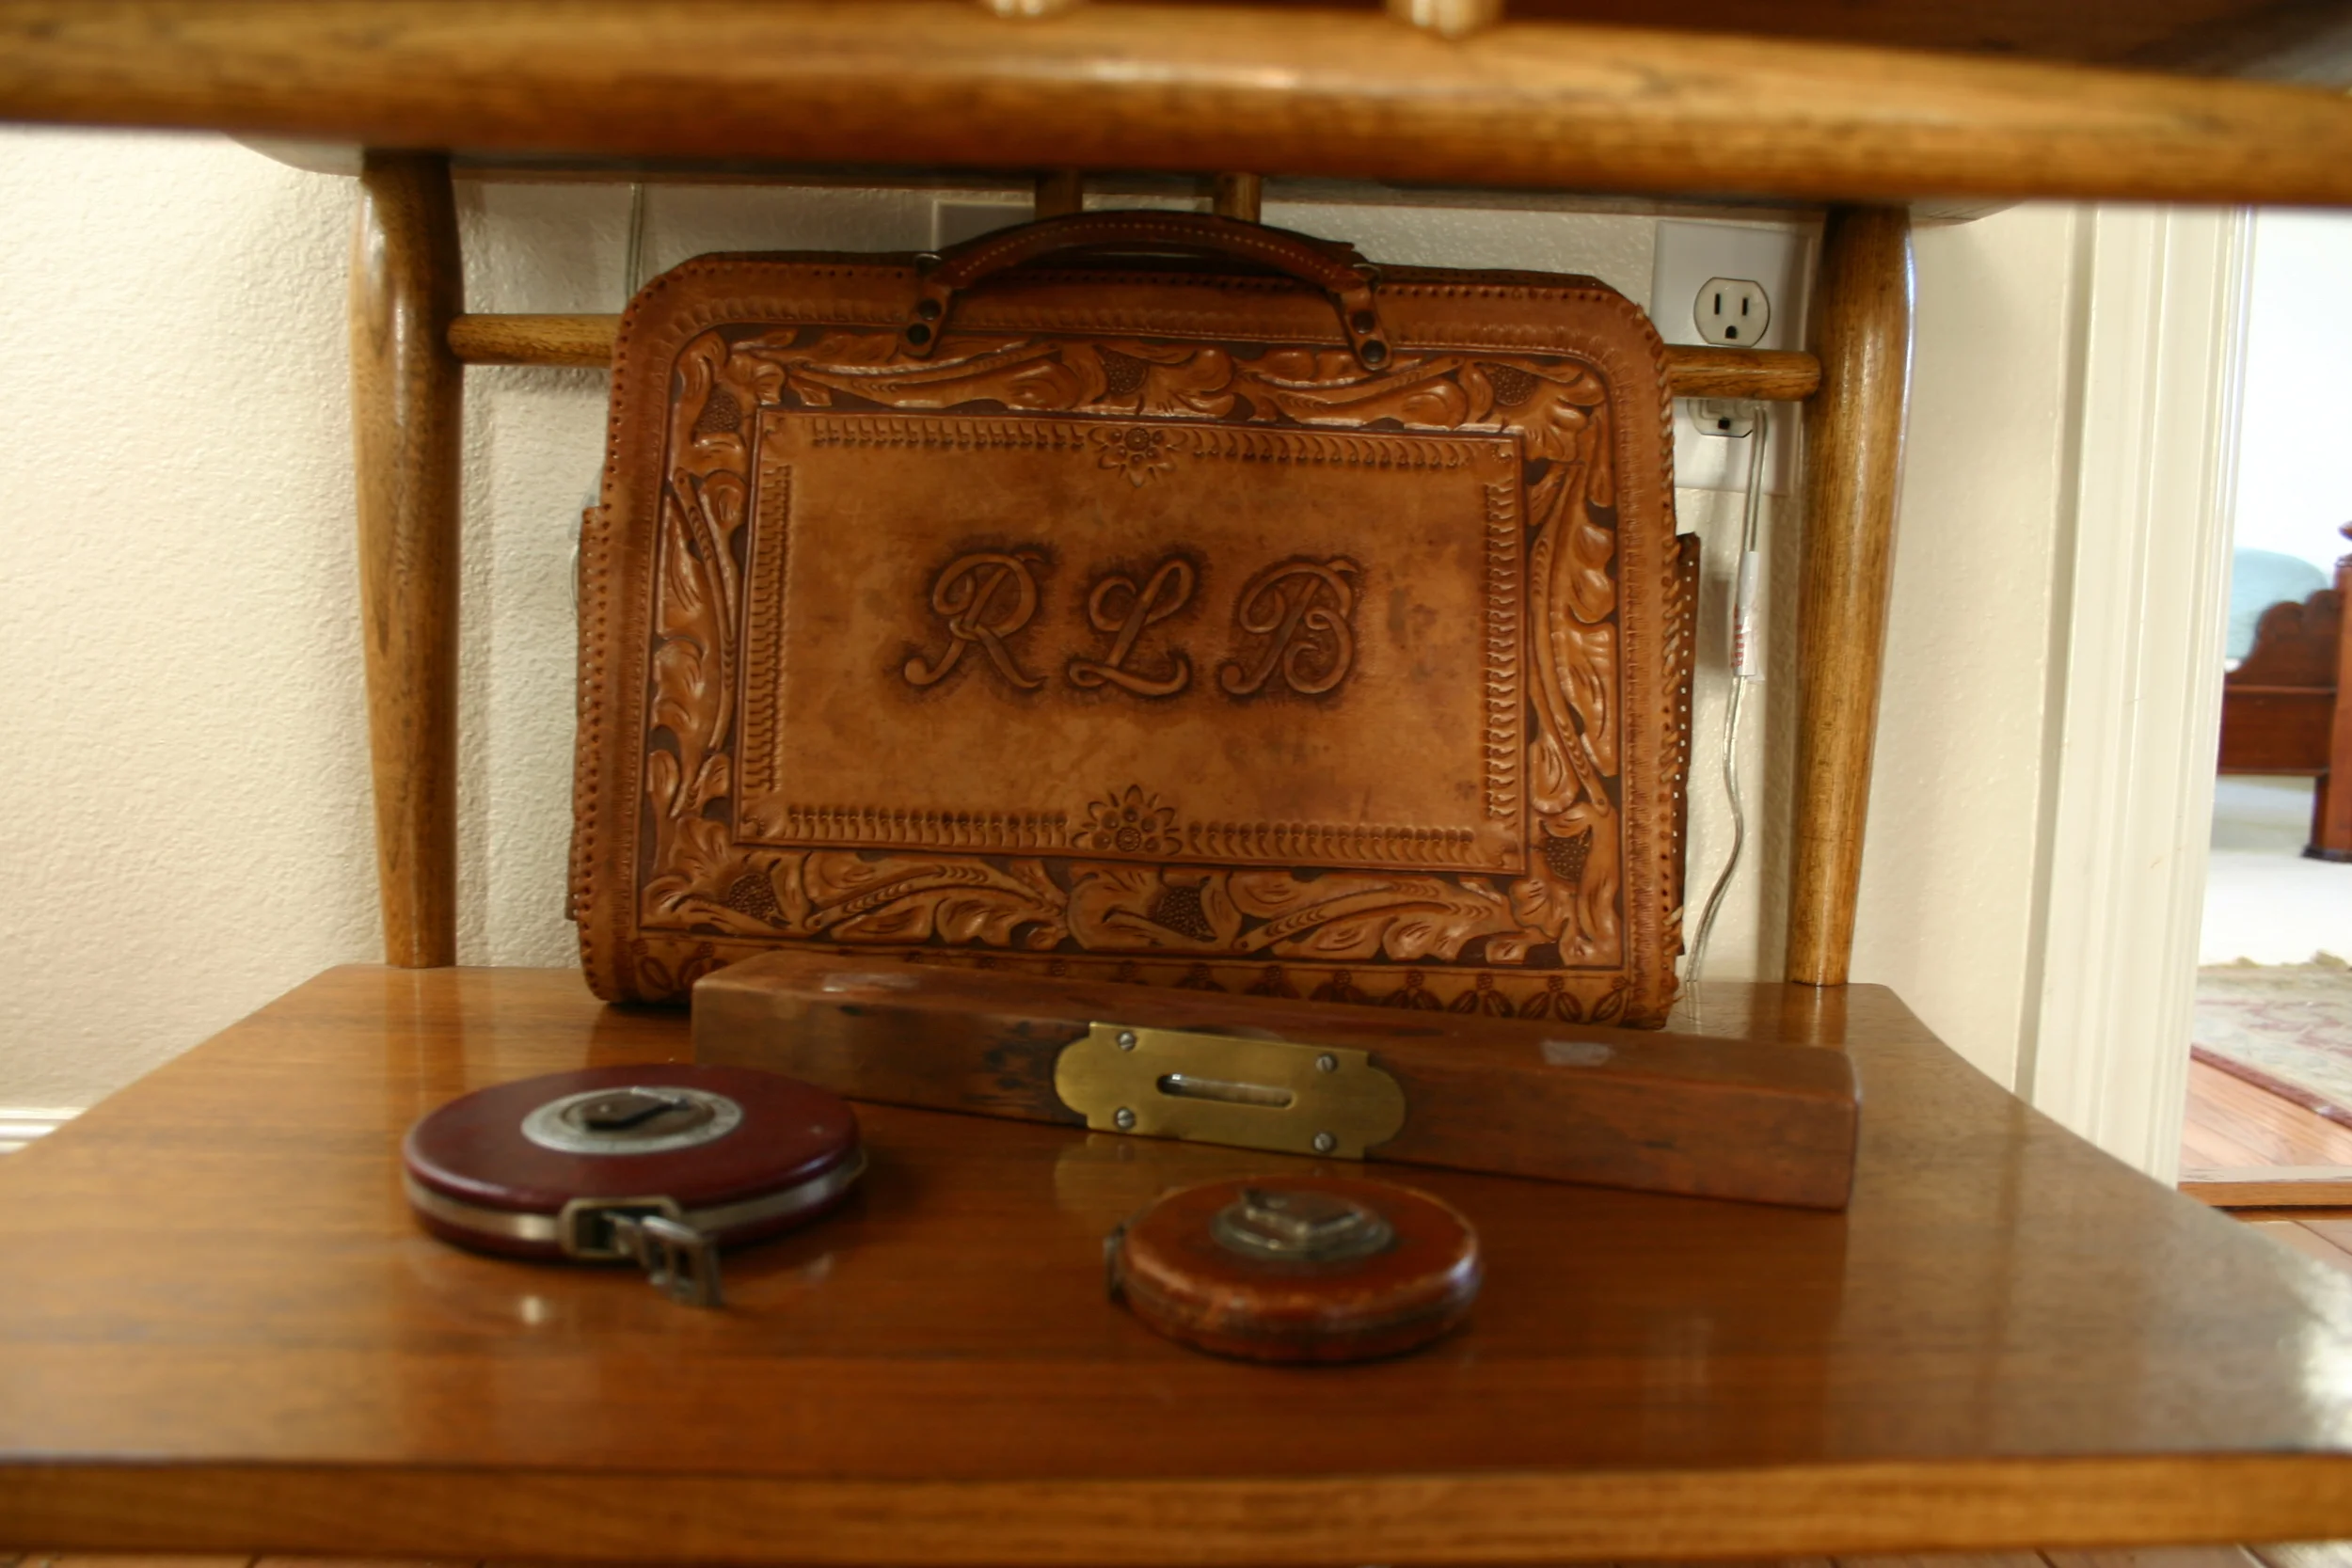
I love old tools. Had this been my father's or grandfather's, I probably wouldn't have touched it.  As a matter of fact, I have an old wood level that belonged to my grandfather...it is displayed with other family heirlooms and featured here....

IMG_8639.JPG

But I love how this old level turned out.  And it took very little effort or money. I think it would be awesome in a shop or utility room...or even a little boy's room!    

Thinking outside the box...finding ways to take the old and give it a new purpose...

Super fun.... 

Comment
Share

Cedar trunk before and after....

I honestly believe the key element to any decor is surrounding yourself with what you truly love.  Because in the end, those pieces will become a part of your life rather than just an element of "decor" you will want to get rid of next year! Both are important in design, but you have to maintain a happy balance.

Right now everyone seems to be taking any and every piece of furniture they can find and painting it...which is fine, if that is what the piece needs to ENHANCE it!  

But there are some pieces that just need a little TLC.  Remove the old mucky yucky and give it a fresh coat of new.  Not different...just clean and fresh. 

This old cedar chest is a prime example.  I know a lot of people would have snatched it up, painted it with a bright funky color or chalk paint...maybe painted the copper straps black.  And that would have been cool looking...for a few years.  Then it would just be another reminder of a by-gone decor era (like ducks and pastels). 

The inside was in mint condition!

Truth is, the only thing wrong with this old truck was the old varnish.  Varnish tends to get "dirty" looking and crackle after a few decades. And of course it gets worn.  But it is easy to strip and easy to reapply.

Personally, I like the Formby's brand stripper and tung oil. 

It makes stripping old varnish a breeze and it conditions the wood.  The tung oil is SUPER easy to apply and unlike poly, it is pretty much fool proof!   

I didn't sand the scratches...I didn't strip the old copper straps or nail heads.  I didn't do anything but strip the old varnish off and apply 3 coats of tung oil. I know...boring...but I LOVE the wood and the age that shows through the fresh coat of varnish and on the strapping!

I wouldn't fault anyone if they wanted to "jazz" up this piece...to each his own.  But while this piece is not yet a family heirloom, I have no doubt it could be in a few generations. As a matter of fact, I have a cedar chest upstairs that has been in my family for who knows how long (and needs a good refinish!).  And my daughter has a little cedar chest that my great-grandfather bought from a man during the depression.   

So think carefully when redoing old pieces...is it something of value that just needs some freshening up or can you really enhance it by painting it or adding a "rad" design like Chevron?   

Neighbors make a house a home....

My neighbors, Maryann and Kenny,  are awesome.  They doggy sit Ginger, our black lab, when we go out of town!  Ginger thinks they are her second family and when we go down there she just prances right in like she owns the place.  They spoil her rotten and we know if we have to leave her or if (God forbid) something were to happen to us, she couldn't be in better hands. 

She loves them...and so do we.

So I was so happy when Maryann decided these little chairs were perfect for her.... 

This was a fun project I featured here .  I was a tad worried that no one else would find their whimsey appealing! But she loved them and they look awesome in her dining room!

I live in the best neighborhood, surrounded by great neighbors!  Several love to come over and see what I am working on when I have furniture and tools spread all over my driveway! I love sharing what I do, but I love it even more when my hard work and "creations" find their way into the hearts and homes of my neighbors!   

One of the hardest things to come to terms with is actually "selling" stuff to friends and neighbors.  I am so use to just giving things away, but I really have to remind myself that I do have money and a great deal of time vested in most pieces.  Truth is, I still pretty much just sell to cover my actual expenses and rarely cover my "time."  But that is okay! My neighbors do for me on many occasions (like taking care of our dog) and I know if I ever need a hand, they (and my kiddos) will be the first ones here to help! 

It is true...neighbors really do make a house a home.   


Comment
Share

Before and afters and a little about plaster paint....

I'm sure you would loooove to see some before and afters...unfortunately, I still forget to take "before" pictures of a lot of the stuff I do!!!  Major annoying! 

I went online hoping to find a picture of a maple doll rocker...thought I might "borrow" a picture so you could get an idea of what this little rocker looked like "before." Nope...nada.  I couldn't find one picture of anything really similar.  So close your eyes and imagine an orangey maple rocker with a broken leg and wobbly arm.  Dirty, scratched up, nothing you would dare want your precious baby putting her dolls in! Yep, that's it, which is why I got it for a song at a garage sale. 

Most broken wood pieces are fairly easy to fix if you have some wood glue and clamps. AND all the pieces are there.  It is a little more difficult when you have to actually manufacture missing pieces...doable with a little more skill than most have. 

But when it is just a chair with loose joints or maybe a "fractured" leg, it's fixable! 

A good scrubbing, a little glue, a little patience, and some paint.... cute as a bug! 

It is difficult to "stage" kid's stuff when you no longer have little kid's stuff around.  I am sure there is a stuffed toy or doll somewhere in my attic...but who really wants to crawl up in the attic when it is 100 degrees out just to stage a picture.  I have a stuffed panda (Pickles) on my bed, but my grandpuppy ate his nose so he isn't very photogenic. This is a doll's rocker...so let's just pretend there is a doll sitting in it!

I do have a "before and after" of a little welcome sign I did.  You can find this stuff for pennies...some of you may not be old enough to remember the "country" style that was all the rage in the 80s and early 90s.  Ducks, pastel pinks and blues, Waverly floral wallpaper, little hearts everywhere.  Nice. 

But you can salvage a few things from that wonderful era ( how I loved that decade....the clothes, big hair, chunky jewelry.... "Dallas" wannabe living at it's finest!) 

I just brushed it lightly with a little plaster paint, hit it with some sand paper and then coated it with a light stain with some poly in it to seal it and give it an "aged" look.  Easy smeasy.   

I think they call this "upcycling."  

I also redid this old wooden tool box...very "vintage."  I bought it at an auction and it was kind of a hunter green (no "before" picture...grrrr).  It hasn't sold so I brought it home and painted it with some homemade plaster paint.  Light sanding and a little wax....perfect for a table display.   

(Not only do I not have live plants in my house, I have very few "fake" ones...I think this may be all I have.  I just got tired of the live plants dying and the fake ones getting all dusty.  So this is as close to "staging" displays as I get. Again, pretend there is a beautiful seasonal floral thingy in it!) 

Which reminds me...even if it hasn't rained in over a month, don't leave a box of Plaster of Paris sitting outside on your work table.  Just in case it does rain.   

I now have a chunk of plaster...fit for a door stop, but little else.  Kind of like washing your car....leave out your supplies and you can almost bet it is going to rain! 

That reminds me as well....I have talked about using the homemade recipe for "chalk/plaster" paint.  I have used both the store bought paint and the homemade paint.  I'm not sure I notice much difference other than the store bought is mixed and ready to go.  And it keeps, whereas the homemade pretty much has to be pitched if it isn't used right away.  But I like the homemade for several reasons...one, I can mix it with ANY latex paint I have on hand or find on clearance and it is a bit cheaper. 

I use kind of a "pinch of this, fist of that" recipe. (Kind of like my cooking!)  My best advice is to Google "homemade chalk paint recipe" and do a little research and experiment....find what works best for you. 

But I will give some advise if you are going to make your own.  Use the Plaster of Paris recipe...it seems to work the best.  

Mix the plaster powder with water FIRST and mix it VERY well...make sure it is smooth with no lumps. I use a big old glass measuring bowl and a rubber spatula.  I use about 3ish tablespoons of Plaster of Paris mixed with enough water to make it the consistency of pancake batter, then I add about a cup of latex paint.  The little sample pots you buy at Lowe's are about one cup. And if it is too thick, just add a little water!  Sometimes it thickens a little more as you paint...just add water and mix well!

Most people who use chalk/plaster paint seal their paint with wax.  I am just now experimenting with wax.  The thing that bothers me the most about it is if you ever want to repaint the piece in the future, you have to remove all the wax.  Whereas, if you just spray it with a clear coat it can easily be painted in the future.  Either way, you have to seal your painted piece after using chalk/plaster paint.  Of course I recommend sealing any paint with a clear coat!  

I'll share more about the wax affect after I have played with it a little more!  This week I am tearing a utility room off the back of my manager's house and adding supports for an open porch so I am not accomplishing a lot at home during the week...just to hot and tired when I get home.  Again, wasps, spiders and creepy crawlies just love to hide in walls and crevices.  You would think I would learn!  

Oh, and since this is my third time in as many weeks to have a little run in with a rusty nail, I guess it is time to get a tetanus shot. What a pain...literally!

Comment
Share

Another busy weekend....

Brian and I went to a living estate auction Saturday....nothing exceptional, but it is always fun to spend a day at an auction!  I just love it...even if I don't find a "great deal." 

But Sunday was a day of getting a few things done.  My garage is overflowing with projects...and inspite of the fact that I don't have room for them at my flea booth, I have to get them done!  (I did take a break and went with Matt and Kaitlyn to take the dogs to the lake.  Last time we took my Lab grandpuppy to the lake, he didn't want to have anything to do with it...but Sunday the "water dog" in him came out!!! Boy that pup can swim!)

Anywho, naturally I failed to take "before" pictures of a few projects....a precious little doll rocking chair that is getting a white and pink paint treatment, a plate shelf painted with plaster paint and a few mirror frames.  You would think I would learn, but noooooo..... 

But I did remember to take before pictures of a few big pieces...a cedar truck we picked up at an auction last week and a HUGE round coffee table I bought at an auction 2 months ago.  

The cedar truck wasn't THAT bad...just old varnish finish that had "crackled" and "muddied" with age.  The copper stripping wasn't too bad either.  So basically I stripped the old varnish and am applying a new tung oil finish.  One more coat and it will be ready for "after" pictures!   

The coffee table...now that is another story.... 

I have no doubt this was originally a very expensive piece...but it's a little "heavy" and ornate for my taste.  But I loved the wood inlay design on top and knew I wanted to preserve that!  The base is getting a "plaster paint/dark wax" treatment. 

But the top...simple strip and refinish...right?  WRONG!!!  The finish came off just fine...but when I got the stripper on the edge of the top it took the "painted" stain off, revealing good ole' MDF.  Holy crud!  In case you don't know much about refinishing, MDF doesn't stain like real wood or wood veneer.  In the infamous words of Reba....CRAAAAAAP!

Don't ask me how I fixed the problem...I'm still working on it!  But I did get the base painted and started the sanding...and it looks pretty awesome.  And I think it will be major awesome when I get the dark wax on it.   

Little secret here...I have never used furniture wax before...and I have never made "homemade dark wax."  But I'm gonna... 

And if I don't drop kick the entire project down the street, I will post before and after pictures later this week1

Comment
Share

Cabinet door chalkboards....

I just assume everyone has old cabinet doors laying around...probably a silly assumption!  But I see old cabinets all the time at garage sales and thrift stores.  If you can find inexpensive old cabinets with decent doors, buy the cabinet and use the doors to make these super cool chalkboards!  Or stop by your local Habitat for Humanity...they have TONS of old doors for cheap!

I just happened to have a bunch of cabinet doors stacked up in storage at my apartments...ones I had saved for whatever reason. I decided to put them to good use!  (I have no doubt I will need one next week...always happens!)

First remove all the old hardware and fill the holes with wood putty.  Some doors have European hinges and those leave big holes...just ignore them!  They are on the back...no one will see them!

Next, sand the door with a 110 or 220 grit paper...just enough to knock the shine off the finish...then use TACK CLOTH!!! 

I always paint the back or underside of any project first...that way when I flip it to do the top I don't feel too terribly bad if I ding or scratch the back or underside!  

You are going to use chalkboard paint in the center of the front, so you only have to paint the back and the frame of the front.

I painted all these cabinet doors different colors since I will be putting them in my flea booth.  

I spray painted a few with bright colors, so I primed those with Kilz (sanding and tack cloth between coats!).  I used plaster paint (no primer) on a few and sanded the edges.  

Regardless of the paint you use, always apply 1-2 coats of clear coat to seal the paint. Do this BEFORE applying the chalkboard paint! 

Let the paint and clear coat dry over night and then tape off the frames with painter's tape.  

I wanted to try the new Frog tape because I have read really outstanding reviews but I could NOT find the roll I bought last week...it is here somewhere, I just can't find it.  So I used good ole' blue painter's tape. 

Several months ago I bought a quart of black chalkboard paint at Lowes.  I have used it on several projects and it really is outstanding.   When Katie wanted "chalkboard" walls, we just used Valspar flat paint since we needed 2 gallons and it has worked great!

I think for this size project, the "real" chalkboard paint is worth the investment.

I used a brush for the corners and edges and then I used a 4" sponge roller.  I applied 3 coats.   

After all the paint dries, put a hanger on the back.  I used cup pulls for the little tray for chalk.   

This is a fairly simple and inexpensive project!  If you have any old cabinet doors sitting around or stumble across a few at a garage sale or thrift store, give it a shot!