"Mud room" bench....

This is a project you see a lot on Pinterest and it is a super simple and functional use of normally wasted space.

Case in point…my daughter-in-law’s sister’s (Laura) house….

This room is next to her kitchen…designed to be the “breakfast room” space but is really used as a thoroughfare from the garage into the house and has become a general “drop zone catch all. “ With two small kiddos, it could be the perfect “craft room” and drop zone but as you can see there was no form or functionality to the space.

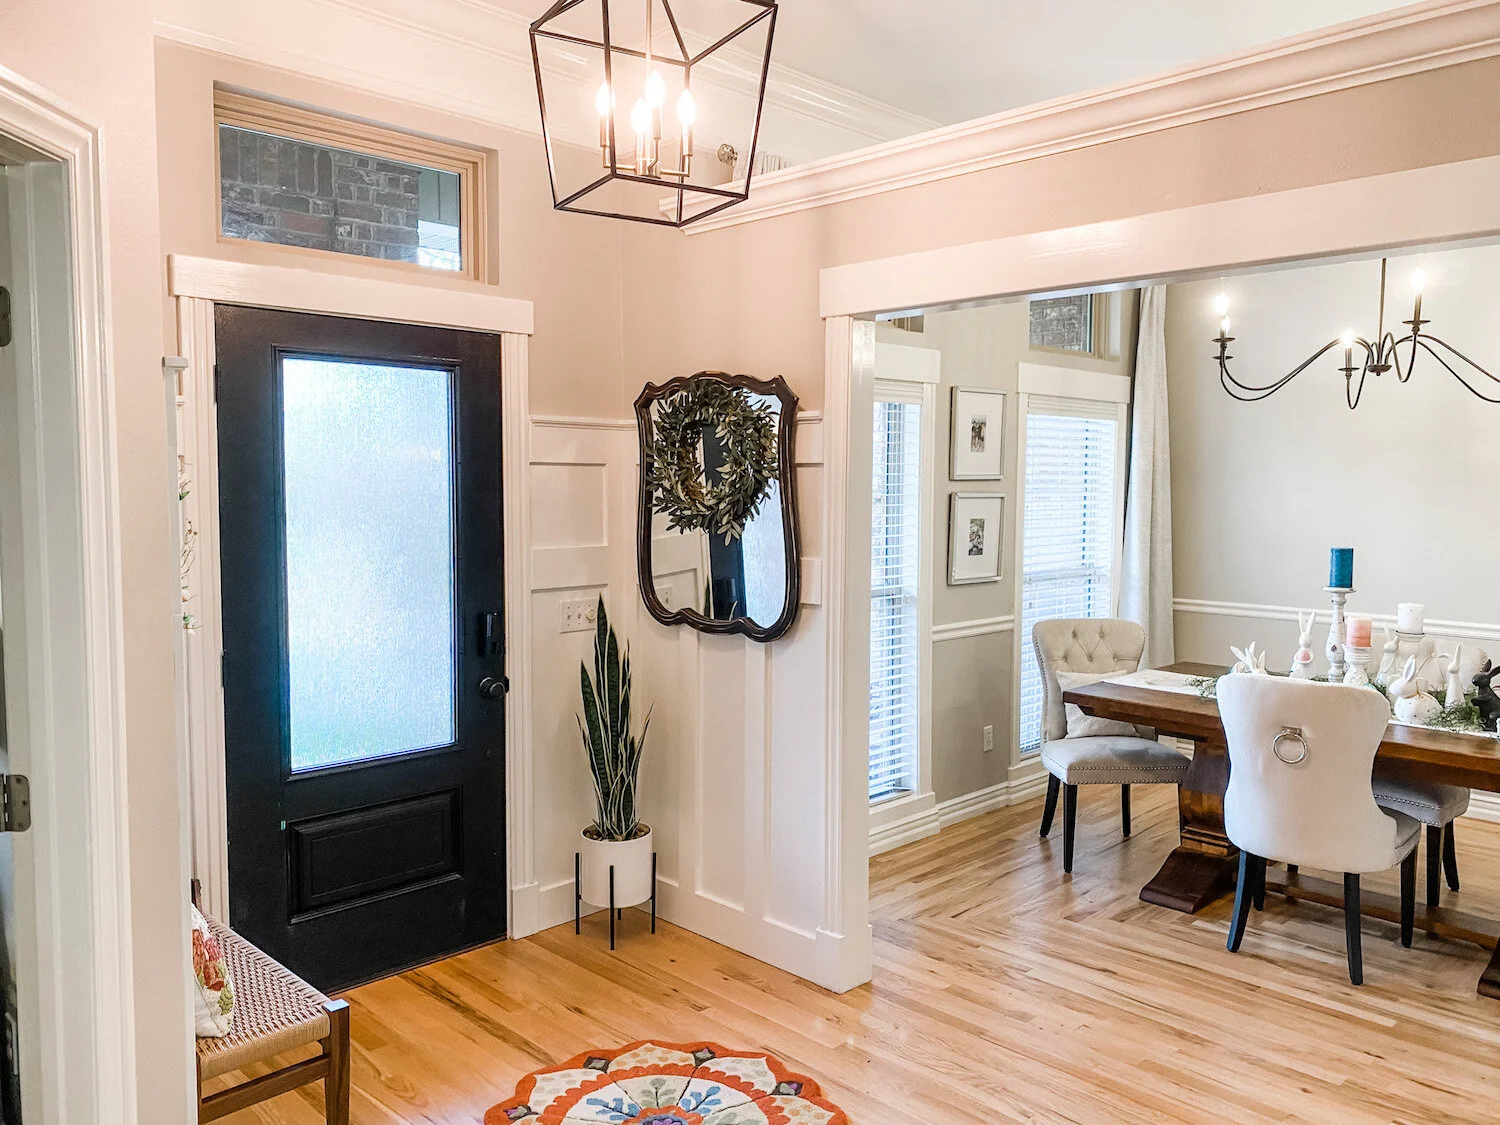
So she sent me this “inspiration” photo.

A functional and organized space for shoes, backpacks, coats, etc.

Heck, I can build that!

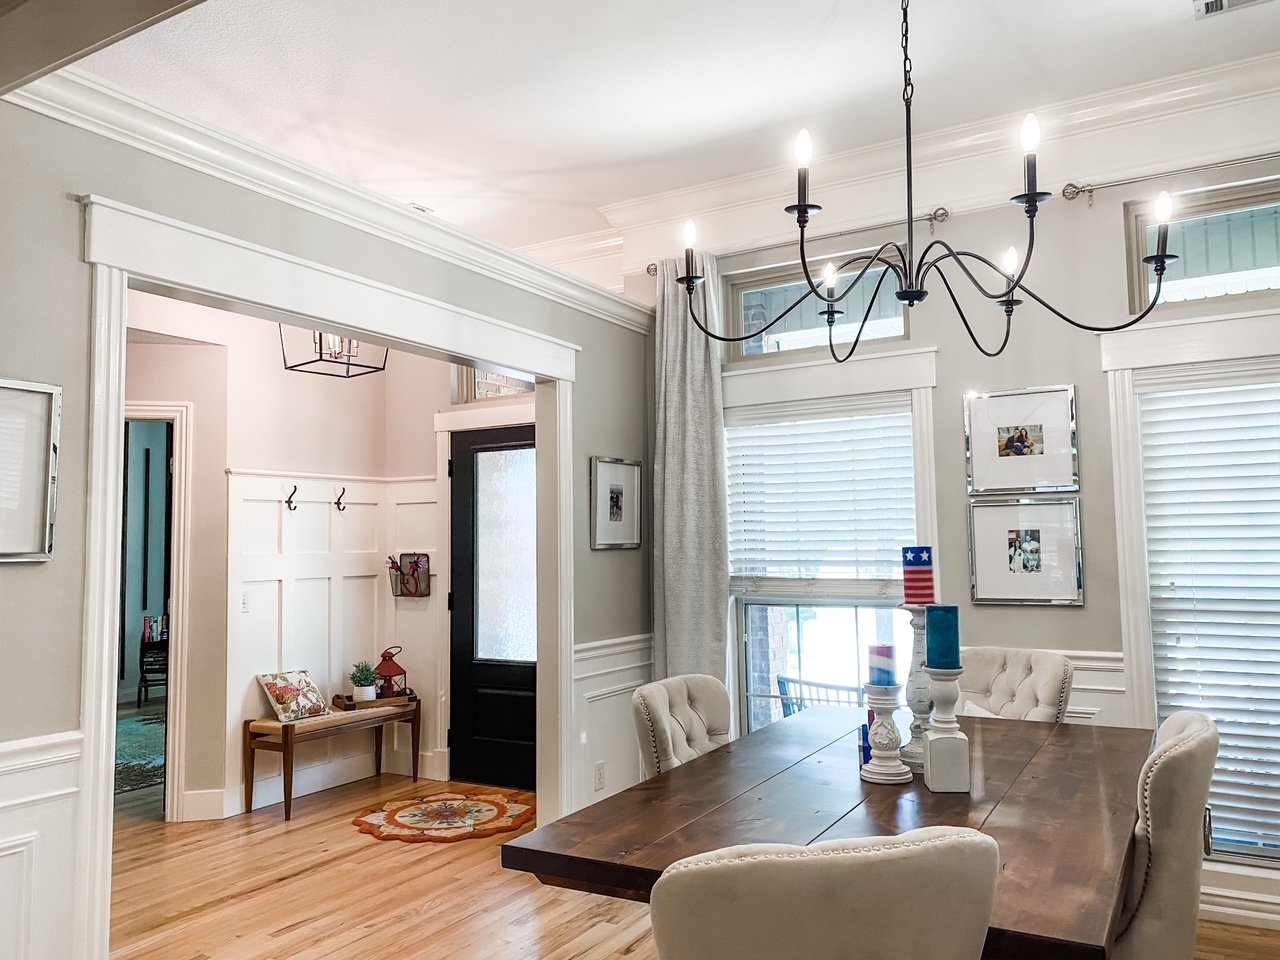
She likes the board and batten look of my entry more than the “panelling” look in her inspiration photo. No biggy. Remember what I have said before…the key to any project is first, your inspiration…..second, your plan and third, the execution.

So we had the inspiration…just a few tweeks and we had a plan…

Now it was time to execute!

I have said before I am not a “how to” kinda person…I am a “YOU CAN DO IT” kinda person. So find a tutorial for installing board and batten and building a bench that makes sense to you and works for your space.

First up…the bench. I had to off center the middle support because of an outlet but it was pretty basic stuff…2x4s, construction mastic and wood screws. Again, find a tutorial that makes sense to you! (Even I look at tutorials sometimes and say WTH!)

I build the legs of the bench out of 2x4s then clad them with plywood. Simple.

I used 1x6 pre-primed pine to trim out the front of the bench. MDF will “swell” if it gets wet so you can use it on wall treatments but I highly recommend using a solid wood product on anything adjacent to the floor.

I always use pre-primed or prime and sand before I install to avoid having to prime and sand inside the house!

I used 3 1x6 lengths of oak for the bench top. You can also use pine…MUCH cheaper but Laura liked the look of the oak. I used a rooter on the edges, just a hair, so when I joined them together they look more “plankish” than solid.

I built the bench top, using a biscuit joiner, in the garage… no stain just 3 coats of polycrylic, and then installed it before I moved on to the wall treatment.

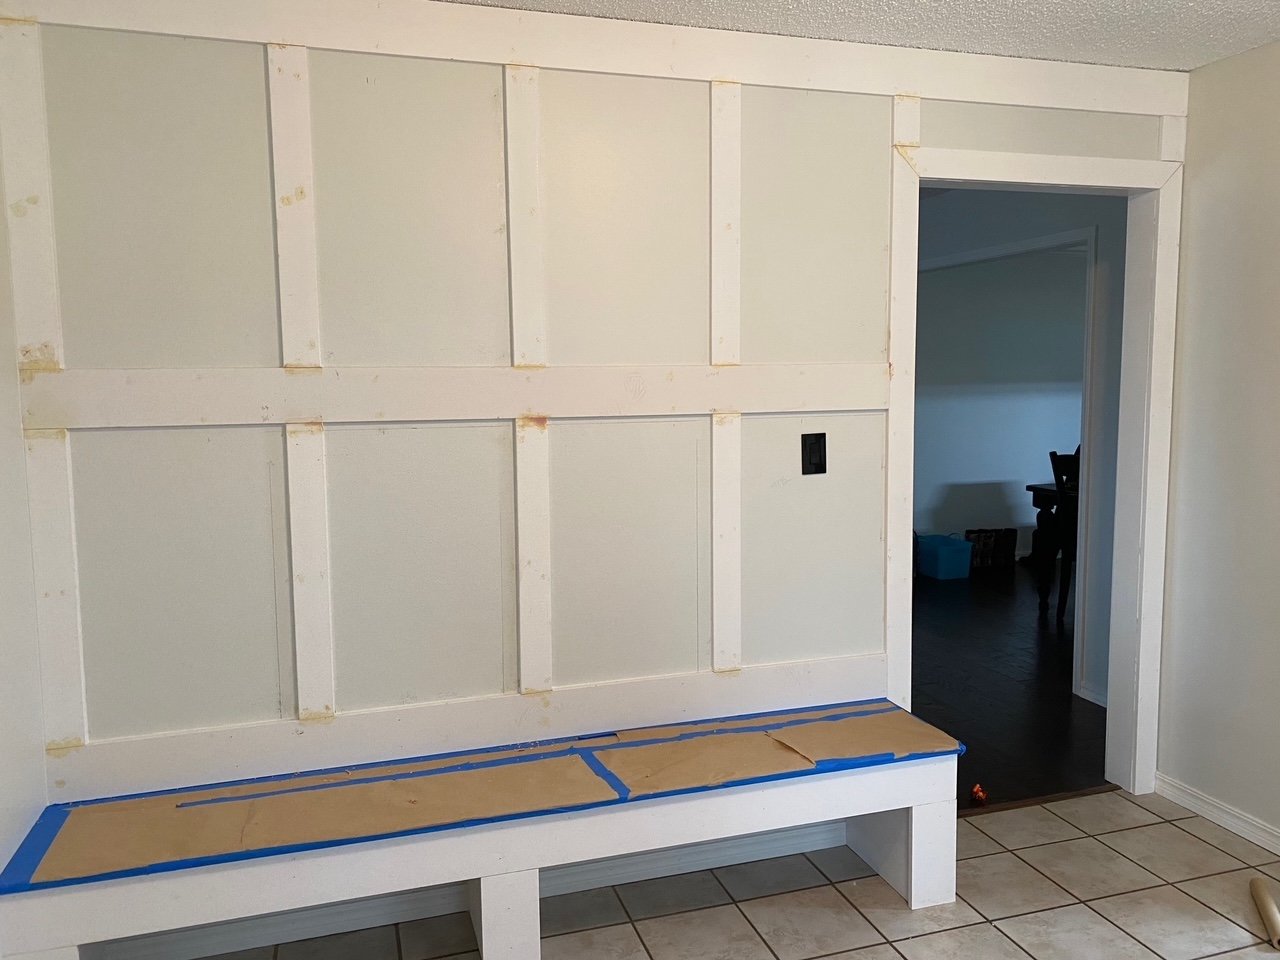
For the board and batten wall treatment I used preprimed MDF.

I usually install the horizontal pieces first…making sure they are perfectly level. Then I go back and add the vertical boards. Putty all the nail holes and seams and make sure you caulk EVERY joint and crack…sand it all super smooth.

REMEMBER if you can feel it you are going to see it after paint…so sand and feel with your hands! Sometimes it can take 2-3 coats of joint filler to get good coverage.

We covered the wood bench top and painted with a brush and roller…three coats!

GORG!!!!

We added cute little hooks Laura picked out!

I was still loading tools and the littlest (3 y.o.) was already claiming all the hooks for his back pack and Hulk costume and mask! Probably should have added more hooks…lol!

Props to Laura…I really believe the vision and inspiration are the most important keys to any successful DIY project.

She did good and I have no doubt this little area will now serve her family well!

Where have I been?

I know…I have been MIA for over a month.

When I first started this blog, I posted every day. That was just too difficult so I started posting twice a week. That was even taxing so I started posting once a week.

And now here we are…over a month later.

Truth be told, the holidays are a super busy time for me.

All the decorating, baking, entertaining.

And of course the sitting and staring at the Christmas tree. I do that A LOT. The season is just so short since I have a hard fast rule to NOT decorate for Christmas until after Thanksgiving…I want to soak it all in.

I get up every morning and turn on all the Christmas lights and they stay on until I go to bed. I don’t even want to tell you what my electric bill is that month…wowza!

This year I added ANOTHER decorated tree in my bedroom…I’ll have to share that next year. I featured my new black and white tree in my office HERE . Now I am one step closer to having my dream of having a decorated Christmas tree in every room. Upside…it is AMAZING…down side….what a chore to take it all down!

The MOST WONDERFUL TIME OF THE YEAR is in the books and time to move into the new year.

First up…a baby shower for my daughter in law.

Everything was beautiful and of course hosting this special event gave me a reason to do a super deep clean on my house.

Breath….

Now on to something that has been bugging me for several months.

The living room rug.

I bought a new rug before Christmas. I loved the old rug….

But after a few years and a puppy, it was ready to go. Rolled it up and hauled it to the trash can.

I tried a holiday Ruggable rug in my entry this year….

…I loved this rug…very durable and at the end of the season I picked it up and threw it in the washing machine! Sweet!

So I decided to try a washable rug in my living room. I couldn’t find one I liked on Ruggable so I checked out Tumble, another washable rug.

I found one I thought I liked, ordered it and put it down.

I didn’t even take pictures of it because I knew the minute I rolled it out it was all wrong!

Do you ever have one of those “design choices” that you get all done, stand back and go ICK!?

Yeah…that was my reaction to this rug!

It is a beautiful rug. And with 3 cats and 2 dogs, and a slew of granddoggies, I love the fact that I can pick it up and throw it in the washing machine.

But it just didn’t work.

The problem was the color…the rug is what I call a “cool” color and everything in my living room is “warm.”

I don’t have a problem mixing “cool” and “warm” decor….if it is done right.

But this just wasn’t right. All this rug did was make my couch look dingy and dirty…and it is not either.

Sooooooo…..what to do, what to do?

First, I do what I always do…I let it be for awhile. I live with it.

A few weeks later…I still dislike it immensely.

I couldn’t send it back because I had “let it be” for a few months and by then…well, life. Rolled it up, tore the bed apart and put it down in my bedroom.

I’m not swooning over it but I’m not growling at it every time I walk through the room… (yes, it looks lavender…but it is actually kind of a taupy/grey/blue kinda color…which makes it appear lavender)

So now I had to find a new living room rug…OH MY GOSH!!!! I can do a lot of things but choose a rug is not something I do well.

I went to 6 different stores…found a few I loved but not enough to justify the price. I know me…in a year I will tire of it and I will want something different. Rugs and pillows are something that is easy to change so I try to keep the cost on those in the reasonable range.

A $3000 rug in a house full of critters and traffic is probably not reasonable.

Finally settled on a new rug…

Meh…again, not swooning but …. (again, it APPEARS browninsh but it is more of a warm grey/copper/blueish color)

So, on to the new year.

So far I only have a few projects online.

A “mudroom” bench and storage for my daughter-in-law’s sister.

She found her inspiration…..

I took measurements, I drew up a plan, and made a material list.

We were going to start that project this week but we got 5” of snow Tuesday so that got pushed to next week.

Definite share when I get it done!

My neighbor wants to redo her pantry like I did mine (shared HERE). She has some family obligations for the next few weeks, so that is on hold.

We are only a few months away from potting, mulching and planting! But as I said, snow…and cold…sooooo….

So I am doing what I always do in January and February….I am hibernating.

I need these few weeks to decompress…and breath!


The dining room wainscoting reveal...

As I mention HERE when I was looking for inspiration for my dining room, I like to keep a list of projects I want to complete so I can check them off as I go.

CHECK!

The dining room wainscoting is done.

Not sure it is really even noticeable, but to me the room looks much more “finished.”

BEFORE

AFTER

Super simple project with simple but lovely results….

The entire space is a far cry from where we started two years ago….

So another simple project checked off the list.

If you will remember, I followed Timisha’s tutorial for this molding…she really does a great job of breaking down the process! She is one of the reasons I don’t do a lot of detailed tutorials…why reinvent the wheel when I can just link you to one…lol!

I still have a few more projects I would like to complete but OH MY GOSH it is stinking hot…with NO relief in sight.

Sooooo…I am doing what I always do in the heat of the summer. I am hibernating. Well, at least after noon. Good thing I get up early…I can cram my entire day into the morning hours!

Dining room wainscoting...

I keep thinking I have no more “major” projects to complete around this house…but inevitably I find something I want to do.

The dining room…a tad formalish but we actually use the room more than I thought we would for casual dining.

Like much of this house it has evolved over the last few years….the first Christmas featuring our new tablecurtainsthe new buffet….all relatively minor.

When we first bought the house the formal dining room was pretty blah…

Right off the entry…first thing you see when you enter the house.

This is the Christmas decor…LOVE! I love decorating this space for holidays and seasons!

As I have shared before, I replaced the arched transoms with rectangular ones, removed all the crown above the doors and windows and changed the light fixtures…all in an attempt to “detraditionalize” the space. It had chair rail and it was obvious it had wallpaper below the chair rail at one time. Before we painted, I had the painter repair some damage from where the wallpaper had been removed and add texture. Then we painted.

For months I have wanted to add wainscoting or SOMETHING to jazz up the space a tad. The only problem I have is that most of the wainscoting inspiration I can find is either really traditional/formal or casual “farmhousey” (like board and batten.) While I have made some changes to detraditionalize the entire space, I don’t want to go super casual. So not formal but not casual.

Don’t get me wrong…I like board and batten wainscoting.

I added it in the breakfast room

….and entry

…and I love it.

But it just seems a tad too “casual” for a formal dining space.

So…what to do, what to do.

I did what I always do when I am looking for inspiration…cruised Pinterest and the blogisphere.

There are a few issues with this room that will influence what I can do. First, the walls do not go all the way to the ceiling…so in my opinion, I need to keep the wall color above the existing chair rail.

Second, the existing chair rail. I really don’t want to remove it because then I have to do a bunch of sheetrock repair and truthfully, I think I can incorporate it into any design I pick…at least the height of it incase I find another trim i like better.

I know I don’t want to do any picture molding above the existing chair rail…kind of formalish.

I realize I have elements in this room that make it more “formal.” But I want to tone it down a bit.

So far my favorite look is this….

Timisha has a great tutorial HERE for this look.

Easy, relatively inexpensive…kinda formal but not so much that you feel like you have to set out the fine china.

Perfect.

Hopefully next week I can share the finished project!!!

Board and Batten in the breakfast room...

This is a simple project I have wanted to complete from day one.

Board and batten in the breakfast room.

As I have said before, there are TONS of board and batten designs and tutorials on the webisphere. Watch videos, read blogs, search Pinterest…find a design you love and a tutorial that makes the most sense to you.

So here is a little before and after.

Before….

Not totally offensive but lacks a little “character.”

After….

Simple project for me since I have done this a time or two. (Check out the guest bath, the entry in the Lankford house and the Bogey house. )

You might notice another little change…the china hutch.

Originally I had the awesome mid century Drexel buffet but I thought I would change it up a bit. I read somewhere china hutches are making a comeback. I can see why…pretty and functional.

Eventually I would like to add some art on each side of the hutch…maybe some botanicals.

My original plan for this piece was to repair it, paint it and sell it but honestly, I kind of like the look in this room. I FINALLY have a place to display some of my heirloom china that has been boxed up and in storage for a year and a half!

Before…

After….

Next week I will share the steps I took to give this piece a little facelift! Not difficult and as you can see it made a HUGE difference!

Until then….

Accent wall tutorial...

I shared HERE how I found inspiration for the accent wall in my office.

I shared HERE the office after everything was done. (Well, everything for NOW!)

At first glance, the accent wall may seem somewhat intimidating.

This is actually a wallpaper. I like the dark wall with lighter accent stripes. I think it gives the wall “depth” and makes a room look larger.

You could easily replicate this entire look with paint…just paint the wall then paint the stripes.

I kind of did the opposite…light walls, dark stripes. I knew from day one I wanted a pink accent wall and decided to make the stripes out of walnut. My office is a big room with tall ceilings…it can take an accent wall that makes the room APPEAR smaller.

Now if you have followed this blog for any amount of time you know I have a deep love for walnut.

I made my fireplace mantel out of walnut.

My kitchen cabinets are walnut….

I made my living room shelving out of walnut…

And most of my furniture is walnut. If it is any other wood there is a good chance I will paint it if need be…but not walnut!

So, pink wall, walnut stripes.

The first thing I did in this room, after a good purge and reorganization, was paint the walls.

The accent wall was painted pink and the three other walls and trim where painted white (BM Chantilly Lace…closest I can find to a TRUE white without an undertone.)

They were ready to go….

So here is a little tutorial for doing any accent wall.

Print off a picture of your inspiration wall…as large as you can get it on a full size piece of paper. I printed off the picture above.

Measure your wall then draw the wall to scale on a piece of graph paper. For me, this is a must any time I am doing a room makeover. I need to know the scale of the space I am working with and how each element fits in that space…on paper.

Since I wanted the accent stripes to be centered between the ceiling and the top of the baseboards, I measured and graphed from the top of the baseboard to the ceiling. I did NOT measure from floor to ceiling.

Identify and mark your center point on the wall…from there you will work out from center to left and from center to right.

I had to figure out the “scale” of the stripes. I did this by making the assumption that the longest stripe in the inspiration picture (#1) was 4” from the ceiling…just a guess. When I measured that with a ruler on the printed picture, it measured 1/8”…that became my scale…1/8” = 4”. The distance between the stripes measured 1/4” on the picture, so I determined the distance between stripes would be 8” (I actually did 8” on center (OC)…which means I drew my stripes 8” apart then centered the 1” strips of wood on that mark.)

All this information gets transferred to my scaled drawing.

I counted the number of each of the different sized stripes. The inspiration wall had 4 different sized stripes…so I assigned each size a number, 1-4. There were 5 #1s (the longest)….4 #2s…5 #3s…3 #4s (the shortest) that would fit on my wall, spacing 8” OC apart.

By using my 1/8” = 4” scale, I determined that each stripe was 24” shorter than the next (12” from the top, 12” from the bottom).

So #1 is 107” (top of baseboard to ceiling is 115” - 8” (4” from ceiling and 4” from baseboard)…#2 is 83” (107” - 24”)…#3 is 59” (83” - 24”) and #4 is 35”. (59” - 24”)

If #1 is 4” from the ceiling, then #2 would be 16” (4” + 12”) from the ceiling, #3 would be 28” from the ceiling and #4 was 40” from the ceiling.

All this was drawn, to scale, on the graph paper.

Man, this sounds confusing….but it really is not. If you draw it all out on a graph paper to scale, it makes perfect sense…I promise.

Then it was all transferred, in pencil, to the wall.

It is so much easier to erase something that is wrong than it is to tear glued and nailed boards off a wall.

So, now I have the entire plan drawn out on paper, to scale, and I have the measurements of each stripe.

I decided to make my walnut stripes 1” wide. I also decided to give them a “3-D” affect by placing them on 1/2” furring strips. Walnut is a pretty expensive wood so I made the furring strips out of plain ole’ poplar and stained the sides to match the oiled walnut.

Matt and I used his table saw to cut the walnut in 1” strips. We cut the poplar into 1/2” strips.

Using the graph paper with the accent drawn to scale as my guide, I used a pencil and level to mark the wall where each stripe would go. After marking the wall, I attached the furring strips using Gorilla Construction Adhesive and my nail gun. I let that dry overnight since the nails did not hit a stud (impossible!!) so the construction adhesive is what really holds the furring strips to the wall.

While that was drying, I prepped the walnut strips.

After cutting each piece the length needed, I sanded, then applied Waterlox. I LOVE this oil. It is a clear oil. It is my “go-to” wood finish these days. I first used it on my kitchen cabinets a year and a half ago and it has held up beautifully!!!! So I used it on the mantel and shelving. No stain…just 3-4 coats of this stuff will make any wood shine!!!

I applied two coats…steel wool and tack cloth between coats…and then applied a third coat after I had installed the strips on the wall and puttied the nail holes.

I applied the walnut strips directly onto the furring strips. Again, I used the construction adhesive and nails.

MAKE SURE EVERYTHING IS LEVEL AS YOU GO!!!! I made sure each furring strip was perfectly level and then I made sure each walnut strip was level. I worked top to bottom…wood, especially narrow strips, will bend…so make sure each strip stays level all the way down.

After I puttied the nail holes with wood filler mixed with stain to match the oiled walnut, I wiped on one more coat of oil.

After all this is done, go back and do wall paint touch up. You will scuff up the walls with the wood strips and the level.

Beautiful!

Now, this may seem like a really tough project. It really is not. It is like any other DIY project…it all hinges on the “prep.” In this case, laying it all out on paper BEFORE you start buying materials and cutting wood.

Changes I would make? I wanted a “3D affect”…in other words I wanted the walnut strips to “stand out”…which is why I added the solid furring strips. I think if I did this again (which I won’t) I would want to use spacers to make the walnut strips stand out. The only downside to that would be that wood has a tendency to “move”…twist, bend, warp. By attaching the walnut strips to solid furring strips, the walnut will not bend or warp! So maybe the way I did it is best…who knows…I just think I would have liked the look of “floating stripes” better.

Other than that, I am pretty happy with the results.

I have some leftover walnut so I THINK, when it warms up a bit (we got 8'“ of snow last night and it is still snowing), I may make some floating shelves for this wall…

Again, I eventually want to make a few other changes to the room (rug, chair, credenza) but I love this accent wall.

As with all DIY projects, the key to success is the prep and planning.

This week I planned, prepped and prepared for board and batten in the breakfast room….

My plan is to install board and batten at chair rail height and paint it white.

I also finished this nasty china hutch…

I know this looks pretty ratty but I painted it and did a little tweeking on it and it turned out super cute. My plan was to sell it, but I think I will move it into this room and style it first…I may even like it well enough to keep it. We’ll see.

Hopefully next week I will have the breakfast room done and in order and I can share that as well.

Until then….

Bathroom makeover on the cheap....

IMG_1880.JPG

I consider myself “apolitical.” In other words, I have an opinion, a personal “ideology,” but I really try to avoid all the political “fodder.” It’s just too depressing, stressful, overwhelming…

It eats into my personal happiness.

But with all that is going on, I found myself sitting on the couch mesmerized by the news ALL DAY FOR AN ENTIRE WEEK!

I was so overwhelmed.

I HAD to get moving and my little morning walk and ride wasn’t cutting it…just too much time left in my day.

So I tackled a project I could not have cared less about lifting a finger or spending a dime on…the guest bath.

It gets used MAYBE 2-3 times a year when the kids come for overnight visits. I threw down a few comfy rugs, stocked it with “guest necessities” (this stuff is important) and hung a nice curtain. I would clean it when I knew we were going to have over night company…other than that…out of sight, out of mind.

The fact that few used it or saw it on a regular bases was just fine by me.

It wasn’t completely offensive.

It was just “blah.” Beige walls, off-white cabinets, dated, boring lighting and fixtures…just blah.

Again, who cares…

But I needed to get moving and put my body in motion. And this was the perfect project. Inside in the AC but away from the TV.

Inspiration…anything “unblah.”

My plan…”unblah” it.

Budget…as little as it takes to “unblah” it.

IMG_1843.jpg
IMG_1844.jpg
IMG_1842.jpg

Usually I am all for finding an inspiration, making a plan, and working with a sound budget. In my opinion, it is the only way to attack a big project like this.

But I need to move and I didn’t have the time or patience to sit and think about this for weeks. I decided my MAIN objective was to use the materials I have on hand and try to make a few changes that would “unblah” the space without breaking the bank.

First on the list…get rid of all the gold fixtures. The style wasn’t TOTALLY offensive but they are gold…gold towel and hand towel bars and gold TP holder. I decided to “repurpose” the hand towel holders and TP holder by painting them black. A little primer, a little black paint…both in my stash. Cost…zero.

IMG_1875.JPG

I also replace the faucets…the existing weren’t totally offensive but these were pretty inexpensive on Amazon…less than $50 each.

I removed the towel bar and added a little bit of board and batten with hooks for towels. Similar to my entry….super simple…again look for a tutorial that makes sense to you! Less than $50.

IMG_1886.JPG

I used some leftover trim paint to paint the board and batten and all the trim. Cost…zero.

I painted all the doors in the main part of the house before we moved in…but again, this space got completely ignored! I even ordered black door knobs but never put them on these doors. I used the left over black paint and the knobs I bought over a year ago. Cost today…zero.

The cabinets….I used the leftover paint from my master bath cabinets. Cost…zero.

I did buy new inexpensive hardware. About $4 each so less than $40. (But I could have painted the existing hardware with black paint I had on hand.)

IMG_1880.JPG

The ceiling needed to be painted. Big water spot around the HVAC vent. I sprayed the spot with some Kilz I had on hand and dug out the leftover ceiling paint! Cost….zero.

IMG_1839.jpg
IMG_1869.jpg

The beige walls needed to be “deblahed.” I painted them white…plain ole’ pure white. I only needed about a gallon and my son had some leftover from their house. Cost…zero.

IMG_1881.JPG

I would have loved to change out the 23 year old tops…maybe add a pretty tile backsplash…but the tops aren’t terribly offensive (just a bit dated) so for now they stay. Just added the new faucets.

Three new light fixtures…two vanity lights and a pendant light…again, Amazon. All three for less than $250.

IMG_1884.JPG

I could have repurposed the lights that where there with a little paint but the new were worth the investment.

Again, this space only gets used 2-3 times a years so it’s not like I need something expensive.

The flooring could stand to be changed…but again, this is a room that is rarely used….soooooo…..

The only other thing I would love to do in this room is change out the mirror…or at least frame it. I found THIS tutorial for a wall treatment I absolutely LOVE….

KM_DIYMirrorUpdate_0015.jpg

Not necessarily the gold mirrors…I think I would go with round wood framed. But I love the wood slate treatment and I may eventually tackle that project…someday…maybe when we have another national crisis and I need to focus on something constructive.

Sadly at the rate our country is going, that may be next week.

With all the negative looming over our heads…fires, hurricanes, Afghanistan, Covid, inflation….I can not stress enough how important it is to stay focused on the positives in your life. Believe me when I say I GET IT. It is hard to stay positive when people we love are sick and dying, our retirements are swirling the drain, you can’t meet you monthly financial obligations, the very fabric of our great country is being shredded.

Turn off the tv…shut down your computer….turn your radio dial. I’m not advocating bathing yourself in complete ignorance….just turn off and tune out the onslaught of negativity and focus on something that makes you happy.

The laughter of your children as they play.

The sound of the the crickets and birds on your morning walk around the neighborhood. (Get out and breath fresh air…EVERY DAY)

The babble of a brook in a nature park.

Coffee on the porch early in the morning before the heat and humidity sets in.

A tiny bit of “quiet time.” (Whether you do yoga, meditate, read your bible, just sit and stare…ALWAYS carve out a little bit of quiet, alone time EVERY DAY.)

A stroll down the aisles of Hobby Lobby…fall and Christmas are just around the corner!!!

I’ll admit it…my life isn’t all roses and peach fuzz. Somedays I really struggle to find something positive to focus on. But as I said HERE, you choose your “hard.”

Choose wisely.

Board and Batten Entry....

IMG_1171.JPG

The entry…the one place in your home EVERY guest will see. They may not see your awesome pantry…or even your darling guest bath or amazing kitchen, but when you open the door they will see your entry.

It is one reason I really stressed about what to do with this space. I wanted it to be warm and welcoming, and while it is a big space, there is very little “wall space” to allow for big credenzas or entry storage. I really don’t need either since we usually enter from the garage into the laundry room…great “drop zone” for our packages, coats, purses, shoes, etc….but I like the look of both in entry spaces!

Of course the first course of business was replacing the dated door, window and light fixture….relatively easy fixes and something I did before we moved in!

IMG_6549.jpg
This was after the window was replaced but before the door, light fixture and flooring!

This was after the window was replaced but before the door, light fixture and flooring!

I debated on the board and batten for some time…

IMG_0580.jpg

I just felt it needed a little “something.”

It only took me 16 years to get the entry in my last house the way I wanted it…I feel like I am moving at warp speed on this one…lol!

At one point I tried a larger rug…but I didn’t like it…I honestly like the little dinky rug that is probably too small for the space. This is a prime example of doing what I LOVE vs. doing what the “design experts” tell me I am suppose to do.

A hint of trouble came when winter hit and we needed a place for visitors coats…other than putting them in the closet in the office, there really was no place to hang them.

Coat racks are a bit out dated and just hanging a wall mount coat rack didn’t trip my trigger.

Board and batten allowed me to put a few hooks on the wall.

IMG_1172.jpg


But that led to a little problem with the table. I LOVED the little walnut table, but you can’t hang coats above a table.

IMG_1084.JPG

Again, it is NOT my style HOWEVER it was my grandparent’s and it is walnut…heirloom and walnut…my two favorite elements.

Truthfully I like the look of an entry table…but I really need the hanging space so I went looking for a simple bench.

And I found it….

IMG_1172.JPG

I LOVE this bench I found on Etsy. Not the least expensive bench out there (and I paid a tad more for walnut) but the quality and craftsmanship made it worth the investment.

Since the table is a family heirloom I didn’t want to get rid of it. The little wickerish bedside table in the guest room had no sentimental value so it got hauled to the bunk room and the table is now a bedside table in the guest room…perfect!

I love the look and feel of this entry now…warm, inviting, functional.

IMG_1173.JPG

I am currently playing around with the dining room table.

When it was set the other way, facing the living room….

….there was no room on the only large wall for a buffet or credenza.

So I have turned the table the “other” way, which gives me room for a buffet or credenza along the wall…

IMG_1176.JPG

But I am not sure I like it “that way.” So it will sit while I ponder.

That is just how I roll…sometimes I have to sit and ponder, like whether to put up board and batten or whether I should turn my table a different way. Sometimes I know almost immediately I am not going to like it. Prime example, the “river rock” I put in a flower bed for drainage. I knew immediately I did not like the white rock I put down originally!

So out came the white rock and I found some that I liked better…

IMG_1174.JPG

Sometimes it is okay to sit and “ponder.” I have learned that the more I really think about something, the more I tend to like it long term. When I just jump right in and start on a project without really visualizing it, living with it in my mind for a while, I tend to not like it as well. And that is a waste of time, energy and money!

Until next time….