Another Christmas....

Ever year I feature my Christmas decor…every year I think not much has changed.

But it does change…a tad here and there.

Last year I shared a few little changes…same this year…a few things here and there.

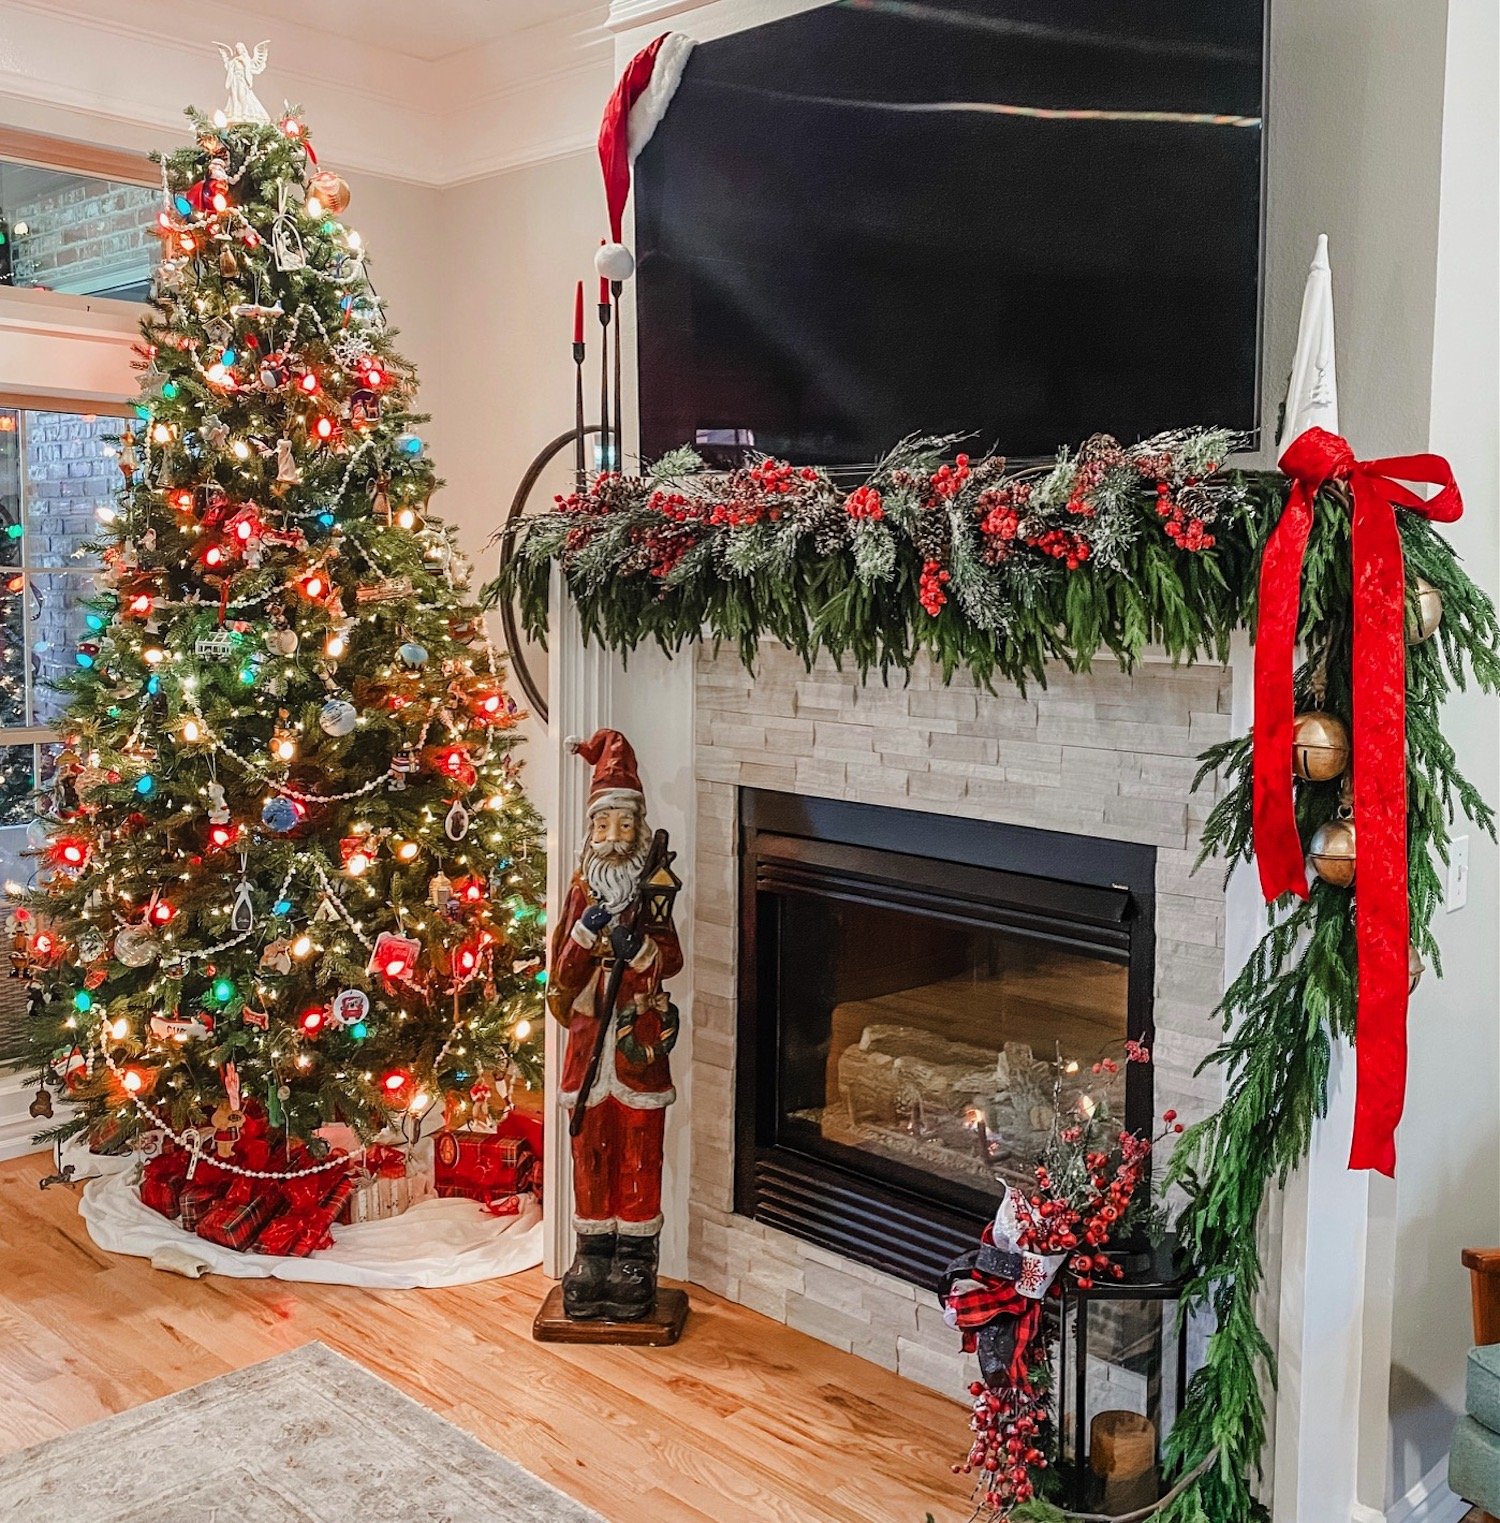
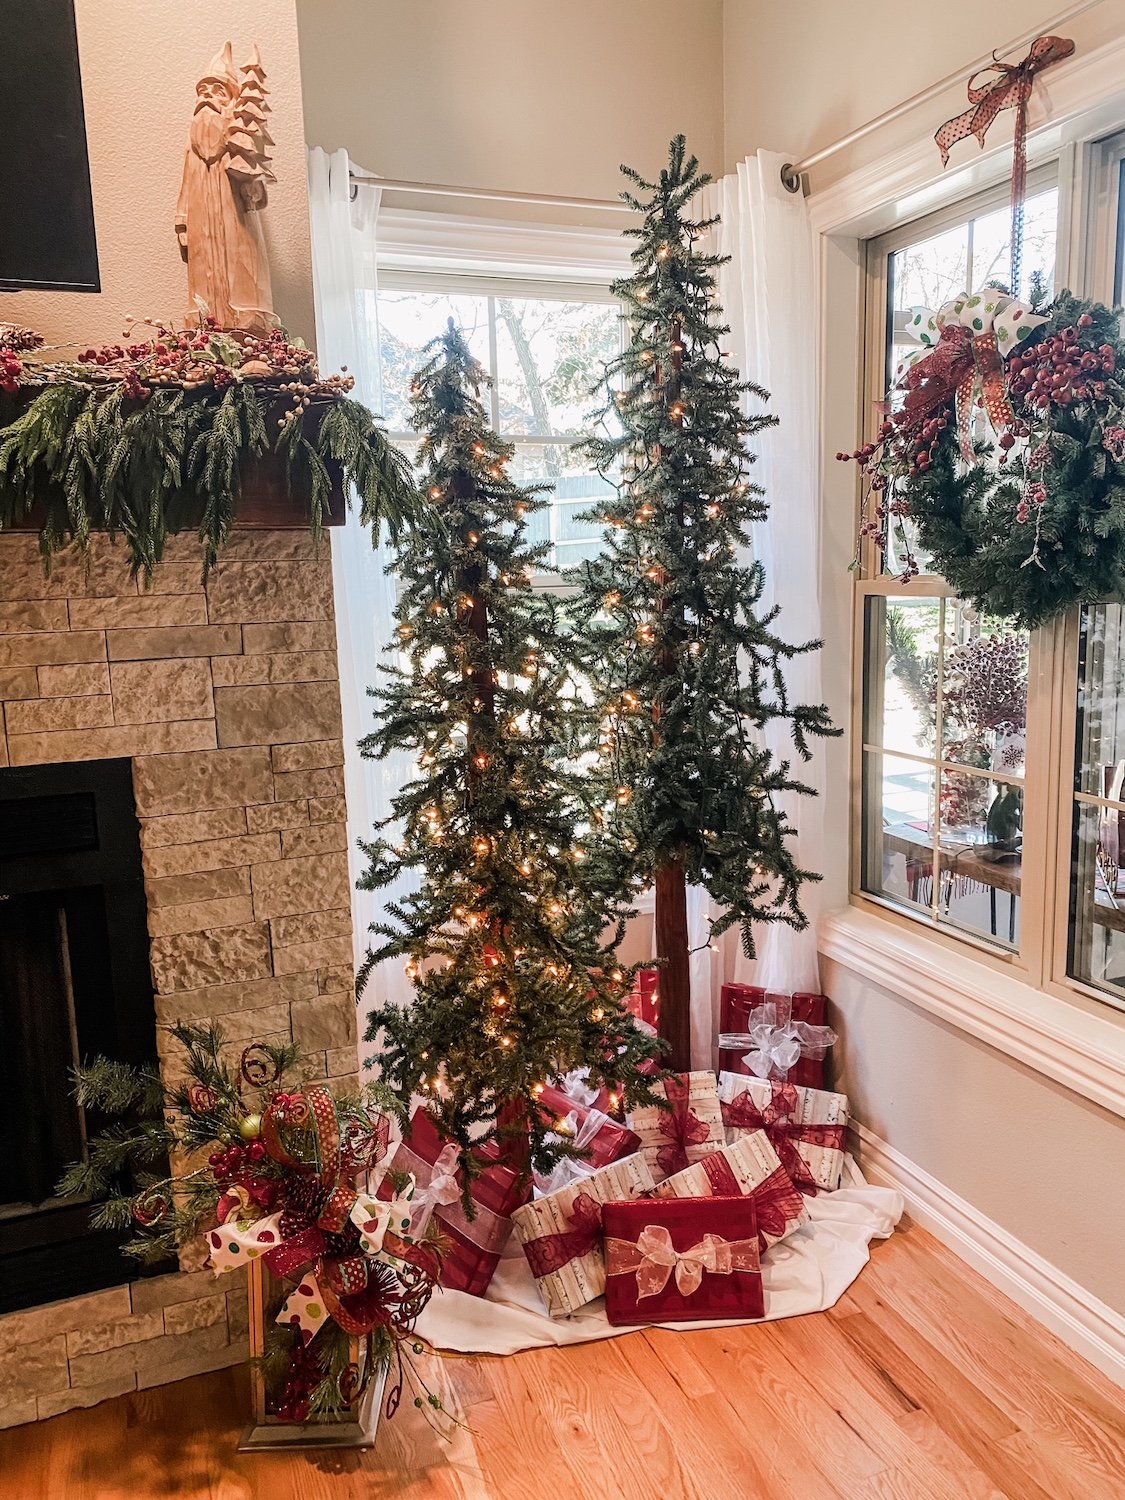
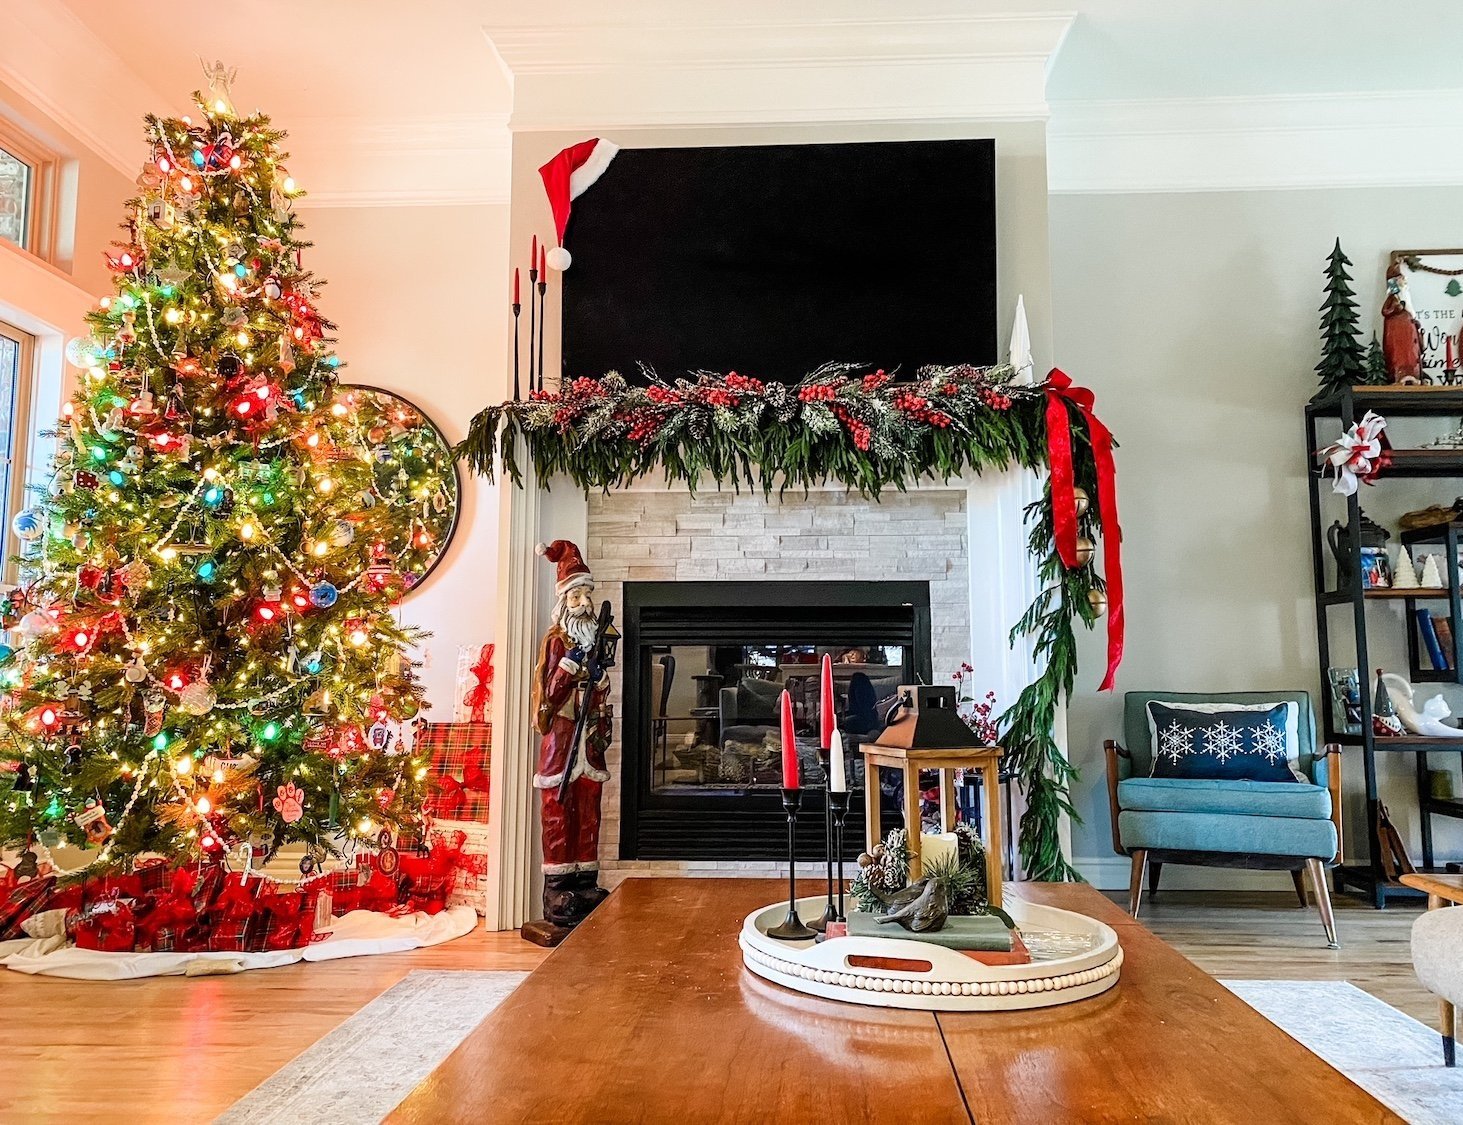
So what did I change this year? Probably the biggest change is the mantel decor….

Last year THIS soft touch garland was ALL the rage…everyone wanted it. Which is why it was sold out and on Ebay for mega bucks. So I waited until after Christmas and bought it when it was back in stock. Problem was, I forgot I bought it, several times, and by the time I brought down all my Christmas decor I had 10 strands of it along with three soft touch wreaths I have NO idea what to do with!

No biggy…while it is a beautiful garland, you really have to layer it to get a good thickness. On my living room mantel I have 4 5’ strands and 1 15’ strand.

In the den I layered 5 5’ strands….

I used Command hooks about every 1-1 1'/2’ and floral wire to secure it.

I added a red velvet ribbon and these awesome bells….

I would love to link to the bells but as usual I have NO idea where I got them. I know I ordered them but from where? Not a clue!

Last year I layered the berry picks on the mantel…this year I layered them on top of the garland…just plain ole’ picks you can get at Hobby Lobby…four on each mantel.

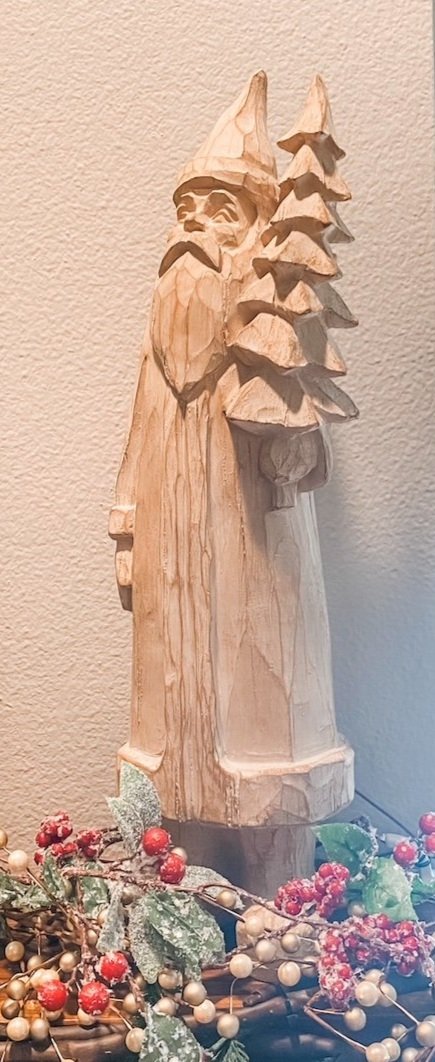
Another new addition is this wood Santa….

I know WHO influenced me to buy it but have no idea WHERE he came from. I follow a couple of great ladies on Instagram…Deb and Danelle…and as influencers go they get me every time. Their style isn’t necessarily my style but they feature elements I love. Truthfully I think that is where the bell inspiration came from!

What drew me to this Santa was his “girth.” He’a skinny.

Okay, so here is the deal…ALL my Santas are skinny. I have NO idea what that is all about but it seems like every time I am drawn to a Santa he is on the anorexic side.

I kid you not.

Another element I added to my decor this year are the cabinets wreaths….

For several years I have wanted to add “mini” wreaths to my upper cabinets. I finally found am inspiration for what I wanted, but honestly, when I put it all together they came out a hair too big. Hardly “mini.”

So be it…maybe next year I’ll try again…for this year it is what it is….

The precious train!

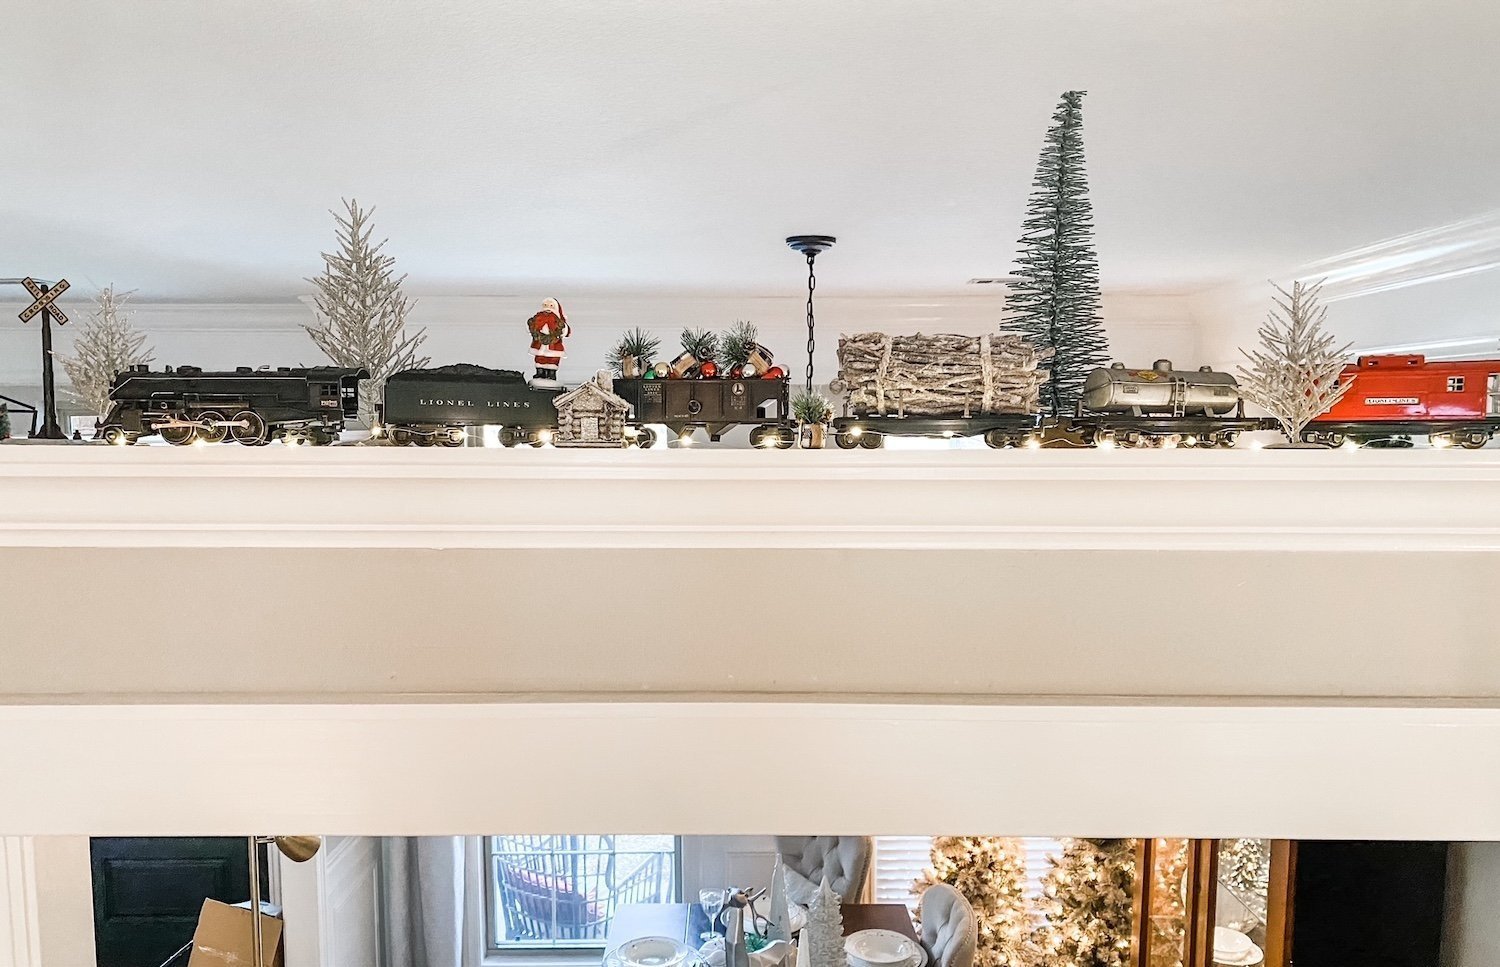
This train was a gift from Brian’s grandfather to his dad in the 40’s…it was used then. Last year we displayed it above the dining room. This year we got it up and running and put it around the tree in the office.

We didn’t put it around the main tree in the living room because 1) too many gifts under that tree and 2) the SLIGHTEST bump derails it and the living room is a high traffic area.

Not sure Callum is really old enough to appreciate it but I sure love it!!!!

And now the pièce de résistance…the final tree in my life long dream of having a tree in every room!!!

For years I swore if I had the time AND the money, I would put a tree in every room of my house. Last year the goal was complete.

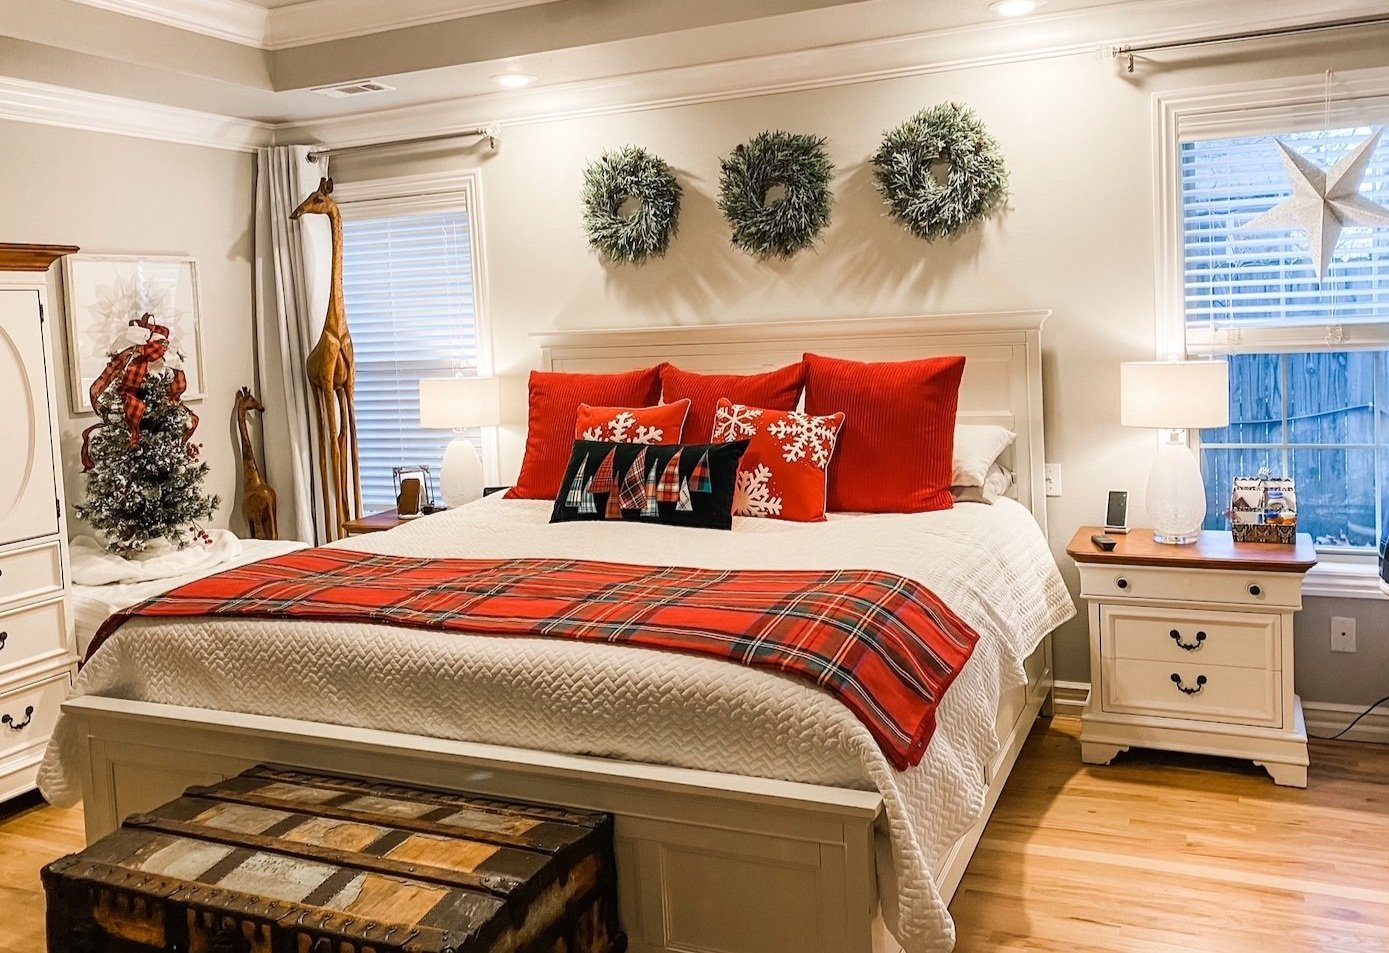
The master bedroom tree!

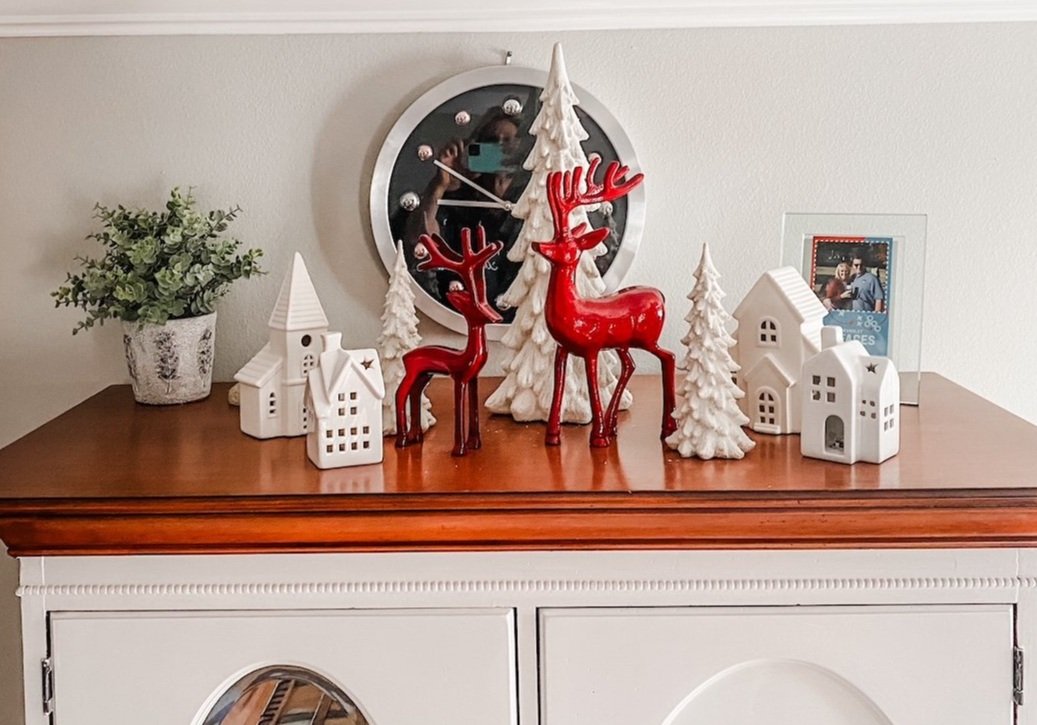
I added a few little knick knacks on the highboy. Just a few little things from Home Goods…nothing fancy.

The office….

The wreath is new…a tad over powering. Again, I tend to “go big” and then I’m not so thrilled with the result. Meh…next year I’ll change it!

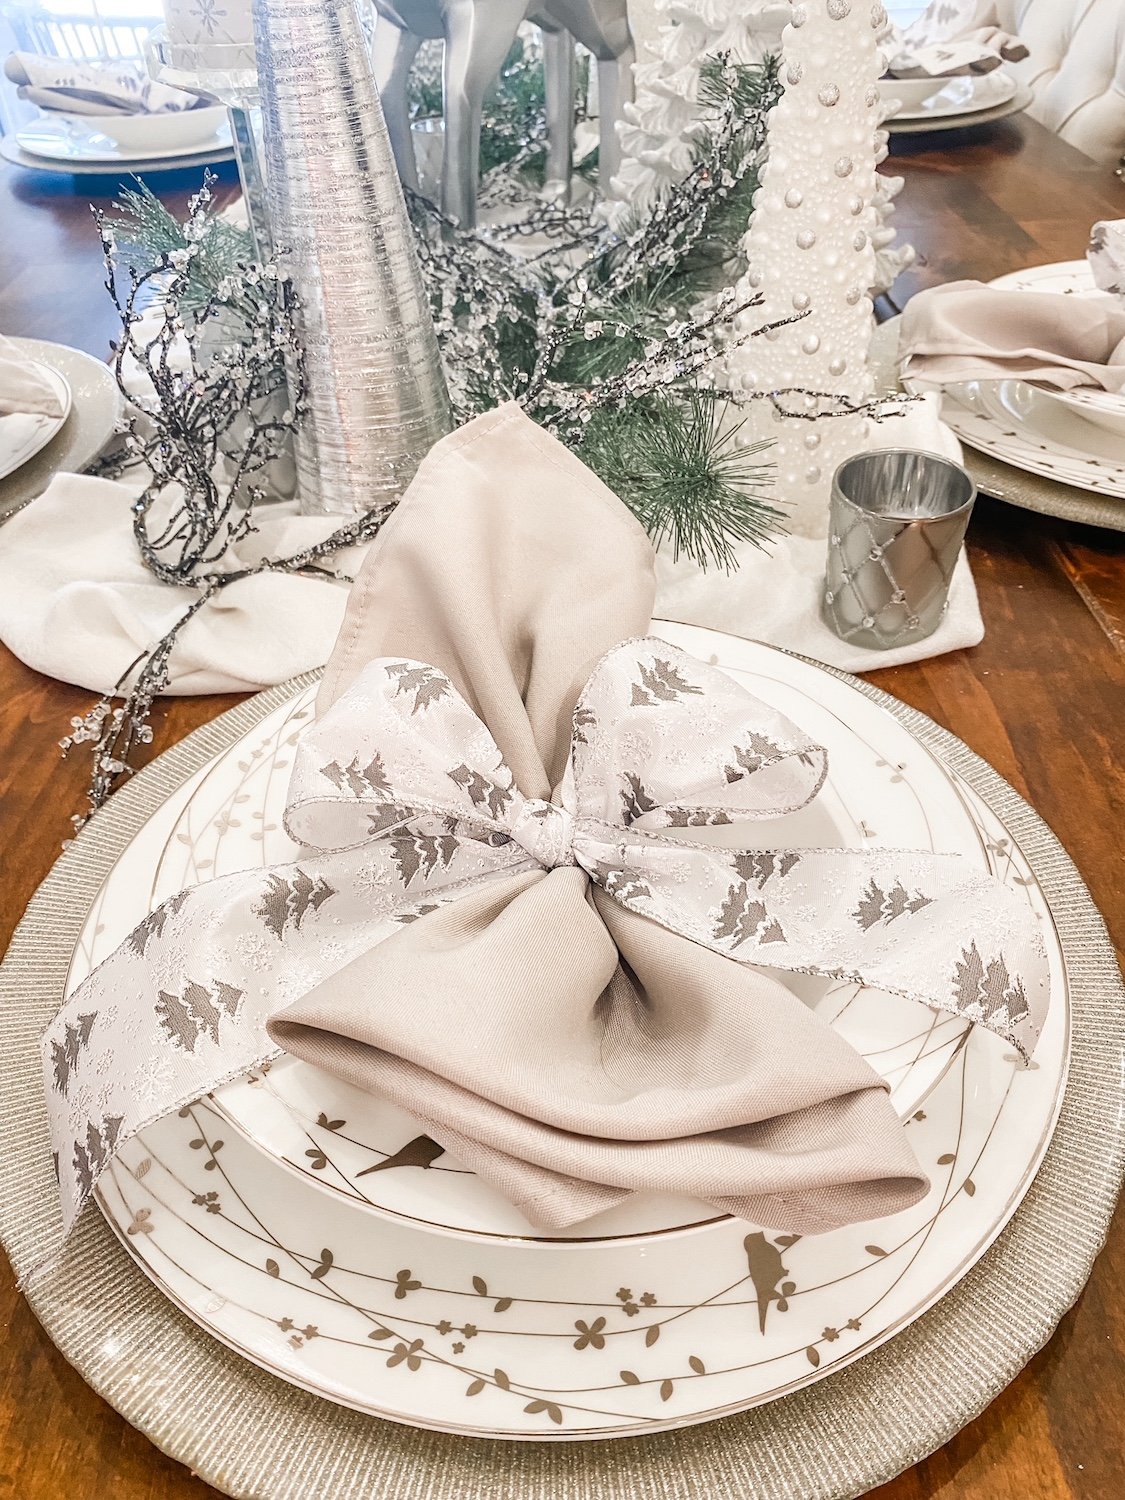
The dining room….

This is always one of my favorite rooms to decorate.. I love the neutrals even though I am drawn to all the vibrant holiday colors in the other rooms.

I like to keep the place settings out even though we don’t usually use these dishes because they have to be hand washed. Simple but elegant.

The sunroom….

I have shared this room before. It is my “Stewart plaid” room in honor of my “Stewart family.” Love it and I am always looking for more Stewart plaid elements to put in here. This year my sweet friend Carrie brought me this precious decoration from Italy!

The den…

The breakfast room….

Not all the trees have decorations…some just have lights. That’s okay. They are still pretty and the four that are decorated take enough time!

The entry…

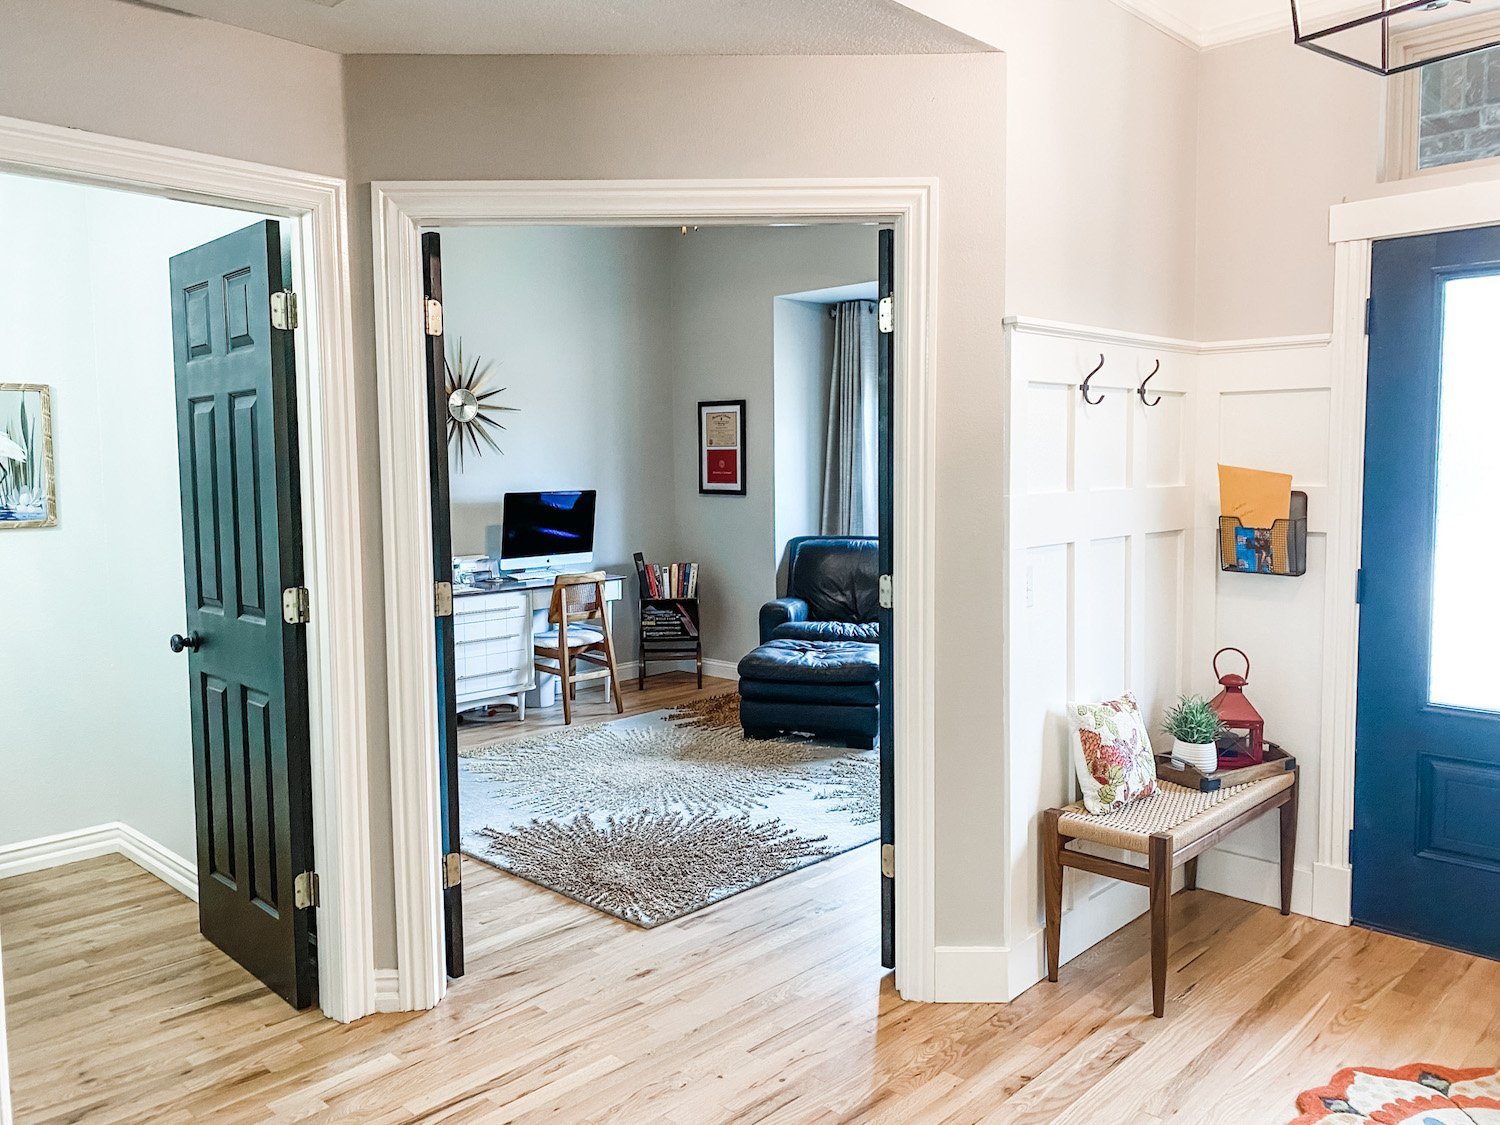
Little has changed here…added some little wooden trees and a Christmas sign on the trim…another PJ pillow. Love the view into the office!

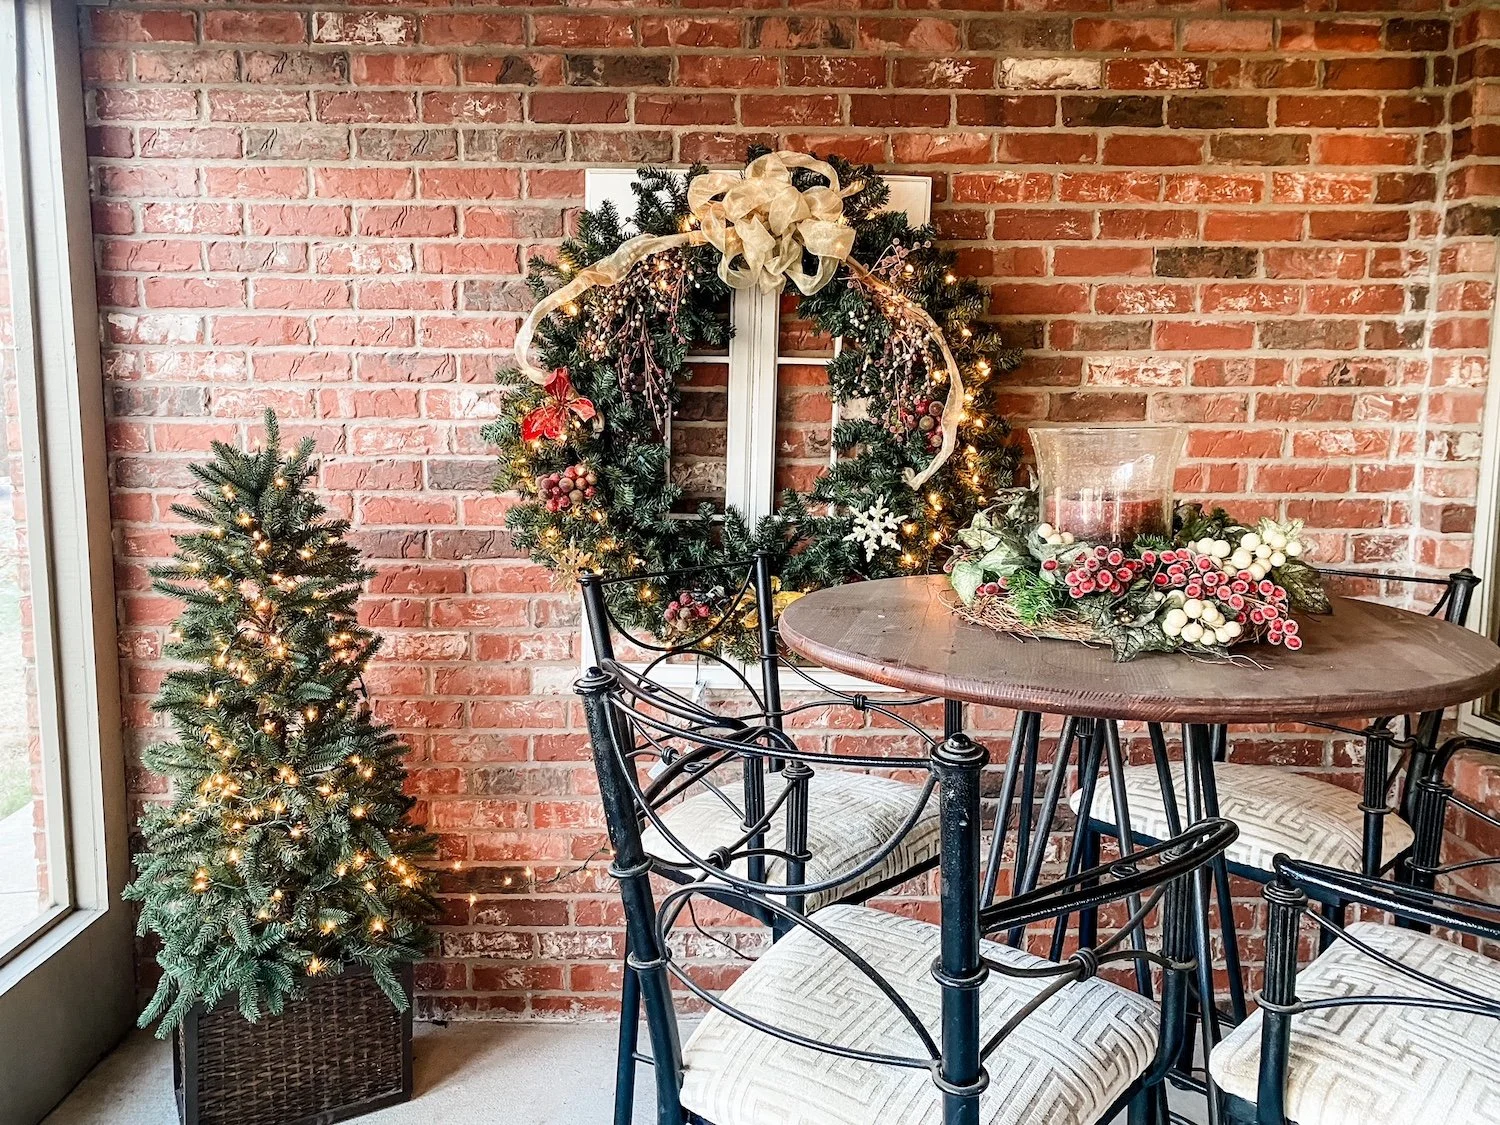
The screened porch….

And of course the main tree in the living room….

All these trees are connected to remotes (THIS is one I use and LOVE) and are turned on every day. I don’t even want to tell you what my electric bill is for the month of December. Suffice it to say it is cheaper to cool this 3500 s.f. house than to light it up…lol!!!

But I love it and as long as I am physically able to do it, I will. Then I may hire it done!

I love this holiday and it seems that year after year I do indeed add something new. I hope something I did will inspire you to add a little more to your home.

Getting ready for the holidays!

It’s been a minute.

I really haven’t had too much going on project-wise…little to share. I guess I could have shared the new water line I ran from my seasonal meter out front to the back yard. Or maybe the repairs I made to a neighbor’s kitchen island or garbage disposal. Could have shared the cute cupcakes the little girl next door and I made and delivered to our neighbors.

I could share the Alaskan cruise we went on in September. I’m not a travel blogger…just go! I promise you won’t be disappointed.

But seriously, no major projects. I have a few in the thinking/planning stage I will share in the coming months. One will be a room makeover for a very special “delivery” coming in May! Stay tuned!

So for now I will just share what is coming this weekend….CHRISTMAS!!!!!!

Yep…for the first time ever I am actually doing a little Christmas decorating BEFORE Thanksgiving!

Why? Well, it has been a lifelong dream to have a tree in every room of my house…and last year I finally achieved that dream.

It started with the “black and white” Christmas tree I put up in the office….I share that HERE.

This year we are going to set up the vintage train set around this tree.

Callum, our youngest grandson, will be 10 months old and he will LOVE it! This is the train set Brian’s grandfather gave his dad when he was a little boy…so Callum will be the 4th generation to enjoy!

The Stewart plaid tree is one I added to the sunroom two years ago…..I shared it HERE!

And for the first time ever, I decorated the master bedroom for the holidays….

What I didn’t share is the large red and white tree I added to this room later in the season.

So with these new additions, as well as ALL the Christmas decor through out the house, I just don’t think I can get it all done the weekend after Thanksgiving….the main tree in the living room takes an entire day!

So for the first time ever I am breaking my hard fast cardinal rule of NO CHRISTMAS BEFORE THANKSGIVING! I love fall decor and I really want to enjoy it for as long as I can. So I have decided to decorate the office, master bedroom and sunroom for Christmas since those rooms don’t have a lot of fall decor!

So stay tuned…at some point in the next few weeks I will share all the holiday decor….again. Little changes from year to year but it is my hope that something I do, and have done for years, may catch your eye and give you a little “Christmas inspiration!”

Happy Thanksgiving!

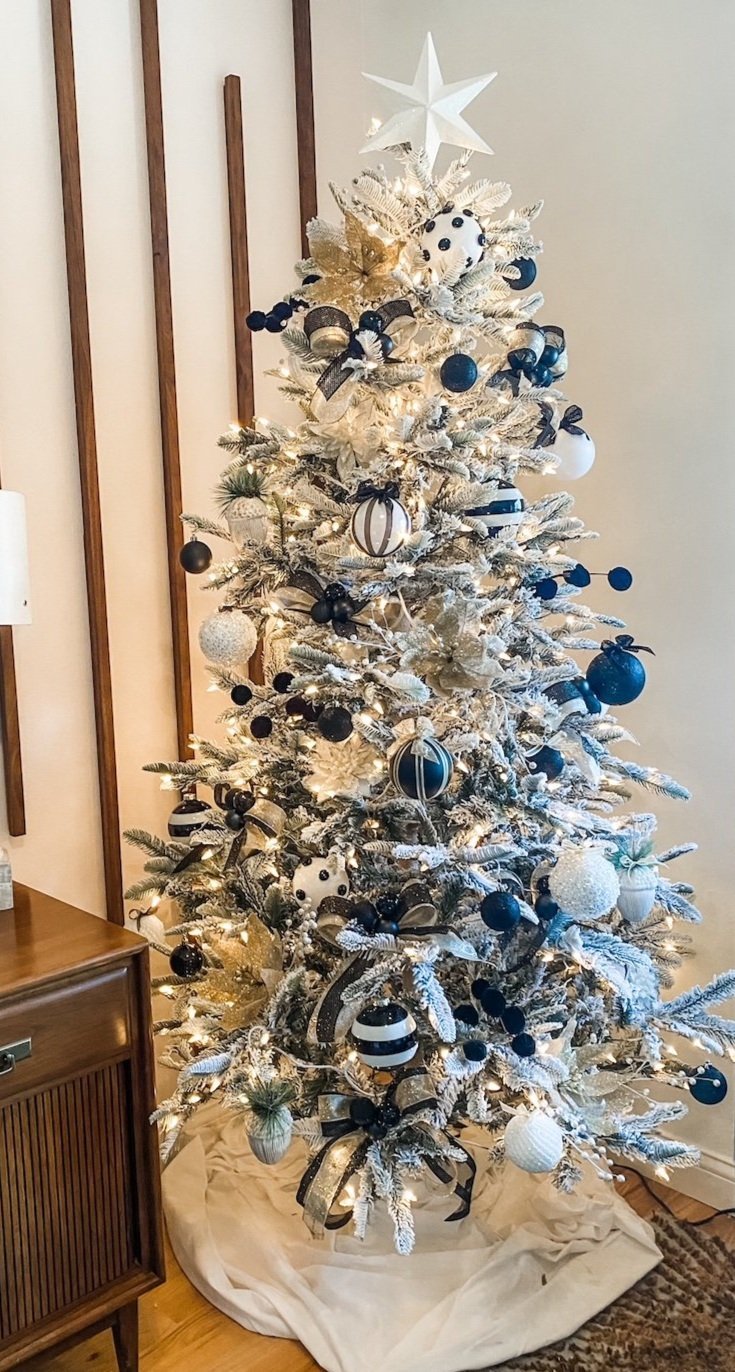
A new black and white Christmas tree...

This is our third Christmas in this house and every year I add something new.

Last year it was the “Stewart decor”….love and can’t wait to deck this room this year!

Year before was my “funky bow” obsession…still love those as well.

In both these links you can see a lot of my Christmas decor. Over the past few years I have added simple pre-lit trees to several rooms…guest room. office, all season room, dining room…most already had some “froo-froo” (flocking, berries, pinecones) so I didn’t really decorate any other than the main tree in the living room.

But while cruising Instagram I saw something that stopped me in my tracks.

This tree….

LOVE! I just think it is soooo pretty!

When I added the accent wall in my office earlier this year, a credenza is one element I wanted for this room. A few months ago I found the perfect credenza….a Heywood Wakefield Cliff House credenza in super awesome condition. Just happen to see it on an Instagram posting from one of my favorite vintage stores and was able to snatch it up over the phone. I can not tell you how much I love this piece….

So….when I saw the black and white Christmas tree I knew exactly where I could put it. In the corner next to the new credenza in my office where it can be seem from the living room and entry!

Last year I bought a little flocked tree for this room and set it on the side table in the front window. Pretty but just okay.

So I set out to recreate the black and white tree!

First thing I did was order a simple pre-lit flocked tree…bought THIS one and I really like it.

Then I took a picture of the inspiration tree to Hobby Lobby to find each little element.

One problem I ran into was finding the different ornaments…black and white polka dot and striped ornaments are not really the “in” thing.

What to do, what to do?

Time to break out the ole’ glue gun and get creative.

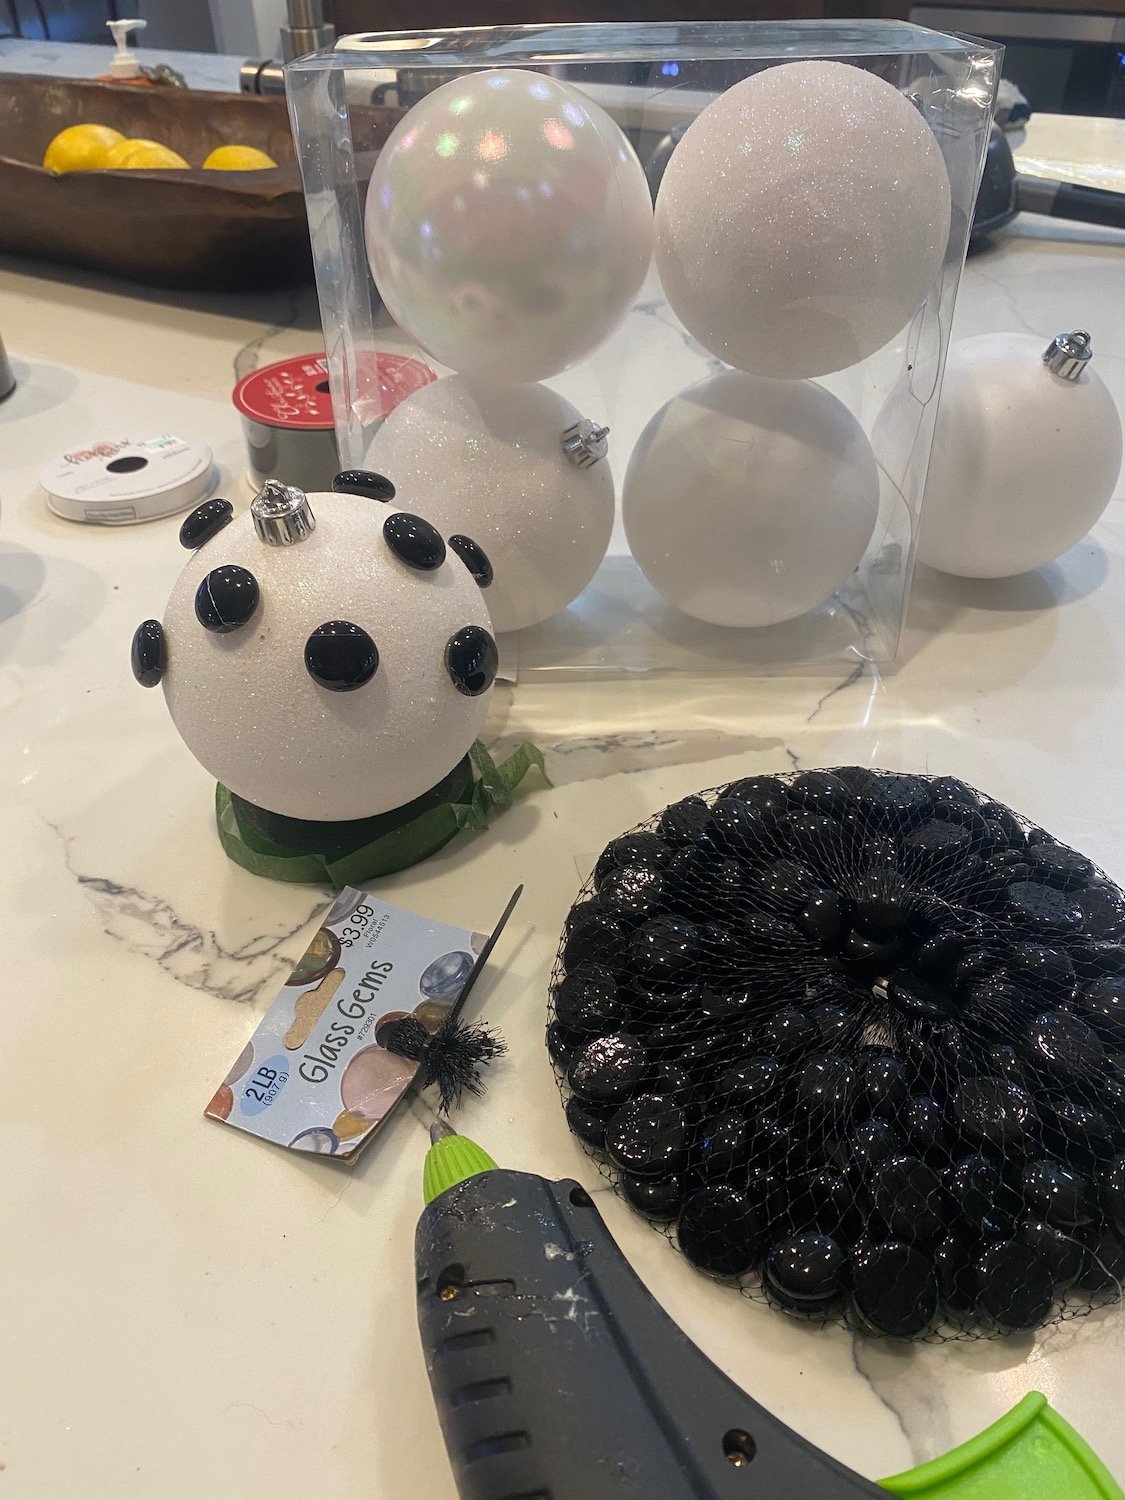
I bought some plain black and white ornaments and glued black glass beads and ribbon to the white ones and gold ribbon to the black ones.

I added pretty little bows to a few ornaments..

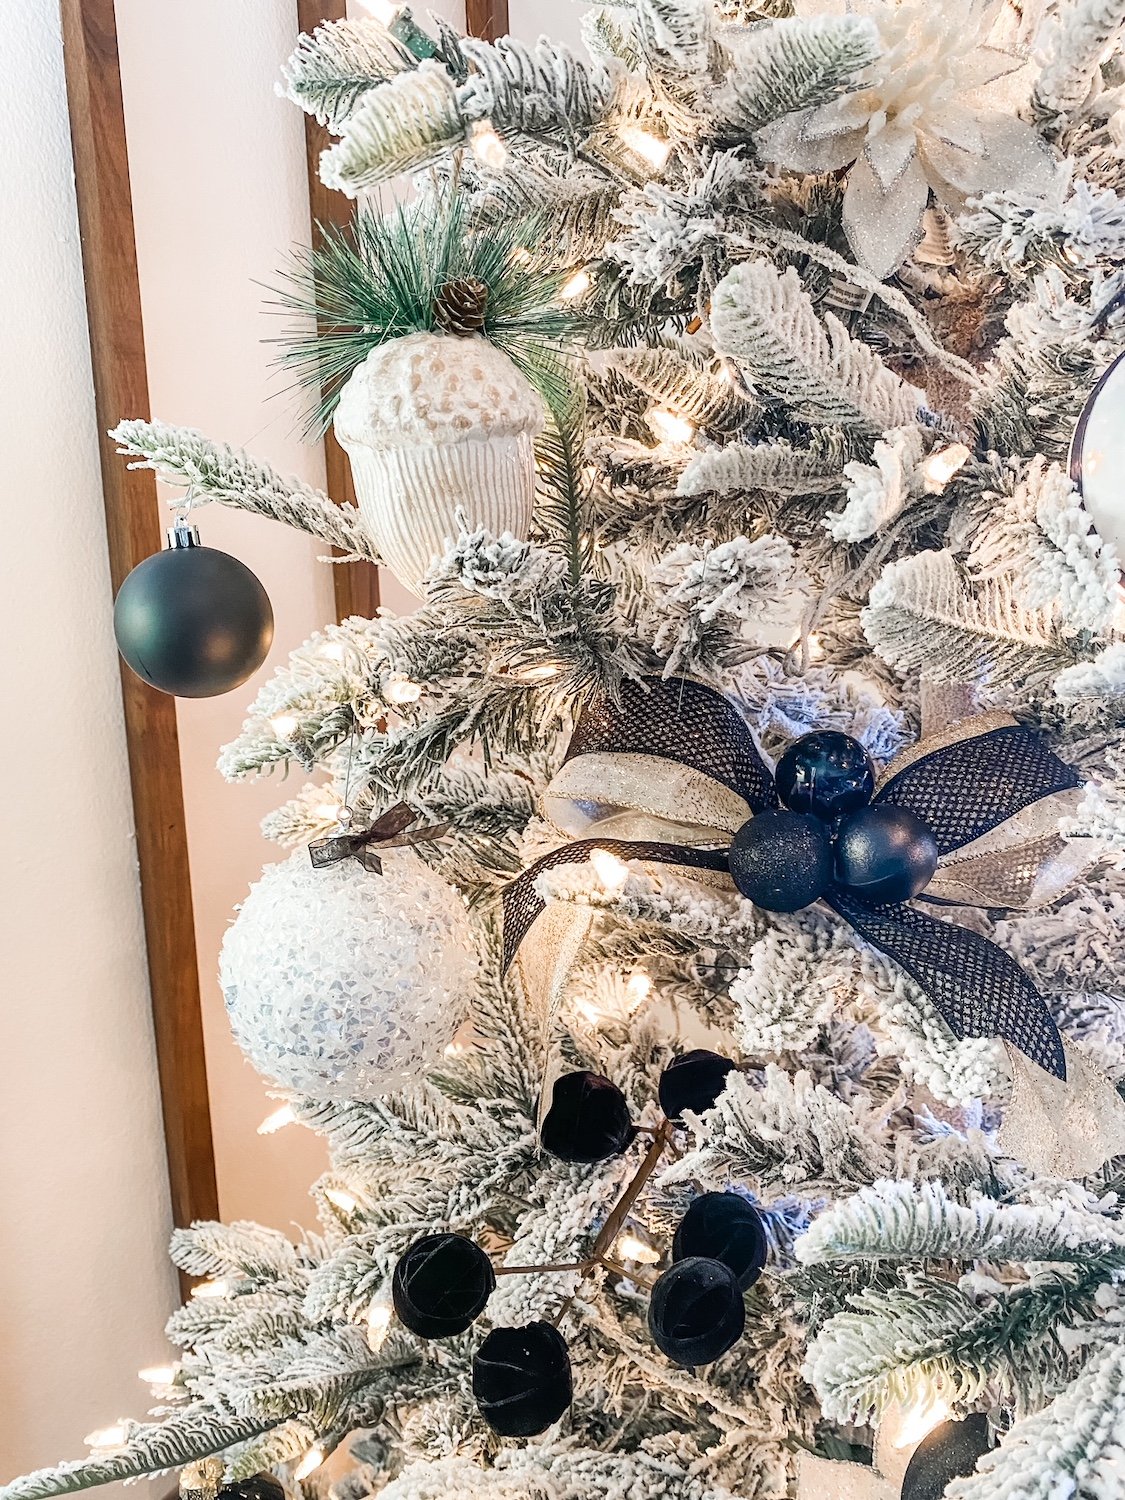
I was able to find a few “glitzy” ornaments that I dressed up with bows, a few velvet picks and even some simple white pinecone ornaments.

I made big bows out of gold and black holiday ribbon and glued inexpensive small black ornaments together to create little clusters.

Filled in here and there with inexpensive poinsettias.

The ornaments are certainly not “keepsake” ornaments like the main tree but simple and inexpensive and will be super easy to change if I decide to go with a different color scheme later down the road.

I wanted a tree that was simple but elegant.

I think I pulled it off!

I wish I had a link to the inspiration tree but it was on instagram and now I can’t find it. But there is tons of inspiration on Pinterest so look until something takes your breath away….then go out and create it!

YOU CAN DO IT!!!!

Accent wall tutorial...

I shared HERE how I found inspiration for the accent wall in my office.

I shared HERE the office after everything was done. (Well, everything for NOW!)

At first glance, the accent wall may seem somewhat intimidating.

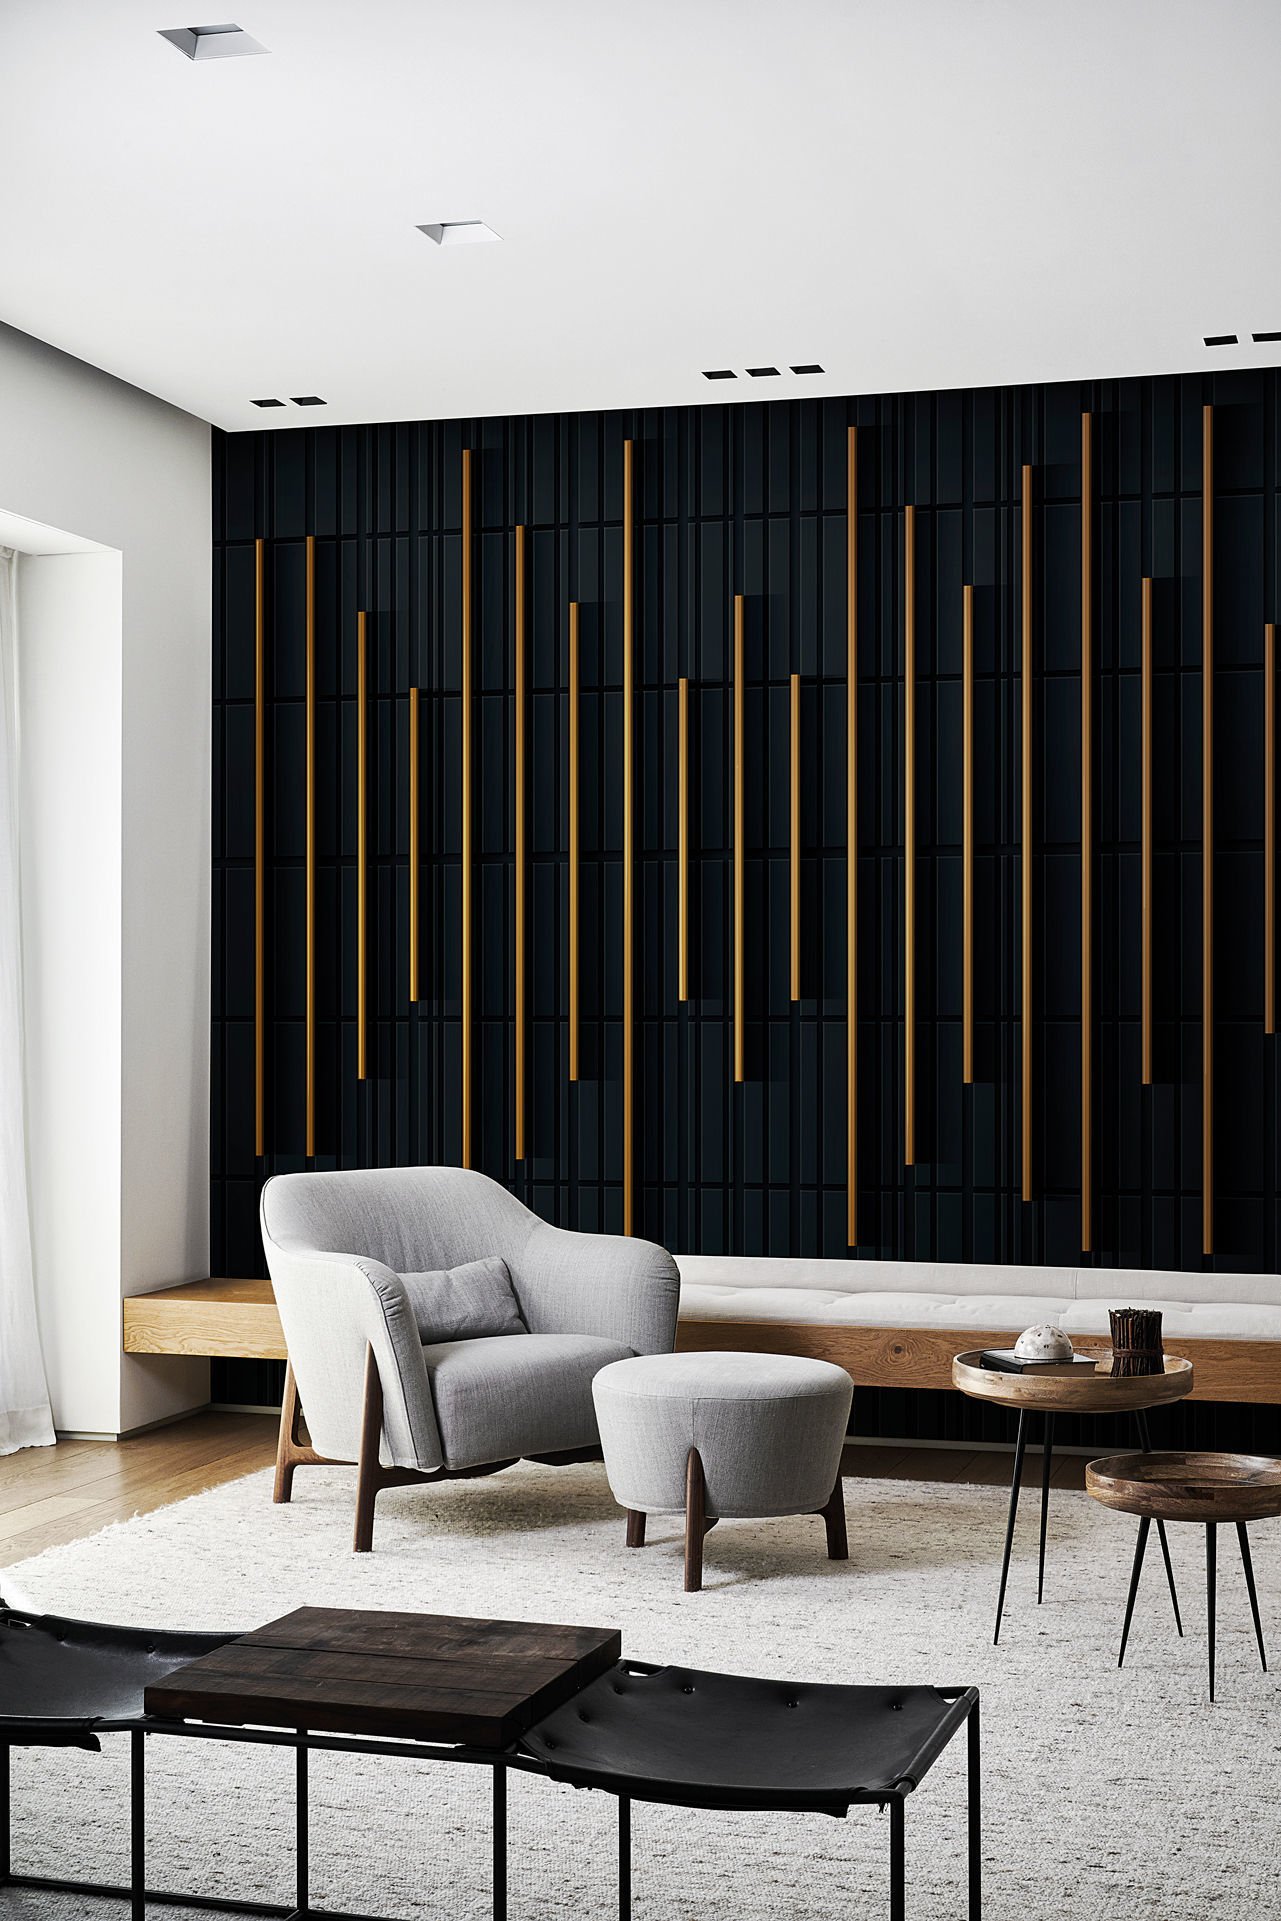
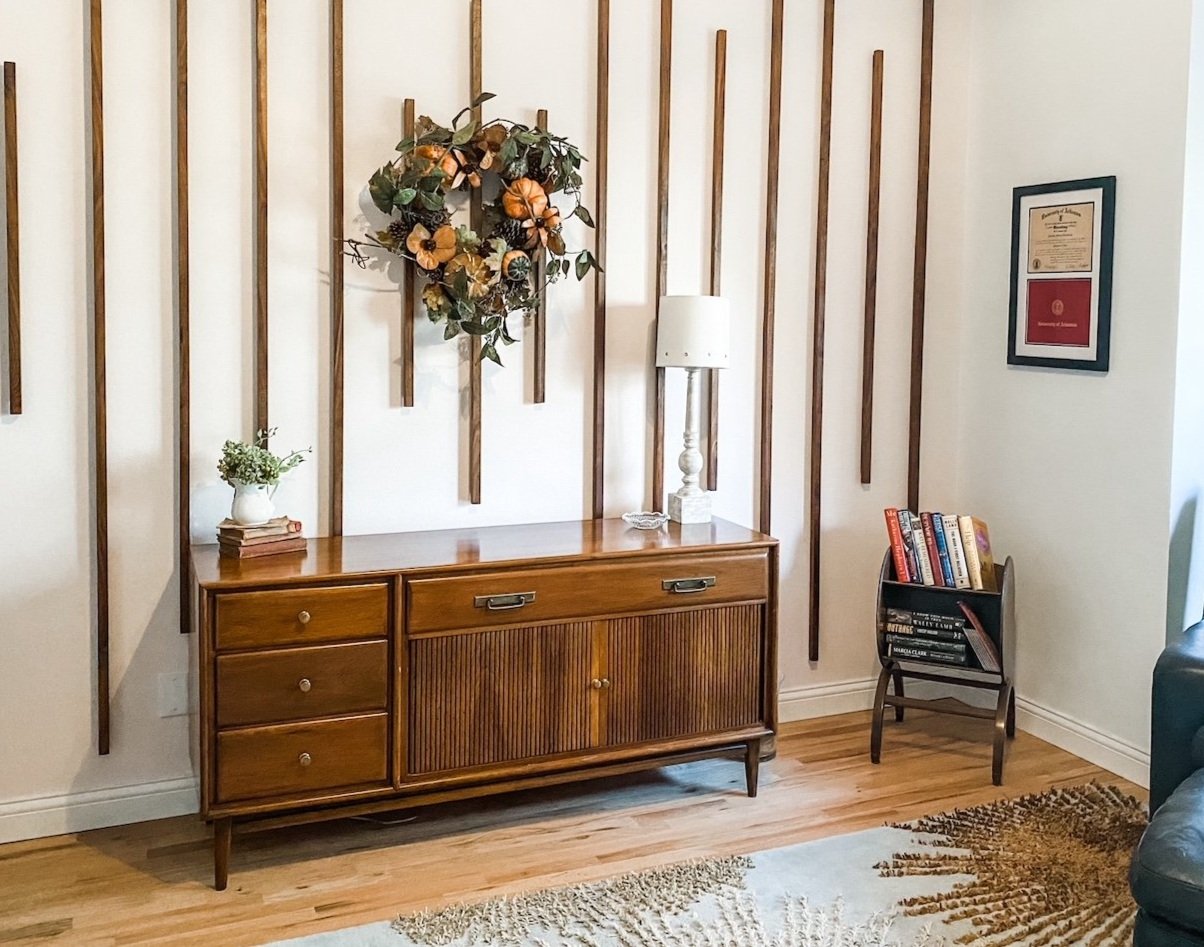
This is actually a wallpaper. I like the dark wall with lighter accent stripes. I think it gives the wall “depth” and makes a room look larger.

You could easily replicate this entire look with paint…just paint the wall then paint the stripes.

I kind of did the opposite…light walls, dark stripes. I knew from day one I wanted a pink accent wall and decided to make the stripes out of walnut. My office is a big room with tall ceilings…it can take an accent wall that makes the room APPEAR smaller.

Now if you have followed this blog for any amount of time you know I have a deep love for walnut.

I made my fireplace mantel out of walnut.

My kitchen cabinets are walnut….

I made my living room shelving out of walnut…

And most of my furniture is walnut. If it is any other wood there is a good chance I will paint it if need be…but not walnut!

So, pink wall, walnut stripes.

The first thing I did in this room, after a good purge and reorganization, was paint the walls.

The accent wall was painted pink and the three other walls and trim where painted white (BM Chantilly Lace…closest I can find to a TRUE white without an undertone.)

They were ready to go….

So here is a little tutorial for doing any accent wall.

Print off a picture of your inspiration wall…as large as you can get it on a full size piece of paper. I printed off the picture above.

Measure your wall then draw the wall to scale on a piece of graph paper. For me, this is a must any time I am doing a room makeover. I need to know the scale of the space I am working with and how each element fits in that space…on paper.

Since I wanted the accent stripes to be centered between the ceiling and the top of the baseboards, I measured and graphed from the top of the baseboard to the ceiling. I did NOT measure from floor to ceiling.

Identify and mark your center point on the wall…from there you will work out from center to left and from center to right.

I had to figure out the “scale” of the stripes. I did this by making the assumption that the longest stripe in the inspiration picture (#1) was 4” from the ceiling…just a guess. When I measured that with a ruler on the printed picture, it measured 1/8”…that became my scale…1/8” = 4”. The distance between the stripes measured 1/4” on the picture, so I determined the distance between stripes would be 8” (I actually did 8” on center (OC)…which means I drew my stripes 8” apart then centered the 1” strips of wood on that mark.)

All this information gets transferred to my scaled drawing.

I counted the number of each of the different sized stripes. The inspiration wall had 4 different sized stripes…so I assigned each size a number, 1-4. There were 5 #1s (the longest)….4 #2s…5 #3s…3 #4s (the shortest) that would fit on my wall, spacing 8” OC apart.

By using my 1/8” = 4” scale, I determined that each stripe was 24” shorter than the next (12” from the top, 12” from the bottom).

So #1 is 107” (top of baseboard to ceiling is 115” - 8” (4” from ceiling and 4” from baseboard)…#2 is 83” (107” - 24”)…#3 is 59” (83” - 24”) and #4 is 35”. (59” - 24”)

If #1 is 4” from the ceiling, then #2 would be 16” (4” + 12”) from the ceiling, #3 would be 28” from the ceiling and #4 was 40” from the ceiling.

All this was drawn, to scale, on the graph paper.

Man, this sounds confusing….but it really is not. If you draw it all out on a graph paper to scale, it makes perfect sense…I promise.

Then it was all transferred, in pencil, to the wall.

It is so much easier to erase something that is wrong than it is to tear glued and nailed boards off a wall.

So, now I have the entire plan drawn out on paper, to scale, and I have the measurements of each stripe.

I decided to make my walnut stripes 1” wide. I also decided to give them a “3-D” affect by placing them on 1/2” furring strips. Walnut is a pretty expensive wood so I made the furring strips out of plain ole’ poplar and stained the sides to match the oiled walnut.

Matt and I used his table saw to cut the walnut in 1” strips. We cut the poplar into 1/2” strips.

Using the graph paper with the accent drawn to scale as my guide, I used a pencil and level to mark the wall where each stripe would go. After marking the wall, I attached the furring strips using Gorilla Construction Adhesive and my nail gun. I let that dry overnight since the nails did not hit a stud (impossible!!) so the construction adhesive is what really holds the furring strips to the wall.

While that was drying, I prepped the walnut strips.

After cutting each piece the length needed, I sanded, then applied Waterlox. I LOVE this oil. It is a clear oil. It is my “go-to” wood finish these days. I first used it on my kitchen cabinets a year and a half ago and it has held up beautifully!!!! So I used it on the mantel and shelving. No stain…just 3-4 coats of this stuff will make any wood shine!!!

I applied two coats…steel wool and tack cloth between coats…and then applied a third coat after I had installed the strips on the wall and puttied the nail holes.

I applied the walnut strips directly onto the furring strips. Again, I used the construction adhesive and nails.

MAKE SURE EVERYTHING IS LEVEL AS YOU GO!!!! I made sure each furring strip was perfectly level and then I made sure each walnut strip was level. I worked top to bottom…wood, especially narrow strips, will bend…so make sure each strip stays level all the way down.

After I puttied the nail holes with wood filler mixed with stain to match the oiled walnut, I wiped on one more coat of oil.

After all this is done, go back and do wall paint touch up. You will scuff up the walls with the wood strips and the level.

Beautiful!

Now, this may seem like a really tough project. It really is not. It is like any other DIY project…it all hinges on the “prep.” In this case, laying it all out on paper BEFORE you start buying materials and cutting wood.

Changes I would make? I wanted a “3D affect”…in other words I wanted the walnut strips to “stand out”…which is why I added the solid furring strips. I think if I did this again (which I won’t) I would want to use spacers to make the walnut strips stand out. The only downside to that would be that wood has a tendency to “move”…twist, bend, warp. By attaching the walnut strips to solid furring strips, the walnut will not bend or warp! So maybe the way I did it is best…who knows…I just think I would have liked the look of “floating stripes” better.

Other than that, I am pretty happy with the results.

I have some leftover walnut so I THINK, when it warms up a bit (we got 8'“ of snow last night and it is still snowing), I may make some floating shelves for this wall…

Again, I eventually want to make a few other changes to the room (rug, chair, credenza) but I love this accent wall.

As with all DIY projects, the key to success is the prep and planning.

This week I planned, prepped and prepared for board and batten in the breakfast room….

My plan is to install board and batten at chair rail height and paint it white.

I also finished this nasty china hutch…

I know this looks pretty ratty but I painted it and did a little tweeking on it and it turned out super cute. My plan was to sell it, but I think I will move it into this room and style it first…I may even like it well enough to keep it. We’ll see.

Hopefully next week I will have the breakfast room done and in order and I can share that as well.

Until then….

Home office makeover reveal...

Last week I shared the need to give my home office a little “character and design appeal.” (You can go to the link to see the “before.”)

This week I will share a few changes I made…not huge changes but enough to give it a little be more appeal.

It wasn’t until I was working on my “Bogey Home Tour” page that I realized I had done absolutely nothing to this room. Not a huge deal but, as I mentioned, you can see this room from the main living area and it is right off the entry…so it really needed a little something.

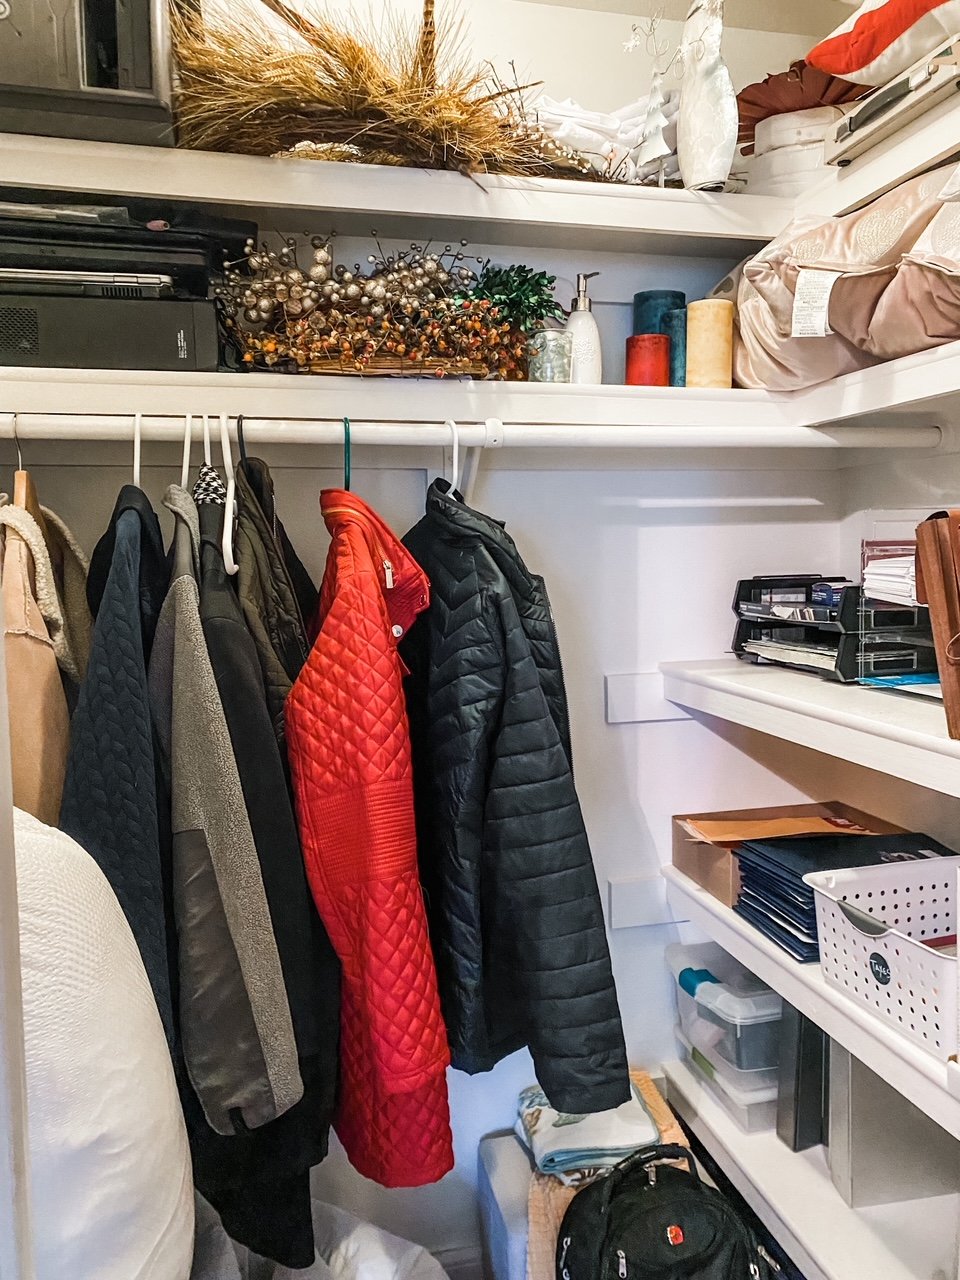
The first step was to purge and organize. The closet is great for storing my small seasonal decor (Valentine’s, Easter, the 4th, etc.) and office supplies but it could stand a little purge and organization.

It had a mismash of boxes and baskets and binders so this is one of the few things I splurged on…matching boxes for receipts and such and new binders. Then it was just a matter of organizing everything else…mostly the small seasonal stuff. I even organized all the decorative candles I switch out for every season on my dining table….

After purging I painted the walls and trim. Three of the walls and all the trim were painted white…just plain ole’ white. The wall I decided to do an accent feature on was painted pink. Yep, pink.

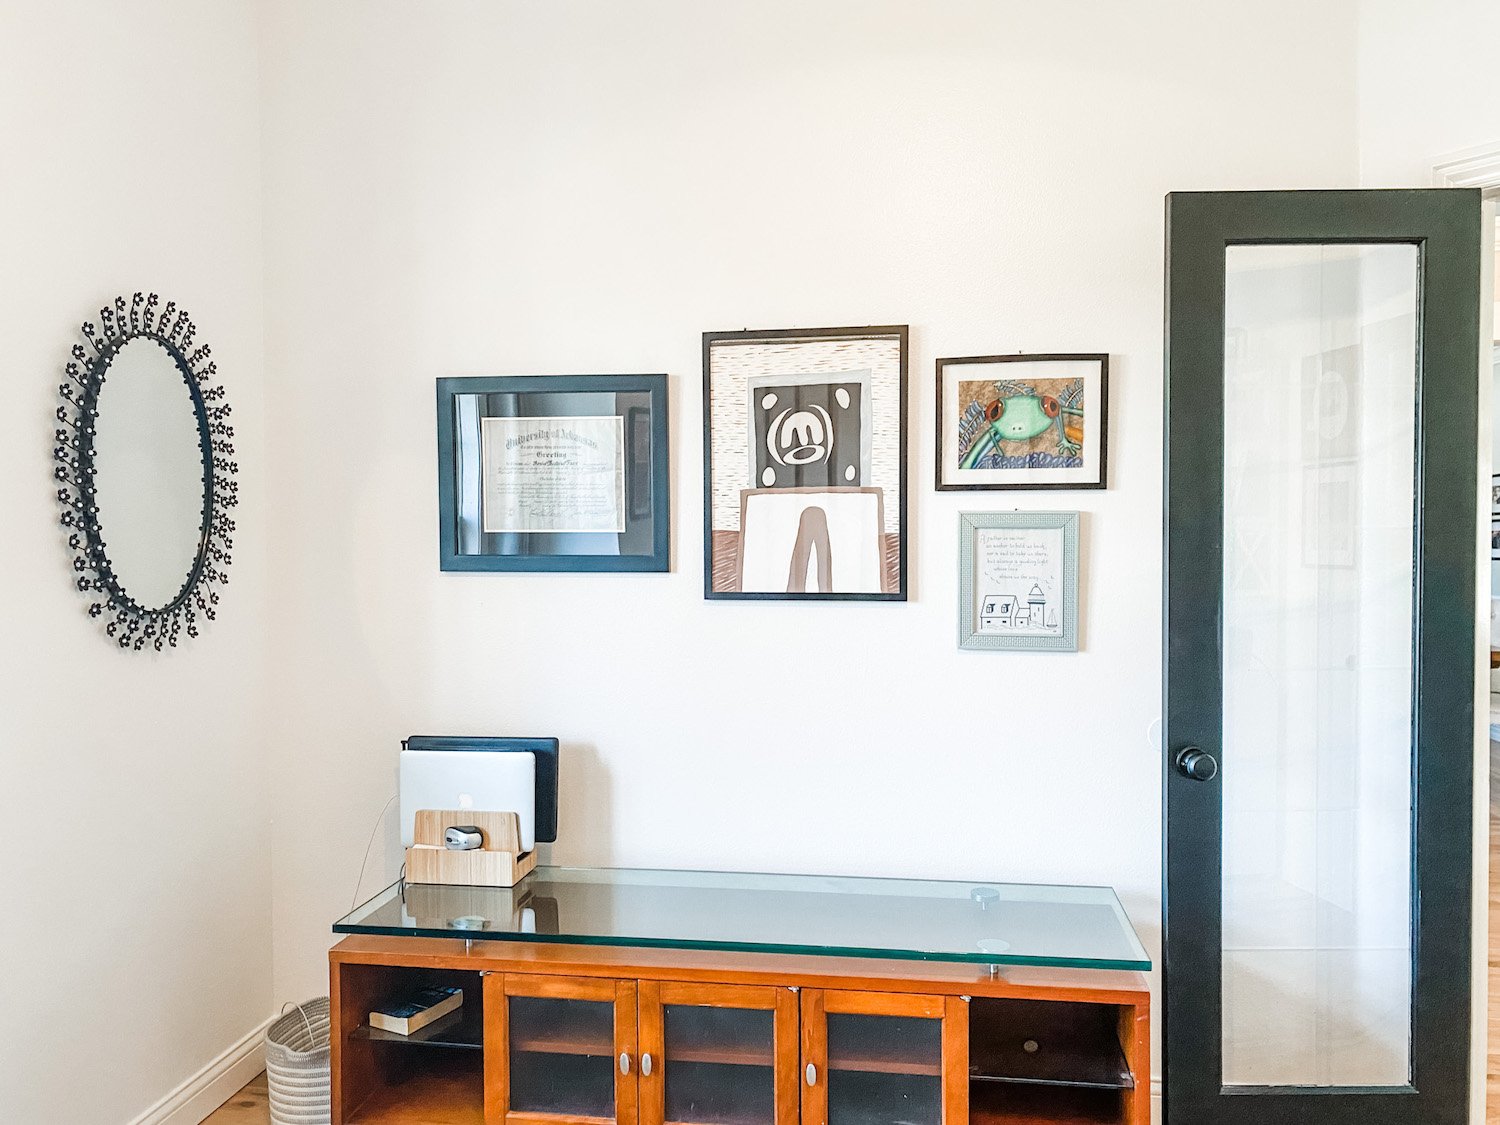
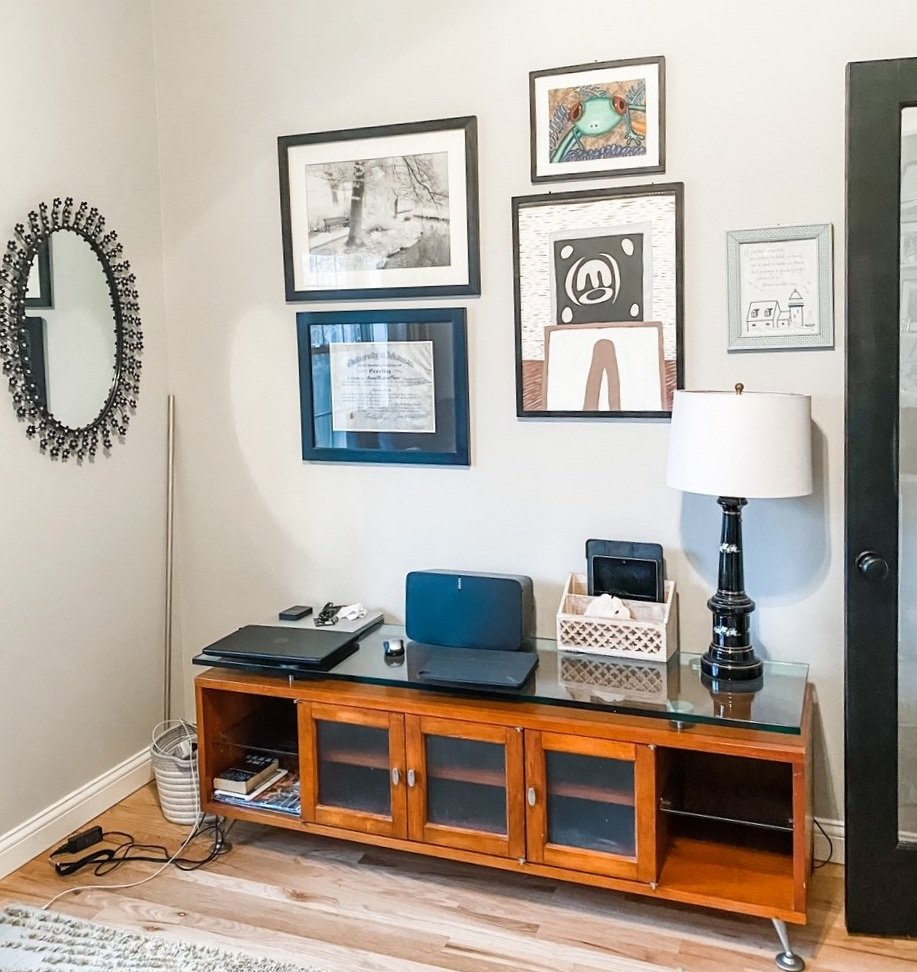
This mess of a wall and credenza had become a dumping ground. I removed all the “unnecessaries,” changed up the pictures on the wall and organized the laptops in THIS little gem.

Eventually I will get another piece to put here but for now, this works.

I also have some leftover walnut and may make some floating shelves or a picture ledge for this wall…maybe…we’ll see.

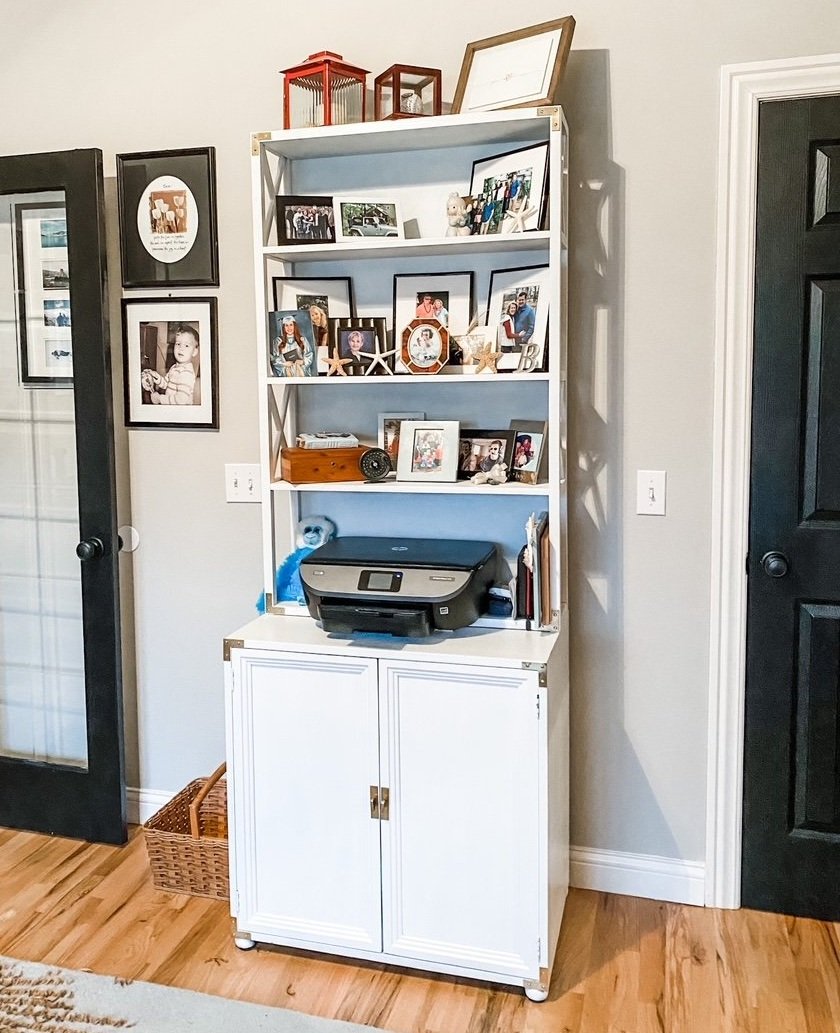
I still like this shelving/cabinet….

…it just desperately needed to be purged and organized. I debated putting the printer inside the cabinet, but we really do use it a lot. All the paper, business checks and cartridges are stored in the bottom. I may eventually add a little more greenery (aka fake plants) but for now this will suffice.

I really wanted to put a glass top desk in front of the window, but as you can see, this is Cleo’s lookout chair…she spends most of her day in this chair guarding the house. Okay, she spends most of the day SLEEPING…but still…

The only real change in this little window space (besides paint) was the removal of the blinds. The window had blinds when we moved in that have never been closed…so I just took them down. I rehung the curtains…they never get closed but they “dress” the window.

I may eventually change out the big ugly brown leather chair for something a little more sleek and modern, but for now Cleo seems perfectly comfortable and content.

I will also eventually change out the rug but for now it matches the chair. This is one of those times when I would love to do a whole room makeover…new chair, new rug, new credenza…but I am doing what needs to be done with as little expense as possible…baby steps!

As I have said time and again, sometimes our design “wants” are dictated by pets and kids…and of course finances. You may WANT a white couch but that’s probably not a good idea if you have a toddler running around with a sippy cup of juice or a large black dog that likes to run around in the mud. (BTW, if you think you will finally be able to get that beautiful white couch after the toddler becomes a kid or the kid becomes an adult, forget it. )

Now, the desk and accent wall….

The top of the desk needed a good purge. There really was nothing on there that couldn’t be put in a drawer or filed away…out of sight. I did buy one acrylic organizer for the top just to put bills and such in. The rest got cleared off and stored away. (Remember, I open my mail by the trash can…trash goes in the trash, mail for the kids goes in the mail holder by the front door and anything that needs my attention goes on my desk. No piles of mail laying around screaming for my attention…I take a few minutes EVERY day to deal with the mail as it comes in. )

I recovered the seat of the office chair with some pink velvet I had on hand.

Now, the pièce de résistance. The accent wall. HERE I talked about “finding my inspiration” for this room. After weeks of cruising the internet, I finally decided that this was the look I love.

And I do love it!

Next week I will share a full tutorial on this wall. Tutorials are usually not my forte’ but hopefully I can make sense out of how I created this “visual interest.”

As with all DIY projects, I firmly believe it all comes down to confidence. No, I had never created a wall like this…but I had no doubt I could give it the old college try. Succeed or fail, I would learn something. I think I succeeded although I will admit there are a few things I might do differently if I did it again (which I probably won’t!) But that is the great thing about sharing what I do…you can learn from my challenges (never say mistakes!)

Until then….

Finding inspiration for my home office...

When I updated my Bogey House Tour page I realized I have done nothing in the office. It is truly a very bland and boring room….

We painted the walls and added the hardwood before we moved in and we have changed out the paddle fan and added curtains but other than that…nothing.

Not a HUGE problem since I only do book work once a month and the only soul who uses this room on a regular basis is Cleo…this is her lookout!

But it really is an issue for a room that is right off the entry and can be seen from the main living room….

This room has ZERO design appeal or character.

So I have decided that this room will be my next big project.

The only question is WHAT TO DO, WHAT TO DO!

So I do what I always do when it is time to plan a makeover. Find my inspiration, make a plan and execute the plan.

First, Pinterest. I know I want some kind of accent wall so I searched “accent wall” and “office wall.”

I found a few things I liked so I dropped them in my “office makeover file.”

I debated whether to do just board and batten or an “accent wall” on the main focal wall…behind the desk.

Hum…I have board and batten in the entry…I like it but not sure if I would like it in this space.

Keep in mind, the one AWESOME thing about this room…the 10’ ceilings…make picking a wall accent very challenging in my opinion. Certain wall treatments just don’t look good in a large room with high ceilings.

My DIL sent me a few that were interesting….this is one….

I love the wood accent as opposed to the all-one-color-treatments like I did in my entry and guest bath….

Now this brings me to the color choice I KNOW I want…I think. I want pink. Not pepto-bismol pink but kind of a pale/blush/coral/whitish color.

Kind of this colorish….

(I can’t for the life of me find the link to this picture…my sincerest apologies!!!!)

One of my blog-friends, Cristina at Remodelando la Casa used it in a bedroom makeover…”Parisian Pink”….I have loved the thought of using pink in a room since.

Somewhere in the room. Maybe paint the board and batten/accent wall white and paint the walls the “pink” color or visa versa. Not sure yet because it will really depend on the wall treatment I choose.

Another choice….

I would paint the entire accent wall the “pinkish” color I choose and then paint the other walls white…just plain ole’ white.

But to date this is my favorite look….

Now, stick with “my vision” here. This is actually a three-dimensional wallpaper. My plan…paint the wall the “pinkish” color then make the vertical stripes out of strips of walnut.

OR paint the wall a darker charcoal greyish color and make the stripes pine with the whitish stain I used on my dining room bench.

If I do decide on this treatment, I know I want a “high contrast”….either light walls and darker stripes or dark walls with lighter stripes. And I really think I would want the stripes to be in wood.

Hum…what to do, what to do.

I am still looking for my inspiration…something that makes me say “YES, THAT’S IT”…not sure when the light bulb will go off but I have learned to live with changes in my mind for a time before I jump head long into a project.

Until that happens the desk, shelving and closet all need to be decluttered, purged and reorganized.

I still like this shelving and it serves a purpose…printer on top, paper and cartridges in the cabinet. But it seriously needs to be decluttered and the pictures on the wall need to be “rethunked.” The long vertical one is of our ski trip 20 years ago…the one with tulips is something that has been hanging around for 20 years…the cute little guy is Brian (that one will go somewhere…just too cute!)

The desk…

The desk will be on the “focal wall” so it needs to be completely clutter free. I thought it would be pretty to put a glass desk in front of the window and move the “reading chair” to this wall…but Cleo likes to lay in the chair and look out the window. Sometime our design decisions have to revolve around kids and pets.

The mirror propped against the wall?

I think I have kicked it around for a good 8-10 years and have never hung it on a wall. I love it but have never found the right place for it. It will be the first thing loaded in the car for donation!

This whatever it is…

The credenza is from our living room in the Lankford House. Between Brian and me, we have 4 computers and a slew of charging cords. The lamp was a Christmas gift from my dad to my mom THEIR FIRST CHRISTMAS…it is literally older than me. The Sonos speaker was in the living room and was moved in here before Christmas. The old mail holder. The wall decor….it’s all just a mess and needs some serious attention!

I have every computer I have owned for the last 20 years and for some stupid reason I think I need to keep the hard drive…you know, just in case I need to find an email I wrote 15 years ago. So I need to dismantle all the computers and pull the hard drives. I also have all the paper work for every car I have owned in the last 20+ years. Why? I don’t know…and I don’t know why I think I need to keep it, but I do. I just need to find a way to organize it all so that it isn’t taking up as much real estate as it is at this moment.

All that is stored in the large closet along with my business supplies, coats and some seasonal decor.

I swear…I am not a hoarder. Ask anyone in my family…they all swear I throw IMPORTANT stuff away all the time. Maybe so, but there have been many times in my life when having documentation for something I bought, or a contact I made, or insurance claim I filed, or bills that I paid, YEARS later, was important.

As a small business owner I also have to keep records for years….especially tax records. Fortunately we have tons of storage space upstairs and I am good about organizing and labeling boxes.

As long as I have the room to keep records on the car I bought in 1999 or the hard drive from the computer I used in 2006, I will keep them. But maybe they can be stored in a box upstairs and not taking up valuable space in a closet downstairs….hum…maybe.

The entire room needs to be purged and reorganized. Since we just moved into this house a little over a year ago, it really isn’t THAT bad.

I always purge and “organize” before I go out and buy storage boxes or organizing systems. And truthfully, I want to get rid of stuff so I am really not interested in adding more stuff…my goal is to try to use what we have!

So my goal this week is to get rid of and reorganize stuff and keep looking for inspiration. Once the clutter is gone and I know exactly what I want, I can make a plan.

Until next week…


Pretty in Pink...

If you “came of age” in the 80’s chances are you saw a John Hughes film. If you haven’t, you are missing out! “Pretty in Pink” was one of my favorites! Check them out…you won’t be disappointed and I can’t think of one that isn’t “kid friendly.”

Which brings me to pink…a color I have always loved but have never really used in my home decor. I must have gotten a “pink bug” because all of a sudden I can’t seem to get enough of it….and since next week is Valentine’s Day, this is a great time to infuse a little pink into my home decor under the guise of “decorating for the holiday.”

I found this little bench in 410 Vintage…the tag said it is walnut but I really think it is mahogany. I used this process to refinish the frame and recovered the seat with the same pink velvet I used for the club chair pillow (makeover here).

Several years ago I refinished a little piano bench to set by the closet so I would have a place to sit and put my shoes on.

In one of my “purging” marathons I moved it out but in all honesty I kinda missed it…so this little bench is a perfect little replacement!

I love my office…a simple room that is really multi purpose…a “thoroughfare” from the living spaces to the master bedroom, a “dressing room,” and of course, an office.

I featured the desk here.

I have seen a few desks over the years that peaked my interest but I still love this desk…it is perfect! Prime example of “buy what you TRULY LOVE and you will never tire of it!”

My office chair looks a lot like a Marcel Gascoin C-chair….I can’t find a picture of this exact chair so I don’t know for certain! Again, I don’t buy pieces like this for their potential value…but because I LOVE them.

I bought it years ago and share it’s little makeover here. Again, still love it!

I have replaced the dresser several times over the years but I LOVE this one! Shared the makeover here and while I loved the dresser that was here before, this one is MORE better!

The little bookcase…just adorbs!

I digress…off to the living room … I found the cutest pink pillows…

…and a yummy smelling pink candle!

The little white pillow was kind of plain so I decided to add some cute pink pom-poms I made out of “furry” yarn. I just tacked them on so they can easily be taken off when I tire of the pink.

The pink pillows will go well with the little bit of Easter decorating I do!

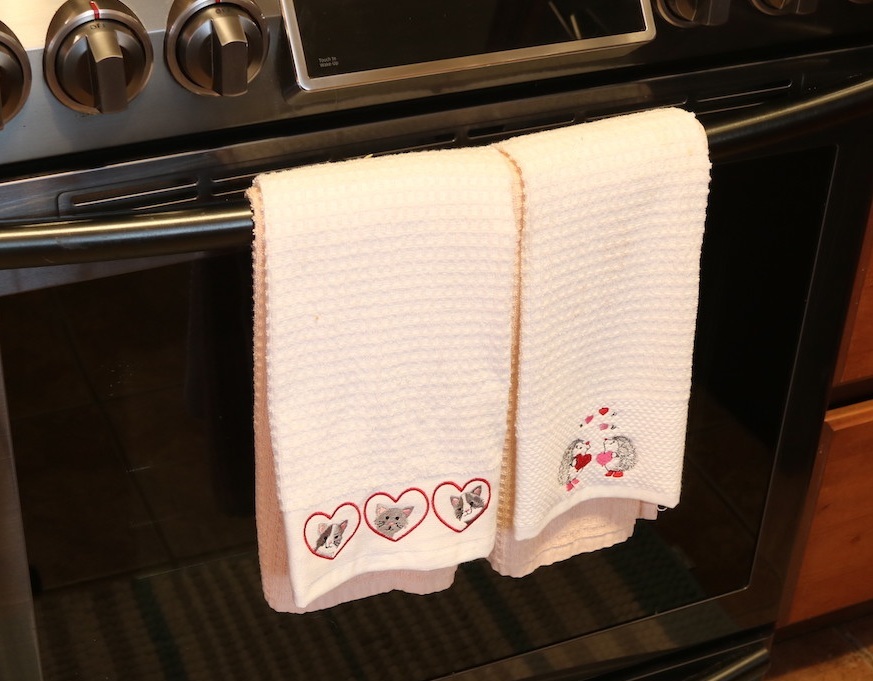
While digging around TJMaxx for pink pillows and candles I found a few other things I thought would be fun for the holiday….cute hedgehog mugs and fun little Valentine’s hand towels!

You don’t have to (or need to) spend a lot of money dressing your home for Valentine’s Day…but it is fun to infuse a little fun and color into an otherwise “drab” time of year!

Funny…I was wearing my pink tennis shoes and a pink vest when I was buying all this pink stuff…the check out lady remarked that I sure must like my pink…lol!

Turns out, I really do! It is so dreary and “wintery” outside and the pink just seems to brighten things up a bit!

I have some leftover pink velvet from the bench makeover…just enough for a few more pink pillows! Now if I can just being myself to sew them…eck!

Organizing one tiny step at a time!

This time of the year the blogs are filled with organizing tips. They are all great but man, can they be overwhelming! 

They feed into our desire to get our lives and homes in order. So I thought I would share a few TINY things I have done in each room of the house that have, in one way or another, made my life a tad simpler. Nothing major or earth shattering...just little things you can do that don't require a pickup load of storage boxes or a week of total madness in your quest to "get it right."

So I walked around my house with my camera and asked myself...what in THIS room makes my life a little easier.

First...my bedroom. Getting my bedroom the way I love it was a looooong process that I revealed here. But there is one tiny element that makes my life a little simpler....

This tiny little change to the outlet next to my bed was super simple to install (here I share how to install one!) and has made my bedtime ritual so much easier. I can still have my clock and lamp plugged in while charging my phone and Ipad.....zero hassle! 

My office...I have a ton of organizing tips for home office spaces, but my absolute favorite is simple...binders!

These are just a few I keep at my finger tips...on a shelf in my closet I also have binders for home and car insurance documents, tax returns, legal papers, etc. Since I have a business, all my receipts and invoices get tossed in a paper box each month and at the end of the year stored in the attic...just in case the IRS comes knocking! Super simple "filing" system! But the documents I need on a regular basis are kept in binders at my finger tips!

The toilet paper holder. Okay, this may seem silly but if you have ever had a puppy, kitten or toddler, you know the struggle....the daily ritual of cleaning up the toilet paper that has been "unrolled!" I discovered this little trick with my last kitten...

Install an "open ended" toilet paper holder vertically rather than horizontally. Not only does it take away the entertainment value of "unrolling" the paper it makes it super simple to replace the roll!

See, I told you these were simple little changes...

On to the laundry room. I have said time and again, I like pretty but it has to have function. One of my favorite little things to collect are the old Lane cedar boxes. Some believe they are old "sample" boxes used by Lane salesmen for their cedar chest line. Not so! They were actually little cedar boxes Lane gave away to girls when they graduated from high school to entice them to buy a large Lane cedar chest. I find them all the time at auctions and in flea markets. A quick strip with my acetone/lacquer thinner mixture and a few coats of tung oil and they are as good as new...and super pretty!

I use one to hold dryer sheets in my laundry room and I also have one on my dresser for reading glasses and such and one in my den to hold the remotes. Pretty with a purpose!

Which brings me to my kitchen. So many neat little ways I have made this space much more functional and organized, but I chose to share one of my few loves that really serve little purpose...my cutting boards....

Here and here I share how super simple it is to revive old cutting boards! Except for the one I use as a recipe holder, they really serve no purpose because I don't use wood cutting boards. But I love the warmth and whimsy they add to kitchen!

In the den a few more of my favorites "with a purpose!" When I started seeing all the "old work benches" being repurposed in the blogosphere I remembered I had my dad's old tool bench stuck back in a storage shed. I pulled it out and gave it a little makeover! It is one of the few "primitive" pieces I feature in my home. Because it was actually built and used by my dad, I LOVE it!!!
It is relatively small and doesn't take up a lot of space and serves as a perfect little side table next to the lounge chair in the den! 

Coffins...again, morbid sounding, I know. But they aren't REALLY coffins, that is just what they are called! I have several and I use them for storing fire wood, photo albums and books!

Another super simple "makeover" project that yields "pretty with a purpose!"

I did manage one major "purge" this year...partially out of necessity. When I redid my entry this year I created a dust bowl that forced me to remove a 30 year collection of hardback books for cleaning and I decided it was time to finally let go! Over 150 books found a new home and my bookcases finally found room to breath! 

I kept the collections of two of my favorite authors but the rest were boxed up and given to a friend.

Truthfully, I haven't missed them and now I think twice before spending money on another hardback. I still read, I just don't "buy to have"...I buy paperbacks I can leave for others or I download them on my Kindle. 

I will say that getting rid of clutter, a real heart wrenching purge and declutter, is ESSENTIAL to making your house a home. Maybe one or all of these tips will make that process a little easier!
A special birthday celebration!

If you follow me on Instagram, you know my dog has become my "fifth child." Yep...that is what happens when you become an "empty nester." You take and post waaaay too many pictures of your animals and, of course, you celebrate their birthdays!

Wednesday we celebrated Cleo's 2nd birthday! If you go by "dog years," I officially have another teenager!

Our grandpuppy, Zoey, came to celebrate with us!

They LOVED the pup treats...the hats, not so much! Zoey wouldn't even wear one for a picture....party pooper!

And of course I have a TON of projects in the pipeline....three chairs to reupholster, five little dressers to repair and rehab and who knows how many other little projects piled in the back of the garage!

I did get a few pieces finished and ready to take to 410 Vintage...this shelf/desk is only one of many...but as usual I either forget to take before OR after pictures...in this case, the before.
Imagine honey oak...eeeck! A little KSTP treatment, and again, another lifetime of awesomeness!

I know I harp on it, but it bears repeating. The ugliest piece of furniture can be dolled up with a little paint! 

I have four dressers lined up in the driveway ready to strip and paint IF the weather will cooperate. I think that is one of the biggest problems this time of the year. One day it is 70, the next we have a freeze warning. So I shuffle stuff around and work on what I can depending on the weather. Some days it is too cold or windy to paint, so I use those days to do repairs or work inside on upholstery projects. Then when it warms up a bit, I paint, but if it is too windy I can't spray paint. Curses!

Not going to complain because in few short months I will be gripping about the heat! And honestly, this is what I love about Arkansas...four seasons! I just wish it would make up it's mind from one day to the next!

A few simple chair makeovers!

I usually have several chairs piled in my garage waiting on a makeover. The reason they get "piled" is because most require, at the very least, a smidge of sewing. My LEAST favorite thing to do! (Okay, root canals are pretty bad, but at least they give you drugs!) I usually wait until I have 2-3 projects that need sewing before I drag out the sewing table and get it all done at once! 

Right now I still have two of the mid century dining chairs waiting to be refinished...no sewing needed, but they are small and tend to get pushed aside...time and again.

And honestly, I had intended to refinish these and keep them but that plan didn't work out so I refinished and sold two of them! 

I have a mid century lounge chair I desperately want to refinish and reupholstery, but I bought it to keep so I have no doubt the selection of an appropriate upholstery will take months!

I did manage to get two chairs finished over the last few weeks.

The first is a simple little maple chair I picked up at Salvation Army.

A "tired and tattered" little thing to say the least. 

I decided to go simple...a little chalk paint and distress on the frame (followed by a coat of poly to seal it) and drop cloth for the seat. This is the first time I have used gimp for trim, but it turned out nice. I just hot glued it over the gathered skirt. 

I didn't even bother to make a back cushion...I like the look of the wood slats!

This cain chair was a tad more complex. Naturally I completely forgot to take a "before" picture until I had already started deconstructing it! But I have no doubt you have run across them in thrift stores and garage sales...a dime a dozen and pretty much what they are worth in their current state! The real gem is finding one with all the caning in tact!

I really was at a loss as to what to do with this chair...until my daughter suggested I do it in blue and gold! Actually, she suggested teal, but I found this blue and white material I really loved! She was right about the gold...it is all the "rage" right now and becoming very popular!

After removing the seat and all the upholstery, I primed the entire chair with Kilz, sanded and wiped it down with tack cloth. Then I sprayed it with white spray paint! After that had cured well, I taped off the legs and sprayed them with metallic gold spray paint. I wasn't sure whether I wanted to keep the tufting on the back but I sprayed the buttons and reused them. They didn't really turn out "gold" like I had hoped...more a "brownish" color, but honestly, close enough. I used metallic gold bias tape to make the piping and the double welting (Here is a tutorial on making piping out of bias tape!) A simple little process, but again, it does require hauling out the sewing machine (ick!) 

Again, I could provide a step by step tutorial on "reupholstering" these simple little chairs, but there are dozens of tutorials on line (including video tutorials) that are ten times better than anything I can do. And every chair is different, so find a tutorial that makes sense to you AND has a chair similar to what you have! This is the very first chair I ever tackled. Knowing what I know now, I can do better. I can honestly say that I learn something new every time I tackle a project like this and regardless of the little imperfections here and there, they always end up WAY better than what I started with!

I tend to be a tad on the OCD side when it comes to projects...but I have learned that nothing is ever going to be perfect! And again, as my very wise Daddy use to say "You'll never notice it on a passing train!"

Which reminds me...Happy Father's Day Daddy! It has been twenty years (this month), but some days it seems like we just talked yesterday. I wish you were here to see all the things I have learned to do. All because you taught me that working with my hands (and my head) and making something out of nothing really can be rewarding! I know you would be proud! Thank you.... and I miss you! 

Happy Father's Day to all the great men out there who are blessed with kiddos!!! Be the man you want your son to be and be the man you want your daughter to marry ;)