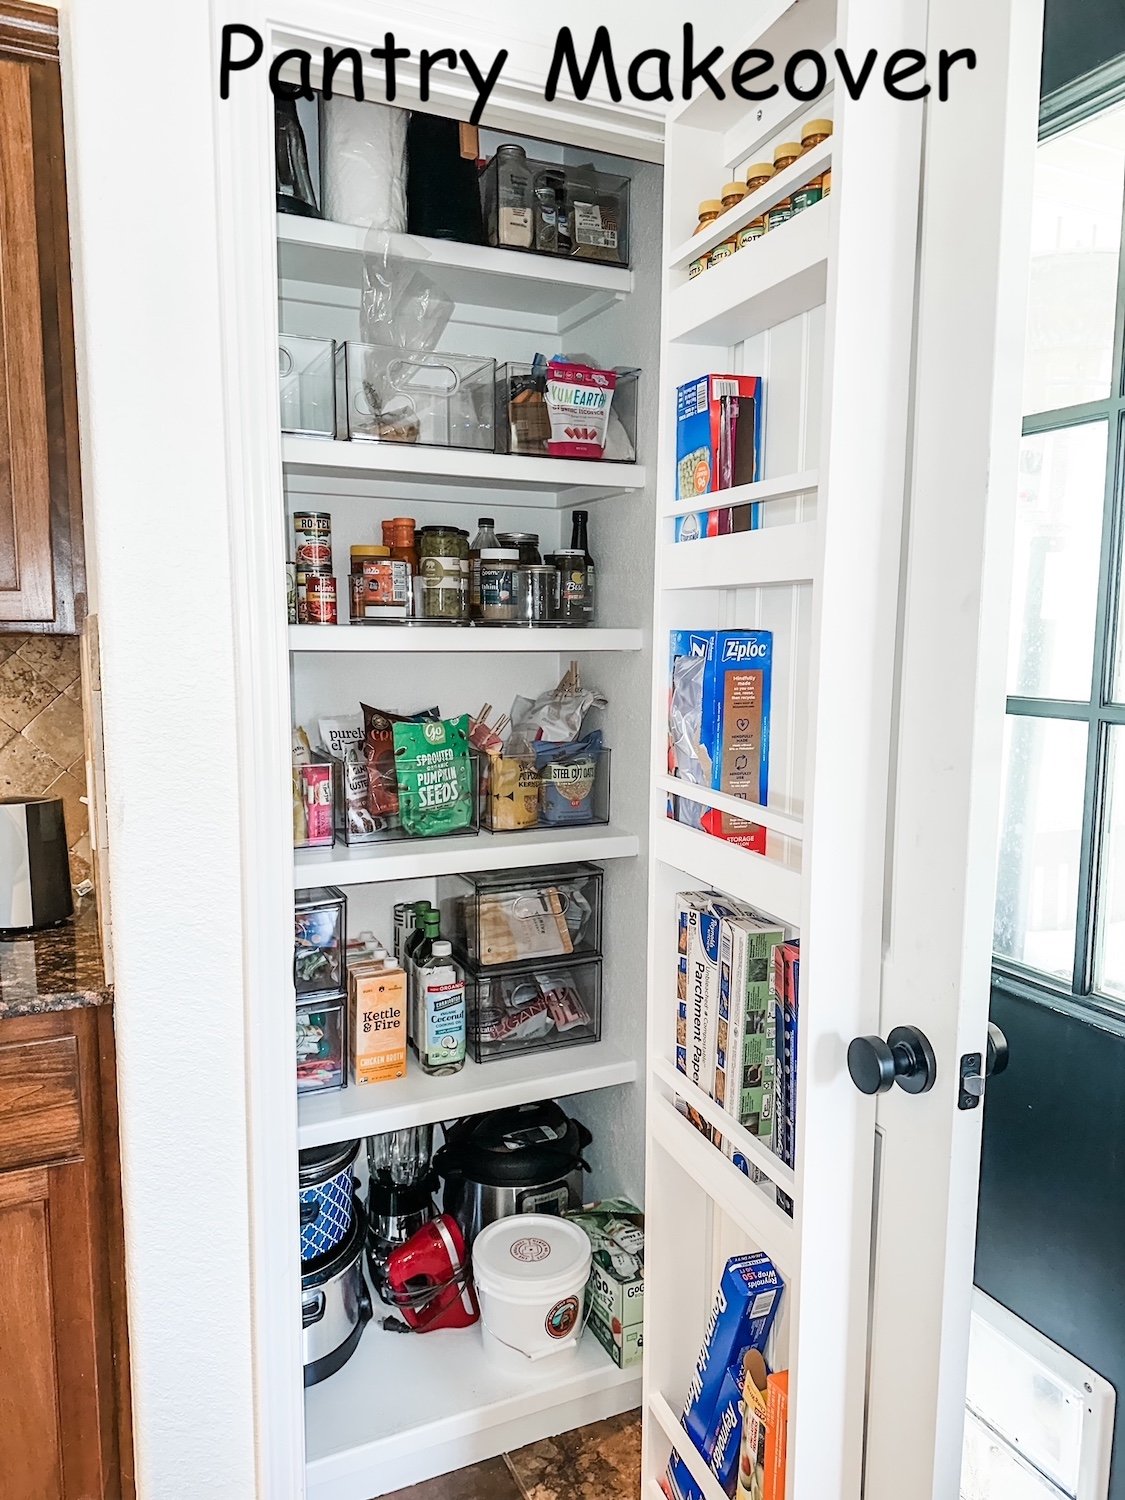
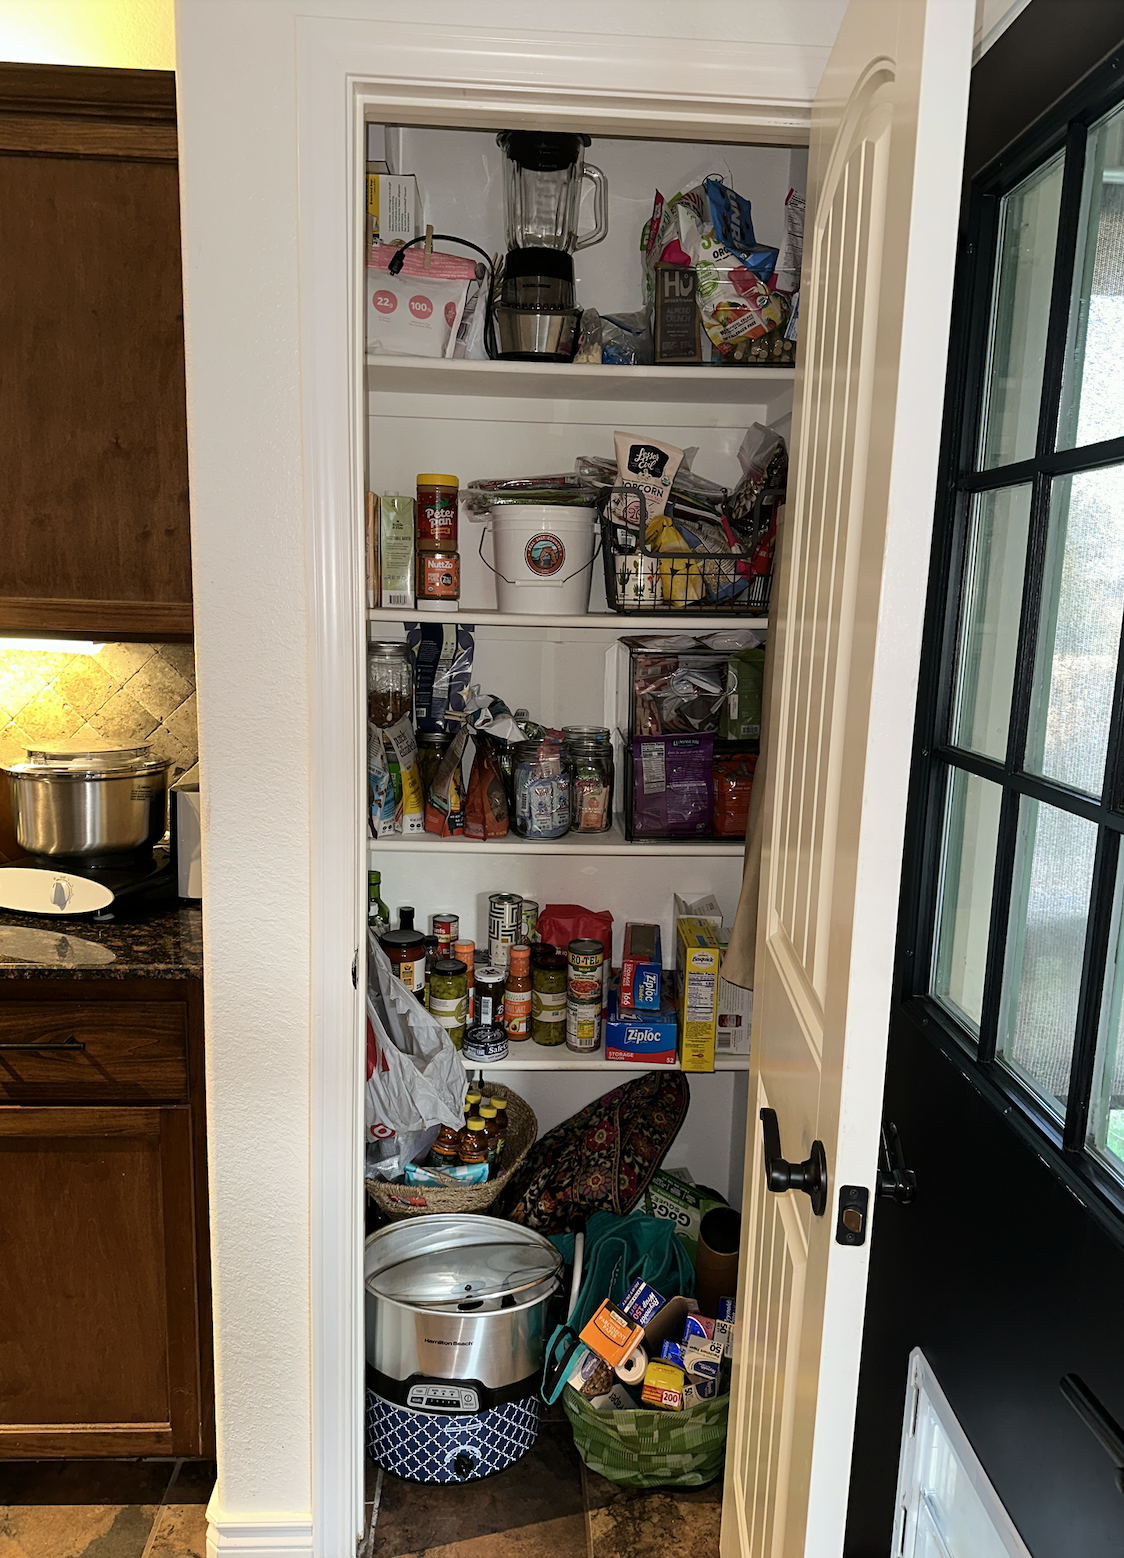
A small pantry makeover....

I love pantry projects…HERE I shared mine!

There is no shortage of inspiration on Pinterest for pantry makeovers…you will find one for every possible size and configuration!

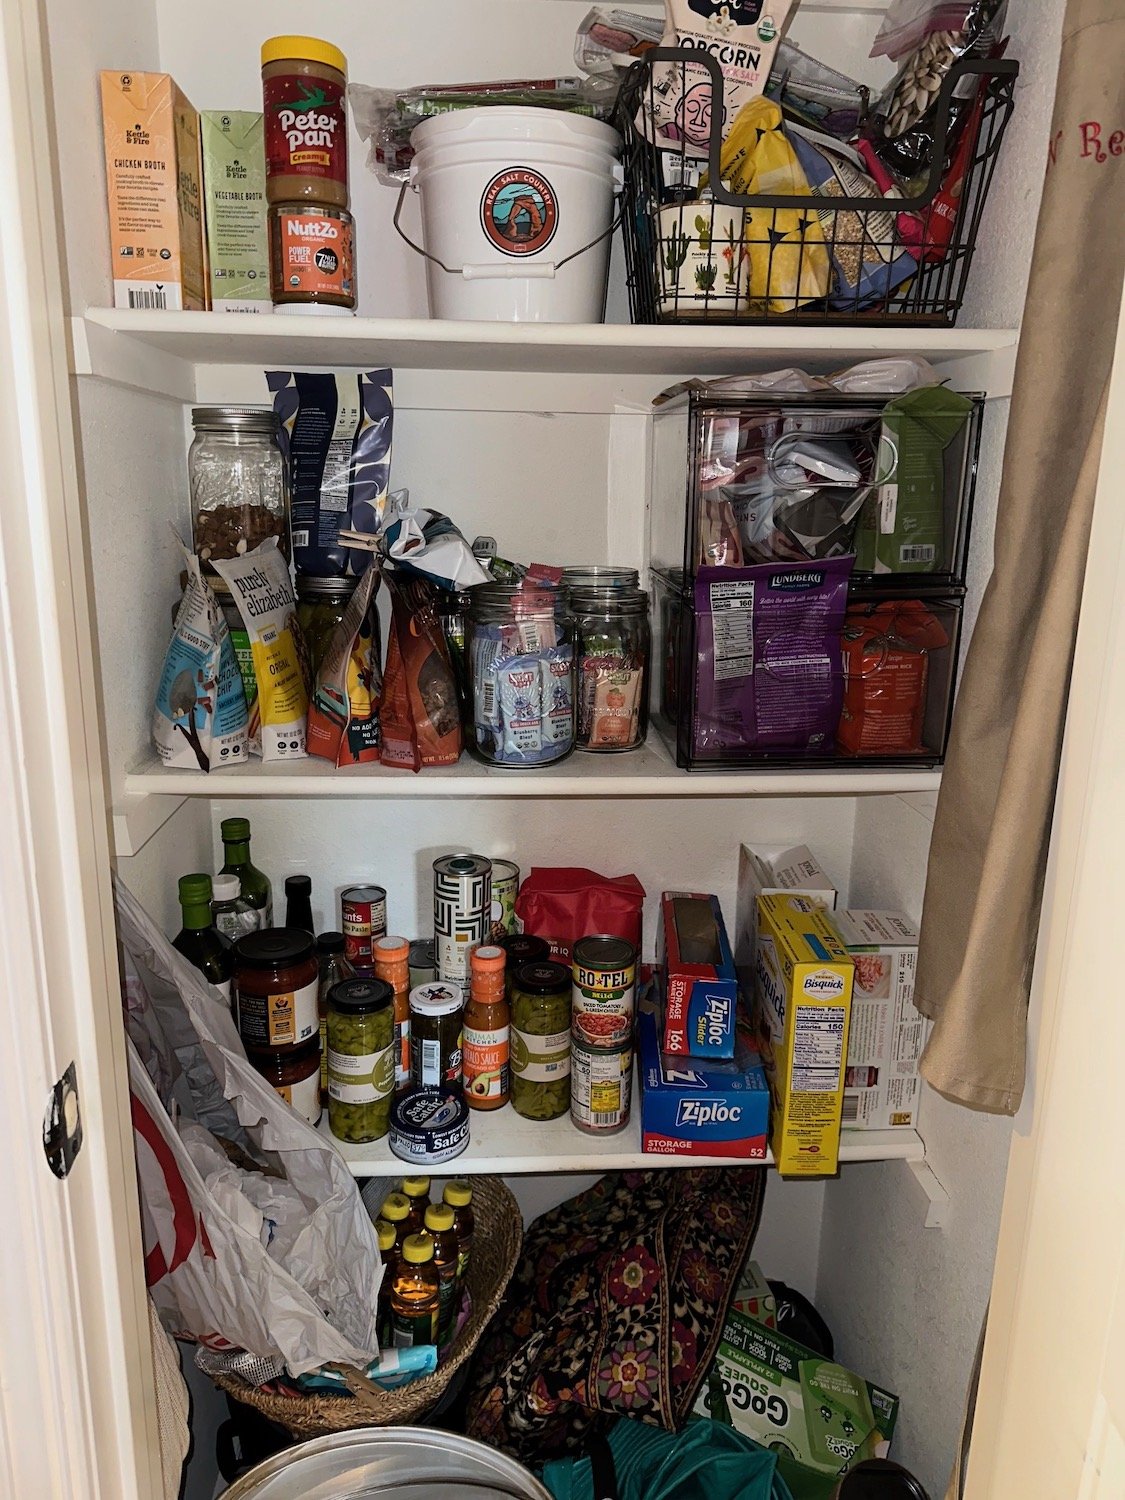
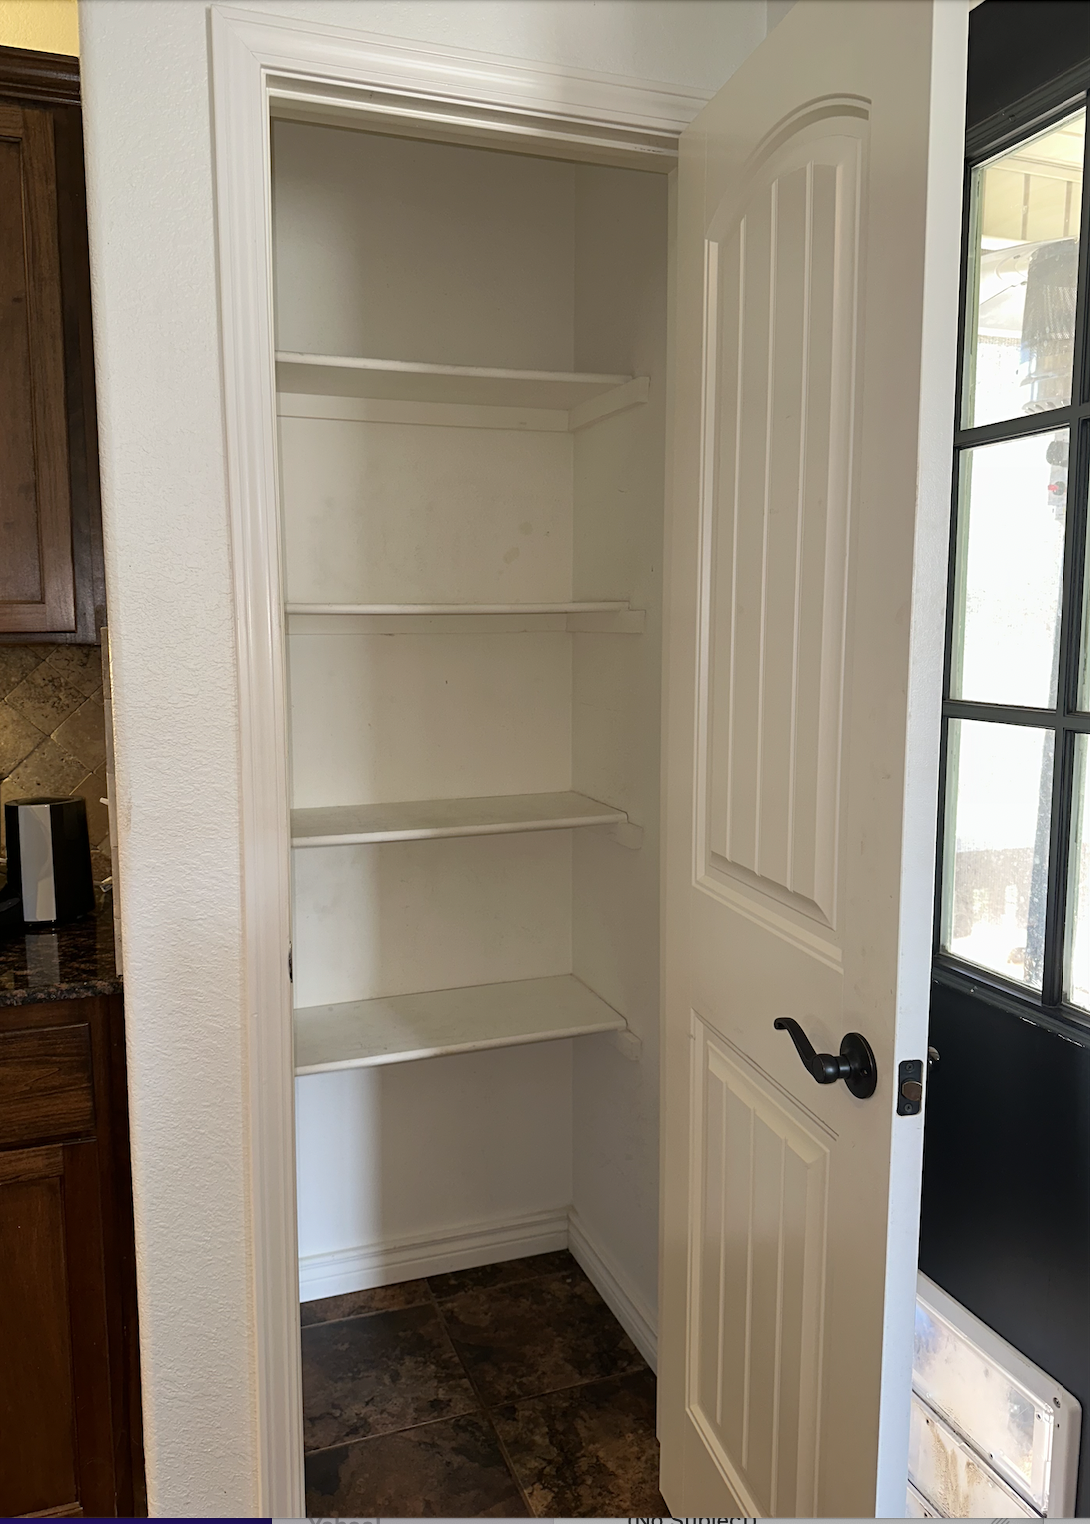
My son and daughter-in-law, Hannah, have a great kitchen but a small pantry with typical poorly designed shelving placement…it was a MESS!

Soooo much wasted space!

For months we discussed giving it a little makeover, but they really wanted a house that is a tad bigger on a few acres further south. So there was a chance they would not be staying in this house.

Several months ago they found one, made an offer, got it accepted and were all set to rent their current home!

So the pantry project got nixed.

Unfortunately, the deal fell through because of a boundary dispute.

Hannah was bummed. (She had already started packing!)

So the pantry project was back on and a few weeks ago we tackled it!

The first thing we did was empty everything that was in the pantry and took measurements.

After emptying the pantry, we “demoed” EVERYTHING…shelving, supports, trim.

I usually repair and paint the walls, install the new shelving, caulk, putty, lightly sand, then paint the shelving. All the shelving is already primed and sanded before I install it so that I don’t have to do any heavy sanding in the house.

When designing the shelving placement in a pantry it is super important that you identify EVERYTHING you may want to store in the space and then measure it.

If you think you want baskets, bins or jars, figure out what will go in what and how many will fit in your space BEFORE you go buy them…or at the very least keep your receipt!

Take measurements of EVERYTHING!

These measurements are important because you can then design your shelving placement based on how tall everything is. You don’t want a bunch of wasted space.

Case in point…can goods stacked two high are less than 9” tall…why would you dedicate a shelf with 12” clearance for canned goods. Paper towels are generally 12” tall…why dedicate a 15” shelf for them.

Add up 3-4 shelves that are 3-4” taller than they need to be and next thing you know you have lost an entire shelf…critical storage space for a small pantry!

In this case we gained an entire shelf. Crock pots and the insta pot are stored low because they are heavy…the extra coffee pot and extra paper towels are stored up high.

We built a shelf 4” off the floor…not necessary for actual storage but they have a dog and her hair inevitably blew under the door and ended up all over everything that was sitting on the floor.

I made the shelving out of 1/2” plywood, the bullnose and supports out of pre-primed 1x2s. All the shelves were 14” deep, except the top…it was 12” deep.

We also built a door shelf system that is perfect for aluminum foil, plastic wrap, storage bags, etc. (HERE I shared one I made for my house on Lankford…I built two for this house! One is in the garage and the other is used for my cake pans and baking supplies.)

You can buy wire door storage system but building one allowed us to place shelves as needed for specific items.

The end result is amazing! Neat, clean and organized!

I am a big fan of clear plastic bins vs. baskets. I use both since there is some stuff I don’t want to see that can be stored in pretty baskets (open chip bags, storage containers, etc) but the baskets are labeled. (Again, check out my pantry HERE!)

She loved it so much she tackled her kitchen cabinets and organized them with storage bins and jars.

Organizing a space (whether it be a pantry, closet or drawer) not only frees up space, but I have learned that if a space is pretty, clean and organized I tend to want to keep it that way.

When everything has a place and everything is where it belongs it makes my life so much easier!

(HERE I share my trips and tricks to getting and staying organized!)

And remember, you don’t have to take on a big DIY project to get a space cleaned and organized…and not every space in your house needs to be done in a day, a week or a month.

Commit to take one space a month…or even every other month….purge, clean, organize. I think once you get started and realize how much easier it makes your life, you will want to keep organizing every space in your house…just like Hannah!

I may not be around for several weeks…this is our vacation month and this year we are going to take a VERY special vacations! Can’t wait to share!


The next project...

The pantry….

HERE I shared how I “organized” my pantry. I’ve even managed to keep it in order this past year.

I still love all the baskets and bins but now it is time to change things up a bit.

This will be a full fledged “gut job” so I need to crack some knuckles, stretch some muscles and dig out the crow bar!

So stay tuned…I’ll share my inspiration, my plan and the reveal!

Making a table or bench top...

One tool I wanted for years was a “biscuit joiner.”

Screen Shot 2021-08-11 at 4.43.53 AM.png

One of the many things I love about my kids….when I ask for a specific tool for Chirstmas/birthday/Mom’s Day, they listen. So several years ago I got a biscuit joiner for Christmas!

This little tool has allowed me to make a few things I otherwise wouldn’t have been able to make. It allows me to join together several boards to make a larger board. A necessity if you want to make benches or table tops.

Let me give you a few examples….

The first was this bench….

I was able to join together the three 1”x6” boards and the ends to make a strong top.

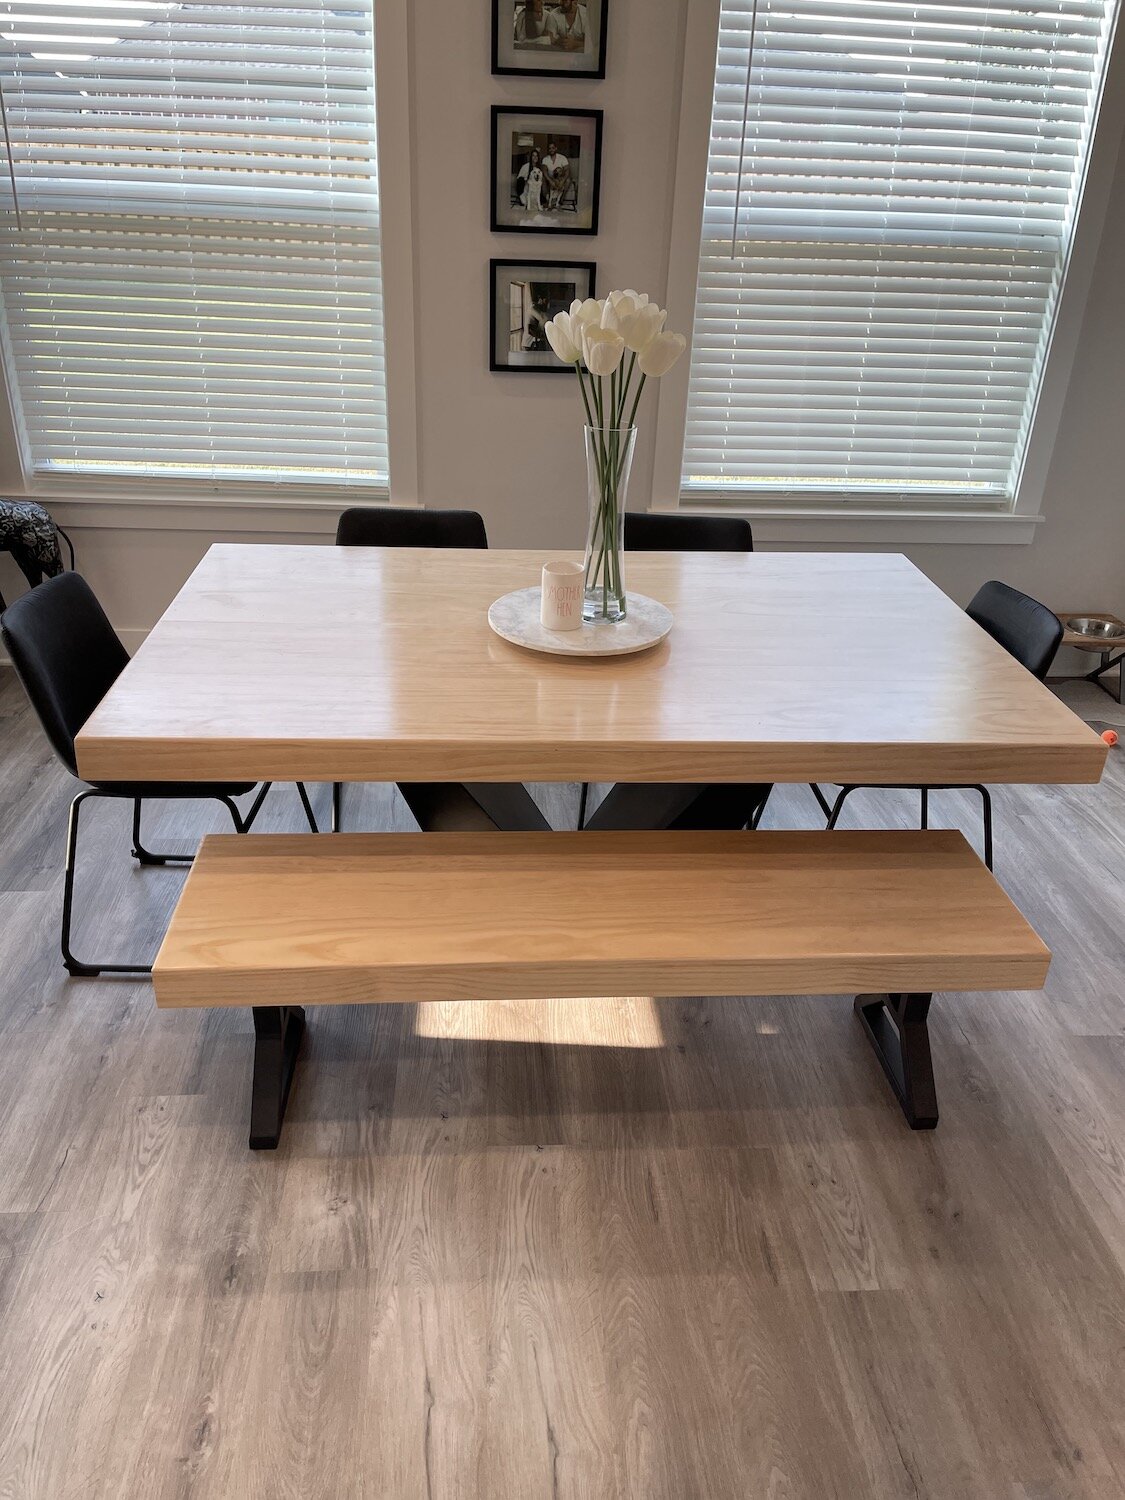
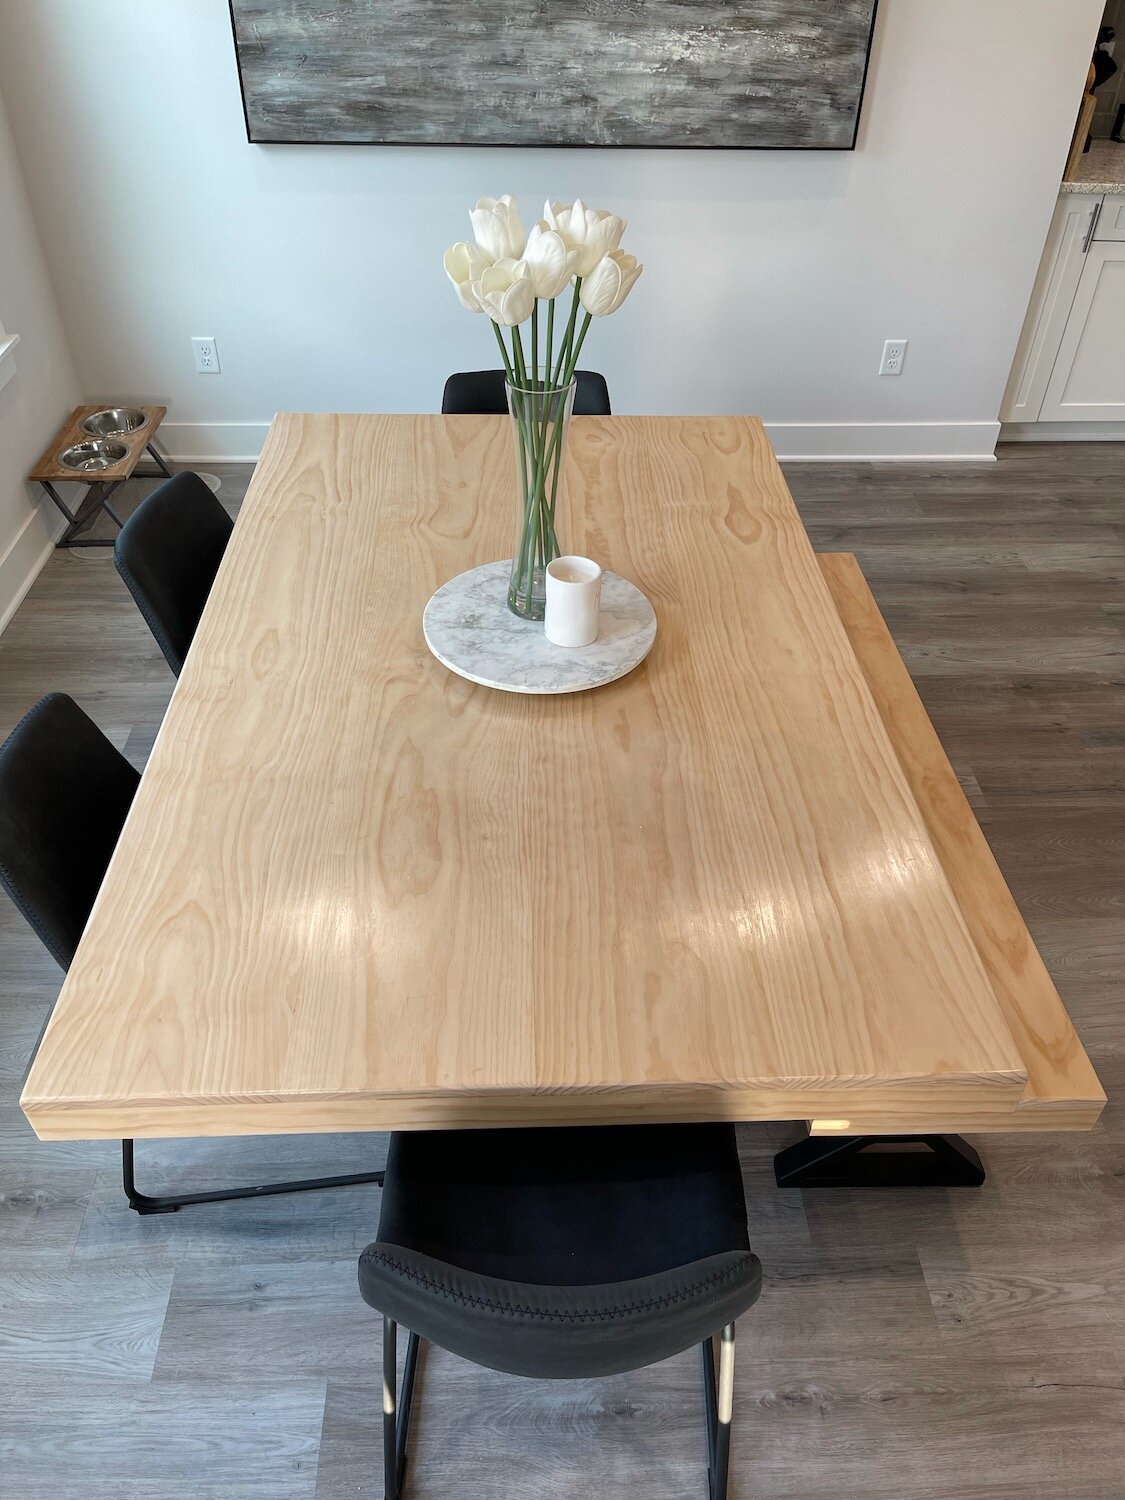
Brandon and Taylor wanted a plain pine table and bench for their new house. I guess they could have spent a fortune like we did for a custom made table but that isn’t really an option for a young couple.

So we went to Lowes, picked out some straight, nice boards with good grain and used the biscuit joiner, glue and clamps to create a table top and bench top.

IMG_1329.jpg

After some serious construction, a LOT of sanding, a polycrylic clear coat, and some nifty bases, they have an AMAZING table and bench!

IMG_1146.jpeg
IMG_1148.jpeg
IMG_1149.jpeg

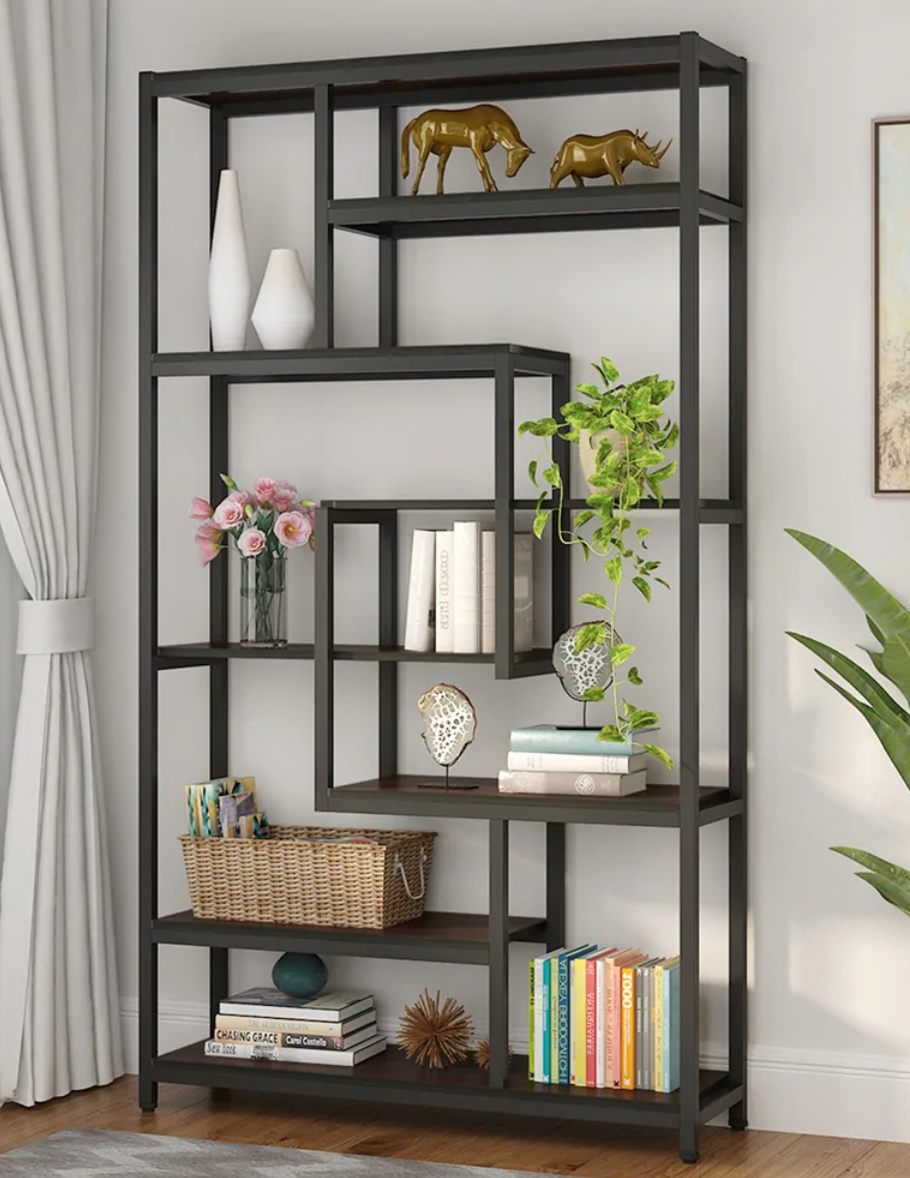
Last year I went looking for some shelving…I found one I absolutely LOVE. It was from the same company that built our dining table so I knew the quality would be amazing….but the price tag was just a tad too steep!

I love everything about this shelving unit….the look, the style, the quality.

So I went looking for a less expensive option. I found one I thought was okay on Overstock.

Waaaay less expensive…and for obvious reasons. The frame is metal vs welded steel and the shelving material is MDF vs. beefy solid wood.

The look and style is very similar…almost identical sizing…but the MDF shelving HAD to go. I knew immediately I wanted to replace them with solid walnut.

It has only taken five months to get around to this project.

The biscuit joiner was a life saver.

Walnut is a pretty expensive wood…and finding pieces wide enough for the needed 12” shelving was pretty much impossible (without a serious outlay of cash.) What I did find were 7”ish board we ran through my son’s table saw and joined together….

IMG_1740.jpg

Using a biscuit joiner is NOT difficult…just take your time and follow the directions.

One little trick I did learn was how to mark the joints so they lined up perfectly. Just put your two boards together then run a mark across the joint….

IMG_1742.jpg

Then just line the joiner up with the mark and plunge away…the joints will line up perfectly!

Always dry fit everything to make sure it all lines up perfectly before you apply glue….

Apply glue and clamp….

IMG_1745.jpg

Joiners are NOT difficult to use. Just follow the directions and watch lots of YouTube tutorials.

I sanded each piece with 220 grit sand paper, tack cloth and sealer.

I used Waterlox as a sealer…no stain…same stuff I used on my kitchen cabinets and I have been extremely pleased with it!

BEFORE

BEFORE

AFTER

AFTER

BEFORE

BEFORE

AFTER

AFTER

BEFORE

BEFORE

AFTER

AFTER

I was able to take a shelving unit fit for a dorm room and turn it into a beautiful accent piece!

LOVE!

A new storage project and Christmas 2019!

It has been a minute since I shared a home project…just too much going on the last few months to do anything other than what HAS to be done around here!

But I saw this little storage idea HERE and knew it was exactly what I need in my guest bathroom!

I had to build a little Christmas gift but I can’t share that just yet since it is suppose to be a surprise. But while I had the saw and nail gun out I decided to take time to build this little storage unit.

I keep plenty of spare toilet paper under the vanity but it is out of reach if you have already sat down. So for years I kept spare rolls in a basket on the floor next to the potty but I just didn’t think it was a sanitary place to store paper. So I set up a little wickerish box…paper inside, magazines on top.

So here’s my opinion about reading materials in a bathroom. First, I don’t want guests hanging out long enough to read an article in the guest bathroom…seriously, do that in your own bathroom. Second, if you have to sit there long enough to read an article, add fiber to your diet.

I needed something to set a little Christmas tree in so the little box got “repurposed.”

Anywho, I saw this little storage idea and thought “HEY! I can do that!”

I constructed mine a tad differently than Barb, but the concept is the same…and as I always suggest, use the tutorial that makes sense to YOU!

Either way, SUPER simple build! Something you could do with a miter saw and box. hammer and screw driver if you don’t have fancy power tools!

The first thing I did was use a stud finder to locate the studs then I cut into the sheet rock to measure the exact distance between studs…

…15”. Most wall studs are 16” on center so they SHOULD be 15” apart, but you never know so it is better to be safe than sorry! Just measure the distance between the studs and make your box a smidge narrower than that…or do as Barb did and “fur out” the studs to make a box a specific width.

I laid out the TP hanger (THIS is the one I used) and the spare rolls to see how tall I wanted the entire box to be…17” seemed to be perfect.

One suggestion…make sure the bar on the holder you choose “pivets”…you want the bar the paper will sit on to swing freely so you can swing it out of the box to put the paper on!

I used 1x4 (actually 3/4” x 3 1/2”) pine boards and 1/4’ luan to build the box. I cut the width pieces about 14 3/4” to give myself a little wiggle room between the studs. Basically I made a 14 3/4” x 18 1/2” box (outside measurements), then backed it with luan, cut to fit. I used wood glue and brad nails…ALWAYS glue your joints…trust me, the nails just hold everything together until the glue dries!

I used “door stop” for the face trim…it is 1/4” thick and 1 1/2’ wide and has a very simple profile! I used it when I installed the glass on my laundry room door…simple and beautiful!

After the box was constructed, I puttied the holes and caulked the joints, primed it with Bullseye primer, sanded it smooth, then wiped it down with a tack cloth.

I used the backside of the box as the “template” to mark the sheetrock, making sure it was level with a small 6” level (don’t assume your studs are level). I used a sheetrock knife to cut the sheetrock.

To install, I slipped the box between the studs, making sure the trim sat flush on the sheetrock. I drilled four 1/4 “holes approximately 3/8” deep on the inside of the box (2 on each side) and used 1 1/2” sheetrock screws to attach the box to the studs. Then I used wood putty to fill those holes and sanded it smooth after it dried.

All my trim is oil based “Swiss Coffee” (and of course I have spare paint on hand) so I painted the box with the trim paint. Again, ALWAYS use an additive when brushing or rolling paint on wood…in this case Penetrol since I am using an oil based paint. Two coats!

After the paint dried well I installed the TP holder and stocked it with spare paper.

Too stinking cute and perfect for storing extra paper and even a little “air freshener.”

Christmas is next week and so little changes from year to year it seems almost redundant to share my Christmas decor. But I will leave you with a few pictures of our cozy holiday home…

I hope you and yours have A VERY MERRY CHRISTMAS!!!

Organizing one tiny step at a time!

This time of the year the blogs are filled with organizing tips. They are all great but man, can they be overwhelming! 

They feed into our desire to get our lives and homes in order. So I thought I would share a few TINY things I have done in each room of the house that have, in one way or another, made my life a tad simpler. Nothing major or earth shattering...just little things you can do that don't require a pickup load of storage boxes or a week of total madness in your quest to "get it right."

So I walked around my house with my camera and asked myself...what in THIS room makes my life a little easier.

First...my bedroom. Getting my bedroom the way I love it was a looooong process that I revealed here. But there is one tiny element that makes my life a little simpler....

This tiny little change to the outlet next to my bed was super simple to install (here I share how to install one!) and has made my bedtime ritual so much easier. I can still have my clock and lamp plugged in while charging my phone and Ipad.....zero hassle! 

My office...I have a ton of organizing tips for home office spaces, but my absolute favorite is simple...binders!

These are just a few I keep at my finger tips...on a shelf in my closet I also have binders for home and car insurance documents, tax returns, legal papers, etc. Since I have a business, all my receipts and invoices get tossed in a paper box each month and at the end of the year stored in the attic...just in case the IRS comes knocking! Super simple "filing" system! But the documents I need on a regular basis are kept in binders at my finger tips!

The toilet paper holder. Okay, this may seem silly but if you have ever had a puppy, kitten or toddler, you know the struggle....the daily ritual of cleaning up the toilet paper that has been "unrolled!" I discovered this little trick with my last kitten...

Install an "open ended" toilet paper holder vertically rather than horizontally. Not only does it take away the entertainment value of "unrolling" the paper it makes it super simple to replace the roll!

See, I told you these were simple little changes...

On to the laundry room. I have said time and again, I like pretty but it has to have function. One of my favorite little things to collect are the old Lane cedar boxes. Some believe they are old "sample" boxes used by Lane salesmen for their cedar chest line. Not so! They were actually little cedar boxes Lane gave away to girls when they graduated from high school to entice them to buy a large Lane cedar chest. I find them all the time at auctions and in flea markets. A quick strip with my acetone/lacquer thinner mixture and a few coats of tung oil and they are as good as new...and super pretty!

I use one to hold dryer sheets in my laundry room and I also have one on my dresser for reading glasses and such and one in my den to hold the remotes. Pretty with a purpose!

Which brings me to my kitchen. So many neat little ways I have made this space much more functional and organized, but I chose to share one of my few loves that really serve little purpose...my cutting boards....

Here and here I share how super simple it is to revive old cutting boards! Except for the one I use as a recipe holder, they really serve no purpose because I don't use wood cutting boards. But I love the warmth and whimsy they add to kitchen!

In the den a few more of my favorites "with a purpose!" When I started seeing all the "old work benches" being repurposed in the blogosphere I remembered I had my dad's old tool bench stuck back in a storage shed. I pulled it out and gave it a little makeover! It is one of the few "primitive" pieces I feature in my home. Because it was actually built and used by my dad, I LOVE it!!!

It is relatively small and doesn't take up a lot of space and serves as a perfect little side table next to the lounge chair in the den! 

Coffins...again, morbid sounding, I know. But they aren't REALLY coffins, that is just what they are called! I have several and I use them for storing fire wood, photo albums and books!

Another super simple "makeover" project that yields "pretty with a purpose!"

I did manage one major "purge" this year...partially out of necessity. When I redid my entry this year I created a dust bowl that forced me to remove a 30 year collection of hardback books for cleaning and I decided it was time to finally let go! Over 150 books found a new home and my bookcases finally found room to breath! 

I kept the collections of two of my favorite authors but the rest were boxed up and given to a friend.

Truthfully, I haven't missed them and now I think twice before spending money on another hardback. I still read, I just don't "buy to have"...I buy paperbacks I can leave for others or I download them on my Kindle. 

I will say that getting rid of clutter, a real heart wrenching purge and declutter, is ESSENTIAL to making your house a home. Maybe one or all of these tips will make that process a little easier!

Lazy days....

This heat is brutal...I hate to gripe because my son reported it was 120 degrees in Phoenix a month ago and I usually we are in triple digits by now. But seriously, this heat and humidity is brutal.

Because of that I get a tad lazy.

First, I want to hibernate...seriously, go inside and not come out until October. Second, I tend to do stupid things....

Like take this little mahogany bookshelf in without doing anything to it....

Not horrible and I really thought just MAYBE someone else would take a risk on it. But it did have several issues.

First, the overall original finish...kind of cruddy!

Not horrible, but not great either.

The biggest issue was a "burn" on the veneer,. Seriously, how does this happen?

I have no idea!

I brought it home after it sat in my room at 410 Vintage for a month or so...evidently no one was willing to do their own DIY on it. So it was up to me to make it presentable...curses!

First, I had to repair the burned veneer (again, what the heck?) I used the same process I used on the old dresser and shared  here. 

I really wanted to save a little bit of the wood feature, so I used this process to strip and oil the top. Didn't take but a few minutes!

Plaster paint, distress and seal. 

I want to admit one little glaring error in this little makeover. Mahogany has a tendency to "bleed" through any paint. The BEST thing to do when painting mahogany is to first seal it with a clear lacquer or primer, then apply your paint. 

I, sadly, did not do this. And while my little "repair" job on the veneer is darn near perfect, the fact that the mahogany bled through makes this little oversight a little more glaring.

You can clearly see where the patch is and where the original finish bled through...I'm blaming this one on the heat too! I know better.

Oh well...guess I'll just drag it back in the house and give it ANOTHER little makeover...curses!

A special birthday celebration!

If you follow me on Instagram, you know my dog has become my "fifth child." Yep...that is what happens when you become an "empty nester." You take and post waaaay too many pictures of your animals and, of course, you celebrate their birthdays!

Wednesday we celebrated Cleo's 2nd birthday! If you go by "dog years," I officially have another teenager!

Our grandpuppy, Zoey, came to celebrate with us!

They LOVED the pup treats...the hats, not so much! Zoey wouldn't even wear one for a picture....party pooper!

And of course I have a TON of projects in the pipeline....three chairs to reupholster, five little dressers to repair and rehab and who knows how many other little projects piled in the back of the garage!

I did get a few pieces finished and ready to take to 410 Vintage...this shelf/desk is only one of many...but as usual I either forget to take before OR after pictures...in this case, the before.

Imagine honey oak...eeeck! A little KSTP treatment, and again, another lifetime of awesomeness!

I know I harp on it, but it bears repeating. The ugliest piece of furniture can be dolled up with a little paint! 

I have four dressers lined up in the driveway ready to strip and paint IF the weather will cooperate. I think that is one of the biggest problems this time of the year. One day it is 70, the next we have a freeze warning. So I shuffle stuff around and work on what I can depending on the weather. Some days it is too cold or windy to paint, so I use those days to do repairs or work inside on upholstery projects. Then when it warms up a bit, I paint, but if it is too windy I can't spray paint. Curses!

Not going to complain because in few short months I will be gripping about the heat! And honestly, this is what I love about Arkansas...four seasons! I just wish it would make up it's mind from one day to the next!

TV cabinet makeover...

The bad news is I have had a lot of vacancies this past month...the good new is I have had a lot of vacancies this past month! 

The reason it is bad is because it means I have pretty much had to bust it every day...cleaning, repairing, rehabbing! I. AM. EXHAUSTED!

The reason it is good news is because OCCASIONALLY I find a decent little piece I can work a little DIY magic on. Before I started "rehabbing for resell" I would either toss this stuff or give it away to friends and neighbors....often after spending days rehabbing and refinishing! Seriously, I just gave away stuff! Now I will make repairs, paint, refinish...whatever it takes to give the piece another lifetime of use!

This piece is a prime example...

Dated, worn and just down right ugly. Very similar in style to this piece but a little sturdier so I thought it was worth giving a little makeover! 

This piece was a prime candidate for a little KSTP treatment I shared here.

It originally had a little shelf but it was missing so I cut another out of a sheet of plywood. Other than that, it really didn't need any repairs! I painted the cabinet a slate blue I mixed up using a blue and black latex paint I had on hand, painted the drawer fronts black and the hardware metallic gold. 

I liked the style of the hardware but definitely not the color.

This is one of those pieces I took to "base neutral" (in other words, primed) and then let sit because I just couldn't decided what color to use on it. 

Obviously the colors were okay...it sold 3 days after I took it to 410 Vintage


Simple makeovers for the worst offenders...the KSTP treatment!

There is NO excuse for ugly furniture. With warmer weather just around the corner, it is time to start looking at your furniture with a critical eye and making a list of pieces that CAN be changed with just a little bit of work!

We all have it...those "cheapo" pieces of furniture that are, at the very least, offensive! Maybe they were given to you, maybe you bought them at a "discount" store...maybe you bought it at the thrift store to fill space in a room.

Pressed board construction, laminate tops, dated finishes, pieces you put together with a little allen wrench thingy that came with the worthless little "screws" that promptly strip out and leave the piece wobbly and worthless!

It's ugly and cheap, but seriously who has the money to buy "real wood" furniture when you are struggling from pay check to pay check and having to buy shoes for a kid whose feet seem to grow a size every month.

I get it...I've been there. Fortunately I have learned to shop resale and auctions for "quality" pieces...and even if they need a little TLC, I have the tools, knowledge and time. But not everyone has that...or the money to buy and refinish high quality pieces.

That is why I advocate the KSTP treatment. Let me explain....

First, before you even get to the KSTP treatment, ALWAYS give the piece a good cleaning. On the nastiest, I use ammonia water but some can just be wiped down with a little water and mild detergent. Whatever you need to do to get the gunk off the piece! If it is "stuck" on just scrape it off with a razor! No matter if you scratch the finish...you are going to paint it!

Second, make any and all repairs that need to be made...and if you don't know how to repair it properly, google it! 

Okay, now the KSTP treatment....

K- Kilz (my favorite primer but any QUALITY PRIMER will do! That is why this is the KSTP treatment and not the PSTP treatment!)

For smaller pieces I use a spray can only because it is easy and gives me a nice smooth finish. On larger pieces I use a brush and 4" foam roller! TIP! Always shake the can longer than the directions recommend. Kilz will spray on with a "grainy texture" if you don't shake the can well! No biggy since you are going to sand anyway, but just makes it a little easier! Also, pay attention to the temperature recommendations...it matters!

Many paints SAY they are a "primer and paint in one." Sorry, I am old school....I ALWAYS prime and I personally recommend it. If you want a superior finish that will hold up to use and abuse, prime! 

S-Sand. A 220 grit paper will usually smooth out the piece after it is primed. I wrap a piece around a sanding sponge block!

If you have "ornate" legs or detailing, use 000-0000 steel wool.

USE YOUR HANDS, not your eyes. Feel the piece.

Trust me, if it isn't smooth, it WILL show after you paint it! Sand it until it is smooth to the touch! If you cleaned the piece well, scraped off all the gunk, this step really should only take a few minutes.

T- Tack cloth. A MUST after you sand but before you paint (or apply any finish). Blow or brush off as much as you can, then use a tack cloth!

You can purchase it at your favorite home improvement store...usually in packages of 2 and relatively inexpensive (around $2)! You can wipe a piece down all day with a clean cloth, but you WILL leave "stuff" on the piece if you don't tack cloth it. Tack cloth will remove EVERYTHING. If you still feel "stuff," hit it with the sand paper again and then tack cloth again! 

P-Paint. This is where people usually freak out. My favorite for wood or laminate furniture is oil-based but it can be a tricky paint to work with for a novice and difficult to clean up. Fortunately latex paints have come a long way and are much more durable these days! QUALITY spray paint is probably your best bet for smaller pieces. I say quality because you can buy spray paint a tad cheaper at discount stores, but I am not a huge fan of cheap paint for ANY project! I usually buy Valspar or Rust-oleum from Lowe's.

On smaller pieces of furniture the difference will only be a few dollars but will be worth it in the long run. 

Each of the brands come in LOTS of great colors...just find the color you love! I have found very little difference between the two brands...the Valspar tends to dry a tad quicker....but both are quality paints! ALWAYS shake the cans well and follow the directions on the can!!! 

I have followed every tip in the book to get rid of the occasional "striping" on large, flat surfaces...like dresser tops or table tops. It doesn't seem to matter how I spray, what the temperature is or how hard the wind is blowing...sometimes I get stripes.

My solution has been to purchase the little "sample pots" of paint custom mixed to match the spray paint I am using and roll it on the large flat surfaces with a 4" foam roller! 

Penetrol and Floetrol are a MUST any time you roll or brush on paint...oil or latex!

Use it. It will eliminate the brush and roller marks and give you a MUCH smoother finish! 

These are just a VERY few projects using the KSTP treatment (I have done hundreds!)....world of difference for a little bit of work! I am working on a piece right now that is in the S stage...primed and sanded but now I need to figure out what color I want to paint it...soon!


Even light fixtures and paddle fans can be spray painted!!! On metal pieces and furniture hardware, I use metal primer primarily for the "rust retardant" factor!

One last important TIP when using ANY technique to paint anything....ALWAYS give the piece time to cure before you put it to work! 

I was always skeptical of those "two day" makeovers they did on tv where they would paint something and then "stage" the pieces with all kinds of stuff within hours of putting a final coat on. (Kind of like getting your nails painted at the salon...even though you dry them for 10 minutes, you are still going to ding them if you dig in your purse for your keys! Unless you get gel polish...awesome stuff!) Trust me, that is the fasted way to ruin a finish! Don't do it...be patient and give the paint time to harden (cure) before you set a lamp on it or try to hang the fixture (trust me...I have had to repaint many pieces because of impatience!) 

One dated, nasty, cheapo piece of furniture can ruin an entire room. Toss it or paint it! YOU CAN DO IT!

*I have not been compensated for pimping these products! These are the products I use and work for me!!!*

A simple TV cabinet makeover...

This is the second year in a row I have been sick around Christmas. Fortunately, last year it was AFTER Christmas. This year it was BEFORE Christmas. Not good when I have so much to do the week before Christmas! I knew I felt bad Tuesday when I was out building fence (the wind did a number on my privacy fence at the apartments) but I didn't realize how bad I felt until I came home and sat down.

Now I have a list of things to do...presents to buy, a few things to return, wrapping boxes to hunt down, presents to ship, grocery shopping....and I feel to cruddy to even drag myself into the shower! Fortunately I THINK the worst is over so hopefully I'll feel like getting around later today!

In the meantime, I thought I would share another simple little makeover.

Remember all that dated, uninteresting furniture I keep harping on you to paint or do SOMETHING with! Well, this is just another example of a piece of furniture that no longer has a place or a purpose in our homes...unless you roll up your sleeves and give it a little makeover.

The dreaded old "tv cabinet" ...or "hutch"....or whatever you want to call it!

Here I shared how I acquired this less-than-interesting piece and how I used beaded craft board to start this simple transformation!

I gave the inside a KSTP treatment with my "go to" off-white and gave the outside a little plaster paint/dristress treatment. But it still lacked "character" so I wiped down the entire cabinet with walnut stain. That changed the color from a soft "teal" to almost a "greenish" color but it also added depth to the finish! Kind of a "patina"....

I sealed it all with poly and changed out the hardware. Actually I painted the original round knobs black and added black cup pulls to the bottom drawer! Remember, if you are changing out hardware, you may have to patch some holes BEFORE you paint. In this case I had to do just that since the holes on the bottom drawer were 3" apart and the holes for the cup pulls are 2 1/2"...no biggy! Just patch them with wood filler, sand and then paint....then just drill new holes for the new hardware!

It would be simple to reinstall the doors...but in this case I decided to go with an "open shelf" look! 

Simple little update! Now this little cabinet is ready for another season of life!