Painting light fixtures and paddle fans....
See, I'm not even trying to be clever with my titles anymore...just too much brain work!
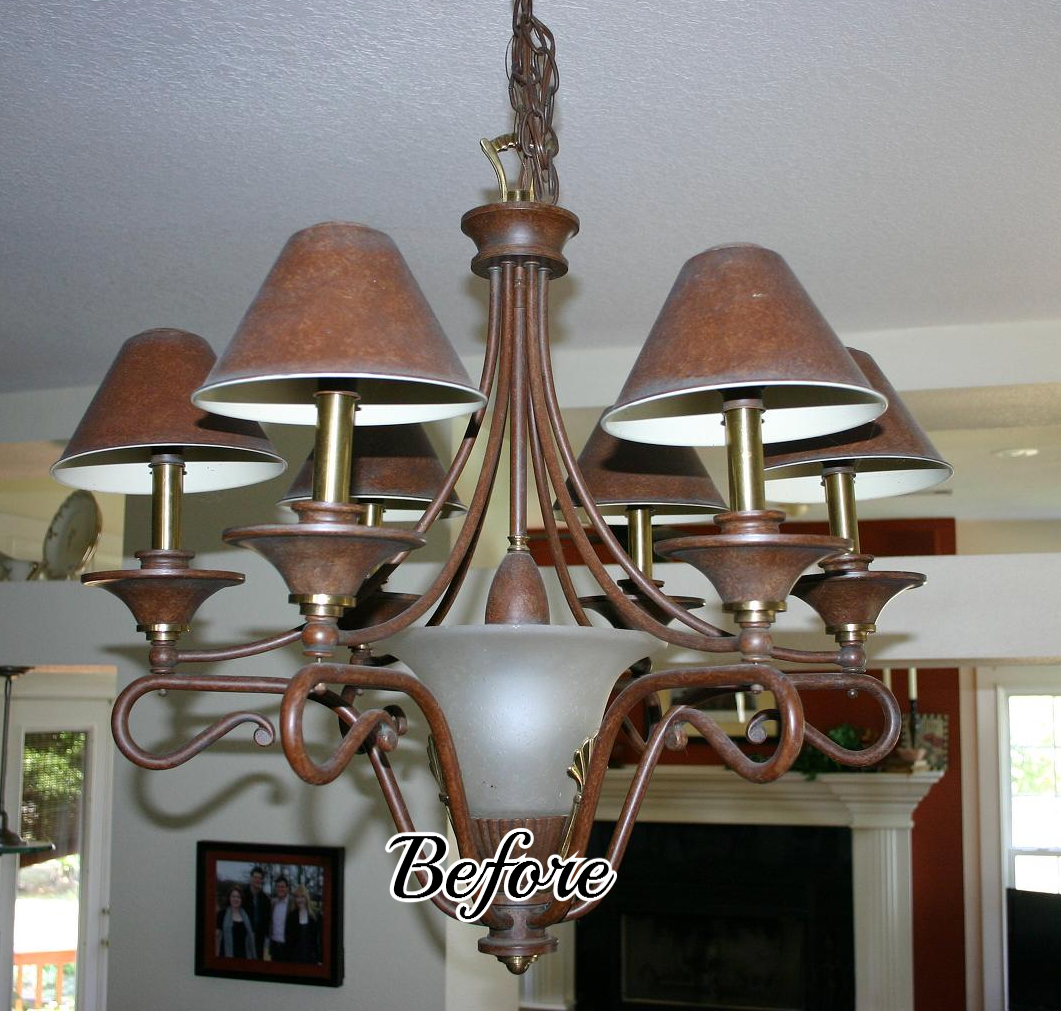
When I bought this house 13 years ago, the "bronzed" look was all the rage...not so much now, or at least not to my taste! I'm more into light, bright and somewhat "modern" looking!
But who can afford to change out ALL their light fixtures when the old trends sour. Not me...so it was time to get "creative."
Paddle fans and dining chandeliers are probably the two biggest expenses in lighting. And naturally, those are often the most noticeable!
Since I was somewhat tired of the dining room light and the paddle fan in my office (and both would be expensive to replace), I didn't think I could do much damage if I took a can of spray paint to them...what is the worst that can happen...I have an excuse to buy new ones, right?

As with everything I paint, I first cleaned them and then "primed" them. On metals, I use a metal primer...or even Kilz! Just spray it on and then after it dries hit it lightly with 0000 steel wool...and then of course tack cloth it well before painting. (ALWAYS TACK BEFORE PAINTING!)
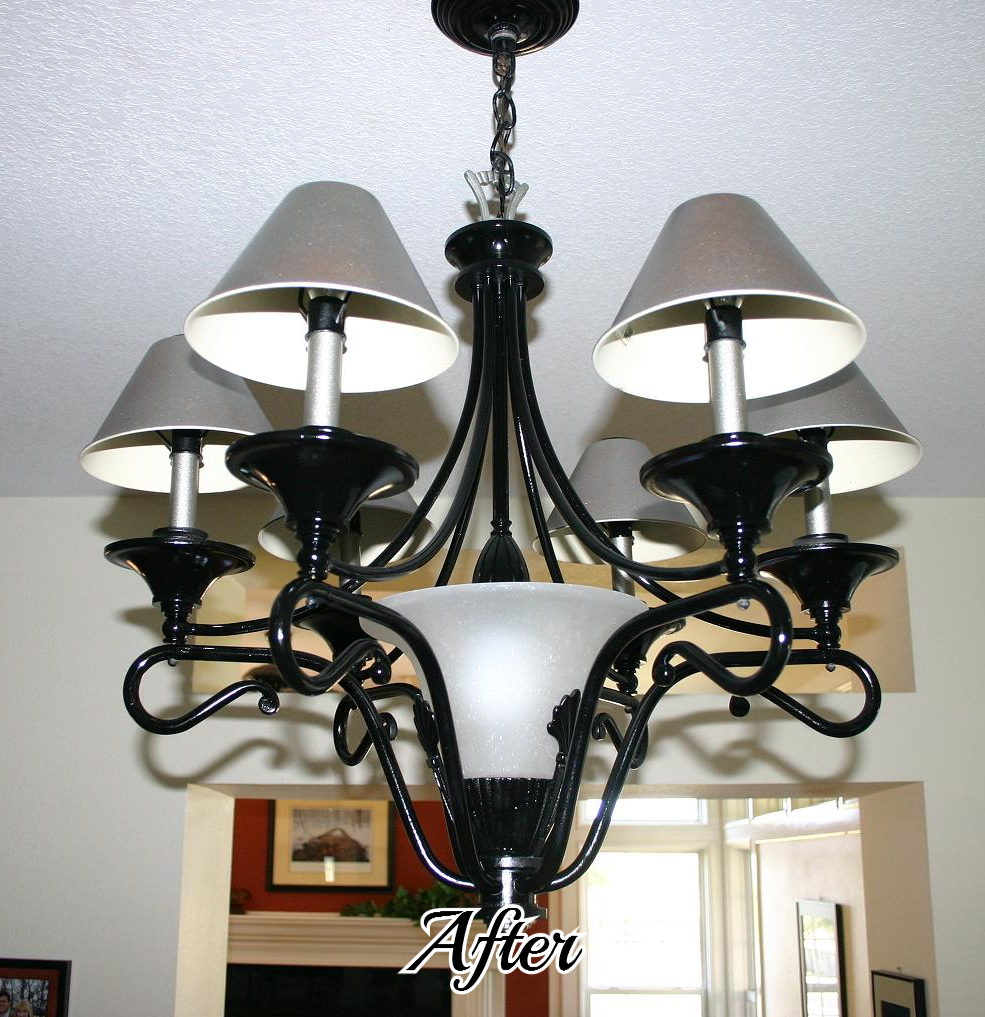
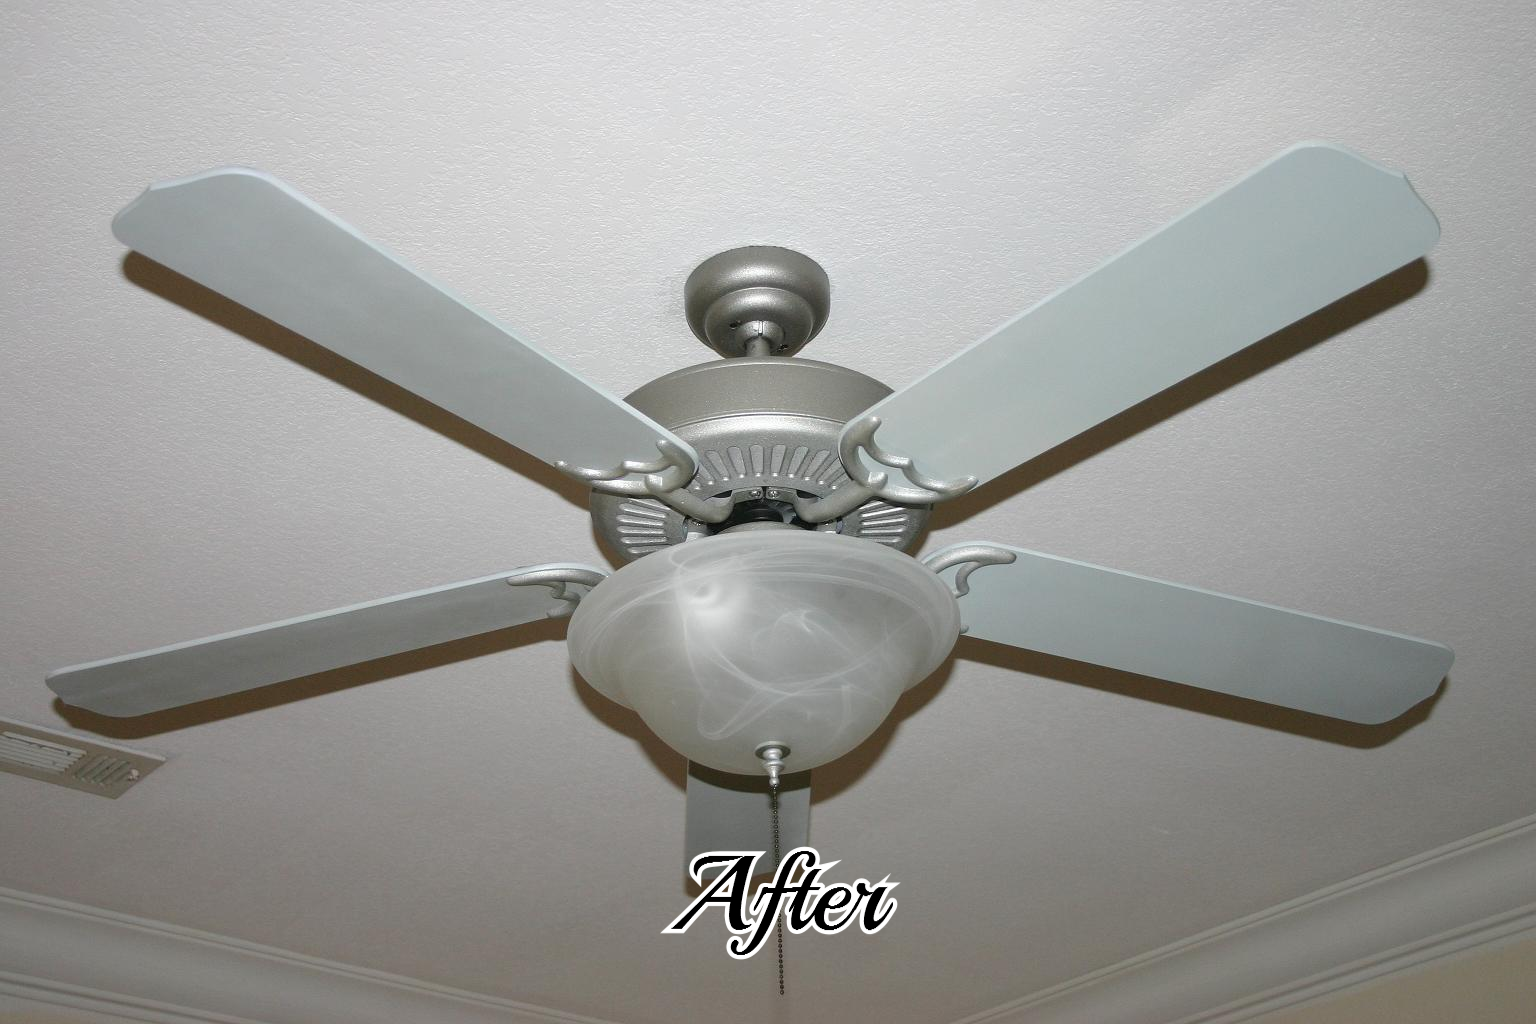
On the dining room light I used gloss black spray paint and the "brushed nickel" spray paint on the shades. I used blue/grey spray paint on the fan blades...the same color I used on my dresser... and brushed nickel on the body and hardware of the fan. I also added a new light globe to the paddle fan, just to update it a tad.
The trick to painting light fixtures or paddle fans is taking them down and basically taking them apart...once you "disassemble" them, they are easy to paint! BUT MAKE SURE YOU KEEP ALL THE HARDWARE AND SCREWS! That is why I have plastic baggies on my materials list. Any time you take ANYTHING apart, you need to put all the screws and hardware in plastic baggies and make sure you label them! (Again, just trust me on these things!) If you have never assembled light fixtures, and you don't feel real comfortable with the thought of getting it all back together, just take LOTS of pictures while you disassemble it. I did that with my first upholstery job, and it helped a lot!

I found that my swing pergola made the perfect spot to hang the fixtures (with a dog leash) while painting...see, you don't need anything "fancy."
Note, I also used blue tape on both the fixture and the wires coming out of the ceiling to label what wires went where so I would know how to rewire it...AND DON'T FORGET TO TURN OFF THE POWER TO THE FIXTURE BEFORE TAKING IT DOWN OR PUTTING IT BACK UP!!!
After 2-3 coats of paint on each of the components, I put 1-2 coats of spray on clear coat, just to give it a durable finish that would allow me to dust and clean them periodically!
This easy process allows you to be REAL creative! It would be fun to paint the fan in your kid's room a fun and funky color...maybe with some interesting design element, like a chevron pattern or polka dots! Just "think outside the box" and remember my motto...YOU CAN DO IT! If you don't have the most creative mind, do what I do...Google it! People post pictures of their projects...and no one is going to be offended if you "copy" their creativity! It really is the greatest form of flattery!
I was kind of sick of my bedside table lamps too...and until I can afford the really awesome crystal lamps at TJMaxx, I got a little creative with those too!


As much as I had tired of this dining room light, it really did turn out great. And it has always been one of my favorite things to decorate during the holidays. During Christmas it is perfect for the gold shades I painted and the garland and red berries!! Sometimes, old is good...it just needs a little facelift from time to time!

