Super simple DIY wall decor....

As I look around at my wall decor, I realize that MOST of it is thrift store, garage sale, vintage market pieces that I have collected and "upscaled" at some point in time.

Here I shared a quick update to my little gallery wall of favorite family photos....

Simple, inexpensive frames spray painted and new matting. I didn't even have expensive "custom" mats made...I cut bulk matting to fit the frame and then mounted the pictures on top of it!

I spent a fortune on these dining pictures 17 years ago and in my quest to transition from "dark and dank" to "light and bright" I gave them a little make-over....

I did spend a little more on custom matting, but I chalk painted the frames and deconstructed and changed it all out myself. A tad more expensive but faaaaar less expensive then going out and buying new matted pictures! You can pick up frames like these for pennies at thrift stores! Maybe the picture is ugly and the frame is "dated" but it really is a simple little DIY project that can make a huge impact! 

This super cool mid century dresser mirror was another DIY project I shared here

I love the fact that I can change out the wreath for the holiday seasons...I have one for fall (pictured) and Christmas, a Valentine's wreath and a cool little metal thing for the 4th of July! For "off-season" I have a simple boxwood wreath!

Now this is where I admit that I am a bad blogger....because AGAIN I failed to take any "before" pictures. So close your eyes and imagine...inexpensive little brown frames with pictures of a goose...or something stupid like that.

Again, a little KTSP treatment, a tiny bit of spray paint, a little inspirational quote printed on stock paper and PRESTO....

When I was at an auction last week I picked up two unfinished oak cabinet doors. Here I shared how easy it is to turn them into cute little chalkboards...perfect for a kitchen, mud room or the kid's room! 

Chalkpaint, chalkboard paint, a little cup pull to hold the chalk and again, PRESTO! 

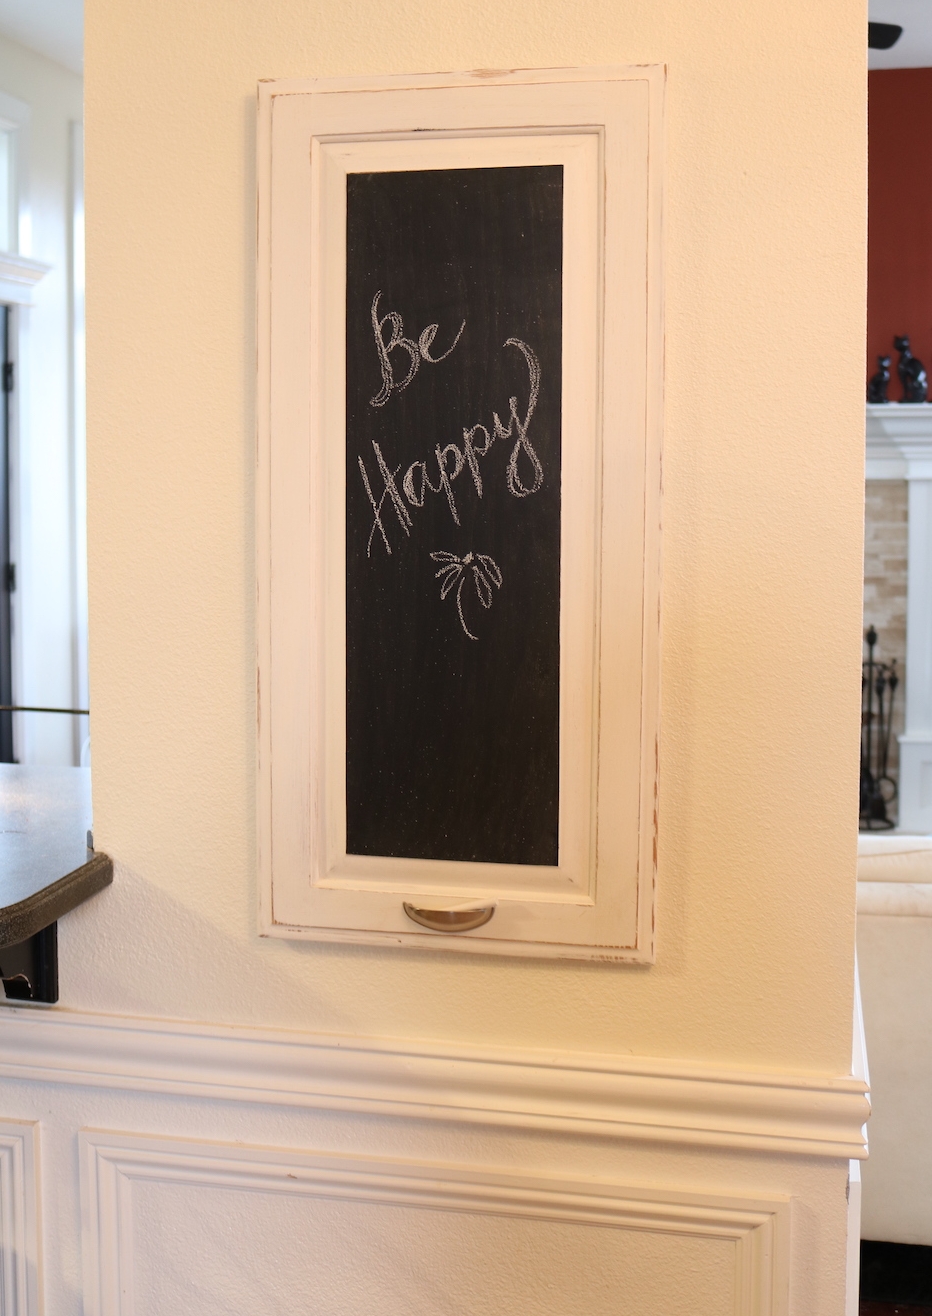
(I even painted the cabinet doors in my garage with chalkboard paint so I have a place to write down supplies I need to pick up or projects I need to work on!)

My point? If you don't like your wall decor,  change it! Paint it, change out the mats, change out the picture. 

Make it pretty! Cuz life is too short to live with ugly wall decor! 

Organizing one tiny step at a time!

This time of the year the blogs are filled with organizing tips. They are all great but man, can they be overwhelming! 

They feed into our desire to get our lives and homes in order. So I thought I would share a few TINY things I have done in each room of the house that have, in one way or another, made my life a tad simpler. Nothing major or earth shattering...just little things you can do that don't require a pickup load of storage boxes or a week of total madness in your quest to "get it right."

So I walked around my house with my camera and asked myself...what in THIS room makes my life a little easier.

First...my bedroom. Getting my bedroom the way I love it was a looooong process that I revealed here. But there is one tiny element that makes my life a little simpler....

This tiny little change to the outlet next to my bed was super simple to install (here I share how to install one!) and has made my bedtime ritual so much easier. I can still have my clock and lamp plugged in while charging my phone and Ipad.....zero hassle! 

My office...I have a ton of organizing tips for home office spaces, but my absolute favorite is simple...binders!

These are just a few I keep at my finger tips...on a shelf in my closet I also have binders for home and car insurance documents, tax returns, legal papers, etc. Since I have a business, all my receipts and invoices get tossed in a paper box each month and at the end of the year stored in the attic...just in case the IRS comes knocking! Super simple "filing" system! But the documents I need on a regular basis are kept in binders at my finger tips!

The toilet paper holder. Okay, this may seem silly but if you have ever had a puppy, kitten or toddler, you know the struggle....the daily ritual of cleaning up the toilet paper that has been "unrolled!" I discovered this little trick with my last kitten...

Install an "open ended" toilet paper holder vertically rather than horizontally. Not only does it take away the entertainment value of "unrolling" the paper it makes it super simple to replace the roll!

See, I told you these were simple little changes...

On to the laundry room. I have said time and again, I like pretty but it has to have function. One of my favorite little things to collect are the old Lane cedar boxes. Some believe they are old "sample" boxes used by Lane salesmen for their cedar chest line. Not so! They were actually little cedar boxes Lane gave away to girls when they graduated from high school to entice them to buy a large Lane cedar chest. I find them all the time at auctions and in flea markets. A quick strip with my acetone/lacquer thinner mixture and a few coats of tung oil and they are as good as new...and super pretty!

I use one to hold dryer sheets in my laundry room and I also have one on my dresser for reading glasses and such and one in my den to hold the remotes. Pretty with a purpose!

Which brings me to my kitchen. So many neat little ways I have made this space much more functional and organized, but I chose to share one of my few loves that really serve little purpose...my cutting boards....

Here and here I share how super simple it is to revive old cutting boards! Except for the one I use as a recipe holder, they really serve no purpose because I don't use wood cutting boards. But I love the warmth and whimsy they add to kitchen!

In the den a few more of my favorites "with a purpose!" When I started seeing all the "old work benches" being repurposed in the blogosphere I remembered I had my dad's old tool bench stuck back in a storage shed. I pulled it out and gave it a little makeover! It is one of the few "primitive" pieces I feature in my home. Because it was actually built and used by my dad, I LOVE it!!!

It is relatively small and doesn't take up a lot of space and serves as a perfect little side table next to the lounge chair in the den! 

Coffins...again, morbid sounding, I know. But they aren't REALLY coffins, that is just what they are called! I have several and I use them for storing fire wood, photo albums and books!

Another super simple "makeover" project that yields "pretty with a purpose!"

I did manage one major "purge" this year...partially out of necessity. When I redid my entry this year I created a dust bowl that forced me to remove a 30 year collection of hardback books for cleaning and I decided it was time to finally let go! Over 150 books found a new home and my bookcases finally found room to breath! 

I kept the collections of two of my favorite authors but the rest were boxed up and given to a friend.

Truthfully, I haven't missed them and now I think twice before spending money on another hardback. I still read, I just don't "buy to have"...I buy paperbacks I can leave for others or I download them on my Kindle. 

I will say that getting rid of clutter, a real heart wrenching purge and declutter, is ESSENTIAL to making your house a home. Maybe one or all of these tips will make that process a little easier!

Thanksgiving bench....

Last year I shared a couple of little benches I whipped up out of necessity! 

My dining table spends 364 days a year against the wall with nothing more than a couple of chairs.

Since I host Thanksgiving dinner, the table is extended and pulled into the middle of the dining room so I need the additional seating!

It is no secret that I tend to stick with what I know so when it was time to pull out the table and get ready for Thanksgiving dinner last week, it was back to the garage to build another bench for the holiday!

Since I had already designed and built a few last year, I really didn't need to draw up new plans...I just needed to dig around in my scrap wood and find a few pieces I could use to construct a new bench.

That was pretty easy considering I had some oak left over from my stairway demo earlier in the year!  I found an old pine dresser at the apartments that was missing the drawers, but the sides and top were perfect slabs of solid wood for the top of the bench. I also had some trim from who knows what project. I always have paint and stain on hand! I had to pull a few nails and sand off some old mastic, but other than that I had everything I needed! In the end, the bench cost me nothing more than a little bit of time!

It's no secret that oak is not my favorite wood but since I just need this little bench for the day, no biggy! The benches I constructed last year served their purpose and then where promptly sold in my booth, which explains why I had to build a new one!

I hope everyone had a great Thanksgiving! After a day of stuffing our faces with turkey and EIGHT pies, I spent the weekend decorating for Christmas! Some people start off the holiday season fighting the crowds at the mall on Black Friday, I start mine wrestling with strings of lights and yards of garland...fun time! 

Little changes from year to year...rarely do I tackle holiday projects. Here I shared a cute little project made out of a butter dish ...

...and here you can see how I made this versatile primitive box display...

....but all in all things pretty much stay the same. 

Well, except the constant changes I keep making....

Heirlooms trump everything!

I have said it time and again....family heirlooms trump EVERYTHING!!! So when my uncle dropped off a china cabinet this week that had been my great-grandmother's, everything was rearranged to make room for it!

It's not "my style."(very traditional) It's not "my wood." (oak) It's not "my finish." (white-wash/pickled kinda look)

But it was my great-grandmother's and that is all that matters.

I even have a picture to prove it!

This is my maternal grandmother, great-grandfather and great-grandmother gathered at a holiday dinner in the early 80s....the china cabinet is in the background and the dishes on the table are my great-grandmother's china I recently acquired.

I vaguely remember this piece in my great grandparent's dining room when I was a child. They lived in a charming little post-war neighborhood in Dallas and during my childhood it was the family gathering spot for holiday's and special occasions.

While I was looking through my family photos for a picture of the cabinet, I also found this awesome holiday photo of my mother's entire family taken in 1948 at their home in Houston.

My mother is the sullen looking teenager in the red gingham shirt, my uncle to her left. The woman to the far left in the picture, in white, is my great aunt Judy. She inherited this china cabinet after my great-grandmother (woman far right) passed in 1986...and now it has come to me!

On the table are my grandmother's dishes I also acquired recently! 

These pictures are pure treasure!

Sooooo...now I have a china cabinet that is not my style, not my wood and not my finish.

I'm not sure what I will do with the finish...if anything. Right now I am just going to let it sit and mull it over. This is one of those pieces I will not touch until I have a very firm game plan in place. I know it needs a few small repairs but the beveled mirrors were replace in 1986...seriously, I found the receipt in the cabinet....$15 for two beveled mirrors. I just spent $130 to replace two mirrors that broke when my living room wall mirror fell off the wall!

I do know I would like to replace the wood shelves with glass...maybe add some interior lighting....and I couldn't wait to remove the metallic red paper inside the cabinet!

Had I picked this piece up at an auction, I would have immediately slathered it in paint. 

Not that I am opposed to making changes to family heirlooms. Sometimes you have to make changes to a piece so it will serve your family for many more decades. But when you are dealing with family heirlooms you should proceed with respect and caution! 

Armoir makeover....

Occasionally I find a piece I really love. This armoire is one of those pieces.

I obviously don't have room for it in my home, but it is a very unique piece that could serve a number of purposes in a home...dresser, kitchen pantry, tv cabinet or even bathroom storage! 

In it's original condition it wouldn't have been difficult to over-look. But this is one of those times one has to look beyond the years of neglect and abuse and know that it can be made beautiful and useful again! 

Again, I have to have my "wood fix" so I decided to strip and refinish the top. I stripped it using this process and then topped it with tung oil finish. I love how removing all the old "muddy" finish revealed a very unique and beautiful walnut veneer! Seriously, this took minutes...don't miss out on uncovering a piece of "art" just because you think this will be a difficult task and do not use the wrong process (like sanding!) 

I had originally planned to paint the inside, but after stripping the drawers I decided the mahogany was just too beautiful to slather in paint so I decided to strip and oil it as well.

The veneer doors and sides weren't anything to write home about. A little "chalk paint and distress" treatment brightened the piece and gave it a much needed "update." This "farmhouse" look isn't exactly my style but it really brought this cabinet into the 21st century!

In the end, a simple makeover made all the difference! 

This week has been "project" week for me. Usually I take inventory of what needs to be done and then make a plan for how and when....again, I use an "assembly line" process when I have a lot to work on!  Tuesday was sand, repair, build and prime day. Can't paint when saw dust is flying all over the place. Today I will sand the primed pieces and chalk paint a few. I like to let the chalkpaint cure a few days before I sand...I have found that the paint "distresses" rather than peels when it has cured well!  

Off to work I go!!!!

Sofa/entry table makeover....

Another simple makeover on a table...gel stain, chalk paint, a little paint on the hardware.

I picked up this little table at an auction a few weeks ago and it really was a relatively simple update.

Gel stain can easily be applied right over existing stain but the top of this table had some serious issues so I used this proess to strip the top...then I applied gel stain.

Okay...I ave  t quit tping nw eause my key oard is otally fried and half y letters won't rkw...enjoy the pitures while I go uy a new mputer...

Little projects that can make a big impact!

While my garage is packed with projects I should be working on, the heat and humidity are just too much. This past week I worked on a few little projects inside!

The first is a "not so little project" but one I have been putting off for a loooong time! I shared the new living room chair I reupholstered here. I also had a little MCM chair and fabric ready to go but I could not bring myself to start the project. Upholstery is one of those things I do ONLY because I like the final results.

I was hoping duck egg blue and mauve would miraculously come back into vogue so I wouldn't have to mess with it, but that's probably not going to happen anytime soon! (Those who remember the 80s will understand this!) 

A teal club chair was one element of my den makeover plan I shared over a year ago. As I mentioned in the reveal post, not all elements of a makeover happen overnight...some may take years. Case in point!

Anywho, this wasn't technically a "little" project. I pretty much had to deconstruct the entire chair, strip and reoil the wood (beautiful!) and then reupholster. 

Once it was done....BIG impact.

But I really did accomplish two relatively "little" projects that have been on my "to do" list and that made a big impact.

The first was changing this little "gallery" wall....one of my "Things I Love" features. Family photos.

Honestly, these have not changed in 16 years but I want to change it up in my quest to "lighten and brighten" elements in my house. Since I am transitioning from the "warm" blacks and burnt reds to "cooler" reds, off-whites and teals, I decided these frames would be easy little elements to update with a little paint and new mats. Still love the pictures...just not how they are displayed

Here I shared the changes to the pictures on my dining room wall....

Just painting the frames and adding new mats made a HUGE difference in this space and cost very little.

I removed all the matting, photos and glass from the frames (good time to REALLY clean the glass!) I had mounted these pictures ON TOP of the matting so all I had to do was cut new teal matting using the old mats as a template and then reattach the photos using double sided tape. Frames are super easy to paint...a little primer and a little spray paint (Valspar Riviera Dune...my favorite off white spray paint) 

Perfect! (Um...yeah...I need to do something about the nasty looking thermostat!)

The other little project was super easy as well. I have wanted "modern" type house numbers for some time. I even painted some on my front door several years ago.

The actual house numbers that can easily been seen from the street are in the gable above the garage door...just cheapo, boring black numbers. Right now they are covered up with the "ivy" that is creeping all over the front of the house and at Christmas they are covered with a huge wreath (that warranted a visit from the code enforcer one year!) 

In my defense, this stuff usually doesn't get THIS out of control. Brian usually pulls it down every year when he puts up the Christmas lights. But last year we used one of those "star shower" thingies and didn't put any lights on the house...so...well...it is out of control! 

I have a plain "ho-hum" brick column on my tiny front porch that I thought might be perfect for a number display!

I ordered the "modern" style 4.5" numbers from Amazon. 

Somewhere along the way I picked up a plank of walnut. I've kind of been hoarding it for the last few years waiting for the perfect project and this was it.

I laid out the numbers on the board, measured and then cut the board the length I needed. Not sure how well tung oil finish will hold up outdoors, but that is what I used to seal the wood (3 coats).

Then I measured and marked where each number was going to go, drilled holes, secured the numbers using hardware screws, and then mounted it all on the brick column.

I used masonry screws to attach the board to the column. Since I didn't want the screws to show, I drilled a hole 1/4" deep with a 1" paddle bit, then pre-drilled in the middle of that hole for the masonry screws and then covered it all with hardwood plugs.

Dabbed a little tung oil finish on the plugs....cute as a bugs ear!

Doesn't look like the heat is going to let up any time soon so I have hauled several pieces into to the dining room to chalk paint! Maybe I can get a little bit of projecting done and get some room to breath in my garage! Maybe....

Lazy days....

This heat is brutal...I hate to gripe because my son reported it was 120 degrees in Phoenix a month ago and I usually we are in triple digits by now. But seriously, this heat and humidity is brutal.

Because of that I get a tad lazy.

First, I want to hibernate...seriously, go inside and not come out until October. Second, I tend to do stupid things....

Like take this little mahogany bookshelf in without doing anything to it....

Not horrible and I really thought just MAYBE someone else would take a risk on it. But it did have several issues.

First, the overall original finish...kind of cruddy!

Not horrible, but not great either.

The biggest issue was a "burn" on the veneer,. Seriously, how does this happen?

I have no idea!

I brought it home after it sat in my room at 410 Vintage for a month or so...evidently no one was willing to do their own DIY on it. So it was up to me to make it presentable...curses!

First, I had to repair the burned veneer (again, what the heck?) I used the same process I used on the old dresser and shared  here. 

I really wanted to save a little bit of the wood feature, so I used this process to strip and oil the top. Didn't take but a few minutes!

Plaster paint, distress and seal. 

I want to admit one little glaring error in this little makeover. Mahogany has a tendency to "bleed" through any paint. The BEST thing to do when painting mahogany is to first seal it with a clear lacquer or primer, then apply your paint. 

I, sadly, did not do this. And while my little "repair" job on the veneer is darn near perfect, the fact that the mahogany bled through makes this little oversight a little more glaring.

You can clearly see where the patch is and where the original finish bled through...I'm blaming this one on the heat too! I know better.

Oh well...guess I'll just drag it back in the house and give it ANOTHER little makeover...curses!

The chest of drawers from hell...

Last week I told you not to be afraid of a sturdy piece of furniture that needs a little repair.

I think the key word is "little."

THIS monster needed more than a little!

Here is how this happens. I want something at an auction. They open bidding on one item, like this HORRID old dresser. I don't want it but neither does anyone else...so they add something...I don't want that either...neither does anyone else...so they add something...I don't want that either...neither does anyone else...so they add something...I WANT THAT! But in order to get it, I have to take all the other crud. So I ended up with this ratty chest of drawers, a disgusting trash can, a burnt orange smelly couch, and the ONE item I really wanted. I started to leave this chest, but I noticed it did have MOST of it's parts, and some stunning hardware.

It also had a serious case of ugly and some water damaged and splintered veneer on the top and at the bottom.

Hum....I can fix that...all because I thought the hardware was kind of nifty!

Seriously, what was I thinking?

I loaded it up and brought it home and went to work...and work it was. But this is a great opportunity to show you how to make the best out of the worst!

The first thing I did was remove all the drawers (and pieces of drawers) and the hardware and set those aside for the time being. The drawers needed some repair and the hardware needed to be painted. But I had bigger issues to deal with and unless I could deal with those issues, spending time on the drawers and hardware would be a waste of time!

The top...wow. Normally I would have just removed and replaced the entire top, but structurally the frame on this one solid. It just needed a new plywood top.

So I removed the old plywood top. Not a biggy...it pretty much popped off. All I had to do was take a chisel and scrape off a few chunks that stuck and some adhesive residue.

I took a piece of 1/8" oak plywood and laid it on the top, face DOWN, and marked the outline of the top with a pencil.

Veneers and plywood WILL "splinter" when you cut it...so the trick is to ALWAYS score it with a sharp utility knife. Once you score it, you will use the appropriate tool (in this case I used a jig saw since the front edge was curved) to cut on the OUTSIDE of your score line. 

I scored on my pencil mark, then cut on the outside of that mark.

Once I had it "rough cut" I applied it to the top frame with wood glue, set some heavy items on it, clamped the edges to the top frame and let it dry over night.

After the glue had dried well, I took a belt sander with 50 grit paper and sanded the edges of the plywood. When I got within 1/8" of the edge, I used my mouse sander with 120 grit to finish up flush with the edge of the frame.

I used my thumb to "putty" on a little wood filler along the edges, sanded smooth, then I primed it with Kilz.

The other issue with this chest was the "veneer rot" at the base. I scored the veneer with a utility knife above the highest point where the veneer was "loose." Then I just peeled the loose veneer off. No need to remove all the veneer if it is secure!

I nailed a 1x4 board along the bottom to improve the stability. I used scraps of the veneer I had removed to "shim" it. I did this on both sides, even though only one side had issues.

Now it was time to "fill in" the missing veneer. For that, I used wood filler and a broad knife. This is where a little creativity and patience comes into play because you will NOT accomplish a smooth finish with one coat! In my case it took THREE shots to get a nice smooth finish. I applied a coat of wood filler, let it dry, sanded, wiped, and then applied another coat. Same process...three times before I was satisfied with the results! 

Once the last coat of wood filler was sanded smooth and I was satisfied with those results, and ALL the other little repairs were made and I had cleaned it all well, it was time to give the "box" the old KSTP treatment...Kilz, sand, tack and THEN paint. 

The drawers...all but the top drawer were present and accounted for but they all needed a little glue and clamping! Remember, WOOD GLUE AND CLAMPS are your friend...not nails and screws. I pulled a few of those as well as scraped off silicone someone had used to "fix" the drawers!

I only had the front and the bottom of the top drawer. My initial plan was to make a little open shelf in that top space, but I decided to build and replace the drawer! Not a biggy for me since I have built drawers before, but you may want to consider making an open shelf if you are missing a drawer, or one is too difficult to repair. 

I primed the inside and sides of the drawers and will paint them as well. This is the best way to "kill" the smells that sometimes penetrate drawers and hide years of use and abuse!

I was super excited about the hardware...very unusual! But it was pretty cruddy so I decided to paint it gold. It is NOT hard to update hardware with paint! First make sure you reinsert the hardware screws. This is important so you don't get paint on the threads of the screws or in the screw holes of the hardware. Second, PRIME!!! There is primer specifically for metal, so make sure you prime with the proper primer. I prime both the back and front of the hardware. You may want to sand a tad after you prime just to knock off the "crumbs." Then just spray on whatever paint you want to use. In this case, I used a gold metallic paint to give them a nice gold sheen! 

(You may notice I am missing one of the smaller pulls...I noticed that too! Found it in the yard...not primed or painted...curses!)

If you are going to change the hardware on a piece of furniture, you will want to use wood filler to putty the existing holes and sand smooth BEFORE you prime and paint (again, it may take 2-3 coats) That way you are not limited by the size or placement of the existing hardware! Then just drill new holes for the new hardware!

The repairs were pretty extensive on this ratty old dresser but in the end, it really was worth restoring! At this point it is repaired and primed and ready for a final coat of paint.

The sky is the limit! I will probably paint this dresser the same color as a few other projects I am working on, so right now it will sit until I am ready to paint several things. Part of the "assembly line" process! 

Again, don't be afraid of doing a few little repairs...in the end, the process will always be worth the effort if you take the time to do it right! 

Remember this process...make ALL necessary repairs first and clean the entire piece! Then KSTP! Kilz (or whatever primer you prefer), sand, tack and paint!

I will share this piece once I get it painted. But even at "base neutral" it's looking pretty good!

Another mid-century chair....

I don't know too many people who would see this ratty old chair and swoon....

...but swoon I did. And to make it even better, there were TWO of them! Yes, two.

Katie TRIED to claim them both but I had to keep one for myself! 

The cushions are the original black naugahyde, which is super common on mid century chairs. Fortunately they were in pretty good shape...not perfect but close enough! 

All I did to both chairs was strip and oil using this process, scrubbed and applied Armor All to the cushions, and BAM....BEAUTIFUL!!!

I told Litty to move so I could take pictures and even nudged her with my foot. One thing about cats...they don't mind well! (A friend told me they had mice...I told him to get a cat...he told me he didn't like cats...I told him the cat wouldn't care!)

Someday I will actually learn to use my camera so you can really see the amazing grain detail in these pieces!! Beautiful!

One of the chairs had a little "boo-boo" on the back...a little glue and some clamps fixed it right up! No biggy! DO NOT be afraid of a sturdy piece of furniture that needs a little repair...if you take the time to do a little "google" search and watch a few Youtube videos, you can pretty much repair anything properly! 

Soooo....I kept one and one went to Little Sister's new condo. Next week I hope to share the desk I made her, the tufted chair we upholstered and a super cool coffee table she refinished! Her first place is shaping up to be super cute and this little chair was an awesome addition!

Until next week....