Where in the world have I been?

I can’t even believe I have not posted since February. Seems like so much has been going on…baby showers, trips, projects…so much!

When last I posted THREE MONTHS AGO I was working on this project…hiding the wart!

I started out by building a “screen” around the “wart.” My original plan was to lay the flagstone first, then build the screen. Honestly, building the screen first worked out much better!

I decided to go with the “louver” look (see HERE for a link to a really good tutorial) so I built two inserts to go between the post I set. They have to be removable so we can service the generator once a year. Built the inserts then attached them to the post with carriage bolts. Threw down a few inches of sand and thats where I left off for a few months….

I needed to give the sand a little time to “level” and pack down…and I also had to get ready for a very special day for my very special son and daughter-in-law! Their baby shower….

Again I was honored to make their cake and desserts…so much fun.

Then it was off for our spring vacation. Brian had to attend a conference in Vegas so I flew to Vegas the last day of his conference, we rented a car and toured the five national parks and one state park in souther Utah. Again, I am not a travel blogger….but if you have never seen these AMAZING National Parks…just go! They will take your breath away!

I can assure you that no photo I took…or have ever seen…does them justice.

Then home for a ton of projects.

Refinishing an antique dresser for the nursery….

I used THIS process and I promise it is hands down the best process for refinishing any piece of furniture…regardless of the existing finish!

I built new shelving in my workshop…..

Not as fancy as some I have seen on the webisphere but functional for my purposes!

I finally laid flagstone around the wart screen and now I am waiting a few months to stain the screen black to match the pergola swing….

New drawers for under the bar storage cabinets. …

I have no idea why I didn’t have my cabinet guy do this when he built these cabinets. I store all my seasonal dishes and service ware under here and it really was a pain to have to shuffle things around to get to the stuff in the back. LOVE!!!!

Now that the weather is warming, I have been planting…nothing new except I decided the flower bed I added last year wasn’t big enough…so I am making it bigger!

I have moved the edging out, weedeated all the existing grass down to the nub, sprayed it with Round Up and next week I will fill it with compost and mulch. I already have a few plants in mind for this space but honestly I need some space to split hostas again next year!

While I wait for grass to die, this is the next project I am contemplating..

A screen around these gawd awful utility things. They have bugged me since day one and with the addition of the “wart controls” to the right, it has gotten worse.

My “plan” is to build a box kinda thing around them and face it out with hinged doors so that it can all be accessed if needed. I want to build it out of treated wood then stain it black to match the swing and the wart screen.

That’s the plan…we will see.

As you can see, it is never ending! Unfortunately, as I have said many times, I am a baaaad blogger. I rarely think of what I do as being “content worthy.” But hopefully the changes I make will inspire you to roll up your sleeves and make changes to your home.

I don’t do good tutorials but there are TONS out there on the blogesphere…anything you want to learn to do can be found on the web!

As I have said before…my daddy didn’t teach me how to build a wart screen, or build cabinet drawers, or bake a cake….what he taught me is how to figure out how to do something I want done.

Will you make mistakes….ABSOLUTELY! I still do and I have been doing this stuff for a lifetime!

So…GO FOR IT!!!

Because until you are willing to roll up your sleeves and dive into whatever you think you want to try or change in your life, you will never be able to ….


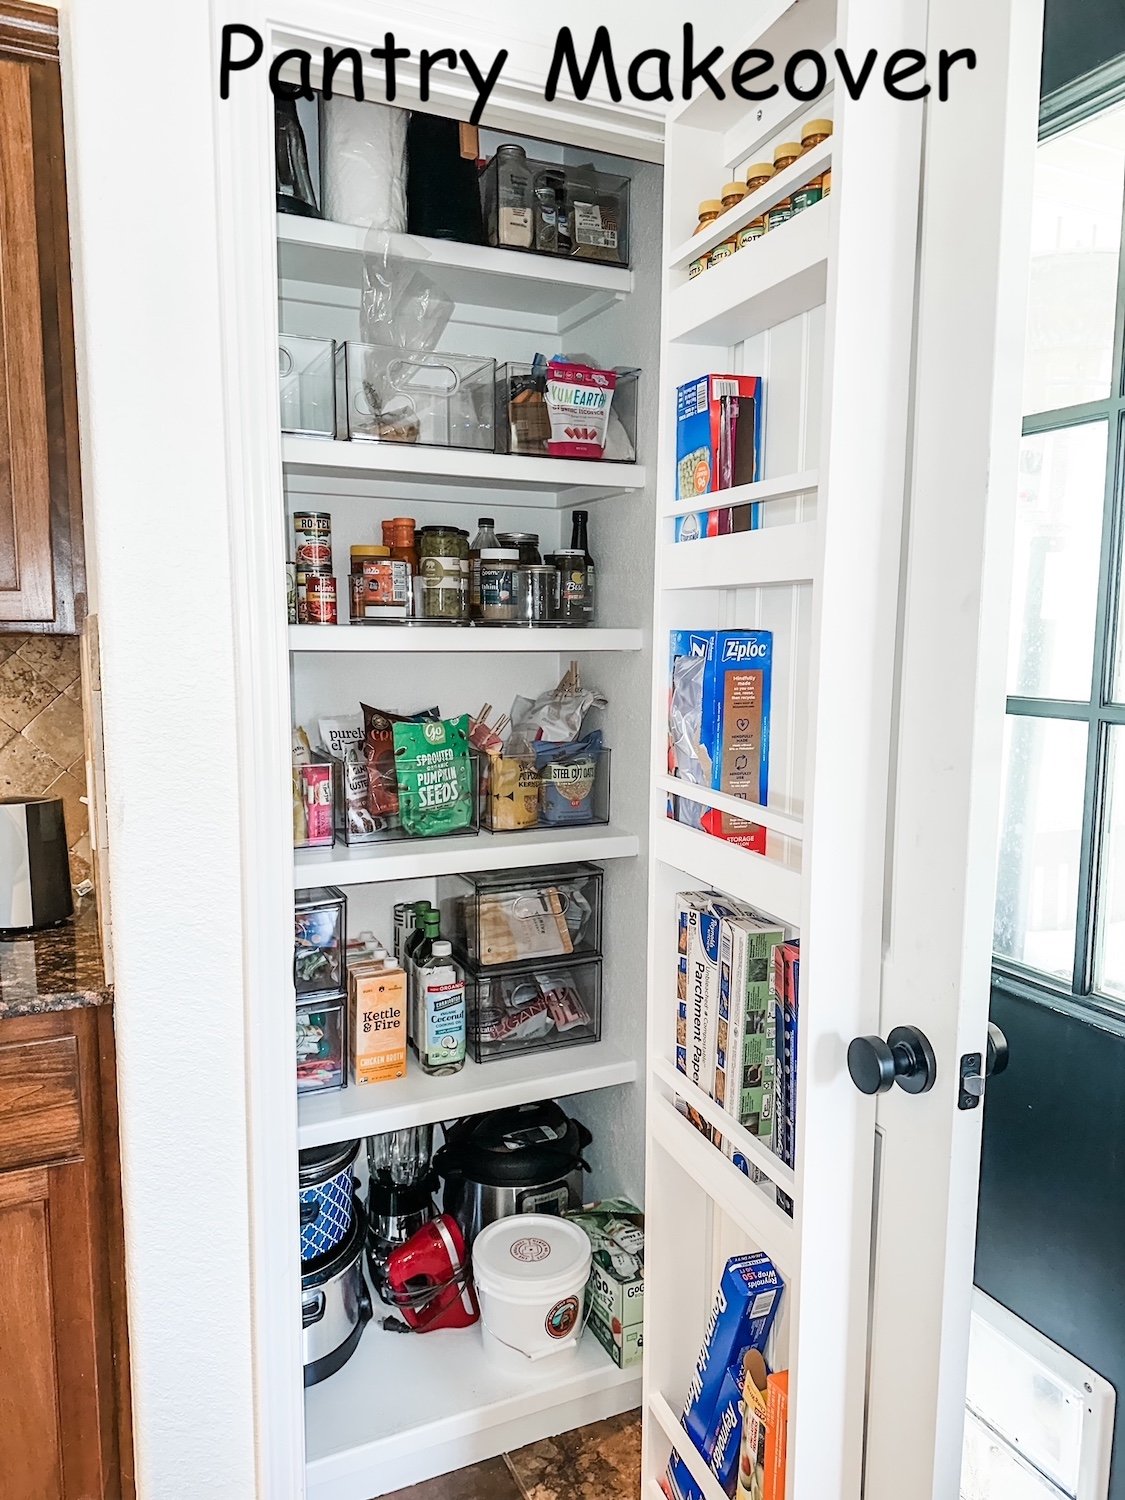
A small pantry makeover....

I love pantry projects…HERE I shared mine!

There is no shortage of inspiration on Pinterest for pantry makeovers…you will find one for every possible size and configuration!

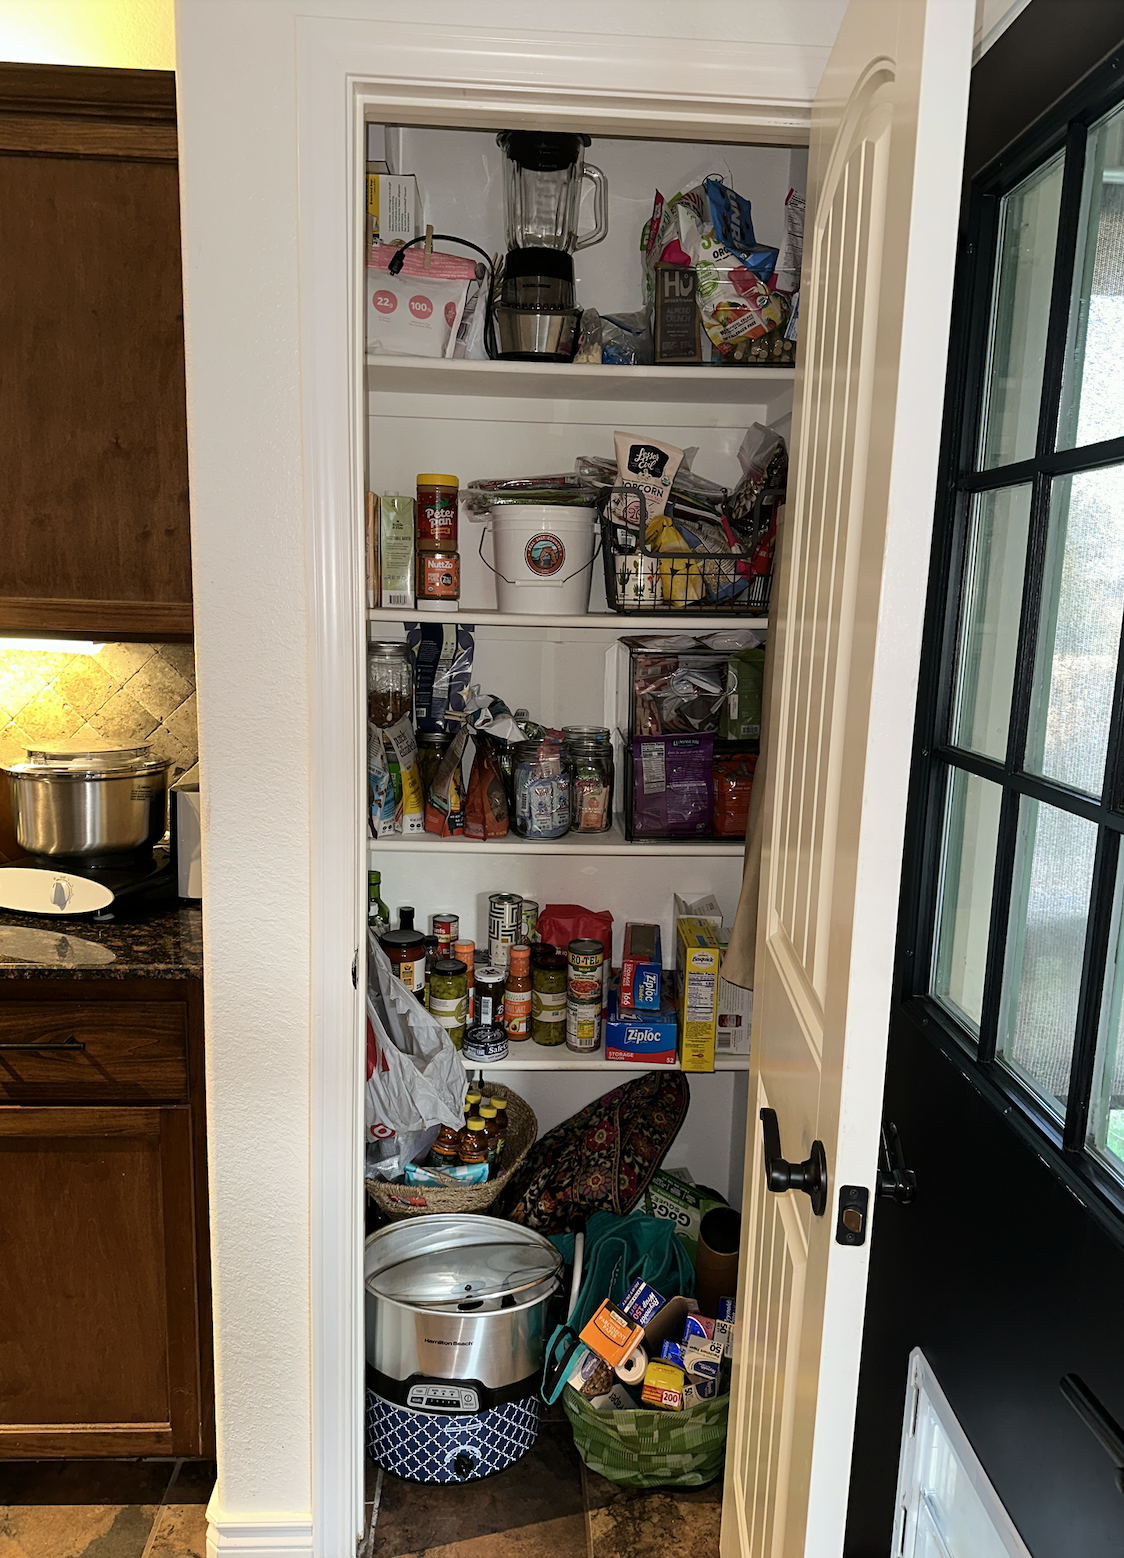
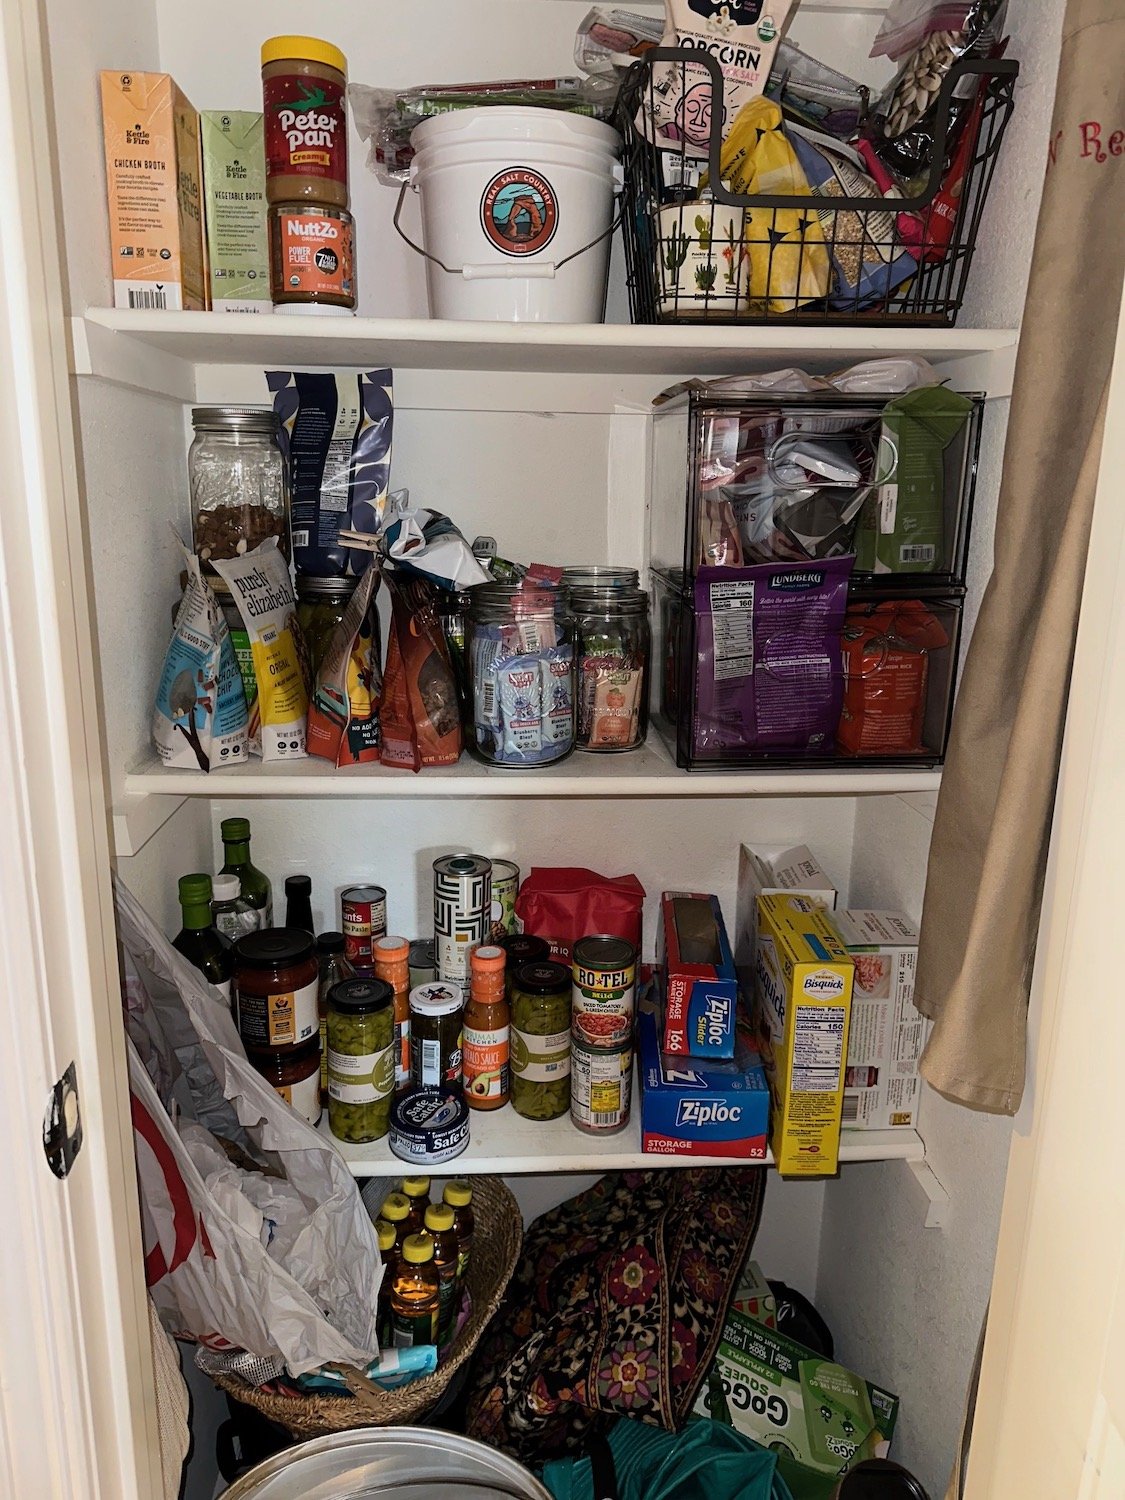
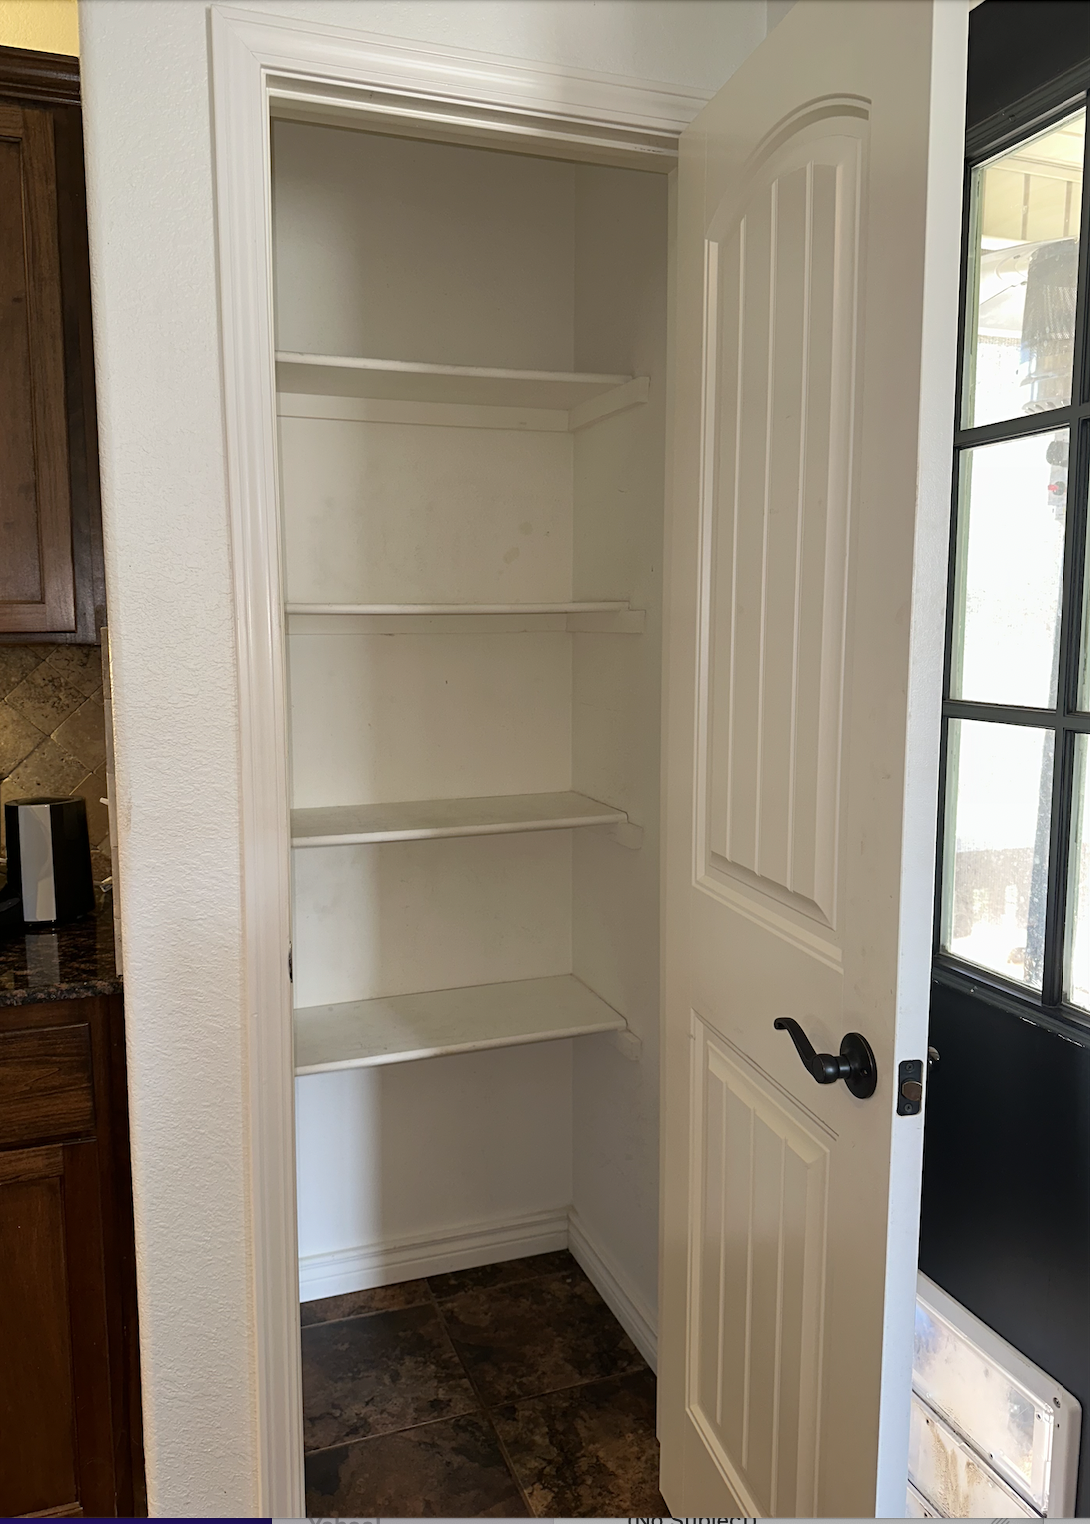
My son and daughter-in-law, Hannah, have a great kitchen but a small pantry with typical poorly designed shelving placement…it was a MESS!

Soooo much wasted space!

For months we discussed giving it a little makeover, but they really wanted a house that is a tad bigger on a few acres further south. So there was a chance they would not be staying in this house.

Several months ago they found one, made an offer, got it accepted and were all set to rent their current home!

So the pantry project got nixed.

Unfortunately, the deal fell through because of a boundary dispute.

Hannah was bummed. (She had already started packing!)

So the pantry project was back on and a few weeks ago we tackled it!

The first thing we did was empty everything that was in the pantry and took measurements.

After emptying the pantry, we “demoed” EVERYTHING…shelving, supports, trim.

I usually repair and paint the walls, install the new shelving, caulk, putty, lightly sand, then paint the shelving. All the shelving is already primed and sanded before I install it so that I don’t have to do any heavy sanding in the house.

When designing the shelving placement in a pantry it is super important that you identify EVERYTHING you may want to store in the space and then measure it.

If you think you want baskets, bins or jars, figure out what will go in what and how many will fit in your space BEFORE you go buy them…or at the very least keep your receipt!

Take measurements of EVERYTHING!

These measurements are important because you can then design your shelving placement based on how tall everything is. You don’t want a bunch of wasted space.

Case in point…can goods stacked two high are less than 9” tall…why would you dedicate a shelf with 12” clearance for canned goods. Paper towels are generally 12” tall…why dedicate a 15” shelf for them.

Add up 3-4 shelves that are 3-4” taller than they need to be and next thing you know you have lost an entire shelf…critical storage space for a small pantry!

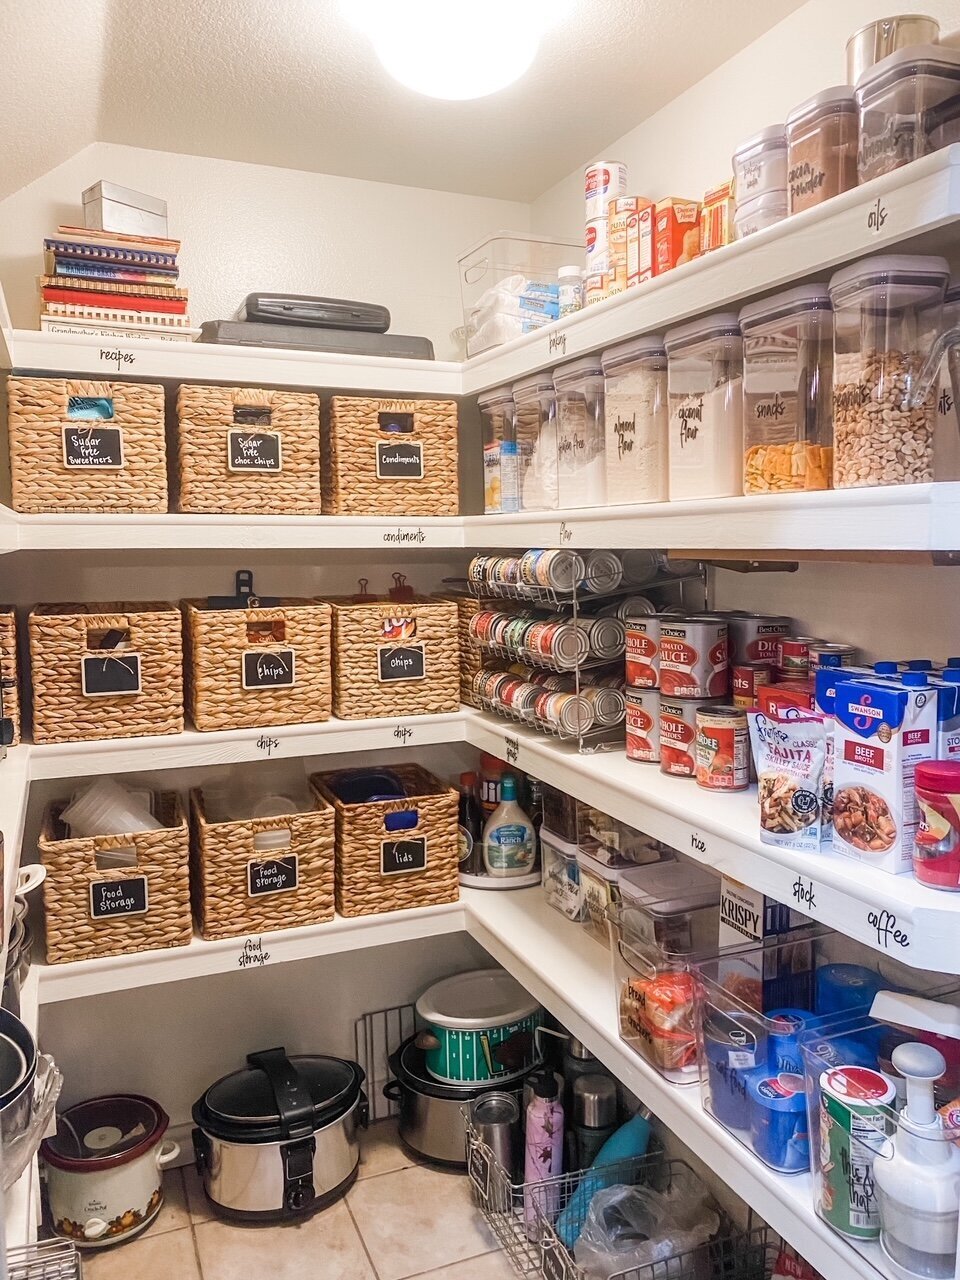
In this case we gained an entire shelf. Crock pots and the insta pot are stored low because they are heavy…the extra coffee pot and extra paper towels are stored up high.

We built a shelf 4” off the floor…not necessary for actual storage but they have a dog and her hair inevitably blew under the door and ended up all over everything that was sitting on the floor.

I made the shelving out of 1/2” plywood, the bullnose and supports out of pre-primed 1x2s. All the shelves were 14” deep, except the top…it was 12” deep.

We also built a door shelf system that is perfect for aluminum foil, plastic wrap, storage bags, etc. (HERE I shared one I made for my house on Lankford…I built two for this house! One is in the garage and the other is used for my cake pans and baking supplies.)

You can buy wire door storage system but building one allowed us to place shelves as needed for specific items.

The end result is amazing! Neat, clean and organized!

I am a big fan of clear plastic bins vs. baskets. I use both since there is some stuff I don’t want to see that can be stored in pretty baskets (open chip bags, storage containers, etc) but the baskets are labeled. (Again, check out my pantry HERE!)

She loved it so much she tackled her kitchen cabinets and organized them with storage bins and jars.

Organizing a space (whether it be a pantry, closet or drawer) not only frees up space, but I have learned that if a space is pretty, clean and organized I tend to want to keep it that way.

When everything has a place and everything is where it belongs it makes my life so much easier!

(HERE I share my trips and tricks to getting and staying organized!)

And remember, you don’t have to take on a big DIY project to get a space cleaned and organized…and not every space in your house needs to be done in a day, a week or a month.

Commit to take one space a month…or even every other month….purge, clean, organize. I think once you get started and realize how much easier it makes your life, you will want to keep organizing every space in your house…just like Hannah!

I may not be around for several weeks…this is our vacation month and this year we are going to take a VERY special vacations! Can’t wait to share!


Changing dated can lights!

My wing is broken.

Poo.

It’s my elbow…it is still boogered. I am trying to “heal” it by resting it but after about a month I’m ready to give up and see what a ortho dude can do for me.

While “resting” I pretty much sit around and look for stuff to do.

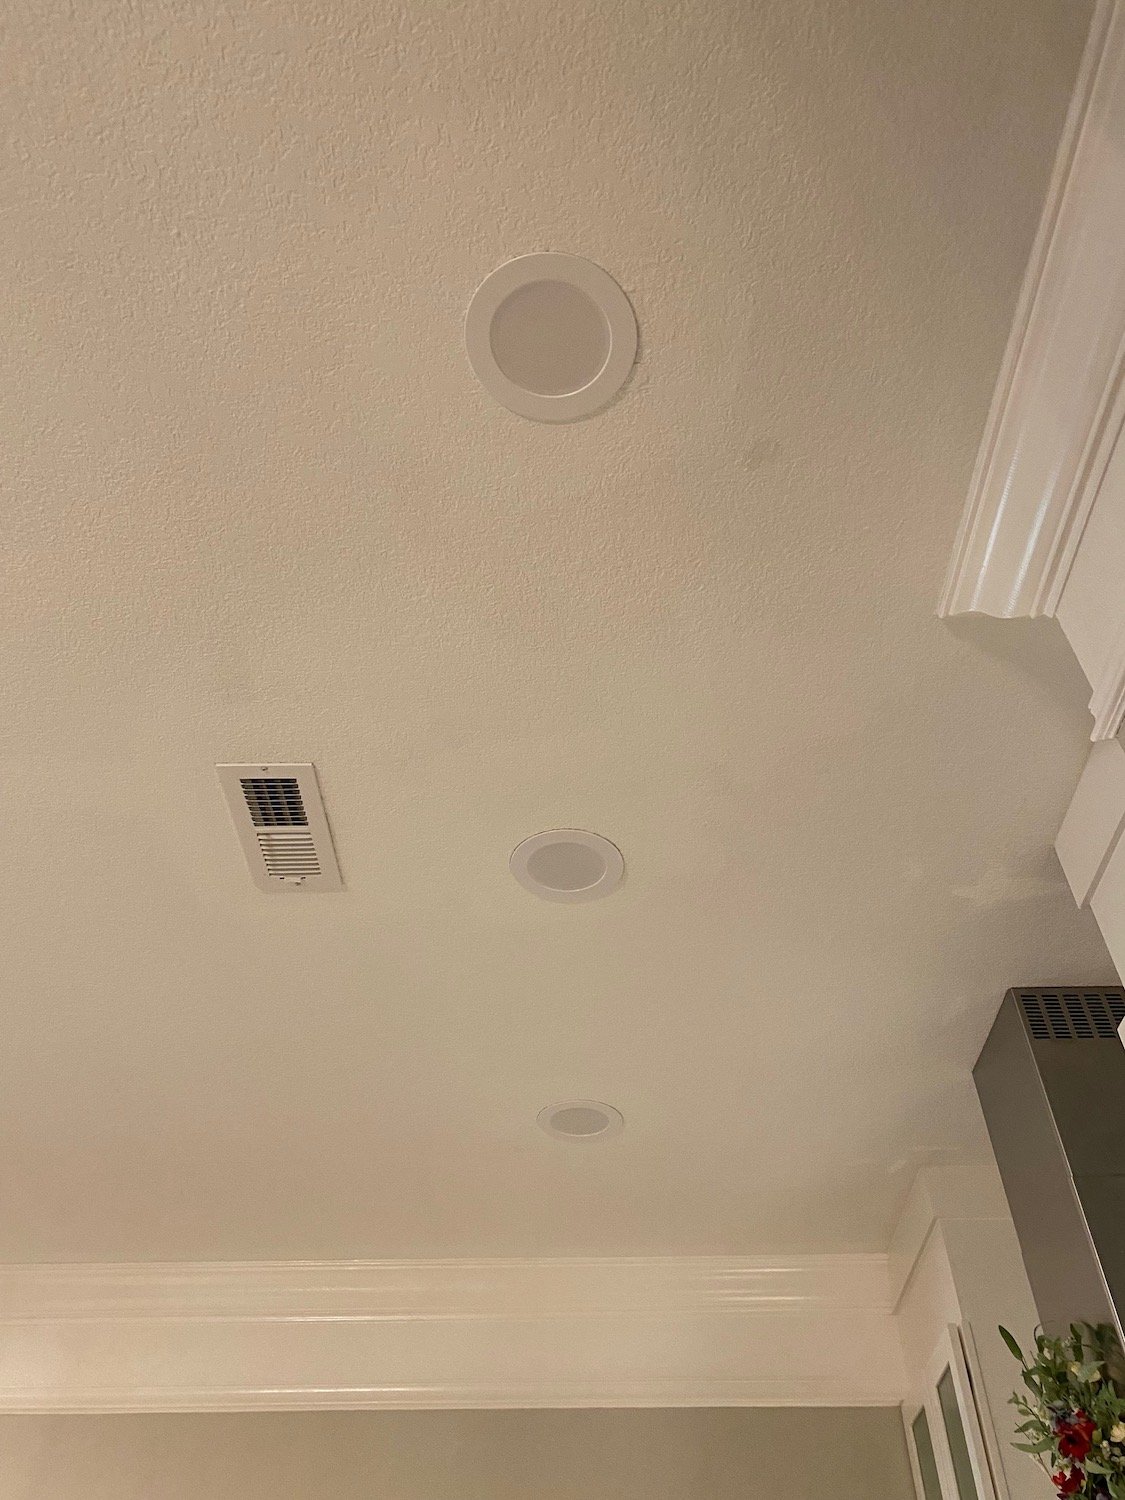
Laying on the couch, looking at the ceiling, I began to obsess about my dated can lights

SUPER simple fix and on a scale of 1-10 it is pretty much a 1.

This is what I have….

…an ugly old can light with a bulb. It had obviously been painted over when the prior owner painted the ceiling. I have five in the kitchen, two in the den, four in the living room, two in the bedroom and four in the bathroom…so yes, they annoy me. But truthfully only when I am laying on the couch or in the bed looking at the ceiling.

While they are “dated,” truth be told no one really pays attention to them except of course when a bulb goes out.

This is where I want to say that when “they” say an LED bulb lasts 10 years, “they” lie.

Beside the point…point is, it is cheap and easy to replace these “dated” fixtures.

So off to Lowes I went and THIS is what I found….

When I say it was easy to replace, I am not kidding. The hardest part was climbing up and down the ladder. Just remove the existing bulb and trim piece. The trim piece is usually held in place by little springs or pinch clips.

Then just screw the new fixture into the socket (like a light bulb) then slip the little pinch clips into the existing brackets on the side of the can. Simple!!!!

The fixture has five different light settings on the back…from bright white to soft “yellowish.” I set all my living space lights on a soft setting and the three in my kitchen on a brighter white for task lighting. Perfect.

TIP! If one of these eventually goes out you can’t just replace a bulb. My suggestion is to get an extra 1-2 in case one goes out in the future and this style or brand is no longer available…that way you won’t have to replace multiples if one goes out!

Again, one of the simplest and most impactful DIY projects you can do. Don’t know why I haven’t done this in the last three years.

Oh, yeah, I know why. Rarely do I lay on the couch and look at my ceiling lights.

Another check mark on the "Honey-do" list...

We returned from our annual Colorado trip last Thursday. We rode trains, zipped across the Royal Gorge, rode bikes from Vail Pass, did our guided fishing trip, shopped, gambled a wee bit and drove the mountains looking at Aspens! Glorious!

Before we left I completed a few “honey-dos.” I got my fall decor up, we got our back yard sodded, I got the yard over-seeded, I painted some of the trim (repainting it with my new favorite white but still have more to go!)…just a few things on my “Honey-do” list I keep on the refrigerator.

Back home and back to work!

One of my spring projects this year was another swing pergola. I love these little projects and we sit in this swing all the time. (HERE you can find a pretty decent tutorial!)

One thing I knew I wanted to do from day one was to stain it black. I like the natural look of treated wood but it does grey over time.

I used Cabot Semi-sold stain mixed in black. I wanted black, but I also wanted to see the grain through the stain.

Almost all tutorials I have read on sealing or staining treated wood suggest you wait 3-6 months to treat it. Treated wood tends to be “wet” and it is important to give the wood time to dry out and “cure” a bit. In my case I waited around 5+ months…I would liked to have waited a tad longer but we had a super dry summer and I wanted to get it done before it gets too cold.

So this little chore has been on my fridge for 5+ months…I finally tackled it this week and was able to check off that “honey do!”

One down…so many more to go!

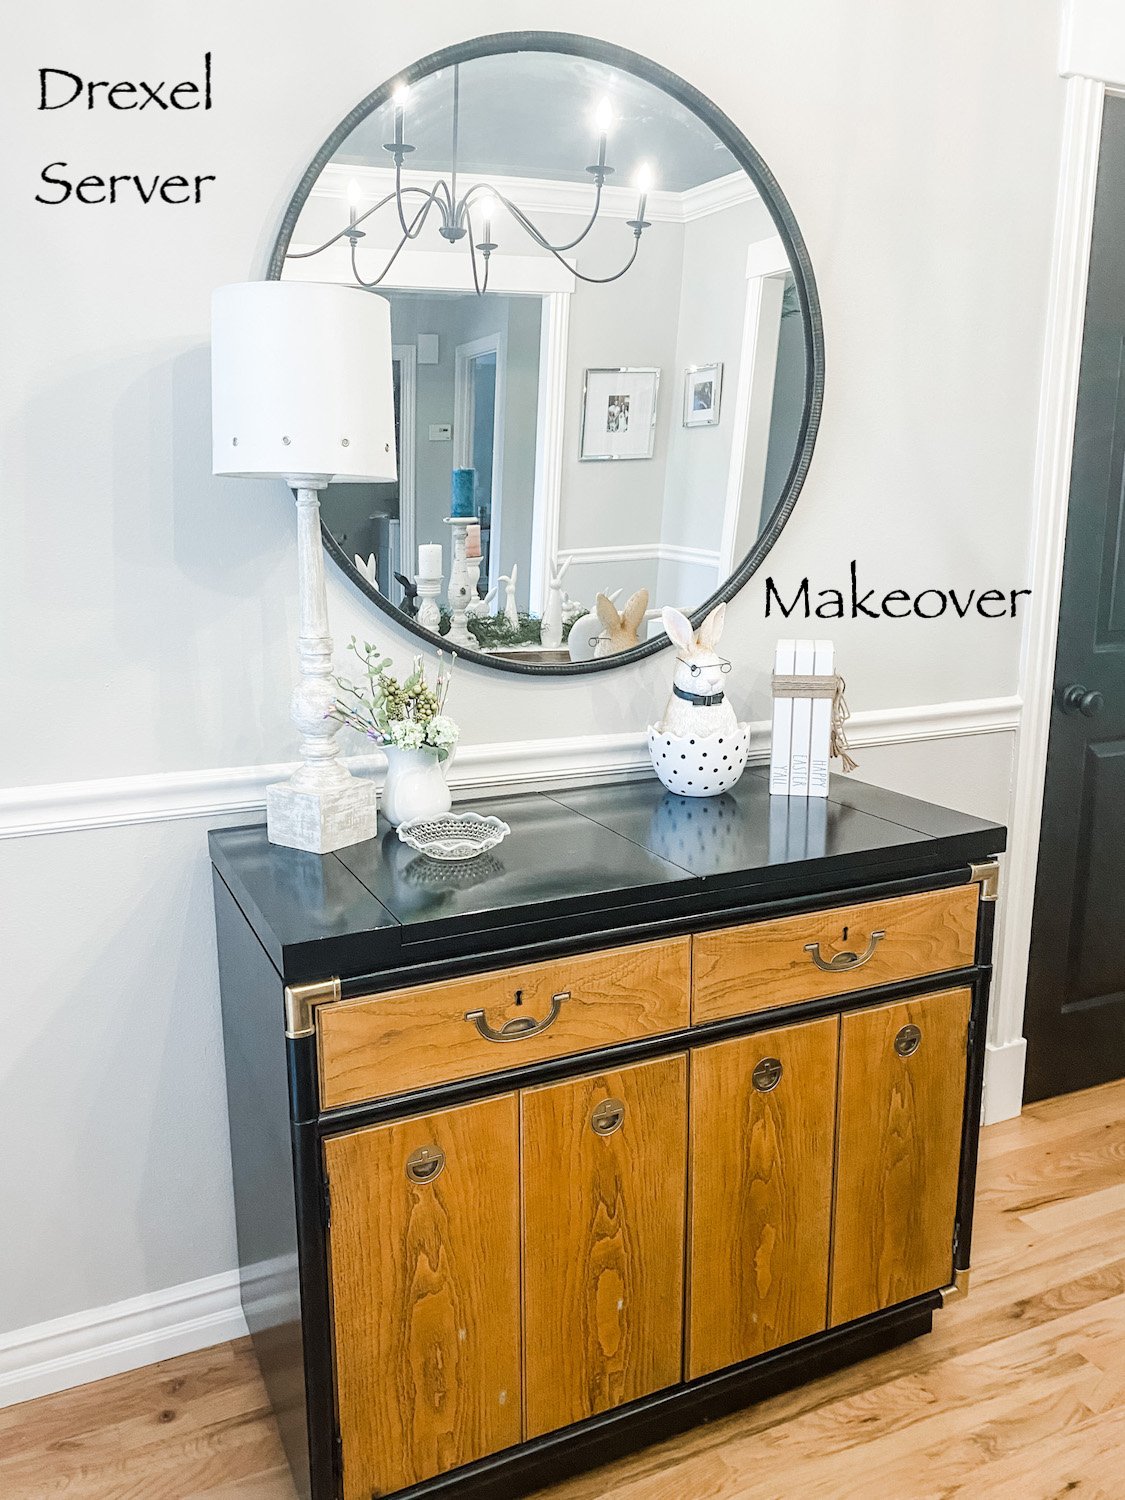
The "new" Drexel server....

I shared my plan for this wonderful vintage piece HERE….

I know purists cringe when people even talk about painting vintage pieces.

This is a prime example of “doing what you love.” If a piece will be more loved and treasured in a different state then go for it.

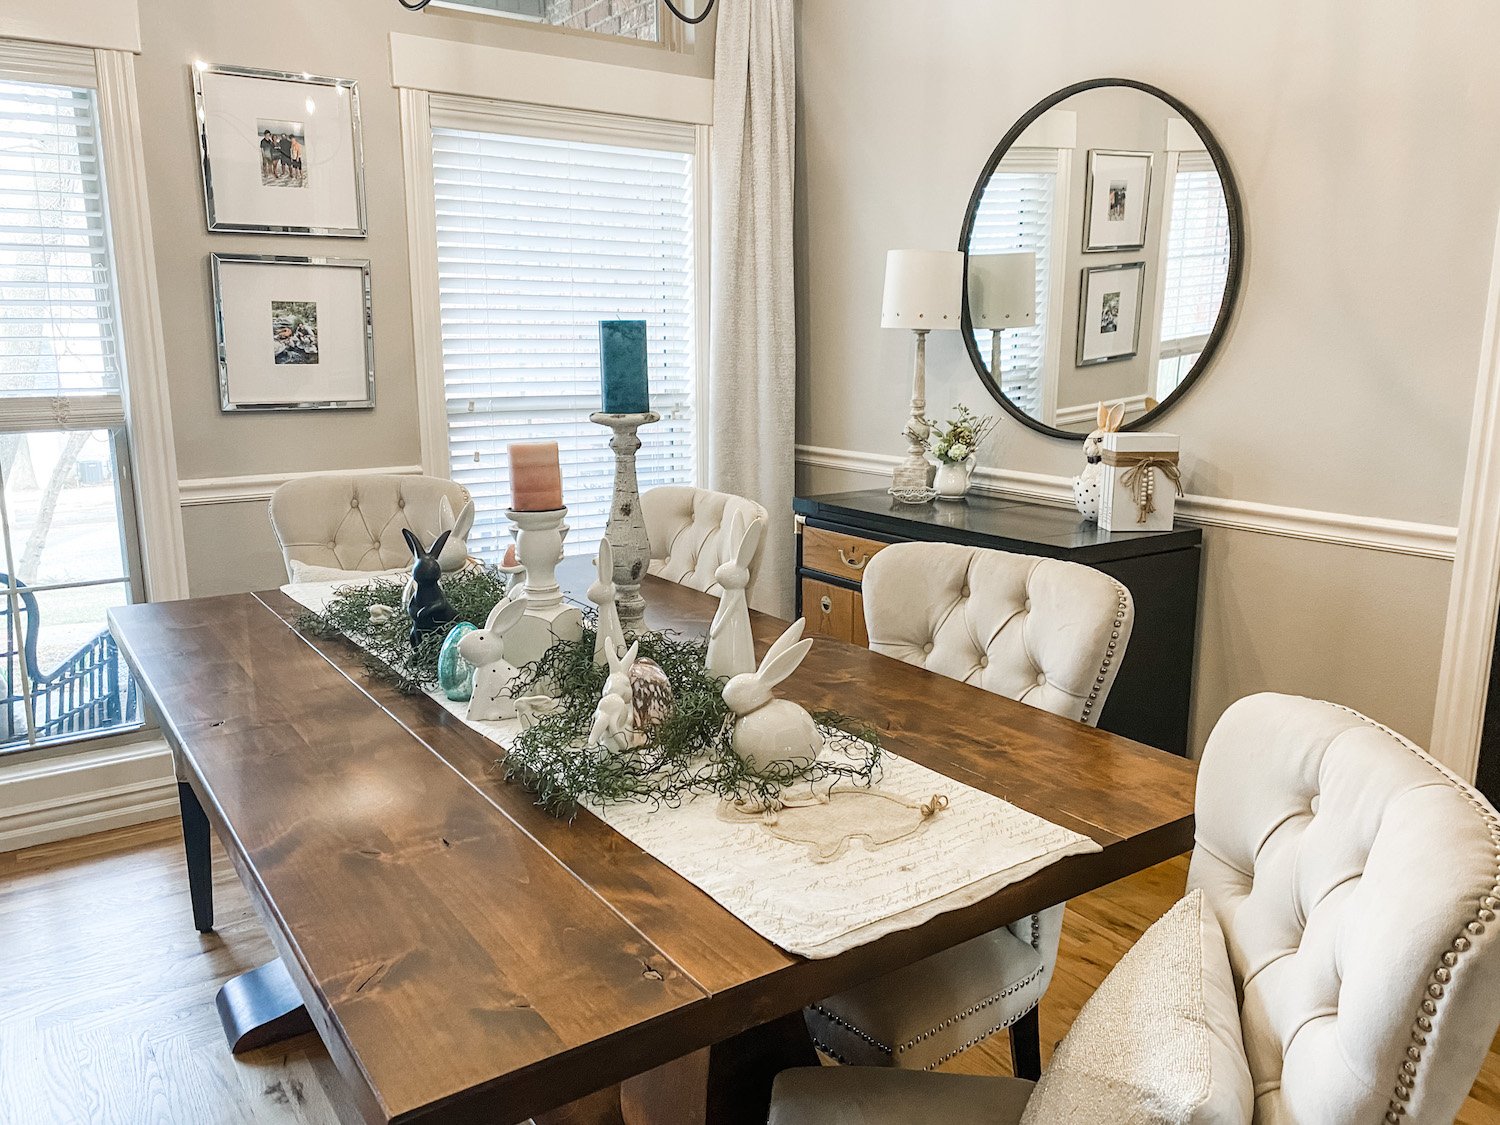
I painted the first one I found years ago and have had it in my dining/breakfast room…

…I recently swapped it out for the china hutch (featured HERE) and sold it.

Now this piece, a Drexel Accolade, has some value as is….if you do a little research you will find they sell for hundreds. But for me “hundreds” is not a value that will keep me from giving a piece a little makeover. If we were talking tens of thousands, yeah, no.

I also have a Drexel nightstand I refinished and shared HERE.

I planned to sell this piece after it’s makeover but I have moved it into my dining room and now I am kind of liking it…hum…guess we will see.

So…what did I do to give this thing a little more appeal?

First, I removed all the old hardware and brightened it up.

The hardware on these pieces are solid brass but after a few decades of neglect it is hard to tell. You can tell if something is solid brass with a magnet. A magnet WILL NOT stick to solid brass.

If the hardware is solid brass, the only way I have found to really brighten it up and get the decades of grime off is with Brasso and SOS pads.

Coat each piece with Brasso. I use a little chip brush to coat the pieces. After that sits for awhile, take an SOS pad and scrub away. You may need to repeat this process a time or two. I also use an old toothbrush to get in all the nooks and crannies.

After all the pieces are really clean, I scrub them with “Never Dull.” It seems to get the last layer of grunge off and gives them a little bit more “brightness.”

Not the easiest or fastest way to clean brass hardware but I just don’t think you can beat beautiful brass hardware.

Now, if the hardware is NOT brass and you want to spruce it up (without the cost of replacing) you can always give it a good scrubbing, prime it with metal primer and then paint it with spray paint. (TIP: put the screws back into the screw holes so that you don’t get paint in the threads.)

I shared another brass hardware restoration project HERE.

So, the hardware is done. If you find a Drexel piece and it is missing any of it’s original hardware, you can find replacements on Ebay…but be prepared to pay dearly for it! Each pull can range from $30 to $110 EACH!!!

I decided to strip and oil the drawer and door fronts. On the last Drexel makeovers (the bedside table and server) I painted the entire piece. This time I decided to shake things up a bit.

While I like wood grain, I am not a huge fan of oak. No biggy since, again, my original plan was to sell this piece. To highlight the pretty wood grain, I stripped the drawer fronts and doors using my trusty 1/2 and 1/2 mixture. 1/2 acetone, 1/2 lacquer thinner. HERE I posted a pretty lengthy tutorial on how to use this mixture to strip even the most stubborn finishes!

After stripping off the old finish I gave the drawers and doors a little mineral spirit wash, lightly sanded, wiped with tack cloth, then applied 3 coats of tung oil finish…my current favorite being Waterlox.

After that had dried and cured well, I taped and papered the doors and began prepping the cabinet for paint. (I removed the drawers to strip and oil them!)

I didn’t need to paint the inside of the cabinet so I taped that off, along with the black laminate under the flip top. I primed with Bullseye primer, then sanded smooth with 220 grit paper and wiped it all down with tack cloth.

I decided to paint the cabinet with high gloss black lacquer spray paint. I am obsessed with the high glass finish on these pieces. I just think it really makes a huge impact, especially with the bright brass hardware.

(You may notice I am all decked out for Easter…that is my new thing…decorating for each holiday/season. Next up will be Memorial Day/4th…patriotic stuff…then “summery”…then fall…then Christmas…then Valentine’s and back to Easter. See what happens when you “retire.”)

The trick to a flawless spray paint finish is LIGHT COATS…lightly spray, let it dry, spray again. It may take 3-4-5 coats but it dries quickly and in the end you will have a beautiful finish. If you go heavy handed you will have drips and runs and will be hugely disappointed!!!

Also pay attention to the temperatures and humidity. If it is too hot or too cold, or if the humidity is really high, you may have issues!

HERE you will find some additional tips on how to property paint furniture…very helpful!

After the paint had properly cured (gave it a good day or two) I replaced the hardware and OH. MY. GOSH!!! I seriously love this piece. Even though I am not a huge oak fan I am really loving it!!!

So the past few weeks I have been tackling a MAMMOTH project. Maybe next week I can share it. Hint, in entails A LOT of the thing I hate most….but man will it be worth it…I think…I hope….

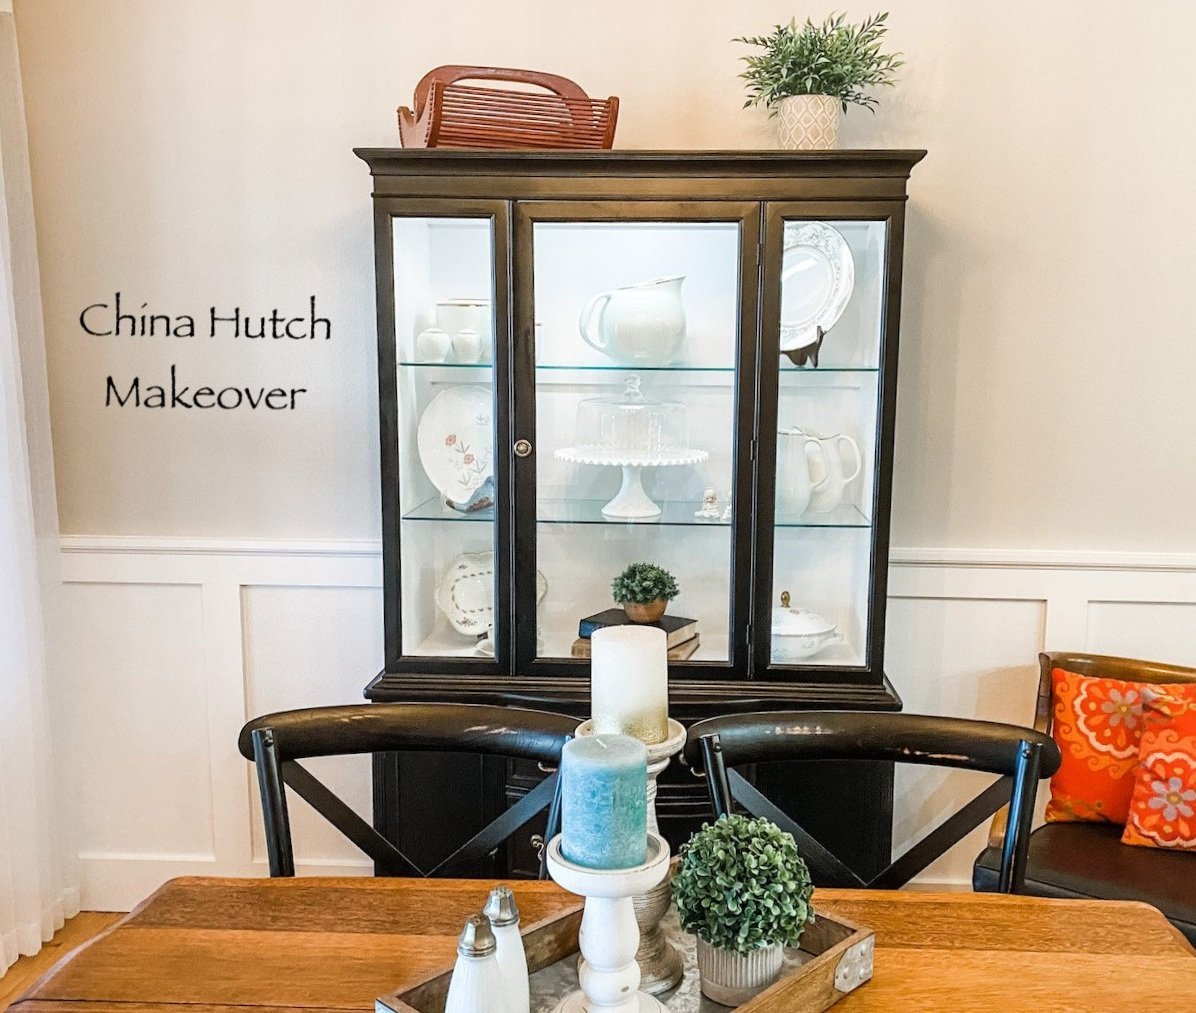
china hutch makeover...

I originally bought this piece to makeover and sell…

When I gave my breakfast room a little makeover (featured HERE last week) I decided I kind of like the look and it gives me a place to display my heirloom china….

I didn’t take pictures while I was giving it a makeover because, well, I just didn’t….

But the process was pretty straight-forward.

I removed all the hardware. The drawer hardware was not the original so I ordered hardware that would have come with the piece originally. Fortunately the door hardware was still there so I just cleaned it up a bit with Brasso and SOS pads to highlight the engravings.

Before you go scrubbing on hardware with Brasso and SOS pads, make sure it is real brass. A magnet will NOT stick to real brass…if one doesn’t, scrub away.

I removed the shelving. I also removed the glass and decorative glass inserts. Not difficult because it was just held in place by some strips of tiny molding and nails…I just popped those right out and set them aside to paint and reuse.

The shelving was pretty warped and I tried my trick of laying them on the floor and placing weights on them…no go. So I ordered glass shelves to replace them. Honestly, I like the glass better.

The glass shelves where a lot heavier than the wood shelves. Originally the piece just had two little supports on each side for the wood shelving (no supports along the back for the span which might explain why the shelves bowed.) I didn’t feel comfortable with that so I added 1x3 support boards along the back, securing them with glue and staples. Now I feel confident that the shelving is properly supported and can handle the weight of dishes. (If you have ever had a glass shelf come crashing down on your china you would understand my concerns. Yeah, it happened!)

There were a few other minor repairs that had to be made…since I was painting the piece, I did them before primer and paint.

Remember, if you are staining, stain first then repair. If you are painting, repair first then paint.

I cleaned the piece well then I caulked all the “joints.” Remember if you are painting a stained piece you have to caulk all the places where wood meets wood…and you may even have to putty nail holes. If you miss anything it will show up when you prime the piece…just caulk and putty and spritz it with a little primer.

I sprayed the entire cabinet with Bullseye primer. Primer is MUST on mahogany pieces because it will bleed through the paint! If you paint a piece and see “red” or “shadows,” that is the mahogany bleeding through…or water stains, oils, etc…more layers of paint WILL NOT cover it. Prime it then repaint it. Or save yourself the grief and prime everything before you paint. Mahogany is not the only thing that will bleed through paint. Nail holes and “gaps” will show up and you will be able to fix them before you apply your paint.

Also, you will get a much prettier and durable finish.

I know some paints (like this one) profess to be paint and primer in one. Maybe so but I always prime with a primer. Usually Kilz or Bullseye.

I sanded it smooth then wiped it down well with tack cloth.

I decided to paint the inside white and the exterior black. I painted the inside with some satin white latex I had on hand, let it dry and cure then taped it all off to spray paint the exterior.

I painted the interior a satin finish but I wanted a flat black for the exterior. I went with Rust-Oleum Matte Farmhouse black.

After the black had cured (I usually give it a few days) I replaced the hardware, reinstalled the door glass (without the decorative doo-dads) using the small trim and silicone and moved it into the house. I gave it another few days to cure before adding the glass shelving.

I did not paint the inside of the drawers or the inside of the lower cabinets. I rarely do unless the piece has an odor or stains I can’t get rid of by cleaning. If you have a piece that has odors or stains sometimes your only recourse is to prime and paint!

I added a LED light to give the display a little glow! That entailed drilling a small hole in the top for the cord and mounting an LED light strip in the top of the cabinet….simple simon!

Lovely.

This is where I remind you that “cure time” is super important when working with painted wood. I always get annoyed when I watch those shows on HGTV and they paint and stage furniture the same day. DO NOT DO THAT!!!! Be patient…give paint time to cure. If you don’t you will scuff and scar your new paint job and will be seriously disappointed.

If you look back at this blog you will see I use to do this kind of thing all the time…I loved it.

I don’t do it much anymore and I forgot how much I love taking an old abused and neglected piece and turning it into something beautiful and useful again!!!


Board and Batten in the breakfast room...

This is a simple project I have wanted to complete from day one.

Board and batten in the breakfast room.

As I have said before, there are TONS of board and batten designs and tutorials on the webisphere. Watch videos, read blogs, search Pinterest…find a design you love and a tutorial that makes the most sense to you.

So here is a little before and after.

Before….

Not totally offensive but lacks a little “character.”

After….

Simple project for me since I have done this a time or two. (Check out the guest bath, the entry in the Lankford house and the Bogey house. )

You might notice another little change…the china hutch.

Originally I had the awesome mid century Drexel buffet but I thought I would change it up a bit. I read somewhere china hutches are making a comeback. I can see why…pretty and functional.

Eventually I would like to add some art on each side of the hutch…maybe some botanicals.

My original plan for this piece was to repair it, paint it and sell it but honestly, I kind of like the look in this room. I FINALLY have a place to display some of my heirloom china that has been boxed up and in storage for a year and a half!

Before…

After….

Next week I will share the steps I took to give this piece a little facelift! Not difficult and as you can see it made a HUGE difference!

Until then….

It's time to get organized!

So it is a New Year (Happy New Year BTW) and I spent the early morning hours on Sunday organizing a few spaces and purging expired foods in the pantry. Fortunately I am a fairly organized person so this isn’t a huge task for me. I keep most closets, drawers and cabinets purged and organized.

Just last year I reorganized and purged my pantry so it really wasn’t too bad….

But if you are one who has that closet/drawer/room/pantry that is unorganized and full of unused or out dated things, this is the year to get it organized and purged.

HERE I share how I organize and purge (I reread it and I must say it is a MUST read)…and a few thoughts on the Marie Kondo method. Truth be told, purging and getting organized is more about “letting go” than anything….and of course finding the time.

Time…pick your spaces and then commit to doing one space a month. Don’t try to do your entire house in one day…you will feel overwhelmed and defeated. But one closet, one drawer, one room a month is doable. And getting that one space done may even motivate you to do the others.

As far as “letting go,” if there is an OUNCE of hesitation on whether you should keep it, put it in a box or bag, put in your car and immediately donate it. I PROMISE I have never said “Darn, I wish I hadn’t given that away.” I never think about it again and couldn’t even tell you all the things I have “purged” over the years.

A few suggestions…get a receipt for any donations, it is a tax deduction.

If you have towels, sheets, blankets or even old rugs, take them to the local animal shelter…they really need that stuff.

When my mom passed away, she had an entire hall pantry stuffed full of old sheets and blankets…stuff she had acquired when HER mother died 20 years ago. We took it all to the animal shelter and they loved it!!!

Most importantly, give yourself a break. Being a mom or working person make it really tough to find time to get organized…but I promise once you do it, your life will be so much easier.

One space a month…it is doable. But like ALL “honey dos” don’t beat yourself up if time slips by and you miss a month. The mess will still be there the next month!

I also posted HERE how I keep my house relatively clean and in order. No huge revelations but keeping a fairly “clean and orderly” house goes hand in hand with getting and staying organized. Another MUST read!

Another Drexel server....

Several years ago I shared a Drexel server I repurposed for my dining room

The “breakfast room” in our new house is almost identical to our old dining room.

Including the Drexel server.

I love it…it is one of my favorite pieces.

So when I spied ANOTHER Drexel server on Marketplace I could not help myself.

As I have mentioned, I have pretty much retired from the whole repurpose/upcycle/refinish business. My hands and back just can’t take all the work that goes into refinishing pieces on the scale I have in the past.

I have refinished a few doozies…just looking back at all the pieces I have shared on this blog blows my mind. There were some pretty nasty pieces that were beautifully refinished and restored and readied for another life-time of love!

When I saw this piece I couldn’t help myself. I had to have it and I wanted desperately to work a little magic on it.

Here is my plan…MAYBE I can discipline myself enough to pick up just one piece at a time, refinish it, sell it, then pick up another…just one at a time. Just one dresser/buffet/nightstand at a time.

Hum…I’m a pretty “self-disciplined” person so I am going to start with this one.

One week into this plan…I have failed. Last week I picked up ANOTHER piece that needs a little TLC….a pretty beat up china hutch.

I have these creative juices in me that have just been screaming for a project.

So, “the plan” ….specifically for the vintage Drexel piece. Strip and oil the drawer and door fronts using THIS process. Shine up the brass hardware….no secret there, just lots of Brasso, steel wool and elbow grease. Prime and paint the “cabinet” a high gloss black lacquer.

For the china hutch…I went to Etsy for inspiration and looked around. There are some beautiful china hutches that have been painted black with the insides painted white…LOVE them.

I THINK that is what I want to do. Sometimes the process takes on a life of its own and I find myself drifting in another direction. We will see.

Right now they are sitting in my AMAZING shop. I was in there last week rearranging everything so I will MAYBE have room to make some kind of paint booth. The shop has electricity and I can easily heat and cool it for temperature control but just not sure I will have enough room since we do use it for mower/yard equipment storage as well.

I can’t wait…this is a “job” that doesn’t really pay well, but it is one I do love.

Cute Christmas door hangers...

Last week I was looking back at some old posts and realized I had never shared THESE cute door hangers I promised to share A YEAR AGO…

Most of my doors have the little candle wreaths but I thought these would be fun and different on the two spare room doors. (This one is my gift wrapping room!) Mix things up a bit!

Super simple to make…

I bought two little wood signs at Hobby Lobby…

I made some little “sprays” using materials leftover from some holidays sprays I made for my lanterns. I just bunched them together and secured them with a pipe cleaner and floral tape.

I drilled a hole in the top of the little wooden sign….

…then I just stuck the “spray” into the hole and secured it with hot glue.

Then I made a “funky bow” using the tutorial linked in THIS post and attached it to the spray.

Presto, bingo, cute little door signs!

A simple way to dress up the cute little signs and a great way to do something other than the expected “holiday wreath.”

This week we enjoyed a quiet Thanksgiving and a busy few days of decorating for Christmas. Not much has changed from last year so you can check out THIS post to get an idea of what is where. I did add a few trees…one in the all-season room and one in the den but nothing earth shattering. The all-season room got a “Stewart plaid” treatment…seems to be all the rage for the “in” plaid this year…but I am a true “Stewart” so it has more meaning. I want to add some lanterns and a few other little things so I may share that room in a few weeks.

Next week I will share my new “projectS.” Stay tuned!!! Exciting stuff!