Sew awesome....

I really want, and honestly need, a sewing desk...some place I can store and use my sewing machine without having to set it up on my dining room table.  I found this sewing desk in a thrift store and man-oh-man was this thing seriously ugly!  

 I knew this desk could be a little treasure after the cruddy paint job was stripped away!​

And even to my surprise, what a treasure it is...what I found under two layers of paint was beautiful mahogany. Initially someone had painted it a really disgusting green and then I guess they tried to improve it by painting it a flat black.  

This is a prime example of hurting a piece in a failed attempt to "enhance" it!  Truth be told, I felt a little guilty painting the base and drawers white.  But I could never live with myself had I not restored the top to it's prior glory!​

Before I started refinishing, I cut the opening a little bigger to accomodate my sewing machine.  TIP ALERT:  when cutting veneer mark the cut with a pencil and then score the veneer with a utility knife. Then use a jig saw with a very sharp blade to cut  "inside" the score...if you don't, the veneer with split and splinter and you will make quite a mess! 

Normally I use Formby's Furniture Refinisher to strip latex paint and old varnish...but two layers of paint needed a little more muscle....so I used a citrus stripper. I will not use anything stronger on veneer (always use any stripper per the instructions and in a VERY well ventilated area!)    This piece didn't have a single chip in the veneer and I didn't want to risk hurting the piece by using industrial strength stripper!​  Took a little more time and more than one application but it was worth it.  

After removing all the old paint, I took 0000 steel wool and mineral spirits and gave the wood a "bath."  When stripping wood, regardless of what you use to strip it, always "wash" the piece with mineral spirits to remove all the "crumbs."  After it dries, take VERY fine sand paper or 0000 steel wool and sand lightly before applying stain or a finish.

TIP ALERT...keep old toothbrushes on hand to get into groves and corners when stripping furniture.  DIYers never throw away old toothbrushes, coffee cans, socks, old tshirts or towels...trust me, you will need them!

IMG_8918.JPG

Since I knew I was painting the base and the drawers, I didn't strip them but I did sand and prime well before painting.​

And again...ALWAYS USE TACK CLOTH BEFORE PAINTING OR APPLYING FINISH...AND BETWEEN EVERY COAT!!  ​I seriously can not stress this enough! So many DIY tutorials tell you to "wipe down"...again, I challenge you...wipe down your piece with a clean cloth, and even some mineral spirits...then wipe it with a tack cloth!  You will be shocked at how much crud was still there!

Two coats of gloss white paint on the base and drawers.  A light coat of walnut brown stain on the wood to even out the color and give it a little more depth....4 coats of my favorite Formby's Tung Oil. New crystal knobs. Total awesomeness!​

I can not stress how beautiful this wood is....I wish I was a better photographer.  And I wonder if I should have stripped and stained the drawer on the right...but then again, I kind of like the paint/stain contrast...I think I would love it either way!

I REALLY love tung oil.... it allows the grain of any wood to just shine!  And it is sooo easy to take care of and touch up when needed!  (Now I know why my father refused to use polyurethane)​  I think so many use polyurethane because they are concerned about durability....that is honestly not an issue with tung oil!  Try it...it is almost impossible to mess up the application (unlike poly) and it is extremely easy to touch up scratches in the future if necessary!  

This project was pure joy!  Anytime I can take something that has been so abused and turn it into a treasure it just makes me happy!  

Maybe now I will enjoy sewing just a little more!  ​

Before and After dresser....

Yesterday Brian and I took off and went trout fishing for the day!  OH MY!  I am sore and sunburned...and I loved every minute of it!  Sometimes you just have to say to heck with the yard work and go have a little fun! Awesome day with my best friend!​

But Saturday was a busy day.  My neighbors came over to show off their new grandson and I found a perfect home for a precious little dresser I have been working on!  Just so happens they NEED a dresser and I NEED to find it a good home.  Done!​

As you can see, it was missing a drawer so I added a shelf...perfect spot for little storage baskets.  I painted the "box" white, the drawers a pretty green and stained the top with my favorite java gel stain.  I originally put little crystal knobs on the drawers, certain it would go to a little girl, but when I found out it was going into a boy's room I changed the knobs to brush nickle...just thought it was more appropriate for a little boy!  And I am going to throw in a cute little cork board I made up and featured earlier!  ​

IMG_8900.JPG

The great thing about these little dressers is the fact that as the little boys grows, the drawers will be easy to paint to match any decor!  ​

Another "trash to treasure"...a piece of furniture destined for the dumpster but given new life and new home with just a little time and attention!  ​

Framing memories....

I think four days of remodeling my closet and painting trim has taken a toll...I am woooorn out.  So today I will do a little coupon shopping! I HATE clothes shopping but give me a good coupon for shampoo or detergent and I am all over it!

So today I thought I would quickly feature some tidbits from past projects...framing memories!

We all frame pictures and diplomas, but frames come in all shapes and sizes and they are a great way to display a collection of things that have great sentiment...and a great way to decorate!

Master closet makeover....

​I'm almost too tired to type...this was a chore but the reward is being able to swipe "master closet" off the dry erase board on the fridge!!!

That and soooo much more storage in my closet.  ​

When both the boys left for college, I basically gutted their rooms.  I decorated with all their "stuff" and organized everything they left in their closets, but the entire room was made-over...new paint, flooring, bedding, window dressings!  Everything.​  And I even had a tad bit of space to store some of MY stuff!

And then they moved home.  And they brought more stuff!​

Anyone who thinks they are going to gain more storage or a hobby or craft room when their kid goes off to college is delusional.  Trust me...first, they leave all their "stuff" and second, they WILL come home!  And that is fine...the rule:  no kids, no spouse, no animals.  As long as they follow THE rule, they still have a room!  ​

So my closet has to stay pretty organized because it is storage central.  I built a large pantry where I keep all my office/business stuff and our personal "coupon stash."  Yes, I am one of those coupon people...but to my credit I only keep what I know my family  will use in the near future.  The rest is donated to the elementary schools!  Last year I donated over $7000 worth of products!  ​

I had a few issues with the closet...first, the flooring.  After 13 years, it was pretty nasty.  And I pretty much hate carpet!  So that had to go.  Second, I have 9' ceilings but all the shelving was standard.  So I basically had a TON of wasted space and plenty of room to add another self all the way around the closet.  I had too much "long" hanging space and not enough "double" hanging space.  Honestly, if I would move all my coats to the coat closet, I probably wouldn't need any long hanging space!  I seriously do not own a dress any more.​  

So here is the before and after...and then I will add some "in between" pictures in the tutorial.....​

Before....​

IMG_8545.JPG
IMG_8547.JPG
IMG_8548.JPG

It wasn't THAT bad...I'm pretty good at cleaning out closets every so often.  My GOAL was to only put back about 1/2 of what I took out.  But honestly, I clean out my closets and donate about twice a year...so there wasn't that much pack-ratted away!  I just needed more shelving and it was due for a good makeover....​

After....​

IMG_8841.JPG
IMG_8842.JPG
IMG_8843.JPG
IMG_8847.JPG
IMG_8845.JPG
IMG_8846.JPG
IMG_8848.JPG

So I have new laminate flooring, 25 l.f. of new shelving, paint,  more hanging space and new lighting.  And a backache, headache and feetache...and I still have a bit of a mess in my office.  But in the long run, I think it is ALL worth it!

I have posted a tutorial here... it will fill you in on exactly what I did!​

Painting light fixtures and paddle fans....

See, I'm not even trying to be clever with my titles anymore...just too much brain work!​

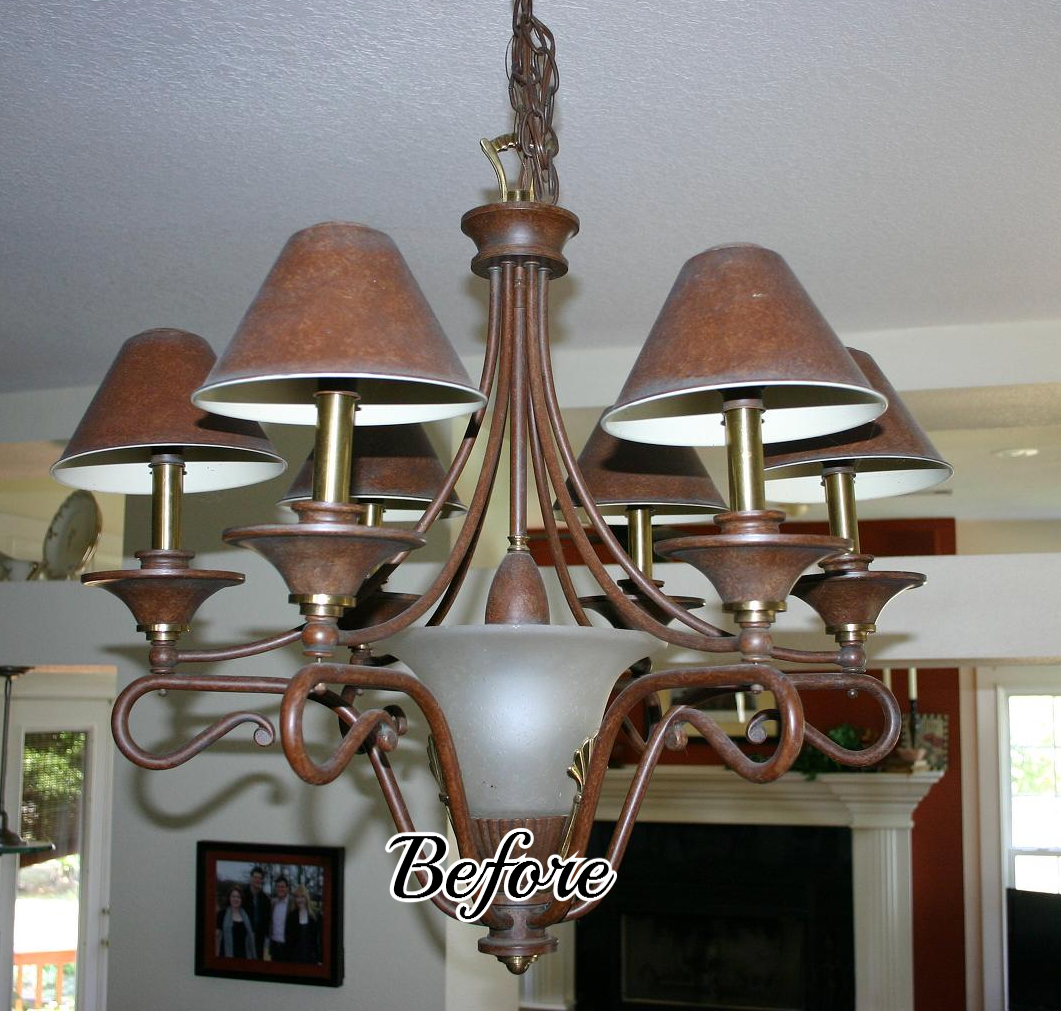
When I bought this house 13 years ago, the "bronzed" look was all the rage...not so much now, or at least not to my taste!  I'm more into light, bright and somewhat "modern" looking! 

But who can afford to change out ALL their light fixtures when the old trends sour.  Not me...so it was time to get "creative."​

Paddle fans and dining chandeliers are probably the two biggest expenses in lighting.  And naturally, those are often the most noticeable!  

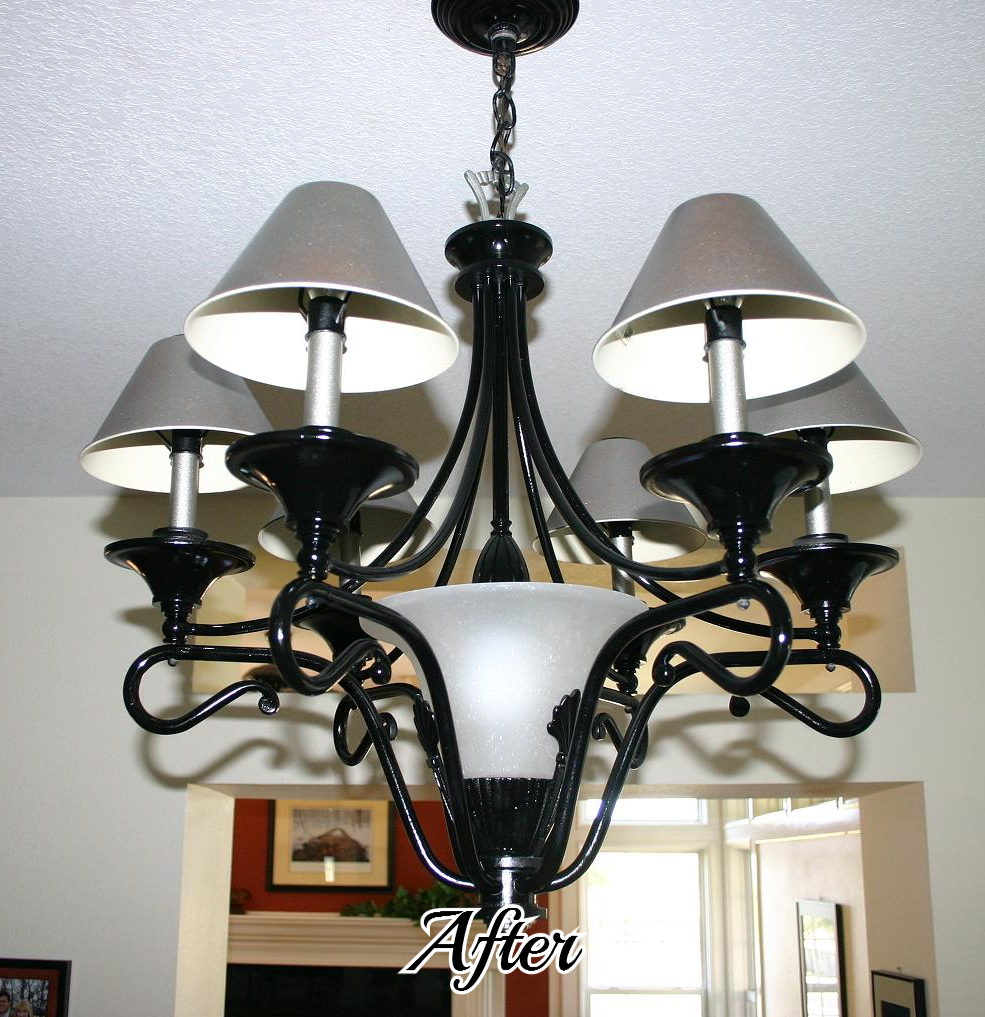
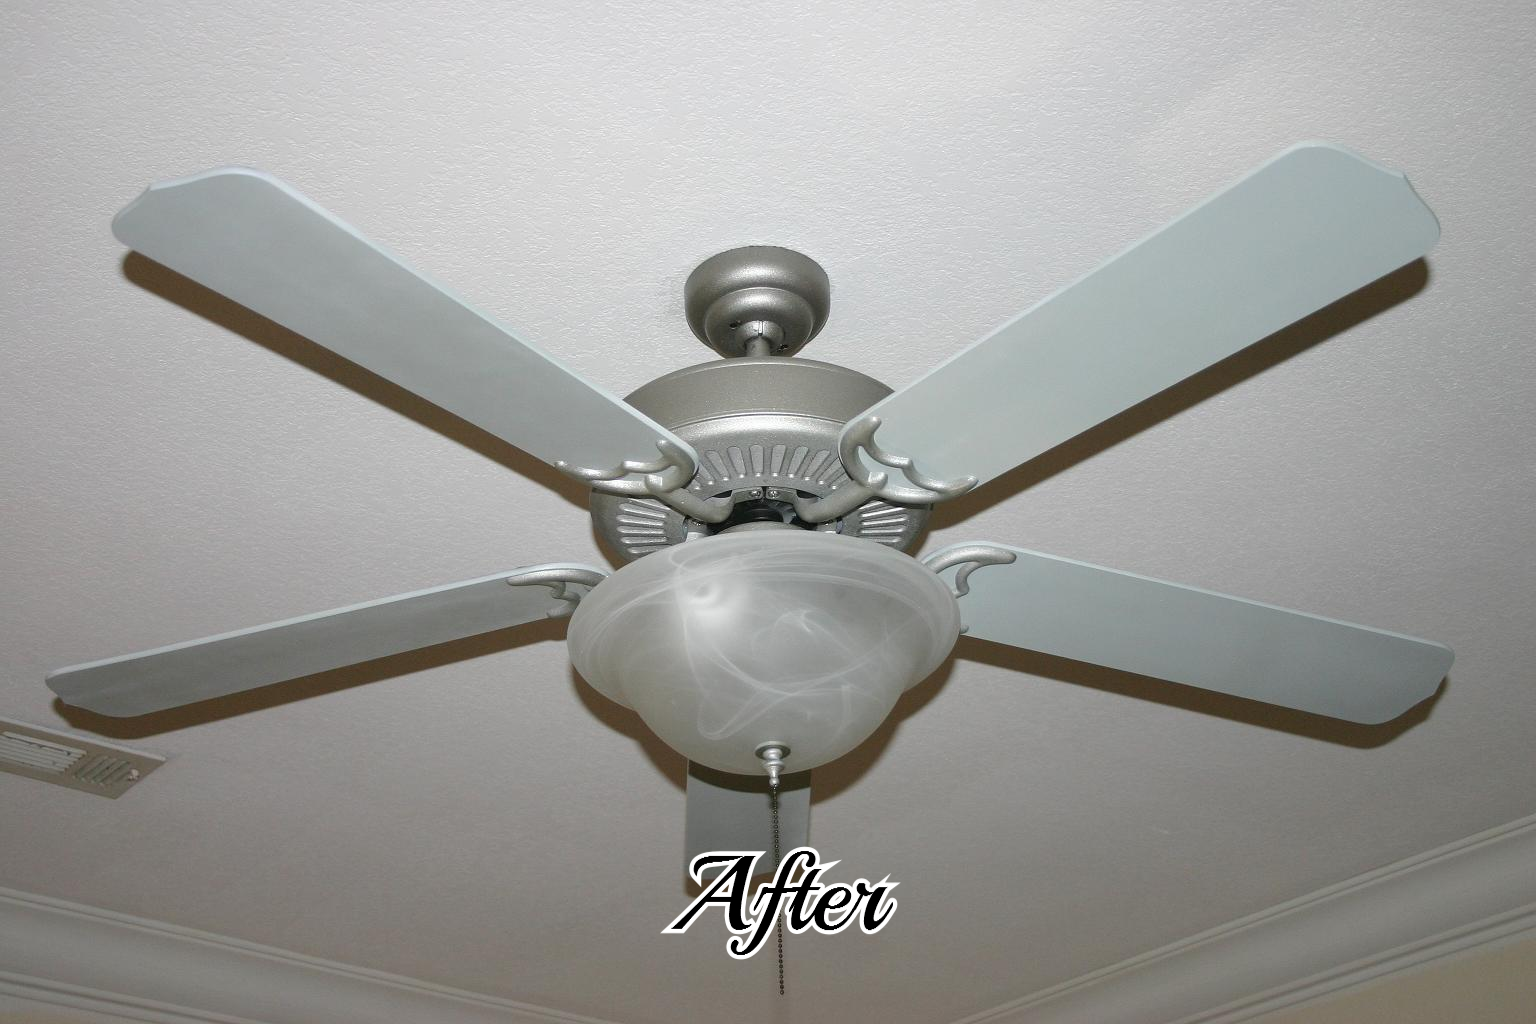
Since I was somewhat tired of the dining room light and the paddle fan in my office (and both would be expensive to replace), I didn't think I could do much damage if I took a can of spray paint to them...what is the worst that can happen...I have an excuse to buy new ones, right? ​

IMG_8223.JPG
IMG_8226.JPG
THE OFFICE AREA (3).JPG
IMG_8149.JPG

As with everything I paint, I first cleaned them and then "primed" them.  On metals, I use a metal primer...or even Kilz!  Just spray it on and then after it dries hit it lightly with 0000 steel wool...and then of course tack cloth it well before painting. (ALWAYS TACK BEFORE PAINTING!)

On the dining room light I used gloss black spray paint and the "brushed nickel" spray paint on the shades.  I used blue/grey spray paint on the fan blades...the same color I used on my dresser... and brushed nickel on the body and hardware of the fan.  I also added a new light globe to the paddle fan, just to update it a tad.

​The trick to painting light fixtures or paddle fans is taking them down and basically taking them apart...once you "disassemble" them, they are easy to paint!  BUT MAKE SURE YOU KEEP ALL THE HARDWARE AND SCREWS!  That is why I have plastic baggies on my materials list.  Any time you take ANYTHING apart, you need to put all the screws and hardware in plastic baggies and make sure you label them!  (Again, just trust me on these things!)  If you have never assembled light fixtures, and you don't feel real comfortable with the thought of getting it all back together, just take LOTS of pictures while you disassemble it.  I did that with my first upholstery job, and it helped a lot!

IMG_8141.JPG

I found that my swing pergola made the perfect spot to hang the fixtures (with a dog leash) while painting...see, you don't need anything "fancy."​

Note, I also used blue tape on both the fixture and the wires coming out of the ceiling to label what wires went where so I would know how to rewire it...AND DON'T FORGET TO TURN OFF THE POWER TO THE FIXTURE BEFORE TAKING IT DOWN OR PUTTING IT BACK UP!!!​

After 2-3 coats of paint on each of the components, I put 1-2 coats of spray on clear coat, just to give it a durable finish that would allow me to dust and clean them periodically! ​

This easy process allows you to be REAL creative!  It would be fun to paint the fan in your kid's room a fun and funky color...maybe with some interesting design element, like a chevron pattern or polka dots!  Just "think outside the box" and remember my motto...YOU CAN DO IT!  If you don't have the most creative mind, do what I do...Google it!  People post pictures of their projects...and no one is going to be offended if you "copy" their creativity!  It really is the greatest form of flattery! ​

I was kind of sick of my bedside table lamps too...and until I can afford the really awesome crystal lamps at TJMaxx, I got a little creative with those too!

IMG_8219.JPG
IMG_8220.JPG

As much as I had tired of this dining room light, it really did turn out great. And it has always been one of my favorite things to decorate during the holidays.  During Christmas it is perfect for the gold shades I painted and the garland and red berries!!  Sometimes, old is good...it just needs a little facelift from time to time!​

IMG_8312.JPG

Swing into spring...

NOW is the time to do this project...too stinking hot in the summer and you will want to enjoy it during the lazy days of summer!​

I have built 5 of these swing pergolas...two at my house, one at my daughter's first home, one at her current home and one for a neighbor.  It is not a difficult project to built but one that requires two sets of hands and a little muscle!  ​And with everything, patience!!!

I have posted a tutorial HERE​.  It is not a terribly difficult project and one I think most DIYers could easily manage.

This is the SUPER sized pergola I built onto my house about 11 years ago...I won't even begin to tell you how it is constructed...but I can promise you, if the house is blown away, it will probably still be standing!  And notice the wisteria canopy...seriously, that stuff is CRAZY!​

Dressing up an old dresser....

I'm tryin' here! Smarmy comes easy..."witty"...not so much! 

But it dawned on me....I have never posted my dresser makeover! 

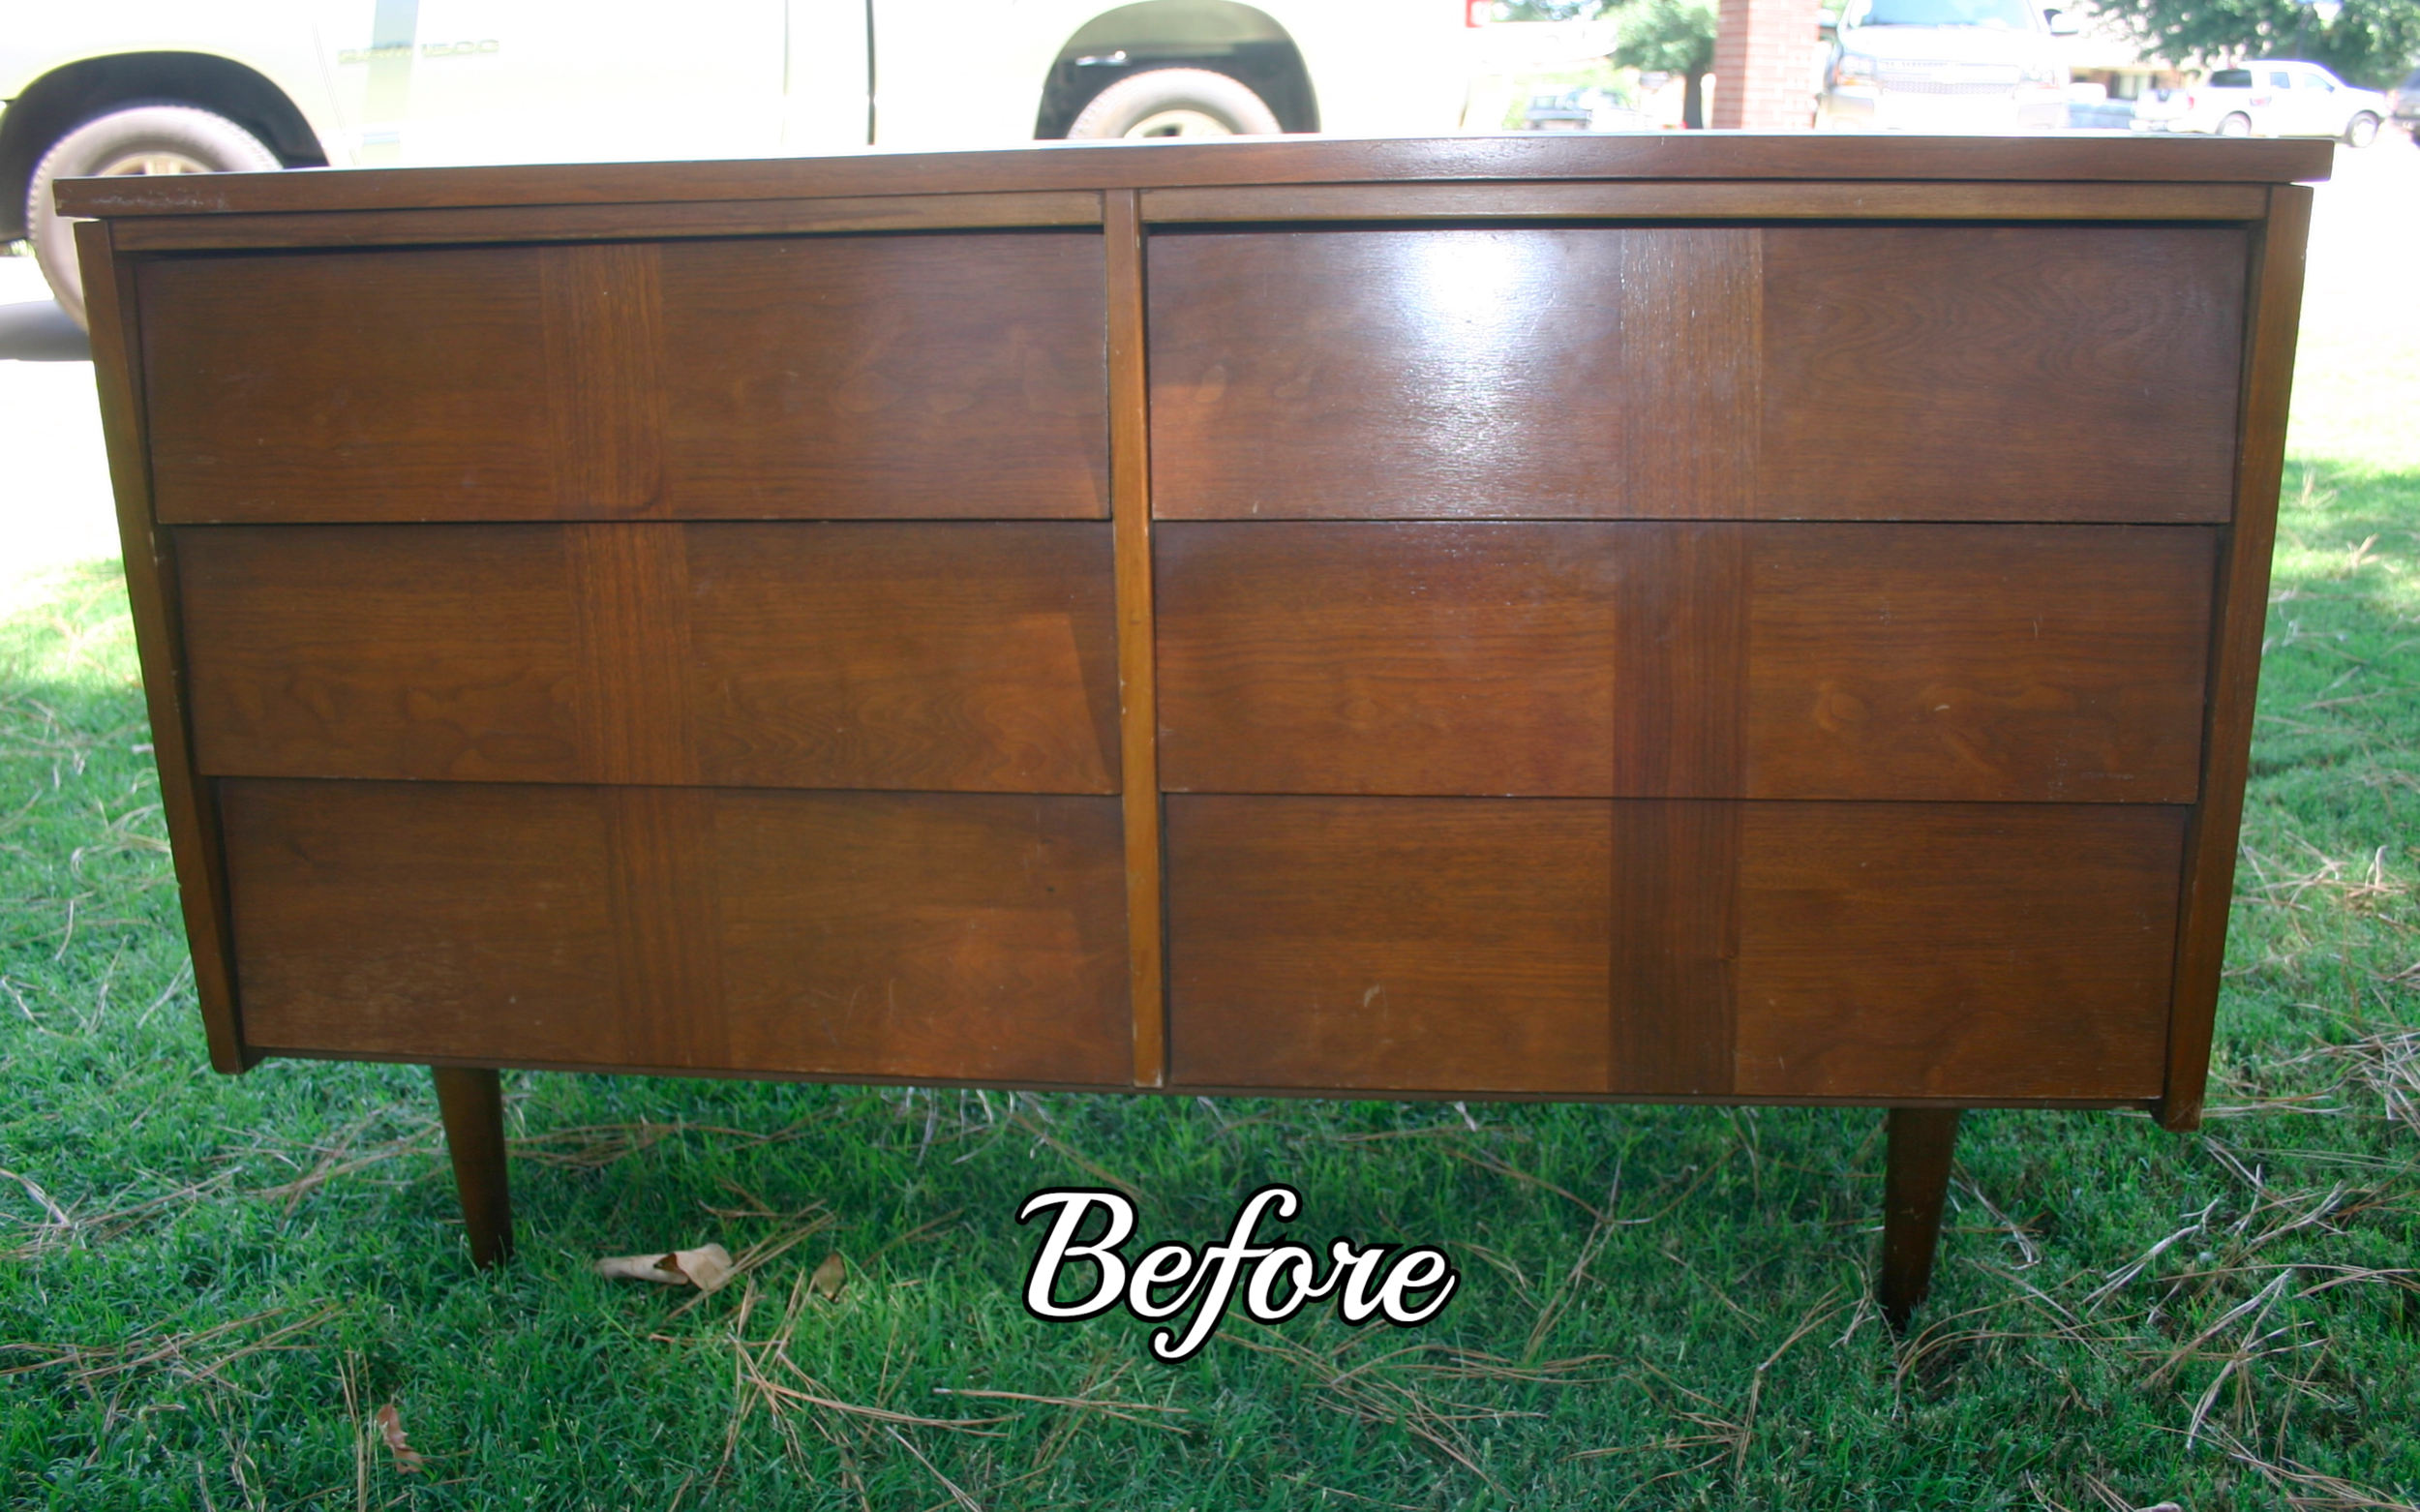
I use to have this HUGE hulking dresser in my office/dressing room.  It was a "matchy-matchy" to my bed and highboy...which I love, but the dresser was seriously huge and just seemed to shrink the entire room.  So when I was out digging around for the desk (featured earlier) I found this sweet little dresser and said to myself "Why not!" 

I LOVE the style.....kind of a mid-century modern with walnut veneer.  The top was laminate, so I knew I was going to have to paint the entire thing...and I did.  But later I found a picture online of an identical dresser and they had painted the top and sides, but refinished the wood veneer drawers...GORGEOUS! And you know how I loooove anything wood, especially walnut!  Live and learn...maybe next time! 

As with most of my furniture, I had a piece of glass cut for the top...lets me clean it with Windex! 


IMG_8157.JPG
IMG_8522.JPG

Pull up a chair...and another...and another...

I have a thing about chairs...and tables...unfortunately, I am running out of room.  But I can't help myself...I see an old battered and abused chair and I KNOW it can be beautiful again. ​

A few of these you have seen...but I thought I would share a few more.  As I have mentioned before, I was DIYing before it became vogue so I have many pieces I don't even have "before" pictures of...I just brought them home and did my thing....​

PA010076.JPG

I think I bought this little guy at a garage sale for $5.  Can't even remember what kind of fabric it had on it, but I bought it when I was remodeling my youngest son's room after he went off to college (it was the last room to get laminate...hence the green carpet)  The oak frame was in pretty bad shape, but a little cleaning, stripping and tung oil spruced it right up and the alligator vinyl is just awesome!​

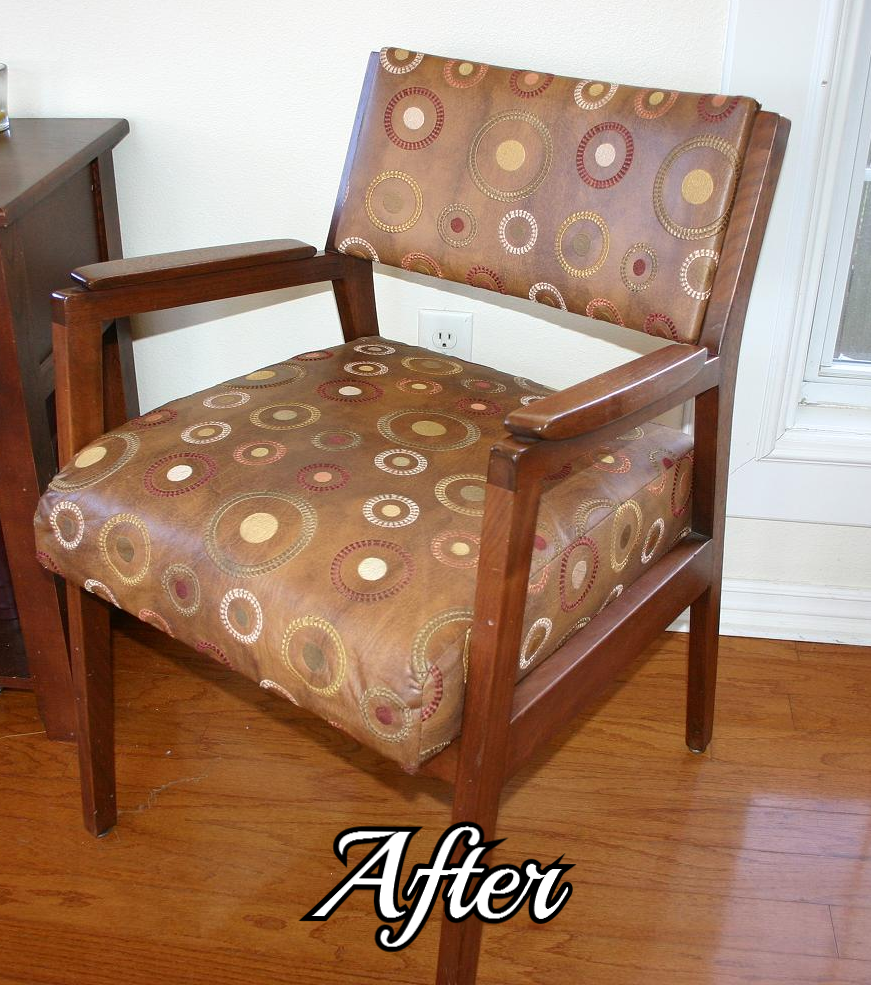
Another apartment find...I remember it had orange vinyl and was in pretty bad shape...walnut maybe?  Again, strip and oil!  The seat was VERY uncomfortable so I added 4" foam and batting.  I expected the fabric to be "funky and whimsical" but it actually turned out kind of nifty looking and is perfect in my den!  What was really interesting about this chair was the little plaque I found on the underside....

IMG_8644.JPG
IMG_8642.JPG

Every piece has a story...I just wonder how this little guy made it all the way to Arkansas from a bank in Galveston, Texas!

IMG_8645.JPG

I told you at one time my taste was more "traditional."  I loved antiques....I bought a mahogany dining set at an antique store 18 years ago...I think it is all I have left of "that phase."  I have six of these chairs and the table...absolutely beautiful wood. I know a lot of people are painting these now, but I just can't! Over the years I have stripped and oiled them and just recently changed the seat cushions...again.  Nice thing about these chairs...the seat fabric are easy to change when your style changes!  I keep eying the "mid century modern" sets floating around but I'm just not ready to turn loose of this set!​ Yet!

IMG_1184.JPG

I found this nasty little oak creature when we were cleaning out a house...a little cleanup, Kilz and green and white paint and it is now a sweet little desk chair at Kaitlyn's!  Sometimes you have to be willing to look past the grunge!​

IMG_8502.JPG
IMG_8175.JPG

I have no idea where this chair came from.  I do know it has been in my attic since I moved here 13 years ago, and I remember moving it around for many years prior to that!   When I remodeled my office, I searched high and low for the perfect chair! 

IMG_8648.JPG

One day I found this lurking in the back corner of my attic and I pulled it down with the intention of cleaning it up and painting it.  But after stripping away all the ​nastiness I found a beautiful mahogany chair...so I put 4 coats of tung oil on it and recovered the seat....sometimes the very treasures we are looking for are hiding behind our Christmas decorations...lol!​

IMG_8363.JPG
IMG_8743.JPG

There was a reason this chair was 1/2 off at a thrift store...but I saw potential!  And I think it had a little!  ( I will not mention the horrendous mistake I made during the construction of the cushion because no one but me probably notices that a very important element of the fabric design is JUST ALL WRONG and is the perfect example of mistakes one can make even when they are being VERY careful and SOMEDAY when I have an extra 4 hours to spare I will redo the cushion...until then, I just keep hoping nobody notices!​  Grrrrrrr! )

I have posted these along the way...but they are just reminders of my obsession with chairs.  And it doesn't stop inside.  In my yard I have built two swing pergolas, one large patio pergola and have started collecting the old metal lawn chairs from the 50s and 60s...I may be constantly moving, but when it is time to plant it, I want something awesome to plant it on!!!!

wingback_before.jpg
office corner.jpg
houndstooth before.png
houndstooth after.jpg
BEFORE.JPG

And last but certainly not least, my dad's walnut chair.  It is currently sitting in the corner of my room and 

IMG_8574.JPG

every day I look at it and wonder what upholstery will do it justice.​  I've looked for fabric several times and I just haven't found "it."  I will...one day a fabric will just "jump out at me."  And it will be perfect.  Until then.....

Doing a project "right" is about being patient...taking your time..sometimes waiting for the inspiration! 

Closet madness.....

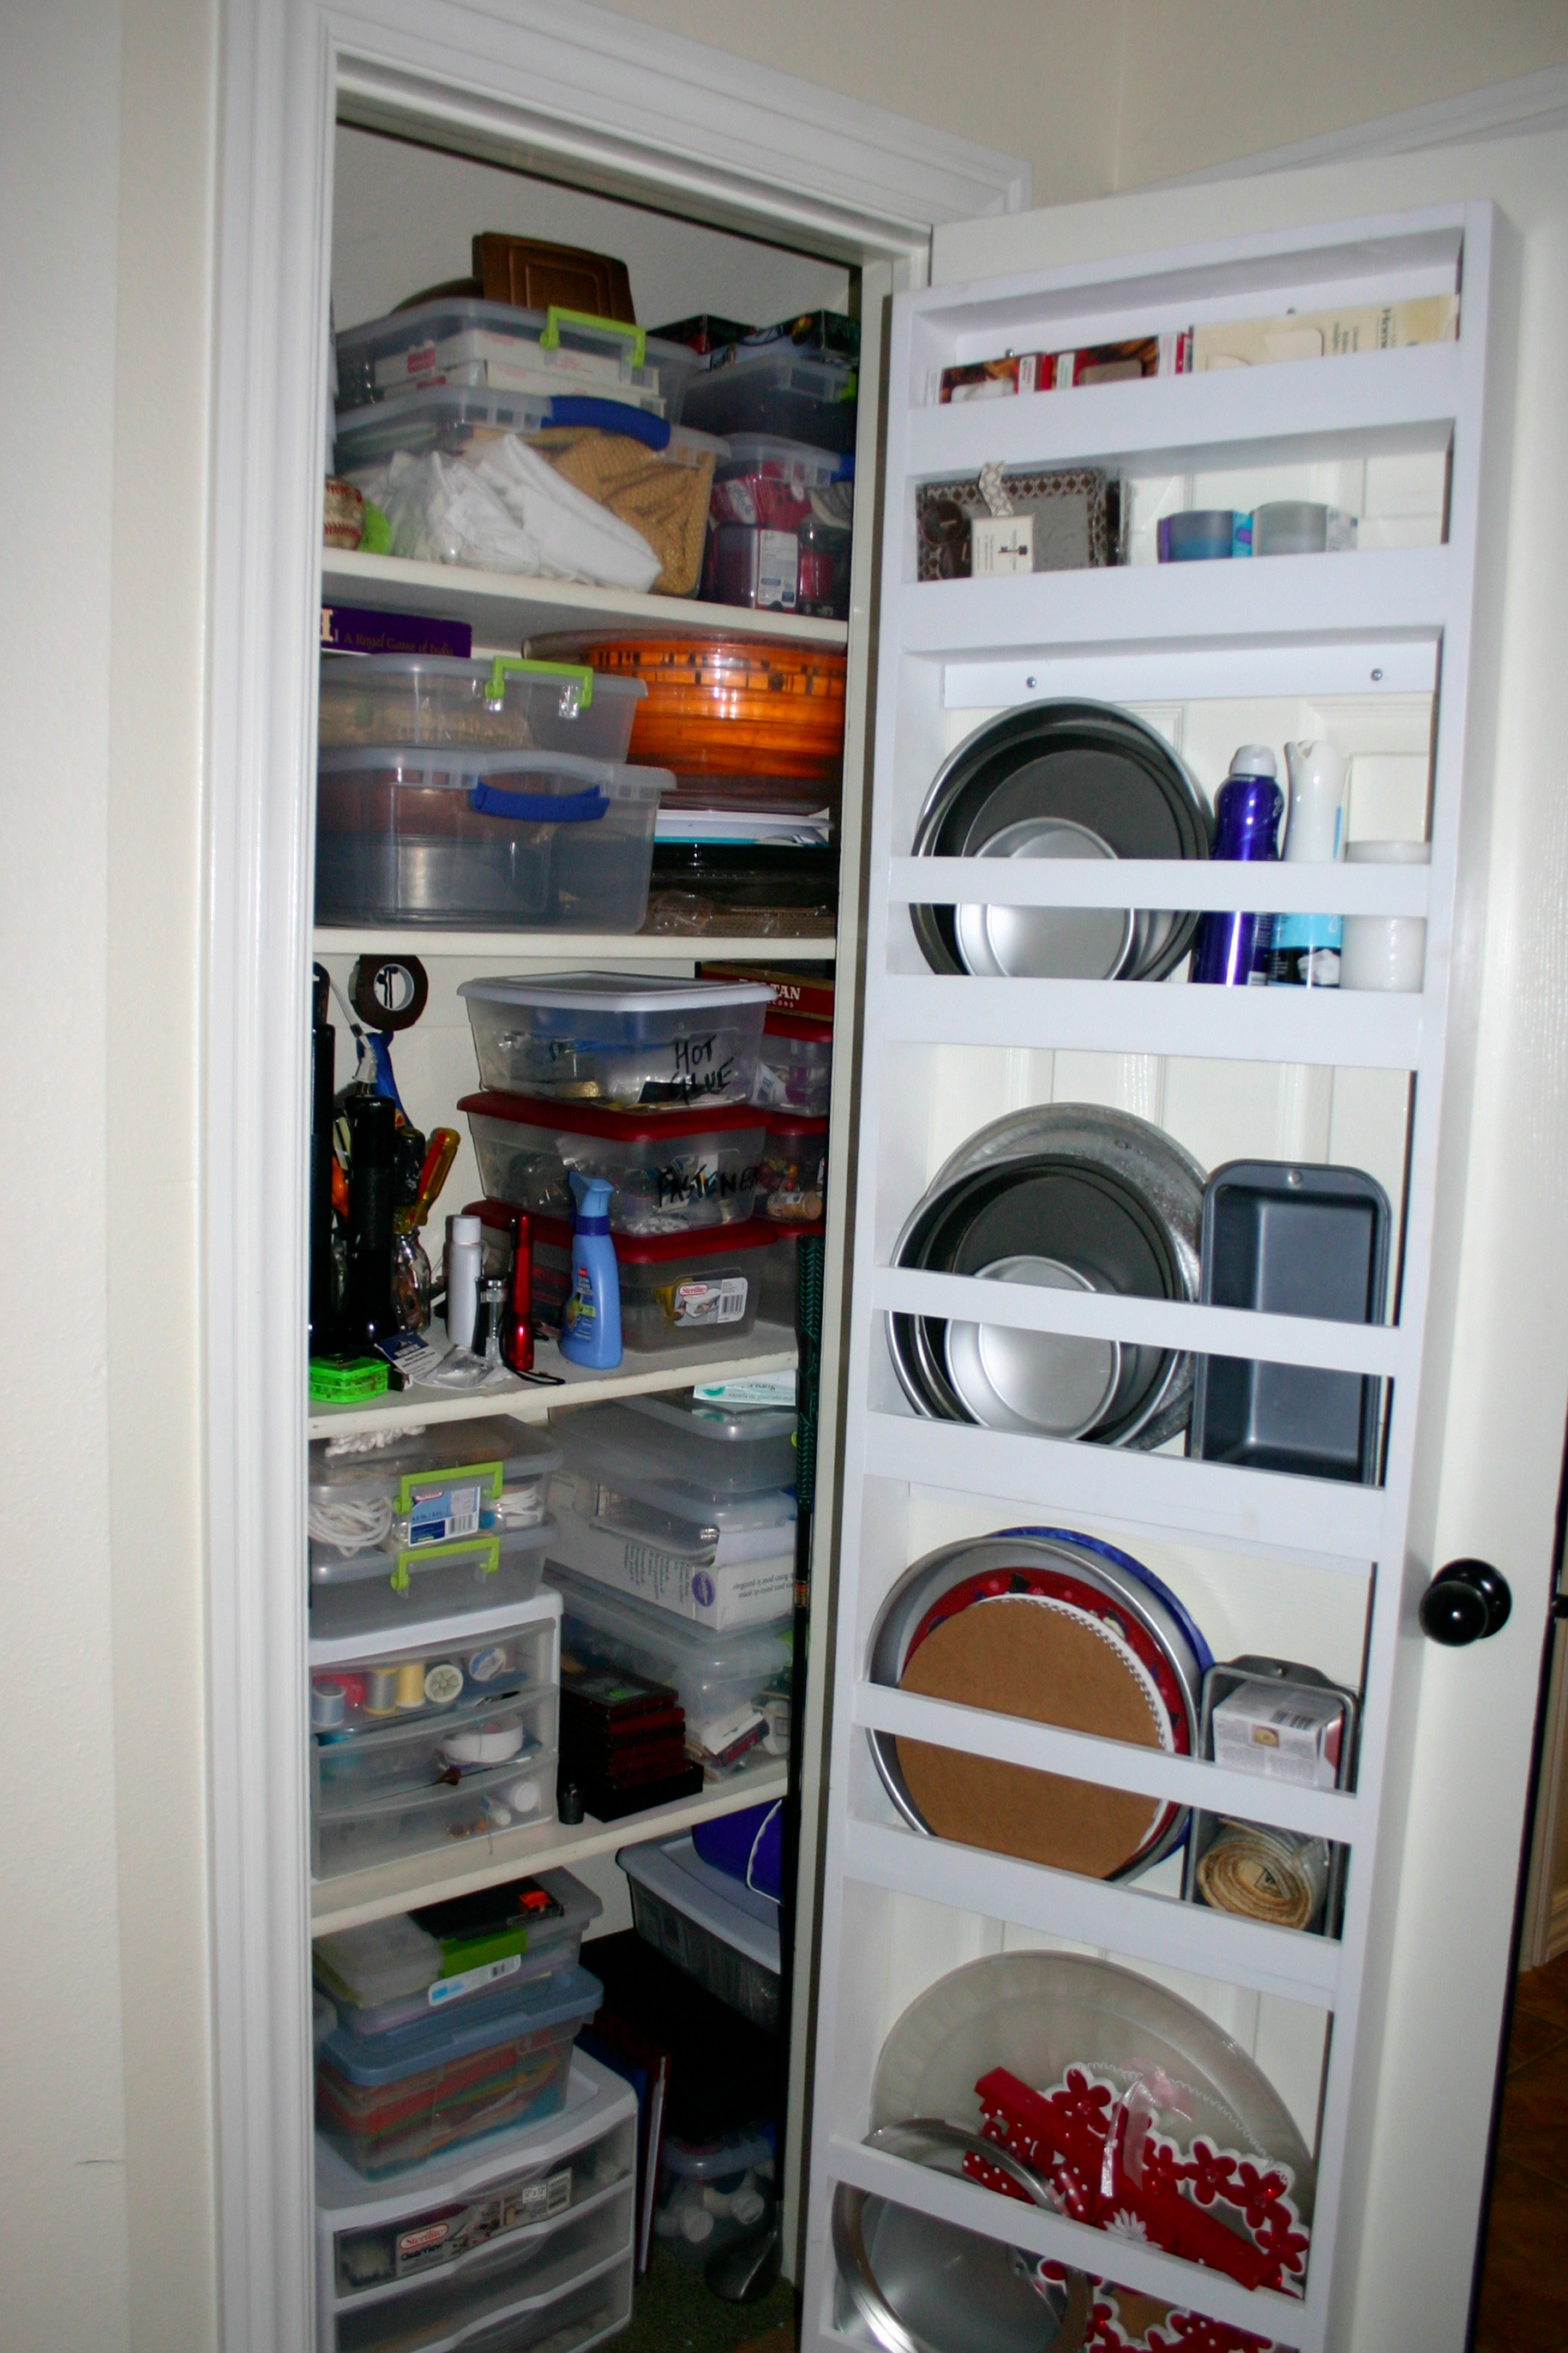
I always envy the organized closets with all the cute little matching boxes.  But I know me...if I had cute little matching boxes, I would throw crud in there, and I would have NO idea what was in each box....labels mean very little to me.  So for me, the easiest way to organize my hall closet was to use clear storage boxes. I can pretty much see what is in every box.​  If I need hot glue, I just take out the box with hot glue!

I also found this nifty closet door shelf system on http://ana-white.com/2010/09/closet-storage via Pinterest.  It was very easy to build from 1x4 and 1/2x2 boards....prime and spray paint white...anchor to the door with toggle bolts!  No biggy.

IMG_8715.jpg

I use it to store my baking pans and candles and such.  When I built it, I measured the things I knew I wanted to store in it and basically set the shelves so those items would fit...as you can see, I made a larger shelf on the bottom to accomodate the bigger serving trays and smaller ones at the top for candles and such.

However, the thing is VERY heavy...so I would not put it on a bifold or sliding doors. And I found it necessary to put an extra long screw in all three hinges on the door just to make sure it was secure.​  Most hinges on interior doors are only anchored into the 3/4" door jamb.  If you hang a heavy object on the door, it is going to cause it to "drag" on the side that closes...that is why you need to put one longer screw in each hinge...so the screw is actually anchoring into the rough frame of the door, not just the door frame.   See, they don't tell you these things so you go to all the trouble to make something like this, then your door won't close or it "drags."  And you are bummed...but it is a relatively simple fix!

I actually made two and put one in my garage for extra cleaning supplies and such.  Nifty little things that are good for storage...would be great behind a utility room door if you have the wall space or in a bedroom closet...since they are made out of 1x4 material, they are less than 4" deep!​

But again...I do envy the pretty matching boxes and the closets that make you go "AHHHHHH!"  But in a real and practical world, clear boxes that allow me to actually SEE what is in it makes more sense.  Not as pretty, but sooooo much easier to find the things I need.  I use the same system in my garage...helps me stay organized but allows me to see what I have at a glance!​

Pathetic little shed no more....

Time flies... I didn't understand why my 4-5 year old shed looked so pathetic and was already showing signs of rot in places...then I realized that it was actually 9-10 years old and had never really had a makeover other than adding some little window planters!

I didn't want a "typical" storage building in my backyard.  So when I bought the "kit" at Meek's originally and contracted them to build it, I had them put a higher pitch on the roof and use architectural shingles.  I designed a cute little "cottage" style door for them to build and I also added two inexpensive windows and shutters. Cost a few pennies more, but is much more attractive than your typical storage building!!!  

But now it is time to spruce up the little place.​

I really just wanted to paint the shutters and door black, but as you can see, the door had a few issues....like a serious case of rot!  As did the siding on the side...and I have always wanted to add little "scallops" above the door and paint the hinges black and add cute little lantern style light fixtures...

Even the simplest little projects turn in to complete "rehabs" around here!!!​

But that is when you learn that doing this stuff is not THAT difficult! Sometimes the only thing stopping you from making a change is FEAR of it being too big....how do you eat an elephant...one bite at a time ;)  

How do you start a project....just be willing to take the first bite!!!!

So we begin...I took down the shutters...marked them on the back so I would know where they go (remember...paint fumes cause memory issues...this has nothing to do with age!) Gave them a good little bath and then used good ole' spray paint!  Beautiful!​

I also took all the screws from the shutters and the hinges, stuck them in an old styrofoam lid, and sprayed them with black paint!!  Easy way to paint screws to match!​

​I pre-primed and pre-painted all the trim I was going to be using on the building and door.  I still have to caulk and do paint touchup after it is installed, but it makes that job a little easier!!!

I took the door off and left the hinges attached to the trim on the building...but I have always wanted the hinges black, so I taped them off and sprayed them with black spray paint as well.  The siding on the side of the building had some "rot issues" from years of standing water, so I chipped away the rotted material and put a ​new piece of trim along the bottom of the building to "hide" the rot. (Before you do this, make sure the area is now VERY dry and there are NO termite issues...look for little ant creatures with wings or their little "tracks" in the wood.  If you see ANYTHING that is remotely suspicious, call your termite company!)

On to the fun part....rebuilding the door.  Unfortunately, I was so focused I didn't take pictures along the way.  But I basically used the old door as a "pattern."  Any time you need to replace or rebuild, examine closely what is there....what materials were used...how is it put together.  Fortunately, this door was a pretty easy read for me...so I bought the materials, measured, cut, glued and nailed.  And presto...I have a new door.​

After cutting the door out of the wood siding material, I had enough left over to make the little scallop things I wanted to put above the door.  This took a little creativity, but I had made a scallop fascia for a little cabinet I made for my daughter years ago, so I pretty much knew how to make it.  I took 6" strips of the leftover wood siding material, used a coffee can to mark the scallops and then cut them out with a jig saw!  I then installed them on the little building by overlapping one row on top of the other and painted them!   No biggy!​

I added some little lantern style fixtures! (they don't REALLY work....there is no electricity in the building...but they are kinda cute! But I think I need bigger ones) 

I still need to repaint the little porch railings...and I can't wait to get the planting done in the beds...but all in do time! ​

For now, the MAJOR work is done! And my little garden shed has new life!

This may seem like a HUGE and daunting task for a novice DIYer.  But seriously, if I can do this YOU CAN DO IT!  Before you can complete any rehab or makeover, you just have to START IT!  Take it slowly and examine what is already there...but conquer your fear and start!​

My father did not teach me to rebuild a storage building door.  He didn't teach me to make scallop siding...he didn't teach me to tile or sheetrock or install hardwood on my stairs.  He taught me to DO....to think...to look at something you want to change and figure out what you have to do to change it!  ​Really if you think about it, DIYing is kind of like life...if you don't like something change it...but you have to be willing to take the first bite! And honestly, if you get stuck, you have to be willing to ask for help when the going gets tough....but never quit or give up!

We are soooo fortunate to have the internet...you can Google just about anything and find a ton of places that will tell you how to do just about anything!  They may differ in some respects, but that is where you have decide what you are comfortable doing....and what makes sense for the project you want to complete!  ​

Dad didn't have internet...he just had a lifetime of experience and knowledge...I get very sad when I think of all he took with him.  I am grateful for the knowledge he gave me...but more than anything I am grateful for the confidence he gave me to start any project and figure it out!  ​

If I can give you just a "smidge" of that confidence, you will have received a tremendous gift!​