Okay, where do I start. Very tight budget so I had to spend wisely!
Paint, that is a given in any room makeover...light, clean...gallon at the most! I did paint the ceilings but after 13 years, it was time!
All the tile was fine. Thank goodness because that can be costly! But the shower doors HAD to go...gold...seriously, what was I smoking? Removing old shower doors is seriously the EASIEST and one of the biggest changes you can make in a bathroom. Remove the doors. Just lift up and tilt out. Take a hammer and carefully knock the top bar "up." Be careful that it doesn't hit you in the head (yeah, I really do learn these things the hard way). Now, MOST shower doors have just 3 little screws securing the side brackets to the wall/tile/insert. So take the little screws out and "pop" the side rails off the wall. Usually silicone is used as an adhesive, so you may have to do a little prying on the side rails and the bottom rail, but they will come up. After all the rails are removed, take a razor blade and gently scrap the silicone off the walls/tile/tub. The three little holes...just take a little bit of silicone and "fill" them. Haul the entire insert to the curb and say "bye, bye!" Buy a pretty rod and spa curtain and say good bye to soap scum and that nasty black crud that grows in the rails!
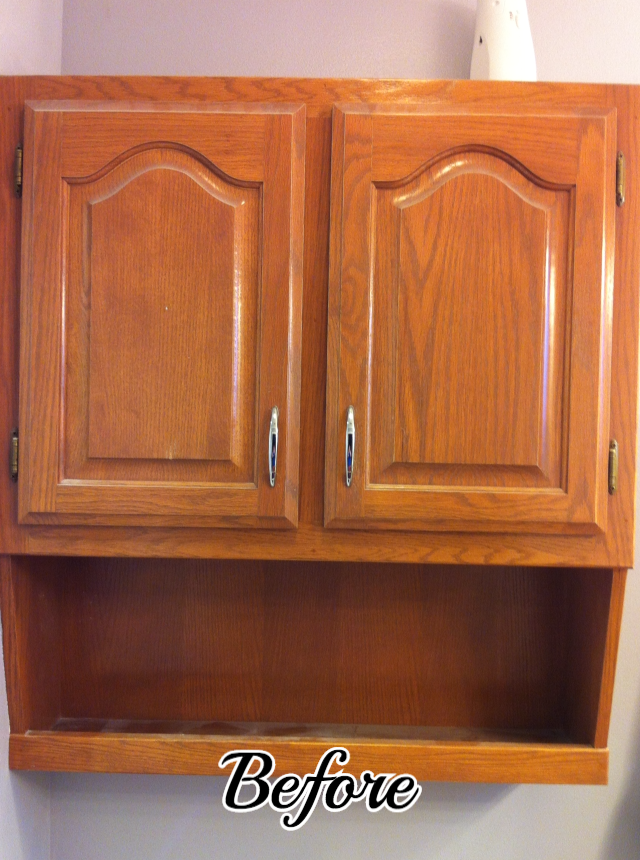
Cabinets. I bought new cabinets. Big expense. But in a bit, I am going to share a way to change the entire look of your cabinets and bathroom without spending a lot of money!!! Seriously...you WANT this!
I was going for "modern" so I decided to go with brush nickel fixtures and hardware. I priced the cabinet hardware at a local home decor store....$28 A PIECE...I only needed 7 but really...$28 for a stupid little handle? That is when I discovered myknobs.com Found the hardware for around $8 a piece....SWEET!
Originally I was going to put in two mirrors...but I bought this one on sale at Hobby Lobby for the hall bath and it didn't work in there so I hung it in the master bath and loved it....so I put in the totally awesome pendant light fixture instead! Well, okay, my totally awesome son in law installed it when he put in the recess lights (not pictures)!
There is only me...and it's a small bathroom...so two sinks was a waste in my opinion. I decided to add much needed storage and just have one sink. I got the sink and faucet on Overstock.com! They have great prices on bathroom fixtures. Always check them before you buy any fixtures or lighting!
Again, great deal on the granite top. Glass tile back splash...yum! A small amount of glass block in a bath back splash can add A LOT of style and class for very little! (That will be a great tutorial...it's super easy!)
The biggest change was the new window. That required some pretty serious construction and vinyl and sheetrock repair but it was doable. And having an operable window in a small bathroom is a must have in my opinion!!! I put in one of those nifty "crank out" kinds and I loooove it!!! It is so nice to be able to air out the bathroom on nice days!
And of course when you do a "remodel" there are always those "little surprises." Like the wad of pine needles and leaves I found in the HVAC vent....no air was getting through those vents....but some critter obviously had during construction. I also discovered that when the plumber installed the wall plumbing behind the cabinets (tech term, rough in) he tore out the sheetrock and insulation, and then the cabinet guys just set the cabinets right over the gaping hole in the wall....you could literally see daylight when I removed the vanity. I always wondered why the floor was soooo cold!! And I never could figure out how water pipes I KNEW were in the floor managed to freeze when it was bitter cold.
So I promised an inexpensive cabinet makeover....a process that will change the entire look of your bathroom and is ubber easy!!! Seriously, it is soooo easy that it totally offended my "craftsman" senses. Keep in mind, I just came to terms with painting wood furniture...so "refinishing" cabinets with this process really offended my senses. But I tried it in my kid's bathroom and my guest bath and I LOVE it! My daughter has refinished her bathroom cabinets, I have used it in the kitchen in my manager's house, and one of my friends just refinished her entire master bath! It is amazing!
I found this process on Pinterest....which linked me to "Monica Wants It." Monica gives a GREAT tutorial on refinishing cabinets...follow it to the T...do not deviate. (Monica used this on oak cabinets...I have maple...worked great on both! I also used it on unfinished oak and it worked just fine!) I have used it three times, and it has never failed me! Nor my daughter nor my friend! Totally awesome. (I wish my photography did it justice...but it doesn't!)

