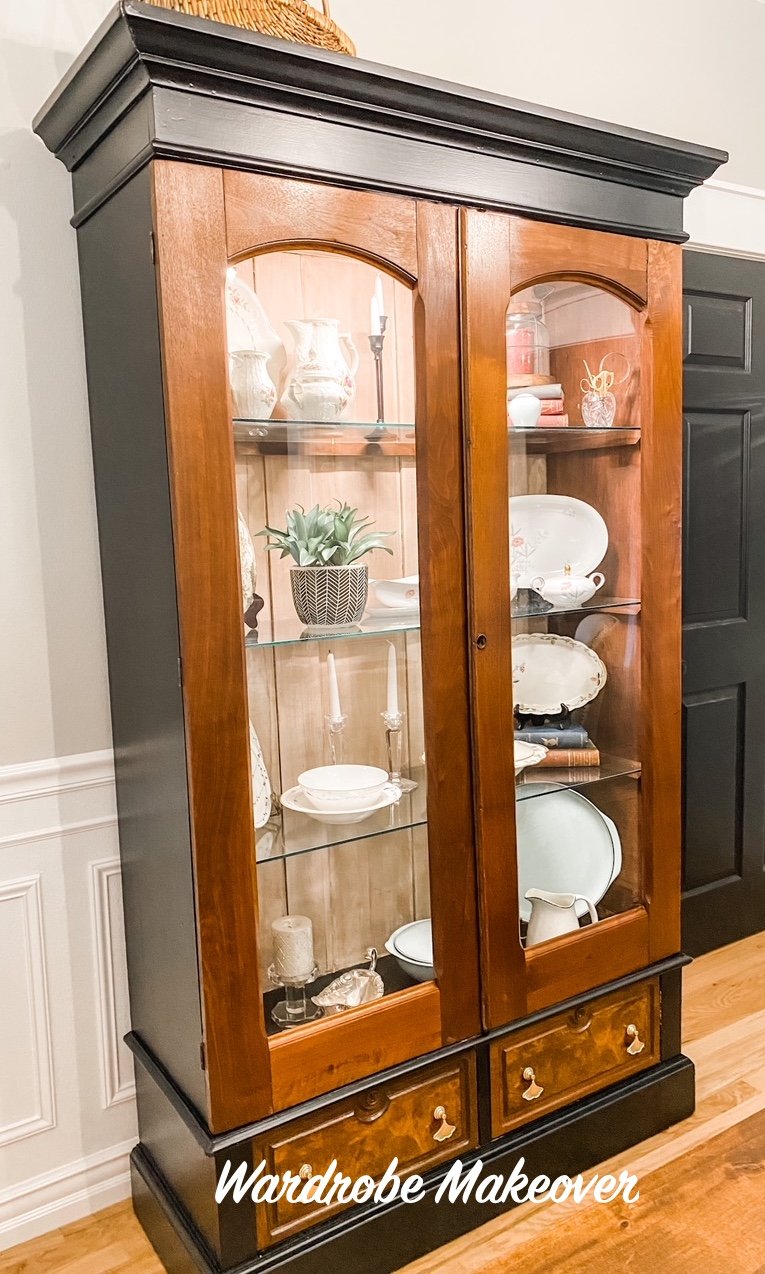
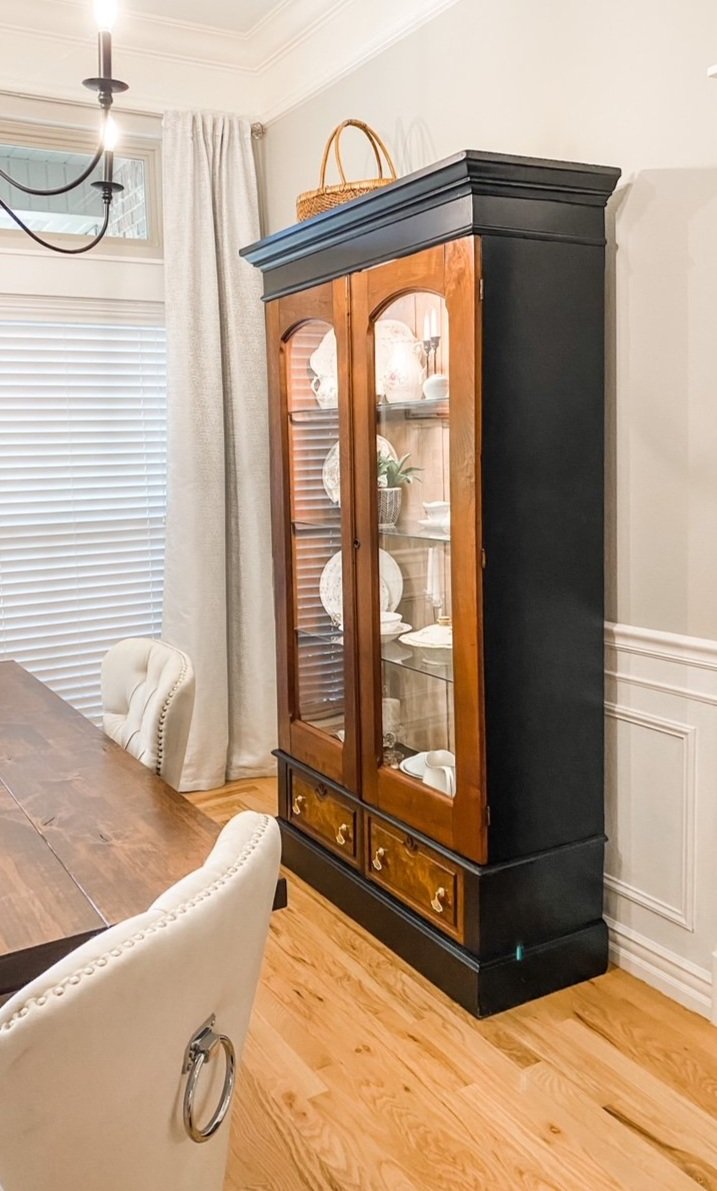
The wardrobe reveal....

Last week I shared the wardrobe cabinet I planned to refinish and convert to a display cabinet….HERE.

Definitely lacking in soooo may respects. But I had a pretty good idea of what I wanted to do with it.

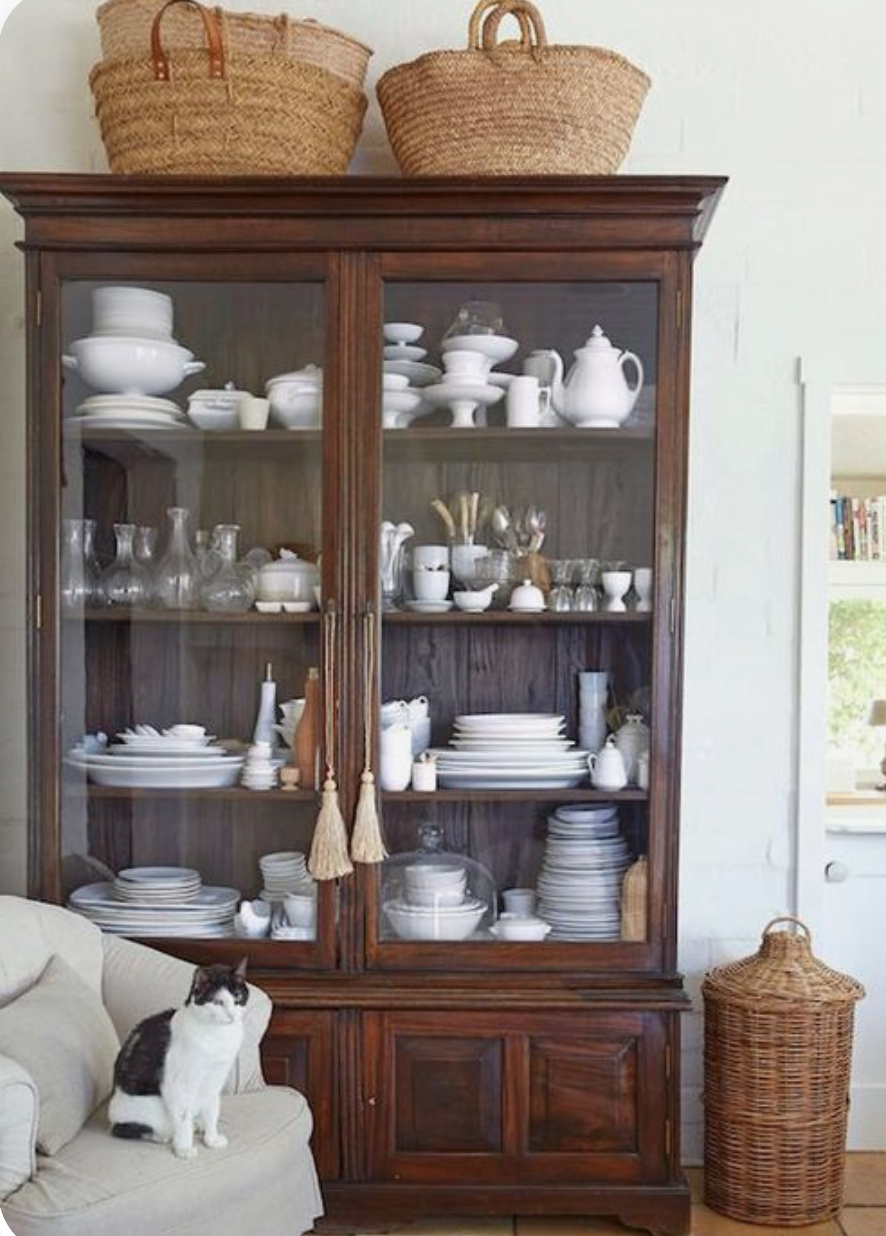
These “inspiration” pictures have been on my computer for over a year, just waiting on the perfect piece to transform!

The last one is probably my favorite…a Pinterest find. It was the one that influenced me the most, as you will see.

So the plan…remove the panels in the door and add glass. Remove all the shelves and add glass shelving. Lighten the back of the inside. Strip the doors and drawers and apply tung oil. Paint the rest of the outside of the cabinet black. Replace the hardware. Add a light.

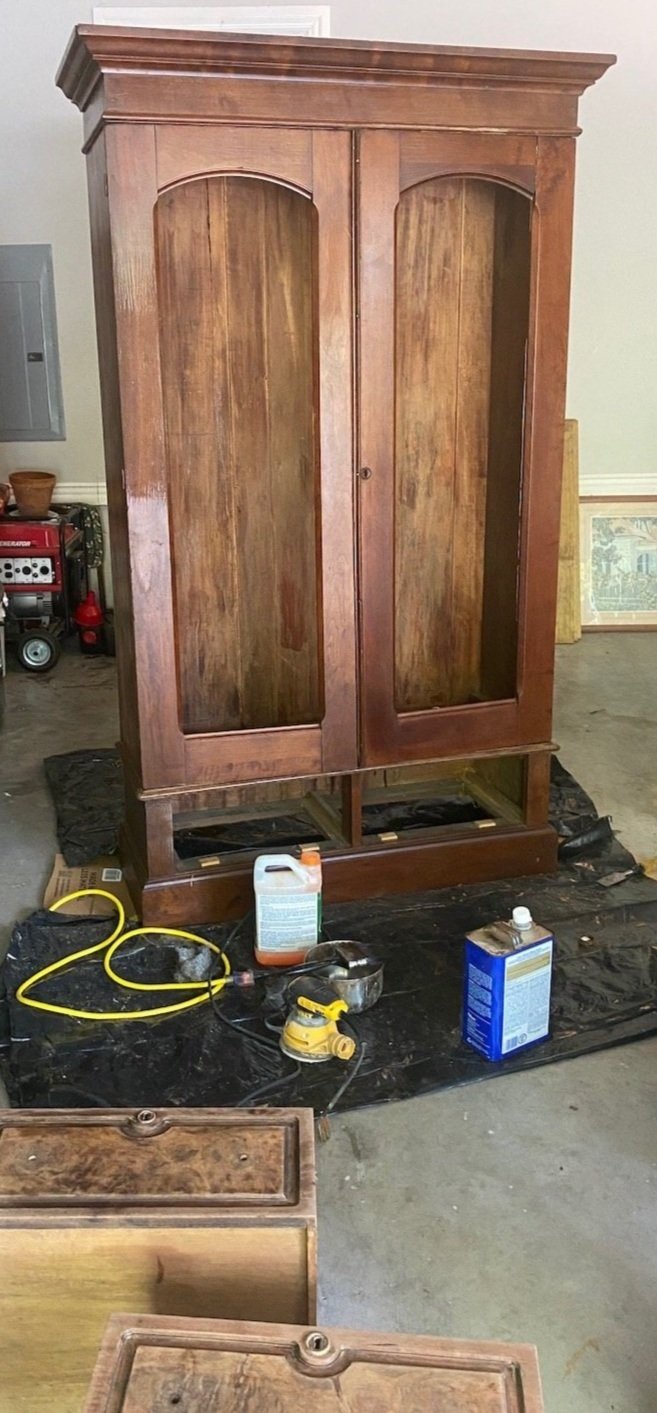
So of course the first step is to deconstruct and then begin the stripping process on the doors, drawers and inside back panel.

What a chore!!!! I think someone, at some point, had applied at least 20 coats of poly. The 1/2 acetone, 1/2 lacquer thinner process I shared HERE, wasn’t cutting it. I applied Citristrip and wrapped everything in plastic wrap…that seemed to do the trick for 80% of the finish…then I was able to sand off the rest since this was mostly solid, then clean it up with the 1/2 and 1/2 mixture. Remember, you don’t want to vigorously sand veneer because it can be super thin and you can end up sanding right through it. I started with an 80 grit then finished with a 220 grit. Then I hand sanded it with 220 to get it butter smooth.

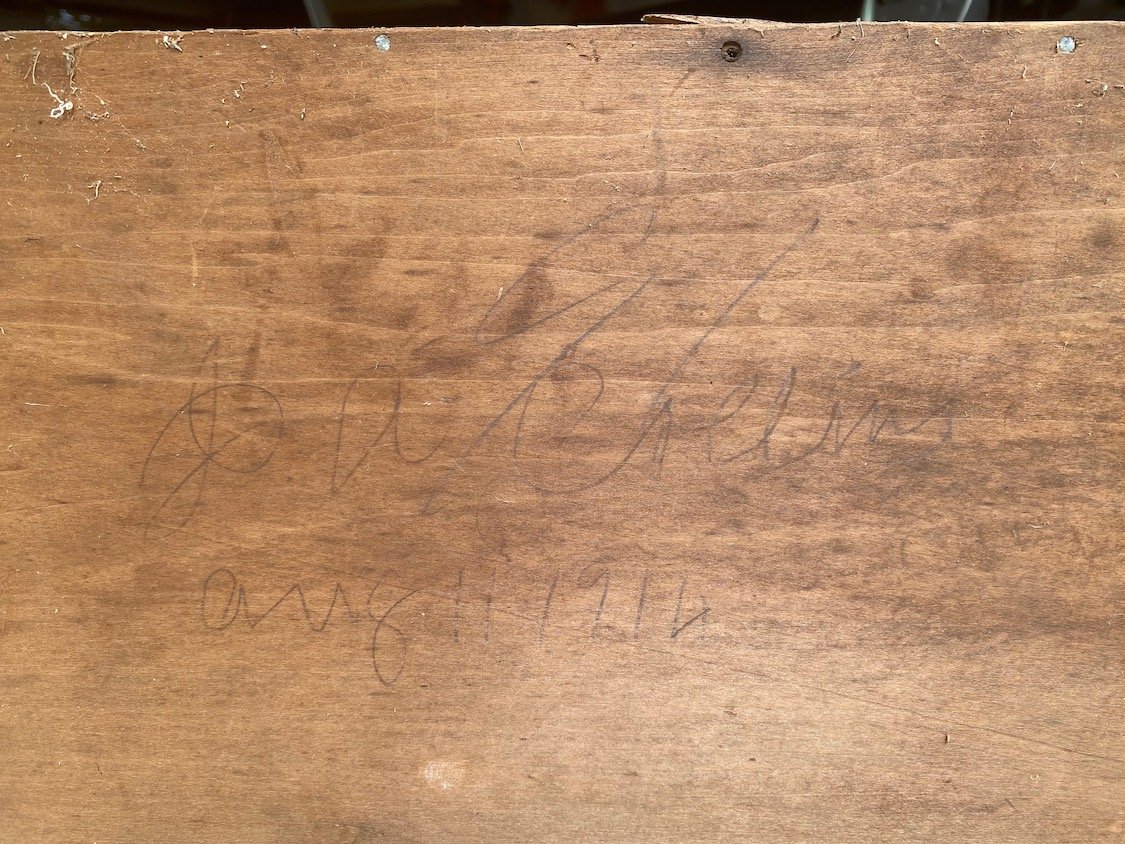
I knew this piece was old (which is why I know the poly was NOT the original finish) and that was confirmed when I checked out the underside of one of the drawers.

It was signed and dated…most likely by the person who constructed it…August 11, 1914…wow!

The other thing I discovered was the mortise and tenon peg joint. So super cool. Normally drawers are constructed using dovetail joints. This was unusual to find, but probably not unusual for the times.

I removed the doors to make it easier to work on the inside as well as make it easier to strip them. Remember to ALWAYS reenforce screw holes when you remove the screws. Not hard at all. Just take a match stick, dip it in wood glue, then insert the stick in the hole and break it off.

This will ensure that when you go to reinsert the screw, it won’t be loose or “wonky.”

I stripped the inside back panel then sanded it down. I tried lightening it with oxalic acid but it still seemed a tad to dark and a bit yellow. So I ended up applying a whitewash. Just a little white paint mixed with water, brush it on, wipe it off…like a stain. I can still see the character and grain of the wood but it lightens the interior considerably.

There was a tiny bit of veneer on the base of the cabinet and one side was in pretty rough shape. My original plan was to remove all the old veneer and apply a new piece. I planned to paint the outside of the cabinet so it didn’t matter that it would be different than the other side.

Problem was, when I went to remove the loose veneer, some of it was SUPER stuck…as in it was NOT coming off.

Soooo, punt.

I scraped off all that I could then I used wood filler to get a smooth surface.

This picture is after the 1st coat.

The whole process took a lot of time and patience. Fill, let it dry, sand…apply some more, let it dry, sand. It probably took 3-4 applications to get the side perfectly smooth and ready for paint.

REMEMBER, paint will NOT cover poorly patched or repaired areas…if anything it will highlight it. So take your time and do it right!

After patching, puttying and caulking, I primed the entire outside of the cabinet with primer, sanded it smooth with 220 grit paper and then wiped it down with a tack cloth.

I then spay painted it with a flat black paint. Remember, light coats…2-3.

The paint I used SAID it was primer and paint in one. As you may know, I do not trust that and will ALWAYS apply a good primer before paint…always.

I stripped the drawers and doors (using this process) and I used my new favorite tung oil finish to seal them.

I added new shelving support using some leftover walnut I had from my office feature wall project. I wanted good solid support since it would be holding glass shelves and china…glue and nails!

(This is solid natural walnut…no stain…just an oil finish!)

I moved it in the house before I added the glass or hung the doors…just made it lighter and easier to move…okay, RELATIVELY easy…this sucker is big!

So, my original plan was to put it in my office. But it covered too much of the feature wall I worked so hard on. I moved the Drexel server into the office and put this cabinet in the dining room.

The final touch was the hardware. My original plan was to find some simple tear drop hardware. While looking, I found these precious little ginko leaf designs on Etsy.

Back story…years ago when my kids were little we lived in a house that had a HUGE old ginko in the court yard. I have the loved these trees ever since. Kind of quirky but with a story.

I added a LED light inside the cabinet…simple!

Now I have a place to display more of our family china.

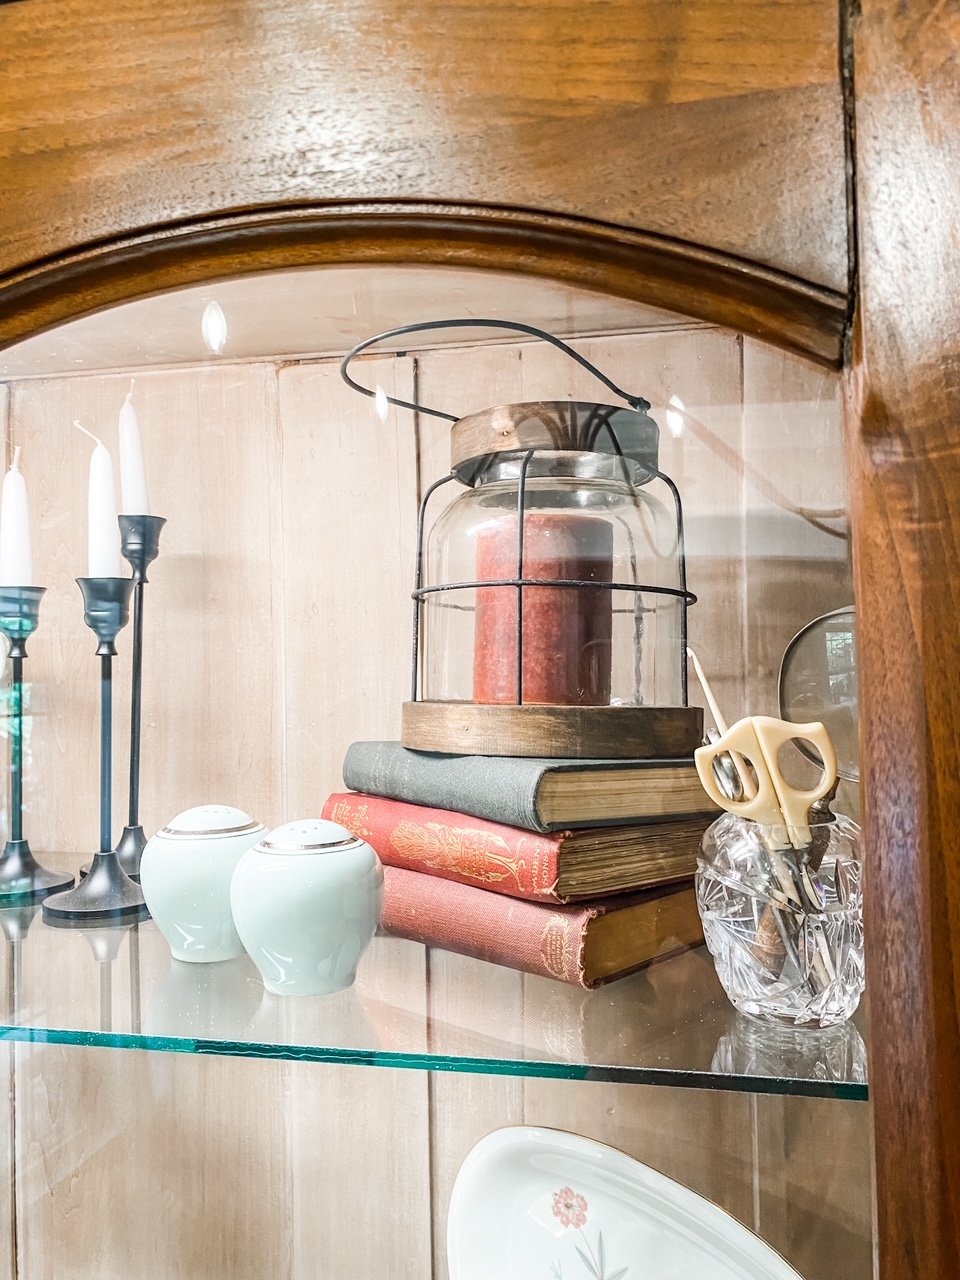
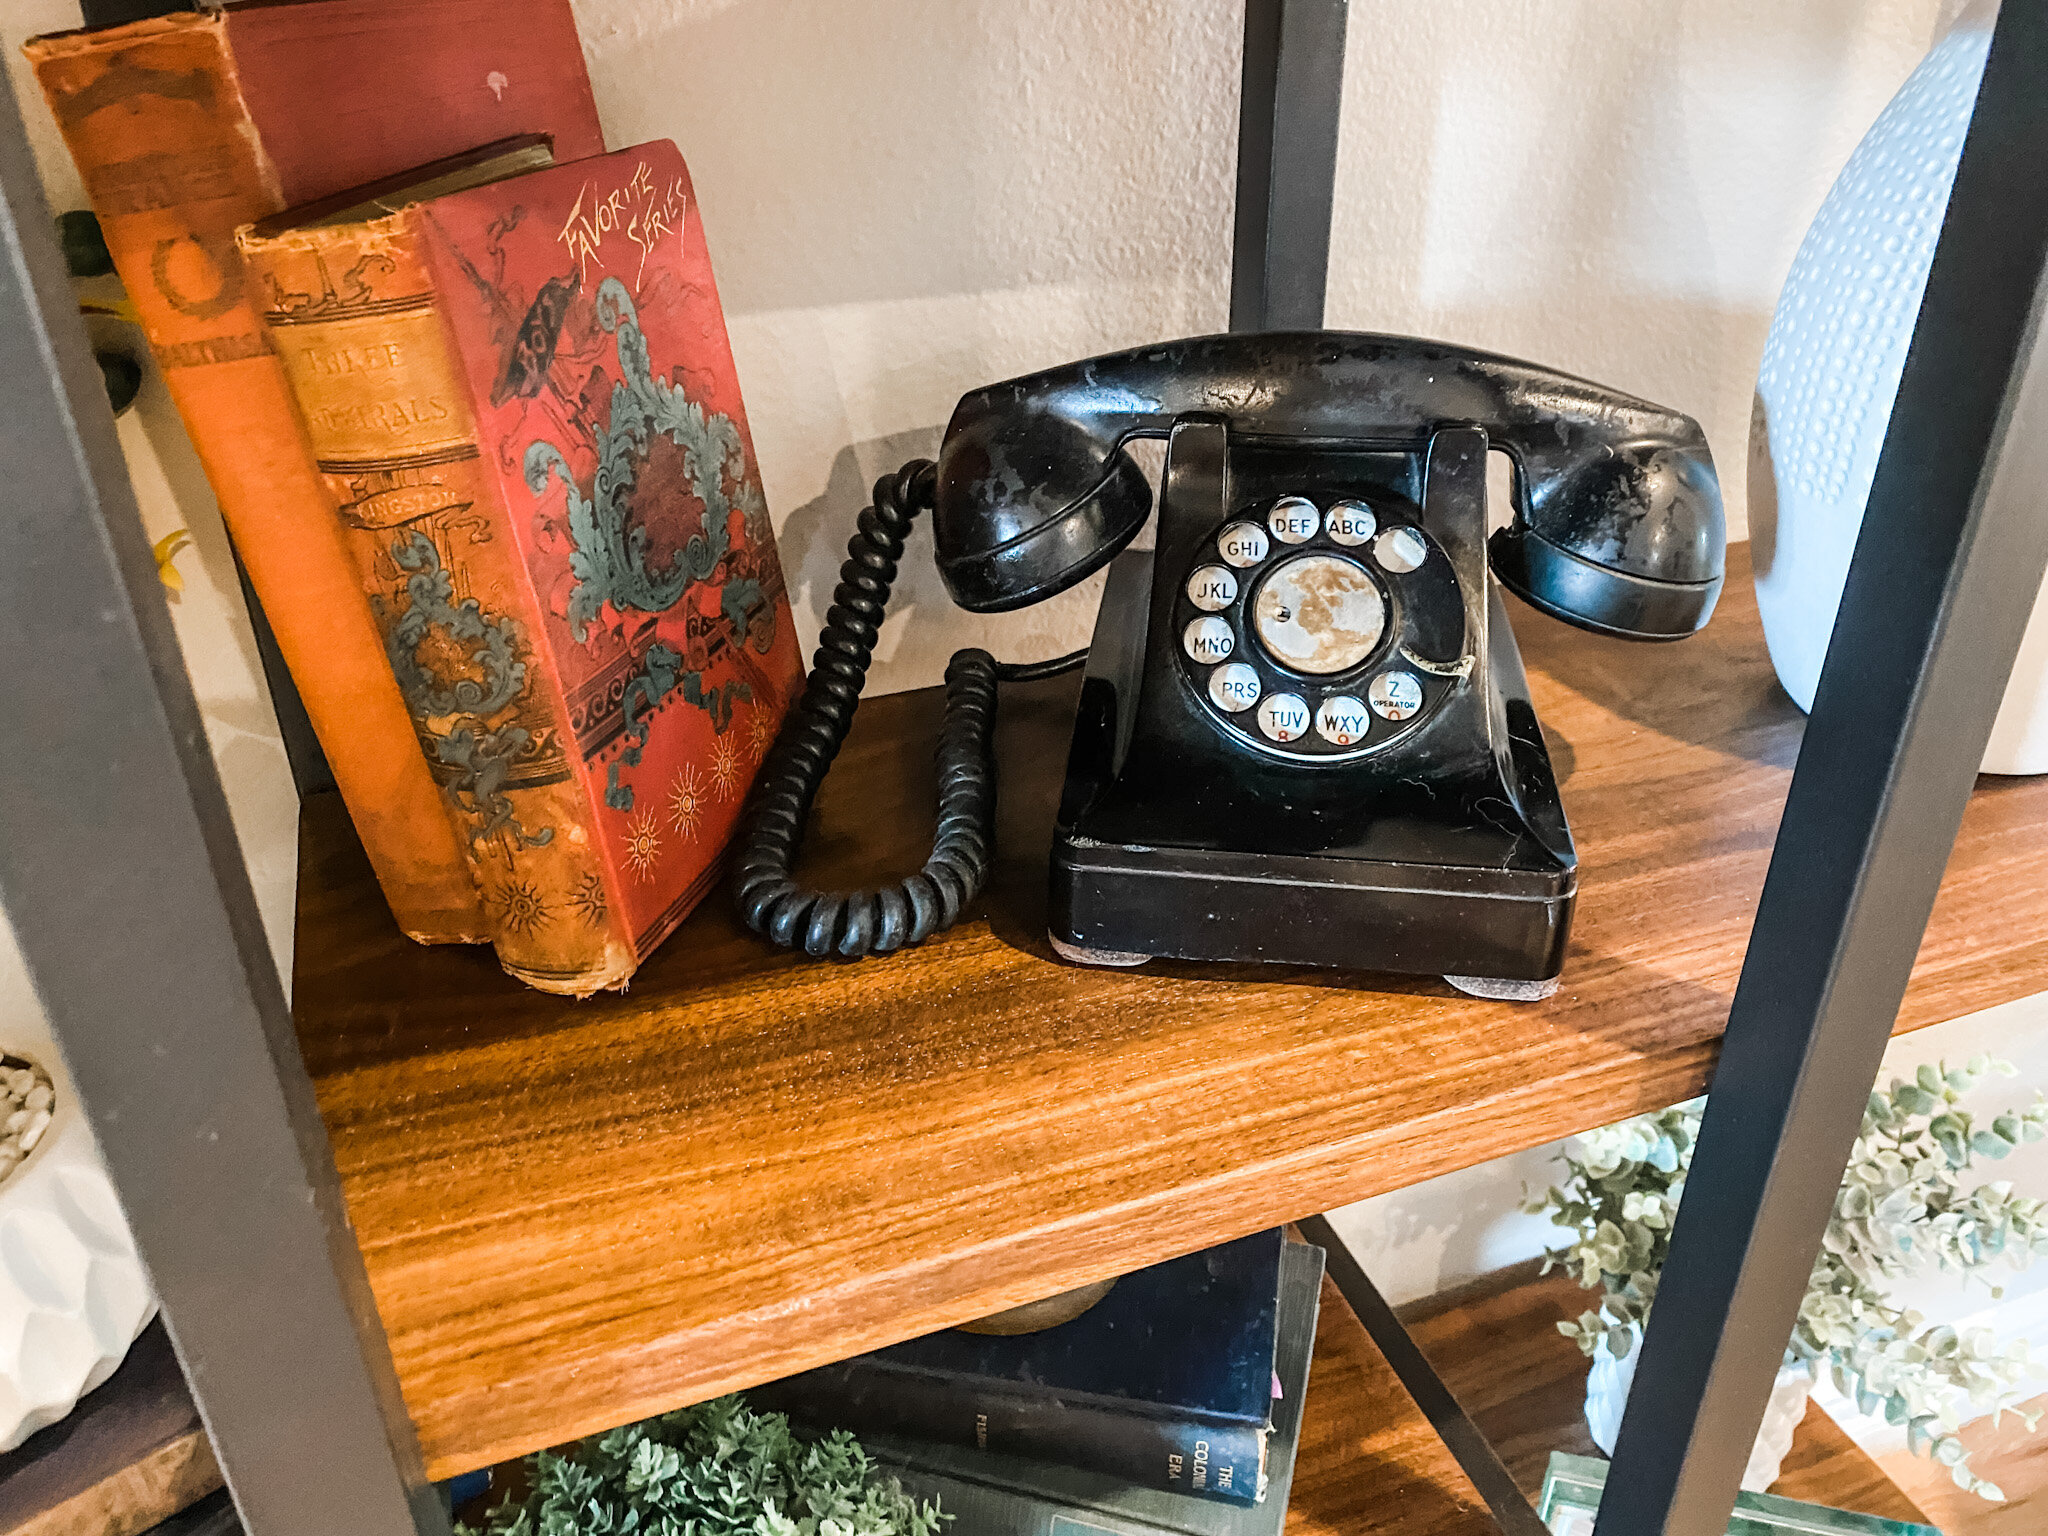
Rather than fill it with all the china I have stored away I selected a few serving pieces of each set. I like to use antique books as risers so I picked a few up at a local flea market.

The only things I purchased were the candle lantern and a fake plant. I know, fake plants are suppose to be “faux pas” these days…I don’t care…I can’t keep a real one alive and it looks lovely.

I love to decorate this room for every holiday so I can’t wait to doll this piece up for fall in a month or so…then Christmas.

I think it will be just stunning!

The wardrobe makeover....

You may have noticed I have been MIA for a few weeks. Pretty unusually for me.

It is the “dog days” of summer…just too stinking hot to do anything major outside. Really too hot to do any projecting inside that requires me to go outside. Just plain HOT!

I have been working on a few little projects. My neighbor has been using her golf cart garage as a make shift office. A tiny little garage in her house with a tiny little garage door. It is heated and cooled and is a good little space for a small office.

No I did not take before pictures. Wish I had because after she had the garage door replaced with a large slider, I spent a few weeks repairing walls, painting and changing out the lighting.

SOOOOO darling. The large slider looks out over her flower garden and the space is just wonderful!

This was one of those “Giving what you have” projects. I can paint, repair sheetrock and do minimal electrical…and that was exactly what she needed.

I also started painting my interior trim. At some point, eons ago, I painted all the trim in the house a “whiter” white. Well now I have found a white that is even “whiter” and is my new “go to” white. BM Chantilly Lace. At some point I started using it on all my trim…when I gave my master bedroom a makeover….the laundry roommy office. I used the new whiter trim paint in all those rooms. But the main part of the house all has the old white trim. When I added the wainscoting in the dining room, I used the new white. No one but me could probably tell the difference….but I could. So now I have to repaint ALL the trim. Curses.

Good project for the dog days of summer!

A few early morning yard projects…a few “give what you have” projects…but really nothing earth shattering!

But that is about to change!

As I have shared, my days of major furniture makeovering are pretty much over. The ole’ back/knees/hands just can’t take it any more. But every once in a while I decide to take on something because, well, I want it.

For over a year a few “inspiration” photos have been on my computer. I just LOVE these cabinets….

(Again, no I don’t have sources…I found them on Pinterest and dropped them onto my desktop. I think the second one is an Etsy find and the third one has her watermark on the photo! She has a pretty good tutorial for the this makeover on her website!)

I just love these pieces and always knew if I could find the perfect piece, I would get it. Never thought I would, until I did.

A local flea market posted this piece….

It just so happens that last week I finally sold one of my office pieces….this credenza has been languishing in my home office since we moved in just collecting dust.

It is one of those pieces I LOVE and spent entirely too much money on…so the thought of selling it for pennies was painful. But it had to go…it no longer served it’s purpose as a flat screen tv credenza and was taking up space. So now I have moved my desk to that wall and have nothing on feature wall.

My plan was to put a mid century style credenza on that wall…the wall treatment is kind of “mid centuryist” and I do have a lot of other pieces in that genre. I absolutely love the style and was pretty much sold on the idea. Simple, clean, sleek. No frills or froo-froo.

But when I saw this old wardrobe, I knew it was exactly what I didn’t know I wanted.

Okay, not EXACTLY…it needs some serious work!

I brought it home and parked it in my garage.

I love being able to park my car in the garage now so I RARELY use it for projecting. But this piece was just too big and hulking to haul back to my shop so I decided to give it a facelift in the garage.

The plan….remove the door inserts so I can add glass. Strip and oil the doors and drawers. Strip the interior and lighten it…either with wood bleach or a whitewash treatment. I don’t want it painted “white” but I want it lighter. Rework all the shelving and add glass shelves. Lighting is a must. Paint the cabinet black. Black cabinet, natural wood doors and drawers, lighter interior.

I THINK the doors and drawers are walnut but I won’t swear to it until I get it stripped….I CAN’T WAIT!!!!

I think it will be amazing!

Funny…I have spent the last 20-25 years leaning more towards simpler, mid-centuryish stuff. Moving away from “traditional” and all the old antique stuff I loved so much 25 years ago. Now I find myself drawn BACK to those styles.

Part of it may be this house…I have the space to accommodate larger pieces. But I think the real reason is “style influence.” As much as I THINK I do my own thing and don’t allow myself to be influenced by the trends of the day…if I was honest, I think I do. I use to believe “my style” was mostly eclectic…leaning more towards mid-century/transitional. If I REALLY look at how I have decorated this house, I think it is kind of “modern farmhouse”/traditional…still eclectic…just a different mix.

Hum…interesting.

Regardless, I still think there is something to be said for being “eclectic.” This is a piece that you wouldn’t think would work in a room with a “mid century” influence…the desk, the side table, the wall treatment. But I think it will look amazing!

But that is me…to each his own.

Maybe next week I will have this done and ready to share…maybe. It is still pretty hot outside!
Fireplace reveal...,

It is done.

As I mention HERE, I had several goals for this room.

The first was easy…replace the paddle fan. Check.

IMG_2074.JPG

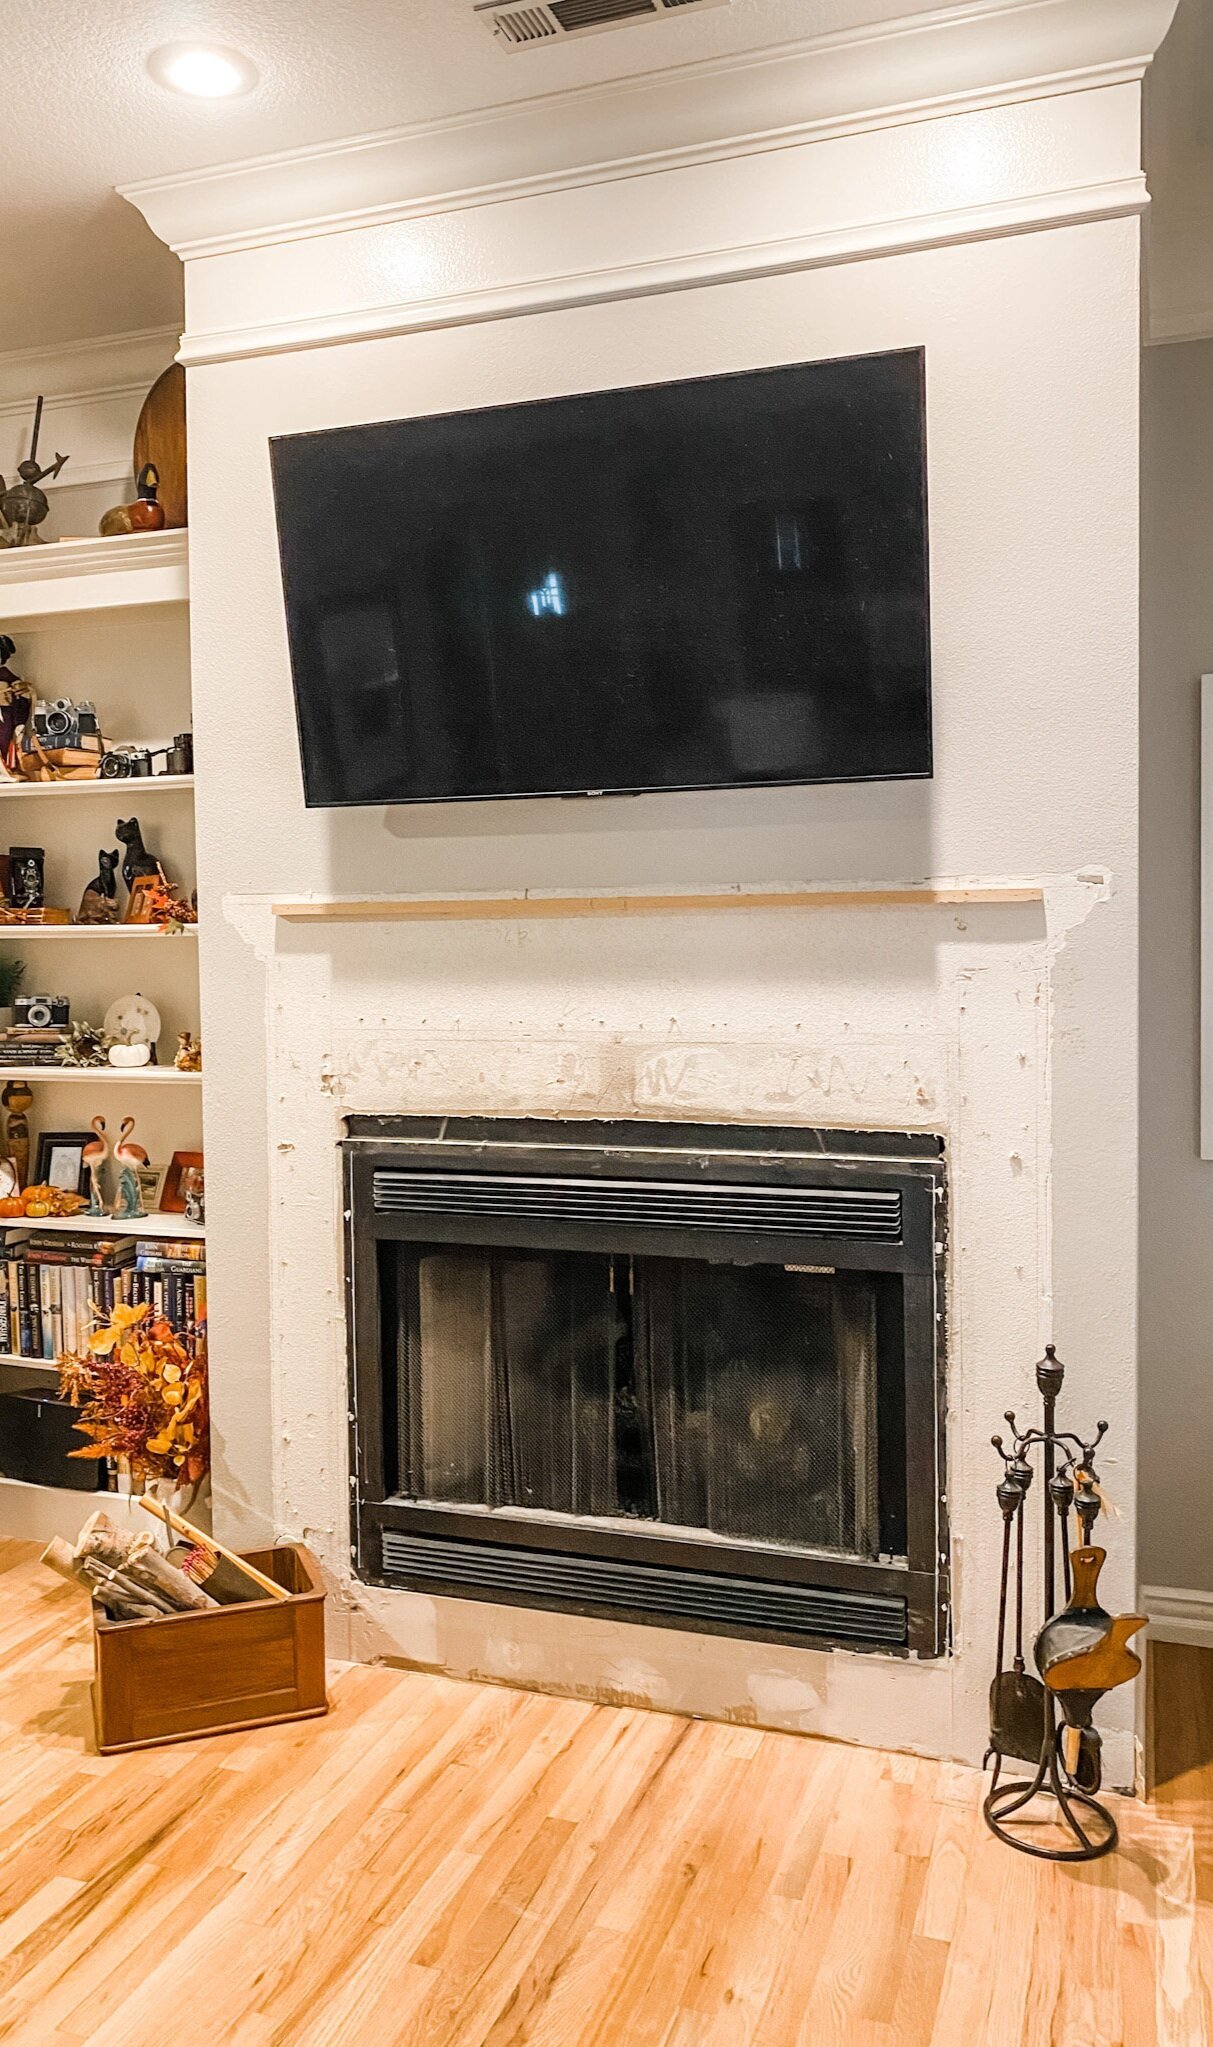
The second was a tad more difficult. Reface the fireplace.

Difficult only because I couldn’t “see” what I wanted which resulted in a spur of the moment “demolition” of what was there….

As I have said time and again, often what “is there” keeps us from seeing “what can be.” I see stuff on Pinterest and in magazines all the time that I love, but I can’t visualize it in my own space because what is there clutters my vision. I have equated it to trying to paint a landscape on a canvas that already has a portrait painted on it.

That is when I advocate painting the canvas white. Base neutral. Painting the piece of furniture or wall white or taking all the furniture and fixtures out of a room so you can visualize what you want rather than what is there. Even if it is a piece of furniture you plan on keeping, take it out…that way you can “see” it in a different spot or even painted a different color.

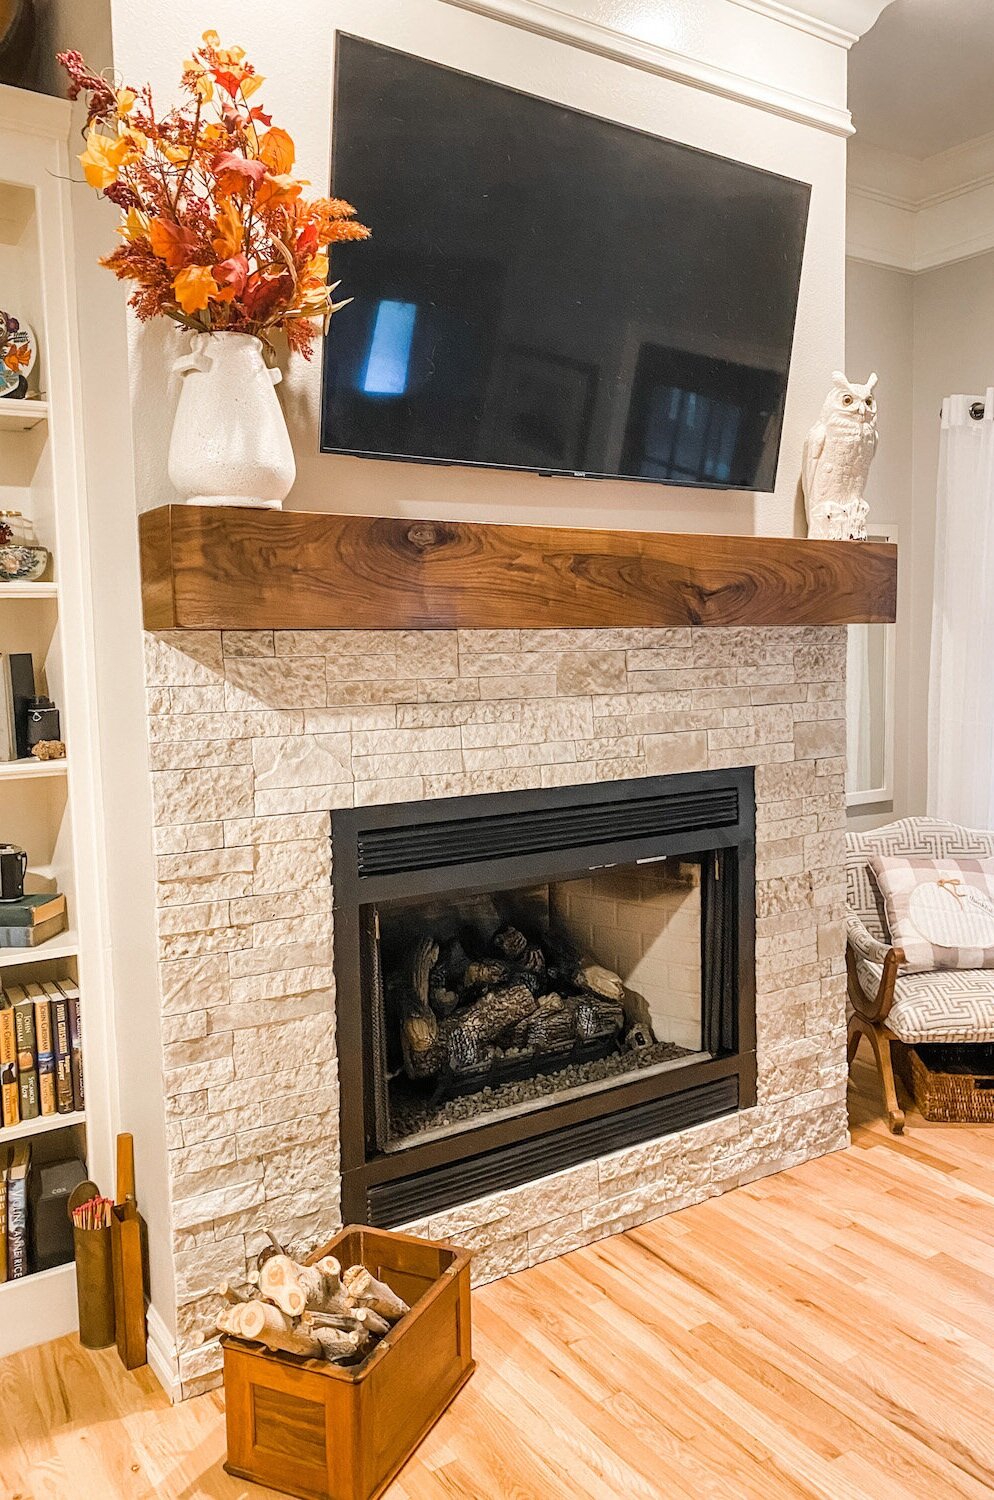
Once I did that with this fire place, I could visualize “the plan.” Rock the bottom…big beefy walnut mantel.

I shared the stone HERE.

Last week Matt and I dragged out the table saw and chop saw and went to work on the mantel. Four coats of Waterlox (I LOVE this stuff) and presto-bingo….the vision came to life. Waterlox is my new “go to” finish…a tung oil finish that gives any wood durable protection while allowing the beauty of the wood grain to shine. And it is SERIOUSLY idiot proof! Just sand, clean the entire piece with a tack cloth and wipe it on. Use 0000 steel wool and tack cloth between each coat. I usually apply 3-5 coats. LOVE!!!

IMG_2040.jpg

I intentionally choose walnut with tons of grain and a few knots…”character.” This house doesn’t lend itself to the “farmhouse look” but I didn’t want formal and fussy either.

The final result was exactly what I envisioned…and I LOVE IT!

Here is the BEFORE (obviously last Christmas)…

image-asset.jpg

And AFTER….

IMG_2073.JPG
IMG_2071.JPG
IMG_2072.JPG

Sometimes we get so wrapped up in getting a project finished as quickly as possible, we fail to live with the results in our minds for a time. Trust me, you will love any DIY project sooooo much more if you will get rid of what is there and take time to live with what you think you want in your mind before you start slathering paint or ripping out walls.

Remember every space is different….just because something looks amazing on Pinterest or in a magazine doesn’t necessarily mean it will work for you. It might, but spend the time to tweek it in your mind before you jump head long into what can be a time consuming and expensive “oops.”

static1.squarespace.png

The fireplace makeover...Part 2...Airstone Faux rock.

The stone work is done….

…and I love it.

I highly recommend the Airstone product. At least as far as installation. It is a relatively easy product to install. Lightweight and exceptionally natural looking.

When we fire up the fireplace in a few months I will let you know how it holds up to heat.

This stone product would work well for a kitchen backsplash, fireplace face or a covered porch area. It SAYS you can use it for exterior application…I can’t attest to that since I did not use it outside.

I think this is a relatively easy DIY project.If you choose to install this product find a tutorial that works for you. More importantly though, FOLLOW THE DIRECTIONS!!!!

I do have a few tips.

Start at the top. Then the sides…them the bottom. That may seem backwards, but it is the way to do it. Start at the top by adding a temporary level brace….I just used some scrap 1x4. I let that dry over night, then did the same on each side, then the bottom. The Airstone mastic sets up fairly quickly.

IMG_2011.jpg

I used pennies as spacers between the floor and the stone. I do this because wood swells and moves and you don’t want the rock sitting on something that has movement. Same would apply if you were using it as a backsplash…don’t set any wall product (faux rock, tile, marble, etc) directly on a top or floor.

Use a tile saw to cut it. I have a wet saw so if you do not, rent one. Makes easy, precise work of tricky cuts.

Pay attention to how to apply the mastic…it’s like frosting a cupcake, not buttering toast.

The tub of mastic specific for the faux stone SAYS it does 30 s.f….it does not. Maybe I “iced” to thickly but I would suggest buying more than you think you will need…you can always return it.

Layout the rock on a template or floor before applying it on the wall and number each piece so you know how to property transfer it to the wall. Also, make sure you pull from different boxes…mix it up. Each box has several different “colors” and “textures”and each box may come from a different run…so you want to make sure you mix it up!

I used the “edge” pieces around the face of the fire box…I think it looks neat.

IMG_2025.jpg

I should have wrapped it around the entire bump out. I would have loved to take it to the ceiling. I am still debating on adding a hearth.

But the “coulda, shoulda, woulda” is always a brain worm until the project is finished.

I didn’t want to take it to the ceiling because I don’t want to remove the crown then have to paint the entire ceiling. I don’t think I want to add a hearth because this is a small space and I don’t want to crowd the space. I didn’t wrap it around the entire wall because, well, I just didn’t.

Hopefully when I get the mantle on, it will all come together.

So the mantel. I think I thought I knew what I wanted but now I not so sure.

My plan is to make a beautiful walnut mantel…smooth…perfect grain…low sheen. Now I am debating on a more “rustic” look with a lighter finish.

What to do, what to do.

As usual, I have searched Pinterest and found dozens of looks…I like them all!

This house style really does not lend itself to that “farmhouse/rustic” look so I think I am going to go with a more smooth, low sheen look. Sometimes you have to “read the room” when making decor decisions.

I bought some walnut boards (dang that stuff is expensive!) and specifically picked pieces with lots of grain and a few shallow knots. Just a smidge rustic but still the beauty of walnut. I know if I apply Waterlox (like I did here with my kitchen cabinets) it will have a dark finish. And I think I am okay with that. The stone is light and I think the dark walnut will be a nice contrast.

Now I am just waiting on my son to have a day we can work on his table saw. I shared HERE about my phobia of table saws. I bought him one for Christmas last year so I have one available and have a “saw buddy.”

Hopefully next week I will have a beautiful new fireplace to share!


Making a table or bench top...

One tool I wanted for years was a “biscuit joiner.”

Screen Shot 2021-08-11 at 4.43.53 AM.png

One of the many things I love about my kids….when I ask for a specific tool for Chirstmas/birthday/Mom’s Day, they listen. So several years ago I got a biscuit joiner for Christmas!

This little tool has allowed me to make a few things I otherwise wouldn’t have been able to make. It allows me to join together several boards to make a larger board. A necessity if you want to make benches or table tops.

Let me give you a few examples….

The first was this bench….

I was able to join together the three 1”x6” boards and the ends to make a strong top.

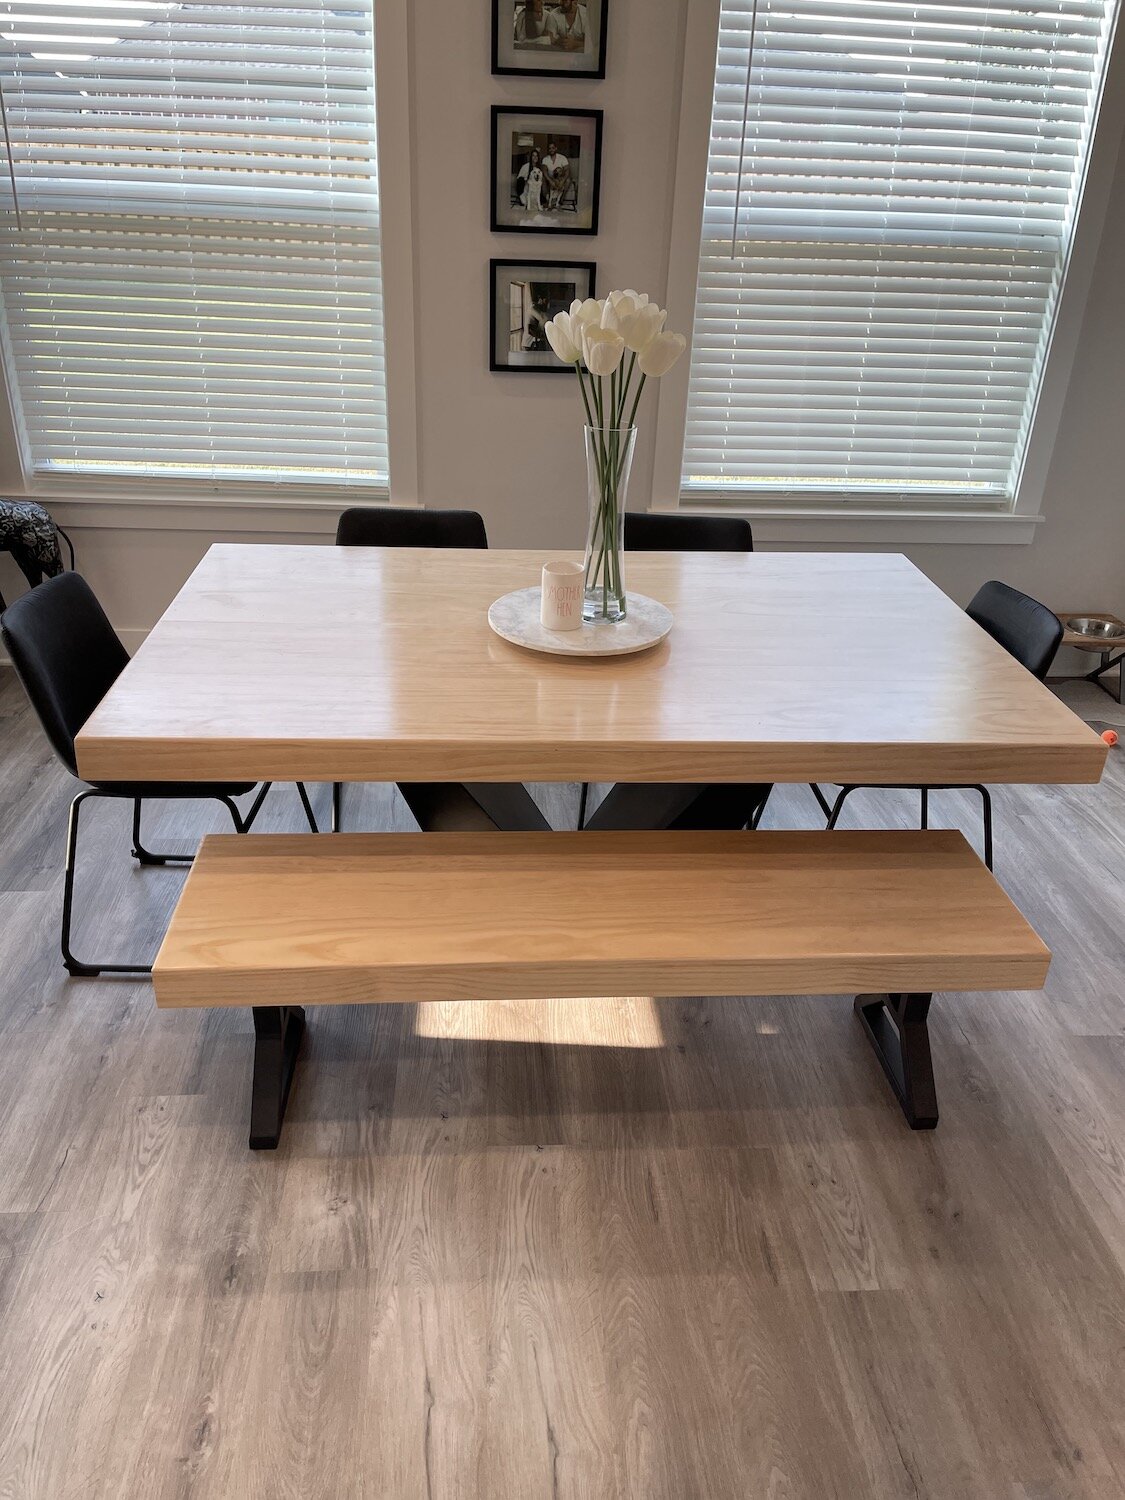
Brandon and Taylor wanted a plain pine table and bench for their new house. I guess they could have spent a fortune like we did for a custom made table but that isn’t really an option for a young couple.

So we went to Lowes, picked out some straight, nice boards with good grain and used the biscuit joiner, glue and clamps to create a table top and bench top.

IMG_1329.jpg

After some serious construction, a LOT of sanding, a polycrylic clear coat, and some nifty bases, they have an AMAZING table and bench!

IMG_1146.jpeg
IMG_1148.jpeg
IMG_1149.jpeg

Last year I went looking for some shelving…I found one I absolutely LOVE. It was from the same company that built our dining table so I knew the quality would be amazing….but the price tag was just a tad too steep!

I love everything about this shelving unit….the look, the style, the quality.

So I went looking for a less expensive option. I found one I thought was okay on Overstock.

Waaaay less expensive…and for obvious reasons. The frame is metal vs welded steel and the shelving material is MDF vs. beefy solid wood.

The look and style is very similar…almost identical sizing…but the MDF shelving HAD to go. I knew immediately I wanted to replace them with solid walnut.

It has only taken five months to get around to this project.

The biscuit joiner was a life saver.

Walnut is a pretty expensive wood…and finding pieces wide enough for the needed 12” shelving was pretty much impossible (without a serious outlay of cash.) What I did find were 7”ish board we ran through my son’s table saw and joined together….

IMG_1740.jpg

Using a biscuit joiner is NOT difficult…just take your time and follow the directions.

One little trick I did learn was how to mark the joints so they lined up perfectly. Just put your two boards together then run a mark across the joint….

IMG_1742.jpg

Then just line the joiner up with the mark and plunge away…the joints will line up perfectly!

Always dry fit everything to make sure it all lines up perfectly before you apply glue….

Apply glue and clamp….

IMG_1745.jpg

Joiners are NOT difficult to use. Just follow the directions and watch lots of YouTube tutorials.

I sanded each piece with 220 grit sand paper, tack cloth and sealer.

I used Waterlox as a sealer…no stain…same stuff I used on my kitchen cabinets and I have been extremely pleased with it!

BEFORE

BEFORE

AFTER

AFTER

BEFORE

BEFORE

AFTER

AFTER

BEFORE

BEFORE

AFTER

AFTER

I was able to take a shelving unit fit for a dorm room and turn it into a beautiful accent piece!

LOVE!

Another MCM dresser makeover!

This is not a dresser…this is a chest of drawers. I think there is often confusion, and I am the world’s worst at referring to a chest of drawers as a dresser.

There is a difference!

But seriously who cares…lol!

Regardless of what you call it, it was A MESS! But oh the potential.

My very first love…MCM pieces. It would take a month of Sundays to link to all the MCM pieces I have refinished…just search MCM or mid century on this site. Truth be told I would have kept every one of them if I didn’t have a fear of being featured on Hoarders. So I find pieces I love, give them a good little makeover and am sincerely happy when someone else gives them a good home.

In spite of all it’s flaws, I loved this piece. It had the normal wear and tear, a seriously cruddy finish, a chipped wood handle (aren’t those wood handles AMAZING!!!!) and what I THOUGHT was some stains around the hardware on the top drawer…turns out it is a beautiful wood inlay. But you couldn’t really tell because the finish was so icky. (The missing knob was in the drawer…yipeee!)

Let’s be honest, we will all have a pretty worn finish after 60 years on this earth!

My first thought was to paint the wood handles an accent color so I could repair the chip. My daughter suggested I just strip them first. So glad I listened to her. I used this process to strip the drawer fronts, handles and legs…the old stain came off the wood handles and revealed a beautiful white wood (oak, teak? Couldn’t tell)….LOVE!!! I sanded the chip down…and you know what, I can live with it….it is obvious it isn’t the way it is suppose to be but HEY…this is a vintage piece and vintage pieces are going to have a few boo-boos!

The drawer fronts and base were stripped and oiled, the cabinet was given a KSTP treatment (Kilz, sand, tack and painted with white high gloss enamel)

(After I took the pictures, I saw the VERY fine over spray on the top drawer…curses…a little mineral spirits cleaned it right off!)

Personally, I love the high contrast of the wood handles and walnut veneer. The Lane Acclaim tables I collect have the same stark contrasting wood detailing when I refinish them…LOVE!

Often vintage pieces would have been stained and finished so all the differing woods and the entire piece had a “uniform” look and the grain detail was toned down a bit. I say LET IT SHINE BABY!!! If you are a “purist” and want vintage pieces to reflect their original state, you probably don’t want to use the processes I use to refinish pieces!

I am all for exposing the grain and the natural color of the wood.

And I am all for bringing the old pieces back to life!

Modifying a Dillingham MCM dresser....

So often I buy mid century pieces fully intending to clean them up and sell them. But then, well, I don’t. Inevitably I fall in love with them or one of my kids does (just search mid century on this site…you will see)

Such was the case with this mid century walnut Dillingham dresser….

It did have a few boo-boos…a broken corner piece I was able to fix with a little wood glue…

A tiny bit of chipped veneer I decided to ignore…

And of course the finish was a little worn and tired looking and needed some freshening. First I tried a little Restor-a-finish….

You can kind of see the difference…the right side has been wiped down with Restor-a-finish.

It helped a tad but in the end I scrubbed it down with mineral spirits and steel wool and applied 2 coats of tung oil finish…brightened it right up and blended all the scratches and wear…after all it is a 50+ year old piece…it’s gonna have a few nicks and dings. But again, nothing terribly glaring.

Even though the issues were relatively minor, I hesitated to sell it. I considered painting the sides to disguise the biggest issue…the broken corner.

Enter my kid! Matt absolutely LOVED it and wanted it for an entertainment cabinet!

The dark walnut matches his vintage Lane tables perfectly and like me he has a real affinity for MCM pieces.

So I went to work modifying it for his needs..specifically he needs a place for his turn table.

(Side note…I get tickled at the newest generation of vinyl lovers. People my age remember how thrilled we were to get away from bulky old record players and vinyl records that scratched and skipped. Cassette tapes and walkmans and boom boxes…life changing! Now the younger generation have circled back around to “vinyl” and think they have discovered the greatest thing since sliced bread…HA!!! See, if you live long enough, it all comes back in style!)

So…how to modify this dresser without changing it too much.

I decided to make the bottom two drawers one deep drawer. That entailed removing the face front of the middle drawer and attaching it to the black face frame and bottom drawer…creating what appeared to be two separate drawers…but is actually just one deep drawer.

Confusing I know…let me see if I can show you what I mean in pictures.

First I had to cut the face frame in half to detach it from the cabinet.

Since it is a laminate material, I knew I needed to tape it first to keep it from “splintering.” ALWAYS tape laminate before you cut it and draw your cut mark on the tape!

I could have used a skill saw with a trim blade to make the cut. But I knew a skill saw wouldn’t work to cut the little shelf inside that separated the two drawer spaces. So, darn, I had to buy a new tool…I hate that when that happens! (NOT!)

I have a small Dremel that has similar functions but this little guy is pretty heavy duty…and it worked like a charm!

Next I used my Kreg jig and glue to attach 1x2 pieces of oak to both edges of the face frame. The drawer fronts and face frame only over lapped by about 1/8”…attaching the oak allowed me to secure the face frame to the drawer fronts with glue and screws.

We used a hole saw to cut a hole in the back of the cabinet to feed electric wires through.

That was pretty much all the modification this dresser needed to turn it into the perfect entertainment cabinet!

In the photos you get a peak of a few of the changes Matt has made to his house since he bought it a year ago…the painted fireplace I shared here and the new tile I haven’t shared yet.

I have promised for A YEAR to share a few of the projects he has completed on his house…he opened up the entry, painted his kitchen cabinets and installed glass cabinet doors, built open shelving in his kitchen and laid new tile in the entry and around the fireplace. He has even built a little storage shed! I am so proud of his “projecting” so while I was there taking pictures of his new entertainment cabinet, I snapped a few of his entry and kitchen and I PROMISE to share those next week.


A mid century chest of drawers makeover...Part one!

While my master bathroom remodel is still progressing (yea!) I finally found time to tackle an amazing mid century dresser I found!

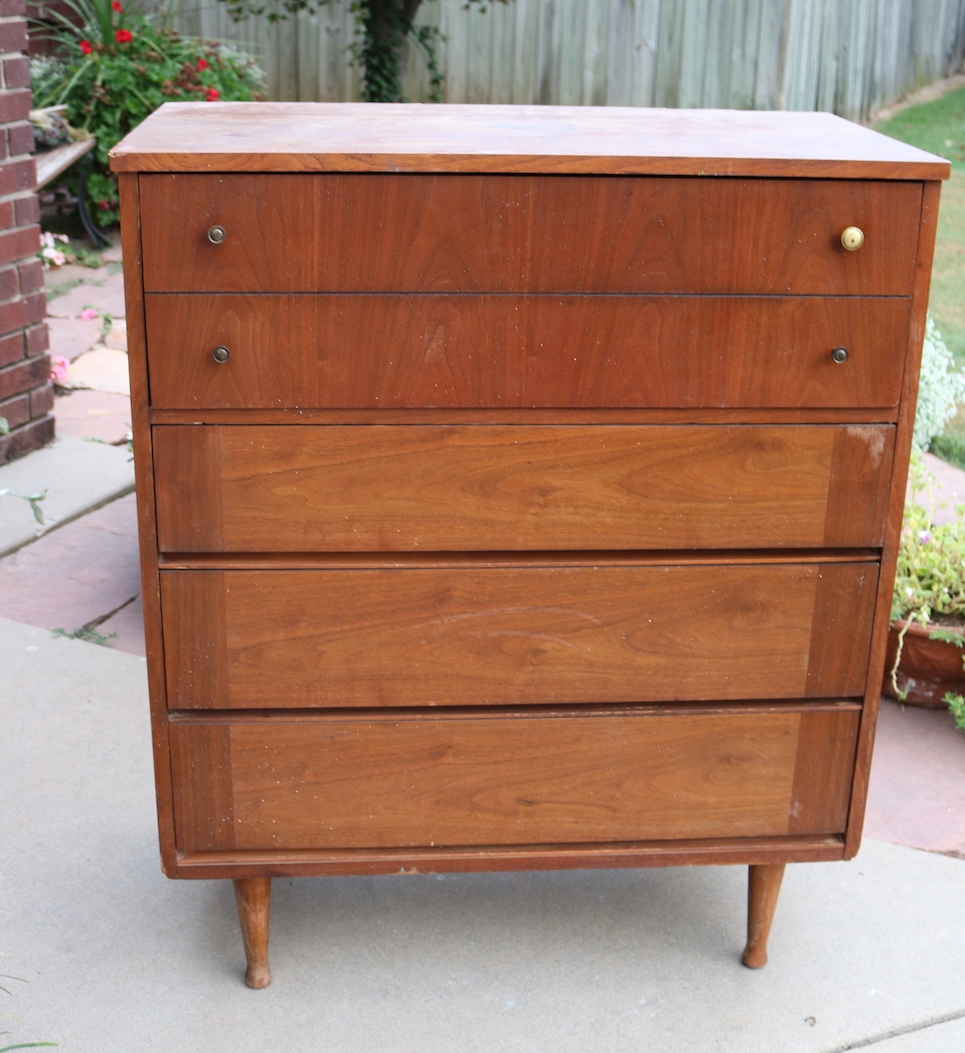
This chest of drawers was pretty shady. Nasty finish, chipped veneers, busted veneers, mismatched hardware…just not something you really want in your home!

It had many of the problems you may encounter with old pieces so it is the perfect project to share a little “step-by-step” tutorial on turning a trashed dresser into something you will want front and center in your home!

First, there was a busted drawer! (Which reminds me, ALWAYS number your drawers on the underside as you take them out!)

This is NOT a huge issue.

I can not stress enough the importance of making proper repairs to any piece before you start making it pretty. Glue and clamps people…NOT silicone, not screws, not nails…just plain ole’ wood clue and clamps.

This one really wasn’t too bad…there have been some I had to completely tear apart and rebuild!

One drawer was missing the wood slide like this one…

Kinda necessary if you want your drawer to not be all whomper jomped. Again, no biggy. You can buy slides online but I used some scrap 1/4” plywood and scrap trim to make one. Again, glue and clamps and good as new!

TIP: If you have a drawer with wood slides that seems to be difficult to pull out, try rubbing a wax candle on the wood slide. If you have a metal slide, make sure it isn’t bent…if it is, just take a pair of pliers and manipulate the metal.

Also, if you find the drawers to be a tad smelly, first wipe them down with ammonia and water, then spritz them with vinegar water and let them sit. Truthfully, I have found a few that smelled no matter how well I cleaned them….in that case I taped off the fronts and painted the interior and exterior of the drawer with Kilz and latex paint (here is an example!)…sometimes you have no choice!

Next up chipped and scratched veneer.

A lot of the older furniture is veneered. If it is chipped or scratched, take the time to remove any loose veneer and repair it with a little wood filler.

The first few coats don’t have to be pretty…you just want to make sure you fill all the boo-boos well. Don’t rush this process…it may take two or even three coats to get a smooth repair!

In this case it took two coats (sand between each coat) and a lot of sanding with a fine grit paper (220) to get a smooth repair, but in the end it will be worth all the effort!

I have found that after I prime and sand, I can often see how well the “patch” will look and can add more filler and do more sanding if needed. If it looks and feels rough after priming, it’s going to look bad with paint…so do a little more work on it after the primer if needed!

My plan originally was to strip and oil the top since it is a walnut veneer, but I did a number on it dragging it out of my truck…so repair and paint it is.

I would like to stress (again!) the importance of sanding and FEELING! You want it smooth to the touch. If you can feel it, you will see it when you paint it! So sand it smooth.

The veneer on the drawer fronts were in mint condition…the finish just looked old and “muddy.” I removed the mis-matched hardware and then stripped the old finish (using this process). It took me less than 30 minutes to strip all four drawers.

The two on the right have been stripped…the two on the left have not…as you can see, they weren’t THAT bad, but this quick step brightens the color and really allows the grain to shine.

On veneers it is important to use chemical stripping as opposed to sanding. Veneers can be very thin and if you sand through the veneer there is no salvaging it…you will have to putty and paint!

After stripping them I applied three coats of Formby’s tung oil finish. I love this stuff and it is my “go-to.” No stain, just a clear finish!

(It was pointed out to me by a kind reader that the original Lane Acclaim tables came with a “toned lacquer” finish….true of many mid century pieces. That may be the case but again, this is the process that works for me and the one I prefer…do your research and do what works for YOU! I prefer the “easy to wipe on and freshen in the future” tung oil finish over lacquer)

I also stripped and oiled the legs since they were in pretty good condition. Same process, same finish.

If your drawer fronts have MINOR chipping like this one did, I would suggest carefully removing or glueing any “loose” veneer (I use a toothpick to slide a bit of glue under any loose veneer and wipe the glue residue with mineral spirits) and then apply the finish. As my daddy use to say, you will never notice it on a passing train! Any time I can salvage and feature a beautiful walnut veneer, I do!

Again, my apologies…this will have to be one of those “to be continued” posts. We had rain and a cold front roll in (yea! it really is fall now!) and since I don’t have a nice cozy shop I am at the mercy of the elements.

Priming, paint and reveal will have to wait until next week!

This process may SEEM daunting and time consuming but in the end it is all worth the time and effort to bring these sturdy old pieces back to life!

Take your time and do it right and you will have a piece fit for another lifetime of use! Hopefully next week you will get to see the results of all this prep work!


Another Drexel Accolade addition to the family....

It has actually been in the garage for months...but when I needed a large piece in my space at 410 Vintage Market and dug it out,I couldn't bring myself to turn loose.

A Drexel Accolade dry bar/server. The top actually flips open.

It isn't the first piece I bought for resale that wormed it's way into my heart...no secret that I love mid century pieces.

But this Drexel Accolade bar is more of the "Hollywood Regency" style. Identical to this little Drexel side table I painted with a high gloss lacquer and love in my den....

There is a good chance I will paint it if I decide to keep it...for now I have shined up the brass hardware and will leave it at that.

Over the years I have snagged some amazing bargains at auctions and on Craigslist...a little DIY magic and they are stunning additions to any home!

This Drexel coffee table....

My growing collection of mid century dressers...

This one is Matt's...I just don't have any more room!

My never ending collection of side tables!

I started collecting Lane Acclaim tables years ago...I think between the kids and I we are up to 10! That doesn't include the 2 walnut Lane coffee tables and the end table I just refinished for Katie and Matt!

Chairs...

Odd little bookcases are always fun!

If you walked through my home you might think I lean more towards the "traditional" side of home decor at a glance...but all these pieces have blended in to created a cohesive "eclectic" style. This "style" of home decor allows me to infuse pieces I love without worrying too much about whether I am breaking a "decorating rule" for a specific style!

So...back to the amazing Drexel Accolade console/bar...

In my opinion, there is too much "wood tone" in this space...I absolutely love the wood grain on this piece but there has to be a good balance...it just doesn't feel "balanced."

So there is a good chance that IF it stays, it will get painted. Again, that is a big "if." I think I have had no less than 5 different buffets and hutches in this space at one time or another and I always end up moving them out and moving the table back against the wall...as I mentioned before my toes tend to find anything out of place, and since the dining table has been against the wall for the better part of 19 years, it may not work well in the middle of the dining room where it REALLY belongs!

We'll see...that is one of the beauties of learning to DIY furniture...you can buy it cheap, paint, upholstery or refinish it and promptly move it out if it doesn't suit your needs. Without the guilt of having to live with something you hate because you paid a fortune for!!!!

OR it can find a permanent home where it can shine for another lifetime!

Just ANOTHER mid century dresser!

I can't help myself...when I see one, I just gotta have it!!!

A mid century bedroom set...Fashion Trend by Johnson Carper. I couldn't find a maker's mark anywhere on the set so I googled "mid century dresser" and found a picture of one like it!

(Look at the curves on this lady!)

I ended up having to buy the entire set at an auction...dresser, chest of drawers and full size bed frame. I sold the chest to off set the cost of the dresser...which is the piece I really wanted! I have a full size bed in  Mitchell's room so I might use the bed frame in there.

I decided not to strip and oil the drawers...they really are in excellent condition....I wiped them down with Restor-a-finish just to clean and brighten a bit. I painted the "box" (KSTP...high gloss white) only because the top was laminate... I did that with Matt's dresser and I love how it turned out!

My original plan was to put the new dresser in the guest room until I get this one back from Katie in a year or so...

But then I got to thinking...why would I hide a beautiful piece like this in a guest room? 

So I took the dresser out of my room and put it in the guest room and put the new one in my room!

LOVE!!!

The only other thing I have added to my "proper" guest room is this little rattan table (bought two and sold one) and the magazine rack from the living room. 

Again, you will not find AFFORDABLE new furniture that is built as well and with woods like walnut, teak, rosewood and mahogany! There is a reason vintage and antique furniture have managed to survive decades of use!

When I walk around my house and look at some of the beautiful vintage pieces I have collected I am amazed at just how little I have paid for them. Keep in mind MOST were in much need of a little care and attention but if you are willing to roll up your sleeves and do the work, you can create a home filled with beautiful pieces too! 

That is why I have this blog...to show you just how easy it can be!!!

Stop drooling and start doing!!!