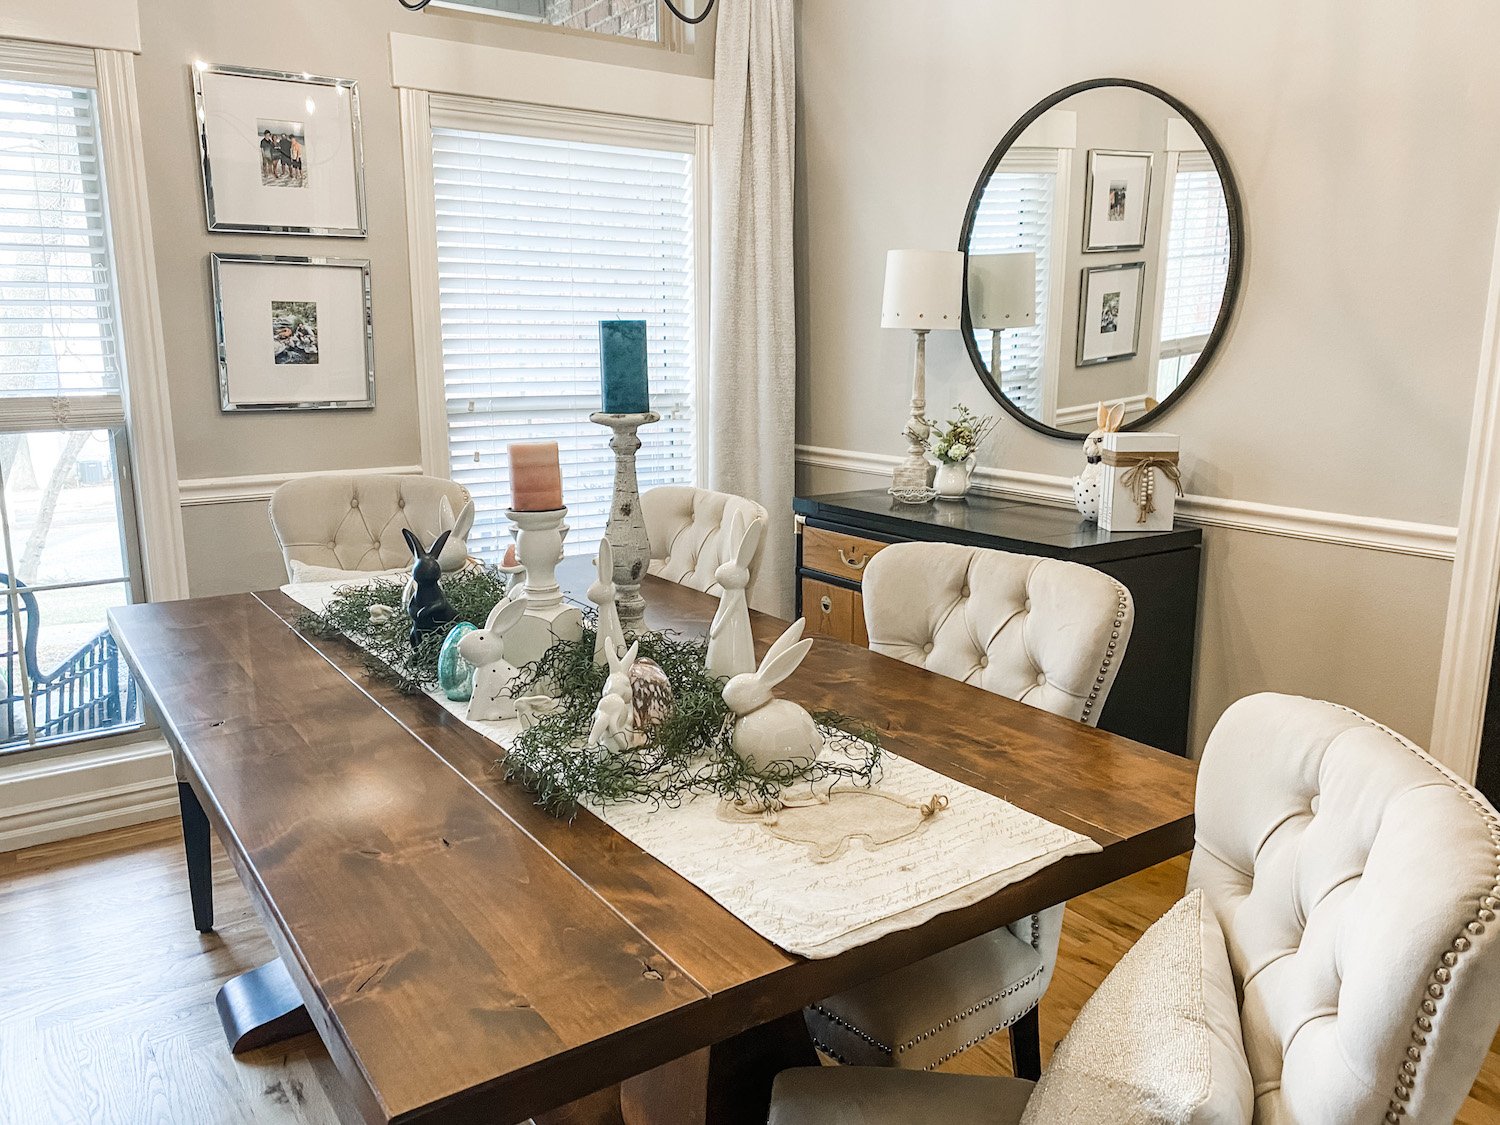
The "new" Drexel server....

I shared my plan for this wonderful vintage piece HERE….

I know purists cringe when people even talk about painting vintage pieces.

This is a prime example of “doing what you love.” If a piece will be more loved and treasured in a different state then go for it.

I painted the first one I found years ago and have had it in my dining/breakfast room…

…I recently swapped it out for the china hutch (featured HERE) and sold it.

Now this piece, a Drexel Accolade, has some value as is….if you do a little research you will find they sell for hundreds. But for me “hundreds” is not a value that will keep me from giving a piece a little makeover. If we were talking tens of thousands, yeah, no.

I also have a Drexel nightstand I refinished and shared HERE.

I planned to sell this piece after it’s makeover but I have moved it into my dining room and now I am kind of liking it…hum…guess we will see.

So…what did I do to give this thing a little more appeal?

First, I removed all the old hardware and brightened it up.

The hardware on these pieces are solid brass but after a few decades of neglect it is hard to tell. You can tell if something is solid brass with a magnet. A magnet WILL NOT stick to solid brass.

If the hardware is solid brass, the only way I have found to really brighten it up and get the decades of grime off is with Brasso and SOS pads.

Coat each piece with Brasso. I use a little chip brush to coat the pieces. After that sits for awhile, take an SOS pad and scrub away. You may need to repeat this process a time or two. I also use an old toothbrush to get in all the nooks and crannies.

After all the pieces are really clean, I scrub them with “Never Dull.” It seems to get the last layer of grunge off and gives them a little bit more “brightness.”

Not the easiest or fastest way to clean brass hardware but I just don’t think you can beat beautiful brass hardware.

Now, if the hardware is NOT brass and you want to spruce it up (without the cost of replacing) you can always give it a good scrubbing, prime it with metal primer and then paint it with spray paint. (TIP: put the screws back into the screw holes so that you don’t get paint in the threads.)

I shared another brass hardware restoration project HERE.

So, the hardware is done. If you find a Drexel piece and it is missing any of it’s original hardware, you can find replacements on Ebay…but be prepared to pay dearly for it! Each pull can range from $30 to $110 EACH!!!

I decided to strip and oil the drawer and door fronts. On the last Drexel makeovers (the bedside table and server) I painted the entire piece. This time I decided to shake things up a bit.

While I like wood grain, I am not a huge fan of oak. No biggy since, again, my original plan was to sell this piece. To highlight the pretty wood grain, I stripped the drawer fronts and doors using my trusty 1/2 and 1/2 mixture. 1/2 acetone, 1/2 lacquer thinner. HERE I posted a pretty lengthy tutorial on how to use this mixture to strip even the most stubborn finishes!

After stripping off the old finish I gave the drawers and doors a little mineral spirit wash, lightly sanded, wiped with tack cloth, then applied 3 coats of tung oil finish…my current favorite being Waterlox.

After that had dried and cured well, I taped and papered the doors and began prepping the cabinet for paint. (I removed the drawers to strip and oil them!)

I didn’t need to paint the inside of the cabinet so I taped that off, along with the black laminate under the flip top. I primed with Bullseye primer, then sanded smooth with 220 grit paper and wiped it all down with tack cloth.

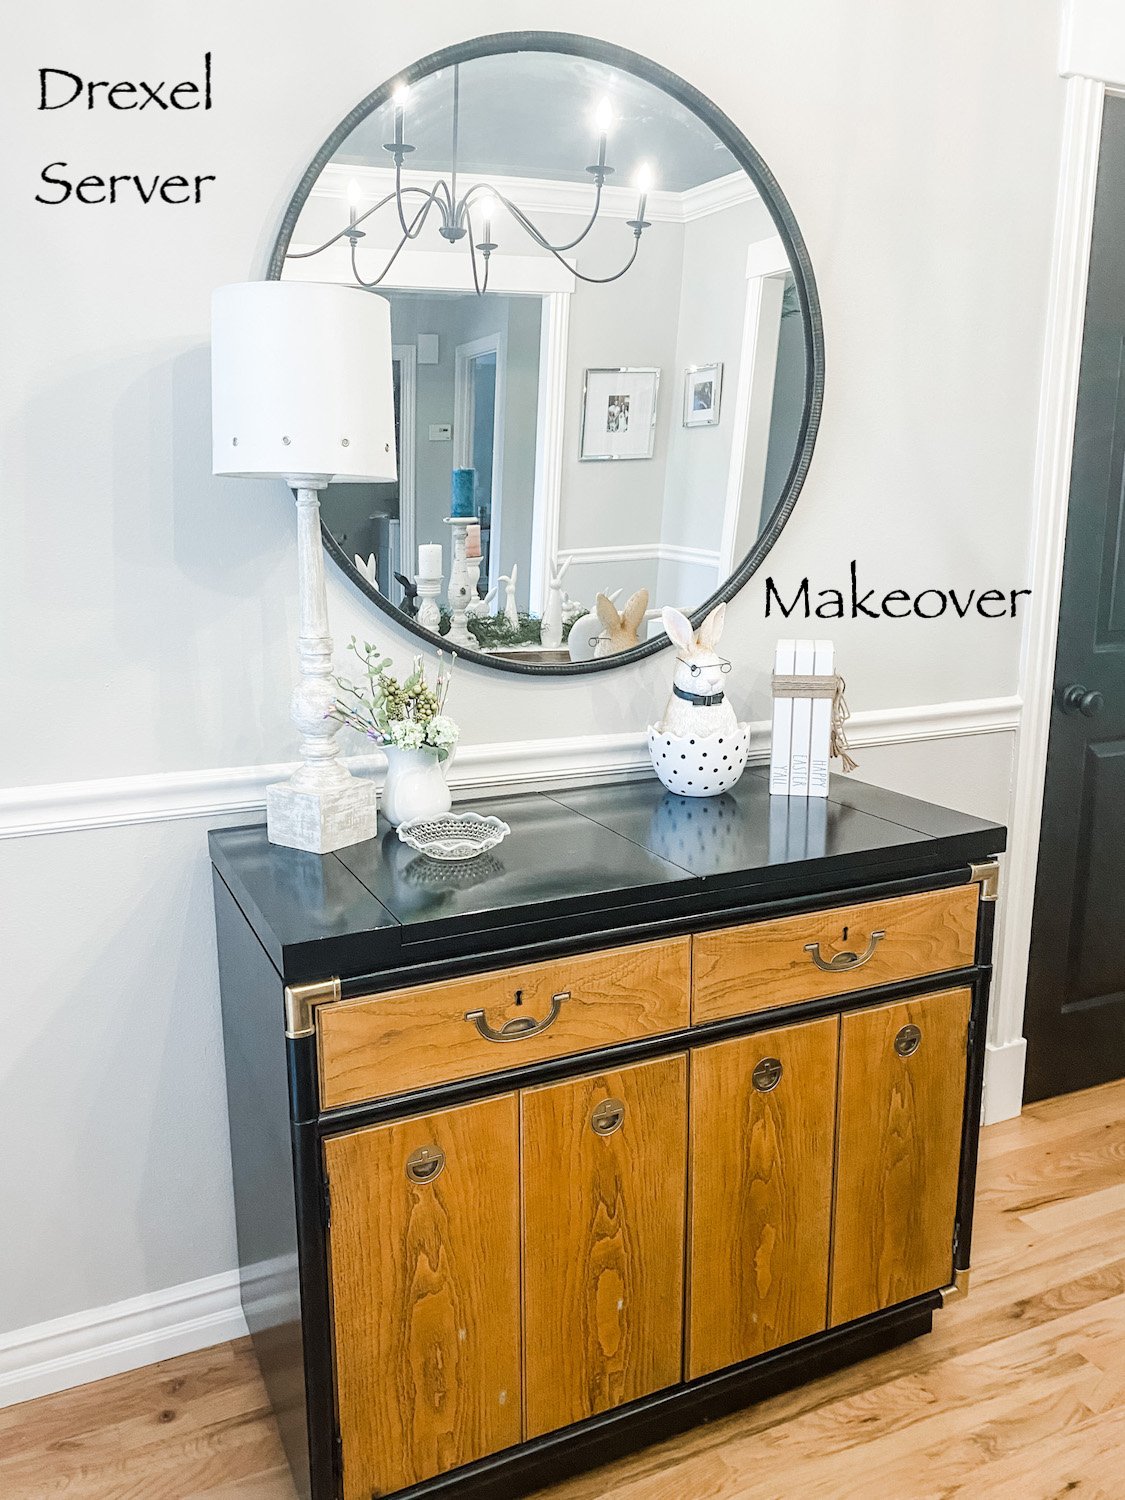
I decided to paint the cabinet with high gloss black lacquer spray paint. I am obsessed with the high glass finish on these pieces. I just think it really makes a huge impact, especially with the bright brass hardware.

(You may notice I am all decked out for Easter…that is my new thing…decorating for each holiday/season. Next up will be Memorial Day/4th…patriotic stuff…then “summery”…then fall…then Christmas…then Valentine’s and back to Easter. See what happens when you “retire.”)

The trick to a flawless spray paint finish is LIGHT COATS…lightly spray, let it dry, spray again. It may take 3-4-5 coats but it dries quickly and in the end you will have a beautiful finish. If you go heavy handed you will have drips and runs and will be hugely disappointed!!!

Also pay attention to the temperatures and humidity. If it is too hot or too cold, or if the humidity is really high, you may have issues!

HERE you will find some additional tips on how to property paint furniture…very helpful!

After the paint had properly cured (gave it a good day or two) I replaced the hardware and OH. MY. GOSH!!! I seriously love this piece. Even though I am not a huge oak fan I am really loving it!!!

So the past few weeks I have been tackling a MAMMOTH project. Maybe next week I can share it. Hint, in entails A LOT of the thing I hate most….but man will it be worth it…I think…I hope….

Board and Batten in the breakfast room...

This is a simple project I have wanted to complete from day one.

Board and batten in the breakfast room.

As I have said before, there are TONS of board and batten designs and tutorials on the webisphere. Watch videos, read blogs, search Pinterest…find a design you love and a tutorial that makes the most sense to you.

So here is a little before and after.

Before….

Not totally offensive but lacks a little “character.”

After….

Simple project for me since I have done this a time or two. (Check out the guest bath, the entry in the Lankford house and the Bogey house. )

You might notice another little change…the china hutch.

Originally I had the awesome mid century Drexel buffet but I thought I would change it up a bit. I read somewhere china hutches are making a comeback. I can see why…pretty and functional.

Eventually I would like to add some art on each side of the hutch…maybe some botanicals.

My original plan for this piece was to repair it, paint it and sell it but honestly, I kind of like the look in this room. I FINALLY have a place to display some of my heirloom china that has been boxed up and in storage for a year and a half!

Before…

After….

Next week I will share the steps I took to give this piece a little facelift! Not difficult and as you can see it made a HUGE difference!

Until then….

Home office makeover reveal...

Last week I shared the need to give my home office a little “character and design appeal.” (You can go to the link to see the “before.”)

This week I will share a few changes I made…not huge changes but enough to give it a little be more appeal.

It wasn’t until I was working on my “Bogey Home Tour” page that I realized I had done absolutely nothing to this room. Not a huge deal but, as I mentioned, you can see this room from the main living area and it is right off the entry…so it really needed a little something.

The first step was to purge and organize. The closet is great for storing my small seasonal decor (Valentine’s, Easter, the 4th, etc.) and office supplies but it could stand a little purge and organization.

It had a mismash of boxes and baskets and binders so this is one of the few things I splurged on…matching boxes for receipts and such and new binders. Then it was just a matter of organizing everything else…mostly the small seasonal stuff. I even organized all the decorative candles I switch out for every season on my dining table….

After purging I painted the walls and trim. Three of the walls and all the trim were painted white…just plain ole’ white. The wall I decided to do an accent feature on was painted pink. Yep, pink.

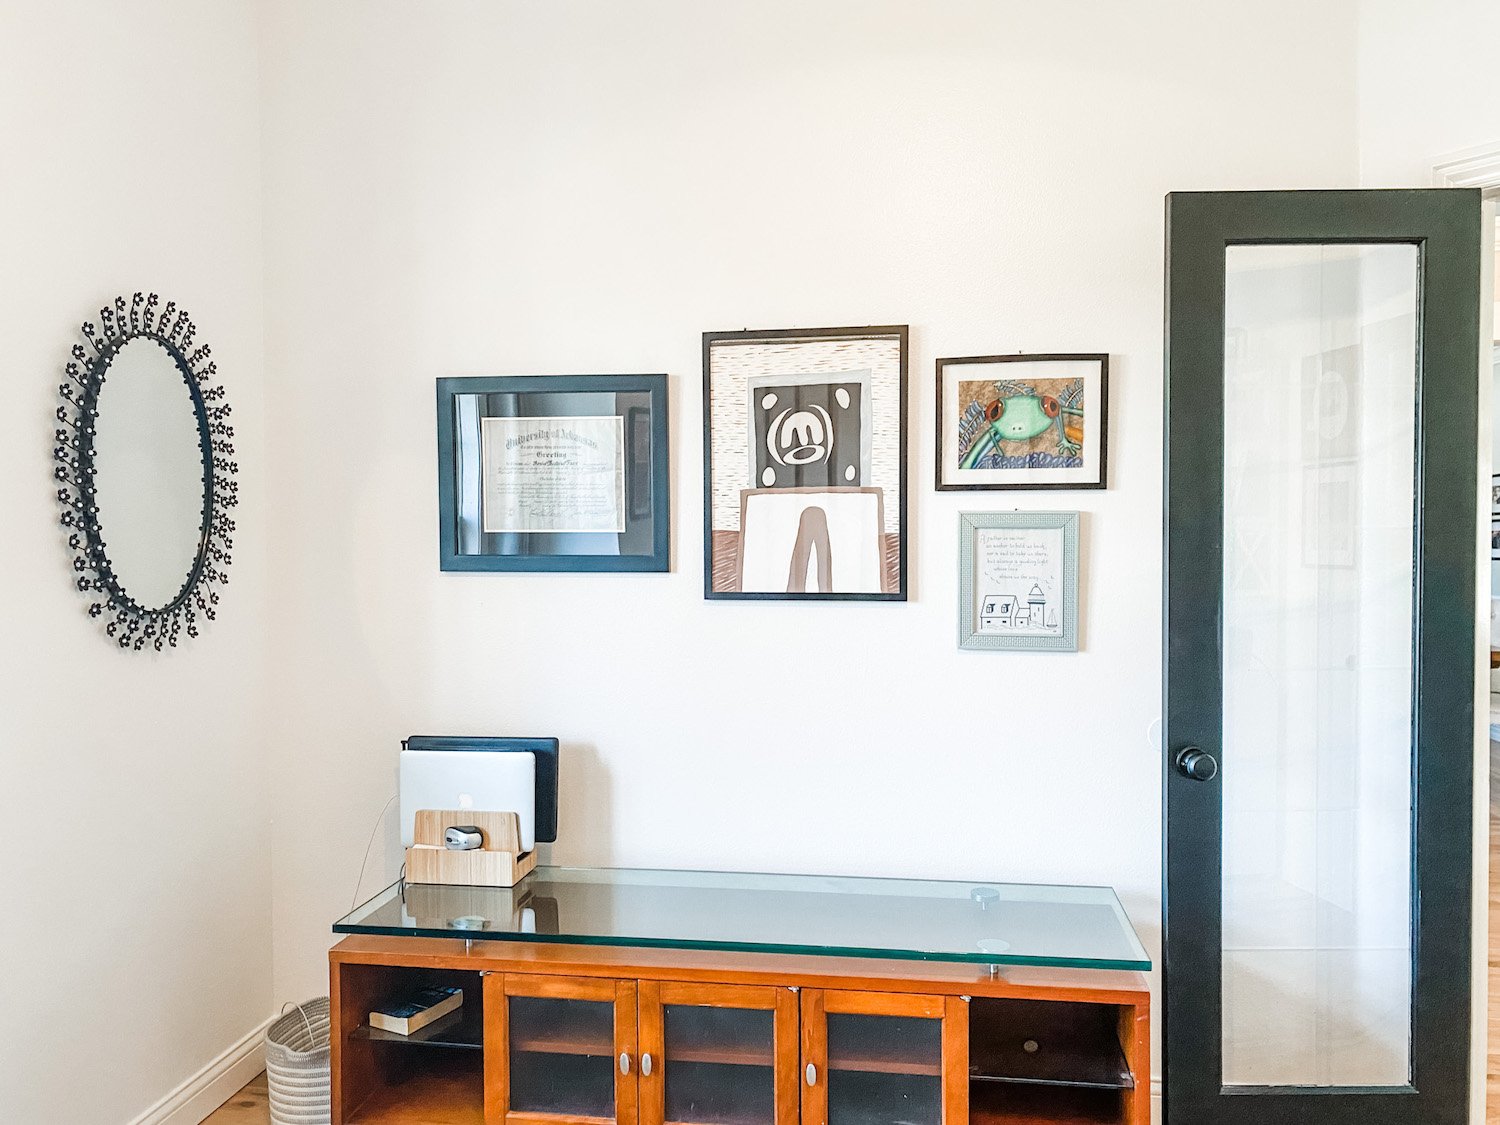
This mess of a wall and credenza had become a dumping ground. I removed all the “unnecessaries,” changed up the pictures on the wall and organized the laptops in THIS little gem.

Eventually I will get another piece to put here but for now, this works.

I also have some leftover walnut and may make some floating shelves or a picture ledge for this wall…maybe…we’ll see.

I still like this shelving/cabinet….

…it just desperately needed to be purged and organized. I debated putting the printer inside the cabinet, but we really do use it a lot. All the paper, business checks and cartridges are stored in the bottom. I may eventually add a little more greenery (aka fake plants) but for now this will suffice.

I really wanted to put a glass top desk in front of the window, but as you can see, this is Cleo’s lookout chair…she spends most of her day in this chair guarding the house. Okay, she spends most of the day SLEEPING…but still…

The only real change in this little window space (besides paint) was the removal of the blinds. The window had blinds when we moved in that have never been closed…so I just took them down. I rehung the curtains…they never get closed but they “dress” the window.

I may eventually change out the big ugly brown leather chair for something a little more sleek and modern, but for now Cleo seems perfectly comfortable and content.

I will also eventually change out the rug but for now it matches the chair. This is one of those times when I would love to do a whole room makeover…new chair, new rug, new credenza…but I am doing what needs to be done with as little expense as possible…baby steps!

As I have said time and again, sometimes our design “wants” are dictated by pets and kids…and of course finances. You may WANT a white couch but that’s probably not a good idea if you have a toddler running around with a sippy cup of juice or a large black dog that likes to run around in the mud. (BTW, if you think you will finally be able to get that beautiful white couch after the toddler becomes a kid or the kid becomes an adult, forget it. )

Now, the desk and accent wall….

The top of the desk needed a good purge. There really was nothing on there that couldn’t be put in a drawer or filed away…out of sight. I did buy one acrylic organizer for the top just to put bills and such in. The rest got cleared off and stored away. (Remember, I open my mail by the trash can…trash goes in the trash, mail for the kids goes in the mail holder by the front door and anything that needs my attention goes on my desk. No piles of mail laying around screaming for my attention…I take a few minutes EVERY day to deal with the mail as it comes in. )

I recovered the seat of the office chair with some pink velvet I had on hand.

Now, the pièce de résistance. The accent wall. HERE I talked about “finding my inspiration” for this room. After weeks of cruising the internet, I finally decided that this was the look I love.

And I do love it!

Next week I will share a full tutorial on this wall. Tutorials are usually not my forte’ but hopefully I can make sense out of how I created this “visual interest.”

As with all DIY projects, I firmly believe it all comes down to confidence. No, I had never created a wall like this…but I had no doubt I could give it the old college try. Succeed or fail, I would learn something. I think I succeeded although I will admit there are a few things I might do differently if I did it again (which I probably won’t!) But that is the great thing about sharing what I do…you can learn from my challenges (never say mistakes!)

Until then….

Drexel Accolade Makeover...

An entire year…A YEAR!!!! That is how long this Drexel buffet has sat in my dining room in it’s original state because I couldn’t pick a stinking paint color. I may be able to paint and refinish and upholstery…but picking a paint color or fabric is TORTURE!!!!

I LOVE the white lacquer finish on this little side table….

….and I love how the bright brass hardware just POPS on the white lacquer but I really wanted to do something different.

But I could NOT make up my mind. I did a lot of research and most of the painted Accolade pieces are white or black…and honestly I did not want to do black.

Hum….

I found a paint color I am madly in love with!!!! It is actually a Krylon “chalky paint” and I have used it on several pieces and I just LOVE the color…Krylon’s Anvil Gray. While it has “gray” in the name it really is a true deep, rich navy. And it sprays on beautifully!

There was one problem with this paint for this project…it is super flat…like most “chalk” paints. I desperately wanted a “high gloss” finish so I tested a few clear coats over the paint to see if I could find a good gloss. I tried a new product (at least to me), Krylon Triple-thick Crystal Clear Glaze. It SAYS it is a “glass-like coating” and “superior high-gloss finish” and it is as good as advertised.

The finish is super high gloss and exceptionally durable…I am VERY pleased.

So…

I changed up the art in the dining room over a year ago and I still love it. I still love the red fabric I used on the chairs. I love the draw leaf table. If you search “buffet” or “dining room table” on this site you will see few last long around here….but truthfully, I think I am finally loving the “look” of my dining room…so these pieces may actually make it a tad longer.

Again, no secret to cleaning brass….lots of brass cleaner, SOS pads, and elbow grease…but worth every bit of the work!

I have already stocked it with my holiday and seasonal dishes. Pretty with a purpose…my favorite. But as I said, buffets don’t last long around here so we’ll see how it fairs.

I think I have mentioned before that I DO NOT have a green thumb when it comes to indoor plants….so some of you may be shocked by the massive peace lily.

A little side story…we went to an auction…they were selling the plants (yes, they sell EVERYTHING!) Nobody would bid on this big ole’ monster so then they threw in a monster pothos plant…I’m talking HUGE!!!! My youngest daughter has been sprouting “cuttings” for her apartment so I knew she would love the pothos…so I ended up buying them both for ONE DOLLAR!!! No kidding….a dollar for two huge plants. She didn’t want the peace lily so I stuck it in my dining room and other than dump my leftover night time water in it every morning, I pretty much ignore it.

And you know what…it THRIVES. It is growing, it is healthy and it is constantly blooming. Go figure!

Now I want to share a little issue I am having with my beloved Kilz…I had this issue sometime back when I was using white lacquer…so honestly I attributed it to the paint since lacquer tends to be a “hot” finish.

But I had the same issue this time, and I was using plain ole’ spray paint.

I call it “alligatoring.”

I cleaned the pieces, sprayed on the Kilz, sanded smooth, then wiped it down with tack cloth. When I sprayed on the paint, it “alligatored.” Curses!!!

I thought MAYBE the tack cloth left a weird residue, so I sanded the spots smooth after they dried well, reapplied Kilz, sanded and then just wiped it down well with a rag…another coat of paint…same problem, just in different areas. The entire piece alligatored randomly. WTF!!! Temperature…nope…humidity…maybe. But I had the same problem when I painted on a drier day. So who the heck knows. Like I said, I had this problem sometime back on another project.

The Kilz is what is actually crackling…not just the paint. I contacted Kilz and they swear they didn’t mess with the formula and were as stumped as I was.

My solution….well I had to sand the entire piece down, paying close attention to the areas that “alligatored.” After everything was smooth and clean again, I used Bullseye 1-2-3 Primer, let it dry well, sanded, and tacked. Sprayed on the paint and presto-bingo…perfect.

Kilz was kind enough to send me a replacement can of primer. Yippee…somehow I guess that is suppose to make up for two days of grief and cursing.

So now my “KSTP” process will become “BSTP” …eck…not really a good acronym…but I hesitate to use Kilz if it really is the only common denominator in this little disaster. Since no other factors seemed to affect the out come, I can only assume it is the culprit.

Who knows…but from now on I can’t say that Kilz is the be-all end-all of primers when painting furniture.

Sorry guys!

Another MCM dresser makeover!

This is not a dresser…this is a chest of drawers. I think there is often confusion, and I am the world’s worst at referring to a chest of drawers as a dresser.

There is a difference!

But seriously who cares…lol!

Regardless of what you call it, it was A MESS! But oh the potential.

My very first love…MCM pieces. It would take a month of Sundays to link to all the MCM pieces I have refinished…just search MCM or mid century on this site. Truth be told I would have kept every one of them if I didn’t have a fear of being featured on Hoarders. So I find pieces I love, give them a good little makeover and am sincerely happy when someone else gives them a good home.

In spite of all it’s flaws, I loved this piece. It had the normal wear and tear, a seriously cruddy finish, a chipped wood handle (aren’t those wood handles AMAZING!!!!) and what I THOUGHT was some stains around the hardware on the top drawer…turns out it is a beautiful wood inlay. But you couldn’t really tell because the finish was so icky. (The missing knob was in the drawer…yipeee!)

Let’s be honest, we will all have a pretty worn finish after 60 years on this earth!

My first thought was to paint the wood handles an accent color so I could repair the chip. My daughter suggested I just strip them first. So glad I listened to her. I used this process to strip the drawer fronts, handles and legs…the old stain came off the wood handles and revealed a beautiful white wood (oak, teak? Couldn’t tell)….LOVE!!! I sanded the chip down…and you know what, I can live with it….it is obvious it isn’t the way it is suppose to be but HEY…this is a vintage piece and vintage pieces are going to have a few boo-boos!

The drawer fronts and base were stripped and oiled, the cabinet was given a KSTP treatment (Kilz, sand, tack and painted with white high gloss enamel)

(After I took the pictures, I saw the VERY fine over spray on the top drawer…curses…a little mineral spirits cleaned it right off!)

Personally, I love the high contrast of the wood handles and walnut veneer. The Lane Acclaim tables I collect have the same stark contrasting wood detailing when I refinish them…LOVE!

Often vintage pieces would have been stained and finished so all the differing woods and the entire piece had a “uniform” look and the grain detail was toned down a bit. I say LET IT SHINE BABY!!! If you are a “purist” and want vintage pieces to reflect their original state, you probably don’t want to use the processes I use to refinish pieces!

I am all for exposing the grain and the natural color of the wood.

And I am all for bringing the old pieces back to life!

Live edge tile backsplash and a dresser makeover reveal...

In my quest to make changes in my master bath, I FINALLY decided on the a sliced white pebble tile for the shower floor and niches. One decision down...too many more to go!!!

When I first remodeled the master bath, I did a glass tile backsplash on the vanity...I like it, but honestly I am no longer in LOVE with it.

And to be honest, I think the glass tile backsplash craze is running it's course. In other words, it is a fad that is fading...at least in my opinion. Besides, it had brown in it and I am moving away from browns!

Since it is such a tiny bit of tile, I decided to change it up a bit.

AGAIN WITH THE DECISIONS!!!! But I got to thinking...I love live edge wood countertops, coffee tables, benches..."live edge" wood anything is just beautiful! If you don't know what I am talking about, google it!

Why can't I make a "live edge" tile backsplash?

The pebble tile I picked out for the shower floor has a "live edge."

In other words the pebbles are laid on the sheet in such a way that the edges of each section of tile are "natural."

This vendor carries a tile border but it is only 4" tall. You can also remove each individual tile from the netting and place each individually...nah, way to much work for me!

Since I have a small backsplash, I cut each 12x12 sheet of tile in half with a wet saw. I only needed 3 sheets of tile...less than $40!

Then I had to set it on the vanity for a few days to see if I was really going to like it!

LOVE!!!

So here is a tutorial for making a "live edge" tile backsplash...

First, I had to remove the old tile. There are times when the easiest thing to do is to cut the sheetrock along the tile down to the studs and remove the whole kit-and-kaboodle! That was an option, but I decided to remove the tile and scrape the old mastic....

Since that tore up the sheetrock AND the new tile wasn't going to cover the entire section I removed, I had to do some sheetrock repair.

No biggy!

If you decide to cut the sheetrock down to the studs, here is a super simple way to "patch" the section you remove!

I didn't have to do any patching, but the basic rules apply...mud, sand, texture and paint!

Apply a coat of mud, let it dry overnight, then sand. Then another coat, let it dry and sand again. I can not stress the importance of sanding sheetrock mud smooth...FEEL IT! If you can feel it, you are going to see it when you paint it! Sand, feel, sand, feel! I used an 80 grit paper. You are better off sanding too much and having to apply more mud!

This product is one of my favorite little DIY "hacks." Sheetrock texture!

If you have properly sanded, this stuff will blend old with new! Just make sure you shake it WELL and always test spray it before you start spraying your wall. On more than one occasion I have had to wipe off the wall and start over because the texture came out to thick or too thin...so take time to test it before you start spraying it on your wall! The knob adjusts for different "textures." Follow the directions on the can.

Let the texture dry WELL before you paint!

And again, I can not stress the importance of keeping spare paint on hand. Fortunately, I just repainted my bathroom a few months ago so I had fresh paint on hand...

So, on to the fun stuff...tiling!

First, this is a "natural" stone tile (if you don't know if your tile is a "natural stone" vs. ceramic or porcelain tile, ask!) The very first thing you want to do is seal it with an "impregnator sealer." Ask...they have it at most home improvement and tile stores. Super simple to apply...brush it on...let it sit for about 5 minutes, then wipe it with a clean cloth.

I would suggest doing this before you cut it with a wet saw, but definitely before you install it and grout it!!!

Since the top edge of the backsplash is going to be the "live edge" it was important to remove any "netting" from the edge...

The net backing is what is holding all the little pebbles in place so you don't want to get carried away...just trim the netting away from the edge that will be exposed!

I used a utility knife and my little sewing scissors (and I wonder why I can't keep a decent pair of sewing scissors!)

I used a premixed tile mastic. Mastic is for small tiles...thinset for large tiles. Always use the adhesive and trowel recommended by the tile manufacturer. I coated the back of the sheet with mastic using a properly sized trowel. I used a small craft brush to apply mastic to the edge pebbles...it is okay for the mastic to "squish out" between the pebbles a tad, but you don't want it squishing out on the edge pebbles...I kept Q-tips on hand "just in case." Just make sure you get enough mastic on the back of the edge pebbles for good adhesion. 

TIP! Never set a tile backsplash directly onto the countertop...always use spacers and then after you grout you will run a small bead of caulk between the backsplash and the top. In this case I wanted a very small space so I used dimes as spacers! Thank goodness we keep a change jar and I was able to fish out a few bucks worth of dimes!

Let the mastic dry over night before grouting! 

Now this is where I tell you to "tune in next week" for grouting instructions. Why? Well because as I mentioned I needed 3 sheets of tile to complete this task and I only had the two I ordered as samples. So now I am waiting on the other sheet to be delivered so I can finish this little project. 

I know...it's annoying to get engrossed in something only to be told "to be continued." But I promise...next week I will share how simple it is to grout, seal and caulk the new tile backsplash.

Until then, I will share something I promised last week I would share!

(The grouting tutorial is up…take a look!)

A DRESSER!

I shared last week that I have been in "dresser mode" recently. I currently have FIVE dressers and chests sitting in my garage ready to roll! 

Last week I took a dresser in and it sold that day! I think it has been in my garage for over 6 months...I just never took the time to work on it.

It wasn't in horrible shape...just a really bad paint job (you could see all the brush strokes) and the hardware was pretty chippy!

I didn't change it up too much...KTSP...kilz, sand, tack and new oil based high gloss white!

The hardware got a little makeover...I primed it with metal primer and sprayed them with high gloss black lacquer.

Again, not a huge change but enough to give it a new life!

Maybe next week I'll share another one...if I can dig them out of the garage!

Well, that and the "to be continued" of the tile saga! 

Another Drexel Accolade addition to the family....

It has actually been in the garage for months...but when I needed a large piece in my space at 410 Vintage Market and dug it out,I couldn't bring myself to turn loose.

A Drexel Accolade dry bar/server. The top actually flips open.

It isn't the first piece I bought for resale that wormed it's way into my heart...no secret that I love mid century pieces.

But this Drexel Accolade bar is more of the "Hollywood Regency" style. Identical to this little Drexel side table I painted with a high gloss lacquer and love in my den....

There is a good chance I will paint it if I decide to keep it...for now I have shined up the brass hardware and will leave it at that.

Over the years I have snagged some amazing bargains at auctions and on Craigslist...a little DIY magic and they are stunning additions to any home!

This Drexel coffee table....

My growing collection of mid century dressers...

This one is Matt's...I just don't have any more room!

My never ending collection of side tables!

I started collecting Lane Acclaim tables years ago...I think between the kids and I we are up to 10! That doesn't include the 2 walnut Lane coffee tables and the end table I just refinished for Katie and Matt!

Chairs...

Odd little bookcases are always fun!

If you walked through my home you might think I lean more towards the "traditional" side of home decor at a glance...but all these pieces have blended in to created a cohesive "eclectic" style. This "style" of home decor allows me to infuse pieces I love without worrying too much about whether I am breaking a "decorating rule" for a specific style!

So...back to the amazing Drexel Accolade console/bar...

In my opinion, there is too much "wood tone" in this space...I absolutely love the wood grain on this piece but there has to be a good balance...it just doesn't feel "balanced."

So there is a good chance that IF it stays, it will get painted. Again, that is a big "if." I think I have had no less than 5 different buffets and hutches in this space at one time or another and I always end up moving them out and moving the table back against the wall...as I mentioned before my toes tend to find anything out of place, and since the dining table has been against the wall for the better part of 19 years, it may not work well in the middle of the dining room where it REALLY belongs!

We'll see...that is one of the beauties of learning to DIY furniture...you can buy it cheap, paint, upholstery or refinish it and promptly move it out if it doesn't suit your needs. Without the guilt of having to live with something you hate because you paid a fortune for!!!!

OR it can find a permanent home where it can shine for another lifetime!

Just ANOTHER mid century dresser!

I can't help myself...when I see one, I just gotta have it!!!

A mid century bedroom set...Fashion Trend by Johnson Carper. I couldn't find a maker's mark anywhere on the set so I googled "mid century dresser" and found a picture of one like it!

(Look at the curves on this lady!)

I ended up having to buy the entire set at an auction...dresser, chest of drawers and full size bed frame. I sold the chest to off set the cost of the dresser...which is the piece I really wanted! I have a full size bed in  Mitchell's room so I might use the bed frame in there.

I decided not to strip and oil the drawers...they really are in excellent condition....I wiped them down with Restor-a-finish just to clean and brighten a bit. I painted the "box" (KSTP...high gloss white) only because the top was laminate... I did that with Matt's dresser and I love how it turned out!

My original plan was to put the new dresser in the guest room until I get this one back from Katie in a year or so...

But then I got to thinking...why would I hide a beautiful piece like this in a guest room? 

So I took the dresser out of my room and put it in the guest room and put the new one in my room!

LOVE!!!

The only other thing I have added to my "proper" guest room is this little rattan table (bought two and sold one) and the magazine rack from the living room. 

Again, you will not find AFFORDABLE new furniture that is built as well and with woods like walnut, teak, rosewood and mahogany! There is a reason vintage and antique furniture have managed to survive decades of use!

When I walk around my house and look at some of the beautiful vintage pieces I have collected I am amazed at just how little I have paid for them. Keep in mind MOST were in much need of a little care and attention but if you are willing to roll up your sleeves and do the work, you can create a home filled with beautiful pieces too! 

That is why I have this blog...to show you just how easy it can be!!!

Stop drooling and start doing!!!

Mid Century Chair Makeover and the trick to sewing vinyl!

Recently my mother has been on a purgefest. As a result, I have inherited a few beautiful pieces of furniture and several sets of family china. 

This little table was one that belonged to my paternal grandparents and is the catalyst for my entry makeover that I will finally share next week.

Not really my style, but again, it combines two of my first loves....heirlooms and walnut! 

This little chair belonged to my maternal grandmother...so when my mom offered it to me I honestly could not get it in my truck fast enough! THREE of my first loves....heirlooms, mid century AND walnut! 

(Again, excuse the quality of the picture...this is from my phone!)

As much as I would love to keep it, Katie tagged it for her condo. Since neither of us were real keen on the finish or the fabric, I immediately put her to work stripping and oiling the frame using this process and finding a new fabric for the cushions. 

After looking online at similar mid century chairs, she decided to go with a "leather look" white vinyl. Beautiful, but the fabric has one serious drawback.

It wouldn't go through my old sewing machine! (When I say old, I'm pretty sure I bought it before my oldest son was born...28 years ago!)

I have used vinyl and naugahyde before, but always for recovering chair seats...like these mid century dining chairs! I had never actually used it for a sewing project. I discovered that the vinyl-like material was NOT going to glide through a sewing machine, which posed a real problem when one needs to make new covers for a cushion, including all the piping! 

My uber smart, engineering minded daughter came up with a perfect (all-be-it tedious) solution. Wax paper!!!! I encased the strips of material I was using to make the piping in strips of parchment paper (that's what I had on hand and it worked just as well!), and it went through the machine like butter!! 

Since the vinyl had a fabric backing, it was not an issue to sew the cushions together since I was sewing the fabric front to front...so the back of the fabric was what was feeding through the machine. The only real problem was when I was making the piping because I was having to sew on the top of the fabric....that is where the parchment paper came in handy!

I covered the old foam with new batting just to give the cushions a little extra loft! Eventually Katie wants to add two little "button tufts" to the back cushion! 

After all the tedious machine work, the cushions turned out beautiful!

Katie has stripped and oiled her new coffee table, I built a little entertainment cabinet and coffee bar and we still have another little tufted barrel chair that needs to be reupholstered. Move in day is this weekend so we may not have everything done but we are getting there! I have been buying kitchen ware at auctions and thrift stores and their kitchen should be well stocked! Exciting time for my baby girl! 

And when we get done with all our little projects, they will have one groovy pad! (did I just show my age...lol!)

Until next week when I FINALLY share my entry makeover....

Mid century chest makeover....

On rare occasions I find a little treasure hidden among all the garbage my tenants leave when they move in the middle of the night! I found this little table years ago and it started my love affair with Lane Acclaim tables....

It did NOT look like this! I remember I picked up the nasty little thing and started to toss it in the back of my truck. But it was sturdy and I could see quality through all the "muck" so I brought it home. I googled the markings on the underside and found that it is a walnut and oak Lane Acclaim table manufactured in 1959. With a lot of elbow grease and a little tung oil, it is now one of my favorite little "treasures." Along with the others I have purchased and restored over the years. Still waiting on the desk and a round end table...but someday...

Now I look at furniture I find a little closer. 

This dresser is one of my recent finds. A true mid century piece. Completely intact and sturdy as the day it was built. Unfortunately someone had done a REALLY bad job painting it!

I cleaned it, primed it with Kilz, sanded it and wiped it down with tack cloth....then I painted it with one of my favorite flat "charcoal" greys. The ole' KSTP treatment! The drawers were in mint condition and just needed a little cleaning!

Beautiful! Because of the style, I kept the finish simple. While I hesitate to paint MCM pieces, this is a prime example of "enhancing" a piece. 

Now I am going to share a little DIY frustration because I know I make this stuff LOOK easy sometimes. I first painted this entire piece with several cans of Valspar flat spray paint. I like spray paint because I normally get a nice smooth finish. For some reason I kept getting that "stripped" look on the top and sides...the drawers looked fine. Not a problem I normally have with flat finishes when the temperature is decent. I ended up buying a quart of latex flat paint, mixed to match, (and added floetrol...a must!) and used a 4" sponge roller to get a uniform finish.  Worth the extra effort!

I know I have said it a thousand times....don't overlook those "ratty old" pieces.....neglected or abused or poorly "restored." With a little bit of your time and attention, they can be beautifully restored and ready for another lifetime of use! 

This week I will be sharing this project at...

I was featured on Remodelaholic

...love their features and their site!