Another pantry makeover....

There was a time when I loved DIY projects and was constantly working on something…everything from room makeovers to furniture rehab.

Unfortunately the time came when my back and fingers just couldn’t take the daily beating. And truthfully I’ve pretty much done everything to this house that can be done. Except the yard…I’m still out there designing and planting and digging…when it is not 100+ out!

One of my favorite DIY projects are pantry makeovers and those I can’t resist.

HERE I shared my pantry.

HERE I shared the pantry I revamped for my son and daughter in law.

Some serious reconfigurations can make a huge difference in the functionality of the space.

My stepson and daughter in law have talked about giving their walk in pantry a makeover for years…actually since they bought the house.

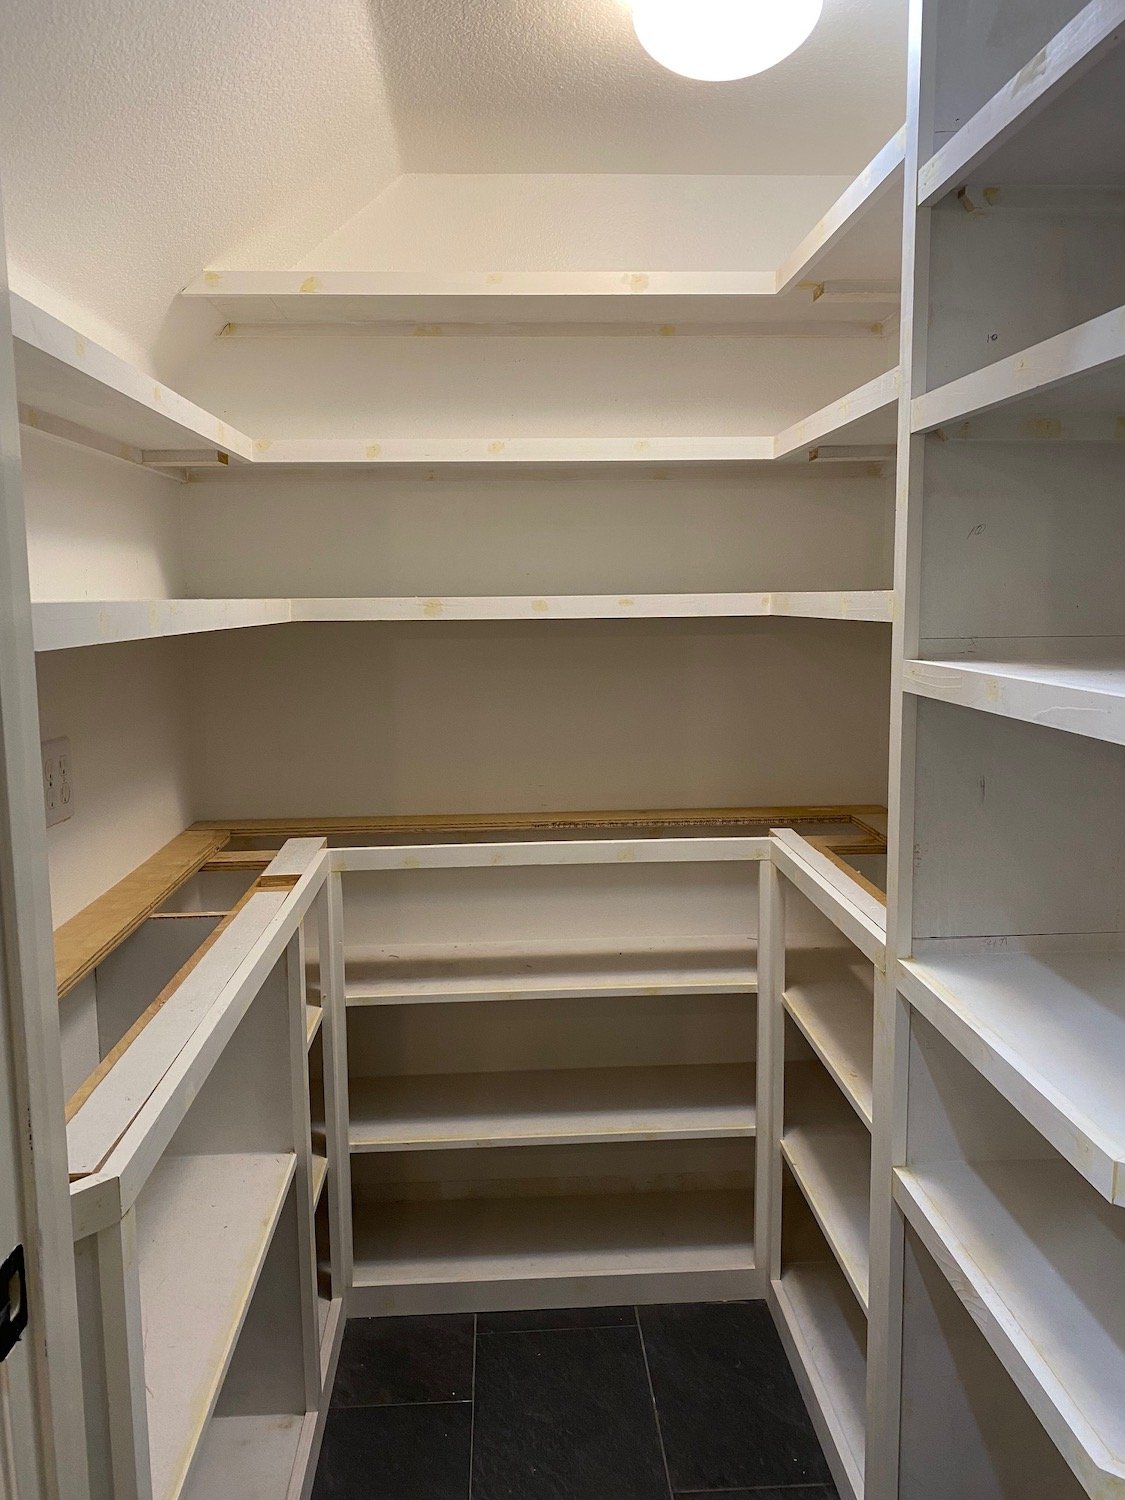
Over time, it became a disorganized disaster….

The shelving was the typical “builder grade” shelving…bull-nosed MDF spaced a good 16-18” apart which leaves a ton of wasted space. Few pantry items need more than 14” head room and a great majority of it just need 10-12”. Just by reconfiguring the shelf layout you can often gain at least 2-3 additional shelves.

Okay in all fairness and in her defense she has a very rambunctious 17 month old and a 2 week old, 5 week premature baby.

So she is a little preoccupied.

Which is all the more reason to get this space in order. With a growing family, having an organized pantry is just a must.

So when they announced a few weeks ago that they were finally ready to get serious about revamping their pantry I jumped on the opportunity to go to work!!!!

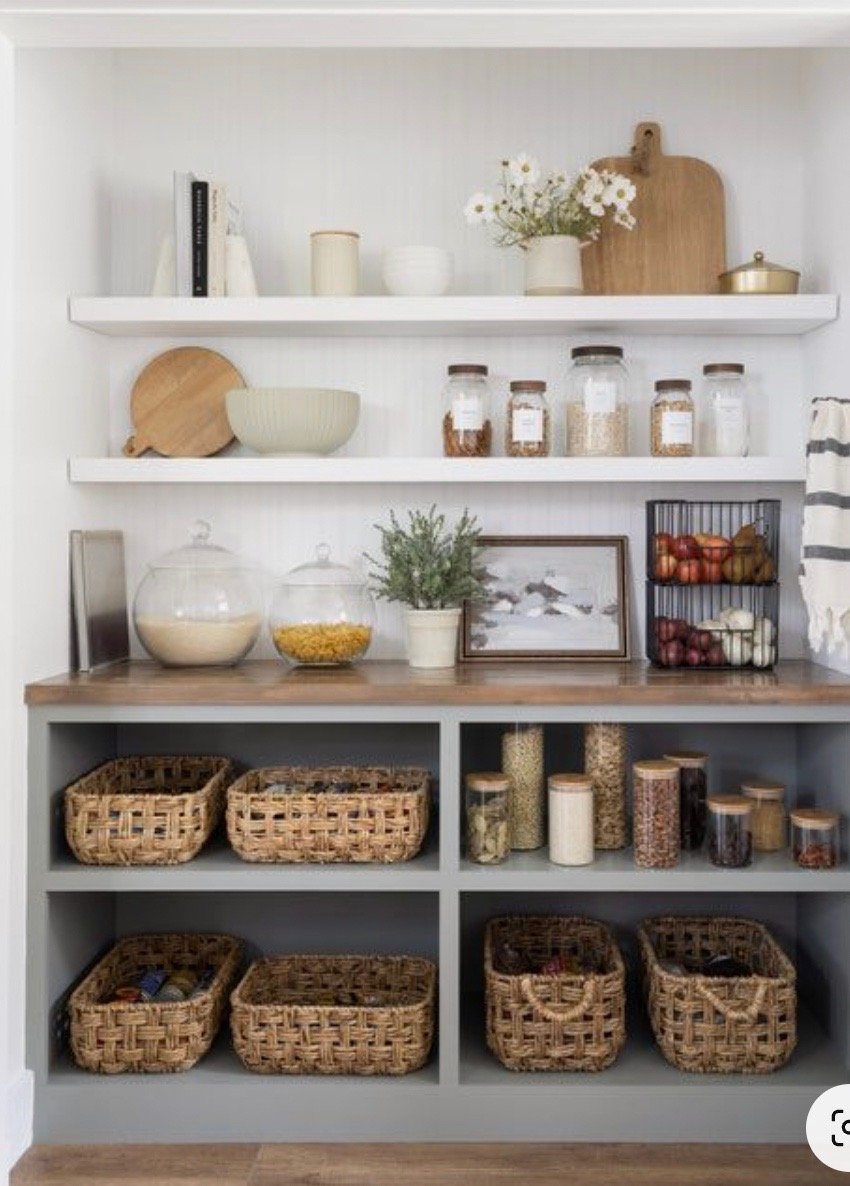
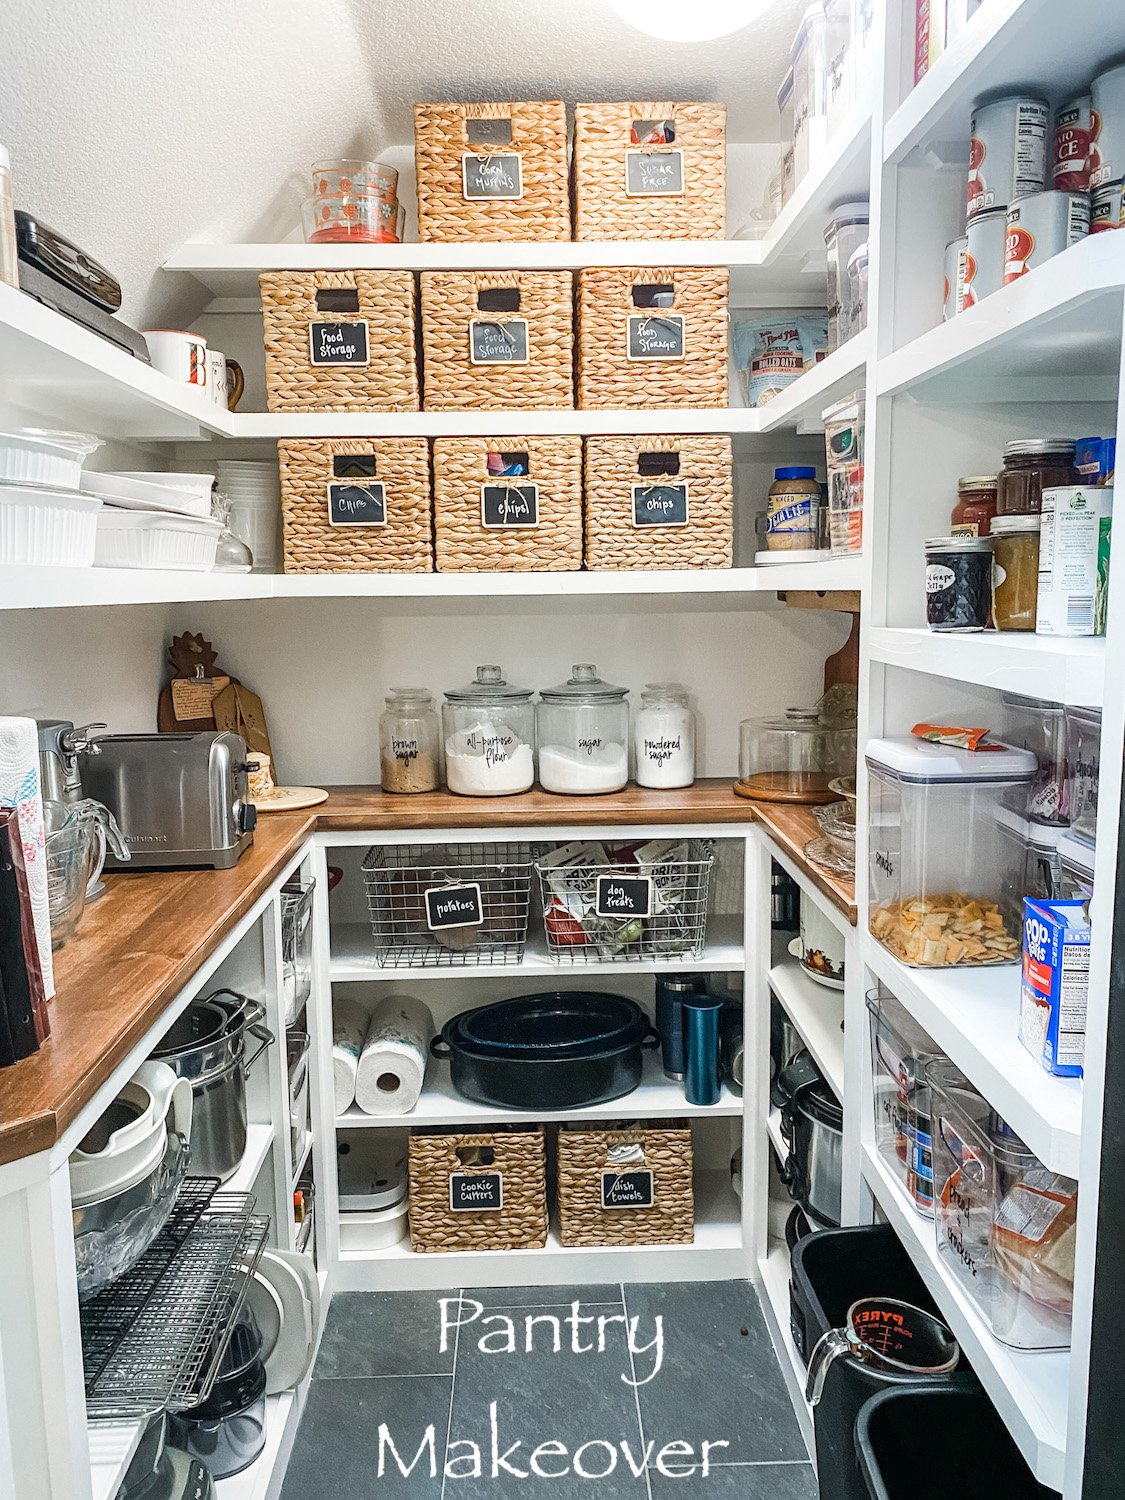
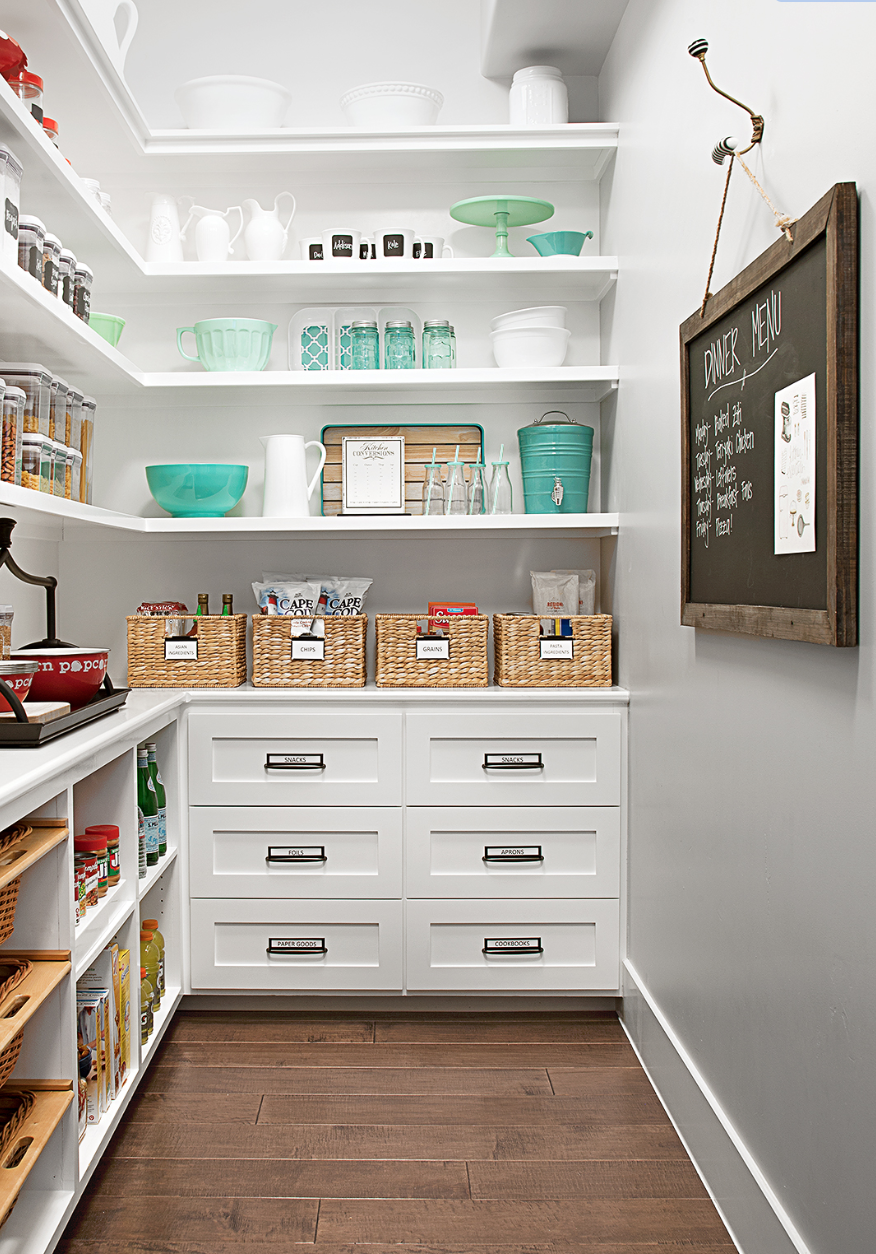
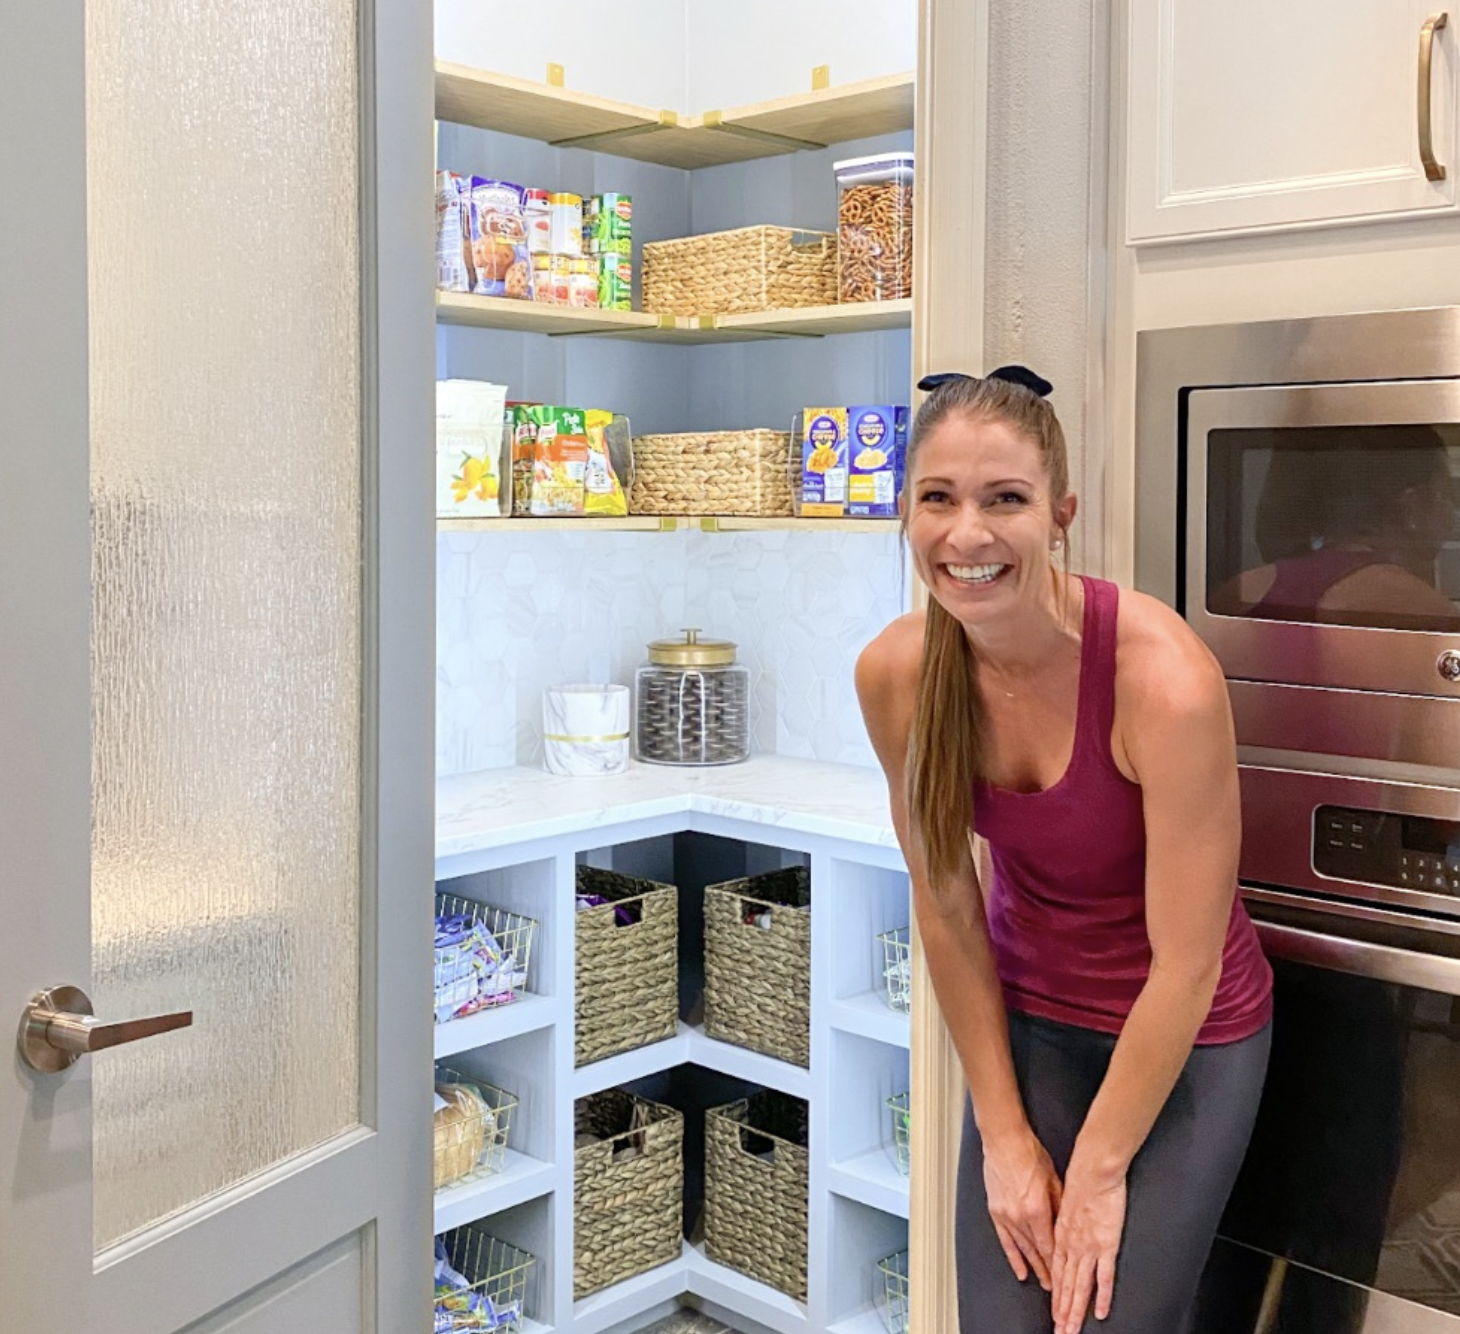
First things first…find your inspiration. I did what I always do…searched “pantry” on Pinterest. Here are a few that caught my eye…. (again, no links…I cut and paste pictures and put them in an “inspiration” folder on my computer.)

Of course it all had to be approved by the home owner. (I hate it when other people think they should have an opinion…lol!)

Fortunately, she liked many of the same looks I liked.

The most appealing thing in all the inspiration photos is the appliance tower. LOVE!

She loves the counter top look with natural wood tops. She loves the look of the floating shelves in the last picture…but she wants natural wood shelving and will paint the base black. I think it will look awesome!

So time to roll up my sleeves and go to work.

First up…take measurements and make a plan….

My plan is to make the cabinet and shelving across from the door “pretty.” This is where she would like a black base cabinet and natural wood floating shelves. They always have the door to the pantry open so we think it would be perfect to make it aesthetically appealing….pretty.

The shelving and the cabinets to the left will be “utilitarian.” A place for all their “food stuffs.” And then of course the coveted appliance tower to the left of the door. Since they have 10’ ceilings we were able to add a ton of shelving space just by reconfiguring the spacing of the shelving.

While this paper plan may make absolutely NO sense to anyone but me, it is what I need to figure out how I can reconfigure the space and what materials I will need.

After I got plan approval from my daughter in law, Brian and I went to Lowes and bought all the materials and had my son precut all the plywood for shelving and base cabinets with his table saw.

The construction of the shelving and bases will be very similar to what Lindsay did in her pantry space. She has a great tutorial for building everything so again, I am not going to reinvent the wheel. As I always say, find a tutorial that makes sense to you and use it.

Day 1….demo!!! I had my DIL empty the entire pantry and my stepson and I went to town with sledge hammers and crowbars and took out everything from top to bottom!

When you remove the existing shelving you may find sheetrock damage and you will notice that you have “lines” where the existing trim (shelf supports) was…primarily because the trim was caulked then the walls are painted…and the walls behind the trim are raw. So you will need to skim those areas with sheetrock mud, sand smooth, then spray with canned wall texture. If you don’t do this, you WILL see the lines where the old shelving was…so do it right… fix the walls, then repaint the walls before installing the new shelving.

TIP: If I am going to paint the shelving I usually paint the walls and shelves the same color…it makes it easier to paint the shelving without having to tape everything off. I use a different grade on the cabinets and shelving vs. the walls, but the same color.

I always prime and sand all the new wood before I cut and intall it…that way I don’t have to do major sanding in the house.

Right now I am still priming, cutting and installing so we have a few more days of work!

Hopefully I will have a big reveal in a week or so!!!!

The Pantry Makeover....

It has only been a little over a year since I “froo-frooed” my kitchen pantry. I love it and have found all the little storage elements I added to be very helpful. I have managed to keep it fairly organized.

After living with this space for a few years, it is time to reconfigure it and install new flooring.

First things first….find my inspiration. Same song, second verse…cruise the blogisphere and Pinterest and see what trips my trigger.

Once I had an idea of what I WANT, it was time to take some measurements and draw everything out on graph paper…inspiration + space = ”the plan.” Drawing the space to scale gives me the ability to play around with the elements I think I want on paper before I start sawing and nailing. It also gives me important measurements for cabinets, flooring and shelf material.

I wanted base cabinets to hide rarely used appliances (food processor, grinder, etc), dutch ovens, crock pots, etc.

I wanted a cute counter top for the flour/sugar jars, toaster and can opener.

Lauren’s pantry was most similar to my layout so I looked closely at what she did….

Like Lauren, I knew I wanted to use 12” wall cabinets as the bases. However, I decided to build my shelves a tad differently.

I liked the look of the shelving featured HERE….

Unfortunately I couldn’t find any wall cabinets to use as base cabinets…at least none that are affordable. It’s a pantry. With the cost of materials THROUGH THE ROOF I have to be conscience of the cost of this little project.

I wasn’t real keen on open base cabinets but Lindsey built some really awesome bases

She posted a great tutorial on building these base cabinets…pretty much exactly the way I built mine!

So all this got worked into “the plan.” Again, a fluid plan, but a plan none the less.

First up…the flooring. The flooring was the original tile and I decided to use the same tile I used in the laundry room. Tiling over the tile in the laundry room worked well so I decided to do that again.

I wanted to reset the shelving and build some additional “shelf towers” so I removed all the existing shelving….

I wanted a new light fixture so I found one I kind of liked. HOWEVER, it came with Edison bulbs. Kind of important since you can see the bulbs through the glass but I just don’t like the light…just too “yellow.”

One morning I woke up thinking “I really don’t like that light.” So I got up, took down the new one and put the old one back up. Again, it’s a pantry…functional is more important that pretty sometimes. Maybe I’ll eventually find something that is both pretty and functional…way down the bottom of the list at this point.

BTW, in case you want to see what “projecting” looks like around here….

I patched and painted the walls white (my new fav, BM Chantilly Lace), grouted the floor tile, then started building the base cabinets and adding the new shelves. I preprimed and sanded all the material so all I had to do after it was assembled was caulk and putty holes. A light sanding, wipe with tack cloth and it was ready for paint. Prepriming and sanding BEFORE you cut and install will save you a MAJOR dust storm in the house.

AGAIN, I am not going to go into a long drawn out tutorial…just so many great tutorials out there.

Some people go to the lake during Memorial Day weekend. I build shelves.

The countertop. I like wood since it is not an actual food prep space.

If I wanted to splurge I would have built walnut counters or even a butcher block. But again…it’s a pantry!

The question then is if I go with a less expensive wood do I stain it with a dark stain or just leave it natural.

SOURCE

I love the dark stain but I worry it is running it’s course. But you know what, I don’t care. I love the darker stain and since the walls and cabinets are white, dark it is! I decided to use the pine “project board” from Lowes, stain with a “brown mahogany” and then apply a couple of coats of polycrylic. (Remember, polyurethane has a tendency to yellow over time)

Floors done, walls painted, cabinets and shelves built and painted, top on. Now the hard part…letting it all sit and cure before I load everything back in. IT IS IMPORTANT PEOPLE!!!! Let your paint and finishes cure before you go all decor-crazy on it…otherwise you will scar and scuff and will have wasted all your time and money!

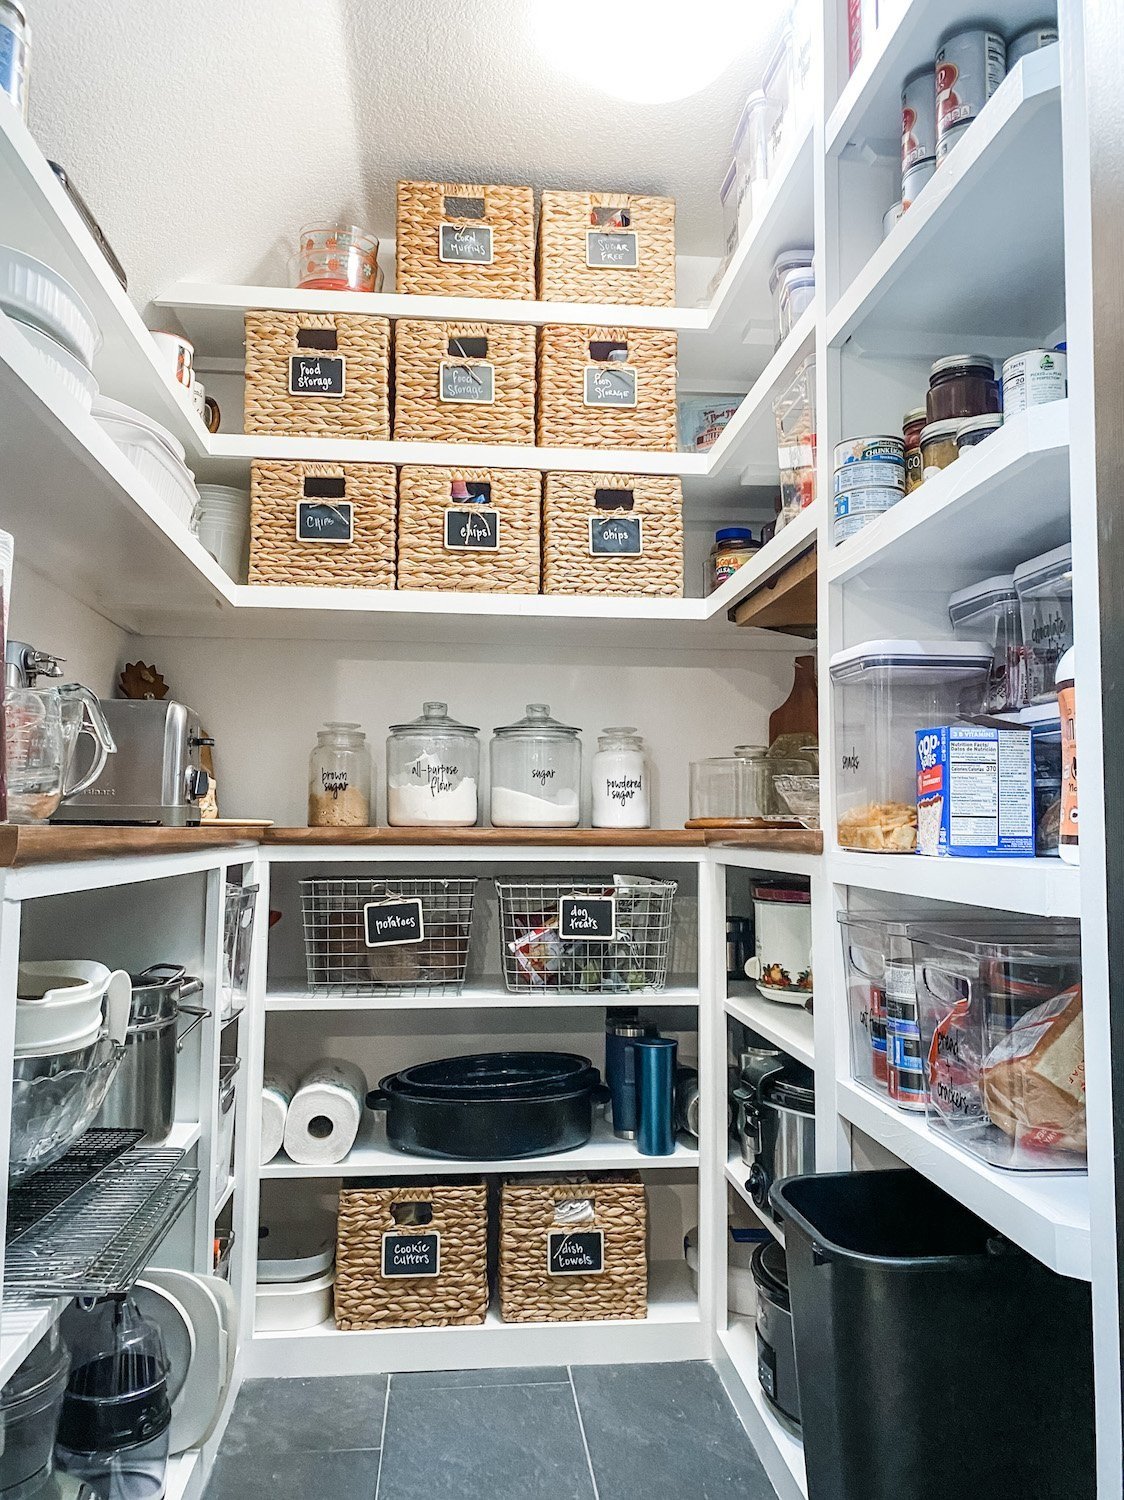
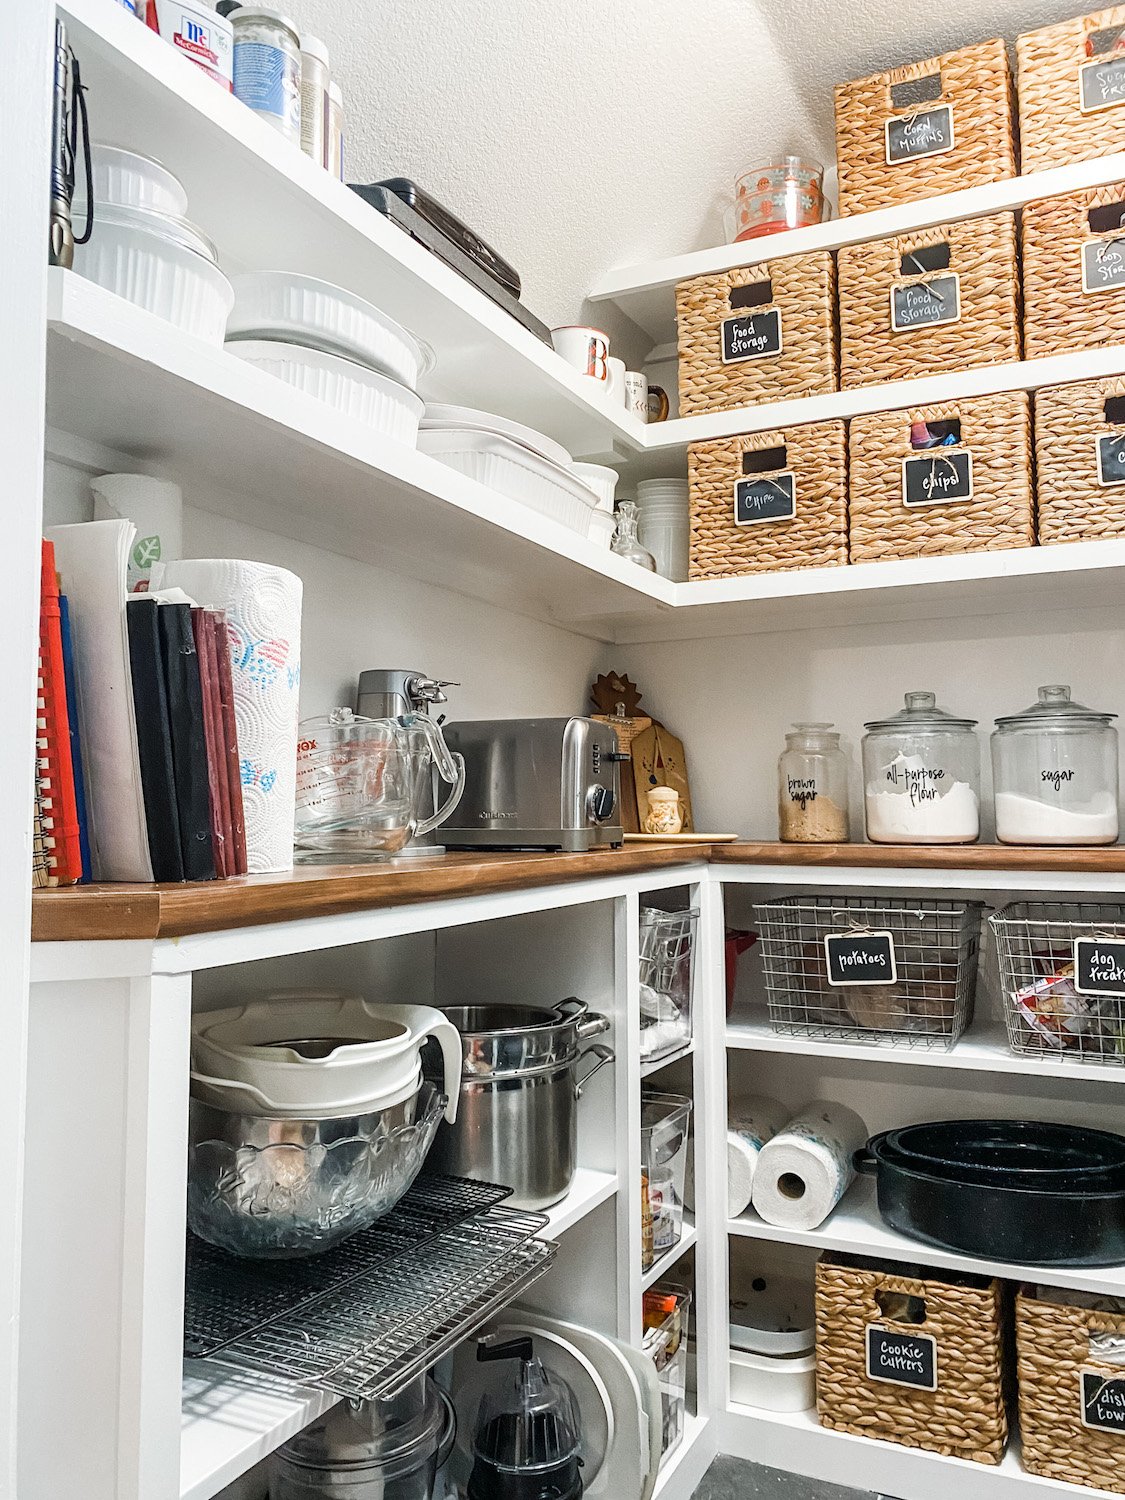
You may notice I actually gained a couple of shelves on the right and middle walls just by reconfiguring them. I also changed the upper shelves on the left to 10” and 8” deep shelves instead of the 12” that were there. I didn’t need the depth and it seemed to “open” up the space a tad.

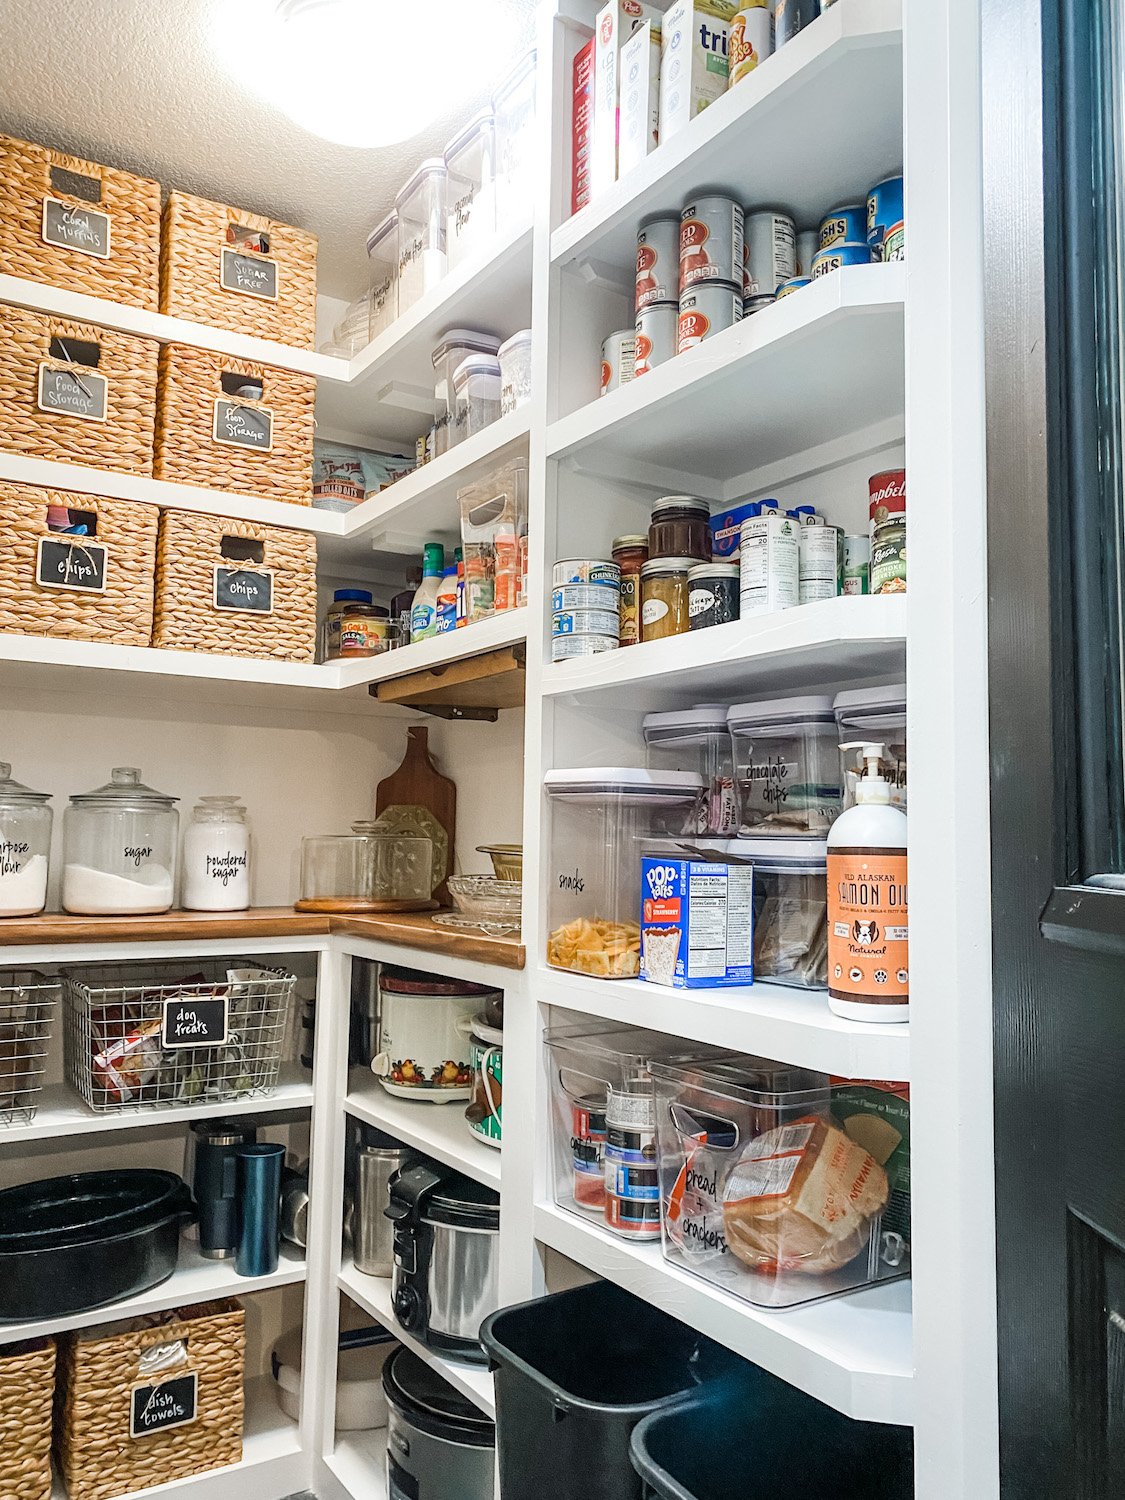
I could have carried the top all the way around on the right and still had dog and cat food storage under it…but I needed a few shelves 14” tall so I decided to do a separate “shelf tower.” Perfect for taller items like the stacked storage containers, cereal boxes and wine bottles. All the other shelves have a 10” clearance which is ample tall enough for most of my stuff.

Right side….

Left side…

I love that we added an outlet in this pantry…perfect for the toaster and can opener so they don’t take up real estate in the kitchen.

I think my Kitchen Aide mixer would look cute in here but I like it on my kitchen counter. If it were in here I would have to haul it back and forth to the kitchen…it’s too heavy and I’m too old!

I was a bit bummed that I couldn’t originally find cabinets with doors but honestly I like this look better! While dutch ovens and crock pots aren’t really display worthy, the open shelves keep the room from feeling so small and claustrophobic. Believe it or not this space is only 5 x 5. Tiny but mighty!

I have no doubt that at some point I will add a backsplash…not sure whether it will be tile or wallpaper or something else…but something to give the space a little color and character. Right now I am worn out just getting to this point!

Last year I added glass to the pantry door. I LOVE it and I’m glad that is one chore I don’t have to do now!

The important thing I want to share is that reworking a space can make a huge difference. I now have a pretty pantry that works beautifully as an extension of my kitchen. Remember, I don’t have a lot of upper cabinet storage in my kitchen so this pantry is super important!

On a scale of 1-10? For me, not difficult because I have the tools and the know-how. For a novice DIYer, probably an 8. But there are a ton of tutorials out there for how to build simple shelving or how to use old cabinets to create a space like this. The first thing you have to do is find “inspiration” for the space you actually have and work from there. It is doable…YOU CAN DO IT!!!!!

On a blog board I am on someone said she was afraid to do something like this because she was afraid to mess up.

Don’t be afraid to “mess up.” That is how you learn…watch tutorials and read blogs. There are so many great resources at your fingertips these days.

Use them…and JUST DO IT!

Master bathroom windows...FINALLY!!!

IMG_1509.JPG

At last!

This isn’t the first master bath reveal and it won’t be the last.

This room is one of those “processes” that will take time, money and a lot of of “humming.”

By that I mean I’m still not sure what i want to do with the cabinets. But I knew from day one I wanted operable windows in this room. Why I didn’t do it when I did the major remodel before we moved in is beyond me.

I had the perfect spot….

IMG_0455.jpg

On either side of my vanity mirror. This wall is adjacent to the back yard and over looks the flower garden I put in under the humungus oak trees.

I learned in my last home that an operable window in the master bath is a MUST!

It is the mustiest, stuffiest room in the house and there are just times when you need to throw open a window and let the fresh air in!

Adding a window will entail cutting sheetrock, removing brick, framing and in my case moving both plumbing and electrical.

Like every major project, the best way to start is to just start…and in this case that meant cutting two big ole’ holes in the wall.

That was when I discovered the plumbing in the left opening. Okay, no biggy. I can manage that. I didn’t discover the electrical issues in the right window until I removed the insulation a few days before my windows arrived. CURSES!!!!

Again, no biggy for me. Just a few junction boxes, new wiring , relocate a light fixture…. blah, blah, blah. Fortunately I have a few basic skills (and a SIL electrician on speed dial) so I was able to do what needed to be done. But If I were without those skills and planning a “little remodel” like this, I would certainly budget for professionals. If you don’t need them, kudos…but be financially prepared.

IMG_1509 2.JPG
IMG_1507.JPG

They let in a ton of natural light!!!! (This is with NO lights)

IMG_1506.JPG

I can not even express how much I love these windows.

I thought adding a window in my laundry room was the best decision I made in this house. Hum…may be a tie! The extra light and ventilation in both is a must!

Even through the screens, I love the view of the back flower garden!

IMG_1512.jpg
IMG_1504.jpg

Now on to the next head scratching project. The bathroom cabinets. It may be difficult to tell in the photos but they are kind of a blah off-white.

I have contemplated refacing the fronts and replacing the doors and finishing it all in a light stain. I like the “concept” but when I searched Pinterest I kind of don’t care much for the look.

This is just a few examples of a bazillion I have put in my “inspiration” file….

a5a48166a2fd9000b6bf16011990d19d.jpg
fce0f15bf4f9aa2fd15d91ab2e960d5c.jpg

I like, but I don’t love.

I kind of like the look of a color…

8bcf39527809249718d4f65e500c4114.jpg
75df4049c026a2d7d83548afdc2e15ca.jpg

Again, liking but not sure I am loving. (And again I can not give proper credit because I stole them from Pinterest and dropped them in my inspiration file…my sincerest apologies!!!)

As much as I dislike the thought of the “sterile” look of all white in this bathroom, I think in reality I would really like it.

So right now I am leaning towards painting the cabinets a brighter white and definitely replacing the hardware.

That is the nice thing about paint… if I eventually find a color that really trips my trigger, it’s just another gallon of paint, a couple of hours of time and a back ache.

Until next week…

static1.squarespace.png

BIG LIFE CHANGES

I know this is a rare Monday posting, but I can finally share the big changes that are happening in my life.

A few months ago I woke up one morning and decided it was time to sell my apartments.

I called a realtor I had worked with last year and told him I was ready to sell. At 3:30 that afternoon he brought me an acceptable offer.

I have owned these apartments for 23 years.

At first I was a bit “sad.” After all, they have been my “career” for 23 years…they are what I do!

The income has provided me with the ability to provide for my children and give them a good life.

I’m only 56…I still feel like I have a few good years in me.

Yes, I am giving up a decent income. I have to roll the profit into other investment properties, specifically rental homes, but they will not produce near the income the apartments have. But that is okey…sometimes you have to sacrifice quantity for quality. The “quality” of my life will be greatly improved.

Yes, I am “starting over” at 56. The new rental homes will not take up near the time the apartments did…so the question now is what will I do with all this free time. Trust me…I am not one to sit around on my hands. I have no doubt I will find SOMETHING to do!

It’s been a stressful few months…I’m usually awake and ticking by 3 a.m. and at this point I feel like I am running on fumes.

So naturally I did what I do when I am stressed and frazzled…I went out and found something else to fret about.

We bought a new home.

For years I have wanted to “down size.” Now that we are empty nesters we don’t need a big house with three empty bedrooms upstairs and a huge yard to care for.

So naturally I went out and found a house that is WAY bigger than what we have now and has a large yard that needs TONS of work.

After a lifetime of owning “projects” I wondered if I might have ONE MORE project in me. I guess I am getting ready to find out.

The new home is waaay more “traditional” than I like…but it has soooo much potential. It has good bones and a workable floor plan!

The kitchen and master bath are complete gut jobs…and after a lifetime of living in “remodel messes” I have decided that this work will be contracted out and we will not move until the big, messy work is done!

The big wall between the kitchen and living room will go away, as well as all the cabinets, and I plan on putting a humungus island smack dab in the middle of the existing kitchen.

The wall on the far right with the glass cabinets will become the “cooking” center with a cook top, wall oven and microwave. And the coolest tile backsplash in the whole world. I can’t wait to share!

No need for lots of upper cabinets because it has a huge walk in pantry!

This is the “sitting room” adjacent to the kitchen…

One way to “detradionalize” this home will be to replace the arched transoms with rectangle ones…a bit of work since it will require brick and sheetrock repair. This is on my list of things to do, but closer to the bottom.

The quickest, simplest and cheapest way to “detradionalize” is to remove all the crown molding around the cased openings and windows! The crown around the ceiling will stay!

Another way is to change out light fixtures…that is closer to the top of the list along with removing carpet and adding more hardwood flooring (yes they are REAL hardwood floors) and refinishing them all with just a clear coat…no stain!

The fireplaces? Yes those will eventually get redesigned…again, not something I will tackle right this minute but it is on “the list!”

The master bathroom…ICK!!!! Suffice it to say, it is a gut job!

Right now I am in the process of “making the plan.” Meeting with tile guys and cabinet makers and flooring companies…getting quotes and ideas. Making a list of what HAS to be done…wants vs. immediate needs.. As always there are things I WANT to do but I might not be able to do right this minute…they stay on the list, just closer to the bottom.

I have a life time of inspiration to pull from but I am still grabbing pictures from the Pinterest and the internet. I pretty much know what I want…

Now that we have closed, it is time to “execute the plan.” We start this week with demo…and then I will work the plan from there.

One by one I will be closing the new rental houses and hopefully creating a “new career.”

These are the big life changes that are going down in my world! Huge!

While the apartments have been stressful and back breaking at times, they were my “career”…they were what I did to provide for my family. Saying good-bye is like retiring and moving on to another career.

This house has been our home for 20 years…it is where I raised my children and I have poured my money, talents and time into this house to create a home.

It will be tough to walk away from both…but that is what is going on in my life and I am super excited about the next chapter…whatever that may be!

The kitchen makeover reveal!

It is time for the big KITCHEN REVEAL!!!

First, I had to wait on the maple trim...then I decided to wait on the new doors and glass!

I had not intended to start decorating for fall before "the big reveal." My plan for this week was to do the glass doors Tuesday, take pictures of the kitchen and get ready for Matt's birthday celebration Wednesday (he turns 26 Saturday!), post the reveal Thursday morning and then get most of the fall decor up and get my hair and nails done ...AND LEAVE FOR COLORADO FRIDAY!!! Yippeee!

One hitch...I got a call Tuesday morning that the glass wasn't on the delivery truck so it wasn't going to be in until Thursday...well that just threw a wrench in my whole week. So Tuesday I started working on my fall decor. Tuesday afternoon, the glass place called and said they "found" my glass and it was ready. Sooooo....short story long, the "reveal" pictures are going to have smatterings of fall! 

I think I have mentioned before that I have a bad case of "Pinterest envy" when it comes to kitchens. 

Tipsaholic recently featured some beautiful kitchen pantry/storage ideas. I love the painted kitchens and all the open shelving but the one thing I noticed about EVERY picture, whether featuring beautiful glass containers or pull out drawers, was the ORGANIZATION of every item and space.

For me, the key to a great kitchen (or any space for that matter) is making sure everything is organized and functional for MY needs! And of course aesthetically appealing, but unless it is organized and functional, I am wasting my time making it pretty!

While I love all the neat pull-outs and storage inspiration, I think the first thing you need to do BEFORE you start any kitchen remodel is get every drawer and cabinet purged and organized and see what you have, what you need and what space you can rework, organize or add to make your kitchen function for YOU! Plan, plan, plan!

Here is a post on purging and organizing your kitchen drawers! A super simple little project but it has made a big difference in my ability to find stuff I need!

My goal in "resetting" my kitchen was to make it more functional for my purposes.....and of course, change things up a bit aesthetically so I am not tempted to take a paint brush to these beautiful cabinets 

I basically had a "standard" (and small) kitchen layout.

I do love stained wood and as drawn as I am to painted cabinets, I knew the day would come in the future when I would regret painting mine. My stain color (Paprika Cherry on Maple) isn't totally offensive and fairly "timeless" if that is possible, unlike my daughter's kitchen which had "pickled oak," a stain my dad and I were putting in houses in the 1990s!! I did not discourage her in the least when they decided to paint their cabinets. 

For those who believe "white is classic and will never go out of style" obviously don't remember the "honey oak" trend of the 90s..."oak is classic and will never go out of style!" EVERYTHING goes out of style...eventually! Which is why we are all painting honey oak cabinets!

Earlier this year I made an offer on a smaller house with a smaller yard in a subdivision I would love to live in. The house was basically a "gut job" and the new kitchen I designed had NO upper cabinets...none! I wanted lots of windows, maybe a few open shelves, tons of base cabinets with drawers and a big island.

But that deal didn't work out and I don't have the "footprint" to build a kitchen even remotely close to what I would have put in that house. Right now I don't have the funds (or energy) to make major changes and I can't bring myself to change out appliances that aren't totally offensive and work perfectly fine! 

What to do, what to do!? I wanted some changes, but I didn't want to do something I might regret down the road.

This is one of those times when I had to "work with whatcha got" and make changes that would give me a few elements I crave, without spending a ton of money or eating out for 2 months while the kitchen is in complete disarray. In the end I probably spend under $800 (doing the work myself!) and I think we ate out two nights! Keep in mind that the three doors cost around $200 and special order maple trim can be costly. The changes I made would be A LOT cheaper if you use stock trim and don't add new doors!

If you aren't in a position to spend a lot of money on major changes and upgrades but you love the concept of open shelving and more storage, these few changes might just be the answer!

I did not paint my cabinets but I was making changes that required a few pieces of new maple trim the color of the existing. THAT is a Herculian task and one I would advise you do BEFORE you start moving things around...unless you have stock wood like oak or poplar, or intend to paint the cabinets! My kitchen cabinets are 16 years old and honestly even if I knew who, what, and where the odds that they would have trim pieces to match after all these years are pretty slim. I tried finding stock trim that came close, but none was close enough. There are cabinet manufacturers that will do "color matches" but unfortunately they won't do it for a few pieces of trim.

As I have mentioned before, most manufactured cabinets and furniture have a stain and finish that is sprayed on...so matching an existing finish can be pretty difficult! Thank you David, at Sherwin Williams in Springdale...most amazing color match EVER! I honestly can not tell the difference between the original and the new! I took a door and a few samples of the new trim and he matched it right up...amazing!

There were a few things I wanted to accomplish in this little "makeover." First, I knew I wanted open shelving. That is one element I am always drawn to in my quest for "inspiration." (Here I talk about finding your inspiration for ANY project!)

I wanted to "pop up" a few of my cabinets and open a few up for display. In the post featuring my laundry room, I tell you exactly how to "pop up" existing cabinets.

Moving the dish cabinet, spice cabinet and the two cabinets on either side of the refrigerator allowed me to add the open shelving beneath them. 

Here you can see a step by step tutorial for constructing three different types of floating shelves!

The frame to the left is just foam board with scanned copied of my grandmother's old recipe cards tacked to it! The boys always gripe about my "shallow" bowls so I pulled a couple Philbe Fire King bowls I had in my booth and then ordered small matching custard cups I found on Ebay for dips and such! 

My spices, along with my cooking and serving spoons, are now at my finger tips!

I love all the different glass jars! I painted my old knife block a pretty teal just to freshen it up a bit! I love refinishing and repurposing old cutting boards...this one is perfect for holding recipe cards!

This is now my "baking corner." I added the antique fan for comfort...you can see how easy it was to rewire this 80 year old fan here and bring it back to life! 

I choose not to pop the cabinets all the way to the ceiling. I know some would, but I have 9' ceilings and to do so would have looked funny and made the cabinets completely unusable. 

One thing I really love are the stainless and glass vent hoods. I really dislike the big hulking, over the range microwaves. The truth is, I don't have the real estate for a counter model, so for now I will stick with the big hulking over the range microwave!  Poo. 

I removed the doors on two of the cabinets and painted the interiors. After looking at them for a few weeks, I decided I did not like that open look even with all the "pretties," so I ordered new maple doors, stained them and added reeded glass inserts...like my laundry room door! (LOVE!)

I get the "openness"  without the cabinets looking "unfinished." There is a chance I may eventually do this with the doors on both sides of the refrigerator!

I did add some under counter lighting above the pasta shelf and the "baking" shelf. 

I wired into the existing under counter lighting and ran the wires between the cabinets and across the top of the cabinet above the refrigerator that was covered by a shelf. Now all the under counter lighting can be turned on with a flip of the switch that was added when we did the original lighting! 

I added glass jars here and there to hold tea, baking stuff, beans, and pasta. I love the Anchor Hocking Heritage jars for flour and white sugar but they don't have sealed lids which is necessary for brown sugar. (That was one great thing about reworking and organizing my pantry...I was able to designate one cabinet and shelf area specifically for baking stuff.) 

I found sealed jars similar to the Anchor Hocking Heritage jars, as well as jars tall enough for spaghetti and linguini at TJ Maxx! I ended up with a variety of jar styles I picked up at TJ Maxx, flea markets and Oneida online.... and I like the different looks! 

While I think the matchy-matchy boxes and storage bins are super cute in pantries, I prefer to actually SEE what I have...so I organized my pantry and cabinets so that like items are together and I am able to see what I have and what I need at a glance!

The upper shelves were a great addition...mostly so I can now openly display my cookbooks and a tiny bit of my china (I have 6 sets!) and also a few little decorative do-dads. 

The old coffee grinder is one I have had in my booth for MONTHS...probably because it is missing a piece of the top...but it looks pretty neat on the shelf with the big gold B I picked up at the flea market, a fall berry wreath (I also have a boxwood, but the berry wreath is a new fall find this year) and an old chopping board I turned into a little "chalkboard." 

This shelf had to be removable for one special reason! "Lord ?" He is stored away in the attic for the time being, but he has to have a special place when I decorate for Christmas and he would be too large for the space if the shelf could not be removed. So I painted the shelf bracing the same color as the wall and the shelf can easily be removed when it is time to display him!


As you can see, my kitchen is pretty "traditional." With furniture, I tend to lean more towards the clean lines of "modern/mid century" now but as with everything in my house, my kitchen is more of a mix of traditional, modern, and "farm house." Eclectic, to say the least. That seems to be the "style" I am most comfortable with...not too much of any one style, but a broad mix of everything!

A toss of this, a pinch of that, a smidge of whatever strikes my fancy!

One of the great things about being "eclectic" in your decorating style is you can pick up anything without worrying about whether it fits in with the "style" of the room. Whether it is modern, traditional, transitional or farm house...if I like it, I can usually make it work!

The biggest improvement for me is the addition of the open shelves and my ability to reorganize a few spaces to make the over-all kitchen a tad more functional and organized. 

And that my friends should be the PRIMARY goal for any "makeover." Because let's be honest...if the piece or space isn't functional and organized, all the pretty it the world isn't going to cut it!

First and foremost, make your space or piece functional and organized. THEN make it pretty!

BTW, as much as I debated painting the fireplace wall when I remodeled my den I am SO glad I didn't...it is perfect for the holiday seasons...fall AND Christmas.... and I can't imagine it any other color!

Friday we head out for our annual train/zipline/fishing/Aspens adventure! I am soooo ready. Matt will be here holding down the fort and when I get home, fall will be in full swing...regardless of the temperatures!