Giving what you have....

The last two weeks have been a booger.

Two weeks ago our city was hit by a F3 tornado.

The damage to our community was pretty bad but we, personally, were very fortunate…it missed us…by about TWO BLOCKS.

I can see the country club from my front porch. They sustained a lot of damage…HUGE trees down, damage to the clubhouse.

I can see the neighborhood to our north. It took a direct hit and was heavily damaged.

As much damage as the community has, we are blessed. Injuries but no deaths.

I was without power for a day and internet for several. Minor compared to the losses some will have.

Last week I had to have a tooth extracted and a bone graft. No biggy you say. HA! Not only do I look like I was punched in the jaw but this sucker hurts like the dickens! Fortunately I am on the mend and now I just have to wait patiently for this to all heal so I can get an implant.

So an eventful two weeks.

No major projects so I have worked on a few little things.

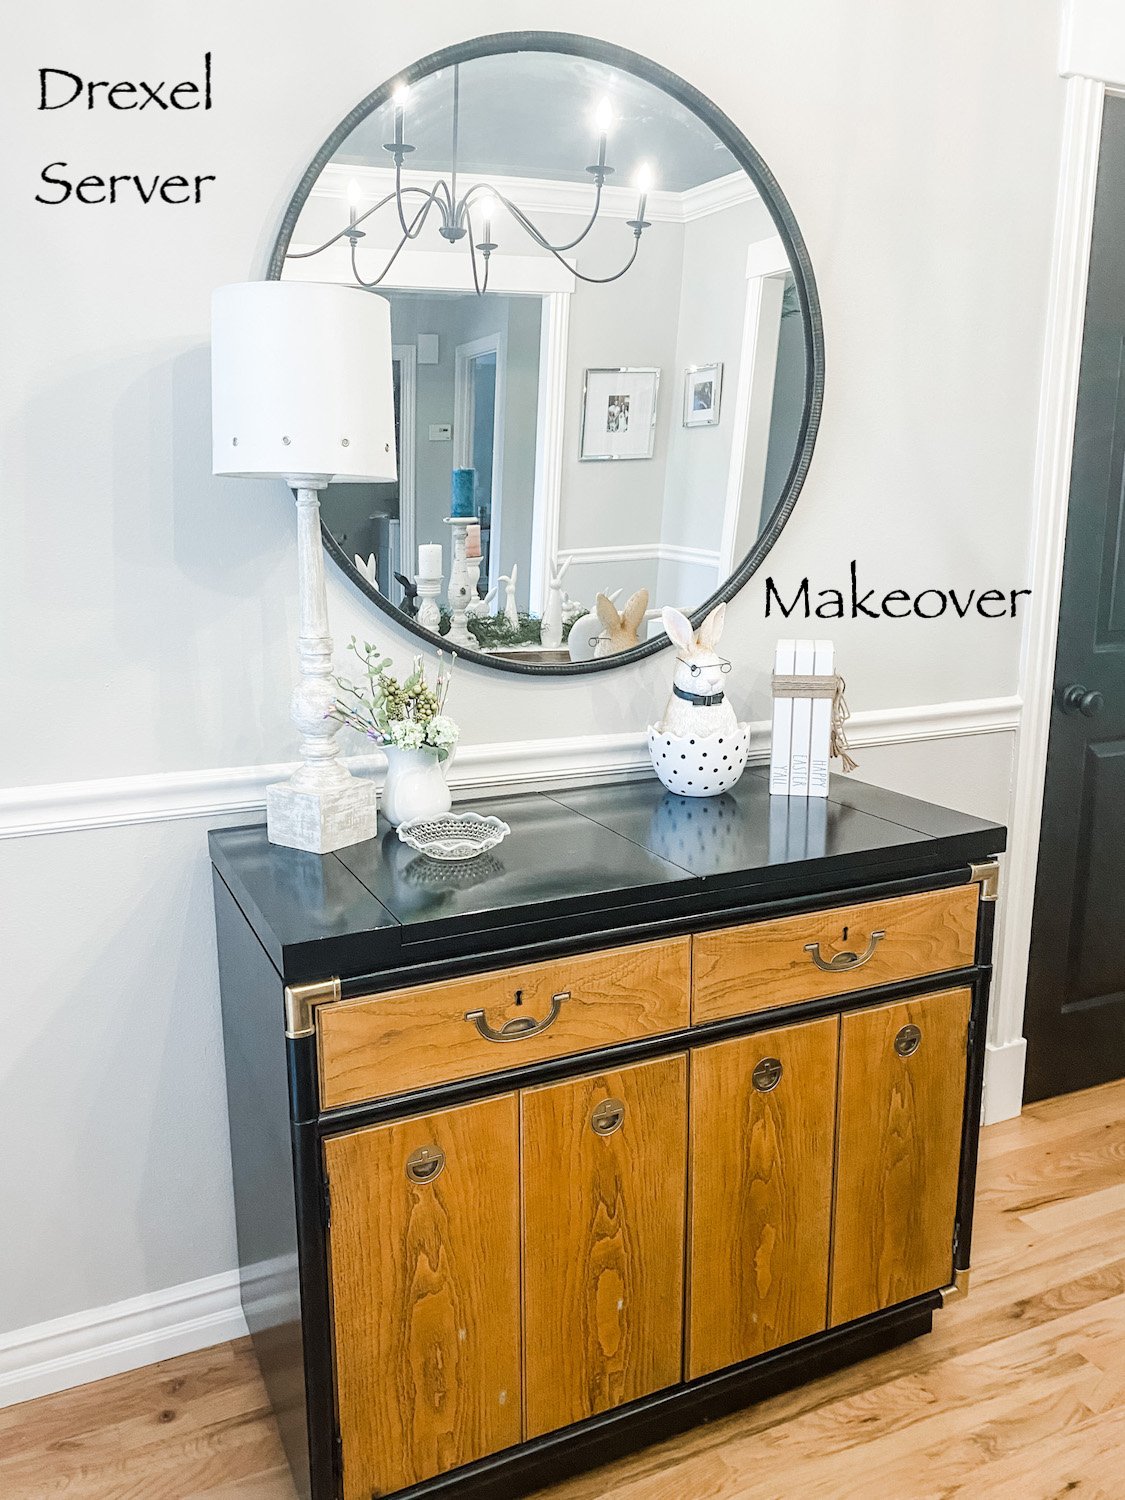
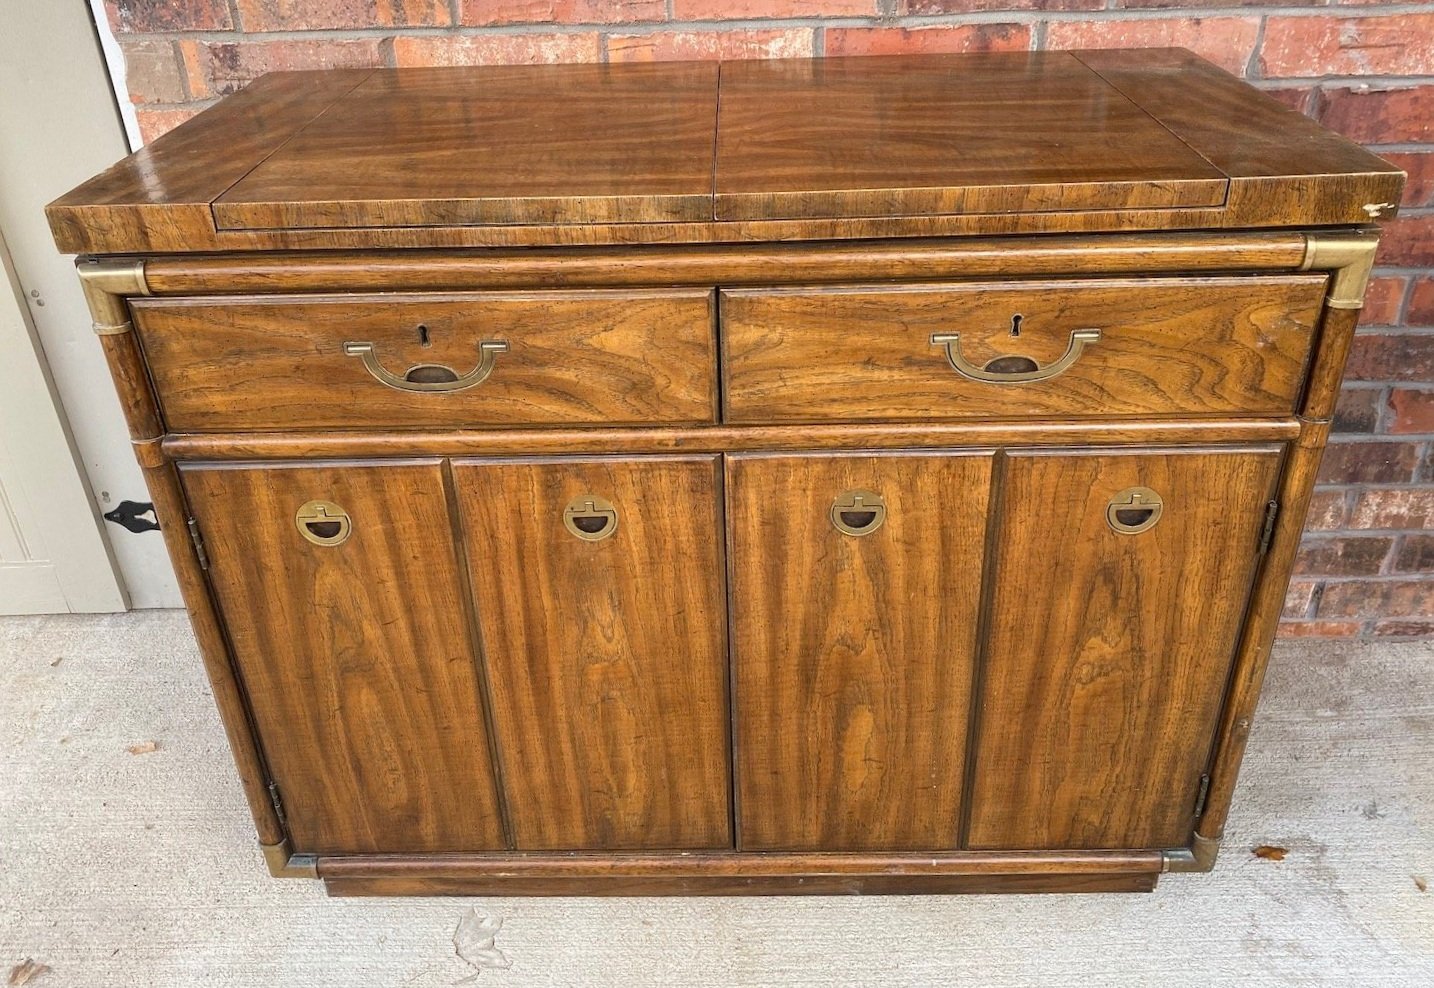
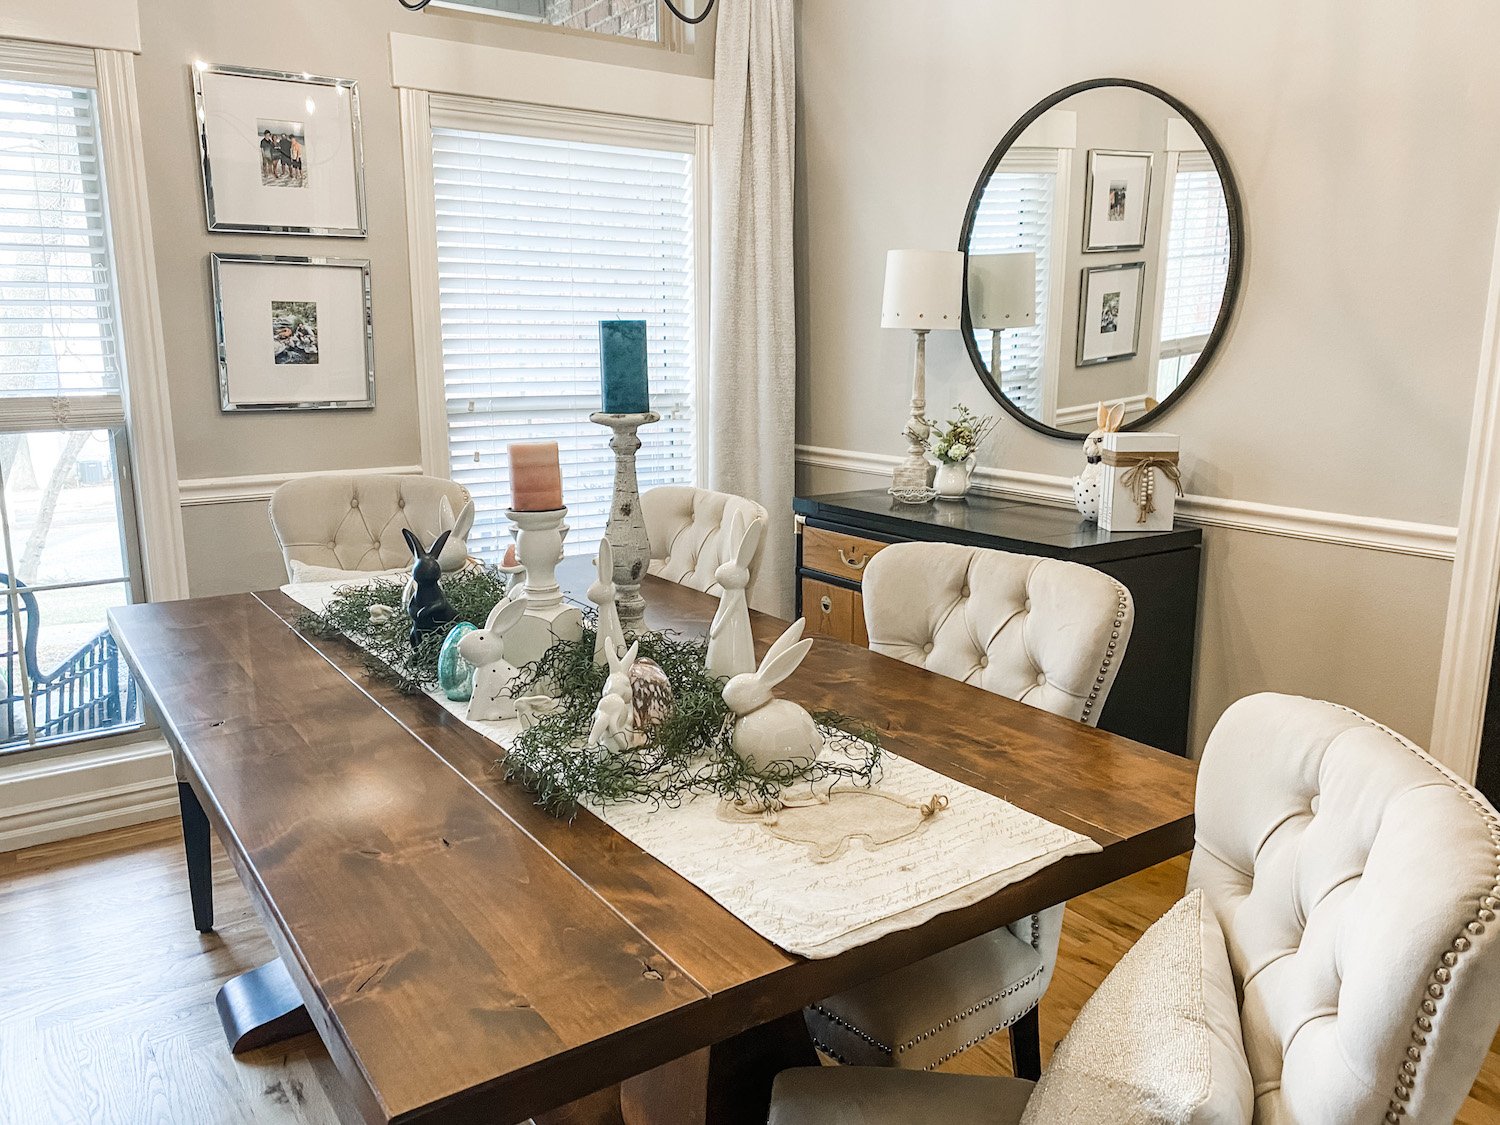
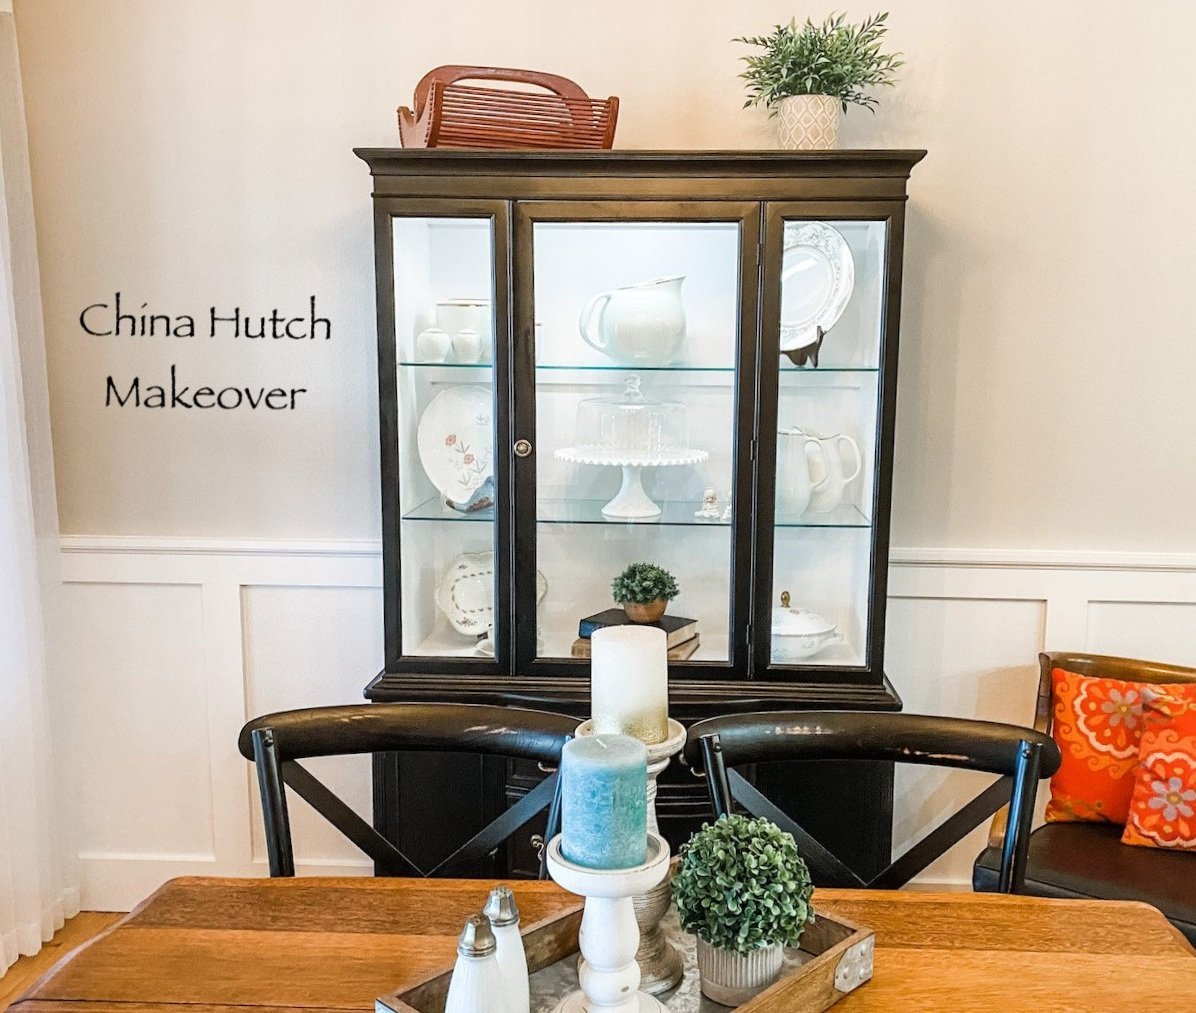
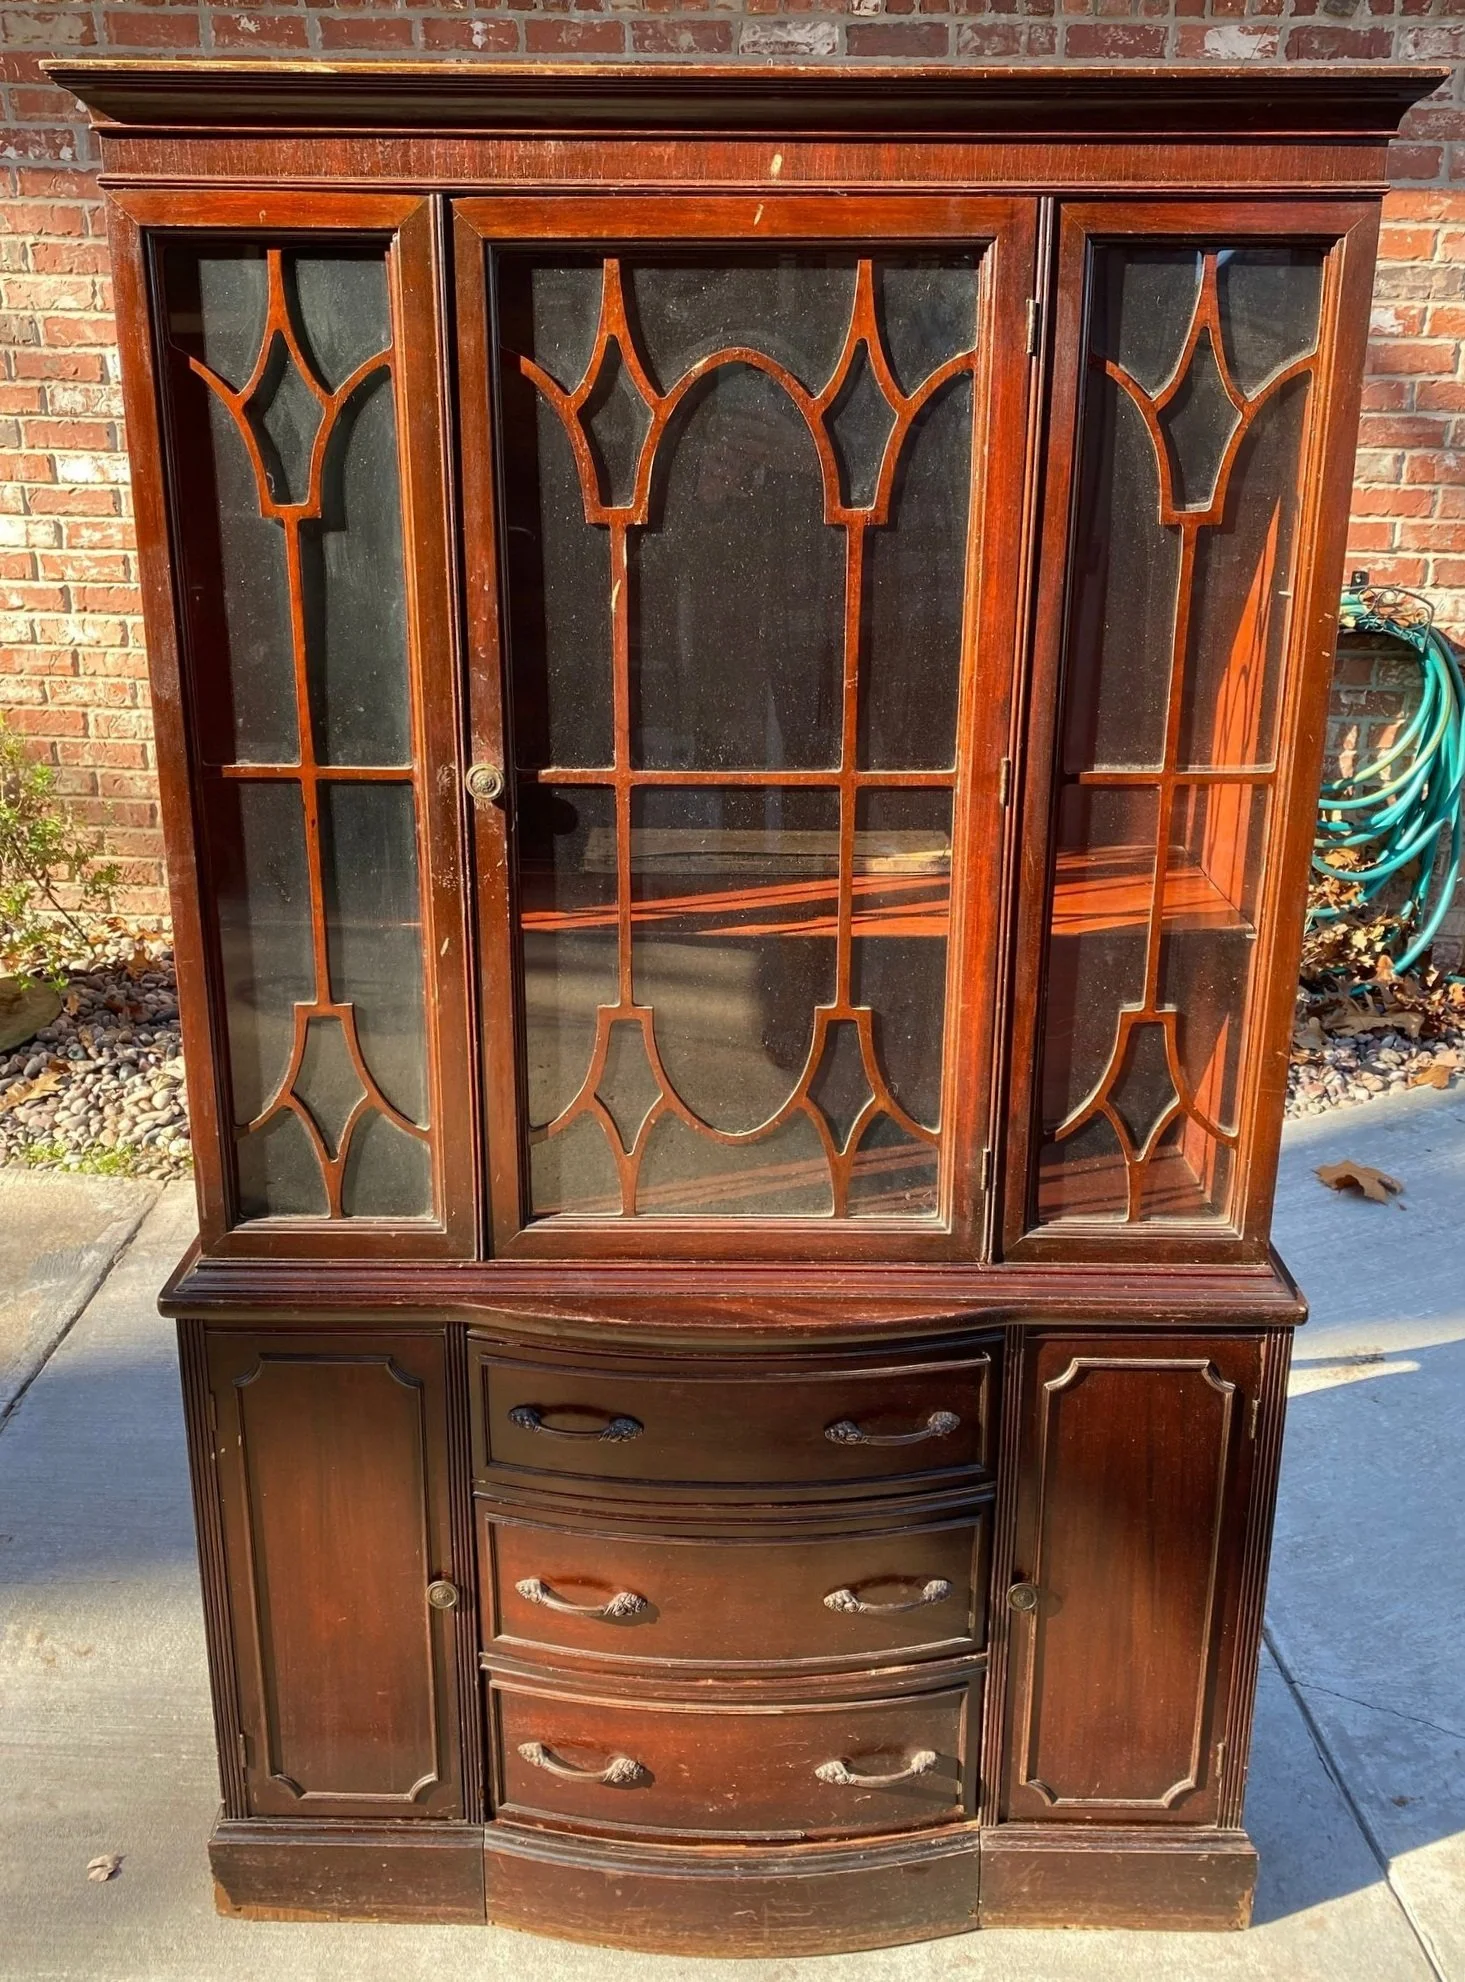
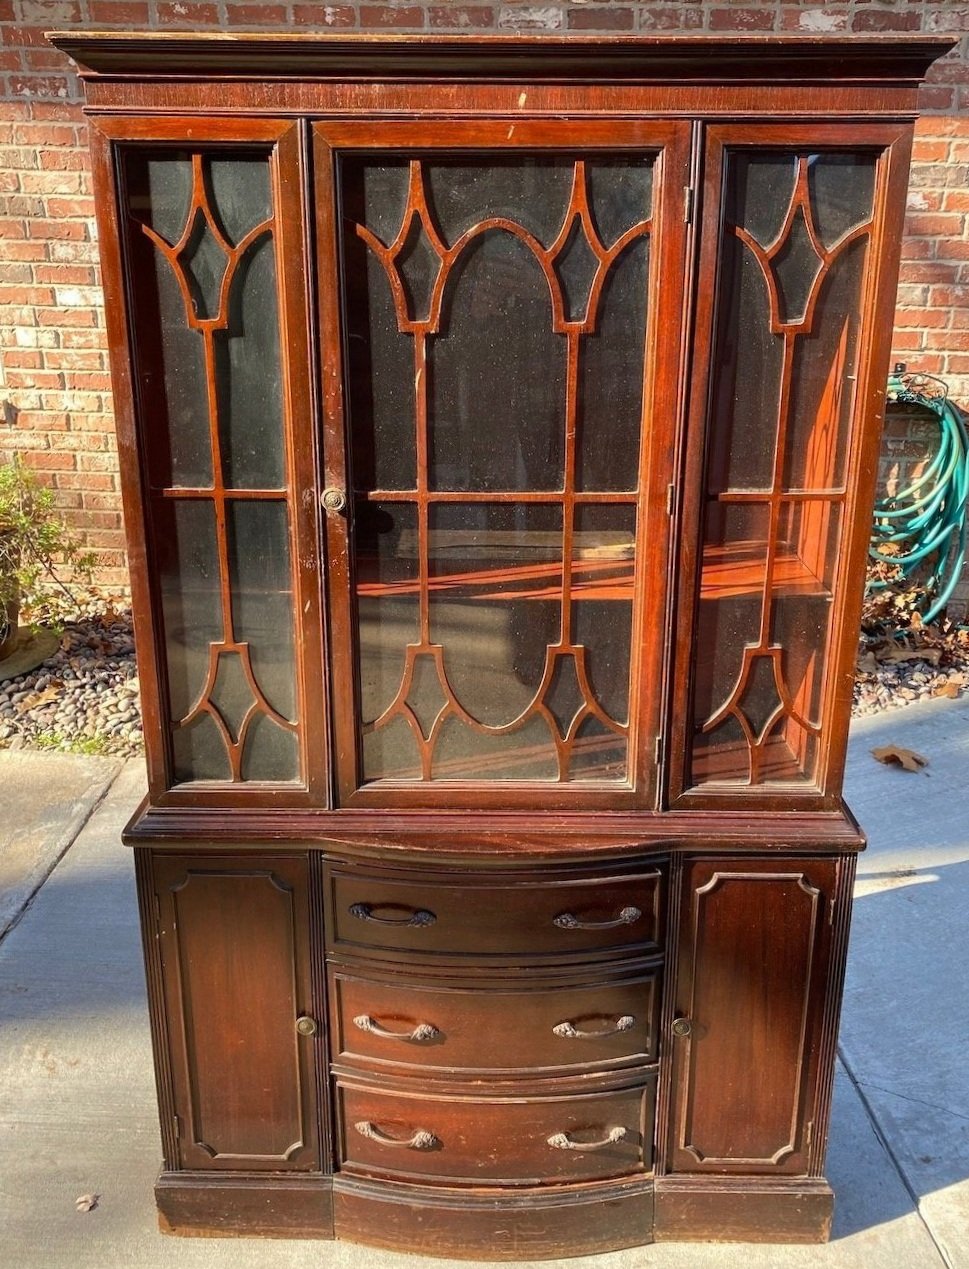
The quilt project. Still chugging along on this. I have three at the quilters and I finished up the last three throws this week. Those will go to the quilters this week. HUGE check off my list. I still want to make a few pillows and such but at least the big stuff is done!

This is the time of year when I start prepping the yard for spring planting. We cleaned out the flower beds and pots and put down mulch. I promised to share the new “grind stone pathway.” Still not quite finished but when I do get it done I will share. This is a prime example of “changing things up” from the original plan…I love it!

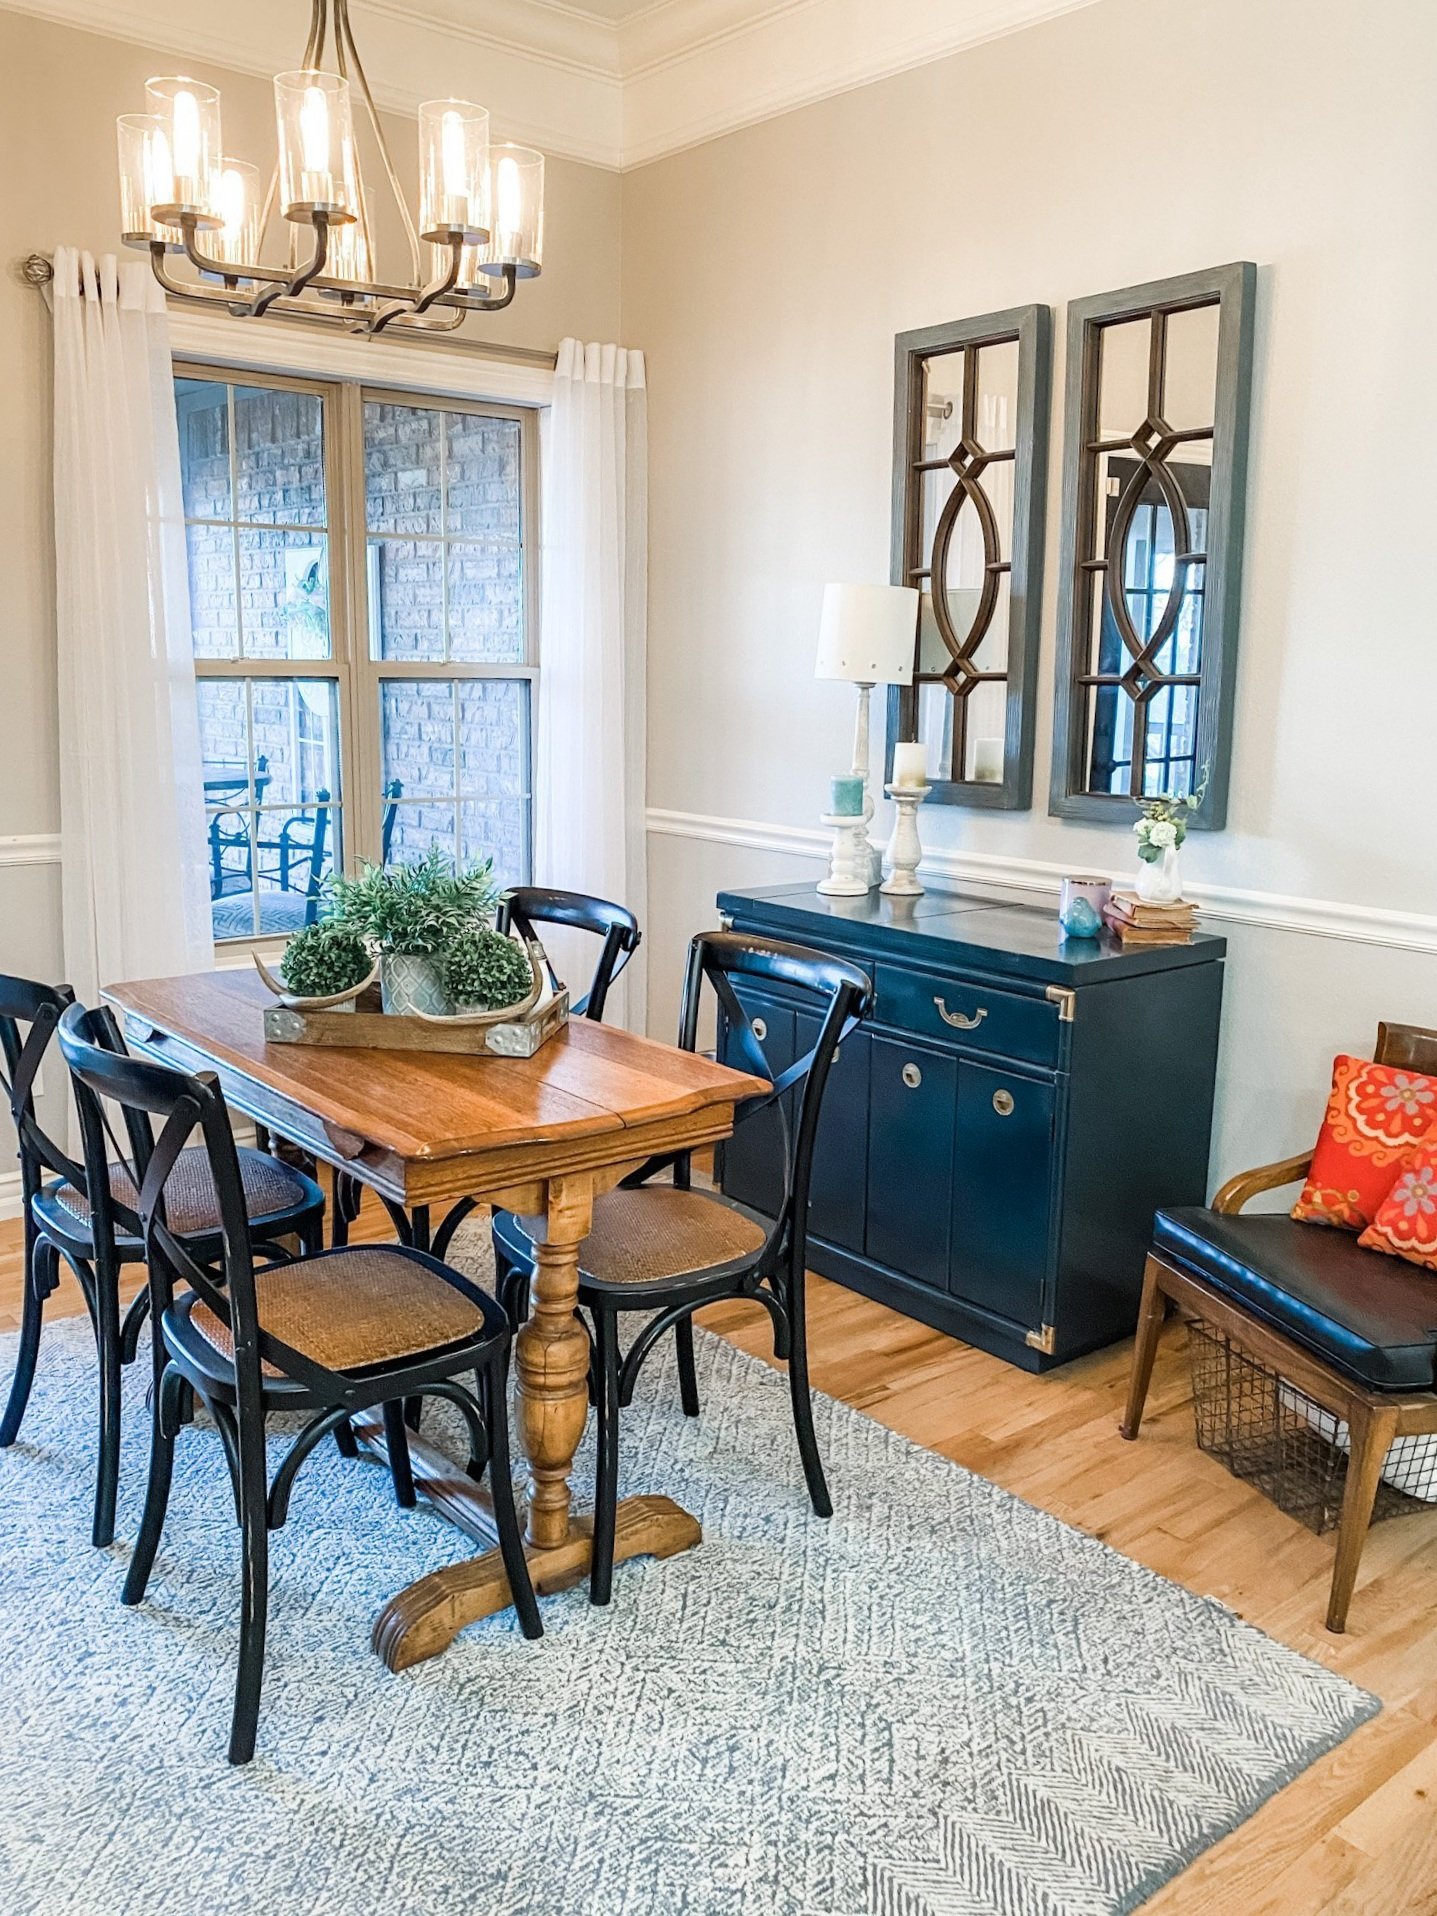
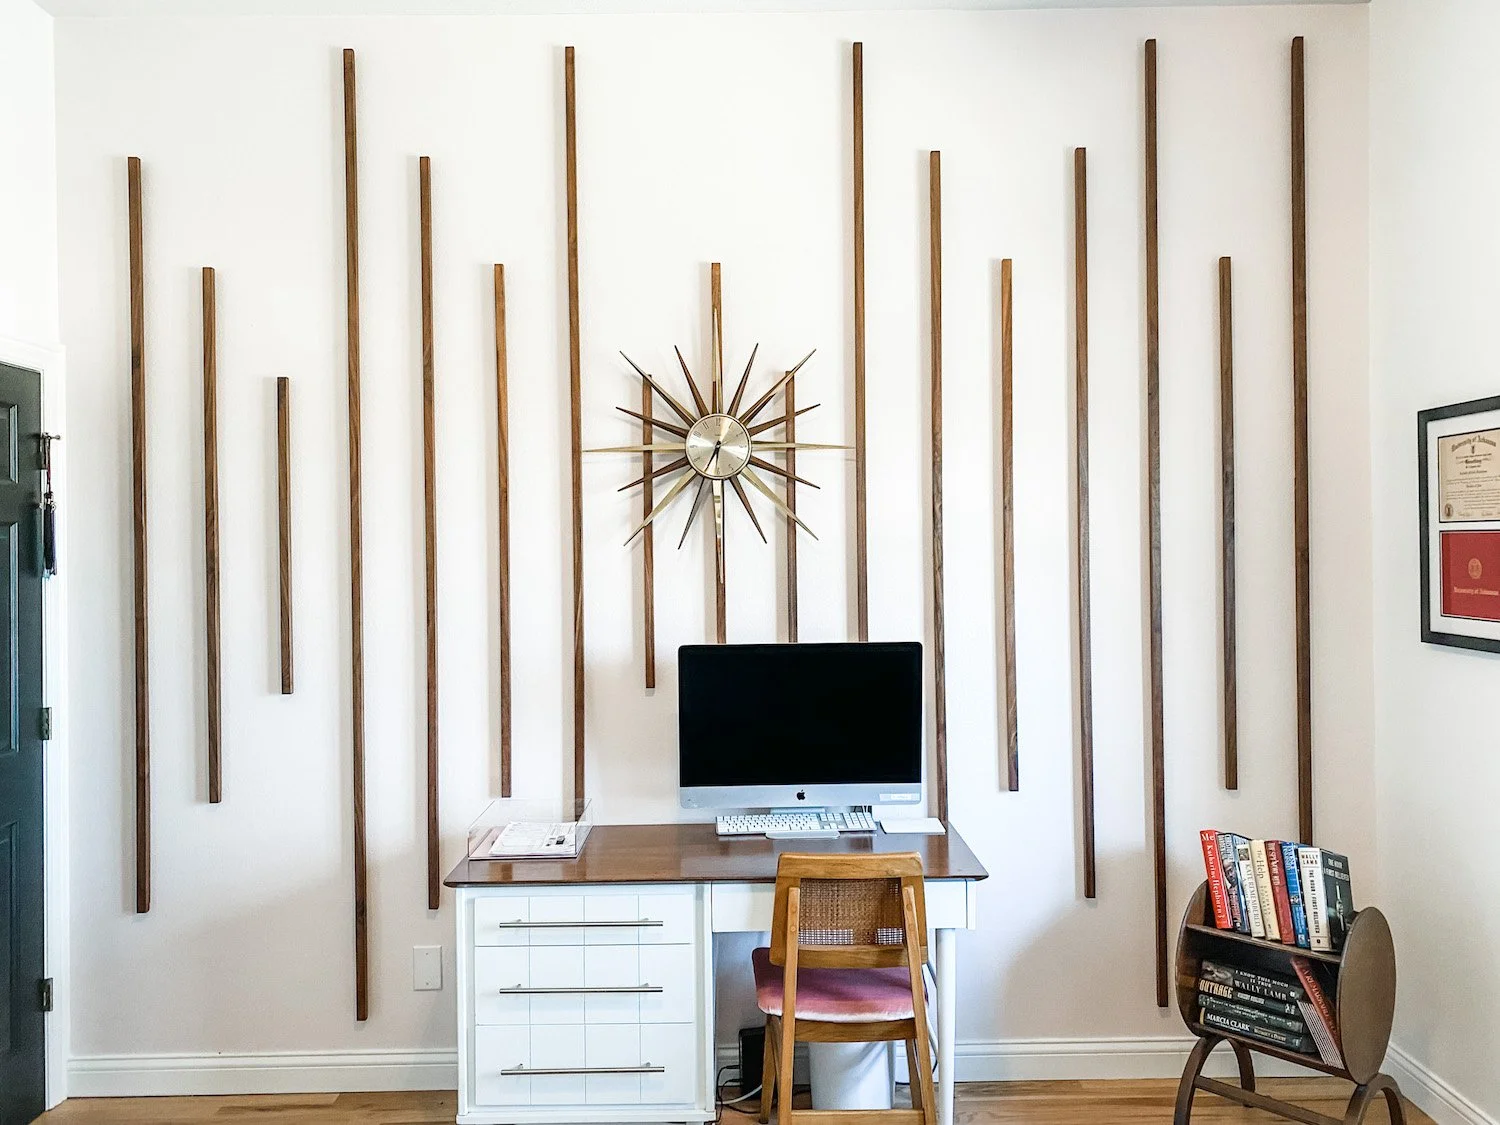
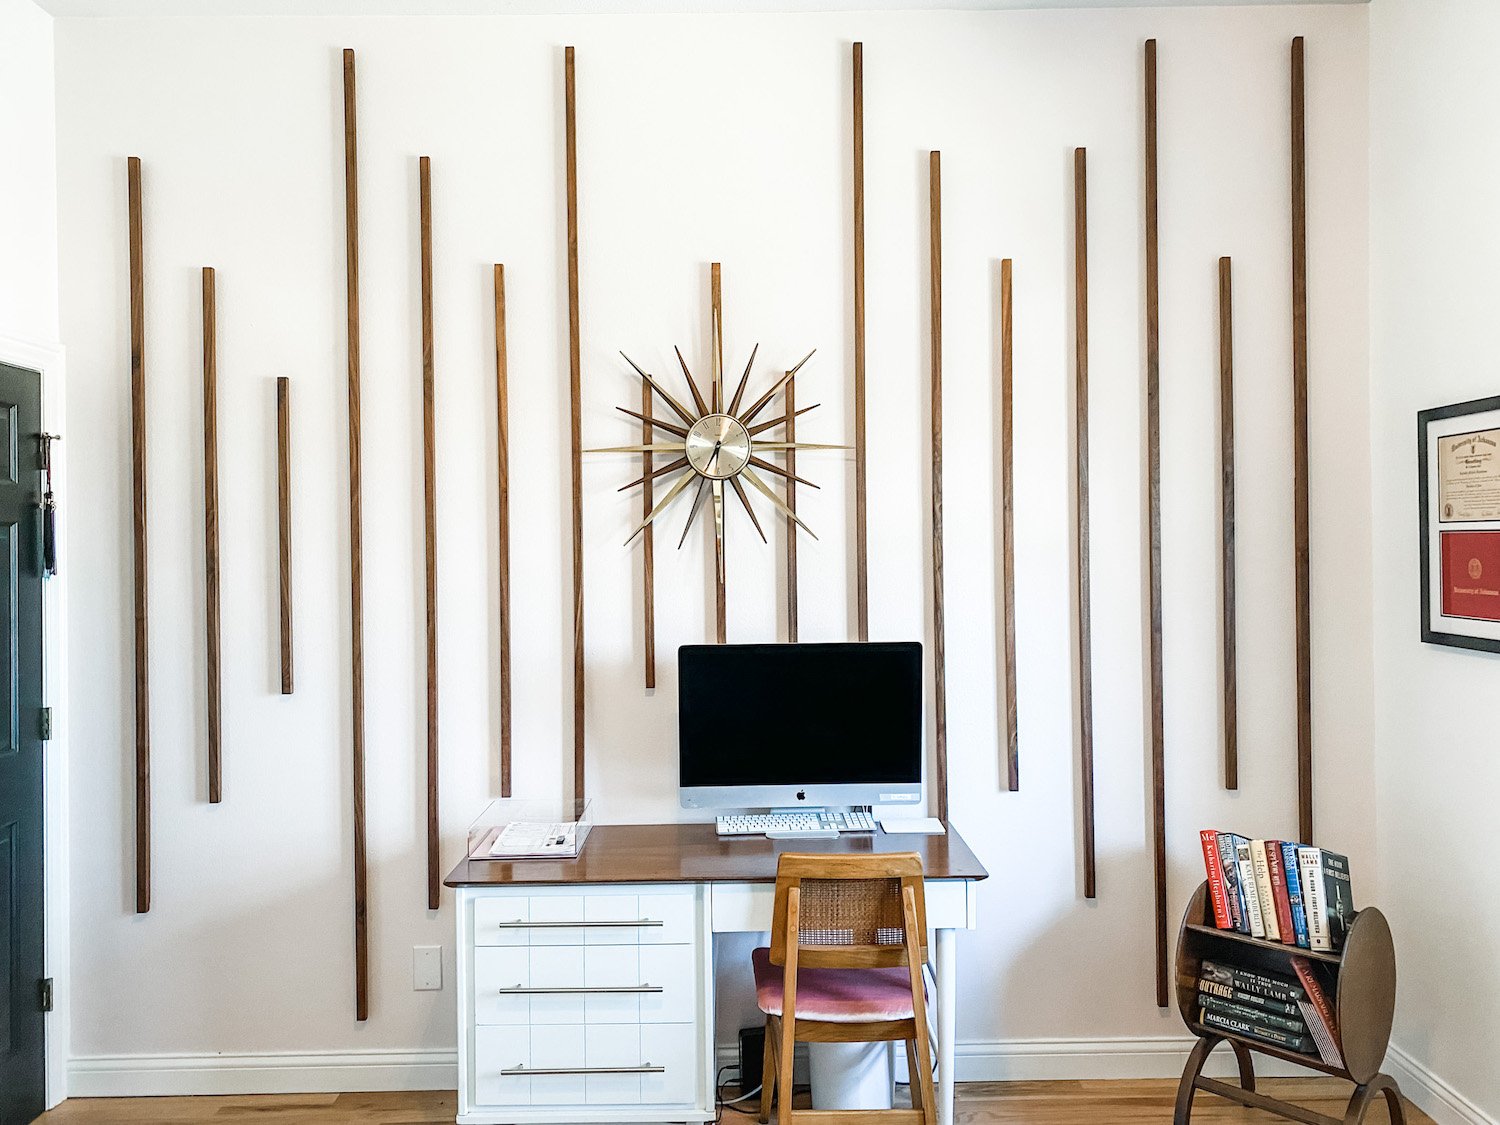
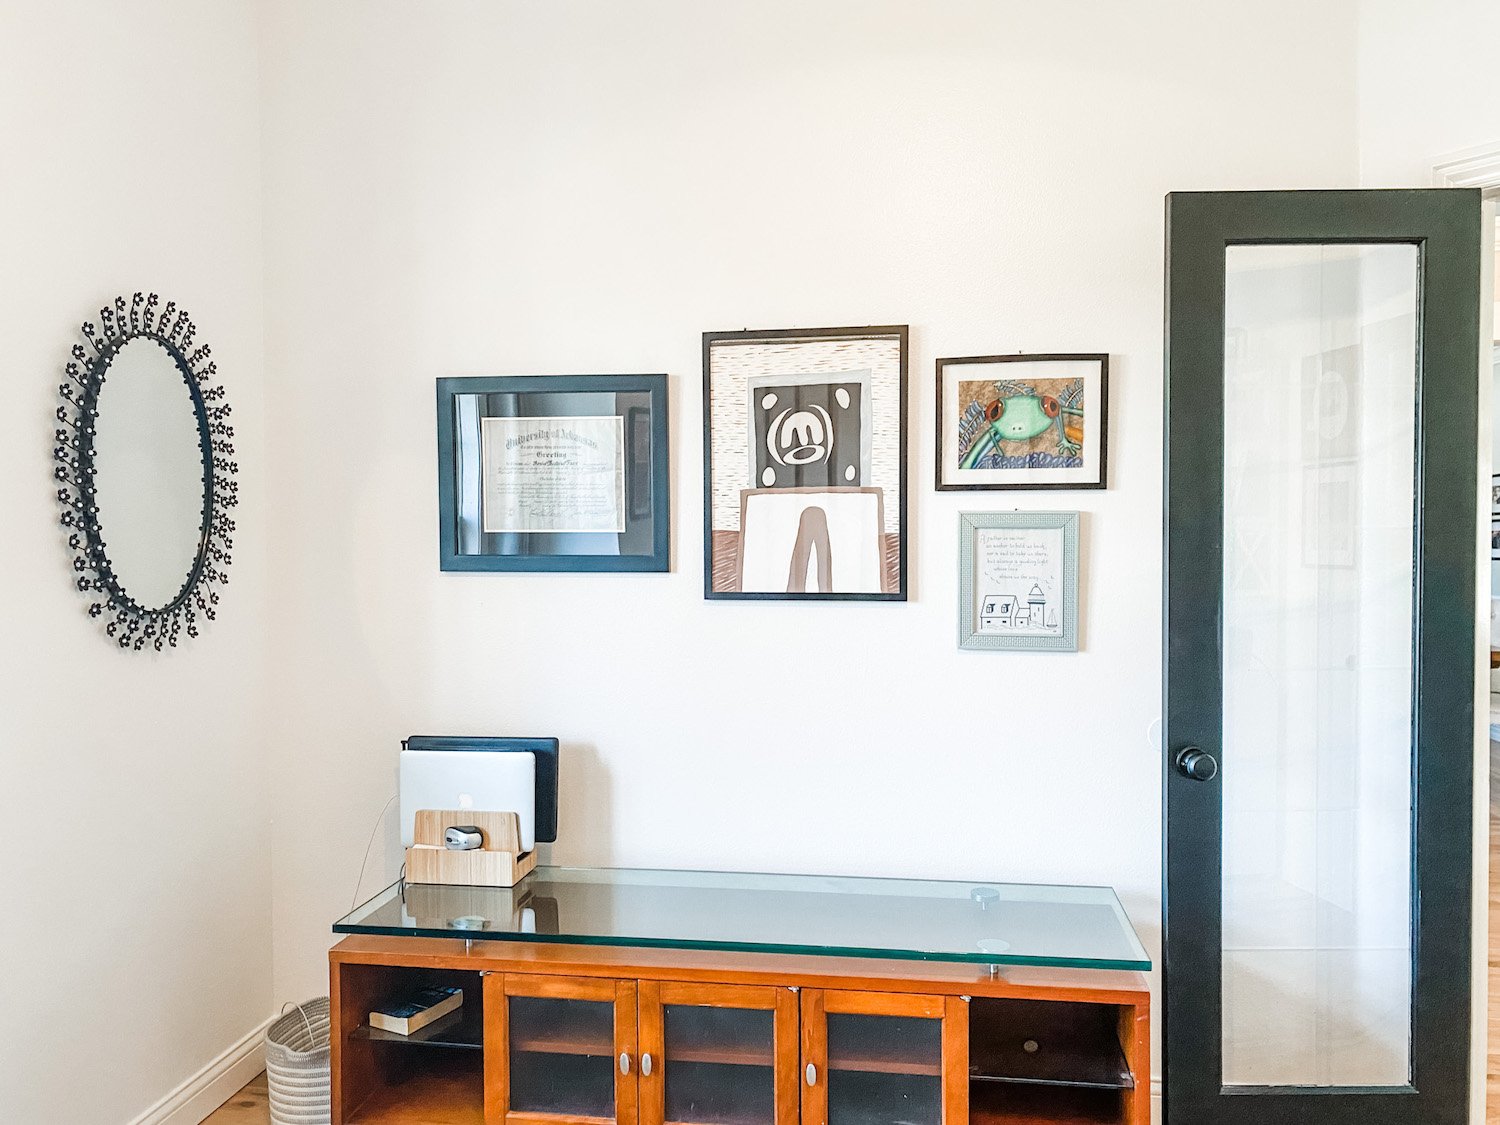
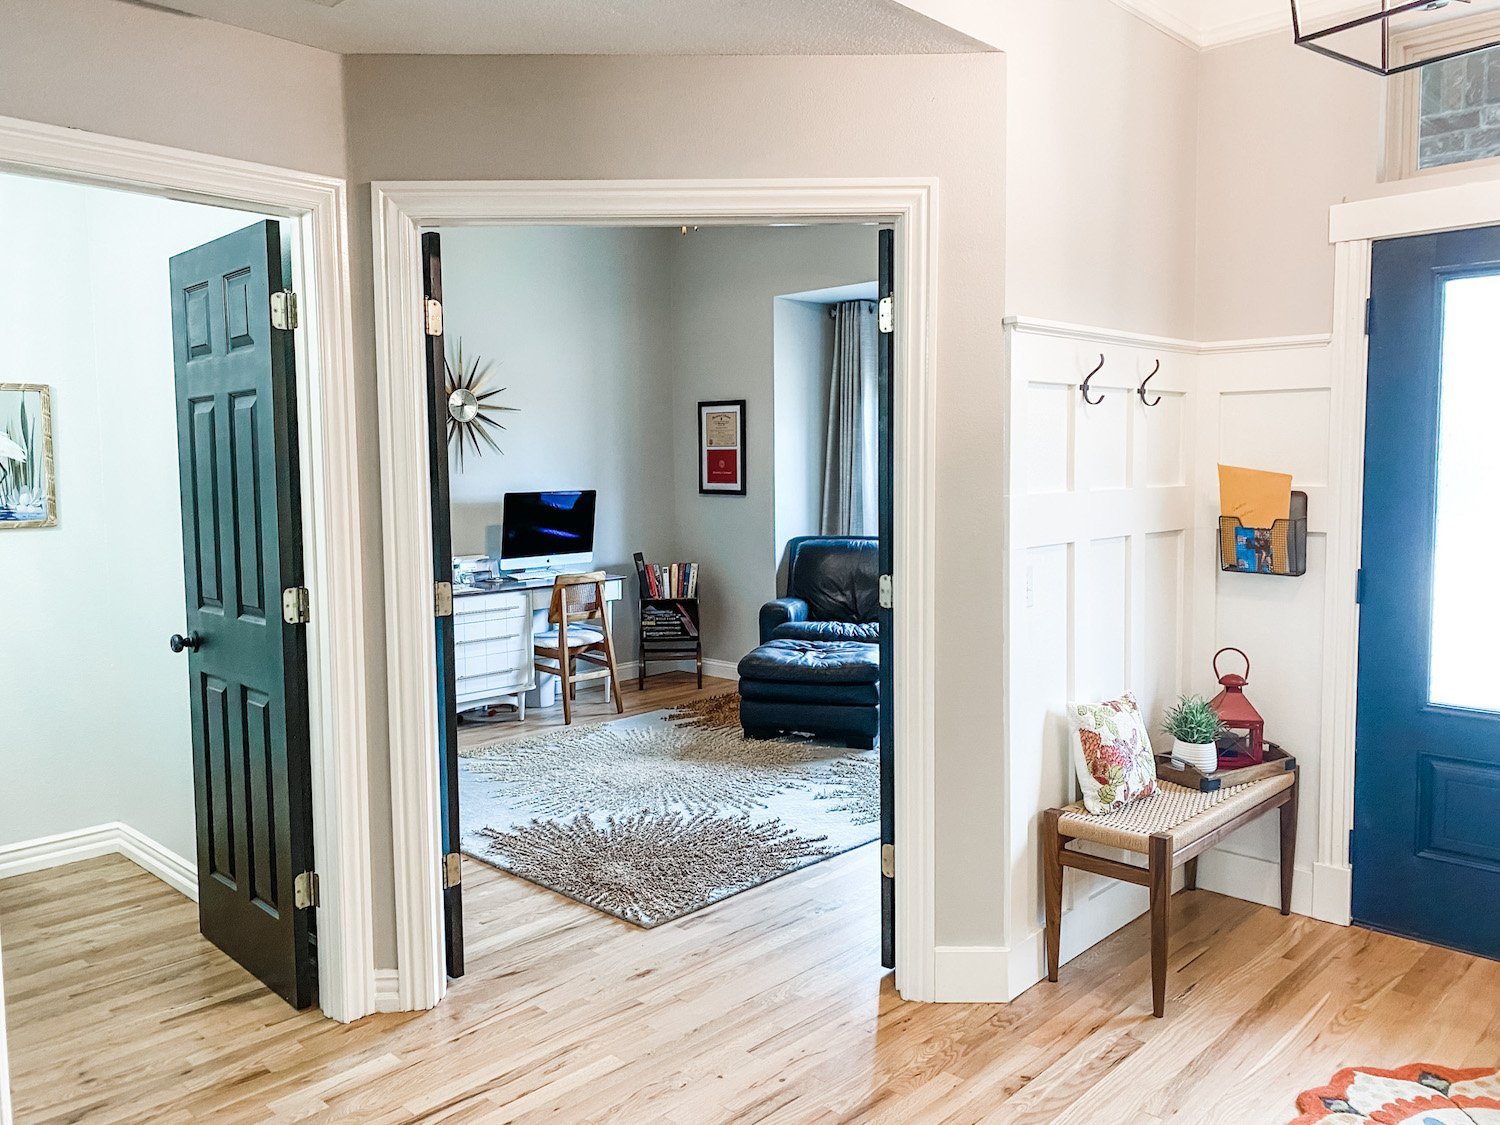
I find myself looking around the house for projects and find that for the most part it is exactly what I love. I still want to do a few little things…the tile in the pantry (like the laundry room I shared HERE!)

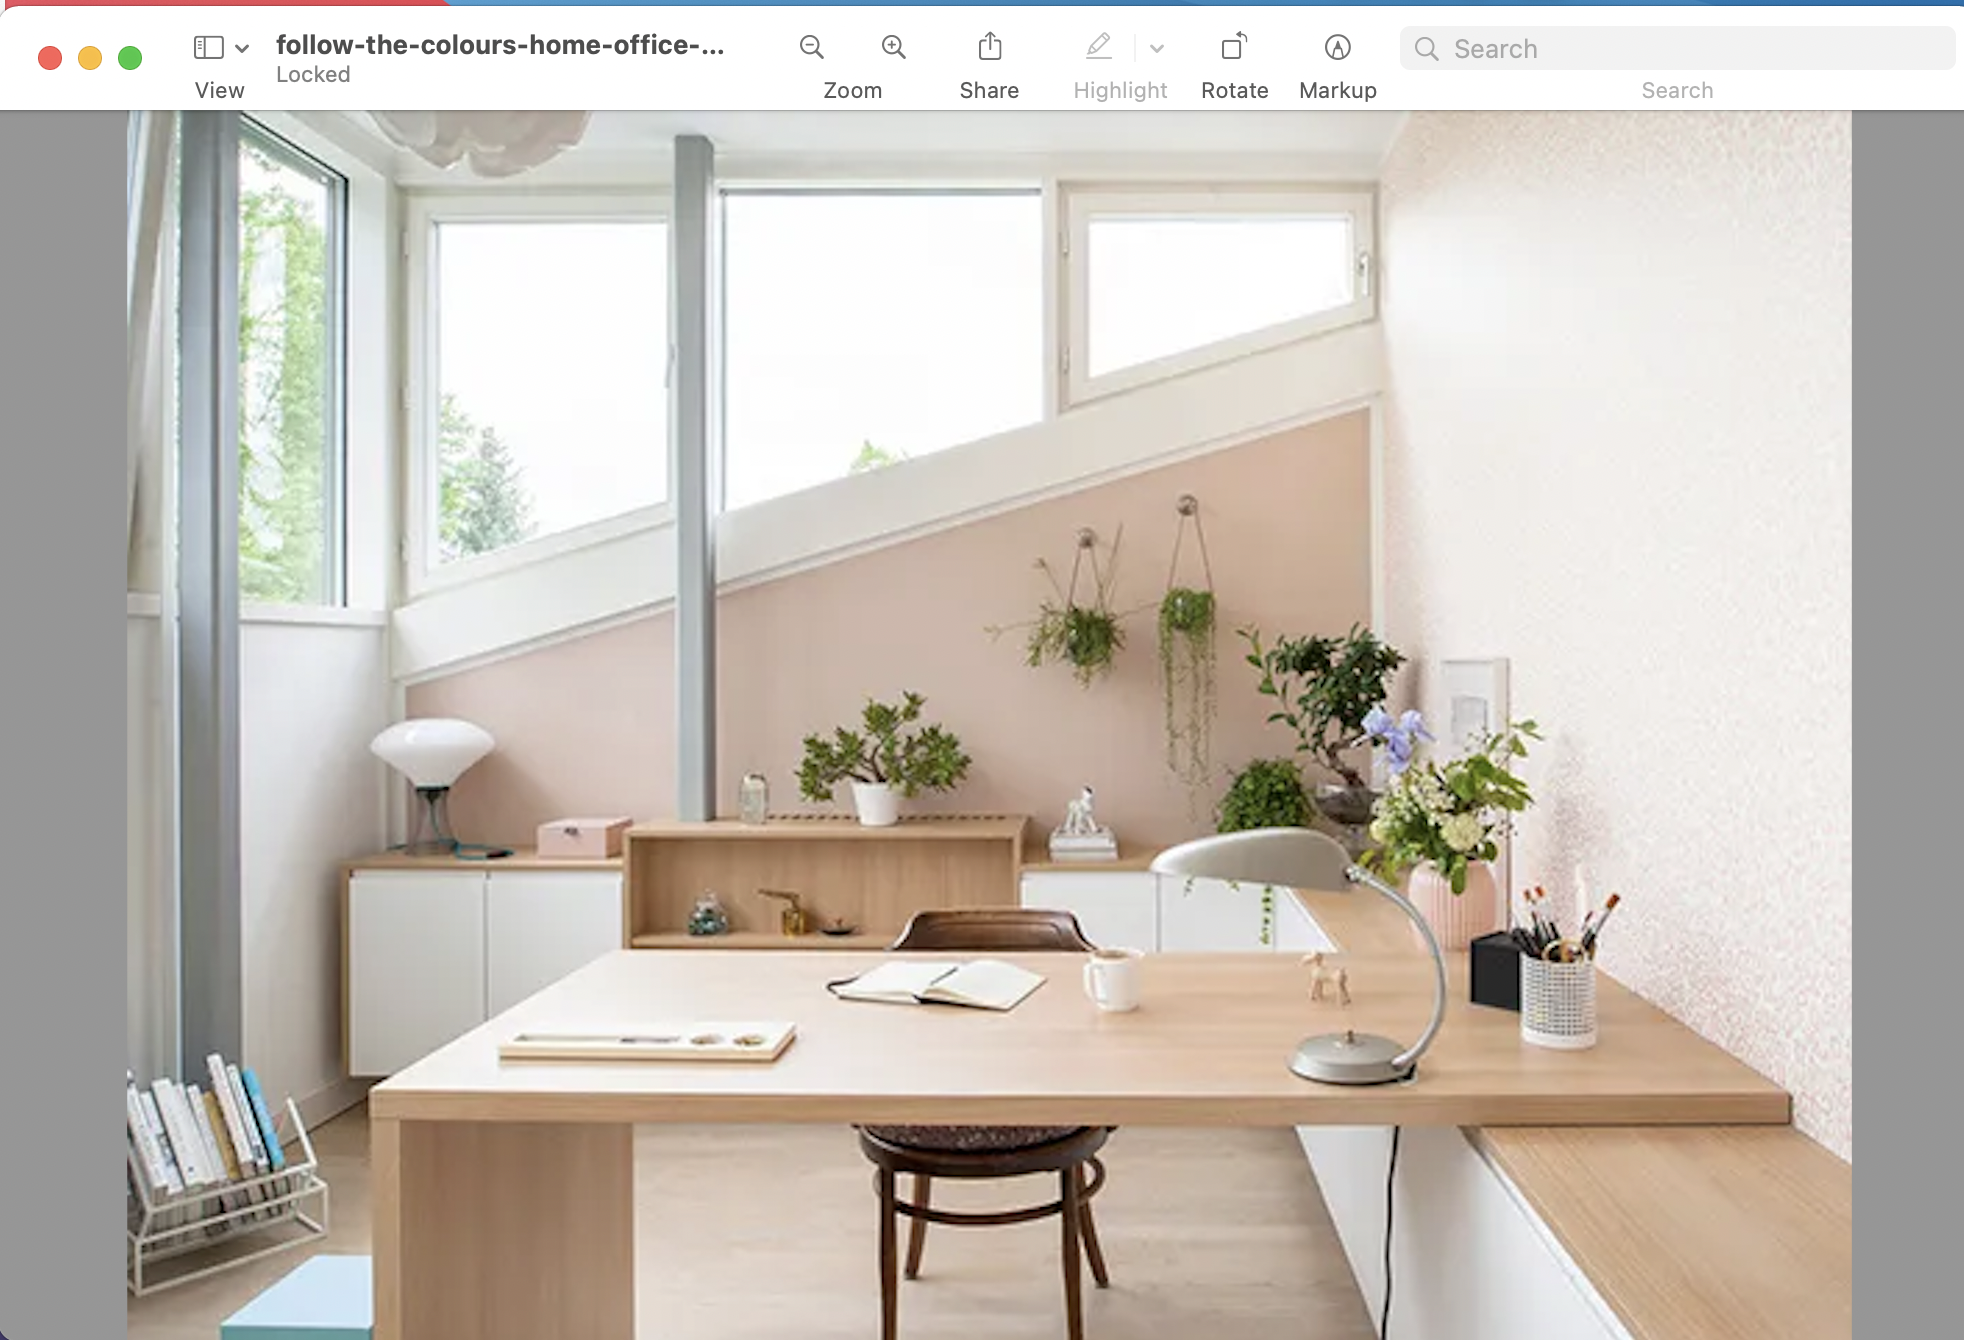
I want to do a “sunrise mirror” in the guest bath…a “sunrise mirror” you ask? Yep…like this….

I LOVE this look and I found a great tutorial HERE.

I shared my guest bath makeover HERE and I knew eventually I would want to do something with the wall mirror.

When I saw this sunrise mirror, I knew I had found my inspiration. I will do one long shelf and two round mirrors.

Someday.

I also want to reface the living room fireplace. It’s just not quite right…..

I love the fireplace makeover I shared HERE in the den….

Someday….

And a few other things here and there.

The struggle to “find something to do” since I semi-retired almost two years ago has been real. So many think “I CAN’T WAIT TO RETIRE.” But trust me when I say that retiring can be a real challenge. I went from busting it every day to waking on Monday morning with a sense of “no purpose.”

Think about ALL the things you want to accomplish. Organize the garage, paint the guest room, make a quilt out of old Christmas pajamas.

Now calculate how long getting ALL that done will take.

Or maybe you have a favorite hobby…golf, sewing, fishing, etc.

Can you do you favorite hobby 7 days a week, 12 hours a day.

Do you have enough projects to last you 10-20-30 years?

It is a challenge to go from having a definite purpose…a place to be every day…work to complete…to…what?

One way I have dealt with this challenge is the “power of positive thinking.” Rather than “what am I going to do with myself this week” I say to myself “I DESERVE this.” I worked my rear off for 30 years to build a business…all the risks and heartaches and struggles. I worked hard to get to the point in my life where I no longer have to work hard…I should be able to sit around til 10 in my pajamas drinking coffee and watching FoxNews without feeling guilty.

The most important thing I have done is identify the gifts and talents I do have, skills I have learned over the years, and sharing them with others. Giving back.

i love projecting…but as I noted I have completed MOST of the major projects around here.

My friends and neighbors…there are others around me who need my “gifts and talents.” Is it a “talent” to be able to change out an electrical outlet? Well, it was for my neighbor whose bathroom outlet didn’t work. It was for another neighbor who needed all new outlets in her kitchen. I saved those women hundreds of dollars just by doing something as simple as changing out electrical outlets.

Another neighbor wanted some type of screen for her hot tub to block the neighbor’s security light.

She was going to pay someone thousands to build it. Between the two of us we managed to build it in two days for around $300. She loves it and I love the fact that I was able to share my “gifts and talents” with someone else.

Today all the neighborhood ladies are gathering to start tearing out the deck of one of our neighbors. We are going to tear out what is there and build a new one. A bunch of every day housewives and retirees are going to learn how to swing a hammer and build a deck. How much fun is that!!!

What “gift and talent” do you have that could benefit someone else? Can you sew…maybe someone you know needs a pair of pants hemmed or a shirt mended. Can you cook…maybe you have an elder neighbor who can’t manage in the kitchen any longer and would appreciate a home cooked meal or fresh cookies. Can you do basic accounting…maybe a friend or neighbor needs help with their finances and bookkeeping. Can you clean a bathtub…bet there are elderly people in your life who can no longer bend over to scrub their bathtub or clean their floors.

You may take “what you do”….you talents and gifts…for granted, but there are those around you who could use your knowledge. Help doing things they can’t do that you do in your sleep.

Finding purpose by giving what you have.

It only took me two years to figure this out…

Another flagstone path...

HERE I shared a flagstone patio I did at my last house. I loved that area. I am grateful I have a covered front porch in this house, but I didn’t at the Lankford house and this little “patio” really opened up the front of the house.

I also shared how to repair flagstone HERE.

HERE I shared how to set a grinding stone walk way.

These were just a few of my stone walk projects. The Lankford house had a good 10-15 tons of flagstone walks and gardens…I love it!

One thing I don’t love is small rock…unfortunately there is one area in our yard that I decided I have no choice.

It is on the south side of the house but it is completely shaded by trees and I think our neighbor’s garden pond leaches into the area keeping it damp.

When it rained or there was a snow melt, water would pool in this area.

No sun, constant damp = no grass.

Out of sight, out of mind. So I have done little here, other than attempt to seed and grow grass, to no avail.

I have two big dogs who like to run and play and always seem to gravitate to this area and inevitably their muddy paw prints end up all over my house! I HAD to so something.

I decided to do a rock pathway.

AGAIN, there are hundreds of great tutorials on how to lay rock pathways. Find one that works for you!

I started by scraping down the area about 1-2” and compacting it well with a garden tamper, paying close attention to the grade. I wanted to make sure there was a gradual fall from the back of the house to the front.

This is where a lot of tutorials suggest putting down “garden fabric.” I do not. I don’t like it and I am willing to spray a little roundup on any weeds that may pop through from time to time.

Some also suggest putting down a firmer base. In some areas you may definitely want to do that. I did not do that here because I didn’t feel like it need it.

The next thing I did was put down sand where the flagstones where going to be set.

This is a super important step in my opinion. First, you want the large stones (whether flagstone or paver stones) to sit on a “clean” base…no rocks or pebbles. If a rock were to work its way into underside of the stepping stone and you put pressure on it by stepping on it, it could break. Second, it gives you a soft “pliable” base…so when you set your rock, it is easy to make adjustments by adjusting the amount of sand…just pick up the stone and easily remove or add sand as needed.

I usually add about 1-2” of sand. After putting down the sand I wet it down well then I used a long 2x4 and dragged it over the sand several times to level it out, again paying close attention to the grade of the area…you DO NOT want to create low spots where rain water and snow melt won’t drain!

Since I was creating a “path” I “walked” the path to see where I wanted each stone to set. I wanted the stones to kind of match my stride.

I leveled each stone as I set it, starting from the lowest area by the front gate and working my way back to the highest point by the corner of the house. There is only about a 6” drop in this 22’ span so I had to be very careful and pay close attention to that grade.

This is where you want to make sure you are not doing anything to impeded the natural flow of any water shed.

For example on the other side of the front gate is the side yard of the front of the house. It is already has a good grade and I wanted to make sure that what I did was not “lower” than that grade, creating a dam.

I also wanted to make sure I wasn’t altering the grade so that water actually flowed toward the house…that could be a major issue! So each stone needed to either be perfectly level or slant slightly away from the house, never towards the house.

Once all the pavers were set and leveled, I hosed down the area so that the sand leached under the rocks, filling any voids that might have been created by all the movement.

Next up was the gravel. You may wonder where I got all this rock. At the rock store, of course…lol! I was talking to my daughter when I went to pick out my rock and mentioned I was going to the rock store…she laughed at the fact that there really is a “rock store.” I picked out my rock, determined how much I needed, then paid them to deliver it. I had hoped they could deliver it to my back yard, but their little machine couldn’t fit through the side gate so I had to wheel barrel four thousand pounds of rock around my back yard! Yes, I hurt like heck this week!!!!

I decided I wanted a “path look” to the rock…so I picked out two different rocks. A small brown rock and a larger multi colored.

I used a 6’ piece of garden edger between each rock to create a crisp line. Put it in place, lay rock on both sides, walk on the rock a bit to bed it down, then just pick up the piece of edging. I used the garden tamper as I went to bed the rock a bit more.

I think this looks super awesome…course the first things the dogs did were run back there and scatter rocks so I am not sure how long this “crisp” look will last.

So far so good…

We have had one light rain and of course it is spring so I am sure we will get some heavy rains in the next few weeks. I held back a few buckets of rock so if there is any settling or pooling I can add more if needed.

Eventually I may add some shade loving plantings…someday. Again, out of site out of mind.

While I was digging around and creating pathways I decided to tackle another area as well. This one will highlight the grindstones that were my grandfather’s. I shared those HERE when I made a path at my other house. It was one of the things I made sure did not convey in the sale…yep, we dug them up and moved them here. They have been sitting under potted plants for over a year but Brian had a wonderful suggestion for using them and I will run with it…when I can run again.

I will share that at another time…maybe when I get further along in the process. I rarely leave a project half finished but after days of digging and hauling I was just too pooped to finish up Sunday. Fortunately it is it has rained for a few days so I a good excuse to stay inside and work on my quilt project.

Until next week….

WHY DO I DO THIS TO MYSELF!!!

If you have ever checked out my “About Me” page you may note the annual pictures of our family in our Christmas PJs. No pictures of the last two years because Brian and I had Covid in 2020 and then Sarah had it this past year…so no family Christmas celebration for two years in a row. I still got everyone matching PJs but no family picture…poooo!

Anywho, I have always wanted to make a quit out of all the different plaid PJs. I have put it off because, well, I hate sewing. Hate is not a word I use often, but I really hate sewing. I wasn’t really sure why. I’m pretty good at it. I love the end results…whether it be a decorative pillow, reupholstered chair, or a custom formal dress.

I just know that every time I sew, I find myself growling and gritting my teeth.

I finally realized why I hate it so much after two weeks of working on this latest project!

It hurts…my back hurts, my neck hurts, my teeth hurt, my head hurts. Most likely the result of my horrible posture and hours of sitting.

The latest project? A PJ quilt…or rather quiltS! As in, I am up to three quilts and two throws.

Why…well, we have a full and twin bed upstairs in the bunk room and I really want some cute Christmasy quilts. Then I decided if I was going to make two for upstairs, I need to make a queen size one for the guest room. And of course the grandsons had different PJs than the adults so I thought it would be neat to make throws for them out of their little PJs.

And then of course I need to make something for the daughter-in-laws…they both want throws…and Sarah wants pillows…

AND BEFORE I KNOW IT ONE TINY SEWING PROJECT HAS TURNED INTO A FRICKING NIGHTMARE!!!

So be it…like I always say, the best way to eat an elephant is one bite at a time. So every morning I take 4 ibuprofen and start chomping away.

As with any DIY project I first had to find my “inspiration.” I knew I wanted quilts, but I also know I don’t want to do a tedious piece mill quilt. When I was in college, I worked for a lady who made applique’ baby quilts…so I know how to do that.

So I went searching and found this….

…I love it and it is something I can do with my skill set…applique’ trees made out of the flannel PJ’s on flannel panels.

I am not going to go into a long tutorial on “how to make a quilt”…as I have said time and again, I am not good at tutorials and there are THOUSANDS of tutorials out there on how to make all kinds of different quilts. Find one that makes sense to YOU!!!! I’m just here to “inspire” you!

So my next step was to gather up all the PJs we have. I sent out a message to all the family to gather up their old PJs and send them to me….

These are just a handful!

We have had this tradition for over 20 years but most of the older ones are long gone. I was able to gather about 15 different plaids from years past. The little guys (my two grandsons) had to wear different PJs up until about 4 years ago and my daughter actually had some of their older PJs stored away….SCORE!!!

I decided (based on some complicated math and chintzy fabric widths) to make the panels 10 1/2” x 10 1/2”. For the little guy’s throws the panels are 9 1/2” x 9 1/2”.

Easy peasy, right?

OH MY GOSH!!!! WHAT HAVE I DONE TO MYSELF!

The queen size quilt requires 72 panels, the full size 56 and the twin 48. The two throws will take 24 each…and each panel has THREE trees! That is a total of 672 trees…so not only did I have to cut out 224 panels, but then I had to cut out 672 trees and 672 tree stumps…and then I had to applique’ three trees and stumps on each panel.

THIS product has been an absolute life saver for me!!!!

Back in the day you would have to iron on a fusible backing. With this stuff, I just cut out the trees on the webbing, peeled one side, stick it on the fabric, then cut it out. Then I peeled the other side, and stuck the tree onto the panel. This stuff allowed me to peel the tree off and reposition it if needed. Not easy to do with iron on fusible backing.

I did use an iron on fusible webbing on the back of each panel…flannel is “stretchy” and this made sewing the trees on a bit easier. It is a “tear away” webbing so when I am done I can just tear away the backing and have a nice soft panel!

Actually, I stuck all the little trunks on the panels, sewed those on with a satin stitch, then went back and added the trees.

Again, it is waaaay more complicated than I make it sound, but this is the end result….

A total of 176 big panels and 48 panels for the little guys.

It only took me two weeks and a big bottle of ibuprofen.

Soooo, now I wait for the flannel I ordered for the stripes that will go between each panel. I got the cute white flannel with little stars for the panels from a local craft store but I read reviews on their flannel and it didn’t score high marks. So I decided to buy a different brand from a different source for the stripes and backing. It was a bit more expensive, but if you are going to put in this kind of time and money, I say go with the best. I want these quilts to last a looooong time!!!!

I decided to go with plain ole’ red…very Christmasy. My plan is to connect each panel with 1 1/2” red stripes and back the quilt with red or maybe another plaid flannel…then bind it with a red and white striped fabric…kind of “candy canish.”

Truthfully, I am grateful for the time off while waiting on the flannel. I need the break!

I am very fortunate. My daughter’s boyfriend’s mother quilts and he knows how to do the top stitch quilting…so he has agreed to do that for me. That is an expensive part of this project so I am grateful he is willing to do it!

AGAIN….find a tutorial that makes sense to you for the type of quilt you want to make. My quilt is a tad more complicated because of the applique’ work, but you can do a simple patch work quilt if you have no other skill than the ability to sew a straight stitch! Don’t let the complicated and beautiful quilt projects intimidate you…they are amazing and I envy the women who have that ability, but you can make a simple keepsake without all the fuss!

I have seen keepsake quilts made out of baby cloths, old jeans and athletic tshirts. My neighbor saw this and decided it would be a great way to preserve a bunch of her father’s old flannel shirts she kept.

This is definitely a “labor of love.”

It is also a prime example of doing something I dislike because I know I will love the end result!

The "new" Drexel server....

I shared my plan for this wonderful vintage piece HERE….

I know purists cringe when people even talk about painting vintage pieces.

This is a prime example of “doing what you love.” If a piece will be more loved and treasured in a different state then go for it.

I painted the first one I found years ago and have had it in my dining/breakfast room…

…I recently swapped it out for the china hutch (featured HERE) and sold it.

Now this piece, a Drexel Accolade, has some value as is….if you do a little research you will find they sell for hundreds. But for me “hundreds” is not a value that will keep me from giving a piece a little makeover. If we were talking tens of thousands, yeah, no.

I also have a Drexel nightstand I refinished and shared HERE.

I planned to sell this piece after it’s makeover but I have moved it into my dining room and now I am kind of liking it…hum…guess we will see.

So…what did I do to give this thing a little more appeal?

First, I removed all the old hardware and brightened it up.

The hardware on these pieces are solid brass but after a few decades of neglect it is hard to tell. You can tell if something is solid brass with a magnet. A magnet WILL NOT stick to solid brass.

If the hardware is solid brass, the only way I have found to really brighten it up and get the decades of grime off is with Brasso and SOS pads.

Coat each piece with Brasso. I use a little chip brush to coat the pieces. After that sits for awhile, take an SOS pad and scrub away. You may need to repeat this process a time or two. I also use an old toothbrush to get in all the nooks and crannies.

After all the pieces are really clean, I scrub them with “Never Dull.” It seems to get the last layer of grunge off and gives them a little bit more “brightness.”

Not the easiest or fastest way to clean brass hardware but I just don’t think you can beat beautiful brass hardware.

Now, if the hardware is NOT brass and you want to spruce it up (without the cost of replacing) you can always give it a good scrubbing, prime it with metal primer and then paint it with spray paint. (TIP: put the screws back into the screw holes so that you don’t get paint in the threads.)

I shared another brass hardware restoration project HERE.

So, the hardware is done. If you find a Drexel piece and it is missing any of it’s original hardware, you can find replacements on Ebay…but be prepared to pay dearly for it! Each pull can range from $30 to $110 EACH!!!

I decided to strip and oil the drawer and door fronts. On the last Drexel makeovers (the bedside table and server) I painted the entire piece. This time I decided to shake things up a bit.

While I like wood grain, I am not a huge fan of oak. No biggy since, again, my original plan was to sell this piece. To highlight the pretty wood grain, I stripped the drawer fronts and doors using my trusty 1/2 and 1/2 mixture. 1/2 acetone, 1/2 lacquer thinner. HERE I posted a pretty lengthy tutorial on how to use this mixture to strip even the most stubborn finishes!

After stripping off the old finish I gave the drawers and doors a little mineral spirit wash, lightly sanded, wiped with tack cloth, then applied 3 coats of tung oil finish…my current favorite being Waterlox.

After that had dried and cured well, I taped and papered the doors and began prepping the cabinet for paint. (I removed the drawers to strip and oil them!)

I didn’t need to paint the inside of the cabinet so I taped that off, along with the black laminate under the flip top. I primed with Bullseye primer, then sanded smooth with 220 grit paper and wiped it all down with tack cloth.

I decided to paint the cabinet with high gloss black lacquer spray paint. I am obsessed with the high glass finish on these pieces. I just think it really makes a huge impact, especially with the bright brass hardware.

(You may notice I am all decked out for Easter…that is my new thing…decorating for each holiday/season. Next up will be Memorial Day/4th…patriotic stuff…then “summery”…then fall…then Christmas…then Valentine’s and back to Easter. See what happens when you “retire.”)

The trick to a flawless spray paint finish is LIGHT COATS…lightly spray, let it dry, spray again. It may take 3-4-5 coats but it dries quickly and in the end you will have a beautiful finish. If you go heavy handed you will have drips and runs and will be hugely disappointed!!!

Also pay attention to the temperatures and humidity. If it is too hot or too cold, or if the humidity is really high, you may have issues!

HERE you will find some additional tips on how to property paint furniture…very helpful!

After the paint had properly cured (gave it a good day or two) I replaced the hardware and OH. MY. GOSH!!! I seriously love this piece. Even though I am not a huge oak fan I am really loving it!!!

So the past few weeks I have been tackling a MAMMOTH project. Maybe next week I can share it. Hint, in entails A LOT of the thing I hate most….but man will it be worth it…I think…I hope….

Sheetrock repair.

I posted a very helpful tutorial on repairing sheetrock HERE almost 9 years ago.

I decided to post another tutorial because I have two small sheetrock repairs…the result of removing security system control panels. (And a son who pointed out that I spent a fortune remodeling this house and left the worthless control panels)

Yes, I am removing a security system. It is the original hardwired system that was probably installed when the house was built 22 years ago and we have never even attempted to use it.

Why? Well, first we have a HUGE dog, an Anatolian Shepherd, that is quick to alert us to all boggy persons, delivery people, squirrels, unfamiliar cars, etc…day or night. And God help you if you tried to enter this house. She is the sweetest dog in the world…if she knows you or I am here to tell her all is okay. But I have no doubt she would make a meal out of you if she didn’t know you or she thought I was afraid.

No worries…we have a precious lab puppy who would be quick to clean up any mess Cleo makes…or give you puppy kisses if you are distressed. Typical lab. Not the best guard dog.

Second, everything is wireless these days. Our current security system is wireless. So an old hardwired security system is kind of useless.

I have found very little evidence of a hardcore security system. Basically there were two control panels, one in the bedroom, one in the laundry room…

…and two motion sensors in the ceiling. I removed those and covered the small holes with new smoke detectors…you can never have too many of those! (I also just noticed the doo-dads on a few doors…will have to deal with those eventually.)

When I removed the control panels in the bedroom and laundry room I found 2” x 2” holes in the sheetrock.

Curses.

So, here is another tutorial for repairing sheetrock without having to install backer boards or tape. I have used this method to repair 2” x 2” holes, door knob holes and even large sections when I removed walls (HERE)

Here are the supplies you will need to repair sheetrock….

*Scrap piece of sheetrock (you can buy this at Lowes or “repurpose” scraps from a new construction job site)

*Sheetrock mud

*Spray texture (my walls are orange peel texture…buy the texture appropriate for your wall texture)

*Broad knife

*Utility knife with a sharp blade

*Measuring tape

*Pencil

First, use a utility knife and make the hole square/rectangular. My holes were 2 x 2 inch squares so no worries.

After you have cut a decent "square" around any damage, measure the width and the height.

Then mark the scrap sheetrock, adding about 3" to that measurement! My sheetrock piece was 5” x 5”…that will leave about 1 1/2” on each side for “tape.”

Sheetrock has a paper backing on each side so it is very easy to cut...basically all you have to do is "score" the back side (usually the side that is brown) with your utility knife then just "snap" it. Then take your knife and cut through the paper on the other side.

After cutting a piece 3" larger than your opening, you will want to mark the actually opening size on the back side of the sheetrock, leaving 1 1/2" on all four sides. (This is where a little "square" tool or ruler will come in handy!) I always make my mark and cut about 1/4" smaller than my actual measurements just to give myself some wiggle room!

After scoring, "snap" one side at a time and carefully peel the "core" (the chalky inside) of the sheetrock and backing off the paper on the front side. You will do this on all four sides.

(Yes, I know I need a manicure.)

After you are all done, it should look like this.....

I also take my utility knife and make a "miter" cut at each corner...just a little slit from the corner of the board to the corner of the paper.  

Basically, what you have done here is create a patch with built in sheetrock tape...so there is no need to tape the gap around the patch and no need to try to put backing behind the board where you are patching...it is "ALL IN ONE!"  Nifty, huh? 

Before putting joint compound in and around the hole, "dry fit" your cut piece and make sure it will fit in the hole. If it seems to stick, you can shave a little off the edges with a utility knife. If you cut the piece about 1/4" smaller than the hole, it should fit right in.

After you make sure your cut piece will fit properly, mud the edges of the hole and the wall about 2" around the hole.

Set your cut piece into the hole and use your broad knife to smooth out the paper and push the excess mud out from underneath the paper edging with your broad knife so the paper lies flat. Then put more mud on your broad knife and lightly coat the entire piece.  "Feather" the edges where the new mud meets the wall. Coat the new mud a few inches onto the wall.  The less mud you leave on the patch and the wall, the less you have to sand! It is okay if you can still see the paper and board through the first coat...no biggy!

HINT:  Some mud can be pretty thick.  You can mix it with a little water and thin it down a bit...makes it easier to work with...but don't make it too runny! 

I usually let this first application dry overnight.  Remember, there is a bunch of mud along the edges that is basically "glueing" the patch in place.  You want to let that dry well before you start sanding. 

After this first coat of mud dries, sand it as smooth as possible.  Don't panic if you sand into the paper coating the sheetrock...it happens!   It really doesn’t matter what the sandpaper grit is at this point.

I always wrap my paper around a sponge sanding block...it helps you sand flat. Sand it as smooth as possible and make sure you "feather" the edges so that you don't have any heavy mud lines showing. Don't panic if you feel like you have sanded "too much"...you really can't.

FEEL the area with your bare hands...if you can feel the lumps and bumps and lines, you are going to be able to see them...so sand away!! (I can not stress this enough...SAND IT SMOOTH...CLOSE YOUR EYES AND FEEL!!!!)

After sanding it REAL smooth, put another coat of mud over the area.  Again, the smoother you coat it, the less sanding you have to do!   Be sure to feather the edges by mudding 2-3" around the repair area.  This is where a wider broad knife really comes in hand!

After this second coat dries, sand again....sand it as smooth as you can.  Again...if you can FEEL lumps, bumps and lines, you are going to be able to see them...so sand it smooth and make sure you feather the edges. This really is the "trick" to getting a good repair!

I can usually get by with two coats of mud...and that should be plenty.  If you feel you have had to sand down too much and need to add a light third coat, go for it.   Just make sure you let it dry well and sand BEFORE moving on to the next step.

After the patch and the surrounding area is really smooth, it is time to put on the spray texture.  

If needed, I usually wait to tape off the surrounding area until AFTER I sand the patch.  Joint compound will clean off easily with a wet towel but the spray texture is pretty tough stuff. So lay down a drop cloth (or newspaper) under the patch and tape off any trim BEFORE applying the spray texture.  

Most wall textures these days are what we call "orange peel."  But you might also have "knock down."  If the texture on your walls is just kind of bumpy, you probably have "orange peel."  If you have heavy blotches, you have knock down.  

You can buy cans of texture at Lowe's and they come in both orange peel and knock down. FOLLOW THE DIRECTIONS ON THE CAN CAREFULLY! And make sure you shake the can well!

(If you have never used spray texture before, I would suggest experimenting on a scrap piece of board or drywall…play with it a bit until you feel confident your application matches your wall texture. )

 If you have orange peel you will just spray it on the patch and surrounding area (using a circular motion to eliminate "lines" and spray "outside" the patch area)  If you have "knock down" texture, you will have to spray it on the patch and surrounding area, let it sit per the cans instructions and then take your broad knife and "knock down" the new texture after it has dried a bit.   Follow the directions on the can for proper application and dry times for both!   

Lighter is better....this stuff dries rather quickly, so if you think the texture is too light, go back over it AFTER the first coat has dried.  It is always easier to add a little texture than to deal with texture that is too heavy....so go light and reapply if necessary.

If you feel like you have totally botched it, just take a damp paper towel and wipe it off the wall while it is still wet. Then either practice a bit more on your scrap or try again.

If the spray texture appears a little "bumpier" than the wall texture, you can always take a piece of sand paper and LIGHTLY run it over the new texture AFTER IT HAS DRIED and before you paint.

ONCE YOU PAINT IT WILL BE REAL TOUGH TO MAKE ANY ADJUSTMENTS TO THE TEXTURE SO DO IT BEFORE YOU PAINT!!! Not impossible but more difficult.

DO NOT PAINT UNTIL THE SPRAY TEXTURE HAS DRIED COMPLETELY!!!!!

Now this is where that can of leftover paint you stored away will come in handy! Seriously, I can not stress enough how important it is to keep "spare" paint....store it somewhere in the house, clearly marked! You may have to match the paint color the best you can and then paint the entire wall. And this is not an issue at all if you are repairing walls before you repaint.

You will probably need 2-3 coats of paint to cover the patch since you are painting over "raw" sheetrock and texture.  I used a little 4" sponge roller and brush.

If you sand well and applied the texture properly, you shouldn't even be able to tell where the patch is!   

This does take a little practice.  After owning apartments and raising teens, I've had a LOT of practice.  But if you take your time, use the proper tools and really pay attention to details you should be able to do this little DIY project yourself!

I hope this gives you the confidence to finally tackle that sheetrock repair that has been bugging the heck out of you.

china hutch makeover...

I originally bought this piece to makeover and sell…

When I gave my breakfast room a little makeover (featured HERE last week) I decided I kind of like the look and it gives me a place to display my heirloom china….

I didn’t take pictures while I was giving it a makeover because, well, I just didn’t….

But the process was pretty straight-forward.

I removed all the hardware. The drawer hardware was not the original so I ordered hardware that would have come with the piece originally. Fortunately the door hardware was still there so I just cleaned it up a bit with Brasso and SOS pads to highlight the engravings.

Before you go scrubbing on hardware with Brasso and SOS pads, make sure it is real brass. A magnet will NOT stick to real brass…if one doesn’t, scrub away.

I removed the shelving. I also removed the glass and decorative glass inserts. Not difficult because it was just held in place by some strips of tiny molding and nails…I just popped those right out and set them aside to paint and reuse.

The shelving was pretty warped and I tried my trick of laying them on the floor and placing weights on them…no go. So I ordered glass shelves to replace them. Honestly, I like the glass better.

The glass shelves where a lot heavier than the wood shelves. Originally the piece just had two little supports on each side for the wood shelving (no supports along the back for the span which might explain why the shelves bowed.) I didn’t feel comfortable with that so I added 1x3 support boards along the back, securing them with glue and staples. Now I feel confident that the shelving is properly supported and can handle the weight of dishes. (If you have ever had a glass shelf come crashing down on your china you would understand my concerns. Yeah, it happened!)

There were a few other minor repairs that had to be made…since I was painting the piece, I did them before primer and paint.

Remember, if you are staining, stain first then repair. If you are painting, repair first then paint.

I cleaned the piece well then I caulked all the “joints.” Remember if you are painting a stained piece you have to caulk all the places where wood meets wood…and you may even have to putty nail holes. If you miss anything it will show up when you prime the piece…just caulk and putty and spritz it with a little primer.

I sprayed the entire cabinet with Bullseye primer. Primer is MUST on mahogany pieces because it will bleed through the paint! If you paint a piece and see “red” or “shadows,” that is the mahogany bleeding through…or water stains, oils, etc…more layers of paint WILL NOT cover it. Prime it then repaint it. Or save yourself the grief and prime everything before you paint. Mahogany is not the only thing that will bleed through paint. Nail holes and “gaps” will show up and you will be able to fix them before you apply your paint.

Also, you will get a much prettier and durable finish.

I know some paints (like this one) profess to be paint and primer in one. Maybe so but I always prime with a primer. Usually Kilz or Bullseye.

I sanded it smooth then wiped it down well with tack cloth.

I decided to paint the inside white and the exterior black. I painted the inside with some satin white latex I had on hand, let it dry and cure then taped it all off to spray paint the exterior.

I painted the interior a satin finish but I wanted a flat black for the exterior. I went with Rust-Oleum Matte Farmhouse black.

After the black had cured (I usually give it a few days) I replaced the hardware, reinstalled the door glass (without the decorative doo-dads) using the small trim and silicone and moved it into the house. I gave it another few days to cure before adding the glass shelving.

I did not paint the inside of the drawers or the inside of the lower cabinets. I rarely do unless the piece has an odor or stains I can’t get rid of by cleaning. If you have a piece that has odors or stains sometimes your only recourse is to prime and paint!

I added a LED light to give the display a little glow! That entailed drilling a small hole in the top for the cord and mounting an LED light strip in the top of the cabinet….simple simon!

Lovely.

This is where I remind you that “cure time” is super important when working with painted wood. I always get annoyed when I watch those shows on HGTV and they paint and stage furniture the same day. DO NOT DO THAT!!!! Be patient…give paint time to cure. If you don’t you will scuff and scar your new paint job and will be seriously disappointed.

If you look back at this blog you will see I use to do this kind of thing all the time…I loved it.

I don’t do it much anymore and I forgot how much I love taking an old abused and neglected piece and turning it into something beautiful and useful again!!!


Board and Batten in the breakfast room...

This is a simple project I have wanted to complete from day one.

Board and batten in the breakfast room.

As I have said before, there are TONS of board and batten designs and tutorials on the webisphere. Watch videos, read blogs, search Pinterest…find a design you love and a tutorial that makes the most sense to you.

So here is a little before and after.

Before….

Not totally offensive but lacks a little “character.”

After….

Simple project for me since I have done this a time or two. (Check out the guest bath, the entry in the Lankford house and the Bogey house. )

You might notice another little change…the china hutch.

Originally I had the awesome mid century Drexel buffet but I thought I would change it up a bit. I read somewhere china hutches are making a comeback. I can see why…pretty and functional.

Eventually I would like to add some art on each side of the hutch…maybe some botanicals.

My original plan for this piece was to repair it, paint it and sell it but honestly, I kind of like the look in this room. I FINALLY have a place to display some of my heirloom china that has been boxed up and in storage for a year and a half!

Before…

After….

Next week I will share the steps I took to give this piece a little facelift! Not difficult and as you can see it made a HUGE difference!

Until then….

Accent wall tutorial...

I shared HERE how I found inspiration for the accent wall in my office.

I shared HERE the office after everything was done. (Well, everything for NOW!)

At first glance, the accent wall may seem somewhat intimidating.

This is actually a wallpaper. I like the dark wall with lighter accent stripes. I think it gives the wall “depth” and makes a room look larger.

You could easily replicate this entire look with paint…just paint the wall then paint the stripes.

I kind of did the opposite…light walls, dark stripes. I knew from day one I wanted a pink accent wall and decided to make the stripes out of walnut. My office is a big room with tall ceilings…it can take an accent wall that makes the room APPEAR smaller.

Now if you have followed this blog for any amount of time you know I have a deep love for walnut.

I made my fireplace mantel out of walnut.

My kitchen cabinets are walnut….

I made my living room shelving out of walnut…

And most of my furniture is walnut. If it is any other wood there is a good chance I will paint it if need be…but not walnut!

So, pink wall, walnut stripes.

The first thing I did in this room, after a good purge and reorganization, was paint the walls.

The accent wall was painted pink and the three other walls and trim where painted white (BM Chantilly Lace…closest I can find to a TRUE white without an undertone.)

They were ready to go….

So here is a little tutorial for doing any accent wall.

Print off a picture of your inspiration wall…as large as you can get it on a full size piece of paper. I printed off the picture above.

Measure your wall then draw the wall to scale on a piece of graph paper. For me, this is a must any time I am doing a room makeover. I need to know the scale of the space I am working with and how each element fits in that space…on paper.

Since I wanted the accent stripes to be centered between the ceiling and the top of the baseboards, I measured and graphed from the top of the baseboard to the ceiling. I did NOT measure from floor to ceiling.

Identify and mark your center point on the wall…from there you will work out from center to left and from center to right.

I had to figure out the “scale” of the stripes. I did this by making the assumption that the longest stripe in the inspiration picture (#1) was 4” from the ceiling…just a guess. When I measured that with a ruler on the printed picture, it measured 1/8”…that became my scale…1/8” = 4”. The distance between the stripes measured 1/4” on the picture, so I determined the distance between stripes would be 8” (I actually did 8” on center (OC)…which means I drew my stripes 8” apart then centered the 1” strips of wood on that mark.)

All this information gets transferred to my scaled drawing.

I counted the number of each of the different sized stripes. The inspiration wall had 4 different sized stripes…so I assigned each size a number, 1-4. There were 5 #1s (the longest)….4 #2s…5 #3s…3 #4s (the shortest) that would fit on my wall, spacing 8” OC apart.

By using my 1/8” = 4” scale, I determined that each stripe was 24” shorter than the next (12” from the top, 12” from the bottom).

So #1 is 107” (top of baseboard to ceiling is 115” - 8” (4” from ceiling and 4” from baseboard)…#2 is 83” (107” - 24”)…#3 is 59” (83” - 24”) and #4 is 35”. (59” - 24”)

If #1 is 4” from the ceiling, then #2 would be 16” (4” + 12”) from the ceiling, #3 would be 28” from the ceiling and #4 was 40” from the ceiling.

All this was drawn, to scale, on the graph paper.

Man, this sounds confusing….but it really is not. If you draw it all out on a graph paper to scale, it makes perfect sense…I promise.

Then it was all transferred, in pencil, to the wall.

It is so much easier to erase something that is wrong than it is to tear glued and nailed boards off a wall.

So, now I have the entire plan drawn out on paper, to scale, and I have the measurements of each stripe.

I decided to make my walnut stripes 1” wide. I also decided to give them a “3-D” affect by placing them on 1/2” furring strips. Walnut is a pretty expensive wood so I made the furring strips out of plain ole’ poplar and stained the sides to match the oiled walnut.

Matt and I used his table saw to cut the walnut in 1” strips. We cut the poplar into 1/2” strips.

Using the graph paper with the accent drawn to scale as my guide, I used a pencil and level to mark the wall where each stripe would go. After marking the wall, I attached the furring strips using Gorilla Construction Adhesive and my nail gun. I let that dry overnight since the nails did not hit a stud (impossible!!) so the construction adhesive is what really holds the furring strips to the wall.

While that was drying, I prepped the walnut strips.

After cutting each piece the length needed, I sanded, then applied Waterlox. I LOVE this oil. It is a clear oil. It is my “go-to” wood finish these days. I first used it on my kitchen cabinets a year and a half ago and it has held up beautifully!!!! So I used it on the mantel and shelving. No stain…just 3-4 coats of this stuff will make any wood shine!!!

I applied two coats…steel wool and tack cloth between coats…and then applied a third coat after I had installed the strips on the wall and puttied the nail holes.

I applied the walnut strips directly onto the furring strips. Again, I used the construction adhesive and nails.

MAKE SURE EVERYTHING IS LEVEL AS YOU GO!!!! I made sure each furring strip was perfectly level and then I made sure each walnut strip was level. I worked top to bottom…wood, especially narrow strips, will bend…so make sure each strip stays level all the way down.

After I puttied the nail holes with wood filler mixed with stain to match the oiled walnut, I wiped on one more coat of oil.

After all this is done, go back and do wall paint touch up. You will scuff up the walls with the wood strips and the level.

Beautiful!

Now, this may seem like a really tough project. It really is not. It is like any other DIY project…it all hinges on the “prep.” In this case, laying it all out on paper BEFORE you start buying materials and cutting wood.

Changes I would make? I wanted a “3D affect”…in other words I wanted the walnut strips to “stand out”…which is why I added the solid furring strips. I think if I did this again (which I won’t) I would want to use spacers to make the walnut strips stand out. The only downside to that would be that wood has a tendency to “move”…twist, bend, warp. By attaching the walnut strips to solid furring strips, the walnut will not bend or warp! So maybe the way I did it is best…who knows…I just think I would have liked the look of “floating stripes” better.

Other than that, I am pretty happy with the results.

I have some leftover walnut so I THINK, when it warms up a bit (we got 8'“ of snow last night and it is still snowing), I may make some floating shelves for this wall…

Again, I eventually want to make a few other changes to the room (rug, chair, credenza) but I love this accent wall.

As with all DIY projects, the key to success is the prep and planning.

This week I planned, prepped and prepared for board and batten in the breakfast room….

My plan is to install board and batten at chair rail height and paint it white.

I also finished this nasty china hutch…

I know this looks pretty ratty but I painted it and did a little tweeking on it and it turned out super cute. My plan was to sell it, but I think I will move it into this room and style it first…I may even like it well enough to keep it. We’ll see.

Hopefully next week I will have the breakfast room done and in order and I can share that as well.

Until then….

Home office makeover reveal...

Last week I shared the need to give my home office a little “character and design appeal.” (You can go to the link to see the “before.”)

This week I will share a few changes I made…not huge changes but enough to give it a little be more appeal.

It wasn’t until I was working on my “Bogey Home Tour” page that I realized I had done absolutely nothing to this room. Not a huge deal but, as I mentioned, you can see this room from the main living area and it is right off the entry…so it really needed a little something.

The first step was to purge and organize. The closet is great for storing my small seasonal decor (Valentine’s, Easter, the 4th, etc.) and office supplies but it could stand a little purge and organization.

It had a mismash of boxes and baskets and binders so this is one of the few things I splurged on…matching boxes for receipts and such and new binders. Then it was just a matter of organizing everything else…mostly the small seasonal stuff. I even organized all the decorative candles I switch out for every season on my dining table….

After purging I painted the walls and trim. Three of the walls and all the trim were painted white…just plain ole’ white. The wall I decided to do an accent feature on was painted pink. Yep, pink.

This mess of a wall and credenza had become a dumping ground. I removed all the “unnecessaries,” changed up the pictures on the wall and organized the laptops in THIS little gem.

Eventually I will get another piece to put here but for now, this works.

I also have some leftover walnut and may make some floating shelves or a picture ledge for this wall…maybe…we’ll see.

I still like this shelving/cabinet….

…it just desperately needed to be purged and organized. I debated putting the printer inside the cabinet, but we really do use it a lot. All the paper, business checks and cartridges are stored in the bottom. I may eventually add a little more greenery (aka fake plants) but for now this will suffice.

I really wanted to put a glass top desk in front of the window, but as you can see, this is Cleo’s lookout chair…she spends most of her day in this chair guarding the house. Okay, she spends most of the day SLEEPING…but still…

The only real change in this little window space (besides paint) was the removal of the blinds. The window had blinds when we moved in that have never been closed…so I just took them down. I rehung the curtains…they never get closed but they “dress” the window.

I may eventually change out the big ugly brown leather chair for something a little more sleek and modern, but for now Cleo seems perfectly comfortable and content.

I will also eventually change out the rug but for now it matches the chair. This is one of those times when I would love to do a whole room makeover…new chair, new rug, new credenza…but I am doing what needs to be done with as little expense as possible…baby steps!

As I have said time and again, sometimes our design “wants” are dictated by pets and kids…and of course finances. You may WANT a white couch but that’s probably not a good idea if you have a toddler running around with a sippy cup of juice or a large black dog that likes to run around in the mud. (BTW, if you think you will finally be able to get that beautiful white couch after the toddler becomes a kid or the kid becomes an adult, forget it. )

Now, the desk and accent wall….

The top of the desk needed a good purge. There really was nothing on there that couldn’t be put in a drawer or filed away…out of sight. I did buy one acrylic organizer for the top just to put bills and such in. The rest got cleared off and stored away. (Remember, I open my mail by the trash can…trash goes in the trash, mail for the kids goes in the mail holder by the front door and anything that needs my attention goes on my desk. No piles of mail laying around screaming for my attention…I take a few minutes EVERY day to deal with the mail as it comes in. )

I recovered the seat of the office chair with some pink velvet I had on hand.

Now, the pièce de résistance. The accent wall. HERE I talked about “finding my inspiration” for this room. After weeks of cruising the internet, I finally decided that this was the look I love.

And I do love it!

Next week I will share a full tutorial on this wall. Tutorials are usually not my forte’ but hopefully I can make sense out of how I created this “visual interest.”

As with all DIY projects, I firmly believe it all comes down to confidence. No, I had never created a wall like this…but I had no doubt I could give it the old college try. Succeed or fail, I would learn something. I think I succeeded although I will admit there are a few things I might do differently if I did it again (which I probably won’t!) But that is the great thing about sharing what I do…you can learn from my challenges (never say mistakes!)

Until then….

Finding inspiration for my home office...

When I updated my Bogey House Tour page I realized I have done nothing in the office. It is truly a very bland and boring room….

We painted the walls and added the hardwood before we moved in and we have changed out the paddle fan and added curtains but other than that…nothing.

Not a HUGE problem since I only do book work once a month and the only soul who uses this room on a regular basis is Cleo…this is her lookout!

But it really is an issue for a room that is right off the entry and can be seen from the main living room….

This room has ZERO design appeal or character.

So I have decided that this room will be my next big project.

The only question is WHAT TO DO, WHAT TO DO!

So I do what I always do when it is time to plan a makeover. Find my inspiration, make a plan and execute the plan.

First, Pinterest. I know I want some kind of accent wall so I searched “accent wall” and “office wall.”

I found a few things I liked so I dropped them in my “office makeover file.”

I debated whether to do just board and batten or an “accent wall” on the main focal wall…behind the desk.

Hum…I have board and batten in the entry…I like it but not sure if I would like it in this space.

Keep in mind, the one AWESOME thing about this room…the 10’ ceilings…make picking a wall accent very challenging in my opinion. Certain wall treatments just don’t look good in a large room with high ceilings.

My DIL sent me a few that were interesting….this is one….

I love the wood accent as opposed to the all-one-color-treatments like I did in my entry and guest bath….

Now this brings me to the color choice I KNOW I want…I think. I want pink. Not pepto-bismol pink but kind of a pale/blush/coral/whitish color.

Kind of this colorish….

(I can’t for the life of me find the link to this picture…my sincerest apologies!!!!)

One of my blog-friends, Cristina at Remodelando la Casa used it in a bedroom makeover…”Parisian Pink”….I have loved the thought of using pink in a room since.

Somewhere in the room. Maybe paint the board and batten/accent wall white and paint the walls the “pink” color or visa versa. Not sure yet because it will really depend on the wall treatment I choose.

Another choice….

I would paint the entire accent wall the “pinkish” color I choose and then paint the other walls white…just plain ole’ white.

But to date this is my favorite look….

Now, stick with “my vision” here. This is actually a three-dimensional wallpaper. My plan…paint the wall the “pinkish” color then make the vertical stripes out of strips of walnut.

OR paint the wall a darker charcoal greyish color and make the stripes pine with the whitish stain I used on my dining room bench.

If I do decide on this treatment, I know I want a “high contrast”….either light walls and darker stripes or dark walls with lighter stripes. And I really think I would want the stripes to be in wood.

Hum…what to do, what to do.

I am still looking for my inspiration…something that makes me say “YES, THAT’S IT”…not sure when the light bulb will go off but I have learned to live with changes in my mind for a time before I jump head long into a project.

Until that happens the desk, shelving and closet all need to be decluttered, purged and reorganized.

I still like this shelving and it serves a purpose…printer on top, paper and cartridges in the cabinet. But it seriously needs to be decluttered and the pictures on the wall need to be “rethunked.” The long vertical one is of our ski trip 20 years ago…the one with tulips is something that has been hanging around for 20 years…the cute little guy is Brian (that one will go somewhere…just too cute!)

The desk…

The desk will be on the “focal wall” so it needs to be completely clutter free. I thought it would be pretty to put a glass desk in front of the window and move the “reading chair” to this wall…but Cleo likes to lay in the chair and look out the window. Sometime our design decisions have to revolve around kids and pets.

The mirror propped against the wall?

I think I have kicked it around for a good 8-10 years and have never hung it on a wall. I love it but have never found the right place for it. It will be the first thing loaded in the car for donation!

This whatever it is…

The credenza is from our living room in the Lankford House. Between Brian and me, we have 4 computers and a slew of charging cords. The lamp was a Christmas gift from my dad to my mom THEIR FIRST CHRISTMAS…it is literally older than me. The Sonos speaker was in the living room and was moved in here before Christmas. The old mail holder. The wall decor….it’s all just a mess and needs some serious attention!

I have every computer I have owned for the last 20 years and for some stupid reason I think I need to keep the hard drive…you know, just in case I need to find an email I wrote 15 years ago. So I need to dismantle all the computers and pull the hard drives. I also have all the paper work for every car I have owned in the last 20+ years. Why? I don’t know…and I don’t know why I think I need to keep it, but I do. I just need to find a way to organize it all so that it isn’t taking up as much real estate as it is at this moment.

All that is stored in the large closet along with my business supplies, coats and some seasonal decor.

I swear…I am not a hoarder. Ask anyone in my family…they all swear I throw IMPORTANT stuff away all the time. Maybe so, but there have been many times in my life when having documentation for something I bought, or a contact I made, or insurance claim I filed, or bills that I paid, YEARS later, was important.

As a small business owner I also have to keep records for years….especially tax records. Fortunately we have tons of storage space upstairs and I am good about organizing and labeling boxes.

As long as I have the room to keep records on the car I bought in 1999 or the hard drive from the computer I used in 2006, I will keep them. But maybe they can be stored in a box upstairs and not taking up valuable space in a closet downstairs….hum…maybe.

The entire room needs to be purged and reorganized. Since we just moved into this house a little over a year ago, it really isn’t THAT bad.

I always purge and “organize” before I go out and buy storage boxes or organizing systems. And truthfully, I want to get rid of stuff so I am really not interested in adding more stuff…my goal is to try to use what we have!

So my goal this week is to get rid of and reorganize stuff and keep looking for inspiration. Once the clutter is gone and I know exactly what I want, I can make a plan.

Until next week…