HAPPY BIRTHDAY KATIE!

IMG_4936.JPG

Today is my precious baby girl’s 24th birthday. I started to type a post for tomorrow but I realized that nothing I had to say or share was more important than celebrating this beautiful, intelligent, precious young lady!

I have no idea where the last 24 years went…seems like just yesterday the nurses were handing me a beautiful dark haired, blued eyed, chubby ( 10 lbs 3 ozs people!!!) little girl. Even though she was my 4th and I couldn’t imagine having any room in my heart for another, somehow my heart swelled and she took her place!

She is beautiful.

She is smart.

She is kind.

She is loving.

She is strong.

She has integrity.

She is respectful.

She is happy

What more can a mom ask for?

I adore her.

I am in awe of her.

I am soooo proud of her.

I am eternally grateful for her.

I can’t imagine my life without her.

So, on this very special day 24 years ago I was blessed with another AMAZING daughter!

So HAPPY BIRTHDAY SIS!!!!!!

Luvs :)

Screened porch reveal...

IMG_1545.JPG

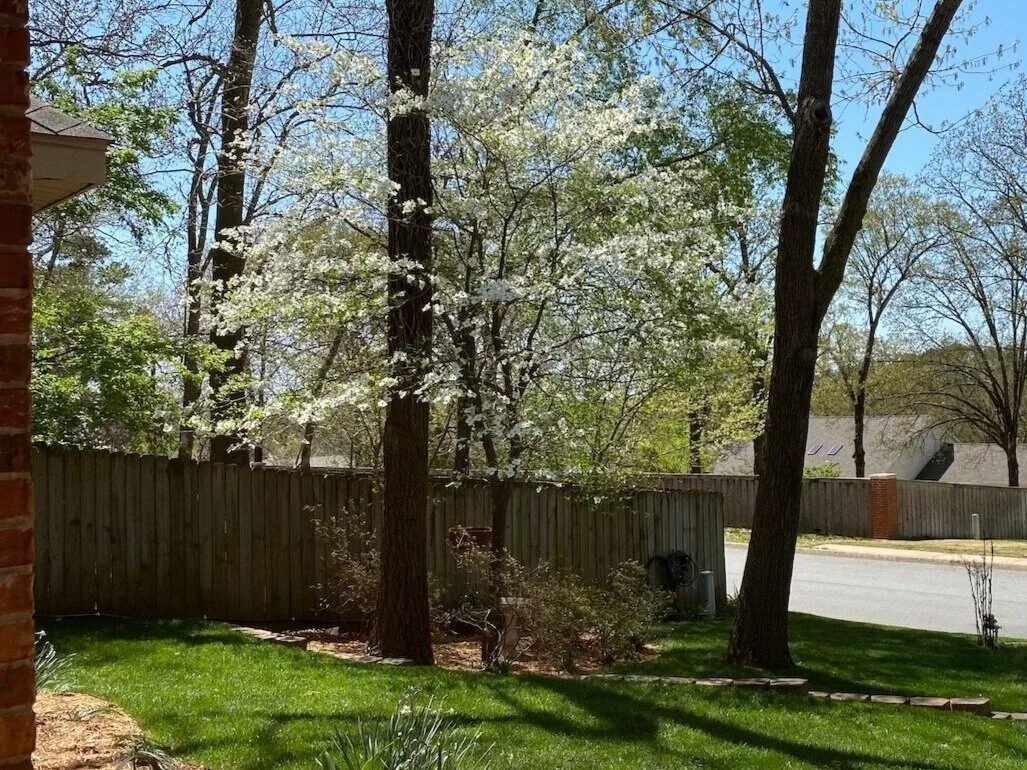
SO. MUCH. RAIN! But that is spring in the Ozarks. We are again fortunate that we haven’t had severe weather…just some flooding here and there.

So much rain my poor plants are screaming ENOUGH ALREADY! They are really struggling. But soon the summer heat and dry will set in and I will be watering every day. This amazing house had an irrigation system but it had been severely neglected for years. It took a bit of time and money but I have 2/3 of the system up and running so HOPEFULLY when it is time to water I can do most of it with a flip of a switch. I still have a few porch plants that will need to be watered but its waaaay better than dragging a hose and sprinkler around the yard.

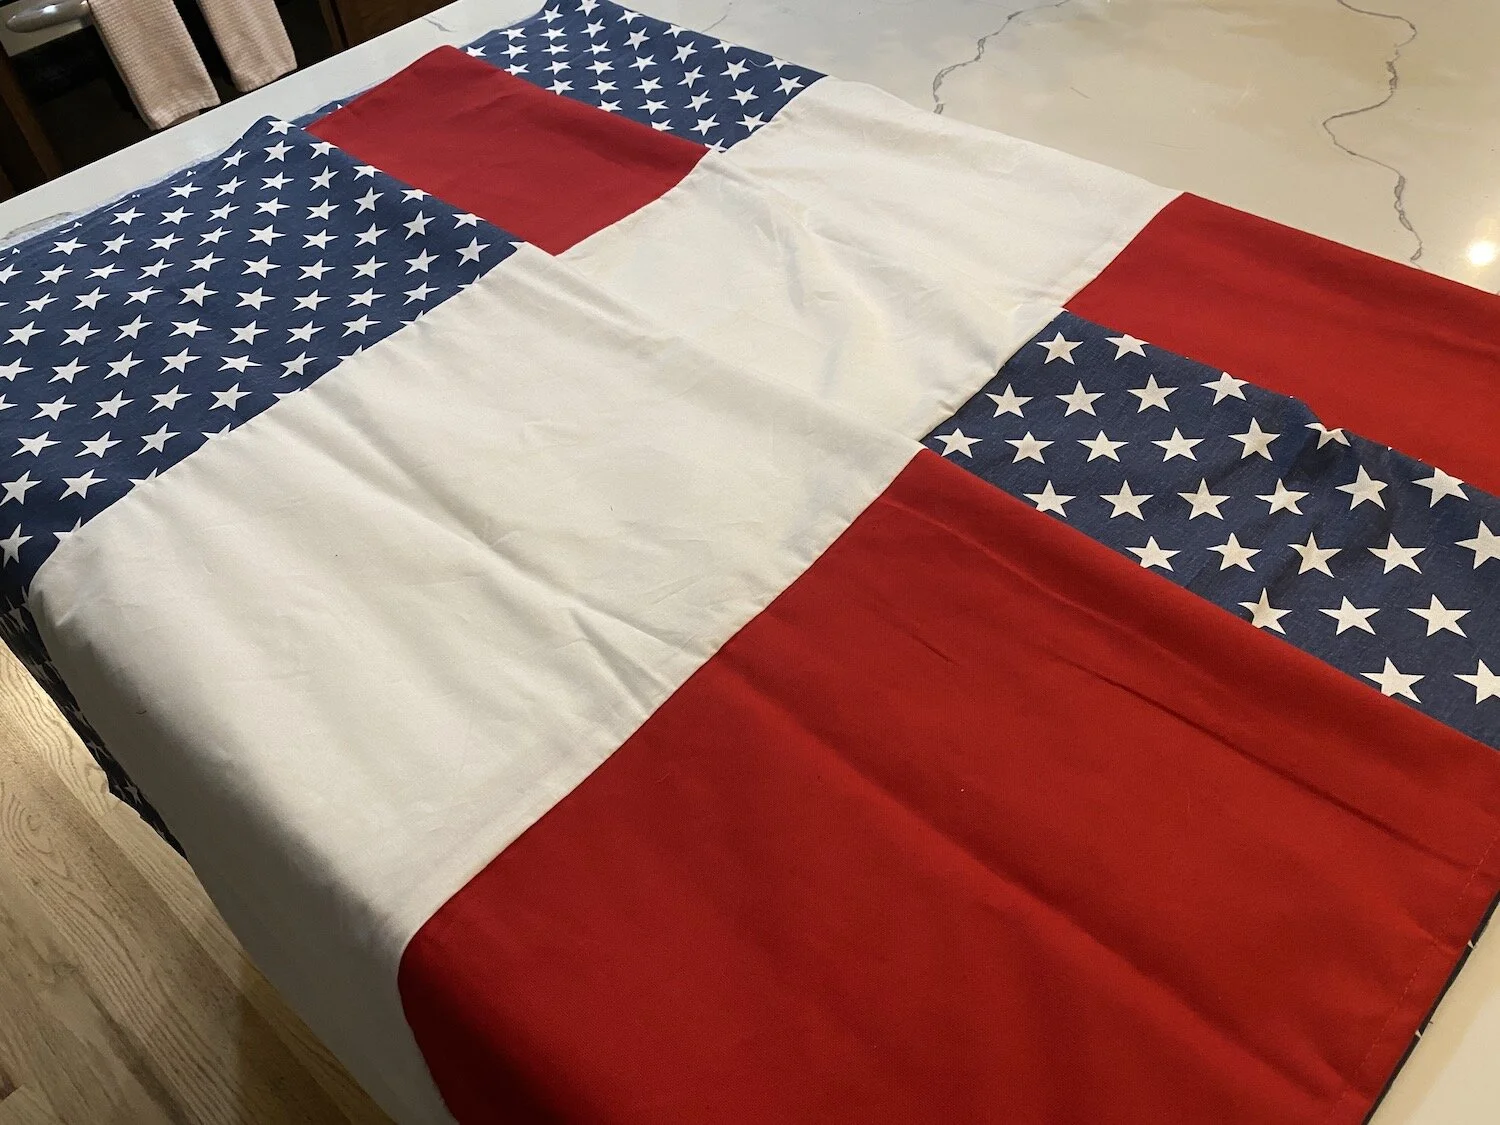
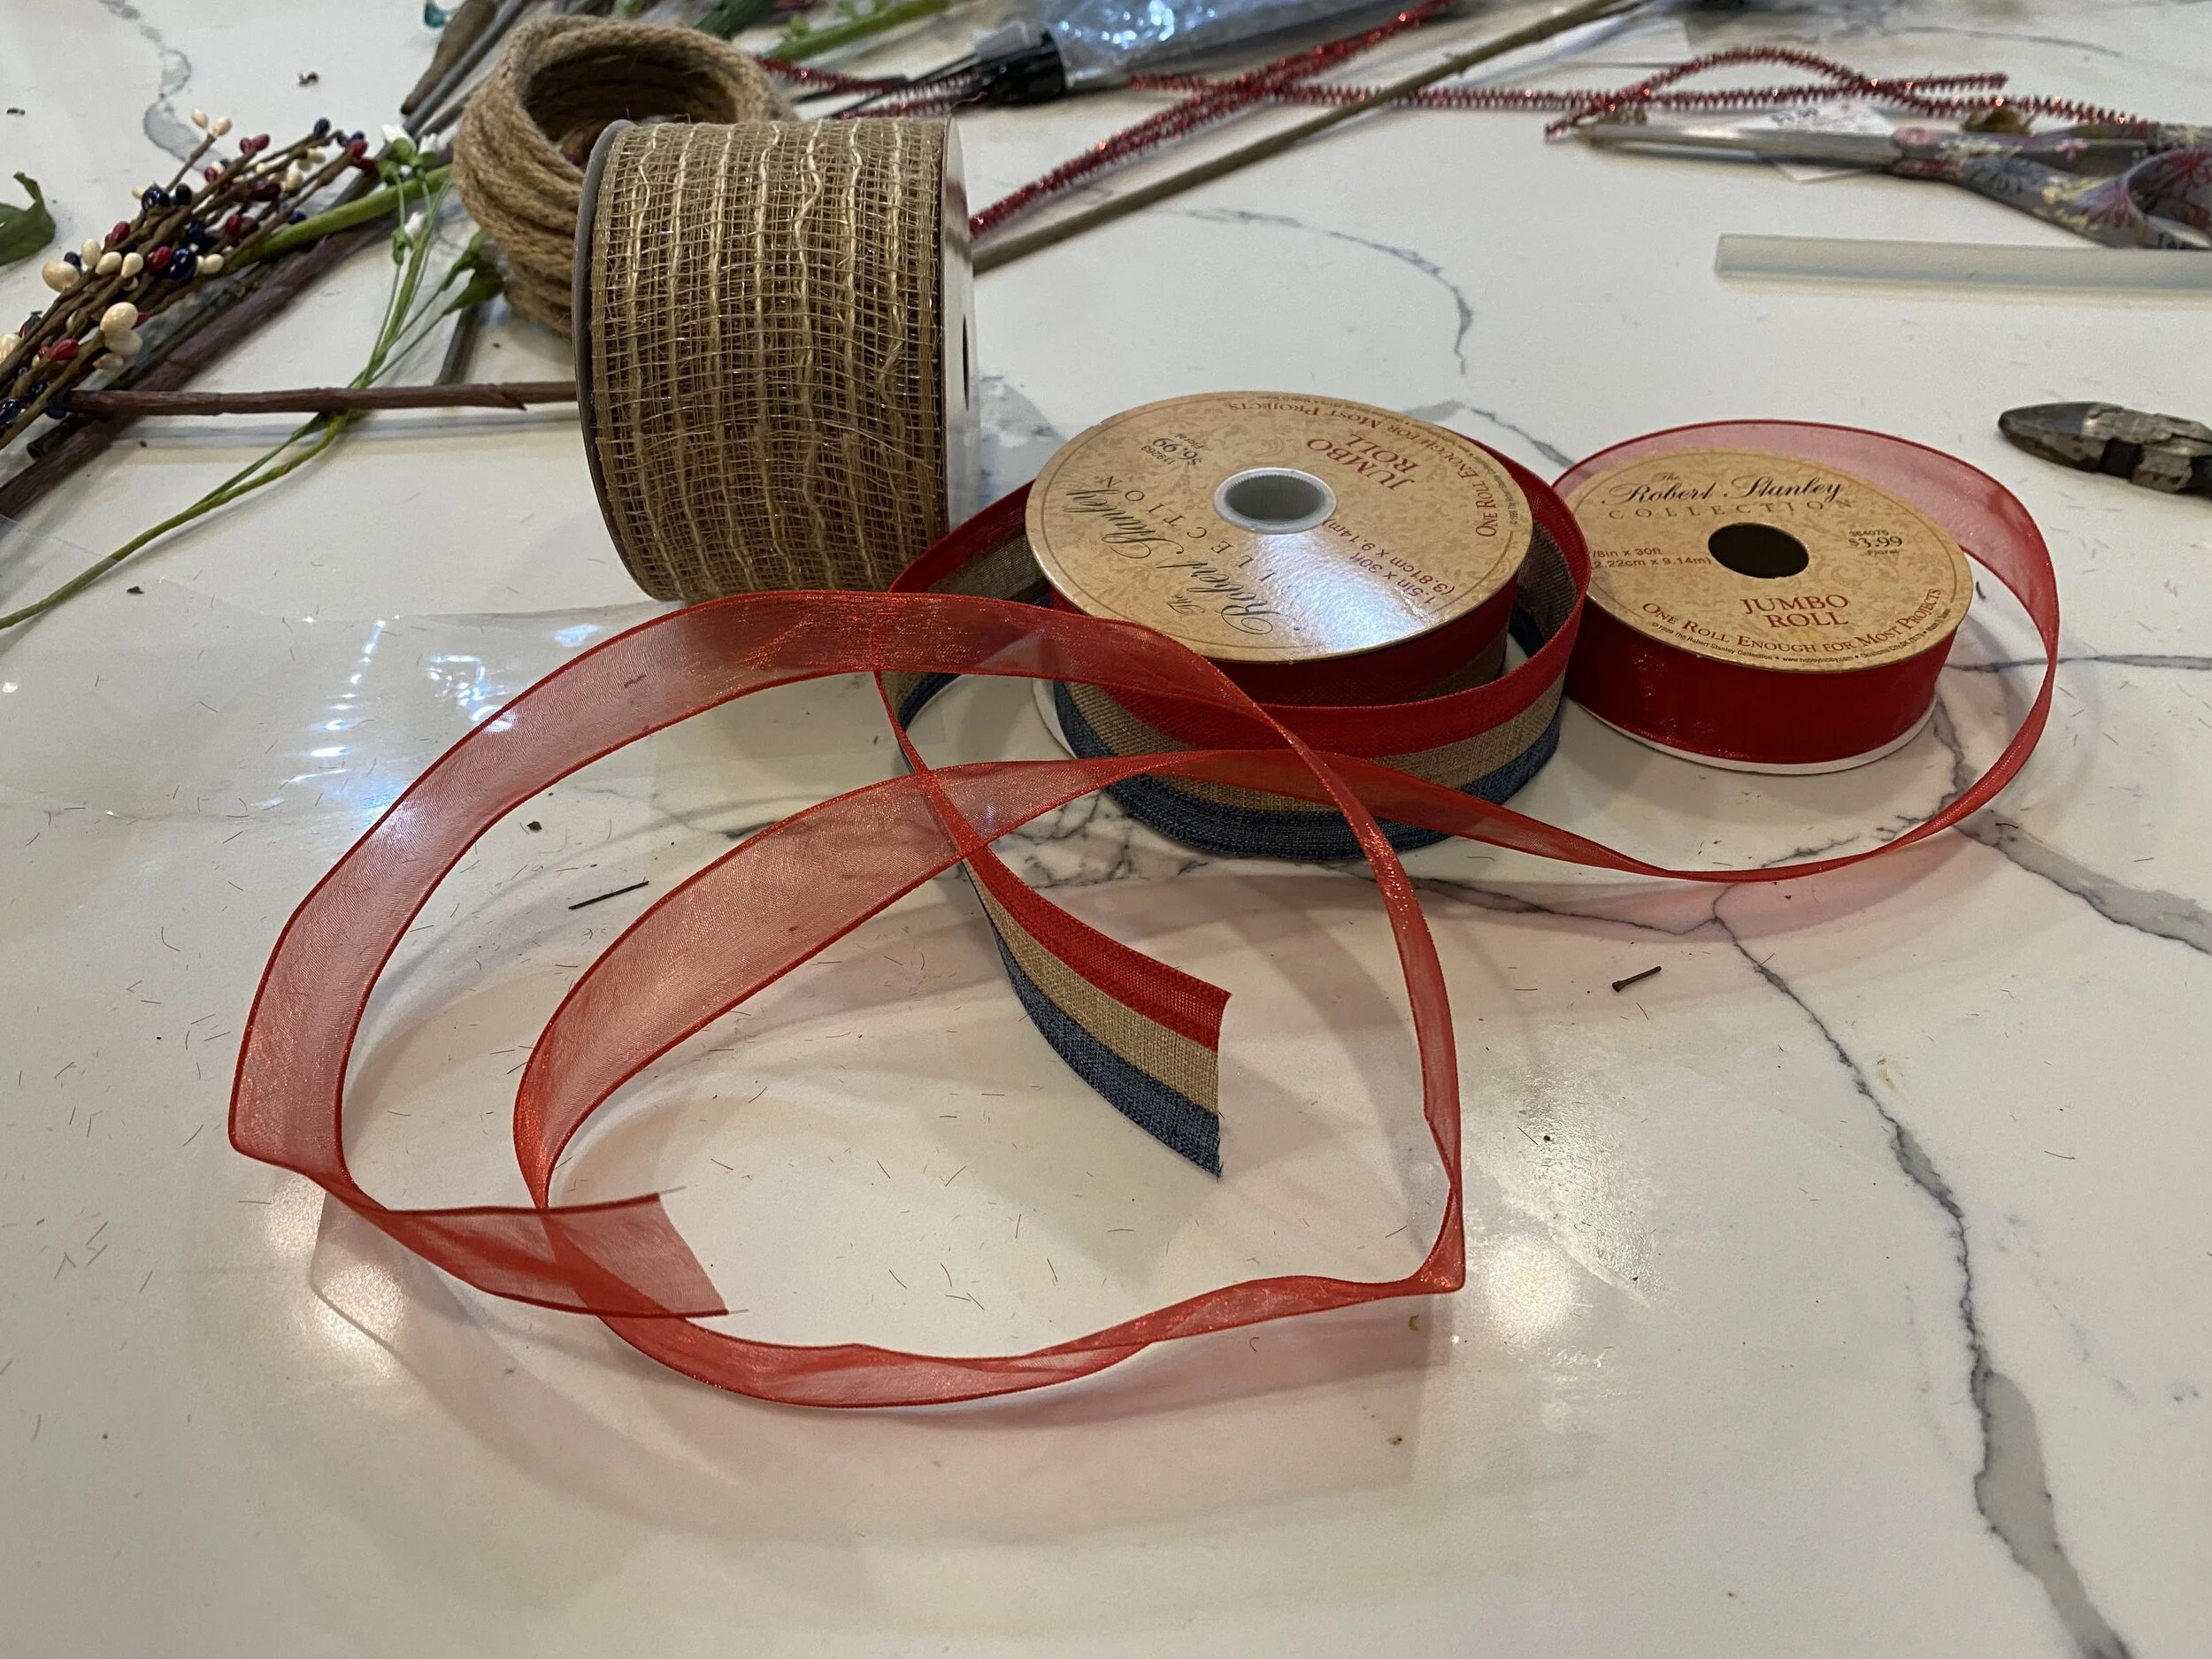
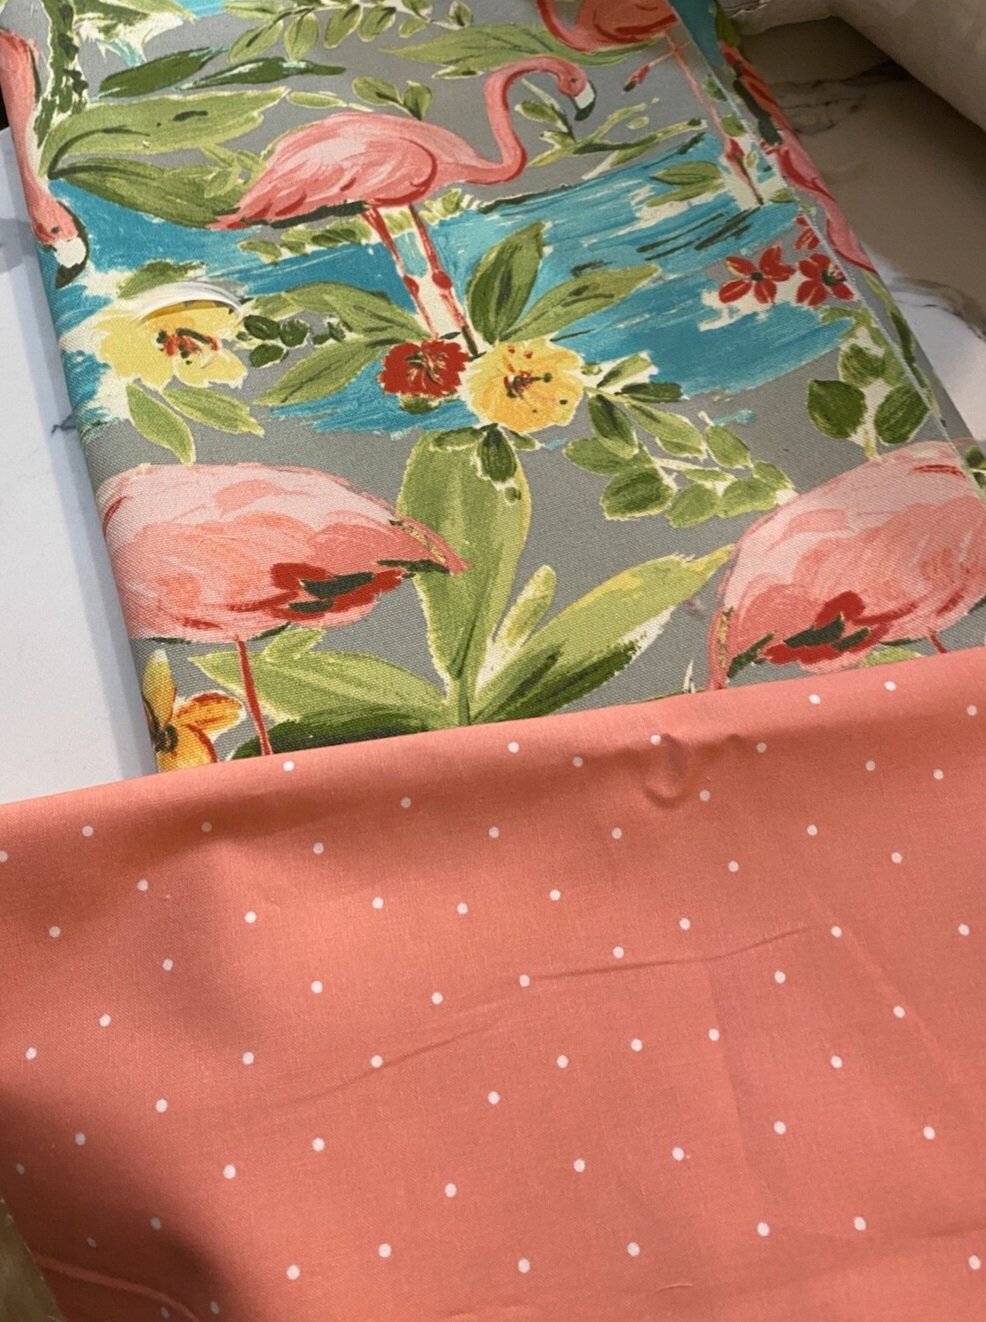
Totally off subject other than to say I have been forced to work on a few indoor projects. Those usually entail my LEAST favorite DIY chore, sewing, but if you want pretty (without a serious financial payout), it is an evil necessity!

The screened porch was no exception…there were a few sewing projects. Pooh.

So my inspiration (okay, kick in the rear) came from another blogger…Tasha. LOVE her screened porch she revealed HERE. Awesome space and if I had a large screened porch and a large family, it would be perfect. But I have a small space and it’s just us and the critters. We often joke….we have this huge house but usually all three cats and the dog manage to crowd in…we can literally take up 10 square feet.

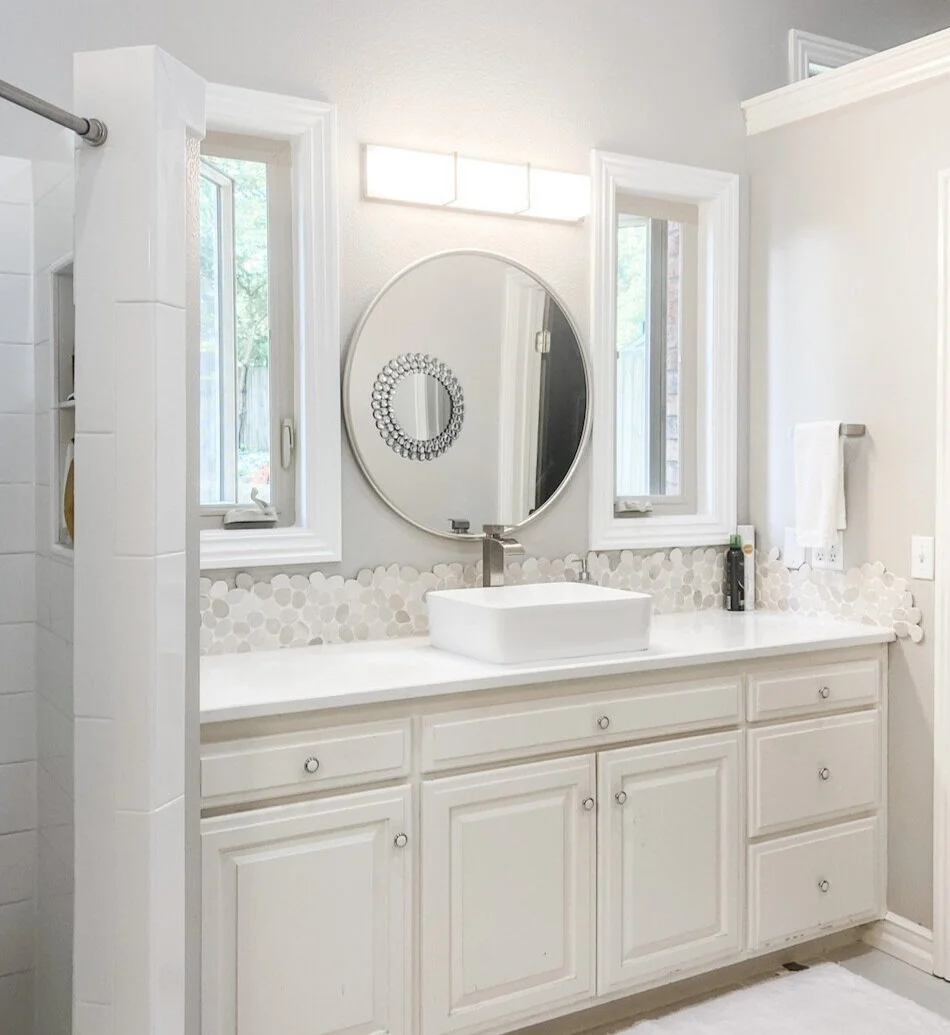
Regardless of the space, you want it comfortable and inviting….this space was neither. It was basically where we “threw” a bunch of overflow outdoor stuff when we moved in and have neglected it since. Other than eating out here at the little table on nice evenings, it had been pretty neglected.

The little table and chairs were an auction score and over the years they sat outside and the black paint chipped. Pretty sad looking. It may be kind of “old fashion” looking, but we really do enjoying sitting at this little table for dinner and in the mornings drinking coffee.

IMG_1438.jpg

The wicker chairs were on our porch at the old house…I think they were originally rockers but over the years the wood rotted and I removed the rocker part.

The round rug was originally my son’s and he didn’t want it so we put it out here.

My intent has been to turn the iron frame between the chairs into an outdoor side table. I think it is an old aquarium stand I salvaged from an apartment years ago.

You may notice the fan and light were pretty pathetic…so that replacement is a MUST

IMG_1440.jpg

The “kitty corner.” They LOVE the old wicker chair that use to be my smoking chair on my back porch. I haven’t smoked in almost 10 years if that gives you an idea of how long that thing has been around. It was pretty nasty and honestly needed to go!

IMG_1442.jpg

Even in a small space, it is important to “make a plan.” Tasha gives some excellent tips for designing a space like this, or any space for that matter.

1) If you have a large space, create zones. I didn’t really have a large space, but I do want it to serve several purposes. Eating, reading, and cat lounging (they are indoor kitties so they LOVE this outdoor space)

2) Make your space USEABLE! That was the motivation for this makeover…useable and comfortable.

3) Add as much ambient light as possible. New fan and light and I do want to eventually add a lamp on the little side table but honestly we rarely sit out there after dark so I’m in no hurry to find a suitable lamp.

4) Add plants! Unfortunately I don’t do well with indoor plants. I did have a HUGE peace lily in the all season room I divided so I put that in here…I tried adding a fuchsia but it took all of about three days for all the pretty pink blooms to drop so it went outside and I ended up adding a little potted planter of outdoor flowers. Maybe they will fair better since I am a master of most outdoor plants!

5) Bring in pops of color! Now that I can do…although if you look around you may notice I don’t do that on a large scale in my decor. But in my plan for this space I knew exactly what I wanted to do,

Pink flamingos.

Okay, so here is how that all started. Years ago Brian bought two vintage pink flamingo knick-knacks at an auction.

IMG_1552.jpg

For some reason that has become a “thing” in our house…possibly because it is so rare for him to buy something other than guns, pocket knives and coins…lol! One Christmas Mom bought him a pink flamingo ornament. Somehow we ended up with pink flamingo metal ornaments in our yard. I bought him some flamingo socks…it just went on and on.

And honestly, I like pink and green.

So my plan for this space…

1) New cushions and pillows for the chairs. Perfect way to bring in the flamingos and A LOT of color.

2) FINALLY paint the ratty iron aquarium frame and make a top for it.

3) Paint the little table and chairs.

4) Years ago I acquired the iron frame to an old train bench from my mom. It had sat on their front porch for YEARS. Eventually the wood rotted and my intent was to rebuild it with new wood. This little porch is the perfect place for it…and it is time!

5) Add some plants here and there.

The reading area…

IMG_1541.JPG

I made new cushions and pillows for the chairs.

A new “funky bow” for the Home Sweet Home sign that hangs on the wood frame that use to hang in our old guest bath.

IMG_1546.JPG

I painted the little iron base and made a wood top out of some scraps I had on hand.

A few little knick knacks. The driftwood is a piece we picked up off a frozen pond in Georgetown, CO almost twenty years ago! A picture of my precious kiddos.

IMG_1547.JPG

A new paddle fan and light…a must!

IMG_1545 2.JPG

I painted the little chair and table. I had to sand it a bit to remove a bunch of chipping paint, primed it all with metal primer, then sprayed it with spray paint.

IMG_1540.JPG

I had this old pewter compote for years and really didn’t have a clue what to do with it.

IMG_1538.JPG

I saw a picture on Pinterest where someone had turned one into a little flower thingy….

IMG_1539.JPG

...gives it a purpose.

I bought little vintage flamingo salt and pepper shakers off Ebay.

I bought a little rug off Etsy…

…and a little flamingo flag….(note the pathetic fuchsia)

IMG_1526.jpg

Hopefully the impatiens will fair better…..

My favorite project was the railroad bench. Primarily because it was a family heirloom and partly because the darn thing has been sitting around for years! It was time…

New wood and good for another few decades.

Somewhere there is a picture of four of my parent’s grandsons sitting on this bench when it was on their front porch. My boys were preschoolers then. Crazy.

IMG_1545 2.JPG

All in all I am pretty pleased with how it turned out.

It certainly isn’t anything as elaborate as Tasha’s but it serves our purposes!

I really didn’t spend a ton of money but the investment was worth every penny. It has been the perfect place to sit and read during the rainy, dreary days.

And of course the cats LOVE it!!!

Another rainy day project…swapping out the front porch decor for Memorial day and 4th of July.

IMG_1549.JPG

Just a few patriotic pillows and the wreath I shared HERE.

We are officially ready for summer. If it ever stops raining……

static1.squarespace.png

Master bathroom windows...FINALLY!!!

IMG_1509.JPG

At last!

This isn’t the first master bath reveal and it won’t be the last.

This room is one of those “processes” that will take time, money and a lot of of “humming.”

By that I mean I’m still not sure what i want to do with the cabinets. But I knew from day one I wanted operable windows in this room. Why I didn’t do it when I did the major remodel before we moved in is beyond me.

I had the perfect spot….

IMG_0455.jpg

On either side of my vanity mirror. This wall is adjacent to the back yard and over looks the flower garden I put in under the humungus oak trees.

I learned in my last home that an operable window in the master bath is a MUST!

It is the mustiest, stuffiest room in the house and there are just times when you need to throw open a window and let the fresh air in!

Adding a window will entail cutting sheetrock, removing brick, framing and in my case moving both plumbing and electrical.

Like every major project, the best way to start is to just start…and in this case that meant cutting two big ole’ holes in the wall.

That was when I discovered the plumbing in the left opening. Okay, no biggy. I can manage that. I didn’t discover the electrical issues in the right window until I removed the insulation a few days before my windows arrived. CURSES!!!!

Again, no biggy for me. Just a few junction boxes, new wiring , relocate a light fixture…. blah, blah, blah. Fortunately I have a few basic skills (and a SIL electrician on speed dial) so I was able to do what needed to be done. But If I were without those skills and planning a “little remodel” like this, I would certainly budget for professionals. If you don’t need them, kudos…but be financially prepared.

IMG_1509 2.JPG
IMG_1507.JPG

They let in a ton of natural light!!!! (This is with NO lights)

IMG_1506.JPG

I can not even express how much I love these windows.

I thought adding a window in my laundry room was the best decision I made in this house. Hum…may be a tie! The extra light and ventilation in both is a must!

Even through the screens, I love the view of the back flower garden!

IMG_1512.jpg
IMG_1504.jpg

Now on to the next head scratching project. The bathroom cabinets. It may be difficult to tell in the photos but they are kind of a blah off-white.

I have contemplated refacing the fronts and replacing the doors and finishing it all in a light stain. I like the “concept” but when I searched Pinterest I kind of don’t care much for the look.

This is just a few examples of a bazillion I have put in my “inspiration” file….

a5a48166a2fd9000b6bf16011990d19d.jpg
fce0f15bf4f9aa2fd15d91ab2e960d5c.jpg

I like, but I don’t love.

I kind of like the look of a color…

8bcf39527809249718d4f65e500c4114.jpg
75df4049c026a2d7d83548afdc2e15ca.jpg

Again, liking but not sure I am loving. (And again I can not give proper credit because I stole them from Pinterest and dropped them in my inspiration file…my sincerest apologies!!!)

As much as I dislike the thought of the “sterile” look of all white in this bathroom, I think in reality I would really like it.

So right now I am leaning towards painting the cabinets a brighter white and definitely replacing the hardware.

That is the nice thing about paint… if I eventually find a color that really trips my trigger, it’s just another gallon of paint, a couple of hours of time and a back ache.

Until next week…

static1.squarespace.png

Patriotic Wreath....

PATRIOTIC WREATH

PATRIOTIC WREATH

I saw this wreath on Facebook and loved it…

IMG_1372.jpg

But as I have mentioned before, I learned the hard way NOT to order from unknown sites and always pay close attention to reviews….this one got bad reviews on Amazon.

So I decided to make one.

First, I had to create the “bunting.” I decided to sew together three fabrics I found.

IMG_1394.jpg

I also picked up all the goodies I wanted to adorn the wreath with…

IMG_1479.jpg

….ribbon, floral pics, the wreath. Since Hobby Lobby only has select stuff on sale every other week, this can take some time. For the record, the grapevine wreaths never go on sale, but they are only around $9. For that matter, if you have a wreath you are no longer in love with, deconstruct it and reuse it, or pick up a cheap one at a garage sale!

IMG_1450.jpg

I bought two yards of each fabric, cut the widths in thirds, then sewed each together. I actually got three buntings so I made a few extra wreaths. Two yards would be 72” so you could also use a table runner or a long scarf if you want to avoid the whole sewing thing.

I folded the fabric in half and kind of gathered it by hand then laid it onto the grapevine wreath….

IMG_1481.jpg

After getting it pulled super tight, I secured it with a zip tie. After adjusting it by hand I hot glued the edges of the bunting at the top just to give it a little bit more security,

Next I made a spray and my funky bow. I have linked to THIS tutorial several times since I discovered it at Christmas. I LOVE how easy she makes this process! I have now made dozens of these decorative sprays for every holiday, big and small, and I just love them.

IMG_1482.jpg

I made my floral spray and made sure it was the size and fullness I wanted. Then I made my bow. I chose these three ribbons for my bow…

IMG_1483.jpg

These bows may look intimidating, but trust me, the tutorial I linked makes it SUPER simple!

After making the bow, I secured it to the spray with floral wire then attached it to the wreath with small zip ties and floral wire!

IMG_1487 2.jpg
IMG_1486.jpg

I absolutely love this wreath and it will work perfectly from Memorial Day through July 4th! In a few weeks I will swap out my spring pillows on the porch for my patriotic pillows! I already have my red, white and blue candles on the table and last week I swapped out the little ribbon on my welcome sign….

IMG_1451.jpg

All part of my plan to stay festive year round. Who said decorating for the “holidays” is only for Thanksgiving and Christmas.

My bathroom windows are finally installed and the only thing left to do is the brick…but the inside is trimmed and painted and I LOVE IT! Can’t wait to share!

Until next week….

static1.squarespace.png

Twiddling my thumbs...

Sometimes I feel like I am just sitting around twiddling my thumbs…waiting.

Right now I am waiting on the brick guy to come cut the brick so I can install operable windows in the master bath.

Relatively easy project…until I removed the sheetrock and the insulation and discovered that plumbing will have to be moved on one side and a whole bunch of electric wires have to be moved on the other. CURSES!!!!

Always something.

Okay, I’m not really sitting around twiddling my thumbs…while I wait I have been chipping away at a few other little projects, like the little patriotic bow I made for my welcome sign….

Whatever it is, the way you tell your story online can make all the difference.

I shared THIS funky bow tutorial when I shared my Christmas decor. I am going to decorate a tad for every holiday so I made another seasonal “funky bow” for this little Welcome sign.

I also spotted this patriotic wreath online…

Whatever it is, the way you tell your story online can make all the difference.

I really like it but I learned the hard way,..don’t order ANYTHING from an “unknown” online company. And pay attention to the reviews on others…this one got horrible reviews on Amazon.

So I decided to tackle this one myself. I have already started the “bunting”…

Whatever it is, the way you tell your story online can make all the difference.

…which of course entailed by LEAST favorite DIY chore…sewing.

I’ve bought the ribbon and the floral stems and now I am just waiting on Hobby Lobby to have their grapevine wreaths on sale.

Another project is my screened porch. I absolutely LOVE Tasha’s screened in porch! Just stunning!

Mine is much smaller and way less WOW! But that doesn’t mean it has to be a neglected space.

We really only use this space for two purposes…sometimes we sit at the little outdoor table and eat or drink coffee and sometimes I sit out there and read.

I decided to go “fun and funky” and since flamingos are “fun and funky” and all the rage right now, I decided to go with them.

Now keep in mind I think pink flamingos will be kind of like watermelons, burlap and chevron was 5 years ago…EVERYWHERE. Now not so much. So I want to keep that in mind when decorating…don’t spend a lot of money on something that is just a “passing fad.”

Another “funky bow”….

Whatever it is, the way you tell your story online can make all the difference.

Some “fun and funky” throw pillows for my reading chairs…

Whatever it is, the way you tell your story online can make all the difference.

We installed a new paddle fan, painted the little metal table and chair, made a wood top for a metal base I am going to use as a side table and I am waiting on cushions and fabric for the lounge chairs.

Nothing as grand as Tasha’s porch but a few little changes that will spruce it up just a tad.

When I get it all done I promise to share…both the porch and the patriotic wreath.

Until then I shall sit and twiddle my thumbs…..

static1.squarespace.png

Adding glass to an interior door...

IMG_1434.JPG

As I mentioned before there are certain things that made this house instantly feel like home.

Like my master bath….

IMG_0439.jpg

Almost identical to the master bath in my last house.

IMG_4031.jpg

Same backsplash, floor tile, vessel sink, shower tile…right down to the same ole’ shower curtain and rugs. And I am waiting on windows that are pretty much identical to the window I had in my old bathroom. Still not sure what I want to do with the cabinets but I have always liked the stained and open shelving look of the last house…

….who knows. I may do a little cabinet makeover at some point.

My black doors….

after.png

Loved them in the old house, love them here…it was one of the first things I did to make this house feel more like my home.

IMG_0716.jpg

The entry…

IMG_1171.jpg

Same board and batten, same mirror and wreath, same rug…black door…

IMG_5981.jpg

I like what I like…and these are just a few of the design elements I really loved in my old house.

Then there are the paint colors, plants, shelving….sooooo much more!

One project I did at the old house that I always loved was the reeded glass door in my laundry room…

IMG_5030-1.jpg

I absolutely loved this project and it was one time I actually posted a pretty good tutorial. Mainly because when I went looking for a tutorial, I couldn’t find one!

I have known from day one I wanted another door like this in my new house. I debated whether to do it with the pantry door or laundry room door.

I finally decided to start with the pantry door….

IMG_1005.jpg

Primary because I used the reeded glass in the upper cabinets and I thought it would look good to have matching glass in the pantry door.

IMG_1434.JPG
IMG_1435.JPG
IMG_1432.JPG

I LOVE it! I love this pantry and the door is just the cherry on top! Eventually I may do the laundry room door as well because then the light from the window in the laundry room can filter into the breakfast room. For now I am perfectly content with the one door.

This is a MUCH less expensive option than purchasing a new glass door…and you get the option to choose the type of glass you want vs. having to get whatever “frosted” glass is in the door you purchase. And it is seriously NOT a difficult project to complete.

YOU CAN DO IT!!!!

DIY and Cinderella...

At this moment I am sitting in my “all-season” room drinking my coffee and watching it rain.

IMG_0254.jpg

Heaven.

There is so much I love about this house and honestly, I can’t t think of a thing I don’t. We have spent a great deal of time the past few weeks working outdoors and many of our neighbors have stopped to tell us how wonderful it is looking. (Probably more a testament to how badly the place looked to begin with.)

Making a home beautiful after years of neglect, for me, is like the Cinderella story. Abused, neglected, mistreated…until someone who cares comes along and waves a magic wand and makes everything beautiful again.

Simple analogy…seriously, who waves a magic wand and makes a home beautiful. Truth is, it takes a lot of work to turn an abused and neglected home or piece of furniture into something beautiful and useful.

My blog friend Cristina shared a chair she recently transformed. Abused, neglected, dated and something no one really wants in their home anymore was completely transformed into a piece of furniture fit for a ball!

A super simple project for someone like her and me and not so difficult that someone with minimal DIY skills couldn’t tackle. The hardest part would be the sanding and staining, but just a simple KSTP treatment (Kilz, sand, tack, paint (search on this site for examples) would completely transform this simple chair. How cute would it be paint lavender for a little girl’s room. Or bright royal blue for a little boy’s room. (Yes I am a “gender snob”…raised 4 kids like that and they are killing it…so get over it)

After sitting and watching it rain for a few hours I finally decided to tackle the trim and cabinets in the laundry room. As I mention I am painting all the trim a whiter-white…BM Chantilly Lace. Not so “yellow”…just a pure white.

I have drug my feet on the laundry room because I really dreaded painting the cabinets. But I did and they are now done. All except the new hardware and that should be here next week. The only other thing I want to do in that room now is replace the dated ceramic tile. That chore is WAAAAY down the bottom of the list.

Still waiting on the master bath windows. Built a dining table and bench for Brandon and Taylor’s new house…just waiting on the legs we ordered. Waiting on a few final touches before I FINALLY share my shop transformation. The glass for the pantry door should be here today. In other words, lots going on to share…just nothing quite ready.

Cinderella may have transformed with the wave of a wand…unfortunately most DIY projects take a little more time and patience. But the result is often the same…magical!

static1.squarespace.png

Mid century chair makeover and the dogwoods...

I originally shared the a makeover of this heirloom chair HERE.

After this little makeover it might not look much different…

IMG_1397+copy+3.jpg

…but it definitely is!

It was my grandmother’s and a “few years ago,” while gathering furniture for her college condo, Katie and I recovered the cushions and stripped and oiled the frame.

When she moved into an apartment her junior year, we found two matching mid century chairs she liked a bit better so this one came back home.

A few months ago I mentioned to Kate that I needed to recover the cushions because the dog had done a number on the white vinyl in the last few years. It was pretty ratty looking…

“Mom…you have had that chair in your house for almost 4 years now…it’s been more than a “few” years.”

Wow, time flies!

So yes, it was time to recover the cushions.

Two minor issues…one, the cushions seriously sucked. I am certain they weren’t the “original” cushions…my grandmother probably replaced the original when she recovered them with the darling blue cotton fabric that was on it when I received it. When Katie and I gave it a little makeover 5 years ago, we just added a little batting to the cushions before we recovered them.

They really weren’t sized properly and they were super uncomfortable.

Second, AS ALWAYS, I really struggled with what fabric to use. It is definitely a “mid century” style chair and so many of this style chair are indeed white and black vinyl. As much as I would have liked to “change it up” a tad, white vinyl really was the best option.

The frame is still in pretty good condition. I could have freshened it up a bit with another coat of tung oil finish, but nah…

New cushions…new fabric. That is all it really needed.

I bought 4” foam, cut it to fit properly and wrapped it in batting.

IMG_1382.jpg

TIP: The BEST way to cut foam is with an electric knife!

IMG_1181.jpg

The vinyl I used didn’t give me near the issues I had the last time we recovered the cushions. This time it went through my sewing machine just fine and I was able to easily create piping. Piping is a tedious accent to make and truthfully you could easily make cushion covers without it if you want to forgo the detail.

If you are having trouble getting vinyl to go through your machine THIS is a pretty nifty trick….

I have said it before and will say it again…and again…and again. If you do not know how to sew a straight stitch, LEARN. Take lessons from your local craft store, online or county extension. It is a skill that will open up your entire DIY world! On one hand I kind of curse my mom for making me take sewing lessons when I was a teen (because I really dislike sewing), but on the other I am so grateful I can make pillows, cushion covers, and curtains! And don’t think you need a high dollar sewing machine. Mine is a basic model and is AT LEAST 35 years old. The more basic, the easier it is to use!!!

AGAIN, I suck at tutorials so find an instructional video online that makes sense to you!!! Making cushion covers is not hard but there are tips and tricks that will make the process easier!

All in all it was time well spent. The chair now has a fresh new look!

IMG_1397+copy+2.jpg

Thank goodness the dog has now moved on to the big leather chair in the office by the front window. Fits her better and the dirt doesn’t show on the brown leather NEAR as badly!

IMG_1386.jpg

We had awesome snow showers Tuesday (seriously a blizzard Tuesday afternoon and by Tuesday evening it was ALL gone!) and a freeze Tuesday nigh.t I had to cover all the hostas with buckets and sheets. Back in the 70s by this weekend. Typical Arkansas weather. This is why I refuse to plant tender annuals even after our “freeze date.” As it is all the beautiful dogwood and azalea blooms may not survive. Sooooo frustrating.

That is one thing I discovered about this house…every single window has an amazing view of the dogwoods! Beautiful.

From the dining room window.

From the dining room window.

From the front porch.

From the front porch.

From the master bedroom window.

From the laundry room window.

From the laundry room window.

From the screened porch.

From the screened porch.

From the back of the house…this will be the view out of my new master bath windows when they FINALLY get here!

From the back of the house…this will be the view out of my new master bath windows when they FINALLY get here!

This past weekend I took a walk around our neighborhood with Cleo and every single yard has dogwoods and azaleas.

Another reason why I love my home!

static1.squarespace.png

Master bedroom reveal....

When we moved into this house in September we basically moved our old bedroom into this new house. Nice fit, but zero thought put into the “design” of the room…I basically just put furniture on the floor and a few pictures on the walls.

A few weeks ago my daughter sent me a picture of a well designed bedroom similar to ours.

IMG_0694.jpg

That’s when I realized our current master bedroom has ZERO “design character.” I hadn’t even taken the time to paint all the trim the “new” white.

IMG_1317.JPG

Twenty year old lamps, white and brass paddle fan, stacks of pillows in bleach spotted pillow cases, no curtains, scuffed and dinged furniture, clutter…

IMG_1318.JPG

The picture was perfect inspiration! The push I needed to work this space to it’s potential.

So last week my goal was to to tackle the room. Paint the trim and furniture, new curtains, throw pillows, a few little touches here and there, and declutter.

I painted my bedroom furniture (HERE) almost 7 years ago and while I still love the pieces, they have gotten quite dingy looking. Remember, whites yellow over time and of course there are chips and scratches from normal wear and tear. So it was time to give them a little paint refresher! And the side table tops…holy crud they have gotten nasty. So it was time to strip and restain the tops as well.

Of course the little “room refresh” became a three day chore!

In the end, worth every minute.

New curtains (I still need to hem them), a little wall art and a plant and new throw pillows.

IMG_1315.JPG

I stuck with my tried and true white bedspread…with a big dirty dog I need something I can bleach every week. It covers a down comforter in the cold months.

I have always loved the larger throw pillows in the guest room so I bought new for that room and put the guest pillows on our bed.

IMG_1308.JPG

(The giraffes? They were made in Africa from the root of a tree…they are Brian’s…they are different…what can I say!)

I painted the high boy and bedside tables and stripped and restained the tops of the bedside tables. ..the dark java stain has pretty much run its course. New lamps (finally!!!)

I love the look of chandeliers in bedrooms but as I have said before, I HAVE to have a paddle fan above the bed. Brandon gave us a paddle fan he took out of his house and it worked perfectly in our room.

Decluttering is always a must in any room makeover so a lot of stuff was put away.

One thing I loved in the inspiration room picture was the bed bench. My trunk belonged to my grandparents so it has to stay. You can still see my granddad’s name stenciled on the side.

I love the basket and pillows on their bench but our big dog uses this trunk as a spring board so that wouldn’t have worked out well. Sometimes you have to change up a plan to fit YOUR life-style (a.k.a. accommodate animals and kids!)

I still want to do more on the “tv side” of the room. I repainted and stripped and stained the top of THIS little side table…

Maybe add a plant…a little more wall art….a wall leaning mirror.

IMG_1306.jpg

It only took me a few decades to style the master bedroom in my last house so again, already working at warp speed here.

My next big project are the master bathroom (reveal HERE) windows…

Oh, it’s happening. I cut big holes in the wall to kind of “force the issue.” Windows are on order and the brick guy is on call.

This was the one thing I neglected to do, and my BIGGEST regret, when I remodeled this house…no operable windows in the master bath. I know from my last house that an operable window in the bathroom is a must. I have ordered two casement windows (the kind that crank out) and hope to have them by the end of the month. I have some plumbing to move (WHY IS NOTHING EASY!!!) and framing to do. These windows will look out at the large flower garden out back…I CAN’T WAIT!!!!

Wait I will though…it has been warm enough to plant a few larger perennials like azaleas and Kimberly ferns, but the threat of a freeze until mid-April prevents me from going all out with the annuals. So I sit…and wait…patiently. Okay, not so patient, but I learned the hard way not to rush the early spring planting! Pay attention to your “last freeze date”….then add a few weeks. Ours is the middle of April, but a few years ago it snowed the first week of May!

Until next week…

A kitchen makeover and painting a refrigerator...YOU CAN DO IT...and sometimes should!

My friends, Tammy and BR, have lived in their home for over 20 years…and like me they are constantly “projecting.” Tammy is the designer ( a.k.a.instigator,) BR is the muscle and craftsman, and usually I am just an advisor and cheerleader.

A few months ago, they started a HUGE project…remodeling their kitchen.

It is a project they have dreamed about and we have discussed and one their 1990s house desperately needed for years!

63279344411__FAECBF4B-CD0D-4684-9D1D-C641426B6A4A.jpg

This picture was taken after they replaced the head scratching paddle fan over the bar with a thrift store upcycled light fixture. MUCH better but as you can see, there was soooo much more to do.

Remove the funky over-the-cabinet florescent lighting and add can lighting, paint the cabinets, replace dated hardware, a new venthood, new tops and backsplash and replace the ORIGINAL almond stove.

A major list on a tight budget.

During one of our “advisory sessions” (again, my advice and opinions are always free) Tammy mentioned she couldn’t wait for her black refrigerator to go out so they HAD to replace it.

With all the other “must have now” expenses, like replacing the dated almond stove with a stainless, replacing the black refrigerator just wasn’t in the budget. They had already replaced the dishwasher and like most people (including myself) the expense of replacing all our appliances at once is often cost prohibitive.

Light bulb moment.

PAINT IT!!!

I know they have “stainless” spray paint but I seemed to recall a product specifically made for painting refrigerators to look stainless. So I started googling and found this product on Amazon….

The product had good reviews. And like I told Tammy, if it doesn’t turn out great, you can still probably sell the refrigerator on Craiglist for a hundred bucks.

So this is what we started out with…a plain ole’ black refrigerator….

IMG_1096.jpg

The first thing I did was read ALL the directions but most importantly, the Amazon reviews. The people who have used the product gave some pretty solid advise.

After reading all the reviews, we went to work. I removed the handles (even if you want to paint them, remove them), cleaned the doors thoroughly, and taped off the water dispenser and inside around the rubber gaskets. One of the sagest pieces of advice was to apply THIN coats…so after the first coat this is what it looked like…

IMG_1100.jpg

While this might not instill confidence in one’s ability to do this, I know how important it is to “trust the process.”

The second coat, a tad better….

IMG_1101.jpg

By the third coat we were all amazed at how great it looked!

BR did a great job of working Tammy’s list…he removed the over head florescent lighting and capped off the cabinets with crown and installed can lights, painted the cabinets and added new hardware,…

…. removed the old venthood and cabinet above the stove and installed a new stainless vent…

IMG_1239.jpg

….and removed the old tile backsplash and installed new.

IMG_1231.jpg
IMG_1238.JPG
IMG_1236.jpg

Quartz counter tops were a little bit out of the budget but they were able to achieve a very similar look with new formica.

Beautiful!

Tammy LOVES her new kitchen and fortunately she loves her “new stainless” refrigerator.

Would she be happier with a brand new REAL stainless fridge? Wouldn’t we all!!!! But this is a prime example of changing an element in a room that will stop the growling (and the envy and frustration) until you can afford to do what you really want to do. I have done it over the years with furniture and now I can say I have successfully done it with a refrigerator.

If you don’t love it, CHANGE IT!!!!