A mid century chest of drawers makeover...the reveal!

When last we spoke, I shared a little “step by step” tutorial for repairing and prepping this “less-than-desirable” chest….

I can not stress enough the importance of “prep work” on any project. Again, if you don’t take the time to make repairs and properly prep (regardless of whether it is a dresser or a wall or a floor) all the “pretty” is going to be wasted.

(BTW, while cruising Pinterest I found this super awesome tutorial for repairing chipped corners with wood filler! Great suggestions!)

Make proper repairs, sand patches smooth, use the right tools and materials! Do the repairs and prep or you are wasting your time and resources making it pretty.

After all the patching and repairs, the next step is properly priming! (I had already stripped and oiled the drawers and set them aside!)

I primed the cabinet of the chest with Kilz. That is usually my go-to primer since it sands smooth and holds up well. Primer is a SUPER important step on most paint projects…unless you are chalk painting! Since this was a relatively small project I used the spray Kilz…one can.

TIP: I know a lot of paints SAY they are a “paint and primer” in one…I may eventually change my tune but I don’t believe them. I ALWAYS use a primer…always!

After the Kilz had dried well (usually overnight but several days is best), I sanded it smooth with 220 grit paper.

After sanding I checked all the areas I had repaired…there were a few little spots that needed additional putty and one I missed on the first go round…

…no biggy….I just filled them again, let it dry, sanded smooth, spritzed on a little more primer and then sanded it again after that had dried.

Tack cloth…it is an absolute necessity on any paint job. I see tutorials all the time that recommend wiping the piece with a damp cloth or even mineral spirits. Forget about it! USE TACK CLOTH! It will pick up the finest grains of whatever and will make a huge difference in the final look and feel of your paint job!

I’m kind of obsessed with white lacquer these days. i just love the high gloss finish. Spray paint is always a great option for smaller projects and you can find a multitude of colors and sheens! Just make sure you use a quality brand! You can also brush and/or roll alkyd (oil based) or latex (water based) paint. ALWAYS use an additive and use a high quality brush and 4” foam roller to apply the paint. Pay attention to the manufactures recommendation for temperature and application…it matters!

Regardless of whether you use a spray paint or lacquer, latex or oil, always apply 2-3 THIN coats, allowing dry time as recommended. Thinner is better. If you try to get a one coat finish, you will likely be disappointed and make a HUGE mess!

Spray, roll, and/or brush on the paint…a thin coat…let it properly dry, lightly sand the boogers AFTER it has properly dried with a fine grit paper (IF needed), tack and recoat. Regardless of whether you need to sand between coats, always use tack cloth before applying additional coats. I usually apply at least two coats and sometimes three.

Most paints do not need a top coat but if your piece will be getting a lot of use, I recommend a light coat of polycrylic. Polyurethane is some good stuff but it tends to “yellow” so polycrylic works great.
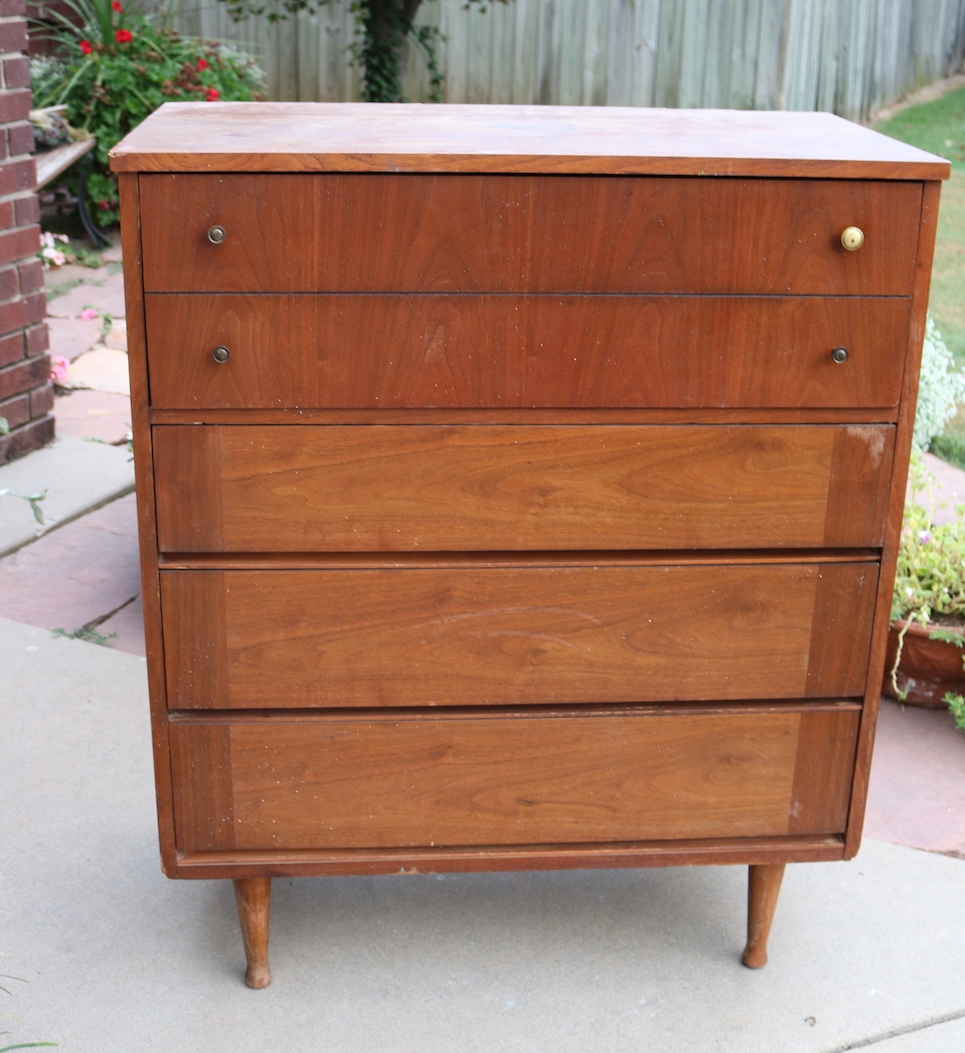
So…before….

…and the oh-so-better after….

You may have noticed one little missing element. The hardware! Why? Well because I didn’t pay attention when I ordered new brass cone knobs and they are coming from CHINA!!! So I should have them someday…maybe…who knows! The hard work is done…knobs are no biggy!

One of the patched areas after paint…

Dry time…IT MATTERS. I cringe when I watch DIY shows and they immediately stage all the pretty pieces they just painted. There is a huge difference between “dry to touch” and “dry to USE.” Truth is, paint and finishes need time to cure before you put all your pretties on it. You can move it in place, but give latex paint AT LEAST a week or two to cure and oil based paints a good 3-4 weeks. Otherwise you may find that your heavy lamp or knick-knacks will stick to the finish or leave a mark!

This is another dresser I finished up a few weeks ago. It didn’t have near the issues the first had, but the refinish process was the same…KSTP the cabinet and refinish the drawer fronts…presto-bingo…

Again, I know this sounds like a daunting and time consuming task…but if you take the time to do it right, you will have a piece that will last another lifetime and one you will be proud to use in your home!

Next week I hope to share my bathroom remodel. In the meantime, you can check out Cristina’s master bath…it will knock your socks off!

Until then….

A mid century chest of drawers makeover...Part one!

While my master bathroom remodel is still progressing (yea!) I finally found time to tackle an amazing mid century dresser I found!

This chest of drawers was pretty shady. Nasty finish, chipped veneers, busted veneers, mismatched hardware…just not something you really want in your home!

It had many of the problems you may encounter with old pieces so it is the perfect project to share a little “step-by-step” tutorial on turning a trashed dresser into something you will want front and center in your home!

First, there was a busted drawer! (Which reminds me, ALWAYS number your drawers on the underside as you take them out!)

This is NOT a huge issue.

I can not stress enough the importance of making proper repairs to any piece before you start making it pretty. Glue and clamps people…NOT silicone, not screws, not nails…just plain ole’ wood clue and clamps.

This one really wasn’t too bad…there have been some I had to completely tear apart and rebuild!

One drawer was missing the wood slide like this one…

Kinda necessary if you want your drawer to not be all whomper jomped. Again, no biggy. You can buy slides online but I used some scrap 1/4” plywood and scrap trim to make one. Again, glue and clamps and good as new!

TIP: If you have a drawer with wood slides that seems to be difficult to pull out, try rubbing a wax candle on the wood slide. If you have a metal slide, make sure it isn’t bent…if it is, just take a pair of pliers and manipulate the metal.

Also, if you find the drawers to be a tad smelly, first wipe them down with ammonia and water, then spritz them with vinegar water and let them sit. Truthfully, I have found a few that smelled no matter how well I cleaned them….in that case I taped off the fronts and painted the interior and exterior of the drawer with Kilz and latex paint (here is an example!)…sometimes you have no choice!

Next up chipped and scratched veneer.

A lot of the older furniture is veneered. If it is chipped or scratched, take the time to remove any loose veneer and repair it with a little wood filler.

The first few coats don’t have to be pretty…you just want to make sure you fill all the boo-boos well. Don’t rush this process…it may take two or even three coats to get a smooth repair!

In this case it took two coats (sand between each coat) and a lot of sanding with a fine grit paper (220) to get a smooth repair, but in the end it will be worth all the effort!

I have found that after I prime and sand, I can often see how well the “patch” will look and can add more filler and do more sanding if needed. If it looks and feels rough after priming, it’s going to look bad with paint…so do a little more work on it after the primer if needed!

My plan originally was to strip and oil the top since it is a walnut veneer, but I did a number on it dragging it out of my truck…so repair and paint it is.

I would like to stress (again!) the importance of sanding and FEELING! You want it smooth to the touch. If you can feel it, you will see it when you paint it! So sand it smooth.

The veneer on the drawer fronts were in mint condition…the finish just looked old and “muddy.” I removed the mis-matched hardware and then stripped the old finish (using this process). It took me less than 30 minutes to strip all four drawers.

The two on the right have been stripped…the two on the left have not…as you can see, they weren’t THAT bad, but this quick step brightens the color and really allows the grain to shine.

On veneers it is important to use chemical stripping as opposed to sanding. Veneers can be very thin and if you sand through the veneer there is no salvaging it…you will have to putty and paint!

After stripping them I applied three coats of Formby’s tung oil finish. I love this stuff and it is my “go-to.” No stain, just a clear finish!

(It was pointed out to me by a kind reader that the original Lane Acclaim tables came with a “toned lacquer” finish….true of many mid century pieces. That may be the case but again, this is the process that works for me and the one I prefer…do your research and do what works for YOU! I prefer the “easy to wipe on and freshen in the future” tung oil finish over lacquer)

I also stripped and oiled the legs since they were in pretty good condition. Same process, same finish.

If your drawer fronts have MINOR chipping like this one did, I would suggest carefully removing or glueing any “loose” veneer (I use a toothpick to slide a bit of glue under any loose veneer and wipe the glue residue with mineral spirits) and then apply the finish. As my daddy use to say, you will never notice it on a passing train! Any time I can salvage and feature a beautiful walnut veneer, I do!

Again, my apologies…this will have to be one of those “to be continued” posts. We had rain and a cold front roll in (yea! it really is fall now!) and since I don’t have a nice cozy shop I am at the mercy of the elements.

Priming, paint and reveal will have to wait until next week!

This process may SEEM daunting and time consuming but in the end it is all worth the time and effort to bring these sturdy old pieces back to life!

Take your time and do it right and you will have a piece fit for another lifetime of use! Hopefully next week you will get to see the results of all this prep work!


Decorating for fall and Mr. Jinx....

Since it is time to decorate for fall and Halloween I thought I would take a minute and formally introduce one of my “rescues.” Mr. Jinx…

All fall decors should include a black cat…right?

I shared pictures of him last year at Christmas…black cats are super tough to photograph. When I look at pictures of him I understand why black is a “slimming” color…he is WAAAAY bigger than this picture reveals. The kids say he is fat…I argue he is just big boned and really fluffy.

Half the time his little fangs are showing…he can’t help it…he has big fangs. Kinda scary looking but super cute when he is stretched out on his back asleep with his little fangs and tongue sticking out…

I have more than a few pictures of him on my Iphone!


Funny story about how I acquired this kitty. He hung around the apartments for months…I knew he wasn’t a feral kitty because he was super friendly. He would rub against your legs and then roll over for a tummy rub. He loves to have his tummy rubbed!

One day I was sitting in my car talking with my manager and mentioned that we should probably take him to the shelter since he was a super friendly and beautiful kitty and someone would certainly adopt him. About that time he jumped in my car and made himself at home on my shoulder.

What was I to do?

Naturally I couldn’t bring him straight home since I didn’t know what I would be exposing my other cats to…so I took him to my vet and had him tested for all kitty diseases. Clean. My vet thought he was about 2 years old and because of his size probably a Maine Coon.

I told the vet to neuter him and give him shots.

At that point I had a small fortune invested in this cat…so I couldn’t very well take him to the shelter.

What was I to do?

Brian was NOT happy that I brought home another cat…

So I told Brian we would foster him. I promptly named him Mr. Jinx…because, well, he’s black…and black cats are suppose to be jinxed right?

This was two weeks before Christmas so with the whole family and their dogs here and all the chaos that goes with the holidays, Mr. Jinx’s nerves kicked in.

Another visit to the vet, a few nights stay, a staggering vet bill…now I REALLY had a small fortune invested in this cat.

What was I to do?

I couldn’t very well just GIVE him away…right?

Brian was still not happy there was another cat in the house (seriously, I only have four…that isn’t TOO many, right?)

But after the holidays, calm was restored and Mr. Jinx settled in…and promptly fell as madly in love with me as I was with him.

Two years later we are still “fostering” him…truth be told, you would have to pry this cat out of my cold, dead hands.

EVERYONE loves Mr. Jinx…even the dogs. He is the coolest, most chill cat I have ever owned…and while Molly was a tough cat to top, he ranks right up there with one of the best cats EVER!

Even Brian has fallen in love with this kitty!

What was he to do…lol!

DECORATING FOR FALL!

It is really tough for me to break out the fall decor when it is still in the 90s every day. But it’s my rule…the week before we leave for our annual trip to Colorado, I decorate for fall.

HOPEFULLY, when we get home it will be a bit cooler. Rarely. Usually I have to put the jeans and Ugg boots back in the depths of the closet for a few more weeks. But the decorating is done and I can sit back and enjoy my favorite time of the year!

Not much changes from year to year…a few years ago I painted these little pumpkins and changed up the window decor…

Refurbished pumpkins, deer antlers, fall picks…nothing fancy! Still like this little vignette so it won’t change this year!

A few weeks ago I changed out the dining room light fixture

I love the new fixture and I love even more that I can still add the fall garland!

I’ve added a few new elements to the den mantel…a tall vase and new candle sticks….

…but the garland and Mr. Owl are still the focal points. The same but different!

The entry…usually void of much because I still haven’t “decorated” it after it’s little makeover…but it’s a great place to infuse a little fall decor…

The seasonal box I featured here…still one of my favorite super simple projects!

I changed out a few pillows and throws….

Even grandmother’s chair got a little pop of fall…

Every year I find pieces of garland, wreaths and picks at the bottom of my storage tubs…I just scatter them here and there for little touches of fall!

Again, little changes, but I love it all the same!

So many don’t decorate for fall because of the cost of buying “stuff.” As I have mentioned before, I usually hit the home decor stores at the end of the season (which seems to be before Halloween these days) and pick up a few things here and there for pennies on the dollar! You may not get to enjoy it for a long time this year, but you will get to enjoy it for years to come!

This is also one reason I strongly recommend sticking with “traditional” vs. “fad” seasonal decor. As much as you might love those teal pumpkin pillows and chevron throws, I promise you won’t love them in a few short years.

I actually bought teal pumpkin pillows this year…

….knowing that I will tire of them quickly. No biggy…they have good forms I know I can reuse in the future!

There is no harm in spending a little money on the latest “fads” but be selective and thrifty. Create small vignettes with the latest trends but don’t blow your entire seasonal budget on it! And check out the blogs and Pinterest…there are thousands of nifty ideas for inexpensive seasonal projects that take little time, effort or money!

Fall may not be “in the air” just yet, but it is certainly “in the house.” Maybe this year it will actually feel like fall outside when we get home!

Live edge tile backsplash and a dresser makeover reveal...

In my quest to make changes in my master bath, I FINALLY decided on the a sliced white pebble tile for the shower floor and niches. One decision down...too many more to go!!!

When I first remodeled the master bath, I did a glass tile backsplash on the vanity...I like it, but honestly I am no longer in LOVE with it.

And to be honest, I think the glass tile backsplash craze is running it's course. In other words, it is a fad that is fading...at least in my opinion. Besides, it had brown in it and I am moving away from browns!

Since it is such a tiny bit of tile, I decided to change it up a bit.

AGAIN WITH THE DECISIONS!!!! But I got to thinking...I love live edge wood countertops, coffee tables, benches..."live edge" wood anything is just beautiful! If you don't know what I am talking about, google it!

Why can't I make a "live edge" tile backsplash?

The pebble tile I picked out for the shower floor has a "live edge."

In other words the pebbles are laid on the sheet in such a way that the edges of each section of tile are "natural."

This vendor carries a tile border but it is only 4" tall. You can also remove each individual tile from the netting and place each individually...nah, way to much work for me!

Since I have a small backsplash, I cut each 12x12 sheet of tile in half with a wet saw. I only needed 3 sheets of tile...less than $40!

Then I had to set it on the vanity for a few days to see if I was really going to like it!

LOVE!!!

So here is a tutorial for making a "live edge" tile backsplash...

First, I had to remove the old tile. There are times when the easiest thing to do is to cut the sheetrock along the tile down to the studs and remove the whole kit-and-kaboodle! That was an option, but I decided to remove the tile and scrape the old mastic....

Since that tore up the sheetrock AND the new tile wasn't going to cover the entire section I removed, I had to do some sheetrock repair.

No biggy!

If you decide to cut the sheetrock down to the studs, here is a super simple way to "patch" the section you remove!

I didn't have to do any patching, but the basic rules apply...mud, sand, texture and paint!

Apply a coat of mud, let it dry overnight, then sand. Then another coat, let it dry and sand again. I can not stress the importance of sanding sheetrock mud smooth...FEEL IT! If you can feel it, you are going to see it when you paint it! Sand, feel, sand, feel! I used an 80 grit paper. You are better off sanding too much and having to apply more mud!

This product is one of my favorite little DIY "hacks." Sheetrock texture!

If you have properly sanded, this stuff will blend old with new! Just make sure you shake it WELL and always test spray it before you start spraying your wall. On more than one occasion I have had to wipe off the wall and start over because the texture came out to thick or too thin...so take time to test it before you start spraying it on your wall! The knob adjusts for different "textures." Follow the directions on the can.

Let the texture dry WELL before you paint!

And again, I can not stress the importance of keeping spare paint on hand. Fortunately, I just repainted my bathroom a few months ago so I had fresh paint on hand...

So, on to the fun stuff...tiling!

First, this is a "natural" stone tile (if you don't know if your tile is a "natural stone" vs. ceramic or porcelain tile, ask!) The very first thing you want to do is seal it with an "impregnator sealer." Ask...they have it at most home improvement and tile stores. Super simple to apply...brush it on...let it sit for about 5 minutes, then wipe it with a clean cloth.

I would suggest doing this before you cut it with a wet saw, but definitely before you install it and grout it!!!

Since the top edge of the backsplash is going to be the "live edge" it was important to remove any "netting" from the edge...

The net backing is what is holding all the little pebbles in place so you don't want to get carried away...just trim the netting away from the edge that will be exposed!

I used a utility knife and my little sewing scissors (and I wonder why I can't keep a decent pair of sewing scissors!)

I used a premixed tile mastic. Mastic is for small tiles...thinset for large tiles. Always use the adhesive and trowel recommended by the tile manufacturer. I coated the back of the sheet with mastic using a properly sized trowel. I used a small craft brush to apply mastic to the edge pebbles...it is okay for the mastic to "squish out" between the pebbles a tad, but you don't want it squishing out on the edge pebbles...I kept Q-tips on hand "just in case." Just make sure you get enough mastic on the back of the edge pebbles for good adhesion. 

TIP! Never set a tile backsplash directly onto the countertop...always use spacers and then after you grout you will run a small bead of caulk between the backsplash and the top. In this case I wanted a very small space so I used dimes as spacers! Thank goodness we keep a change jar and I was able to fish out a few bucks worth of dimes!

Let the mastic dry over night before grouting! 

Now this is where I tell you to "tune in next week" for grouting instructions. Why? Well because as I mentioned I needed 3 sheets of tile to complete this task and I only had the two I ordered as samples. So now I am waiting on the other sheet to be delivered so I can finish this little project. 

I know...it's annoying to get engrossed in something only to be told "to be continued." But I promise...next week I will share how simple it is to grout, seal and caulk the new tile backsplash.

Until then, I will share something I promised last week I would share!

(The grouting tutorial is up…take a look!)

A DRESSER!

I shared last week that I have been in "dresser mode" recently. I currently have FIVE dressers and chests sitting in my garage ready to roll! 

Last week I took a dresser in and it sold that day! I think it has been in my garage for over 6 months...I just never took the time to work on it.

It wasn't in horrible shape...just a really bad paint job (you could see all the brush strokes) and the hardware was pretty chippy!

I didn't change it up too much...KTSP...kilz, sand, tack and new oil based high gloss white!

The hardware got a little makeover...I primed it with metal primer and sprayed them with high gloss black lacquer.

Again, not a huge change but enough to give it a new life!

Maybe next week I'll share another one...if I can dig them out of the garage!

Well, that and the "to be continued" of the tile saga! 

Old typewriter cart upcycled....

I am in "dresser" mode these days...lots of dressers and chest of drawers being "refinished" but after 5 years, I still can't remember to take good "before and after" pictures! So while I have refinished 4-5 dressers in the last few weeks, I have no good pictures to show for it! CURSES!

My garage is packed with dressers and chests I am working on now so MAYBE I will remember to take pictures when they are done so I can share!

One little project I DID remember to take pictures of is this old metal typewriter table....

I shared here the first little table I refinished. I have found they are perfect for my portable sewing machine. I commented on the first makeover that I wish I had one with a little drawer...low and behold I found one!

It wasn't in bad shape...just a really bad paint job. So I primed it with metal primer, sanded smooth, wiped it with tack cloth and painted it with a few coats of black lacquer....

This little table makes it super simple to store away my sewing machine until I need it...

...then I can just roll it out and set it up anywhere in the house! Just roll it out and put it anywhere...no more scratching my dining room table.

If you find one of these little metal tables that has a bit of a "rust issue" I shared here how to deal with that

I think these old metal tables can be used for many things...a portable sewing table, coffee bar, maybe even a little portable "prep" table for the laundry room, garage or kitchen. Roll it out then tuck it away when you no longer need it!

Simple!

A new bar top and Wayfair light fixture...

As I mentioned here, change is tough for me...which is why these things haven't changed much in 19 years.

I painted the dining room light years ago (antique bronze to black)...as much as I really didn't love the actual fixture, I loved what I could do with it during the holidays....

One year I removed the little shades and I liked that a bit better, but I still wasn't digging the light fixture itself.

Just too ornate and "heavy."

But I could never find one that would allow me to decorate it for the seasons...until I did!

(As you can see, I still have the Drexel buffet...love the piece...just not the color...waiting on "inspiration.")

The install was super simple...here I share how to install a new light fixture!

Not a huge fan of the Edison bulbs, but I think those can easily be changed out...eventually. For now I can live with them knowing that come fall (right around the corner...yea!) and Christmas, I can still decorate the fixture!

I think it is more of a "farmhouse" look but the nickel accents tie in with the more "modern style" brushed nickel bar lights. So it works for me....

Which brings me to the bar top....

...it wasn't totally offensive, but in my quest to go "light and bright" in my kitchen without painting all my kitchen cabinets, I impulsively ordered a white quartz top.

Truth is, I wasn't really loving it after it was installed. Just too "stark" and soooo white! 

I painted the little support corbels the same color as the trim...more "white." (They were originally black but since I didn't damage them when I removed the old top I just primed them and painted them with the trim paint...BM Swiss Coffee.)

This is what we refer to in the design world as "OMGosh what have I done" moments.

I decided what was really bugging me was the dingy old bar stool seats. They had certainly seen their better days. The bar stools are 18 years old and I still love the style dearly...heavy iron and super sturdy...but the "grey tweed" upholstery just didn't cut it any more!

Choosing fabrics is something I really struggle with...but I know I LOVE the fabric I used on this little chair makeover

Light and bright with just a touch of grey! So I ran out and bought enough fabric to recover the bar stool seats. About 1 1/2 yards for four seat cushions. If you don't know how to figure for fabric, take your measurements with you and they will help you figure it...just make sure you add 2" on each side! (Or better yet, just take a seat with you!)

Pay CLOSE attention to the direction of the fabric. This fabric doesn't APPEAR to have a "right or wrong" way, but it does. I put a pin in the top of each piece so I would know which way to lay the fabric on the seats!

Reupholstering chair seats is a super easy DIY project...probably one of the simplest DIY projects one can tackle! And this easy little project is an excellent way to make a pretty dramatic change in any room without breaking the bank or dragging out the sewing machine! There are thousands of great tutorials online...so again, do your research and find one that makes sense to you and use it!

In this case I had no desire to paint the stools...I like the black iron...but if you want to paint a dining chair or stool, do it after you have removed the seats but BEFORE reattach them. Again, super simple project! Use the KSTP method (kilz, sand, tack, paint...here is a pretty good paint tutorial.)

I removed the seat cushions! In this case, 4 little screws! I also scrubbed down the stools...pretty nasty after 18 years of use!

Then it was just a matter of wrapping the seats with the new fabric...I didn't even remove the old fabric or bother with applying a new underside....and reattaching them.

I guess that might be an issue if you are laying on the floor looking up at the underside.

Here I do share a few helpful tips on upholstering...pretty much applies to the simplest project!

While I had the camera out I played around with a few different "centerpieces" for the bar with knick-knacks I had on hand...

But honestly, with mischievous cats who insist on knocking everything off the bar, we are better off leaving it clutter free! Same with the dining table...too many broken vases and scattered flowers!

A few relatively minor decor changes that made a subtle but significant difference! 

Simple "before and afters"...

Some of the simplest "befores" turn out to be my favorite "afters."

Which explains why I often don't have decent "before" pictures...I think "oh, that's no biggy" and dive right in to giving them a simple little makeover. Then they turn out so stinking cute I wonder why I didn't take time to take "before" pictures.

They are a reminder of why do this blog...to show you how easy it is to take a simple, boring, out-dated, dark piece of furniture and turn it into something you will want in your home rather than in your yard at the next garage sale!

We DIYers live for those hidden treasures...pieces of furniture that people want to get rid of... they drop them at their local thrift store or sell them for pennies in garage sales or just set them out on the curb...we take them home, clean them up and work a little DIY magic. 

The worst...you live with the ugly, dark furniture because you can't afford to replace it!

I get it...you paid a small fortune for your "matchy-matchy" bedroom furniture so you can't bring yourself to get rid of it.

I've shared "makeovers" hundreds of time...too many times to link ALL the pieces I have "upcycled" over the years. But I would bet money you still have a few pieces lurking around your house that serve a purpose or are "family heirlooms" or you paid too much to get rid of it...so you just live with it.

Don't fret...take the plunge...buy some primer and some paint AND CHANGE IT!

LIFE IS TOO SHORT TO LIVE WITH UGLY FURNITURE!

This shelf was your typical Target cheapo...dark finish...no I did not take a picture of it "before." Honestly, I think it was a piece someone left at the apartments so I loaded it up and brought it home.

I removed the back panels...primed and painted the frame and shelves with one of my "sample" pots of white (KSTP). I painted the back panels with a sample pot of teal and then reattached them.

Super simple and too stinking cute!

This little bedside table came with a set I bought at an auction. Someone bought the dresser, chest and bed but didn't want this little table.

Meh....

Simple makeover! I removed the drawer and simply brightened it up with some Restorafinish. I primed the cabinet, sand, tack and white gloss paint. It was missing a knob so I ordered two new ones...

....again, SUPER SIMPLE and so stinking cute!

This old oak dresser...the finish and the little applique' really dated the piece.

I popped off the appliques using a chisel...lift carefully...chances are they are applied with a little bit of glue and a few tiny nails.

... sanded the old glue, stained the top with gel stain (no need to strip the old finish) and chalked painted the rest of it....distressed and sealed the whole thing with poly...

Too stinking cute!

Simple...simple...simple! 

Nothing earth shattering on any of the pieces...just super simple little makeovers that updated the pieces and gave them new life! 

Walk around your house...what simple little piece can you haul out to the garage and work a little "DIY magic." Trust me...if you don't like it when you are done, you won't get any less for it at a garage sale! 

The death of the rose bushes....and a peak at the rest of my landscaping!

Que sad music...the knock out roses finally bit the dust.

They were beautiful little additions to the side yard when I first planted them....

I walked around the yard and took a few pictures a few months ago and they looked halfway decent then!

I built this flower bed and planted the knock out roses because it is an area of the yard I rarely tend to...

Rarely...as a result they were looking REALLY pathetic!

Two bushes died last year so I removed them and planted another. This year the another died and two were near death.

In their defense, knock out roses tend to stop blooming in the heat of the summer...but they obviously had other issues!

So this past weekend we decided to pull them all out...except for the one little bush I planted last year. It may eventually get transplanted when it is cooler if I decide to go another direction with this bed.

I'm not sure what caused their demise. Age, disease, neglect...maybe a combination of all. I did throw a little fertilizer down on them occasionally but I can honestly say I probably didn't tend to them like I should have...a weed eater is probably not the proper tool to use to prune rose bushes.

Knock out roses don't make the best "cut flowers." Cute in a little ironstone creamer...but certainly not something you plant for the purpose of creating indoor arrangements....

Que sera...

I think I will leave the bed "vacant" for the time being...let it winter just incase it is harboring disease or fungus.

Besides, I can't decide what I want to plant in their place and honestly, it is really too hot to plant right now.

I would love to plant hydrangeas but evidently they don't take well to direct afternoon sun...and that is exactly what this bed gets...hot afternoon sun. Curses. I like crepe myrtles but they get very full and bushy and are probably not ideal for a narrow bed against a fence. 

When planning your plantings pay attention to what sunlight and care the plants will need. Do your research!

Maybe I will just resort to more potted plants...those tend to do well but they certainly can't be neglected this time of year. Right now I am watering every day.

I will leave you with a few pictures of areas of the yard I don't neglect...

After YEARS of struggling to landscape this front bed, I finally resorted to flagstone and potted annuals..I love it!

Hostas are a super simple perennial that require little maintenance! They can easily be split every spring which explains why I have TONS of them in my yard! I have even started planting some in containers!

Planting in containers has become my "thang." I'll scatter a few annuals around in the ground, but just about all annuals go in containers these days!

Make your yard an extension of your home...

BTW, last year I shared here the new fescue sod...I thought the "difference" between the fescue and bermuda would bug the heck out of me...not so much! I see the difference...but I can live with it! As you can see, it made it through the winter and that is a good thing!

Until next week....

The "compact" microwave and new stove....

It is done...the new microwave, stove and tile are installed.

And I LOVE them!

It all started with my quest to get rid of the over-the-range microwave.

As I mentioned here, it really became an issue for me when I read that over-the-range microwaves are now considered a kitchen "faux pas." Truth be told, it has bugged me for years...I hated the big ole' hulking thing hanging over my head while I cooked. 

And of course there was the whole issue of the black stainless refrigerator and the fact that the range, microwave and dishwasher were black. We bought the black stainless refrigerator almost two years ago, planning to transition all the other appliance to black stainless. Unfortunately I can't bring myself to buy new appliances when the old work just fine.

The microwave worked just fine...but my "obsession" with getting rid of the big ole' hulking appliance drove me to the point of madness...so I bought this awesome little thing. I guess technically it is still an "over-the-range" microwave, but it is really not much bigger than a vent hood and doesn't bother my aesthetic senses at all!

I ordered the microwave in black stainless, knowing one day I would break down and buy the black stainless stove I had been drooling on for several year. Low and behold my oven went out a few days after I ordered the microwave....curses! Now I HAD to buy a new stove. (Honestly, it was just the ignitor....a relatively easy and inexpensive fix...but that is beside the point!)

The only real issue I had with replacing the much larger microwave with a smaller one was the tile back splash. Several years ago I replaced the original tile backsplash with travertine.

I tiled to the bottom of the microwave...but the compact microwave is about 7" shorter than the original, which means I was going to have to add tile. Fortunately, I am a hoarder of "scrap construction crap" and managed to piece together enough scrap travertine tile to fill the gap.

All I had left from the original install were scraps...so to make sure I would have enough (and not have to order a few pieces of this extremely expensive tile!) I made a little template the size of the space and began laying out the scraps. I numbered each piece on the back so I could install it in the proper order!

If you do not have any scrap of your backsplash (and can't buy it), think about adding a little "decorative" accent...Pinterest is full of inspiration! 

Another little issue was the fact that I had tiled over the original tile (not something I normally do!)...as a result there was a 3/8" difference in thickness. No biggy really, I just put a piece of 3/8" board (scrap sheetrock) to fill the space then tiled with the travertine! 

I picked up a few sticks of travertine pencil liner at Lowe's to create little borders on the sides and under the microwave. Not a perfect match but close enough!

I have one really serious problem now...the dishwasher doesn't match.

Since it was replaced 5 or 6 years ago, I don't see it going out any time soon! Dang it! I'm trying to convince myself that I can live with this unsightly thing....trying! 

I have also ordered a new quartz top for the bar...

I have tired of the black and want something "light and bright." Again, I am always looking for a way to lighten the kitchen without painting the cabinets. The granite counter tops now seem a little "busy and dark" but that has to wait. I desperately want to make some serious changes to master bath and that has to be my next big project!

I haven't used either appliance enough to give a proper review but I can say I LOVE the look of both. The microwave is plenty large enough to do what I do...warm leftovers and melt butter. (Whirlpool is the only company that currently makes a "compact" microwave and their "black stainless" blends well with the Samsung black stainless stove and refrigerator.)

I love the new stove top but I have one minor beef...no drip pans. Not a huge problem...I ordered silicone "cut to fit" drip mats from Amazon. Not sure how happy I will be with this solution but I guess I will find out. It has a "wok grate" but I don't have a wok so whatever! The middle griddle is a neat feature but I'm not sure I will use it much...again, we'll see! The oven has both a "traditional bake" as well as convection...and it will automatically calculate the conversion...which is nice for someone who has been cooking with a regular ole' stove for 40 years! 

I want to share Matt's entry...he is having his kitchen cabinet painted so he wants me to wait to take pictures until he has his kitchen finished...so MAYBE next week!

Until then...

Modifying a cabinet...

When I first remodeled my master bathroom, I loved it...honestly, I still do! But someday soon I want to make some major changes just for practical purposes. Specifically, I want to remove the whirlpool tub (seriously, I think I have used it 3 times in the last 20 years!) and add a walk in shower.

As much as I love the existing tile, I know that will mean picking new tile for the shower....which means I will want to go ahead and replace the floor tiles...you know, while there is already a mess! But picking a tile that will carry me through another 20 years is tough for me...I know people say this or that is "timeless" but I can assure you NO home decor is timeless.

This will all happen as soon as I can find the perfect tile person to construct the shower. I do not want to hire someone who isn't VERY experienced because one of the worst things that can happen would be a shower that leaks! 

There is one other tiny detail that kinda bugged me...the "medicine cabinet."

While I love the look, it just wasn't practical. Why? Because everything in the back half of the cabinet goes there to die! Seriously, I found a bunch of products and pills that had expired years ago.

I cut down my kitchen pantry several years ago and have never regretted losing that extra 12" of space. I like how the smaller cabinet opens up the kitchen a bit! And again, everything in the back of the cabinet had a tendency to expire before I got to it. (No, I don't have a picture of the pantry before I cut it down...that was "preblog!")

So I knew cutting down the depth of the cabinet in the bathroom was doable! 

The first thing I did was take EVERYTHING out of the cabinet and took inventory. Major purgefest! I made sure that what was needed or wanted would fit comfortably if I only had 6" of depth. Yep, all but the basket of old prescription medication and most of it had expired. 

Once I knew that cutting down the cabinet wouldn't pose a logistical problem, I removed the cabinets from the wall, cut them down, rebuilt the back and reinstalled them. (Did I take pictures of this process...of course not...who knew I would share something so mundane!)

Sounds easy...honestly, it wasn't. There was an electrical outlet to deal with and the trim detail and then of course there was the exposed sheetrock boo-boos from the old marble backsplash...curses. I always think a project will be easier than it is!

But again, it was doable, and after a day of cutting and cussing I had a smaller cabinet.

The sheetrock boo-boo was an easy fix...mud, sand and retexture. Since I am good about keeping old paint for touchups...no biggy. Except it had been so long since I painted the bathroom, the paint had hardened. So I got to repaint the entire bathroom! Yippee!

Fortunately I had a couple of left over gallons of paint from when I painted my living areas...

Now I am eyeballing my kitchen again. I am a sucker for the "power of suggestion" so when I read that big ole' hulking over-the-range microwaves are now a kitchen "faux pas" I decided I want to remove the microwave above the stove...which means I have to find a place for a smaller microwave. The counter is not an option since I have a small kitchen and limited counter space. Hum...the pantry...maybe I can put it in the pantry. Well, I could if it weren't so stinking shallow...remember I cut it down so now no microwave more than 13" deep will fit. Thank goodness for the internet...I spent days researching microwaves. Fortunately, I found a few that would work so that's one hurdle! Small little things but honestly the only thing I use a microwave for is to boil water, warm coffee and melt butter.

Hurdle #2...can I afford to loose shelf space in the pantry? Again, I pulled everything out and start measuring cans of beans and moving shelves around. 

Doable! Keep in mind we are now a family of two and I don't need the food storage space I use to!

Hurdle #3...when I take down the over-the-range microwave...what then?

Honestly, I didn't know.

And then I found a solution that changed my whole plan...

A compact over the range microwave by Whirlpool!

I would post a picture but the site won't let me steal the pictures so just go look at it!

How cool is THIS! It's only about 10" tall so I won't feel like I have a big ole' hulking appliance hanging above my head while I am cooking.

I ordered the black stainless even though my stove is black.

I hate to buy new appliances when they work perfectly fine so I thought I would live with my old black stove for the time being.

(Fortunately for me the ignitor went out on the oven this week. Yippeee! Perfect excuse to order the new black stainless stove I drool on every time I go to Lowe's! God forbid I fix it with the $30 part!)

Now I don't have to give up pantry space or counter space. I guess it is still technically a "kitchen faux pas" since it is an "over the range microwave." But you know what...I'm okay with it. I'm probably one of the few who hasn't painted my kitchen cabinets, I have no shiplap in my house and while I would love to retile my entire kitchen and dining area with beautiful, light travertine tile, it's not happening...so I'm okay with bucking the decor trends!

The only problem I have is the space that will have to be tiled after the big ole' hulking microwave is removed. Fortunately, I am a pack rat and kept all my scraps from when I retiled the kitchen backsplash! Yea me! Thank goodness because that stuff was E.X.P.E.N.S.I.V.E!

So when I get the new microwave and stove are installed and the tile work done I'll share...can't wait!