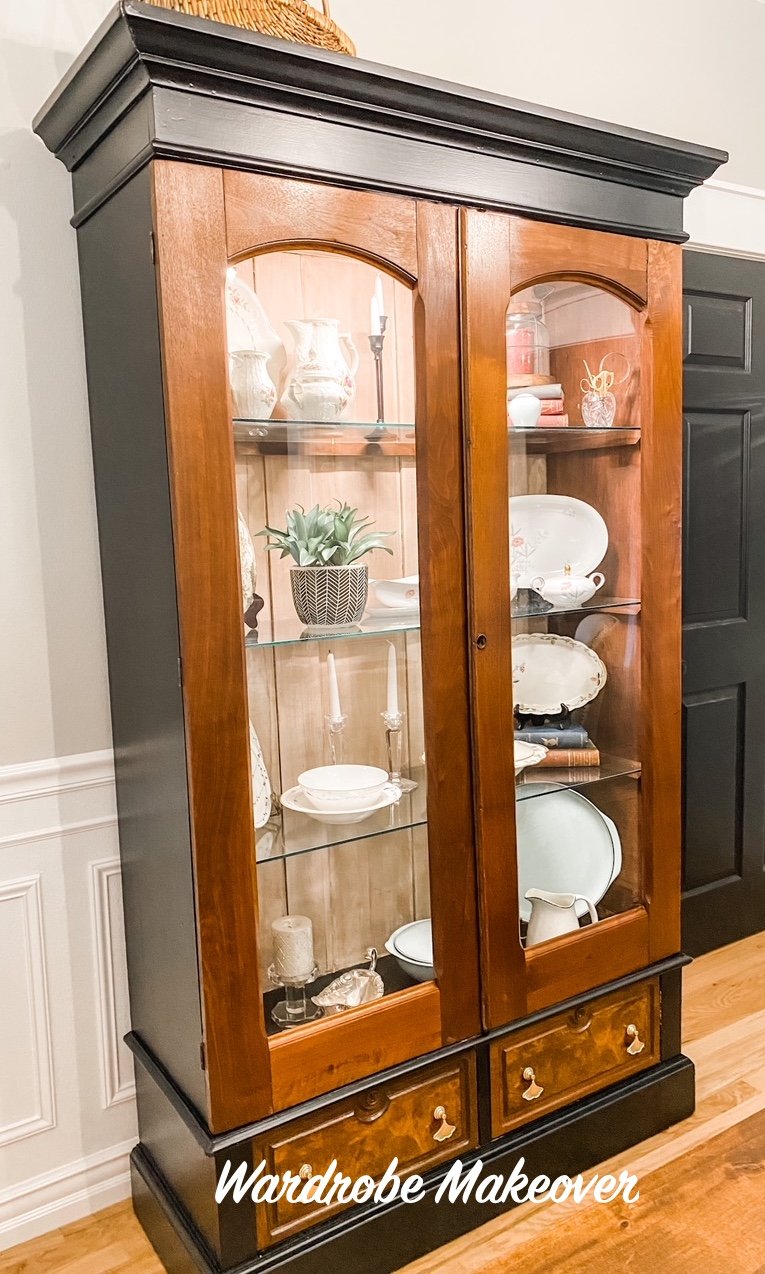
The wardrobe reveal....

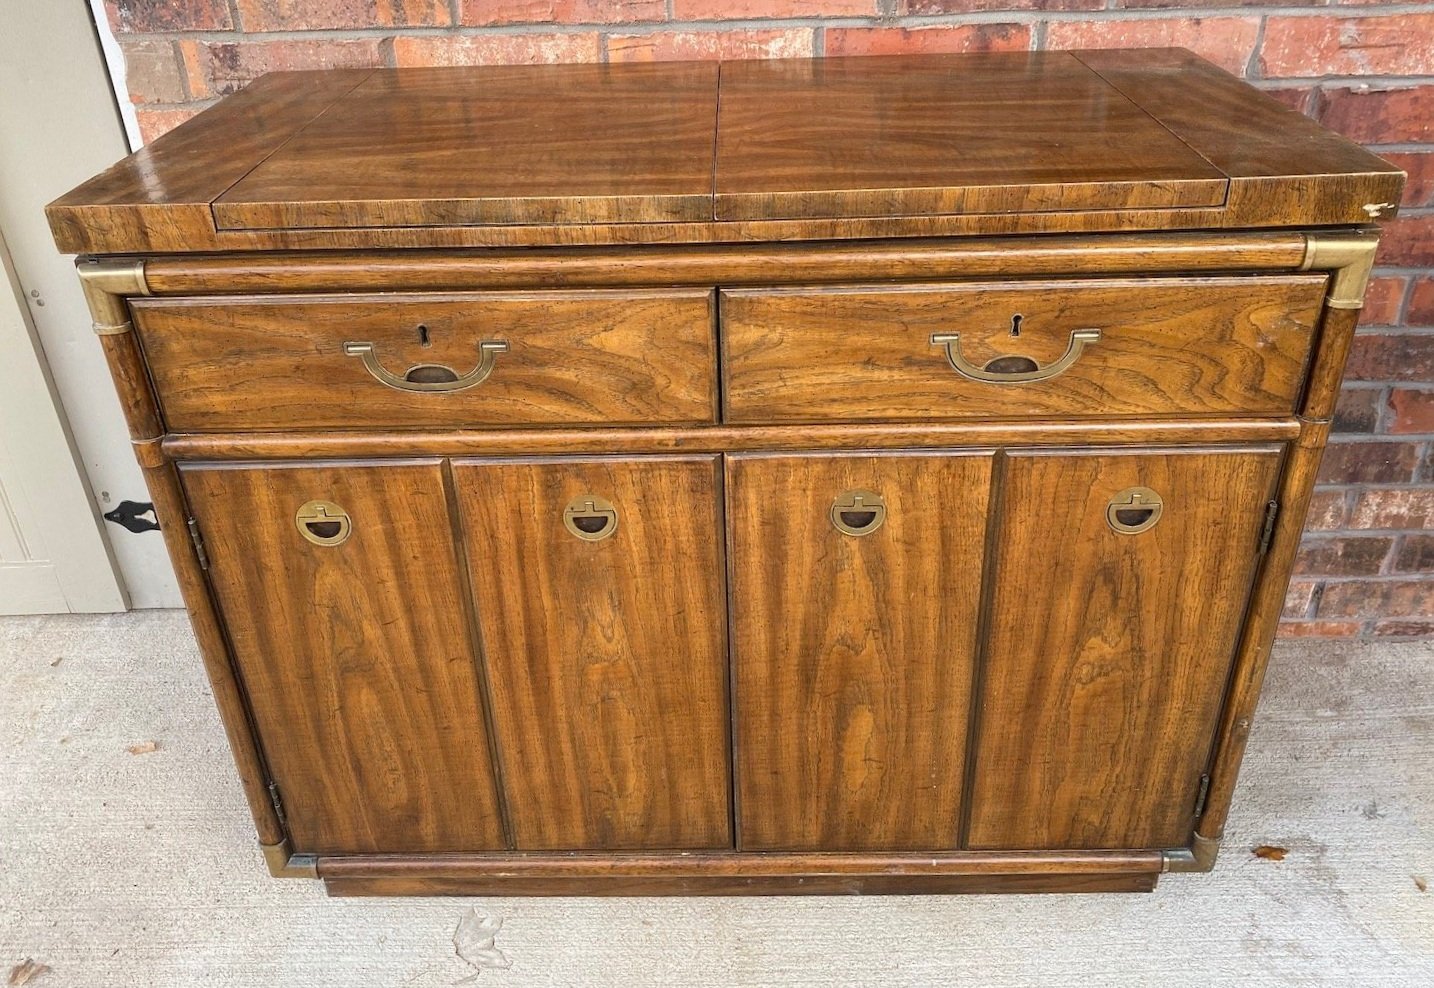
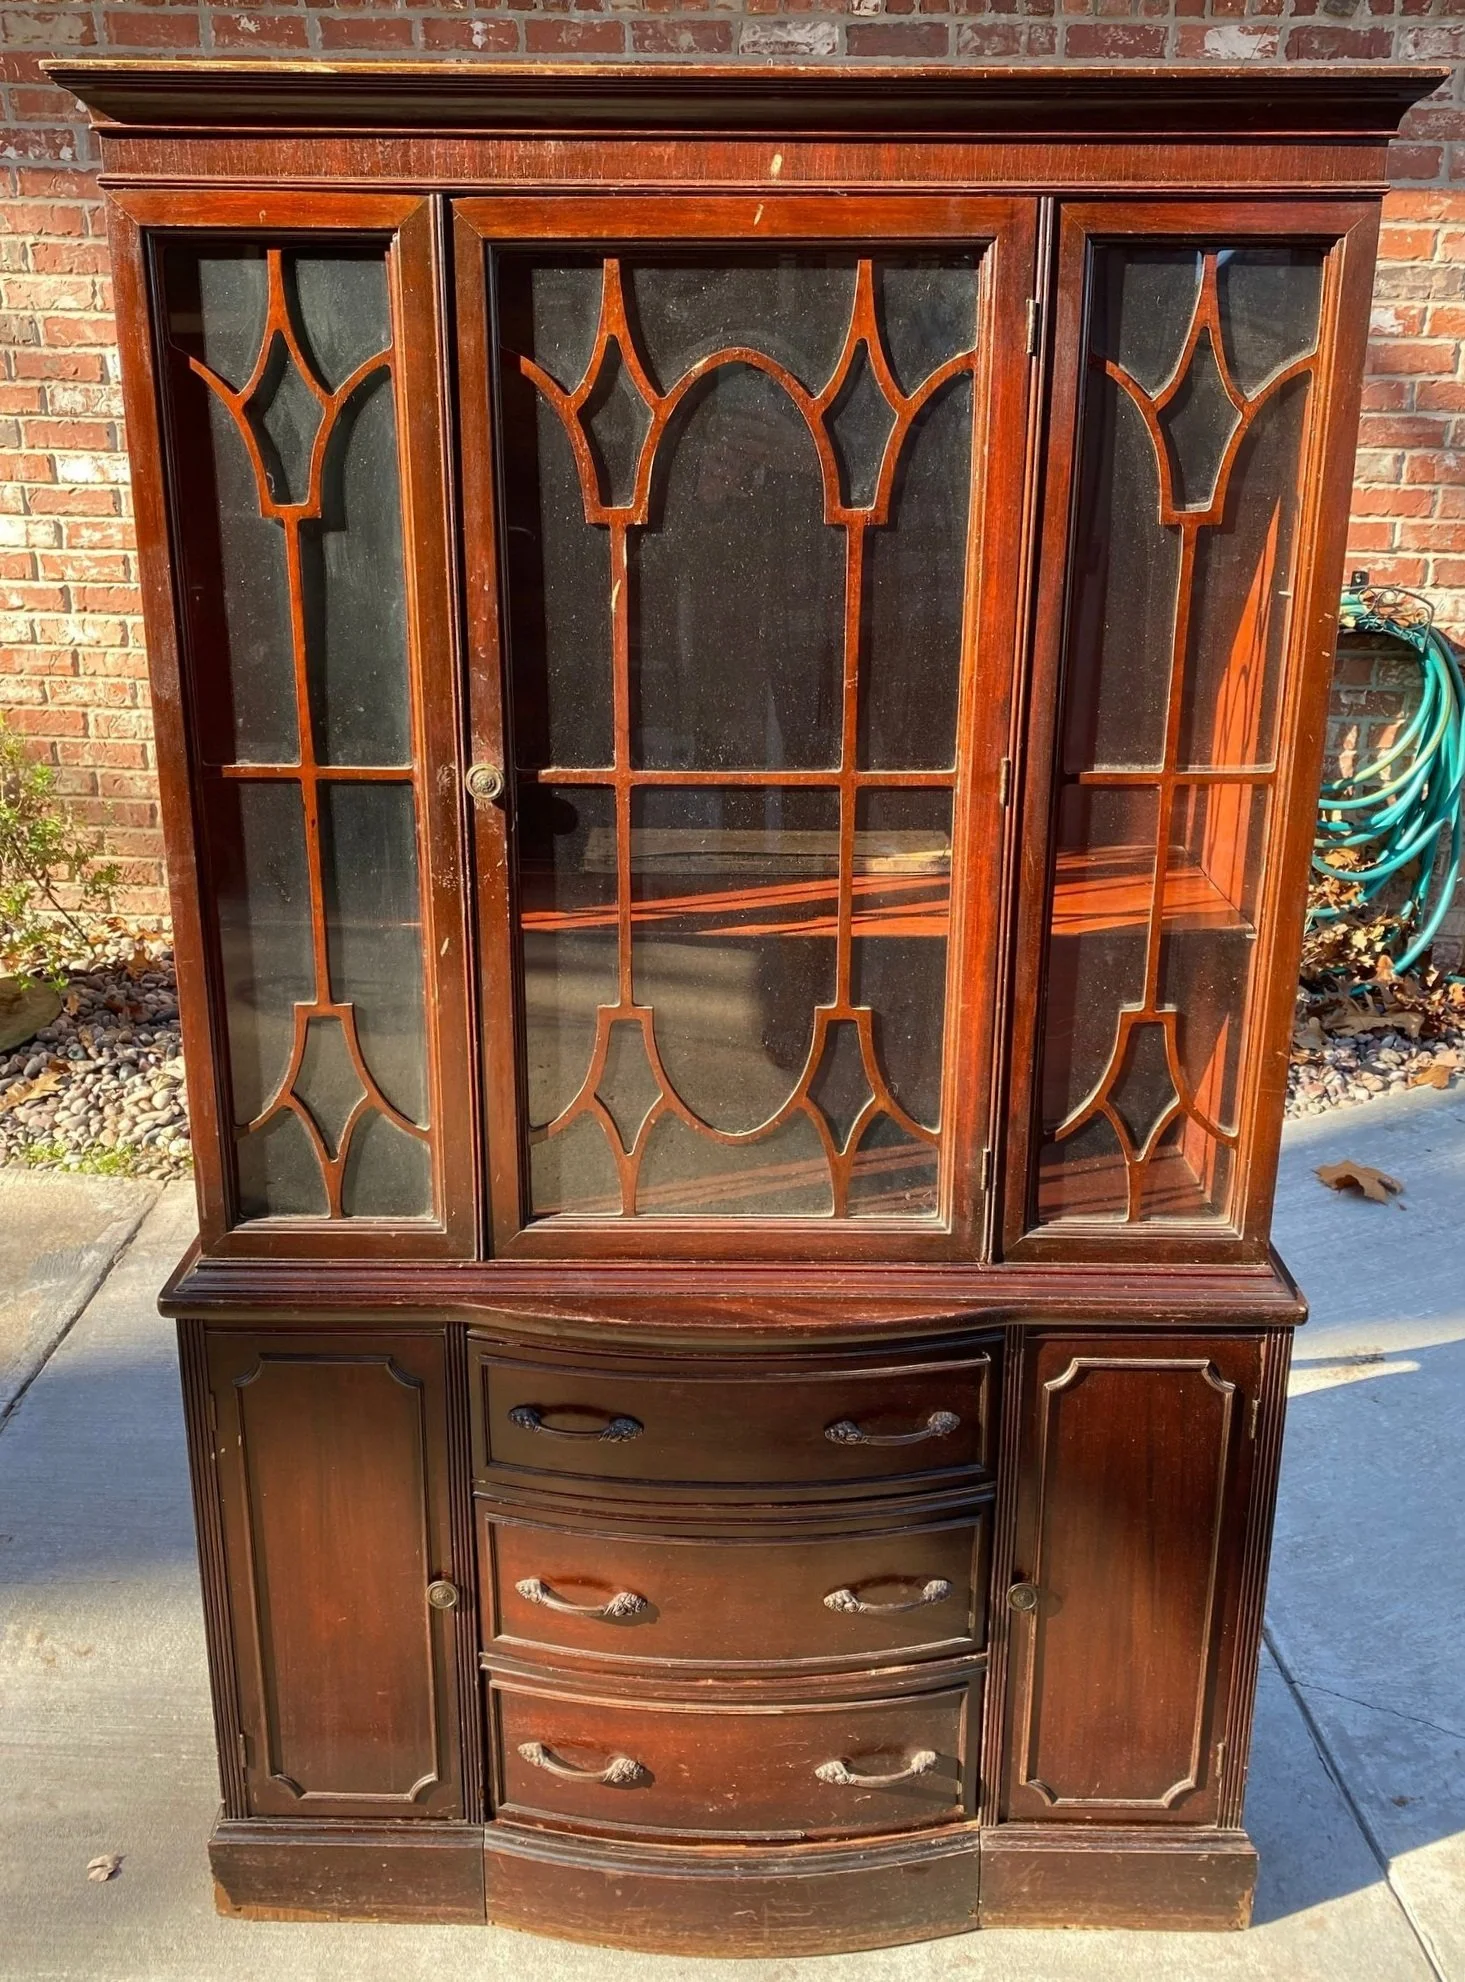
Last week I shared the wardrobe cabinet I planned to refinish and convert to a display cabinet….HERE.

Definitely lacking in soooo may respects. But I had a pretty good idea of what I wanted to do with it.

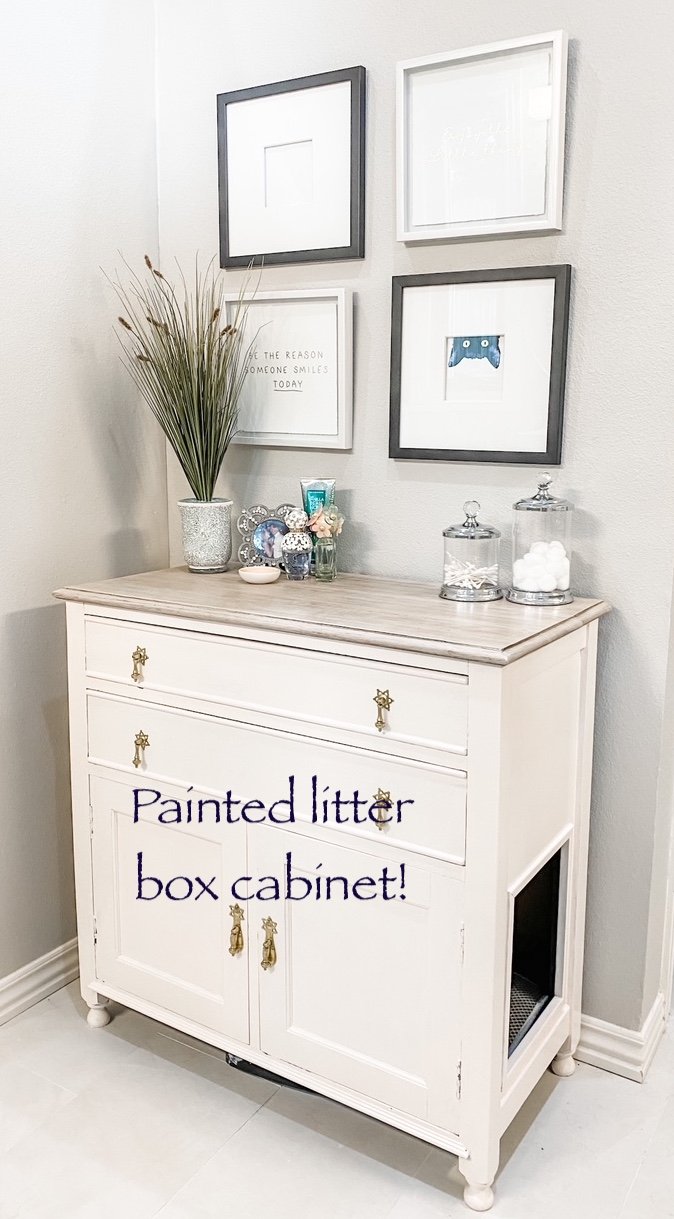
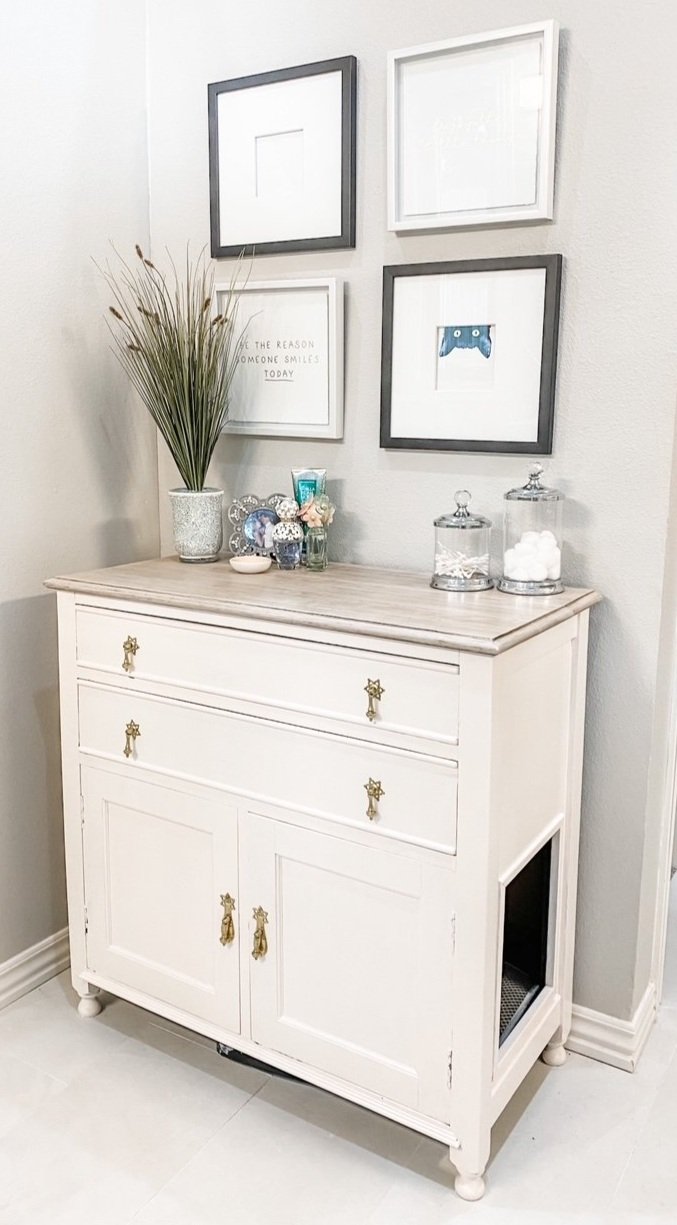
These “inspiration” pictures have been on my computer for over a year, just waiting on the perfect piece to transform!

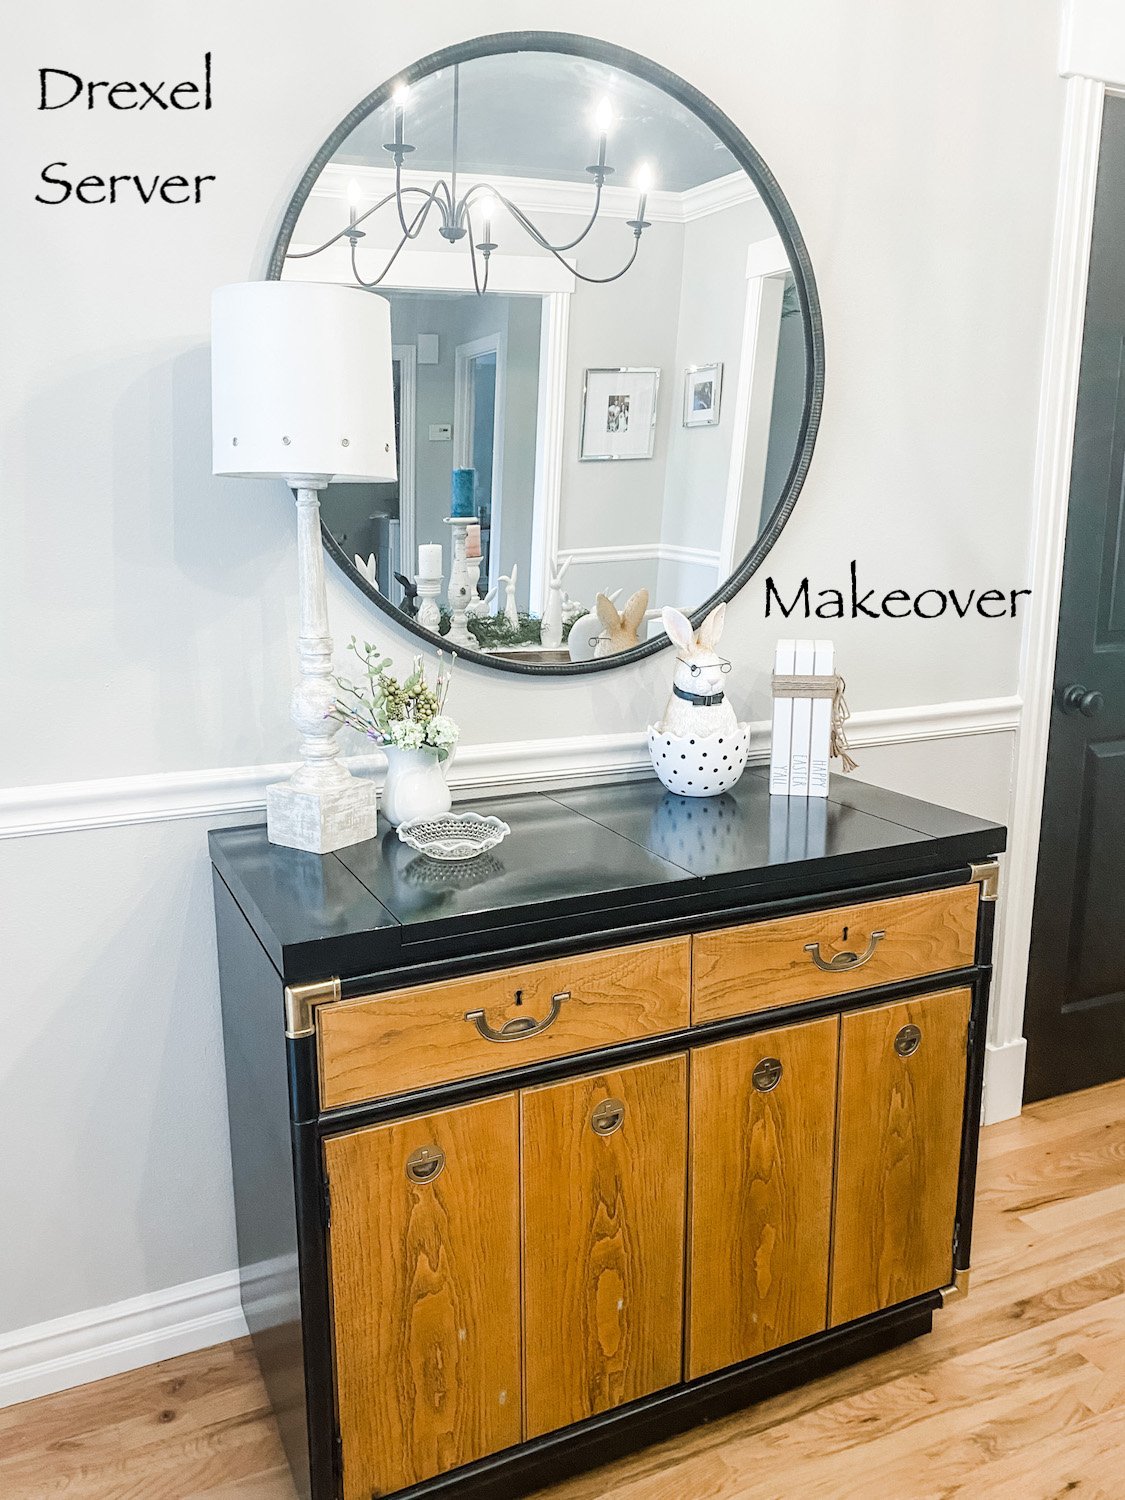
The last one is probably my favorite…a Pinterest find. It was the one that influenced me the most, as you will see.

So the plan…remove the panels in the door and add glass. Remove all the shelves and add glass shelving. Lighten the back of the inside. Strip the doors and drawers and apply tung oil. Paint the rest of the outside of the cabinet black. Replace the hardware. Add a light.

So of course the first step is to deconstruct and then begin the stripping process on the doors, drawers and inside back panel.

What a chore!!!! I think someone, at some point, had applied at least 20 coats of poly. The 1/2 acetone, 1/2 lacquer thinner process I shared HERE, wasn’t cutting it. I applied Citristrip and wrapped everything in plastic wrap…that seemed to do the trick for 80% of the finish…then I was able to sand off the rest since this was mostly solid, then clean it up with the 1/2 and 1/2 mixture. Remember, you don’t want to vigorously sand veneer because it can be super thin and you can end up sanding right through it. I started with an 80 grit then finished with a 220 grit. Then I hand sanded it with 220 to get it butter smooth.

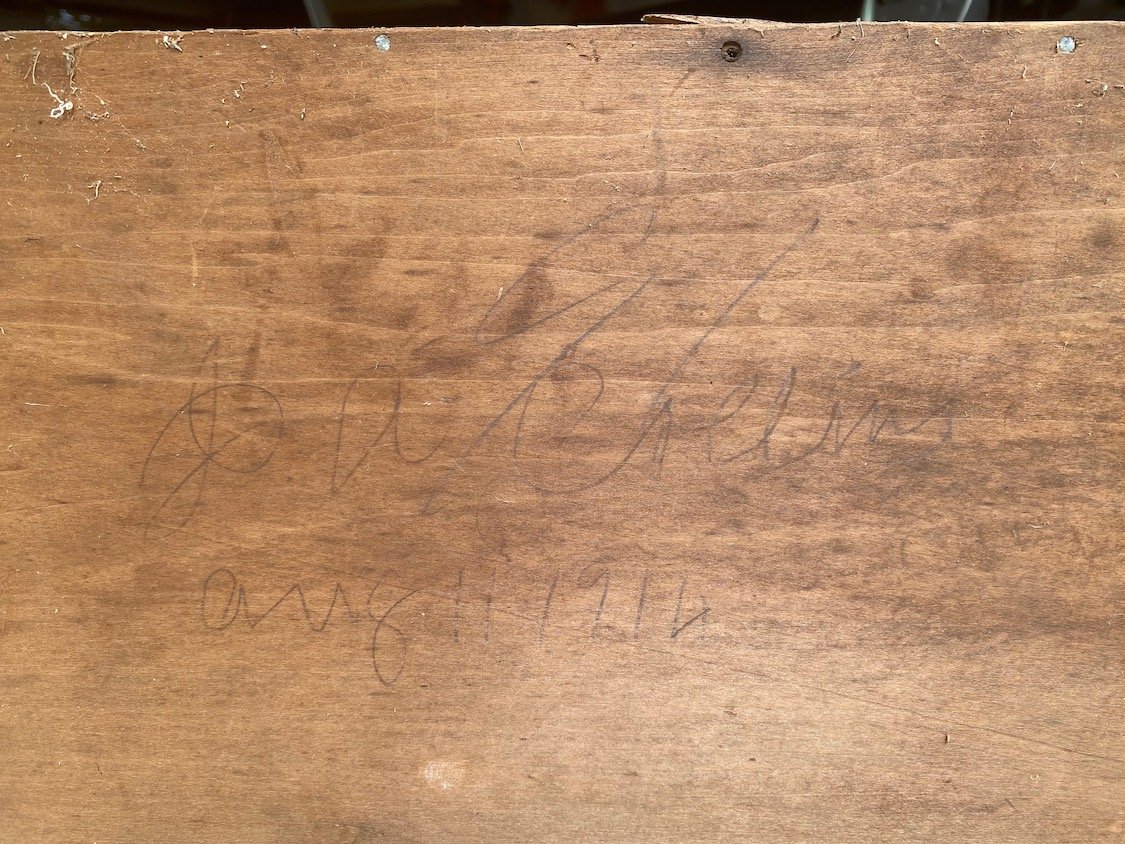
I knew this piece was old (which is why I know the poly was NOT the original finish) and that was confirmed when I checked out the underside of one of the drawers.

It was signed and dated…most likely by the person who constructed it…August 11, 1914…wow!

The other thing I discovered was the mortise and tenon peg joint. So super cool. Normally drawers are constructed using dovetail joints. This was unusual to find, but probably not unusual for the times.

I removed the doors to make it easier to work on the inside as well as make it easier to strip them. Remember to ALWAYS reenforce screw holes when you remove the screws. Not hard at all. Just take a match stick, dip it in wood glue, then insert the stick in the hole and break it off.

This will ensure that when you go to reinsert the screw, it won’t be loose or “wonky.”

I stripped the inside back panel then sanded it down. I tried lightening it with oxalic acid but it still seemed a tad to dark and a bit yellow. So I ended up applying a whitewash. Just a little white paint mixed with water, brush it on, wipe it off…like a stain. I can still see the character and grain of the wood but it lightens the interior considerably.

There was a tiny bit of veneer on the base of the cabinet and one side was in pretty rough shape. My original plan was to remove all the old veneer and apply a new piece. I planned to paint the outside of the cabinet so it didn’t matter that it would be different than the other side.

Problem was, when I went to remove the loose veneer, some of it was SUPER stuck…as in it was NOT coming off.

Soooo, punt.

I scraped off all that I could then I used wood filler to get a smooth surface.

This picture is after the 1st coat.

The whole process took a lot of time and patience. Fill, let it dry, sand…apply some more, let it dry, sand. It probably took 3-4 applications to get the side perfectly smooth and ready for paint.

REMEMBER, paint will NOT cover poorly patched or repaired areas…if anything it will highlight it. So take your time and do it right!

After patching, puttying and caulking, I primed the entire outside of the cabinet with primer, sanded it smooth with 220 grit paper and then wiped it down with a tack cloth.

I then spay painted it with a flat black paint. Remember, light coats…2-3.

The paint I used SAID it was primer and paint in one. As you may know, I do not trust that and will ALWAYS apply a good primer before paint…always.

I stripped the drawers and doors (using this process) and I used my new favorite tung oil finish to seal them.

I added new shelving support using some leftover walnut I had from my office feature wall project. I wanted good solid support since it would be holding glass shelves and china…glue and nails!

(This is solid natural walnut…no stain…just an oil finish!)

I moved it in the house before I added the glass or hung the doors…just made it lighter and easier to move…okay, RELATIVELY easy…this sucker is big!

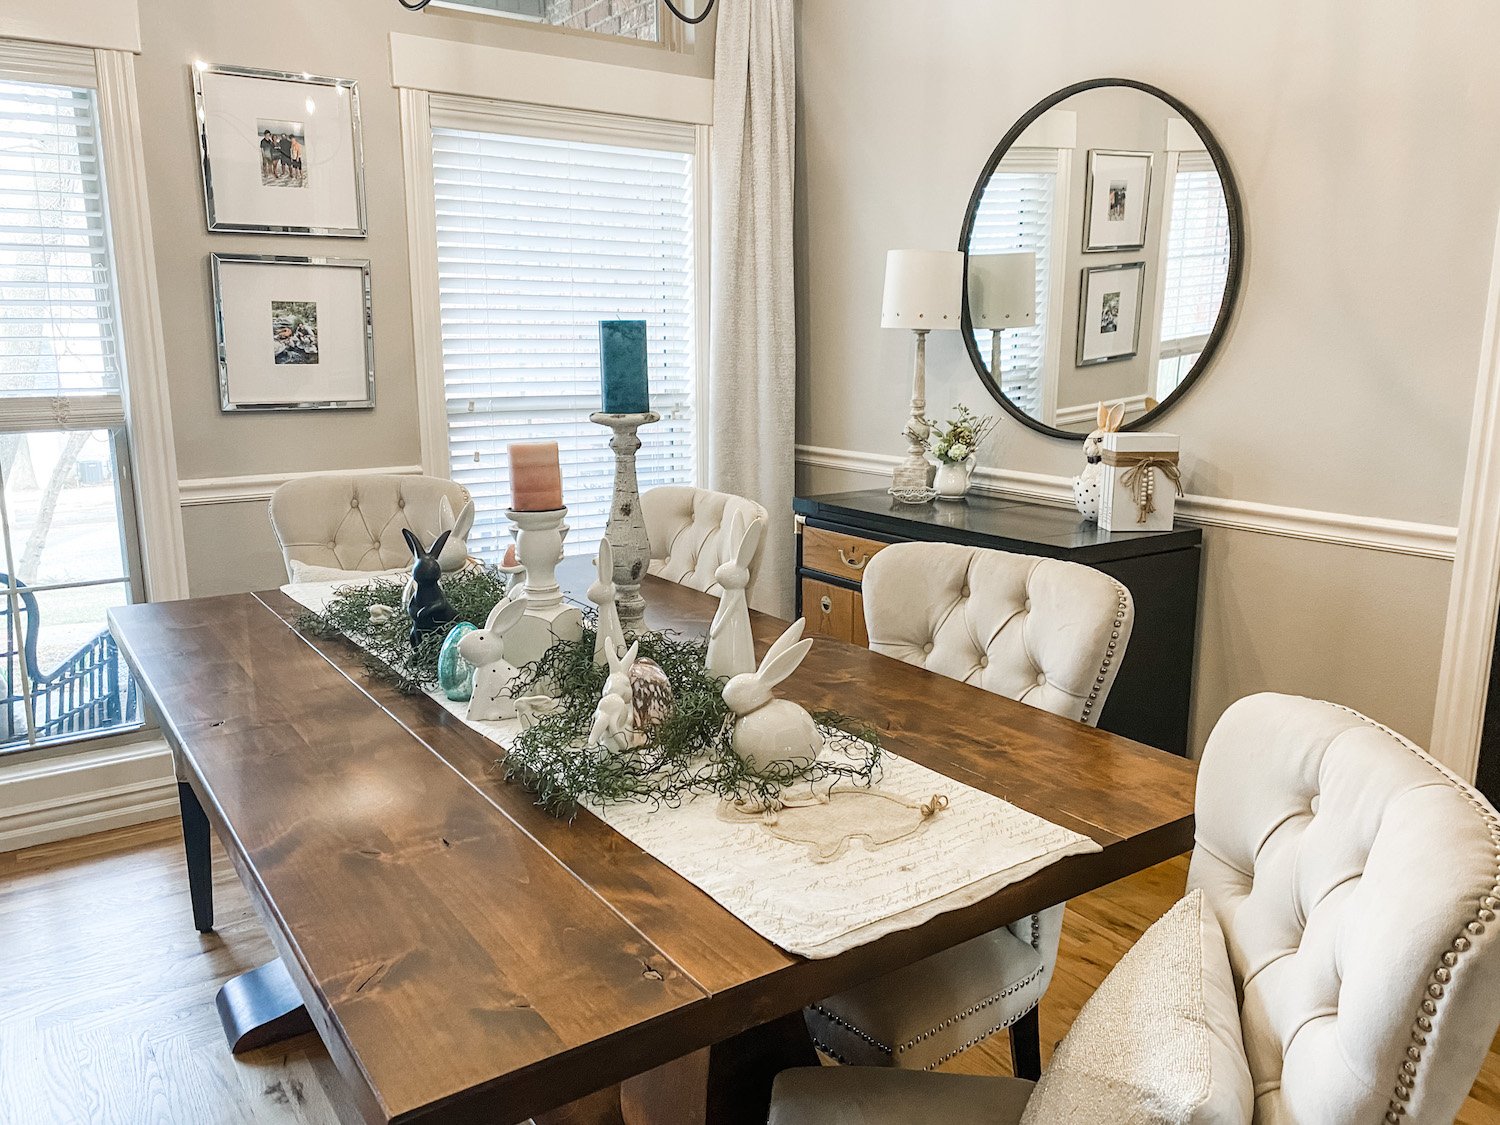
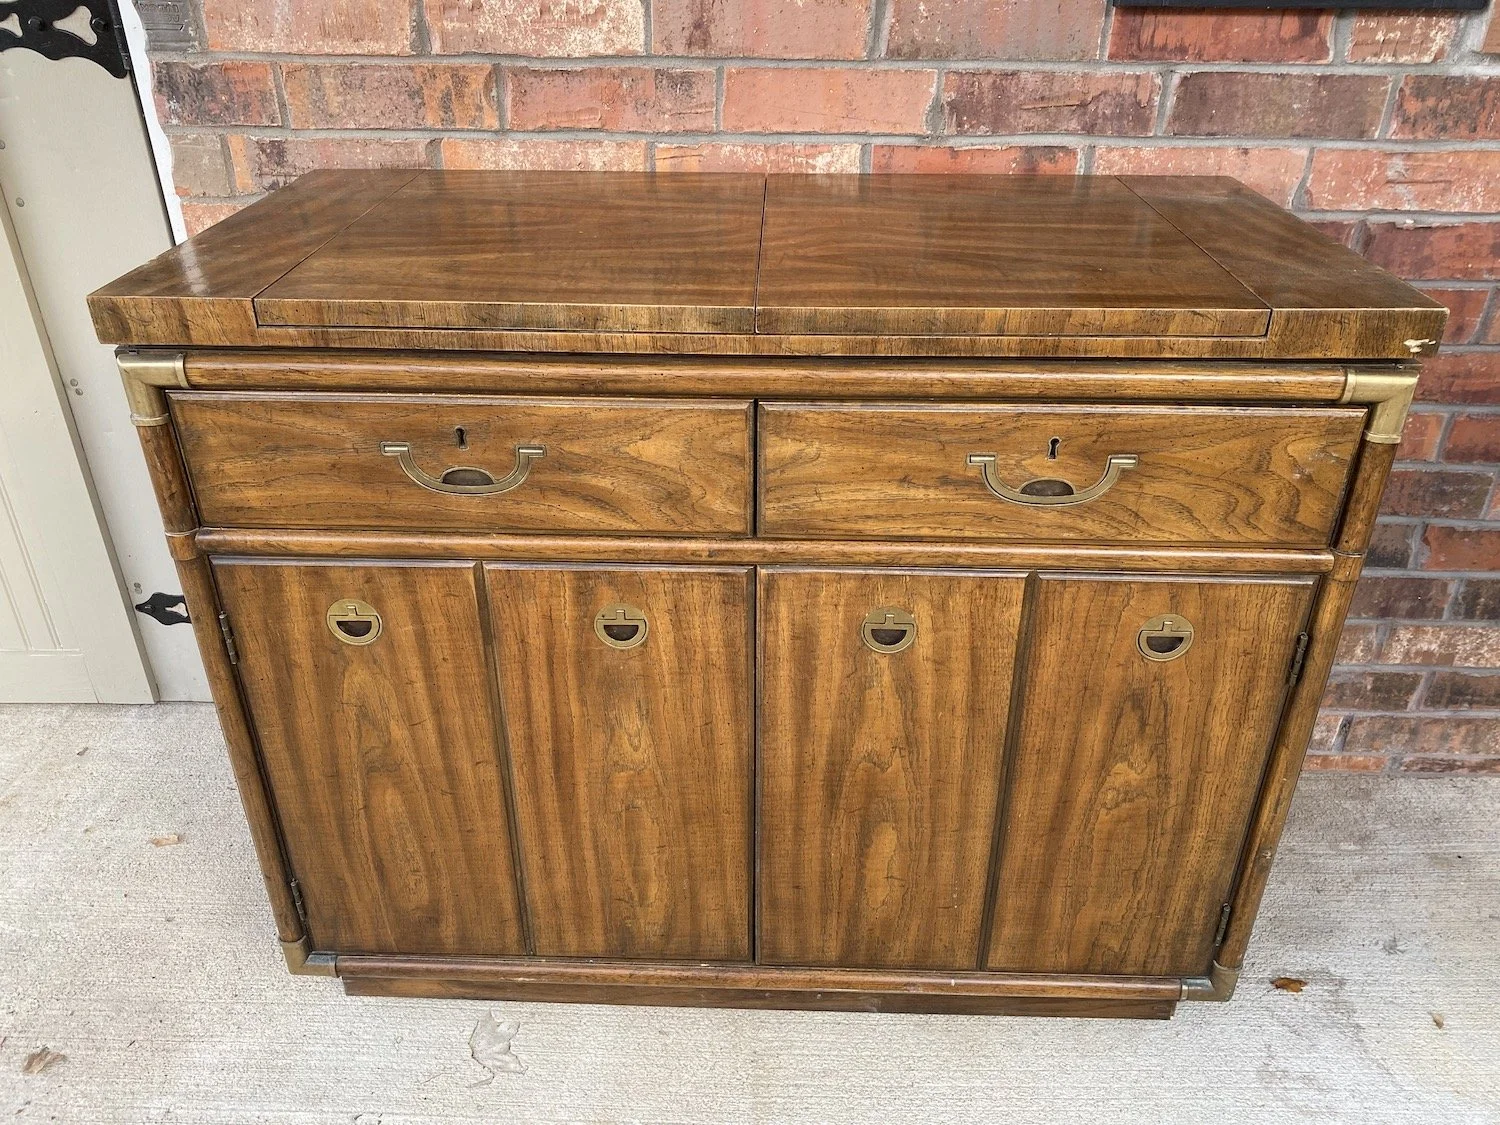
So, my original plan was to put it in my office. But it covered too much of the feature wall I worked so hard on. I moved the Drexel server into the office and put this cabinet in the dining room.

The final touch was the hardware. My original plan was to find some simple tear drop hardware. While looking, I found these precious little ginko leaf designs on Etsy.

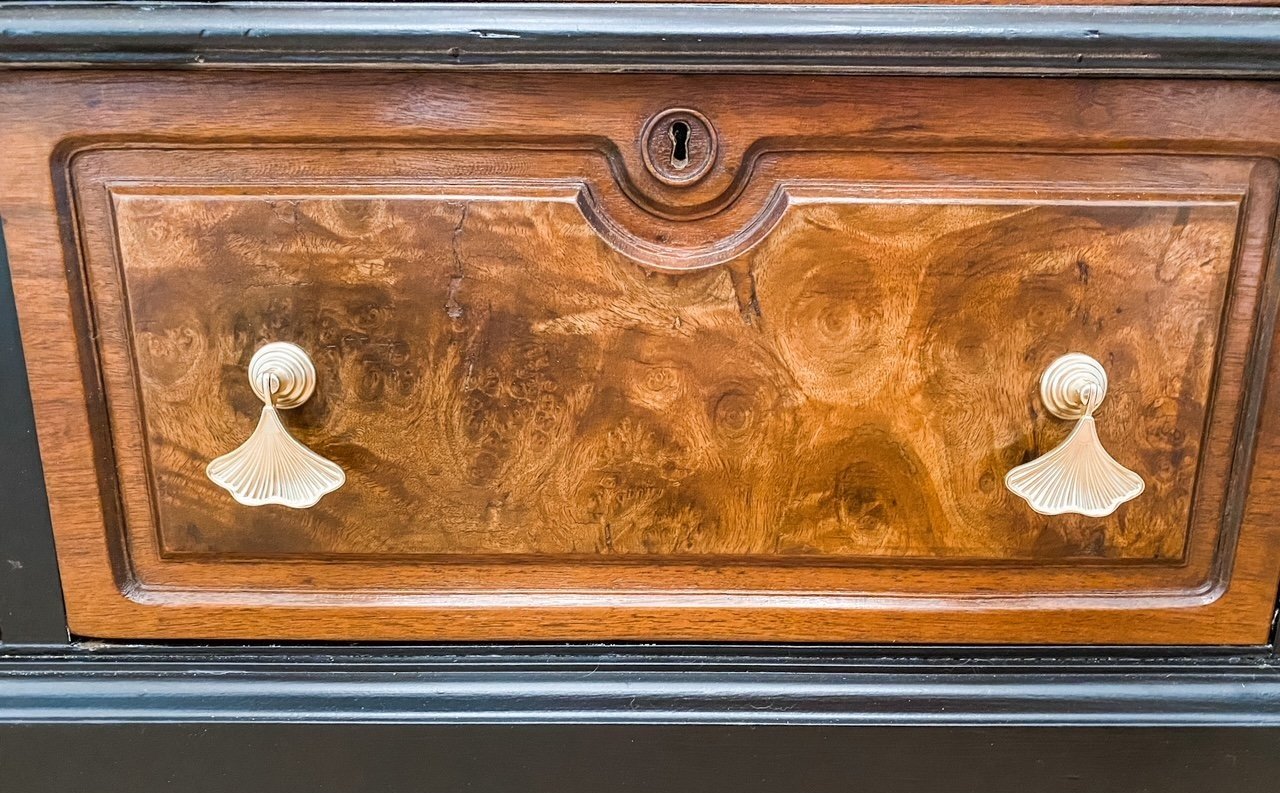
Back story…years ago when my kids were little we lived in a house that had a HUGE old ginko in the court yard. I have the loved these trees ever since. Kind of quirky but with a story.

I added a LED light inside the cabinet…simple!

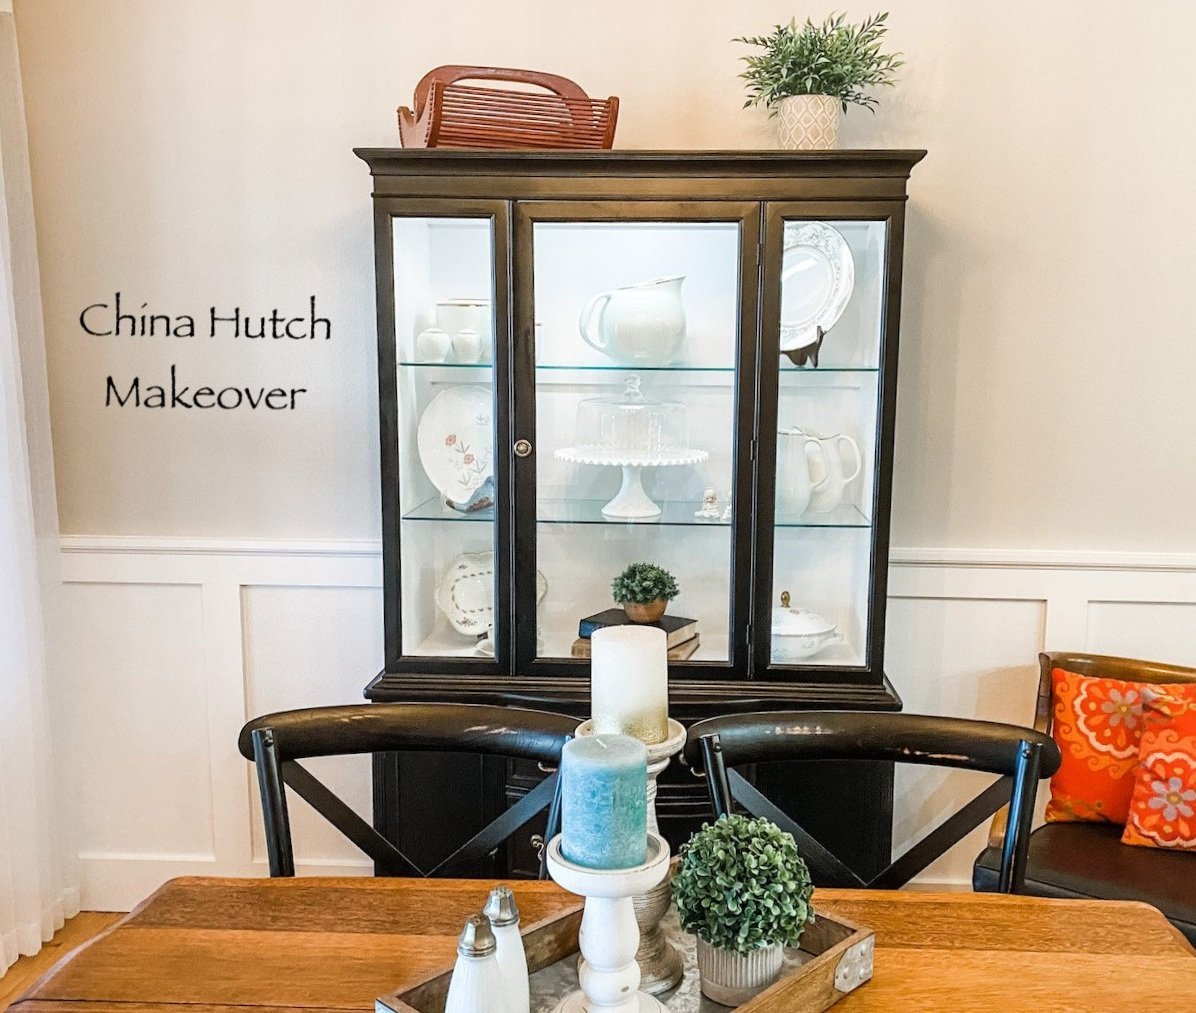
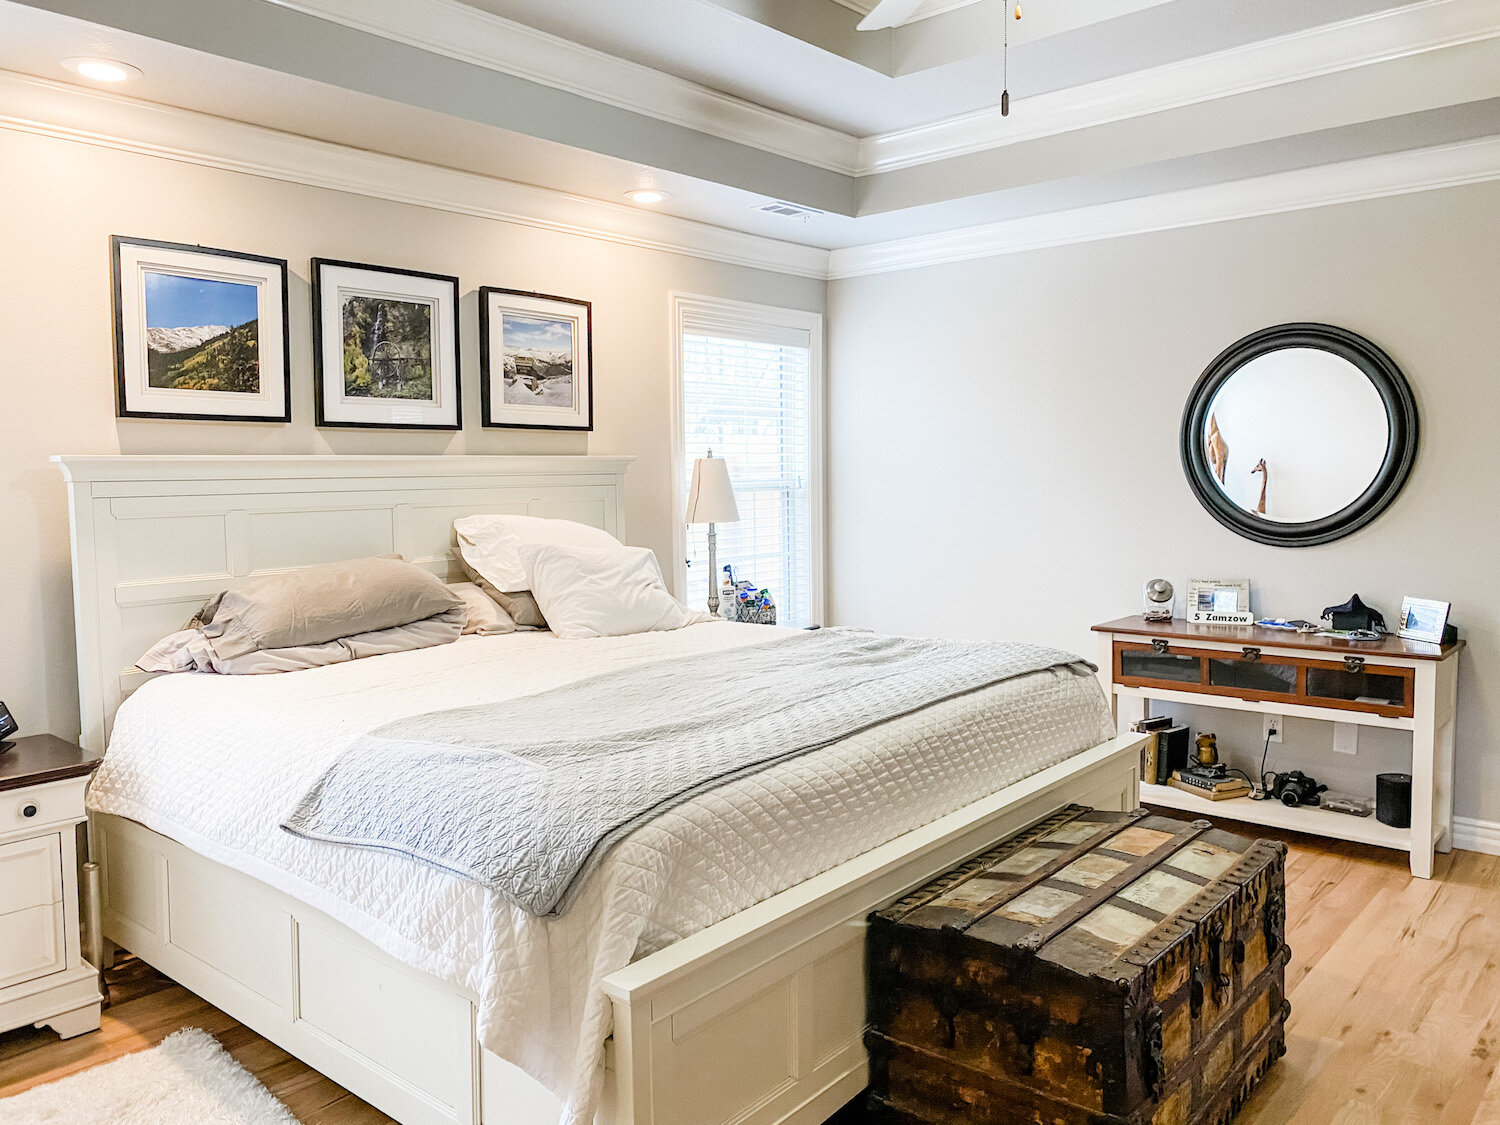
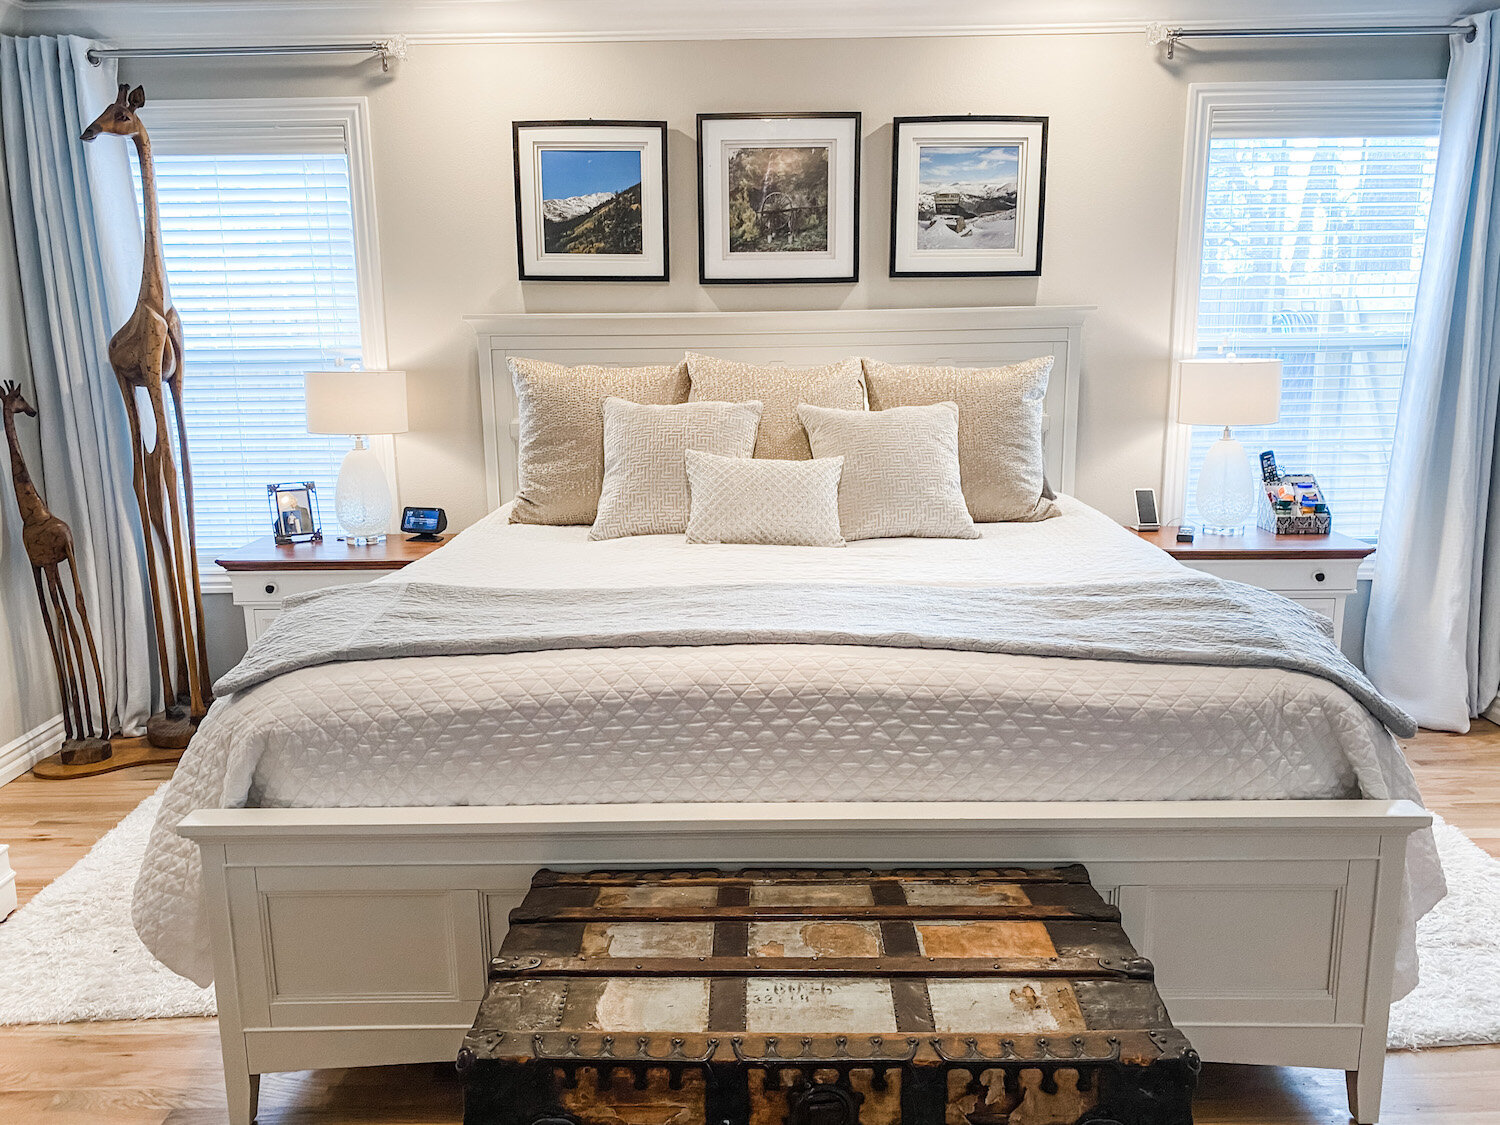
Now I have a place to display more of our family china.

Rather than fill it with all the china I have stored away I selected a few serving pieces of each set. I like to use antique books as risers so I picked a few up at a local flea market.

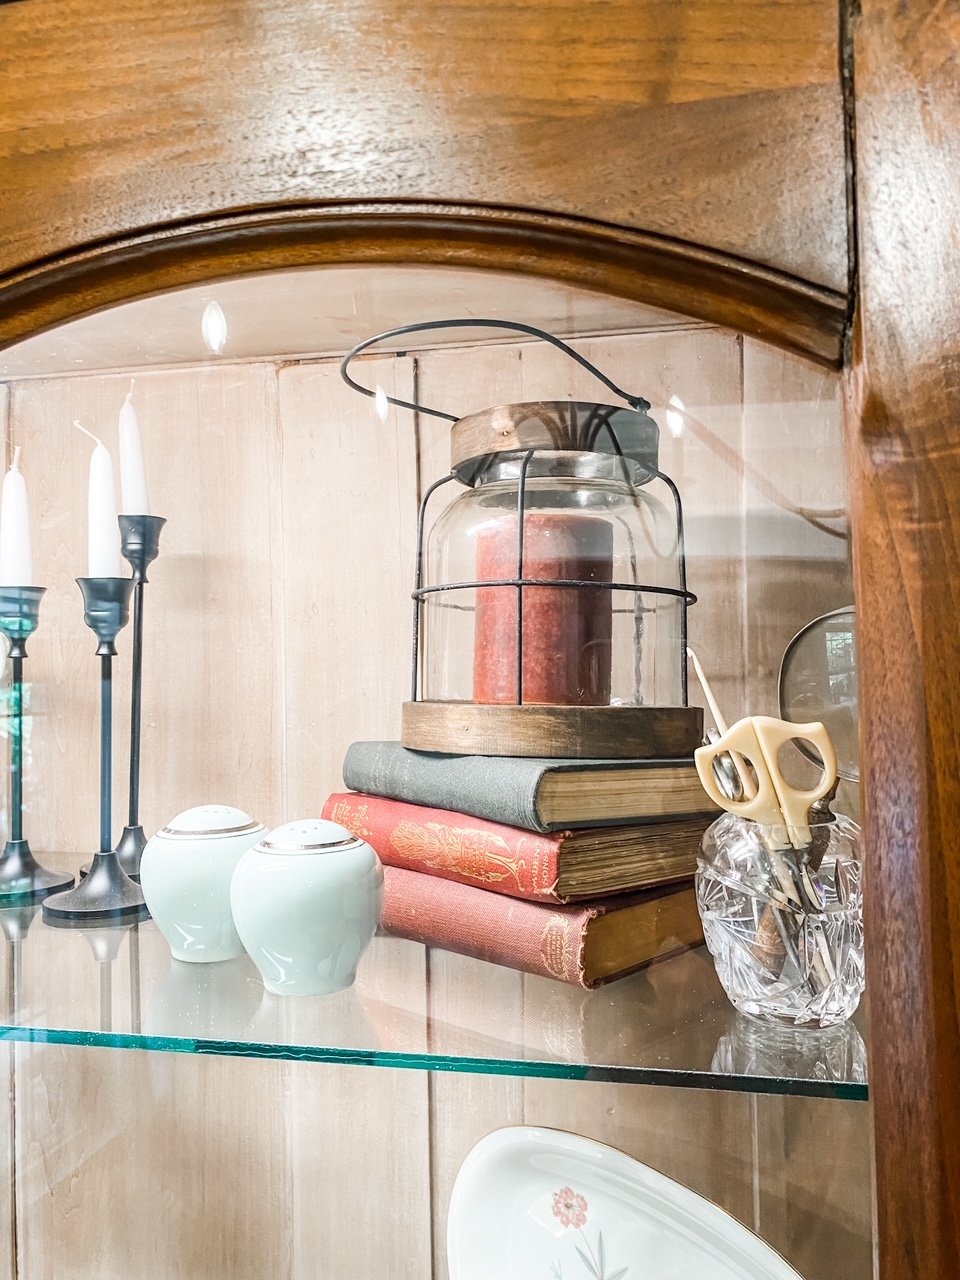
The only things I purchased were the candle lantern and a fake plant. I know, fake plants are suppose to be “faux pas” these days…I don’t care…I can’t keep a real one alive and it looks lovely.

I love to decorate this room for every holiday so I can’t wait to doll this piece up for fall in a month or so…then Christmas.

I think it will be just stunning!

Painted bathroom litter cabinet...

I keep a list of projects I want to do on my refrigerator. Repair the irrigation line on the norths side of the house, wainscoting in the dining room, paint the trim, trim tops of windows and doors, paint the bathroom cabinet, add a flower bed around the backflow…and on and on it goes.

When something gets done, it gets marked off…when I think of something I want to do, I add it to the list!

It keeps me focused on what I want to get accomplished…eventually! And being able to check a project off my list feels amazing! (Sometimes if I do something that wasn’t on the list, I add it just so I can mark it off)

I’ve managed to get a few things done this week. The flower bed around the backflow is done. The dining room wainscoting is done (will share next week) and the littler box cabinet in the master bath has been painted.

Why did the litter box cabinet in the master bath need to be painted since I just painted it you ask?

Last year I painted the bathroom cabinets and in my opinion the two kind of clash…so it has bothered me for the last year.

So I wanted to paint the litter box cabinet but couldn’t decide on a color.

Last week I was cleaning out some drawers and found a little dish my daughter in law got me as a gift. I have no idea why it was stuck in a drawer, but it was my “inspiration” for the cabinet.

I have three cats…I would have more if Brian would tolerate it. My children know me well.

Anyway, I love pink. When I finally decorated my home office, I added a tiny bit of pink. I try not to over-saturate my house with pink because there is a guy living here, but I do like to throw it in there from time to time.

Pink…

Since I had already done all the sanding and repair and priming and all the other fun prep work before I painted it the first time (HERE I did a fairly decent tutorial for turning a cabinet into a littler box), all I did this time was remove the hardware, scuff the finish with 220 grit paper, tape off the inside and rolled and brushed on my new favorite paint…the BM waterborne alkyd.

Better than my “go to” white…not as stark as black. Shined up the brass hardware again and walla!

Love!

Check. One thing down, a dozen more to go! But that is okay…being able to check one thing off the list feels amazing!

The "new" Drexel server....

I shared my plan for this wonderful vintage piece HERE….

I know purists cringe when people even talk about painting vintage pieces.

This is a prime example of “doing what you love.” If a piece will be more loved and treasured in a different state then go for it.

I painted the first one I found years ago and have had it in my dining/breakfast room…

…I recently swapped it out for the china hutch (featured HERE) and sold it.

Now this piece, a Drexel Accolade, has some value as is….if you do a little research you will find they sell for hundreds. But for me “hundreds” is not a value that will keep me from giving a piece a little makeover. If we were talking tens of thousands, yeah, no.

I also have a Drexel nightstand I refinished and shared HERE.

I planned to sell this piece after it’s makeover but I have moved it into my dining room and now I am kind of liking it…hum…guess we will see.

So…what did I do to give this thing a little more appeal?

First, I removed all the old hardware and brightened it up.

The hardware on these pieces are solid brass but after a few decades of neglect it is hard to tell. You can tell if something is solid brass with a magnet. A magnet WILL NOT stick to solid brass.

If the hardware is solid brass, the only way I have found to really brighten it up and get the decades of grime off is with Brasso and SOS pads.

Coat each piece with Brasso. I use a little chip brush to coat the pieces. After that sits for awhile, take an SOS pad and scrub away. You may need to repeat this process a time or two. I also use an old toothbrush to get in all the nooks and crannies.

After all the pieces are really clean, I scrub them with “Never Dull.” It seems to get the last layer of grunge off and gives them a little bit more “brightness.”

Not the easiest or fastest way to clean brass hardware but I just don’t think you can beat beautiful brass hardware.

Now, if the hardware is NOT brass and you want to spruce it up (without the cost of replacing) you can always give it a good scrubbing, prime it with metal primer and then paint it with spray paint. (TIP: put the screws back into the screw holes so that you don’t get paint in the threads.)

I shared another brass hardware restoration project HERE.

So, the hardware is done. If you find a Drexel piece and it is missing any of it’s original hardware, you can find replacements on Ebay…but be prepared to pay dearly for it! Each pull can range from $30 to $110 EACH!!!

I decided to strip and oil the drawer and door fronts. On the last Drexel makeovers (the bedside table and server) I painted the entire piece. This time I decided to shake things up a bit.

While I like wood grain, I am not a huge fan of oak. No biggy since, again, my original plan was to sell this piece. To highlight the pretty wood grain, I stripped the drawer fronts and doors using my trusty 1/2 and 1/2 mixture. 1/2 acetone, 1/2 lacquer thinner. HERE I posted a pretty lengthy tutorial on how to use this mixture to strip even the most stubborn finishes!

After stripping off the old finish I gave the drawers and doors a little mineral spirit wash, lightly sanded, wiped with tack cloth, then applied 3 coats of tung oil finish…my current favorite being Waterlox.

After that had dried and cured well, I taped and papered the doors and began prepping the cabinet for paint. (I removed the drawers to strip and oil them!)

I didn’t need to paint the inside of the cabinet so I taped that off, along with the black laminate under the flip top. I primed with Bullseye primer, then sanded smooth with 220 grit paper and wiped it all down with tack cloth.

I decided to paint the cabinet with high gloss black lacquer spray paint. I am obsessed with the high glass finish on these pieces. I just think it really makes a huge impact, especially with the bright brass hardware.

(You may notice I am all decked out for Easter…that is my new thing…decorating for each holiday/season. Next up will be Memorial Day/4th…patriotic stuff…then “summery”…then fall…then Christmas…then Valentine’s and back to Easter. See what happens when you “retire.”)

The trick to a flawless spray paint finish is LIGHT COATS…lightly spray, let it dry, spray again. It may take 3-4-5 coats but it dries quickly and in the end you will have a beautiful finish. If you go heavy handed you will have drips and runs and will be hugely disappointed!!!

Also pay attention to the temperatures and humidity. If it is too hot or too cold, or if the humidity is really high, you may have issues!

HERE you will find some additional tips on how to property paint furniture…very helpful!

After the paint had properly cured (gave it a good day or two) I replaced the hardware and OH. MY. GOSH!!! I seriously love this piece. Even though I am not a huge oak fan I am really loving it!!!

So the past few weeks I have been tackling a MAMMOTH project. Maybe next week I can share it. Hint, in entails A LOT of the thing I hate most….but man will it be worth it…I think…I hope….

china hutch makeover...

I originally bought this piece to makeover and sell…

When I gave my breakfast room a little makeover (featured HERE last week) I decided I kind of like the look and it gives me a place to display my heirloom china….

I didn’t take pictures while I was giving it a makeover because, well, I just didn’t….

But the process was pretty straight-forward.

I removed all the hardware. The drawer hardware was not the original so I ordered hardware that would have come with the piece originally. Fortunately the door hardware was still there so I just cleaned it up a bit with Brasso and SOS pads to highlight the engravings.

Before you go scrubbing on hardware with Brasso and SOS pads, make sure it is real brass. A magnet will NOT stick to real brass…if one doesn’t, scrub away.

I removed the shelving. I also removed the glass and decorative glass inserts. Not difficult because it was just held in place by some strips of tiny molding and nails…I just popped those right out and set them aside to paint and reuse.

The shelving was pretty warped and I tried my trick of laying them on the floor and placing weights on them…no go. So I ordered glass shelves to replace them. Honestly, I like the glass better.

The glass shelves where a lot heavier than the wood shelves. Originally the piece just had two little supports on each side for the wood shelving (no supports along the back for the span which might explain why the shelves bowed.) I didn’t feel comfortable with that so I added 1x3 support boards along the back, securing them with glue and staples. Now I feel confident that the shelving is properly supported and can handle the weight of dishes. (If you have ever had a glass shelf come crashing down on your china you would understand my concerns. Yeah, it happened!)

There were a few other minor repairs that had to be made…since I was painting the piece, I did them before primer and paint.

Remember, if you are staining, stain first then repair. If you are painting, repair first then paint.

I cleaned the piece well then I caulked all the “joints.” Remember if you are painting a stained piece you have to caulk all the places where wood meets wood…and you may even have to putty nail holes. If you miss anything it will show up when you prime the piece…just caulk and putty and spritz it with a little primer.

I sprayed the entire cabinet with Bullseye primer. Primer is MUST on mahogany pieces because it will bleed through the paint! If you paint a piece and see “red” or “shadows,” that is the mahogany bleeding through…or water stains, oils, etc…more layers of paint WILL NOT cover it. Prime it then repaint it. Or save yourself the grief and prime everything before you paint. Mahogany is not the only thing that will bleed through paint. Nail holes and “gaps” will show up and you will be able to fix them before you apply your paint.

Also, you will get a much prettier and durable finish.

I know some paints (like this one) profess to be paint and primer in one. Maybe so but I always prime with a primer. Usually Kilz or Bullseye.

I sanded it smooth then wiped it down well with tack cloth.

I decided to paint the inside white and the exterior black. I painted the inside with some satin white latex I had on hand, let it dry and cure then taped it all off to spray paint the exterior.

I painted the interior a satin finish but I wanted a flat black for the exterior. I went with Rust-Oleum Matte Farmhouse black.

After the black had cured (I usually give it a few days) I replaced the hardware, reinstalled the door glass (without the decorative doo-dads) using the small trim and silicone and moved it into the house. I gave it another few days to cure before adding the glass shelving.

I did not paint the inside of the drawers or the inside of the lower cabinets. I rarely do unless the piece has an odor or stains I can’t get rid of by cleaning. If you have a piece that has odors or stains sometimes your only recourse is to prime and paint!

I added a LED light to give the display a little glow! That entailed drilling a small hole in the top for the cord and mounting an LED light strip in the top of the cabinet….simple simon!

Lovely.

This is where I remind you that “cure time” is super important when working with painted wood. I always get annoyed when I watch those shows on HGTV and they paint and stage furniture the same day. DO NOT DO THAT!!!! Be patient…give paint time to cure. If you don’t you will scuff and scar your new paint job and will be seriously disappointed.

If you look back at this blog you will see I use to do this kind of thing all the time…I loved it.

I don’t do it much anymore and I forgot how much I love taking an old abused and neglected piece and turning it into something beautiful and useful again!!!


Another Drexel server....

Several years ago I shared a Drexel server I repurposed for my dining room

The “breakfast room” in our new house is almost identical to our old dining room.

Including the Drexel server.

I love it…it is one of my favorite pieces.

So when I spied ANOTHER Drexel server on Marketplace I could not help myself.

As I have mentioned, I have pretty much retired from the whole repurpose/upcycle/refinish business. My hands and back just can’t take all the work that goes into refinishing pieces on the scale I have in the past.

I have refinished a few doozies…just looking back at all the pieces I have shared on this blog blows my mind. There were some pretty nasty pieces that were beautifully refinished and restored and readied for another life-time of love!

When I saw this piece I couldn’t help myself. I had to have it and I wanted desperately to work a little magic on it.

Here is my plan…MAYBE I can discipline myself enough to pick up just one piece at a time, refinish it, sell it, then pick up another…just one at a time. Just one dresser/buffet/nightstand at a time.

Hum…I’m a pretty “self-disciplined” person so I am going to start with this one.

One week into this plan…I have failed. Last week I picked up ANOTHER piece that needs a little TLC….a pretty beat up china hutch.

I have these creative juices in me that have just been screaming for a project.

So, “the plan” ….specifically for the vintage Drexel piece. Strip and oil the drawer and door fronts using THIS process. Shine up the brass hardware….no secret there, just lots of Brasso, steel wool and elbow grease. Prime and paint the “cabinet” a high gloss black lacquer.

For the china hutch…I went to Etsy for inspiration and looked around. There are some beautiful china hutches that have been painted black with the insides painted white…LOVE them.

I THINK that is what I want to do. Sometimes the process takes on a life of its own and I find myself drifting in another direction. We will see.

Right now they are sitting in my AMAZING shop. I was in there last week rearranging everything so I will MAYBE have room to make some kind of paint booth. The shop has electricity and I can easily heat and cool it for temperature control but just not sure I will have enough room since we do use it for mower/yard equipment storage as well.

I can’t wait…this is a “job” that doesn’t really pay well, but it is one I do love.

Screened porch reveal...

IMG_1545.JPG

SO. MUCH. RAIN! But that is spring in the Ozarks. We are again fortunate that we haven’t had severe weather…just some flooding here and there.

So much rain my poor plants are screaming ENOUGH ALREADY! They are really struggling. But soon the summer heat and dry will set in and I will be watering every day. This amazing house had an irrigation system but it had been severely neglected for years. It took a bit of time and money but I have 2/3 of the system up and running so HOPEFULLY when it is time to water I can do most of it with a flip of a switch. I still have a few porch plants that will need to be watered but its waaaay better than dragging a hose and sprinkler around the yard.

Totally off subject other than to say I have been forced to work on a few indoor projects. Those usually entail my LEAST favorite DIY chore, sewing, but if you want pretty (without a serious financial payout), it is an evil necessity!

The screened porch was no exception…there were a few sewing projects. Pooh.

So my inspiration (okay, kick in the rear) came from another blogger…Tasha. LOVE her screened porch she revealed HERE. Awesome space and if I had a large screened porch and a large family, it would be perfect. But I have a small space and it’s just us and the critters. We often joke….we have this huge house but usually all three cats and the dog manage to crowd in…we can literally take up 10 square feet.

Regardless of the space, you want it comfortable and inviting….this space was neither. It was basically where we “threw” a bunch of overflow outdoor stuff when we moved in and have neglected it since. Other than eating out here at the little table on nice evenings, it had been pretty neglected.

The little table and chairs were an auction score and over the years they sat outside and the black paint chipped. Pretty sad looking. It may be kind of “old fashion” looking, but we really do enjoying sitting at this little table for dinner and in the mornings drinking coffee.

IMG_1438.jpg

The wicker chairs were on our porch at the old house…I think they were originally rockers but over the years the wood rotted and I removed the rocker part.

The round rug was originally my son’s and he didn’t want it so we put it out here.

My intent has been to turn the iron frame between the chairs into an outdoor side table. I think it is an old aquarium stand I salvaged from an apartment years ago.

You may notice the fan and light were pretty pathetic…so that replacement is a MUST

IMG_1440.jpg

The “kitty corner.” They LOVE the old wicker chair that use to be my smoking chair on my back porch. I haven’t smoked in almost 10 years if that gives you an idea of how long that thing has been around. It was pretty nasty and honestly needed to go!

IMG_1442.jpg

Even in a small space, it is important to “make a plan.” Tasha gives some excellent tips for designing a space like this, or any space for that matter.

1) If you have a large space, create zones. I didn’t really have a large space, but I do want it to serve several purposes. Eating, reading, and cat lounging (they are indoor kitties so they LOVE this outdoor space)

2) Make your space USEABLE! That was the motivation for this makeover…useable and comfortable.

3) Add as much ambient light as possible. New fan and light and I do want to eventually add a lamp on the little side table but honestly we rarely sit out there after dark so I’m in no hurry to find a suitable lamp.

4) Add plants! Unfortunately I don’t do well with indoor plants. I did have a HUGE peace lily in the all season room I divided so I put that in here…I tried adding a fuchsia but it took all of about three days for all the pretty pink blooms to drop so it went outside and I ended up adding a little potted planter of outdoor flowers. Maybe they will fair better since I am a master of most outdoor plants!

5) Bring in pops of color! Now that I can do…although if you look around you may notice I don’t do that on a large scale in my decor. But in my plan for this space I knew exactly what I wanted to do,

Pink flamingos.

Okay, so here is how that all started. Years ago Brian bought two vintage pink flamingo knick-knacks at an auction.

IMG_1552.jpg

For some reason that has become a “thing” in our house…possibly because it is so rare for him to buy something other than guns, pocket knives and coins…lol! One Christmas Mom bought him a pink flamingo ornament. Somehow we ended up with pink flamingo metal ornaments in our yard. I bought him some flamingo socks…it just went on and on.

And honestly, I like pink and green.

So my plan for this space…

1) New cushions and pillows for the chairs. Perfect way to bring in the flamingos and A LOT of color.

2) FINALLY paint the ratty iron aquarium frame and make a top for it.

3) Paint the little table and chairs.

4) Years ago I acquired the iron frame to an old train bench from my mom. It had sat on their front porch for YEARS. Eventually the wood rotted and my intent was to rebuild it with new wood. This little porch is the perfect place for it…and it is time!

5) Add some plants here and there.

The reading area…

IMG_1541.JPG

I made new cushions and pillows for the chairs.

A new “funky bow” for the Home Sweet Home sign that hangs on the wood frame that use to hang in our old guest bath.

IMG_1546.JPG

I painted the little iron base and made a wood top out of some scraps I had on hand.

A few little knick knacks. The driftwood is a piece we picked up off a frozen pond in Georgetown, CO almost twenty years ago! A picture of my precious kiddos.

IMG_1547.JPG

A new paddle fan and light…a must!

IMG_1545 2.JPG

I painted the little chair and table. I had to sand it a bit to remove a bunch of chipping paint, primed it all with metal primer, then sprayed it with spray paint.

IMG_1540.JPG

I had this old pewter compote for years and really didn’t have a clue what to do with it.

IMG_1538.JPG

I saw a picture on Pinterest where someone had turned one into a little flower thingy….

IMG_1539.JPG

...gives it a purpose.

I bought little vintage flamingo salt and pepper shakers off Ebay.

I bought a little rug off Etsy…

…and a little flamingo flag….(note the pathetic fuchsia)

IMG_1526.jpg

Hopefully the impatiens will fair better…..

My favorite project was the railroad bench. Primarily because it was a family heirloom and partly because the darn thing has been sitting around for years! It was time…

New wood and good for another few decades.

Somewhere there is a picture of four of my parent’s grandsons sitting on this bench when it was on their front porch. My boys were preschoolers then. Crazy.

IMG_1545 2.JPG

All in all I am pretty pleased with how it turned out.

It certainly isn’t anything as elaborate as Tasha’s but it serves our purposes!

I really didn’t spend a ton of money but the investment was worth every penny. It has been the perfect place to sit and read during the rainy, dreary days.

And of course the cats LOVE it!!!

Another rainy day project…swapping out the front porch decor for Memorial day and 4th of July.

IMG_1549.JPG

Just a few patriotic pillows and the wreath I shared HERE.

We are officially ready for summer. If it ever stops raining……

static1.squarespace.png

Master bedroom reveal....

When we moved into this house in September we basically moved our old bedroom into this new house. Nice fit, but zero thought put into the “design” of the room…I basically just put furniture on the floor and a few pictures on the walls.

A few weeks ago my daughter sent me a picture of a well designed bedroom similar to ours.

IMG_0694.jpg

That’s when I realized our current master bedroom has ZERO “design character.” I hadn’t even taken the time to paint all the trim the “new” white.

IMG_1317.JPG

Twenty year old lamps, white and brass paddle fan, stacks of pillows in bleach spotted pillow cases, no curtains, scuffed and dinged furniture, clutter…

IMG_1318.JPG

The picture was perfect inspiration! The push I needed to work this space to it’s potential.

So last week my goal was to to tackle the room. Paint the trim and furniture, new curtains, throw pillows, a few little touches here and there, and declutter.

I painted my bedroom furniture (HERE) almost 7 years ago and while I still love the pieces, they have gotten quite dingy looking. Remember, whites yellow over time and of course there are chips and scratches from normal wear and tear. So it was time to give them a little paint refresher! And the side table tops…holy crud they have gotten nasty. So it was time to strip and restain the tops as well.

Of course the little “room refresh” became a three day chore!

In the end, worth every minute.

New curtains (I still need to hem them), a little wall art and a plant and new throw pillows.

IMG_1315.JPG

I stuck with my tried and true white bedspread…with a big dirty dog I need something I can bleach every week. It covers a down comforter in the cold months.

I have always loved the larger throw pillows in the guest room so I bought new for that room and put the guest pillows on our bed.

IMG_1308.JPG

(The giraffes? They were made in Africa from the root of a tree…they are Brian’s…they are different…what can I say!)

I painted the high boy and bedside tables and stripped and restained the tops of the bedside tables. ..the dark java stain has pretty much run its course. New lamps (finally!!!)

I love the look of chandeliers in bedrooms but as I have said before, I HAVE to have a paddle fan above the bed. Brandon gave us a paddle fan he took out of his house and it worked perfectly in our room.

Decluttering is always a must in any room makeover so a lot of stuff was put away.

One thing I loved in the inspiration room picture was the bed bench. My trunk belonged to my grandparents so it has to stay. You can still see my granddad’s name stenciled on the side.

I love the basket and pillows on their bench but our big dog uses this trunk as a spring board so that wouldn’t have worked out well. Sometimes you have to change up a plan to fit YOUR life-style (a.k.a. accommodate animals and kids!)

I still want to do more on the “tv side” of the room. I repainted and stripped and stained the top of THIS little side table…

Maybe add a plant…a little more wall art….a wall leaning mirror.

IMG_1306.jpg

It only took me a few decades to style the master bedroom in my last house so again, already working at warp speed here.

My next big project are the master bathroom (reveal HERE) windows…

Oh, it’s happening. I cut big holes in the wall to kind of “force the issue.” Windows are on order and the brick guy is on call.

This was the one thing I neglected to do, and my BIGGEST regret, when I remodeled this house…no operable windows in the master bath. I know from my last house that an operable window in the bathroom is a must. I have ordered two casement windows (the kind that crank out) and hope to have them by the end of the month. I have some plumbing to move (WHY IS NOTHING EASY!!!) and framing to do. These windows will look out at the large flower garden out back…I CAN’T WAIT!!!!

Wait I will though…it has been warm enough to plant a few larger perennials like azaleas and Kimberly ferns, but the threat of a freeze until mid-April prevents me from going all out with the annuals. So I sit…and wait…patiently. Okay, not so patient, but I learned the hard way not to rush the early spring planting! Pay attention to your “last freeze date”….then add a few weeks. Ours is the middle of April, but a few years ago it snowed the first week of May!

Until next week…

Another family heirloom...a desk makeover.

As I have mentioned a bazillion times I am all about family heirlooms.

So when my mother offered me “dad’s desk” I didn’t hesitate…even though I have absolutely no use or room for it.

If I remember the story right my dad built this desk when he was 12…he would have been 79 this year…that makes the desk 67 years old…something my dad made when he was a boy….yes, I want it!

Fortunately my son Matt loves family heirlooms as well and since he just moved into a larger home, he has the space and need.

The desk was sporting green. I THINK it is green because at some point I did have it and I painted it green for Matt’s room. When the boys were younger everything in Mitchell’s room was blue and everything in Matt’s was green!

I guess at some point I gave it back to Mom.

Originally the desk would probably have been stained. I remember a time in the 70s when it was red. Then there was the “mauve” phase in the 80s. In other words, I knew there were at LEAST four layers of finish on it!

My original plan was to strip it down to bare wood and stain it.

What is the old saying about “best laid plans….” Yeah…that wasn’t happening.

There was the green…then the mauve…something white I suspect is a primer that was painted over the red…the red was painted over the original finish…whatever that may have been

I used every trick in my arsenal and still could NOT get all the paint off. Industrial stripper, my 1/2 and 1/2 mixture and even sanding.

One thing I will say about both my dad and I…when we do something, we do it to last!

After a few days of stripping and sanding I was able to get all the paint off the top but finally gave up on the rest of it…it wasn’t happening without doing serious damage to the wood itself.

I decided to stain the top and paint the base.

I sanded everything as smoothly as possible, primed it, sanded again, rubbed it down with tack cloth then painted it with a white enamel.

I stained the top with a java stain and sealed it with poly.

It is not exactly what I wanted but Matt and I both love the way it turned out. Right now he is using it as a tv stand in his den.

I was only able to snap a quick picture with my phone but as you can see, it turned out pretty cute.

We are in the process of making some major changes in his new house…new flooring, paint, shelving, etc.

Our plan is to eventually makes some major changes to his kitchen and den and when we do, hopefully I can get some good, staged pictures!

Until then I just wanted to share what one can do with older pieces…and also show that even we “old pros” get stumped occasionally…and when we do, we just drop back and punt!

Lego table project!

One of the “littles” in our family LOVES Legos. Course I am all for any child’s entertainment that doesn’t involve electronics.

Believe it or not I managed to raise four intelligent, college educated children without video games or smart phones…imagine that!

When I heard she has to commandeer the family room coffee table to build her Lego sets, I decided she needed her own personal space!

I looked at buying a Lego table as a Christmas gift…but as with much of the furniture today, they were all cheaply made and didn’t seem very sturdy…certainly not pieces a child could lean on for hours.

So I decided to build one!

First thing I had to do was locate “Lego flats.” I found these on Amazon…perfect!

The package SAYS they are 10x10 but when I laid out 3 wide I discovered the measurement was actually 30 1/8” …good to know! I decided to build a table that would hold 3 wide and 2 deep…and knowing the exact measurement of them laid out is important. The inside measurement of the trim on the top will be 20 1/4” x 30 1/4” so there is room for 6 total interchangeable flats.

I constructed the table out of 1/2” plywood, 14” furniture legs, 1x3 pine boards and 3 1/4” trim.


I bought a piece of 24” x 48” 1/2” plywood and cut down the width to 34”.

When cutting plywood with a skill saw, make sure you “score” the line you will be cutting with a utility knife…

…then cut on the OUTSIDE of the scored line…this will keep the plywood from “splintering” when you cut it with a skill saw.

After cutting the plywood 24” x 34” I “banded” the entire board with 1x3 pine… then added the leg brackets to each corner. The legs just screw into the brackets.

Banding the plywood top with 1x3 pine does several things…it increases the width and length of the table by 1 1/2” …remember 1”x3” boards are actually 3/4” x 2 1/2”. It also strengthens the plywood and the “skirt” it creates will hide the leg brackets.

Also remember…glue AND nails. ALWAYS USE GLUE!!! The glue is what actually holds everything together!

After the base of the top was constructed, I flipped it over and added the trim to the top…cutting it so that the opening on the table top would be 30 1/4” x 20 1/4” to accommodate 6 flats with a smidge of wiggle room so they can easily be changed out.

Once it was all constructed, I puttied all the holes and caulked all the joints. I primed it with primer, sanded everything smooth, tacked and painted it with Krylon satin white.

A few of the tables I looked at had storage drawers or the tops lifted for storage…cute idea and something I could have incorporated into the design…but truthfully if you have a “lego kid” you know the table would have to be the size of Montana to hold all their pieces…so you are better off finding bins or stackable containers that suit your needs!

This table is strictly so the little doesn’t have to clutter up the family coffee table when she wants to build and tear it all down when it is time to put it away…she can just remove the legs and slide it under the couch or bed!

Super cute and hopefully sturdy enough for hours of leaning.


A simple "before" and "after"....

A simple and inexpensive makeover.

Before….

After….

A little homemade chalk paint….5 tablespoons of Plaster of Paris and 3 tablespoons of water, mixed well. Add 2 cups of latex paint. Two coats…a little distressing…sealed with polycrylic.

The hardware wasn’t anything special…I primed it with metal primer and hit it with some blue spray paint I had on hand…could have been black, teal, white…whatever…not sure I am loving the navy but it would be easy to change it!

Simple, inexpensive…but oh so much better!

Remember, LIFE IS TOO SHORT TO LIVE WITH UGLY FURNITURE!!! YOU CAN DO IT!