The playroom makeover...

I shared HERE a few little changes in the room I am working on for the littles!

Eventually I may add a built in daybed with shelving but for now I just need a cute little bookcase where I can store toys and books.

I found THIS one on Amazon….

It’s cute as a bug’s ear but it was a tad to big for the space so I decided to build something.

I sat down and designed what I wanted, then worked up the cost.

Then lighbulb moment…I already had a bookshelf. It wasn’t the EXACT size I wanted but close enough…it just needed a little tweeking!

I thought I might like a painted shelf, but didn’t really want red…I am trying to keep all the colors in this room fairly neutral.

I bought this bookshelf at an auction a bazillion years ago. I remembered it was cherry wood so I decided to strip all the paint off the exterior and expose the natural wood.

I used THIS process. I can assure you that this is the simplest and best way to strip any finish from any piece of furniture.

Once you use the chemicals process, the need to sand is minimal.

I removed the existing top and since my plan was to add a “roof top,” I added 45 degree beveled boards on each side….

As you can see I did not strip the inside.

I liked the raw wood look so well I just sealed the exterior with three coats of polyacrylic.

If you have been around a while you know I usually prefer an oil finish…but this is a bookshelf in a kid’s playroom, so whatevs!

Now it was time to doll it up a bit.

I decided to add a little “pitched roof” with a scalloped fascia…bear with me.

So first I took two 1x3s and put a 45 degree cut on one end of each…laid them out and used a large can to draw a scallop design…

I cut the scallop design with a jig saw, used a router to round off the other edge, then sanded it all down smooth.

I took a piece of 1/2” plywood and cut two boards the width of the base cabinet (12 3/4”) and 24” long. I used my skill saw to cut a 45 degree edge on one end of each piece. I also took a piece of 1x3” and put a 45 degree edge on each side.

I used glue and nails to join the two pieces of plywood, using the 1x3” as a center support.

After the “roof” was constructed, I added the scalloped fascia with glue and a few nails. Then I applied glue to the beveled edges on the top and just sat the new “roof’ onto the base shelf….

As you can see I used a piece of outside corner trim to edge the ends of the top and cap the peek. Just to dress it a bit…nothing structural.

Again, I just sanded and coated with 2-3 coats of polycrylic.

I wanted to add a little storage on the side like my inspiration piece so I built a little shelf and attached it to the side with glue and screws….

I also found THESE cute little shelves on Amazon…added them to a small wall next to the closet for just a little more book storage…

Next week I will share the rest of the room.

Nothing earth shattering but a great space for the littles to do whatever littles do!

Until then….

Another pantry makeover....

There was a time when I loved DIY projects and was constantly working on something…everything from room makeovers to furniture rehab.

Unfortunately the time came when my back and fingers just couldn’t take the daily beating. And truthfully I’ve pretty much done everything to this house that can be done. Except the yard…I’m still out there designing and planting and digging…when it is not 100+ out!

One of my favorite DIY projects are pantry makeovers and those I can’t resist.

HERE I shared my pantry.

HERE I shared the pantry I revamped for my son and daughter in law.

Some serious reconfigurations can make a huge difference in the functionality of the space.

My stepson and daughter in law have talked about giving their walk in pantry a makeover for years…actually since they bought the house.

Over time, it became a disorganized disaster….

The shelving was the typical “builder grade” shelving…bull-nosed MDF spaced a good 16-18” apart which leaves a ton of wasted space. Few pantry items need more than 14” head room and a great majority of it just need 10-12”. Just by reconfiguring the shelf layout you can often gain at least 2-3 additional shelves.

Okay in all fairness and in her defense she has a very rambunctious 17 month old and a 2 week old, 5 week premature baby.

So she is a little preoccupied.

Which is all the more reason to get this space in order. With a growing family, having an organized pantry is just a must.

So when they announced a few weeks ago that they were finally ready to get serious about revamping their pantry I jumped on the opportunity to go to work!!!!

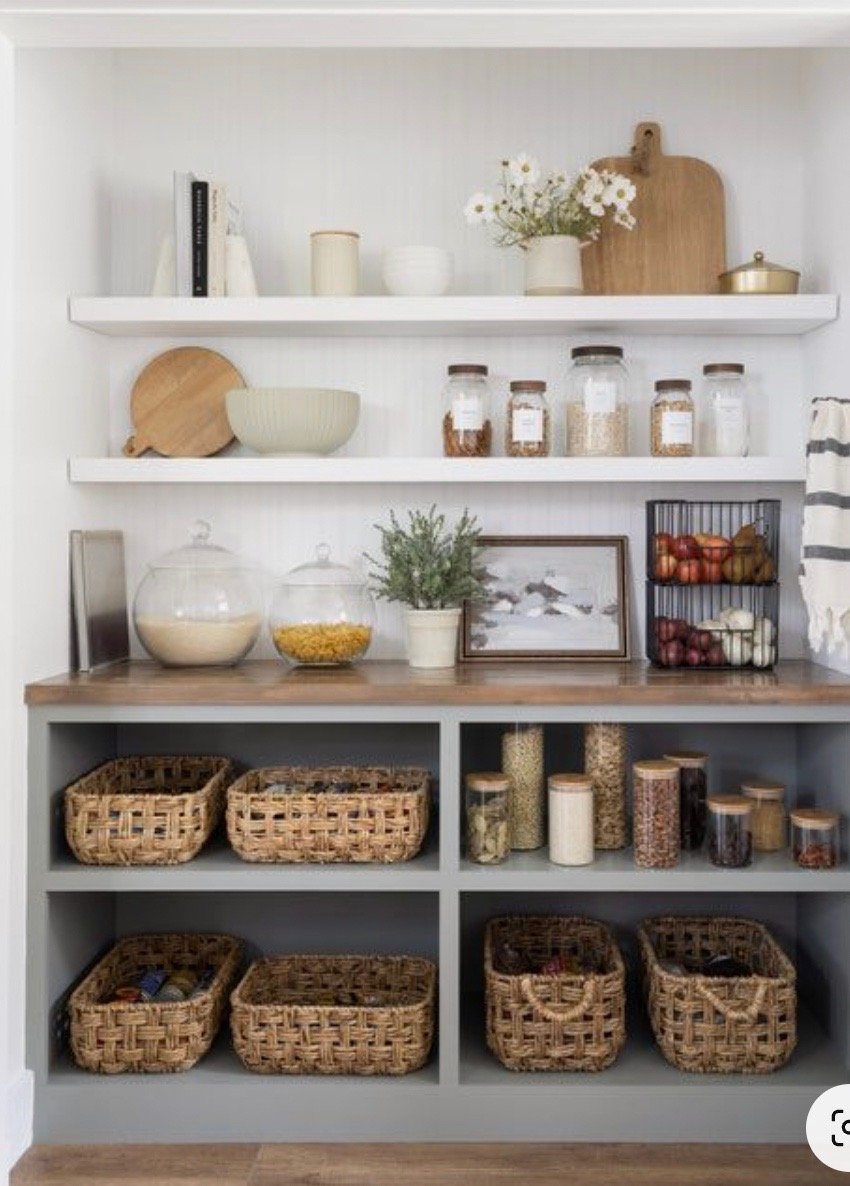
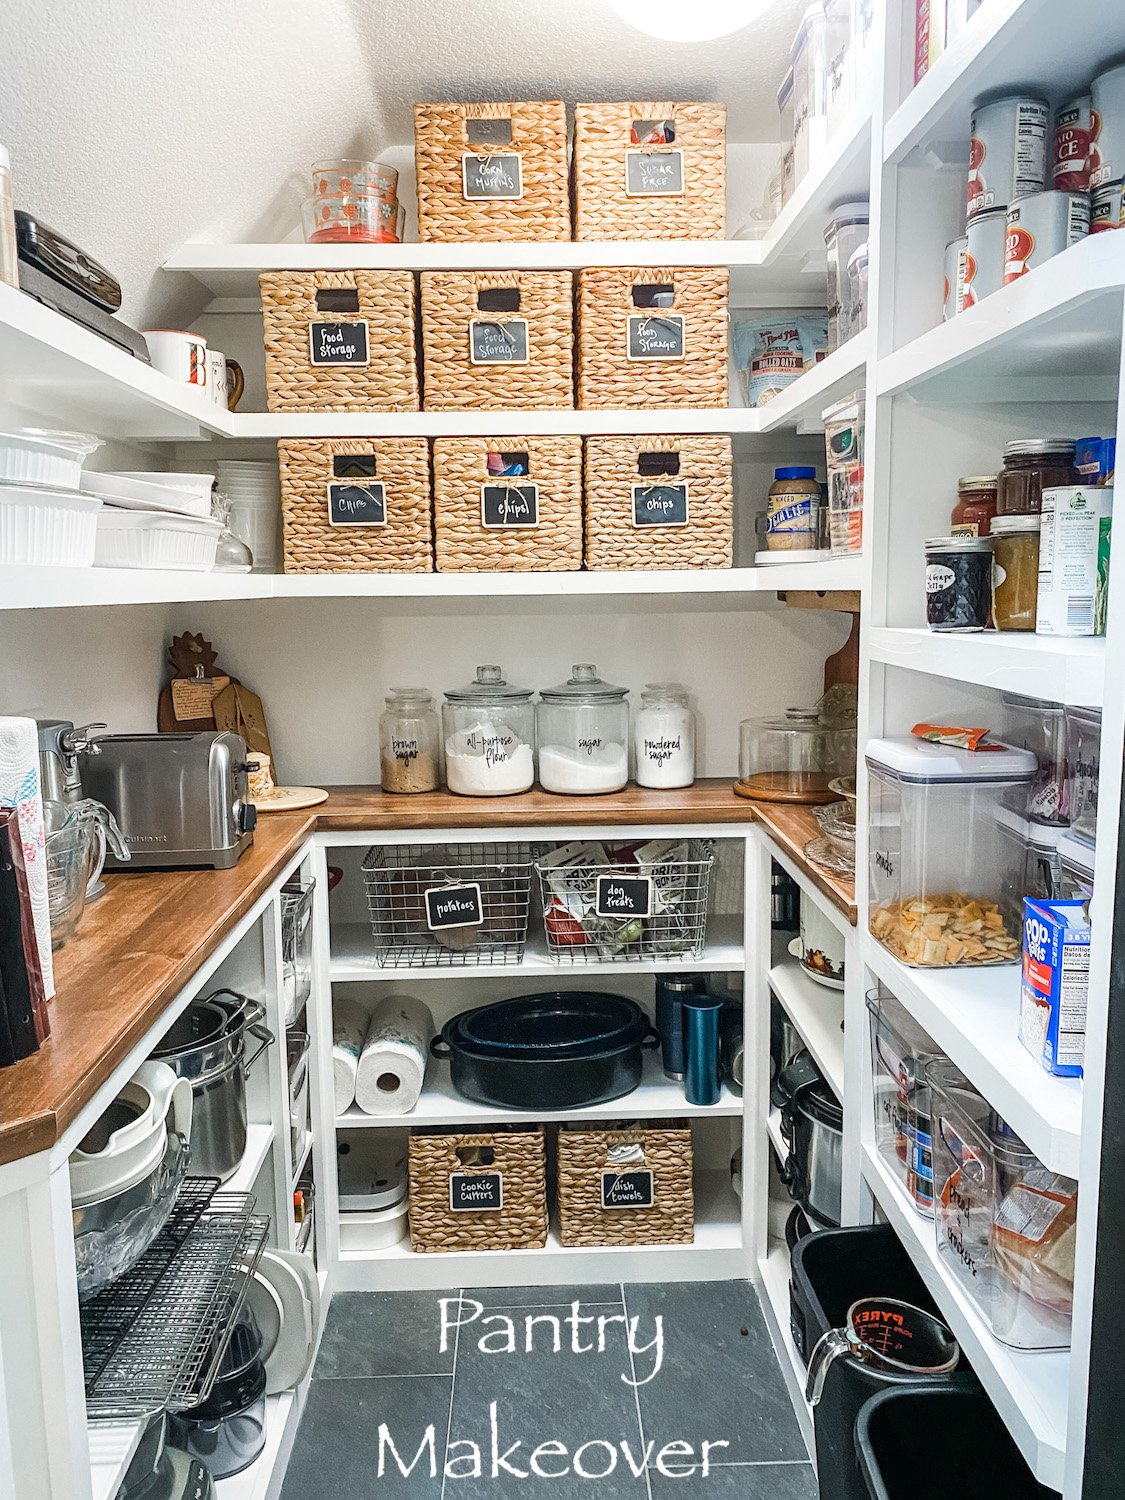
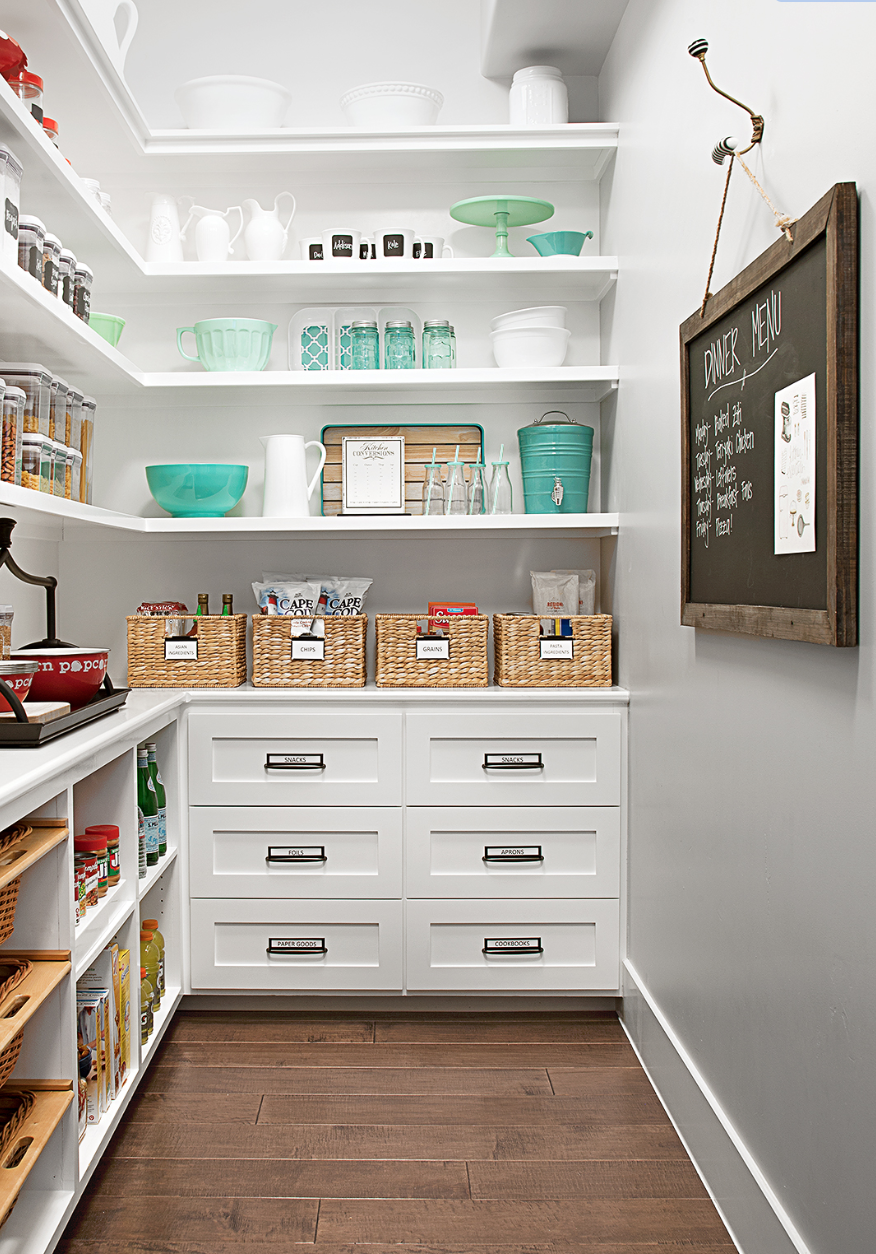
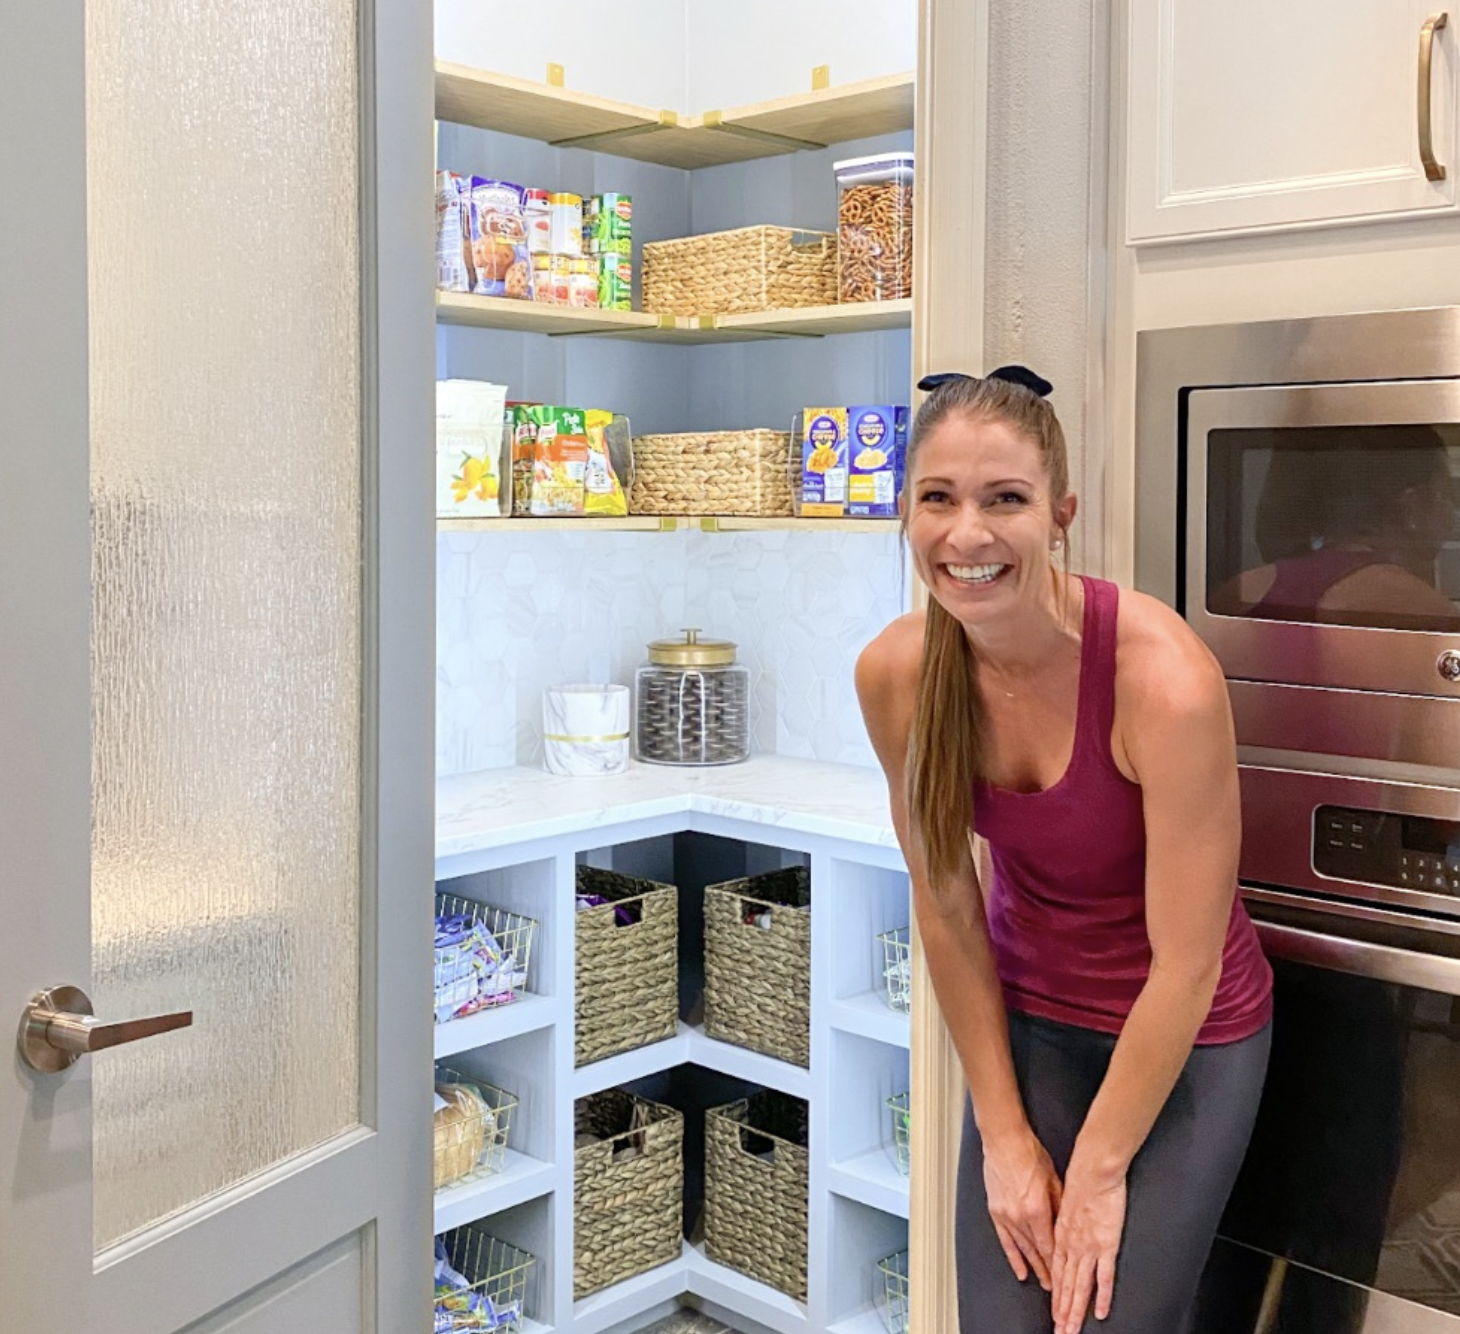
First things first…find your inspiration. I did what I always do…searched “pantry” on Pinterest. Here are a few that caught my eye…. (again, no links…I cut and paste pictures and put them in an “inspiration” folder on my computer.)

Of course it all had to be approved by the home owner. (I hate it when other people think they should have an opinion…lol!)

Fortunately, she liked many of the same looks I liked.

The most appealing thing in all the inspiration photos is the appliance tower. LOVE!

She loves the counter top look with natural wood tops. She loves the look of the floating shelves in the last picture…but she wants natural wood shelving and will paint the base black. I think it will look awesome!

So time to roll up my sleeves and go to work.

First up…take measurements and make a plan….
My plan is to make the cabinet and shelving across from the door “pretty.” This is where she would like a black base cabinet and natural wood floating shelves. They always have the door to the pantry open so we think it would be perfect to make it aesthetically appealing….pretty.

The shelving and the cabinets to the left will be “utilitarian.” A place for all their “food stuffs.” And then of course the coveted appliance tower to the left of the door. Since they have 10’ ceilings we were able to add a ton of shelving space just by reconfiguring the spacing of the shelving.

While this paper plan may make absolutely NO sense to anyone but me, it is what I need to figure out how I can reconfigure the space and what materials I will need.

After I got plan approval from my daughter in law, Brian and I went to Lowes and bought all the materials and had my son precut all the plywood for shelving and base cabinets with his table saw.

The construction of the shelving and bases will be very similar to what Lindsay did in her pantry space. She has a great tutorial for building everything so again, I am not going to reinvent the wheel. As I always say, find a tutorial that makes sense to you and use it.

Day 1….demo!!! I had my DIL empty the entire pantry and my stepson and I went to town with sledge hammers and crowbars and took out everything from top to bottom!

When you remove the existing shelving you may find sheetrock damage and you will notice that you have “lines” where the existing trim (shelf supports) was…primarily because the trim was caulked then the walls are painted…and the walls behind the trim are raw. So you will need to skim those areas with sheetrock mud, sand smooth, then spray with canned wall texture. If you don’t do this, you WILL see the lines where the old shelving was…so do it right… fix the walls, then repaint the walls before installing the new shelving.

TIP: If I am going to paint the shelving I usually paint the walls and shelves the same color…it makes it easier to paint the shelving without having to tape everything off. I use a different grade on the cabinets and shelving vs. the walls, but the same color.

I always prime and sand all the new wood before I cut and intall it…that way I don’t have to do major sanding in the house.

Right now I am still priming, cutting and installing so we have a few more days of work!

Hopefully I will have a big reveal in a week or so!!!!

The Pantry Makeover....

It has only been a little over a year since I “froo-frooed” my kitchen pantry. I love it and have found all the little storage elements I added to be very helpful. I have managed to keep it fairly organized.

After living with this space for a few years, it is time to reconfigure it and install new flooring.

First things first….find my inspiration. Same song, second verse…cruise the blogisphere and Pinterest and see what trips my trigger.

Once I had an idea of what I WANT, it was time to take some measurements and draw everything out on graph paper…inspiration + space = ”the plan.” Drawing the space to scale gives me the ability to play around with the elements I think I want on paper before I start sawing and nailing. It also gives me important measurements for cabinets, flooring and shelf material.

I wanted base cabinets to hide rarely used appliances (food processor, grinder, etc), dutch ovens, crock pots, etc.

I wanted a cute counter top for the flour/sugar jars, toaster and can opener.

Lauren’s pantry was most similar to my layout so I looked closely at what she did….

Like Lauren, I knew I wanted to use 12” wall cabinets as the bases. However, I decided to build my shelves a tad differently.

I liked the look of the shelving featured HERE….

Unfortunately I couldn’t find any wall cabinets to use as base cabinets…at least none that are affordable. It’s a pantry. With the cost of materials THROUGH THE ROOF I have to be conscience of the cost of this little project.

I wasn’t real keen on open base cabinets but Lindsey built some really awesome bases

She posted a great tutorial on building these base cabinets…pretty much exactly the way I built mine!

So all this got worked into “the plan.” Again, a fluid plan, but a plan none the less.

First up…the flooring. The flooring was the original tile and I decided to use the same tile I used in the laundry room. Tiling over the tile in the laundry room worked well so I decided to do that again.

I wanted to reset the shelving and build some additional “shelf towers” so I removed all the existing shelving….

I wanted a new light fixture so I found one I kind of liked. HOWEVER, it came with Edison bulbs. Kind of important since you can see the bulbs through the glass but I just don’t like the light…just too “yellow.”

One morning I woke up thinking “I really don’t like that light.” So I got up, took down the new one and put the old one back up. Again, it’s a pantry…functional is more important that pretty sometimes. Maybe I’ll eventually find something that is both pretty and functional…way down the bottom of the list at this point.

BTW, in case you want to see what “projecting” looks like around here….

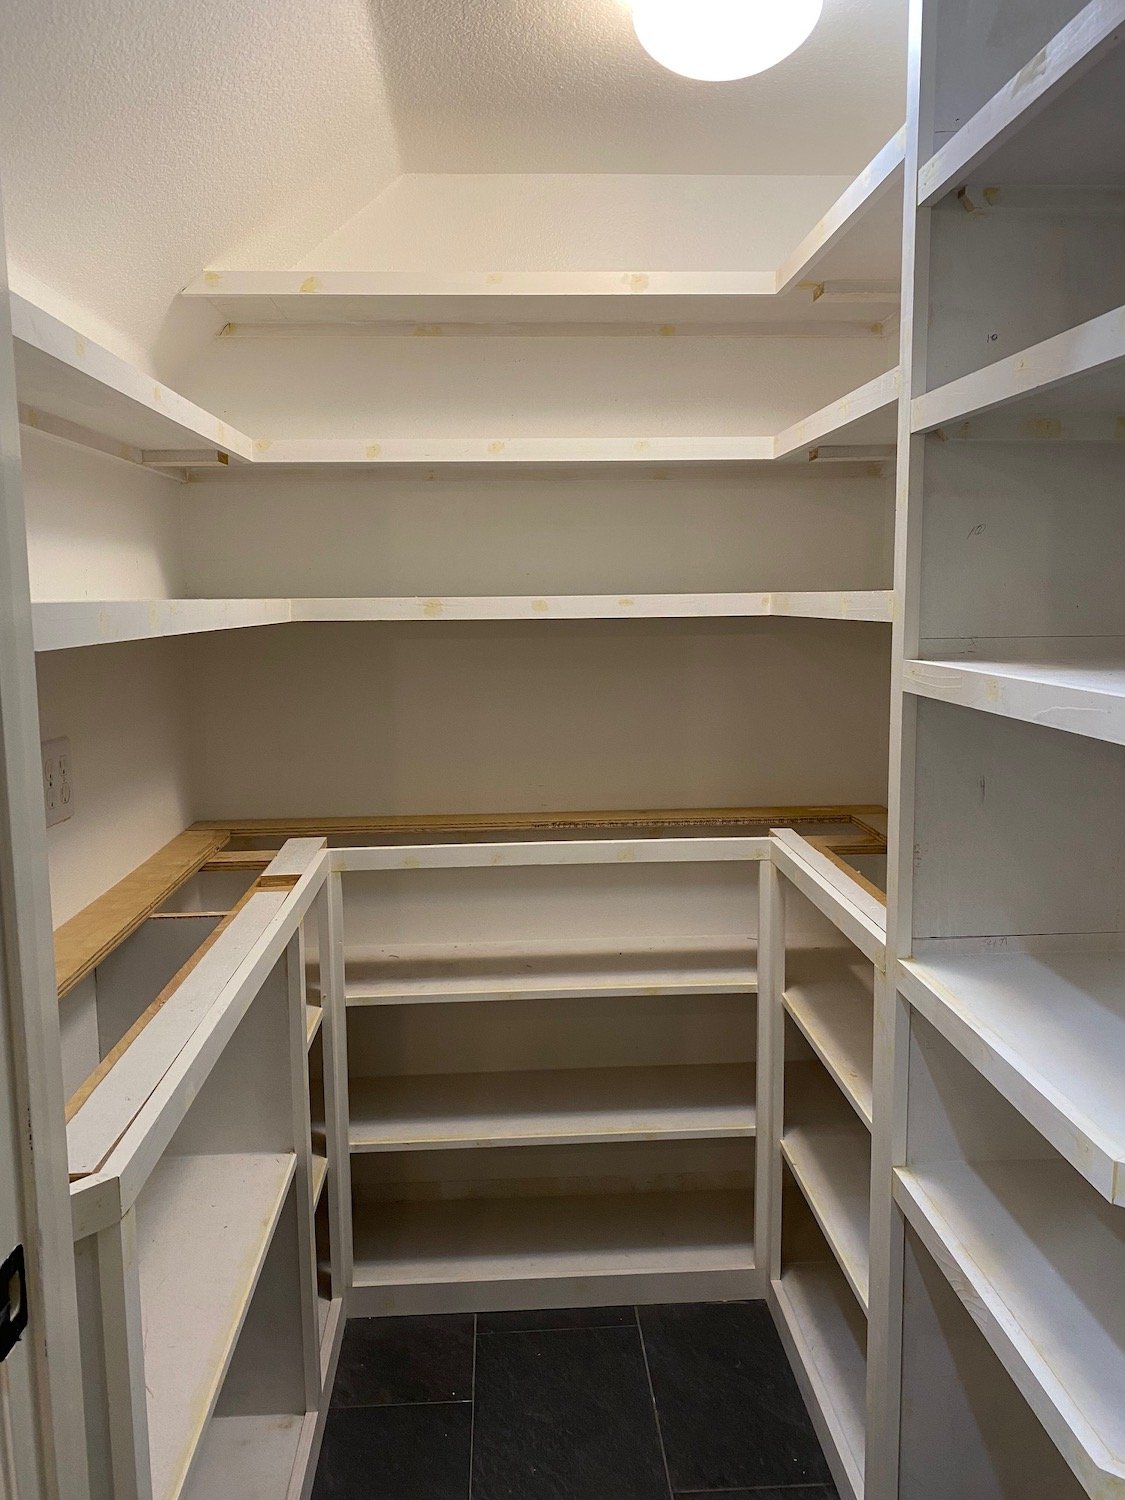
I patched and painted the walls white (my new fav, BM Chantilly Lace), grouted the floor tile, then started building the base cabinets and adding the new shelves. I preprimed and sanded all the material so all I had to do after it was assembled was caulk and putty holes. A light sanding, wipe with tack cloth and it was ready for paint. Prepriming and sanding BEFORE you cut and install will save you a MAJOR dust storm in the house.

AGAIN, I am not going to go into a long drawn out tutorial…just so many great tutorials out there.

Some people go to the lake during Memorial Day weekend. I build shelves.

The countertop. I like wood since it is not an actual food prep space.

If I wanted to splurge I would have built walnut counters or even a butcher block. But again…it’s a pantry!

The question then is if I go with a less expensive wood do I stain it with a dark stain or just leave it natural.

SOURCE

I love the dark stain but I worry it is running it’s course. But you know what, I don’t care. I love the darker stain and since the walls and cabinets are white, dark it is! I decided to use the pine “project board” from Lowes, stain with a “brown mahogany” and then apply a couple of coats of polycrylic. (Remember, polyurethane has a tendency to yellow over time)

Floors done, walls painted, cabinets and shelves built and painted, top on. Now the hard part…letting it all sit and cure before I load everything back in. IT IS IMPORTANT PEOPLE!!!! Let your paint and finishes cure before you go all decor-crazy on it…otherwise you will scar and scuff and will have wasted all your time and money!

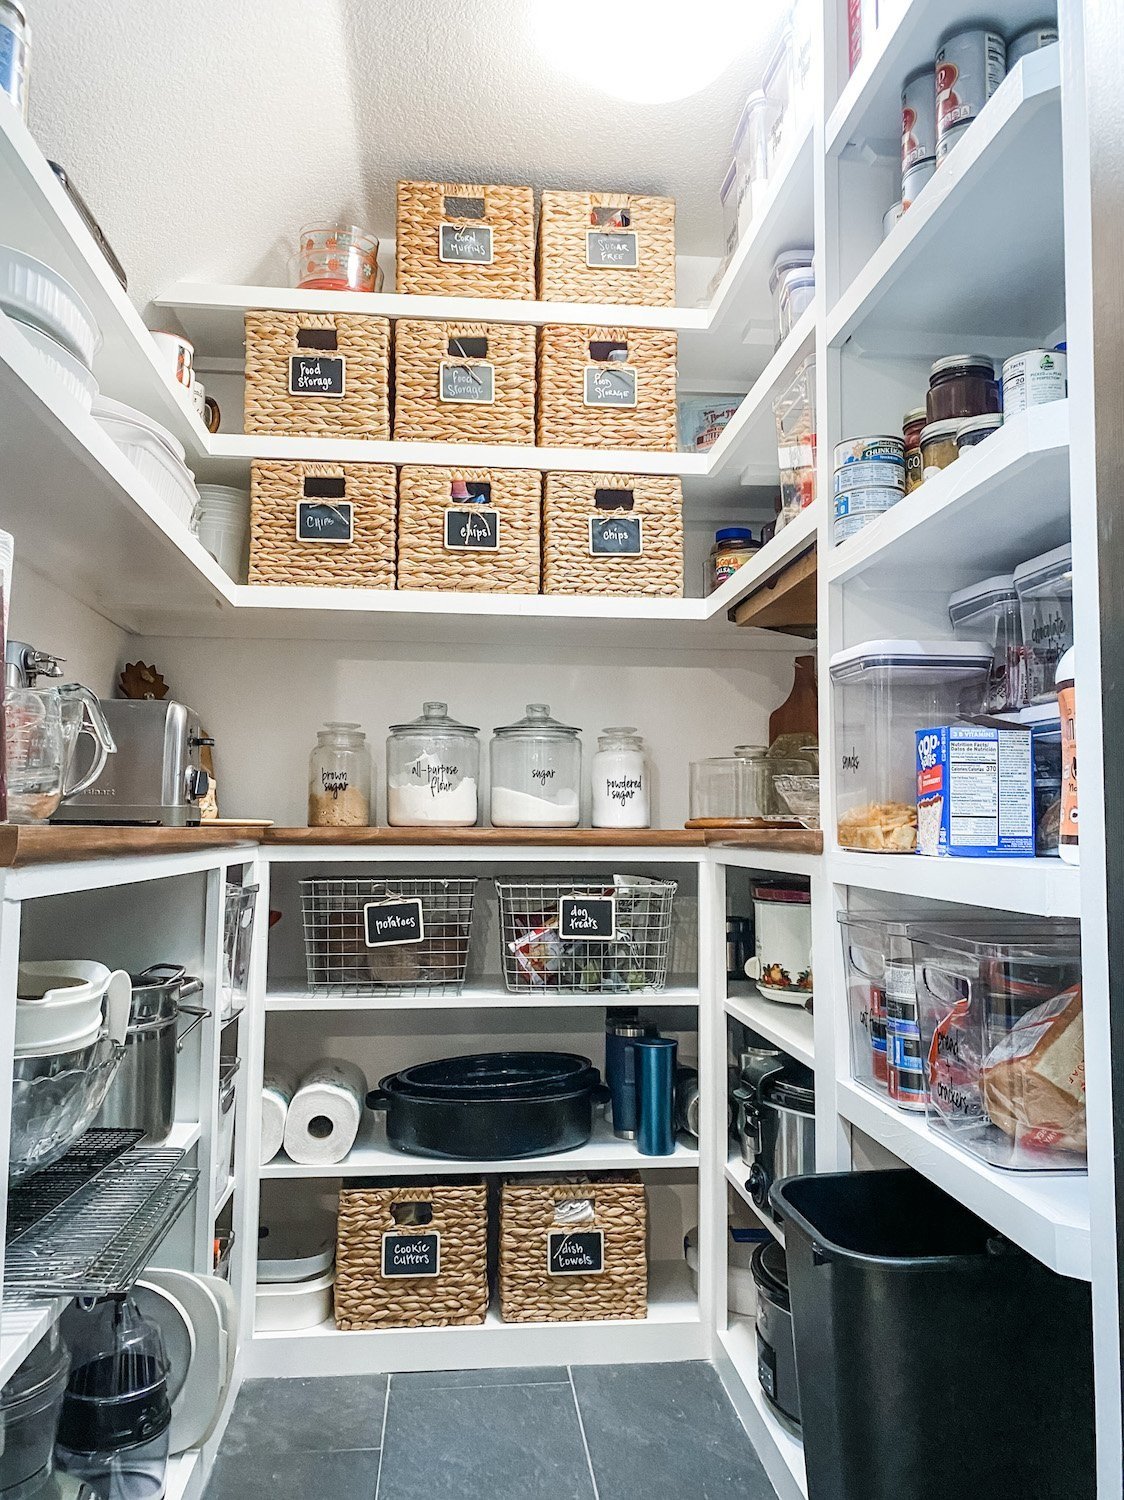
You may notice I actually gained a couple of shelves on the right and middle walls just by reconfiguring them. I also changed the upper shelves on the left to 10” and 8” deep shelves instead of the 12” that were there. I didn’t need the depth and it seemed to “open” up the space a tad.

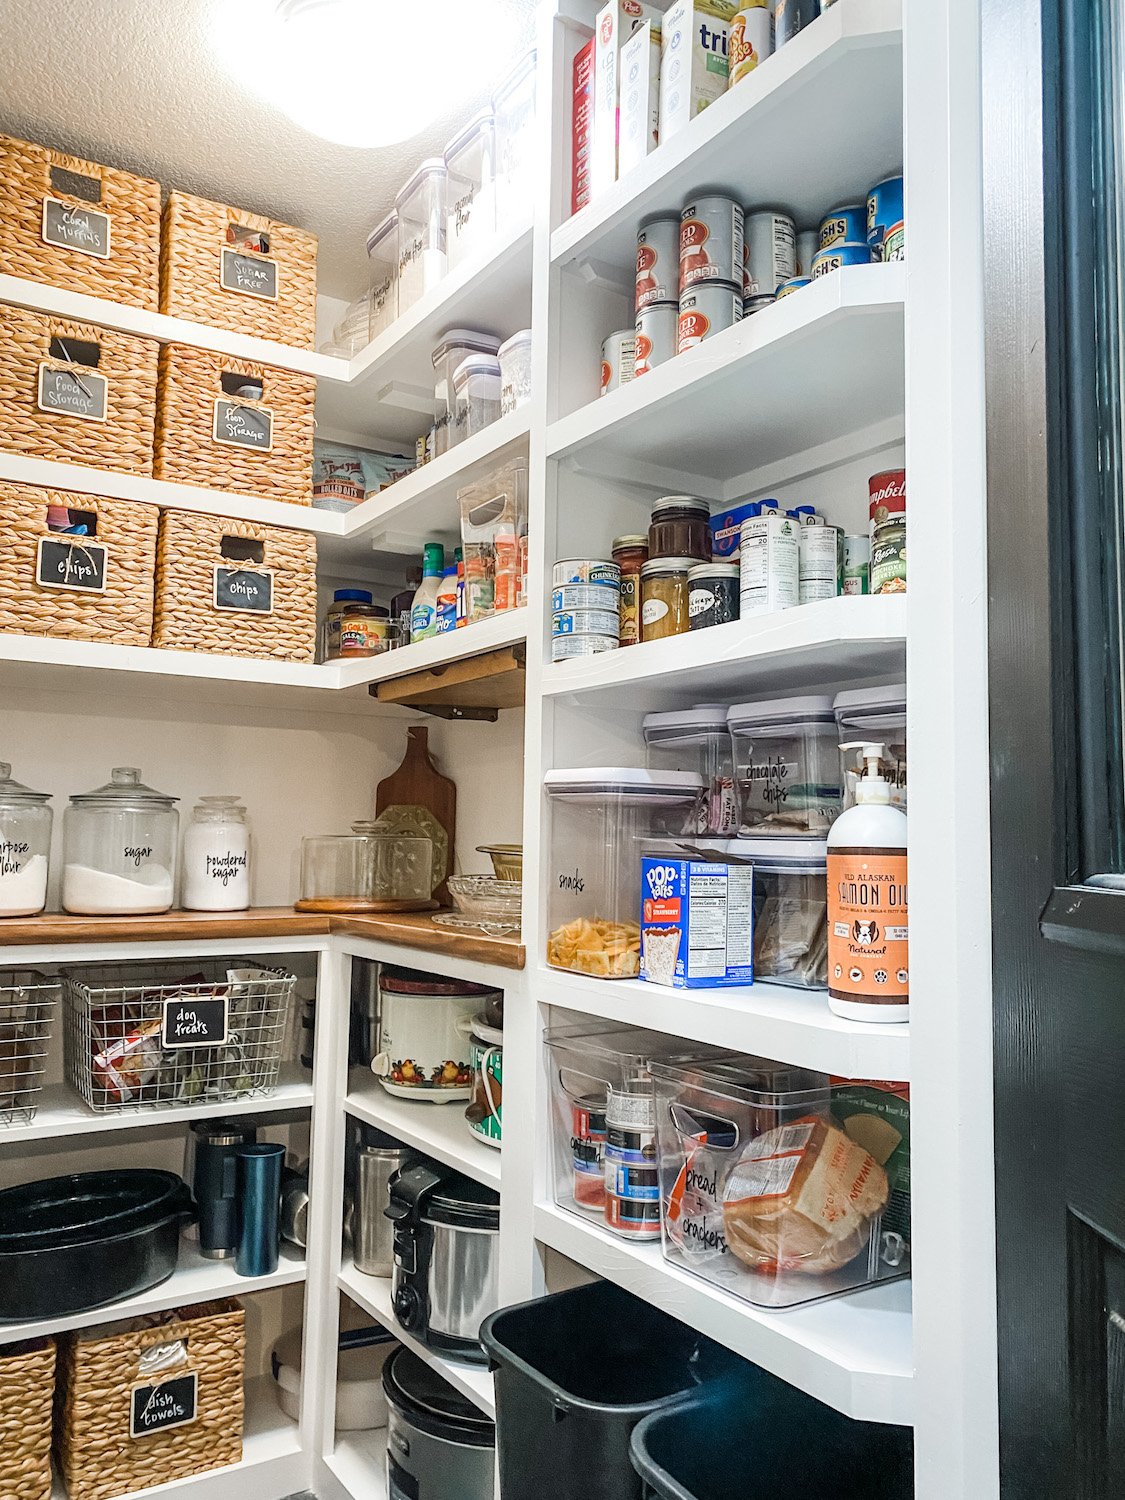
I could have carried the top all the way around on the right and still had dog and cat food storage under it…but I needed a few shelves 14” tall so I decided to do a separate “shelf tower.” Perfect for taller items like the stacked storage containers, cereal boxes and wine bottles. All the other shelves have a 10” clearance which is ample tall enough for most of my stuff.

Right side….

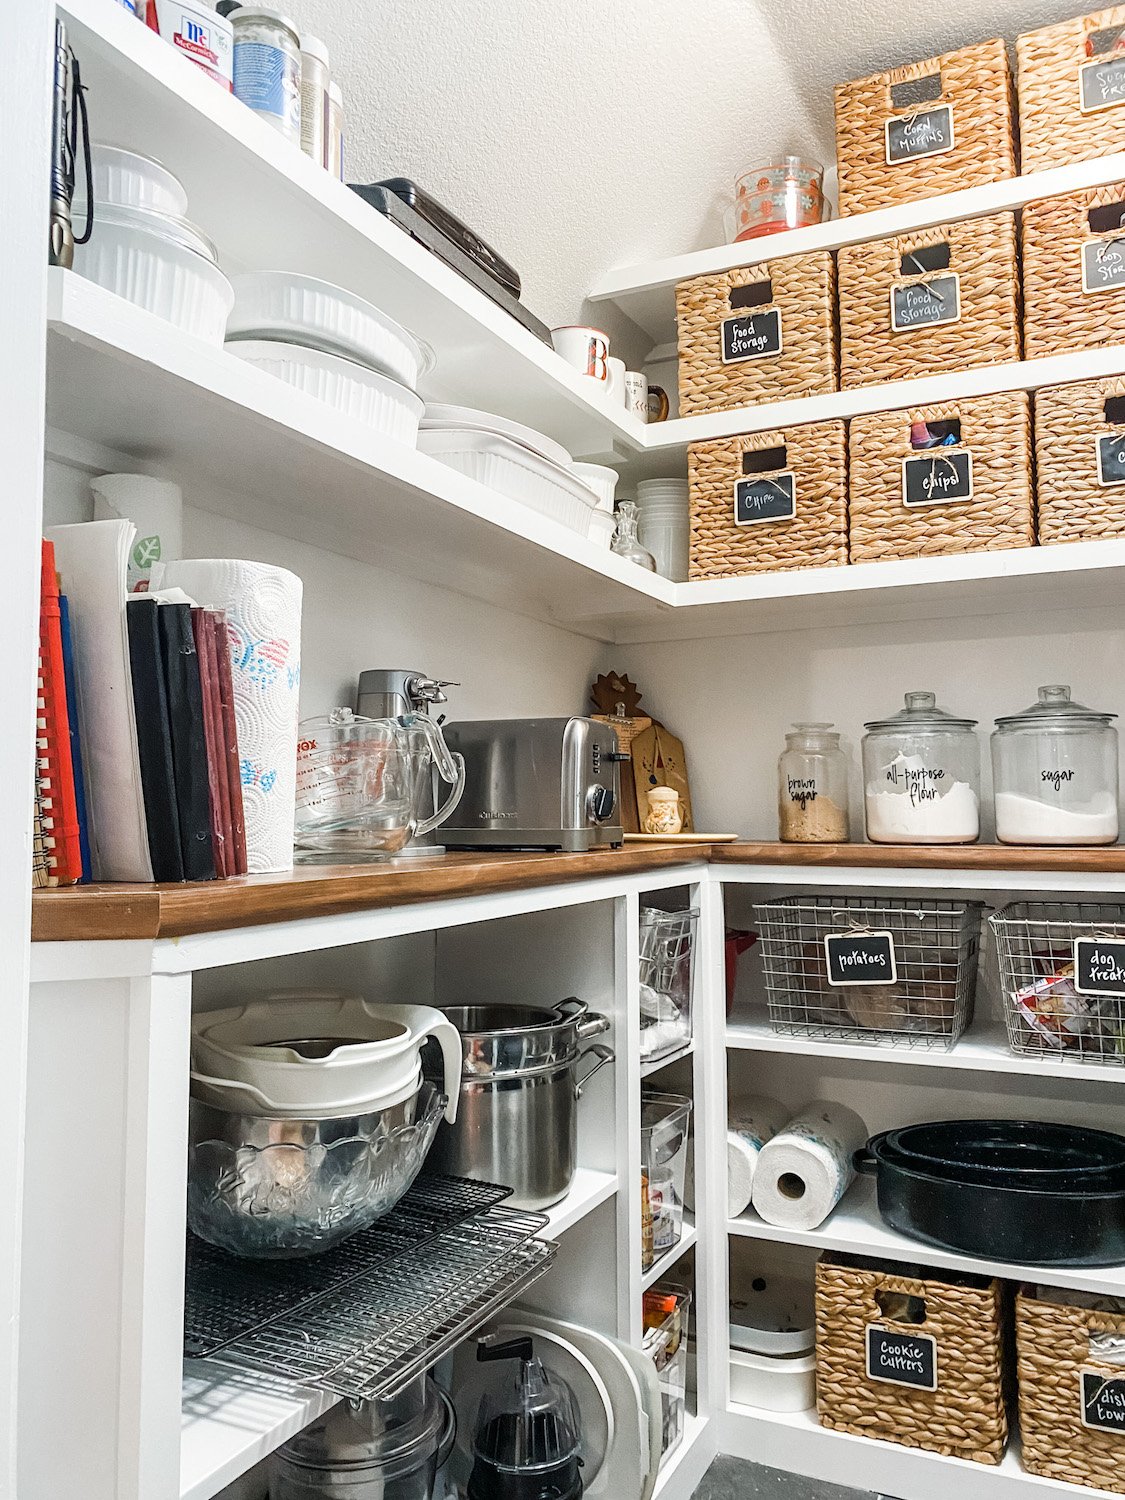
Left side…

I love that we added an outlet in this pantry…perfect for the toaster and can opener so they don’t take up real estate in the kitchen.

I think my Kitchen Aide mixer would look cute in here but I like it on my kitchen counter. If it were in here I would have to haul it back and forth to the kitchen…it’s too heavy and I’m too old!

I was a bit bummed that I couldn’t originally find cabinets with doors but honestly I like this look better! While dutch ovens and crock pots aren’t really display worthy, the open shelves keep the room from feeling so small and claustrophobic. Believe it or not this space is only 5 x 5. Tiny but mighty!

I have no doubt that at some point I will add a backsplash…not sure whether it will be tile or wallpaper or something else…but something to give the space a little color and character. Right now I am worn out just getting to this point!

Last year I added glass to the pantry door. I LOVE it and I’m glad that is one chore I don’t have to do now!

The important thing I want to share is that reworking a space can make a huge difference. I now have a pretty pantry that works beautifully as an extension of my kitchen. Remember, I don’t have a lot of upper cabinet storage in my kitchen so this pantry is super important!

On a scale of 1-10? For me, not difficult because I have the tools and the know-how. For a novice DIYer, probably an 8. But there are a ton of tutorials out there for how to build simple shelving or how to use old cabinets to create a space like this. The first thing you have to do is find “inspiration” for the space you actually have and work from there. It is doable…YOU CAN DO IT!!!!!

On a blog board I am on someone said she was afraid to do something like this because she was afraid to mess up.

Don’t be afraid to “mess up.” That is how you learn…watch tutorials and read blogs. There are so many great resources at your fingertips these days.

Use them…and JUST DO IT!

Simple makeovers for the worst offenders...the KSTP treatment!

There is NO excuse for ugly furniture. With warmer weather just around the corner, it is time to start looking at your furniture with a critical eye and making a list of pieces that CAN be changed with just a little bit of work!

We all have it...those "cheapo" pieces of furniture that are, at the very least, offensive! Maybe they were given to you, maybe you bought them at a "discount" store...maybe you bought it at the thrift store to fill space in a room.

Pressed board construction, laminate tops, dated finishes, pieces you put together with a little allen wrench thingy that came with the worthless little "screws" that promptly strip out and leave the piece wobbly and worthless!

It's ugly and cheap, but seriously who has the money to buy "real wood" furniture when you are struggling from pay check to pay check and having to buy shoes for a kid whose feet seem to grow a size every month.

I get it...I've been there. Fortunately I have learned to shop resale and auctions for "quality" pieces...and even if they need a little TLC, I have the tools, knowledge and time. But not everyone has that...or the money to buy and refinish high quality pieces.

That is why I advocate the KSTP treatment. Let me explain....

First, before you even get to the KSTP treatment, ALWAYS give the piece a good cleaning. On the nastiest, I use ammonia water but some can just be wiped down with a little water and mild detergent. Whatever you need to do to get the gunk off the piece! If it is "stuck" on just scrape it off with a razor! No matter if you scratch the finish...you are going to paint it!

Second, make any and all repairs that need to be made...and if you don't know how to repair it properly, google it! 

Okay, now the KSTP treatment....

K- Kilz (my favorite primer but any QUALITY PRIMER will do! That is why this is the KSTP treatment and not the PSTP treatment!)

For smaller pieces I use a spray can only because it is easy and gives me a nice smooth finish. On larger pieces I use a brush and 4" foam roller! TIP! Always shake the can longer than the directions recommend. Kilz will spray on with a "grainy texture" if you don't shake the can well! No biggy since you are going to sand anyway, but just makes it a little easier! Also, pay attention to the temperature recommendations...it matters!

Many paints SAY they are a "primer and paint in one." Sorry, I am old school....I ALWAYS prime and I personally recommend it. If you want a superior finish that will hold up to use and abuse, prime! 

S-Sand. A 220 grit paper will usually smooth out the piece after it is primed. I wrap a piece around a sanding sponge block!

If you have "ornate" legs or detailing, use 000-0000 steel wool.

USE YOUR HANDS, not your eyes. Feel the piece.

Trust me, if it isn't smooth, it WILL show after you paint it! Sand it until it is smooth to the touch! If you cleaned the piece well, scraped off all the gunk, this step really should only take a few minutes.

T- Tack cloth. A MUST after you sand but before you paint (or apply any finish). Blow or brush off as much as you can, then use a tack cloth!

You can purchase it at your favorite home improvement store...usually in packages of 2 and relatively inexpensive (around $2)! You can wipe a piece down all day with a clean cloth, but you WILL leave "stuff" on the piece if you don't tack cloth it. Tack cloth will remove EVERYTHING. If you still feel "stuff," hit it with the sand paper again and then tack cloth again! 

P-Paint. This is where people usually freak out. My favorite for wood or laminate furniture is oil-based but it can be a tricky paint to work with for a novice and difficult to clean up. Fortunately latex paints have come a long way and are much more durable these days! QUALITY spray paint is probably your best bet for smaller pieces. I say quality because you can buy spray paint a tad cheaper at discount stores, but I am not a huge fan of cheap paint for ANY project! I usually buy Valspar or Rust-oleum from Lowe's.

On smaller pieces of furniture the difference will only be a few dollars but will be worth it in the long run. 

Each of the brands come in LOTS of great colors...just find the color you love! I have found very little difference between the two brands...the Valspar tends to dry a tad quicker....but both are quality paints! ALWAYS shake the cans well and follow the directions on the can!!! 

I have followed every tip in the book to get rid of the occasional "striping" on large, flat surfaces...like dresser tops or table tops. It doesn't seem to matter how I spray, what the temperature is or how hard the wind is blowing...sometimes I get stripes.

My solution has been to purchase the little "sample pots" of paint custom mixed to match the spray paint I am using and roll it on the large flat surfaces with a 4" foam roller! 

Penetrol and Floetrol are a MUST any time you roll or brush on paint...oil or latex!

Use it. It will eliminate the brush and roller marks and give you a MUCH smoother finish! 

These are just a VERY few projects using the KSTP treatment (I have done hundreds!)....world of difference for a little bit of work! I am working on a piece right now that is in the S stage...primed and sanded but now I need to figure out what color I want to paint it...soon!


Even light fixtures and paddle fans can be spray painted!!! On metal pieces and furniture hardware, I use metal primer primarily for the "rust retardant" factor!

One last important TIP when using ANY technique to paint anything....ALWAYS give the piece time to cure before you put it to work! 

I was always skeptical of those "two day" makeovers they did on tv where they would paint something and then "stage" the pieces with all kinds of stuff within hours of putting a final coat on. (Kind of like getting your nails painted at the salon...even though you dry them for 10 minutes, you are still going to ding them if you dig in your purse for your keys! Unless you get gel polish...awesome stuff!) Trust me, that is the fasted way to ruin a finish! Don't do it...be patient and give the paint time to harden (cure) before you set a lamp on it or try to hang the fixture (trust me...I have had to repaint many pieces because of impatience!) 

One dated, nasty, cheapo piece of furniture can ruin an entire room. Toss it or paint it! YOU CAN DO IT!

*I have not been compensated for pimping these products! These are the products I use and work for me!!!*