Live edge tile backsplash and a dresser makeover reveal...

In my quest to make changes in my master bath, I FINALLY decided on the a sliced white pebble tile for the shower floor and niches. One decision down...too many more to go!!!

When I first remodeled the master bath, I did a glass tile backsplash on the vanity...I like it, but honestly I am no longer in LOVE with it.

And to be honest, I think the glass tile backsplash craze is running it's course. In other words, it is a fad that is fading...at least in my opinion. Besides, it had brown in it and I am moving away from browns!

Since it is such a tiny bit of tile, I decided to change it up a bit.

AGAIN WITH THE DECISIONS!!!! But I got to thinking...I love live edge wood countertops, coffee tables, benches..."live edge" wood anything is just beautiful! If you don't know what I am talking about, google it!

Why can't I make a "live edge" tile backsplash?

The pebble tile I picked out for the shower floor has a "live edge."

In other words the pebbles are laid on the sheet in such a way that the edges of each section of tile are "natural."

This vendor carries a tile border but it is only 4" tall. You can also remove each individual tile from the netting and place each individually...nah, way to much work for me!

Since I have a small backsplash, I cut each 12x12 sheet of tile in half with a wet saw. I only needed 3 sheets of tile...less than $40!

Then I had to set it on the vanity for a few days to see if I was really going to like it!

LOVE!!!

So here is a tutorial for making a "live edge" tile backsplash...

First, I had to remove the old tile. There are times when the easiest thing to do is to cut the sheetrock along the tile down to the studs and remove the whole kit-and-kaboodle! That was an option, but I decided to remove the tile and scrape the old mastic....

Since that tore up the sheetrock AND the new tile wasn't going to cover the entire section I removed, I had to do some sheetrock repair.

No biggy!

If you decide to cut the sheetrock down to the studs, here is a super simple way to "patch" the section you remove!

I didn't have to do any patching, but the basic rules apply...mud, sand, texture and paint!

Apply a coat of mud, let it dry overnight, then sand. Then another coat, let it dry and sand again. I can not stress the importance of sanding sheetrock mud smooth...FEEL IT! If you can feel it, you are going to see it when you paint it! Sand, feel, sand, feel! I used an 80 grit paper. You are better off sanding too much and having to apply more mud!

This product is one of my favorite little DIY "hacks." Sheetrock texture!

If you have properly sanded, this stuff will blend old with new! Just make sure you shake it WELL and always test spray it before you start spraying your wall. On more than one occasion I have had to wipe off the wall and start over because the texture came out to thick or too thin...so take time to test it before you start spraying it on your wall! The knob adjusts for different "textures." Follow the directions on the can.

Let the texture dry WELL before you paint!

And again, I can not stress the importance of keeping spare paint on hand. Fortunately, I just repainted my bathroom a few months ago so I had fresh paint on hand...

So, on to the fun stuff...tiling!

First, this is a "natural" stone tile (if you don't know if your tile is a "natural stone" vs. ceramic or porcelain tile, ask!) The very first thing you want to do is seal it with an "impregnator sealer." Ask...they have it at most home improvement and tile stores. Super simple to apply...brush it on...let it sit for about 5 minutes, then wipe it with a clean cloth.

I would suggest doing this before you cut it with a wet saw, but definitely before you install it and grout it!!!

Since the top edge of the backsplash is going to be the "live edge" it was important to remove any "netting" from the edge...

The net backing is what is holding all the little pebbles in place so you don't want to get carried away...just trim the netting away from the edge that will be exposed!

I used a utility knife and my little sewing scissors (and I wonder why I can't keep a decent pair of sewing scissors!)

I used a premixed tile mastic. Mastic is for small tiles...thinset for large tiles. Always use the adhesive and trowel recommended by the tile manufacturer. I coated the back of the sheet with mastic using a properly sized trowel. I used a small craft brush to apply mastic to the edge pebbles...it is okay for the mastic to "squish out" between the pebbles a tad, but you don't want it squishing out on the edge pebbles...I kept Q-tips on hand "just in case." Just make sure you get enough mastic on the back of the edge pebbles for good adhesion. 

TIP! Never set a tile backsplash directly onto the countertop...always use spacers and then after you grout you will run a small bead of caulk between the backsplash and the top. In this case I wanted a very small space so I used dimes as spacers! Thank goodness we keep a change jar and I was able to fish out a few bucks worth of dimes!

Let the mastic dry over night before grouting! 

Now this is where I tell you to "tune in next week" for grouting instructions. Why? Well because as I mentioned I needed 3 sheets of tile to complete this task and I only had the two I ordered as samples. So now I am waiting on the other sheet to be delivered so I can finish this little project. 

I know...it's annoying to get engrossed in something only to be told "to be continued." But I promise...next week I will share how simple it is to grout, seal and caulk the new tile backsplash.

Until then, I will share something I promised last week I would share!

(The grouting tutorial is up…take a look!)
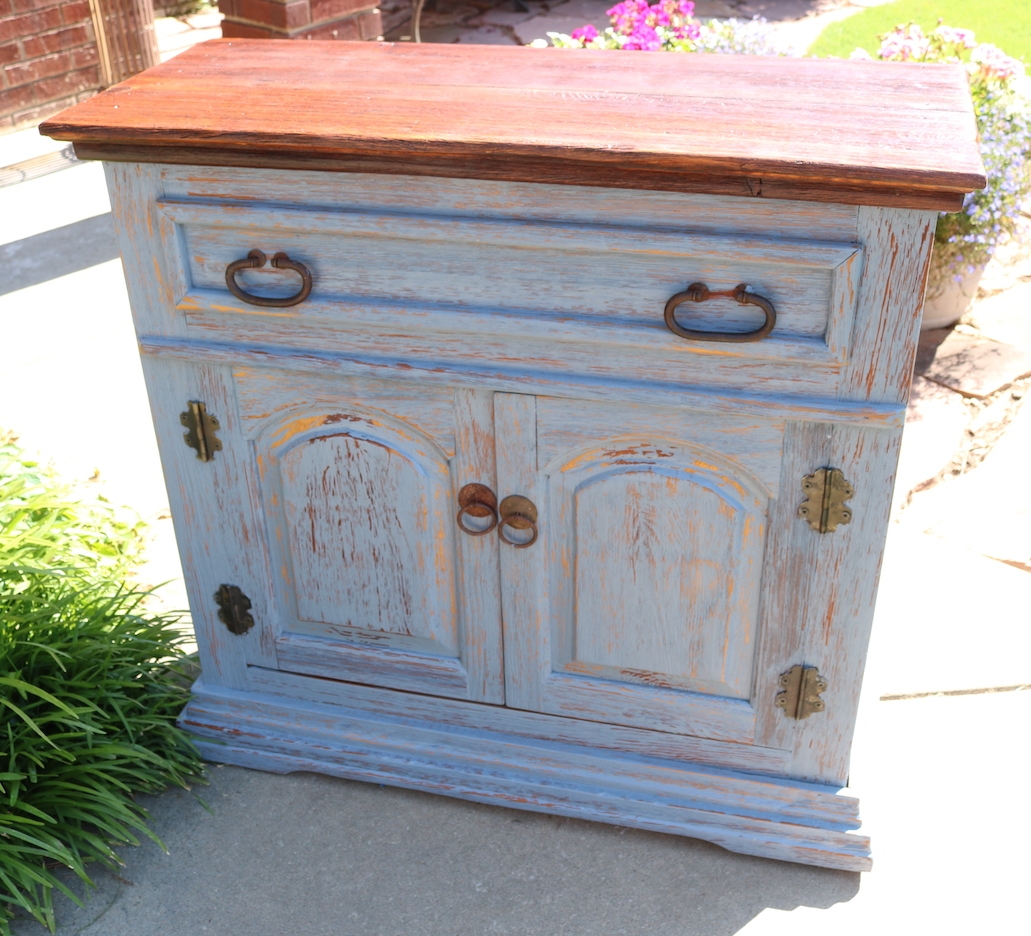
A DRESSER!

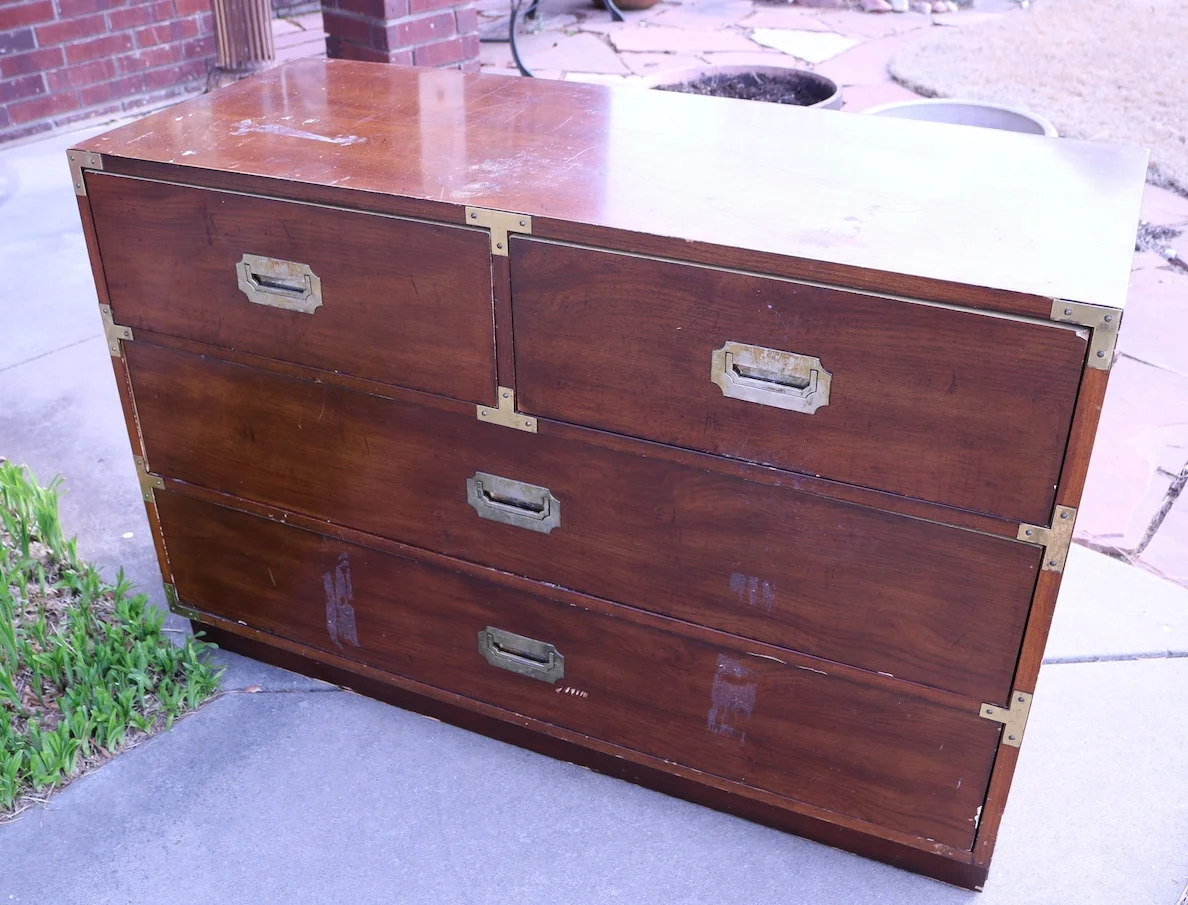
I shared last week that I have been in "dresser mode" recently. I currently have FIVE dressers and chests sitting in my garage ready to roll! 

Last week I took a dresser in and it sold that day! I think it has been in my garage for over 6 months...I just never took the time to work on it.

It wasn't in horrible shape...just a really bad paint job (you could see all the brush strokes) and the hardware was pretty chippy!

I didn't change it up too much...KTSP...kilz, sand, tack and new oil based high gloss white!

The hardware got a little makeover...I primed it with metal primer and sprayed them with high gloss black lacquer.

Again, not a huge change but enough to give it a new life!

Maybe next week I'll share another one...if I can dig them out of the garage!

Well, that and the "to be continued" of the tile saga! 

Simple "before and afters"...

Some of the simplest "befores" turn out to be my favorite "afters."

Which explains why I often don't have decent "before" pictures...I think "oh, that's no biggy" and dive right in to giving them a simple little makeover. Then they turn out so stinking cute I wonder why I didn't take time to take "before" pictures.

They are a reminder of why do this blog...to show you how easy it is to take a simple, boring, out-dated, dark piece of furniture and turn it into something you will want in your home rather than in your yard at the next garage sale!

We DIYers live for those hidden treasures...pieces of furniture that people want to get rid of... they drop them at their local thrift store or sell them for pennies in garage sales or just set them out on the curb...we take them home, clean them up and work a little DIY magic. 

The worst...you live with the ugly, dark furniture because you can't afford to replace it!

I get it...you paid a small fortune for your "matchy-matchy" bedroom furniture so you can't bring yourself to get rid of it.

I've shared "makeovers" hundreds of time...too many times to link ALL the pieces I have "upcycled" over the years. But I would bet money you still have a few pieces lurking around your house that serve a purpose or are "family heirlooms" or you paid too much to get rid of it...so you just live with it.

Don't fret...take the plunge...buy some primer and some paint AND CHANGE IT!

LIFE IS TOO SHORT TO LIVE WITH UGLY FURNITURE!

This shelf was your typical Target cheapo...dark finish...no I did not take a picture of it "before." Honestly, I think it was a piece someone left at the apartments so I loaded it up and brought it home.

I removed the back panels...primed and painted the frame and shelves with one of my "sample" pots of white (KSTP). I painted the back panels with a sample pot of teal and then reattached them.

Super simple and too stinking cute!

This little bedside table came with a set I bought at an auction. Someone bought the dresser, chest and bed but didn't want this little table.

Meh....

Simple makeover! I removed the drawer and simply brightened it up with some Restorafinish. I primed the cabinet, sand, tack and white gloss paint. It was missing a knob so I ordered two new ones...

....again, SUPER SIMPLE and so stinking cute!

This old oak dresser...the finish and the little applique' really dated the piece.

I popped off the appliques using a chisel...lift carefully...chances are they are applied with a little bit of glue and a few tiny nails.

... sanded the old glue, stained the top with gel stain (no need to strip the old finish) and chalked painted the rest of it....distressed and sealed the whole thing with poly...

Too stinking cute!

Simple...simple...simple! 

Nothing earth shattering on any of the pieces...just super simple little makeovers that updated the pieces and gave them new life! 

Walk around your house...what simple little piece can you haul out to the garage and work a little "DIY magic." Trust me...if you don't like it when you are done, you won't get any less for it at a garage sale! 

Modifying a cabinet...

When I first remodeled my master bathroom, I loved it...honestly, I still do! But someday soon I want to make some major changes just for practical purposes. Specifically, I want to remove the whirlpool tub (seriously, I think I have used it 3 times in the last 20 years!) and add a walk in shower.

As much as I love the existing tile, I know that will mean picking new tile for the shower....which means I will want to go ahead and replace the floor tiles...you know, while there is already a mess! But picking a tile that will carry me through another 20 years is tough for me...I know people say this or that is "timeless" but I can assure you NO home decor is timeless.

This will all happen as soon as I can find the perfect tile person to construct the shower. I do not want to hire someone who isn't VERY experienced because one of the worst things that can happen would be a shower that leaks! 

There is one other tiny detail that kinda bugged me...the "medicine cabinet."

While I love the look, it just wasn't practical. Why? Because everything in the back half of the cabinet goes there to die! Seriously, I found a bunch of products and pills that had expired years ago.

I cut down my kitchen pantry several years ago and have never regretted losing that extra 12" of space. I like how the smaller cabinet opens up the kitchen a bit! And again, everything in the back of the cabinet had a tendency to expire before I got to it. (No, I don't have a picture of the pantry before I cut it down...that was "preblog!")

So I knew cutting down the depth of the cabinet in the bathroom was doable! 

The first thing I did was take EVERYTHING out of the cabinet and took inventory. Major purgefest! I made sure that what was needed or wanted would fit comfortably if I only had 6" of depth. Yep, all but the basket of old prescription medication and most of it had expired. 

Once I knew that cutting down the cabinet wouldn't pose a logistical problem, I removed the cabinets from the wall, cut them down, rebuilt the back and reinstalled them. (Did I take pictures of this process...of course not...who knew I would share something so mundane!)

Sounds easy...honestly, it wasn't. There was an electrical outlet to deal with and the trim detail and then of course there was the exposed sheetrock boo-boos from the old marble backsplash...curses. I always think a project will be easier than it is!

But again, it was doable, and after a day of cutting and cussing I had a smaller cabinet.

The sheetrock boo-boo was an easy fix...mud, sand and retexture. Since I am good about keeping old paint for touchups...no biggy. Except it had been so long since I painted the bathroom, the paint had hardened. So I got to repaint the entire bathroom! Yippee!

Fortunately I had a couple of left over gallons of paint from when I painted my living areas...

Now I am eyeballing my kitchen again. I am a sucker for the "power of suggestion" so when I read that big ole' hulking over-the-range microwaves are now a kitchen "faux pas" I decided I want to remove the microwave above the stove...which means I have to find a place for a smaller microwave. The counter is not an option since I have a small kitchen and limited counter space. Hum...the pantry...maybe I can put it in the pantry. Well, I could if it weren't so stinking shallow...remember I cut it down so now no microwave more than 13" deep will fit. Thank goodness for the internet...I spent days researching microwaves. Fortunately, I found a few that would work so that's one hurdle! Small little things but honestly the only thing I use a microwave for is to boil water, warm coffee and melt butter.

Hurdle #2...can I afford to loose shelf space in the pantry? Again, I pulled everything out and start measuring cans of beans and moving shelves around. 

Doable! Keep in mind we are now a family of two and I don't need the food storage space I use to!

Hurdle #3...when I take down the over-the-range microwave...what then?

Honestly, I didn't know.

And then I found a solution that changed my whole plan...

A compact over the range microwave by Whirlpool!

I would post a picture but the site won't let me steal the pictures so just go look at it!

How cool is THIS! It's only about 10" tall so I won't feel like I have a big ole' hulking appliance hanging above my head while I am cooking.

I ordered the black stainless even though my stove is black.

I hate to buy new appliances when they work perfectly fine so I thought I would live with my old black stove for the time being.

(Fortunately for me the ignitor went out on the oven this week. Yippeee! Perfect excuse to order the new black stainless stove I drool on every time I go to Lowe's! God forbid I fix it with the $30 part!)

Now I don't have to give up pantry space or counter space. I guess it is still technically a "kitchen faux pas" since it is an "over the range microwave." But you know what...I'm okay with it. I'm probably one of the few who hasn't painted my kitchen cabinets, I have no shiplap in my house and while I would love to retile my entire kitchen and dining area with beautiful, light travertine tile, it's not happening...so I'm okay with bucking the decor trends!

The only problem I have is the space that will have to be tiled after the big ole' hulking microwave is removed. Fortunately, I am a pack rat and kept all my scraps from when I retiled the kitchen backsplash! Yea me! Thank goodness because that stuff was E.X.P.E.N.S.I.V.E!

So when I get the new microwave and stove are installed and the tile work done I'll share...can't wait!


And another campaign dresser makeover...

I shared the "before" of this Dixie campaign dresser here....

A very desirable piece that I knew needed the perfect makeover.

I spent hours cleaning the brass hardware. One of the little doodad brackets was missing so I had to order two on Etsy....they didn't match the original hardware exactly but as my Daddy use to say "You'll never notice it on a passing train!"

A few minor repairs but all in all, it was in outstanding condition for a 50+ year old piece!

A KTSP treatment...kilz, sand, tack cloth and a high gloss oil based paint!

Gorgeous!

This was a tough one to let go! I took it to 410 Vintage at around 3:00 Tuesday afternoon and they texted me at 5:00 that it was sold....I'm so glad someone else loved it as much as I did!

These vintage pieces can be brought back to life with a little elbow grease...if you can find one, don't let the grungy old finish and dingy hardware deter you! You won't be disappointed!


Funky little chair makeover and a few upholstery tips....

Another auction buy that languished in the garage for months until I pulled it out and thought..."Hum, I kinda think that is cool!"

It may not LOOK cool, but it is a funky little chair...and I like "different." Not really my style (Hollywood Regency maybe?) but since my style is "eclectic," I can find a place for it! 

I'm not sure exactly what wood it is...my guess is walnut. But the finish was the typical dark stain with black flecks I see on a lot on furniture from the 70's...not really attractive...


After I stripped all the old fabric, I used my 1/2 and 1/2 mixture and stripping process to strip the old finish and stain...then I applied 4 coats of tung oil finish (no stain)! I like the warmth of natural wood.

As always, if one comes in, one must go out. So this little chair in my office was moved upstairs into the guest room until I have room in my space at 410 Vintage! I bought it 25 years ago at an estate auction and it was my first real reupholstery project.

Fabric is always a tough one for me...maybe because I know how hard it is to reupholster a piece and I don't want to do something I will tire of and have to redo. I found several fabrics I thought I might like, brought samples home and did what I always do...stare at it for a few days. In the end I went with this fun but somewhat conservative "geo" pattern...I like that it is relatively neutral and could be spiced up with a pillow or throw...

And spice it I did. When I was looking at fabrics I found an awesome pink velvet. I was briefly tempted to cover the chair in the fabric but I knew it would be a "fad color" I would later regret. But I couldn't stop obsessing over the pink so I decided to find a pink accent pillow.

Naturally, I couldn't find a pillow I like so I ended up buying a little bit of the pink velvet and made a little pillow. Instead of cording, I decided to go with tassels on the corners but couldn't find any I liked...so I made little "tufts" out of feather cording...just too stinking cute!

A simple but fun little detail that brings in the pink I was drooling over without the huge commitment of covering an entire chair in it! I would advise taking this approach on all "big ticket items." Couches, chairs, bedding...keep them neutral and add the "fad" details and colors with pillows, throws, curtains and rugs...accents that are relatively inexpensive to change out when the color falls out of favor in a few short years!

By the way, you may have noticed I changed the curtain...I went with white just to lighten the corner a bit!

I could never post a good tutorial on how to upholstery YOUR piece of furniture...there are so many great video tutorials online for just about any style of chair/couch/ottoman/etc and I strongly suggest you do a lot of research before you start your project. Find a tutorial that best suits YOUR needs.

I will share a few tips that will make your job a tad easier. It doesn't matter if you are recovering a chair or couch or ottoman...these rules apply!

First, learn to sew. Every DIYer should know how to use a sewing machine if for no other reason than to sew pillows or curtains or do basic upholstery or even hem a pair of pants. If you don't know how to sew a straight stitch, learn! I was fortunate that my mother made me take sewing lessons when I was young but I know a lot of local county extensions and hobby stores offer cheap (if not FREE) lessons! Take them...learn! And don't think you need an expensive sewing machine...I have a basic cheap machine that is at least 30 years old! 

Start simple. Before you tackle an heirloom wingback chair with expensive fabric, try something simple like this ottoman....

The drop cloth material I used was relatively inexpensive and super easy to sew. And I used a premade bias tape for the cording.

Take your time! I always think a project will take a lot less time than it actually does...so know that reupholstering anything isn't a "rainy day project!" Maybe a rainy WEEK...but deconstructing alone will take time and a lot of patience and you want to do it right!

Take LOTS of pictures while you deconstruct! Just snap random pictures as you strip the piece. If you are like me you THINK you will remember, but you won't...and you will find yourself sitting there wishing you knew how in the world it was originally put together. So take pictures!

It is always good to have a visual reference!

TRY to keep the pieces of the old upholstery intact so you can use them as a pattern for the new. If the old is really stinky and ewwwy, make a "pattern" with them out of butcher block paper or old newspaper. Make sure you label each pattern piece or old fabric so you know where it goes! And keep in mind that the fabric you remove has been trimmed...so add a few inches on each side of the piece...you can always trim after it is attached!

If you are going to strip and stain or paint, do it after you strip the old upholstery but before the new! 

Take time to make repairs! Make any repairs that need to be made BEFORE you start painting/stripping/staining and reupholstering! Do not spend the time and money reupholstering a chair if it wobbles or needs new strapping. If you don't know how to repair something property, Google it! Or email me! And remember, glue and clamps are your friend...not silicone, not sheetrock screws, not nails. Do it right or you are wasting your time!!!

Remove ALL the old upholstery nails and staples...all of them. And honestly, I have bought every tool on the market to make the job easier and I always revert back to a plain ole' flat screw driver, a hammer and a pair of good needle nose pliers!

Which reminds me...wear shoes! I don't care how careful you are, those nails and staples fly all over the place and you WILL find them with your bare feet!

Speaking of tools, I think I have tried every electric and manual stapler on the market. I have found that MOST will not set a staple flush or securely. So now I use a pneumatic stapler, similar to this one.  Best. Stapler. Ever!!!!  But word of warning...don't make a mistake and don't plan on recovering the piece any time soon because those staples aren't coming out!

Alway cover old batting with new. Even if the old batting seems to be in good condition, cover it with new batting. Always! If it has old horse hair stuffing replace it...if it has old "strapping," now is the time to replace it!!! On a few chairs, I have actually stripped everything down to the bare wooden bones and added new everything. Trust me, that is better than getting it all back together and discovering that the seat still sags or is lumpy and it smells!

Buy enough material! When you buy material make sure you account for any piping (welt cording) you might have to make. You can buy premade cording, but if you are going to make it out of the upholstery fabric it MUST be cut on the bias...in other words, diagonal across the fabric. To give you an example, on this little chair, I needed less than two yards for the seat and back, but I needed another yard just so I would have enough to make the welting. Again, google welt cording/piping and you will find great tutorials that will show you exactly how to make it. 

Make sure you have enough fabric to complete the project before you start. Lay ALL your "pattern pieces" out on the fabric and account for the welting before you start cutting. Nothing is worse than getting half way through the project only to discover you don't have enough fabric...and you bought the last bit of it! If all else fails you can always use two different fabrics on the project like I did on these little tuffets...but PLAN for it!


Google, google, google. I learned a lot at the elbow of my dad but today we have the world at our finger tips and you can find a good tutorial for just about any project...even upholstering furniture! I always advise watching as many tutorials as you can find and use the one that makes the most sense to you and your project! Watching DIY tutorials is also a great way to decide if you even want to tackle the project...advisable before you buy a wingback chair at a garage sale for $20 with the intent of "learning to upholstery!" 

Until next week when I hope to share Matt's entry makeover...


Entry cabinet/console/buffet makeover...

Occasionally I will buy something at an auction for resale I THINK I won't need to do anything to! Example...this nifty "primitive" cabinet/console/buffet...

It could be used for many things...hence the cabinet-slash-console-slash-buffet.

It would make a darling entry table. Or a tv console. Or even a small dining buffet.

The wood is really rustic and rough...nifty iron hardware.

But alas, no one shared my vision and it sat in my space at 410 Vintage for MONTHS!

Last week I did a little reset...technical word in the world of retail for "move stuff around." Since this little cabinet/console/buffet had been hanging out for quite some time I decided to bring it home and give it a little facelift.

Darker gel stain on the top and a grey/blue chalk paint and distress on the base.

I think it is darling and HOPEFULLY someone else will agree! 

Another example of how easy it is to change things up a bit with just a little effort!

Another Drexel Accolade addition to the family....

It has actually been in the garage for months...but when I needed a large piece in my space at 410 Vintage Market and dug it out,I couldn't bring myself to turn loose.

A Drexel Accolade dry bar/server. The top actually flips open.

It isn't the first piece I bought for resale that wormed it's way into my heart...no secret that I love mid century pieces.

But this Drexel Accolade bar is more of the "Hollywood Regency" style. Identical to this little Drexel side table I painted with a high gloss lacquer and love in my den....

There is a good chance I will paint it if I decide to keep it...for now I have shined up the brass hardware and will leave it at that.

Over the years I have snagged some amazing bargains at auctions and on Craigslist...a little DIY magic and they are stunning additions to any home!

This Drexel coffee table....

My growing collection of mid century dressers...

This one is Matt's...I just don't have any more room!

My never ending collection of side tables!

I started collecting Lane Acclaim tables years ago...I think between the kids and I we are up to 10! That doesn't include the 2 walnut Lane coffee tables and the end table I just refinished for Katie and Matt!

Chairs...

Odd little bookcases are always fun!

If you walked through my home you might think I lean more towards the "traditional" side of home decor at a glance...but all these pieces have blended in to created a cohesive "eclectic" style. This "style" of home decor allows me to infuse pieces I love without worrying too much about whether I am breaking a "decorating rule" for a specific style!

So...back to the amazing Drexel Accolade console/bar...

In my opinion, there is too much "wood tone" in this space...I absolutely love the wood grain on this piece but there has to be a good balance...it just doesn't feel "balanced."

So there is a good chance that IF it stays, it will get painted. Again, that is a big "if." I think I have had no less than 5 different buffets and hutches in this space at one time or another and I always end up moving them out and moving the table back against the wall...as I mentioned before my toes tend to find anything out of place, and since the dining table has been against the wall for the better part of 19 years, it may not work well in the middle of the dining room where it REALLY belongs!

We'll see...that is one of the beauties of learning to DIY furniture...you can buy it cheap, paint, upholstery or refinish it and promptly move it out if it doesn't suit your needs. Without the guilt of having to live with something you hate because you paid a fortune for!!!!

OR it can find a permanent home where it can shine for another lifetime!

Another campaign dresser makeover!

If I find one, I'm gonna buy it! A campaign dresser!

This one isn't a "vintage" campaign dresser...probably an imitation but sweet all the same! Well...it wasn't when I bought it....

Structurally it was in great shape but the finish was definitely lacking. A little KSTP (Kilz, sand, tack and paint...high gloss white lacquer), scrubbed up the brass hardware, and presto....

Again, this one wasn't a REAL vintage campaign dresser...but that didn't stop someone from buying it 1 hour after taking it to 410 Vintage.

This, my friends, is a REAL campaign dresser!!

I have already scrubbed up the brass hardware (no tricks there...Brasso, Brillo and A LOT of elbow grease.) I had to order a few replacement hardware pieces...holy cow those little brass doo-dads are expensive (found them on Etsy.) I sprayed on Kilz and sanded it down. Now I just need to apply a few coats of white lacquer...I can't wait! I will make sure I share it when it is done because I know it will be beautiful!

PORCH MINI-MAKEOVER....

Now that Matt has settled into his new house, we have started on a few little projects that make his home a little bit more...well..."him." (If you search "Matt's house" on this site you can will see several of the projects we have worked on!)

The back yard was a total disaster...lots of trees and years of neglect. I wish we had been smart enough to take before and after pictures of the side yard we have been working on. We added a few flower beds, raked up a truck load of rocks and brought in four truck loads of dirt and mulch. We seeded with fescue. I know it will probably burn up this summer but he was so excited to see the little guys sprouting! We dug up some of my neighbor's lirope and transplanted it in his new flower bed....repurposed the stones that were originally used as a "pad" to make a stepping stone path....a new little Japanese maple. I think it will all be wonderful when he is finished. My yard is an oasis...I have remind him it took 19 years of hard work to get it that way!

The back patio was a tad on the blah side. I did remember to snap a few pictures with my Iphone before we added just a few little touches.

We changed out the flush mount "boob" light for a pendant light...seriously, who puts a dinky flush mount light on a vaulted ceiling?

Threw down a pretty striped rug and added a potted palm and hanging basket. Nothing earth shatter but just a few simple touches to dress the space a bit!

He still needs to change out the seat cushions and eventually I would like to add a baker's rack or build a potting bench...maybe add some kind of wall decor on the wall! We could paint the wood railing but he is determined to eventually add a large deck off the patio so no sense in putting out the effort for the time being!

A few little touches here and there can add personality and style to a space.

It takes time to make a house your home... 

Just ANOTHER mid century dresser!

I can't help myself...when I see one, I just gotta have it!!!

A mid century bedroom set...Fashion Trend by Johnson Carper. I couldn't find a maker's mark anywhere on the set so I googled "mid century dresser" and found a picture of one like it!

(Look at the curves on this lady!)

I ended up having to buy the entire set at an auction...dresser, chest of drawers and full size bed frame. I sold the chest to off set the cost of the dresser...which is the piece I really wanted! I have a full size bed in  Mitchell's room so I might use the bed frame in there.

I decided not to strip and oil the drawers...they really are in excellent condition....I wiped them down with Restor-a-finish just to clean and brighten a bit. I painted the "box" (KSTP...high gloss white) only because the top was laminate... I did that with Matt's dresser and I love how it turned out!

My original plan was to put the new dresser in the guest room until I get this one back from Katie in a year or so...

But then I got to thinking...why would I hide a beautiful piece like this in a guest room? 

So I took the dresser out of my room and put it in the guest room and put the new one in my room!

LOVE!!!

The only other thing I have added to my "proper" guest room is this little rattan table (bought two and sold one) and the magazine rack from the living room. 

Again, you will not find AFFORDABLE new furniture that is built as well and with woods like walnut, teak, rosewood and mahogany! There is a reason vintage and antique furniture have managed to survive decades of use!

When I walk around my house and look at some of the beautiful vintage pieces I have collected I am amazed at just how little I have paid for them. Keep in mind MOST were in much need of a little care and attention but if you are willing to roll up your sleeves and do the work, you can create a home filled with beautiful pieces too! 

That is why I have this blog...to show you just how easy it can be!!!

Stop drooling and start doing!!!

Gel stain tutorial on table makeovers...

I did it again...dove head straight into a project without taking a "before" picture. But at least this time I got an "inbetween" picture!

These little tables were simple makeovers. I picked up the side table at an auction a few weeks ago. Got it for a few dollars because, well, it was nasty, the color is pretty putrid AND the top had come unglued.

No biggy for me. I glued and clamped the top, then I sanded off the old finish on it. Yes, you heard me right, I sanded it. Two reason...first, I got glue on the top when I repaired it and stain will not adhere to glue. Second, it is solid wood and I knew I couldn't do a lot of damage to it. Light sanding...220 grit! Just enough to remove the old finish and glue residue.

I got the drop leaf table from my neighbors. I told you I am the dumping ground for neighborhood furniture...it just "appears." Again, the top is solid so I gave it a light sanding.

I knew I wanted to paint both tables but as always I have to have my fix of stained wood. So I used gel stain on both tops. 

Gel stain is SUPER easy to apply IF you use the right technique and product. As I have said before the ONLY gel stain I will use is General Finishes. It is not a brand the big box improvement stores carry so I usually order mine on Amazon. I have tried other gel stains and have not been happy with the results. The General Finishes brand never disappoints. I have used both the Java and Brown Mahogany colors.

I am going to share how I gel stain...it is a super easy application process and perfect for real wood or even that cheapo fake stuff you find on the ends of cabinets. Since it goes on fairly translucent, the wood grain (real or fake) will show through.

I have used this process on cabinets, tables, dresser tops and drawer fronts....some I have stripped down to bare wood, others I simply applied it over the existing finish.  It is a great process to use on any project where you want "stain" but know you might not get a good result by completely stripping the piece and applying penetrating stain!

First step for ANY makeover (after repairs of course)...give the piece a good cleaning. In this case, since both tops were solid wood, I also gave them a good sanding. Sanding is NOT necessary but you want to make sure that any old finish is stable and somewhat smooth. So if your old finish is flaking or a bit rough, sand it smooth with 220 grit paper.

You will need....

The gel stain...again, I ONLY use General Finishes. A quart will cost you around $30+ but it seriously goes a loooong way!!! If you just have a small project, get a pint. I have found that it doesn't store well.

The gel stain top coat...in this case I used the GF Poly wipe-on top coat. But I have used a spray on Polyurethane and Polycrylic and they work just as well. 

Disposable rubber gloves. I always have those on hand. Just the cheap latex gloves you buy in a box so you can toss when finished.

Old athletic socks. Again, I keep a stash on hand. Any time I find old socks at thrift stores or garage sales I buy them. They are perfect for applying any type of stain or finish and I can toss them when I am finished.

That's it...a relatively short list of supplies!

The trick to applying gel stain is to remember it is suppose to be somewhat "translucent." Put on a rubber glove, then an old sock over the glove...dip you finger tips into the gel stain and wipe the gel stain on the piece with the grain. The first coat will look like crud so don't try to get perfect solid coverage! Just wipe it on LIGHTLY WITH THE GRAIN....do not "glob" it or apply it thick...it is NOT paint. I usually wipe it on, then use the clean side of the sock to give it one final wipe WITH THE GRAIN...working edge to edge. 

THE FIRST COAT WILL LOOK LIKE CRUD!!!! I can not stress this enough...you are better to go light than to try to make the first coat look decent. It is not going to! If you can't see the grain through the coat of stain, it is WAY to thick.

Now, let that dry over night. Then do it again. New glove, new sock. Wipe on a second LIGHT COAT! The second coat will look a tad better, but not great. THAT IS OKAY. Keep it light and translucent! 

Let the second coat dry over night. Then with a new glove and sock, apply the third coat. NOW it should look good. The stain should allow the grain to show through!

If you feel like you have messed up....too thick, too streaky, just don't like it...you can still wash this stain off with mineral spirits if you haven't applied a top coat! 

Let the third coat dry overnight. If you are happy with the look, apply your top coat. Again, I used the GF gel wipe on poly on these tables...super easy to apply. Rubber glove, sock, wipe on. As simple as it sounds. You may want to apply 2-3 coats of the finish...especially on tops or cabinets that get a lot of use...just make sure you wipe it down with 0000 steel wool and tack cloth between coats. You will get a nice smooth finish that way!

Presto, bingo! This really is an easy application IF you don't overthink it and try to get a decent looking finish on the first and second coat...if you do, you will put the gel stain on too thick and I promise you won't be happy with it! My neighbor, Tammy, tried this process on a little side table...and sure enough she put the stain on too thick...it did not turn out well! Each coat should be light and "translucent." 

After I let the top coat dry well for a few days, I painted the rest with chalk paint...a light distressing with 220 grit sand paper and sealed with a spray on polyurethane. Again, sometimes I use polyurethane, sometimes polycrylic. I find that the urethane tends to "yellow" and give the piece a bit of an aged look...which is kind of what I was going for here. The polycrylic is a true clear coat and won't alter the color of the paint or yellow with time.

(As you can see the sun was very bright the day I tried to get decent pictures of these two tables...trust me that was the ONLY day this past week that it wasn't dreary, raining or cold as crud. I even had to cover my hostas this week to protect them from a freeze...and they are predicting another freeze this weekend...grrr!)

My recipe for chalk paint is 5 tablespoons of Plaster of Paris, 3 tablespoons of water, mix well then add two cups of flat latex paint. I usually paint two thin coats, then sand and seal.

Cute as a bugs ear and ready for another generation of use!

This week I decided I am getting too old and tired to paint my own house. I actually hired someone to paint my living room, kitchen and den! Ten years ago I would never have paid someone to do something like that! 

But just the process of getting ready to paint creates a mess and is exhausting!

This, my friends, is the reality of home improvement...normally we bloggers only share the beautifully styled and perfect "after." Truth is, most projects make a mess!

I'm a pretty clean person...or so I thought until I moved things that haven't been moved in years...yuck! 

I'm painting my living areas the same color I used in the master bedroom and guest room....SW Nuance. I'm a little nervous about painting these rooms a different color...I told you, change is hard for me. But I have lived with this color in those two rooms and I THINK I will like it! The painter will be here around 10 so there is no turning back now!

Hopefully the weather will take a turn for the better and I can finish and share a few fun projects I have waiting in the wings next week!

Until then....