My "life quandary"and FINALLY the shop reveal....

IMG_1704.jpg

Occasionally I go back and reread some of my posts from the last eight years. Man i have transformed some awesome pieces of furniture and spaces!!!

Now that I am “semi-retired” I have been trying to decide what I want to do “when I grow up.” After a year of binge watching “Gilmore Girls” and finishing the little projects around this house, I desperately need something to do.

I still haven’t decided what.

I love refurbishing furniture but honestly my body isn’t exactly cooperating these days. After just one day of projecting, I am usually hobbled for at least two days.

I don’t like to golf, I don’t knit, sewing is NO WAY JOSE, I raised four kids so while I will eventually help with my future local grand kiddos, I don’t think I want to take them on full time.

Volunteer…an option, but where. I love animals but if I volunteered at a shelter I would have a house full of critters. I would love to work at a zoo, but sadly we don’t have one!

Sick kids…they make me sad. I just don’t know if that is something I could do.

Old people. Hum….to close for comfort?

A real job? Nice idea but I don’t want to work nights, weekends or holidays. Brian and I like to take little vacations so I need lots of flexibility. Not exactly an ideal employee.

Besides I have NO idea what I want to do and I don’t want to spend 20 hours a week doing something I don’t enjoy.

I am blessed. I was blessed to own a business for 23 years that darn near killed me but allowed me to care for my family and “semi-retire” at a relatively young age.

So what do I do?

This blog is a wealth of information and I am sure there is a way I could turn it into a “business.” But truthfully, I like sharing my experiences with those who need the guidance. And I don’t want to make people pay for that help.

Which bring me back to my first love….building, creating, repairing, helping, sharing, instructing…my blog logo says it all….I hope I can share with you a passion and desire to easily create a home you will love!

All this whining and moaning to finally share one of my favorite things about this house…the shop. A space I have wanted for decades, finally got, and now really can’t use to it’s full potential!

For YEARS I worked out of my garage…what a mess. When I saw this house had an amazing shop I was stoked! A place to keep all my tools and work on a few small projects and I would still be able to park my car in the garage.

It is insulated, it has electricity, large doors, windows….the only downside was it was SERIOUSLY ugly!
Like baaaaad ugly.

IMG_0008.jpg

As with every inch of this house, I could see the potential.

I knew I had to make it pretty!

IMG_1703.jpg

The windows were old aluminum windows so those had to be replaced. I even moved the front one to the left to make it more “aesthetically pleasing.” New light fixtures inside and out were a must. The doors were aluminum and vinyl siding and not real attractive so I did just enough to make them look a little better. New cedar posts, some shutters…

And the biggy,,…brick. No I am not a brick layers so I was super fortunate to find someone who would take on a few small projects. Finding brick to match the brick on this 22 year old house was dang near impossible, but I was able to find one that was close enough and it made all the difference in the world.

We went from having a big ugly vinyl shed in the yard to having a super cute building.

The inside…it’s a storage shed in spite of what it looks like from the outside. Lawnmowers, tools, yard stuff…nothing fancy. I love the workshops that are all perfect and spotless….but it is a shop/storage shed, plain and simple. (Note Brian’s big fancy grill/smoker….God forbid it sit on the patio and get wet like a normal grill)

As I shared HERE when I spruced up the storage shed at our old house, I firmly believe storage sheds should enhance your space…not just be a big eye sore where you store you mower and shovel.

GET CREATIVE…make it pretty. Take a little time to doll it up and make it something that is aesthetically pleasing rather than just a huge eye sore in your back yard. Pinterest (my “go to” inspiration") is full of outdoor buildings that have been transformed into something other than just big ole’ eye sores!

No, you do not have to do something as fancy (or expensive) as mine…but a Pinterest search and a little “oops paint” can really make a difference.

Do a little “storage shed” search, then let your imagination run wild. Remember, we have lived in this house almost a year and I am just now sharing…transformations don’t happen over night!

Painted bathroom cabinets...

As I mentioned in the first two reveals of my master bathroom (HERE and HERE), it is one of those ever evolving rooms.

This is where we last left off…

…the addition of the operable windows. I can not express how much I love these.

The cabinets….not so much. They are actually kind of an off-white-yellowed-ick kind of color. And the hardware was pretty blah and cheapo. Cheapo is great if it has just a tiny bit of character, but these didn’t.

I debated changing out the drawers and doors to mission style doors but honestly I don’t want to spend the money on them right now. Someday I may do some major magic on these cabinets but for right now I just want to give the room a more “polished” look.

Paint…hum. An inexpensive way to give a space a little facelift.

So the debate raged…white or color…and if color, what color.

You would think as much as I do this kind of thing paint color would be no big deal for me.

WRONG!

This is just a few of the paint samples I brought home.

This is the trick to finding the right paint color. Go to the store and pick up every sample you THINK you might like…then take them home and look at them in your light. You would be surprised at how much a paint color can change in different lighting. If you still find yourself drawn to 2-3 colors, buy sample pots…they are well worth the investment. Also, if you are torn between a light color and just a tad darker, go light. First, the bigger the area, the darker a paint will look. Second, if you still think you want darker you can always go back and have them mix it the darker shade. Once you have the darker shade mixed, you really can’t do much more than buy another gallon.

I finally landed on one I think I kinda sorta like. I ordered simple brushed nickel hexagon hardware…inexpensive but with a tiny bit of character.

IMG_1656.JPG
IMG_1657.JPG

The two vanities took all of about 1/10th of a gallon of paint. I should have bought a quart but custom colors tend to be a smidge off in the quarts.

All in all I’m not UNHAPPY with it, but not sure I am over the moon thrilled. For the time and money you can’t beat slapping a coat of paint on a wall or a piece of furniture or cabinets to change the entire look.

Now, I want to share my latest “find.” I am, as I have said before, “old school.” Primer and oil-based on furniture, trim and cabinets and latex on walls.

I have experimented with a relatively new (to me) product and I have decided I kind of like it.

It is a “hybrid” paint….will go over latex OR oil-based without the need to strip or prime. I do knock off the shine and any rough spots just a tad with 220 grit sandpaper and wipe it all down with tack cloth, but other than that it takes very little prep. And the super cool thing is it doesn’t matter if the old paint is oil-based or latex…usually that matters A LOT. This hybrid paint needs no additive, brushes on super easy, “levels” beautifully (which is great if you are brushing or rolling on wood), cleans up with soap and water and so far seems super durable.

The only problem I have with it is it seems to be a tad thinner than most paints and you need to watch carefully for drips and runs…but because it levels so nicely they are easy to manage!

Both Sherwin Williams and Benjamin Moore carry it and I have used both…with great results.

So if you are not sure what type of paint your trim/cabinet/furniture is and you don’t want to go to all the trouble of priming, try this product. So far, so good.

So that’s that for this bathroom…for now. I really don’t have any more MAJOR changes I want to make in there. But knowing me, I’ll find something. This week my project has been my utility room. A necessary change that I will share next time….

static1.squarespace.png

Patriotic Wreath....

PATRIOTIC WREATH

PATRIOTIC WREATH

I saw this wreath on Facebook and loved it…

IMG_1372.jpg

But as I have mentioned before, I learned the hard way NOT to order from unknown sites and always pay close attention to reviews….this one got bad reviews on Amazon.

So I decided to make one.

First, I had to create the “bunting.” I decided to sew together three fabrics I found.

IMG_1394.jpg

I also picked up all the goodies I wanted to adorn the wreath with…

IMG_1479.jpg

….ribbon, floral pics, the wreath. Since Hobby Lobby only has select stuff on sale every other week, this can take some time. For the record, the grapevine wreaths never go on sale, but they are only around $9. For that matter, if you have a wreath you are no longer in love with, deconstruct it and reuse it, or pick up a cheap one at a garage sale!

IMG_1450.jpg

I bought two yards of each fabric, cut the widths in thirds, then sewed each together. I actually got three buntings so I made a few extra wreaths. Two yards would be 72” so you could also use a table runner or a long scarf if you want to avoid the whole sewing thing.

I folded the fabric in half and kind of gathered it by hand then laid it onto the grapevine wreath….

IMG_1481.jpg

After getting it pulled super tight, I secured it with a zip tie. After adjusting it by hand I hot glued the edges of the bunting at the top just to give it a little bit more security,

Next I made a spray and my funky bow. I have linked to THIS tutorial several times since I discovered it at Christmas. I LOVE how easy she makes this process! I have now made dozens of these decorative sprays for every holiday, big and small, and I just love them.

IMG_1482.jpg

I made my floral spray and made sure it was the size and fullness I wanted. Then I made my bow. I chose these three ribbons for my bow…

IMG_1483.jpg

These bows may look intimidating, but trust me, the tutorial I linked makes it SUPER simple!

After making the bow, I secured it to the spray with floral wire then attached it to the wreath with small zip ties and floral wire!

IMG_1487 2.jpg
IMG_1486.jpg

I absolutely love this wreath and it will work perfectly from Memorial Day through July 4th! In a few weeks I will swap out my spring pillows on the porch for my patriotic pillows! I already have my red, white and blue candles on the table and last week I swapped out the little ribbon on my welcome sign….

IMG_1451.jpg

All part of my plan to stay festive year round. Who said decorating for the “holidays” is only for Thanksgiving and Christmas.

My bathroom windows are finally installed and the only thing left to do is the brick…but the inside is trimmed and painted and I LOVE IT! Can’t wait to share!

Until next week….

static1.squarespace.png

Twiddling my thumbs...

Sometimes I feel like I am just sitting around twiddling my thumbs…waiting.

Right now I am waiting on the brick guy to come cut the brick so I can install operable windows in the master bath.

Relatively easy project…until I removed the sheetrock and the insulation and discovered that plumbing will have to be moved on one side and a whole bunch of electric wires have to be moved on the other. CURSES!!!!

Always something.

Okay, I’m not really sitting around twiddling my thumbs…while I wait I have been chipping away at a few other little projects, like the little patriotic bow I made for my welcome sign….

Whatever it is, the way you tell your story online can make all the difference.

I shared THIS funky bow tutorial when I shared my Christmas decor. I am going to decorate a tad for every holiday so I made another seasonal “funky bow” for this little Welcome sign.

I also spotted this patriotic wreath online…

Whatever it is, the way you tell your story online can make all the difference.

I really like it but I learned the hard way,..don’t order ANYTHING from an “unknown” online company. And pay attention to the reviews on others…this one got horrible reviews on Amazon.

So I decided to tackle this one myself. I have already started the “bunting”…

Whatever it is, the way you tell your story online can make all the difference.

…which of course entailed by LEAST favorite DIY chore…sewing.

I’ve bought the ribbon and the floral stems and now I am just waiting on Hobby Lobby to have their grapevine wreaths on sale.

Another project is my screened porch. I absolutely LOVE Tasha’s screened in porch! Just stunning!

Mine is much smaller and way less WOW! But that doesn’t mean it has to be a neglected space.

We really only use this space for two purposes…sometimes we sit at the little outdoor table and eat or drink coffee and sometimes I sit out there and read.

I decided to go “fun and funky” and since flamingos are “fun and funky” and all the rage right now, I decided to go with them.

Now keep in mind I think pink flamingos will be kind of like watermelons, burlap and chevron was 5 years ago…EVERYWHERE. Now not so much. So I want to keep that in mind when decorating…don’t spend a lot of money on something that is just a “passing fad.”

Another “funky bow”….

Whatever it is, the way you tell your story online can make all the difference.

Some “fun and funky” throw pillows for my reading chairs…

Whatever it is, the way you tell your story online can make all the difference.

We installed a new paddle fan, painted the little metal table and chair, made a wood top for a metal base I am going to use as a side table and I am waiting on cushions and fabric for the lounge chairs.

Nothing as grand as Tasha’s porch but a few little changes that will spruce it up just a tad.

When I get it all done I promise to share…both the porch and the patriotic wreath.

Until then I shall sit and twiddle my thumbs…..

static1.squarespace.png

Adding glass to an interior door...

IMG_1434.JPG

As I mentioned before there are certain things that made this house instantly feel like home.

Like my master bath….

IMG_0439.jpg

Almost identical to the master bath in my last house.

IMG_4031.jpg

Same backsplash, floor tile, vessel sink, shower tile…right down to the same ole’ shower curtain and rugs. And I am waiting on windows that are pretty much identical to the window I had in my old bathroom. Still not sure what I want to do with the cabinets but I have always liked the stained and open shelving look of the last house…

….who knows. I may do a little cabinet makeover at some point.

My black doors….

after.png

Loved them in the old house, love them here…it was one of the first things I did to make this house feel more like my home.

IMG_0716.jpg

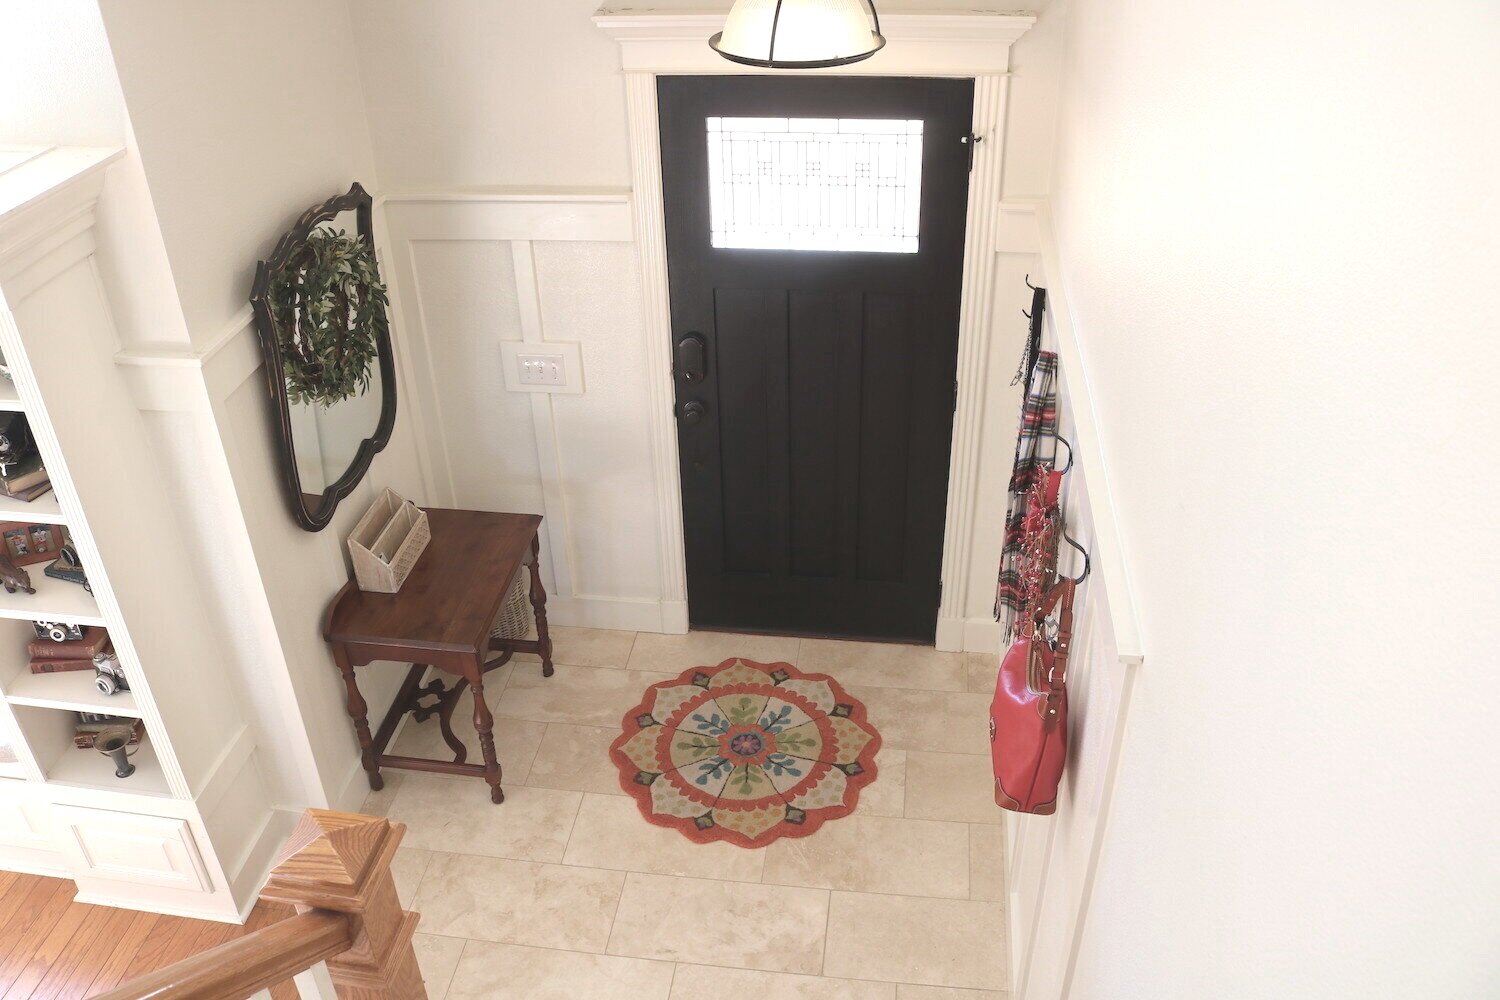
The entry…

IMG_1171.jpg

Same board and batten, same mirror and wreath, same rug…black door…

IMG_5981.jpg

I like what I like…and these are just a few of the design elements I really loved in my old house.

Then there are the paint colors, plants, shelving….sooooo much more!

One project I did at the old house that I always loved was the reeded glass door in my laundry room…

IMG_5030-1.jpg

I absolutely loved this project and it was one time I actually posted a pretty good tutorial. Mainly because when I went looking for a tutorial, I couldn’t find one!

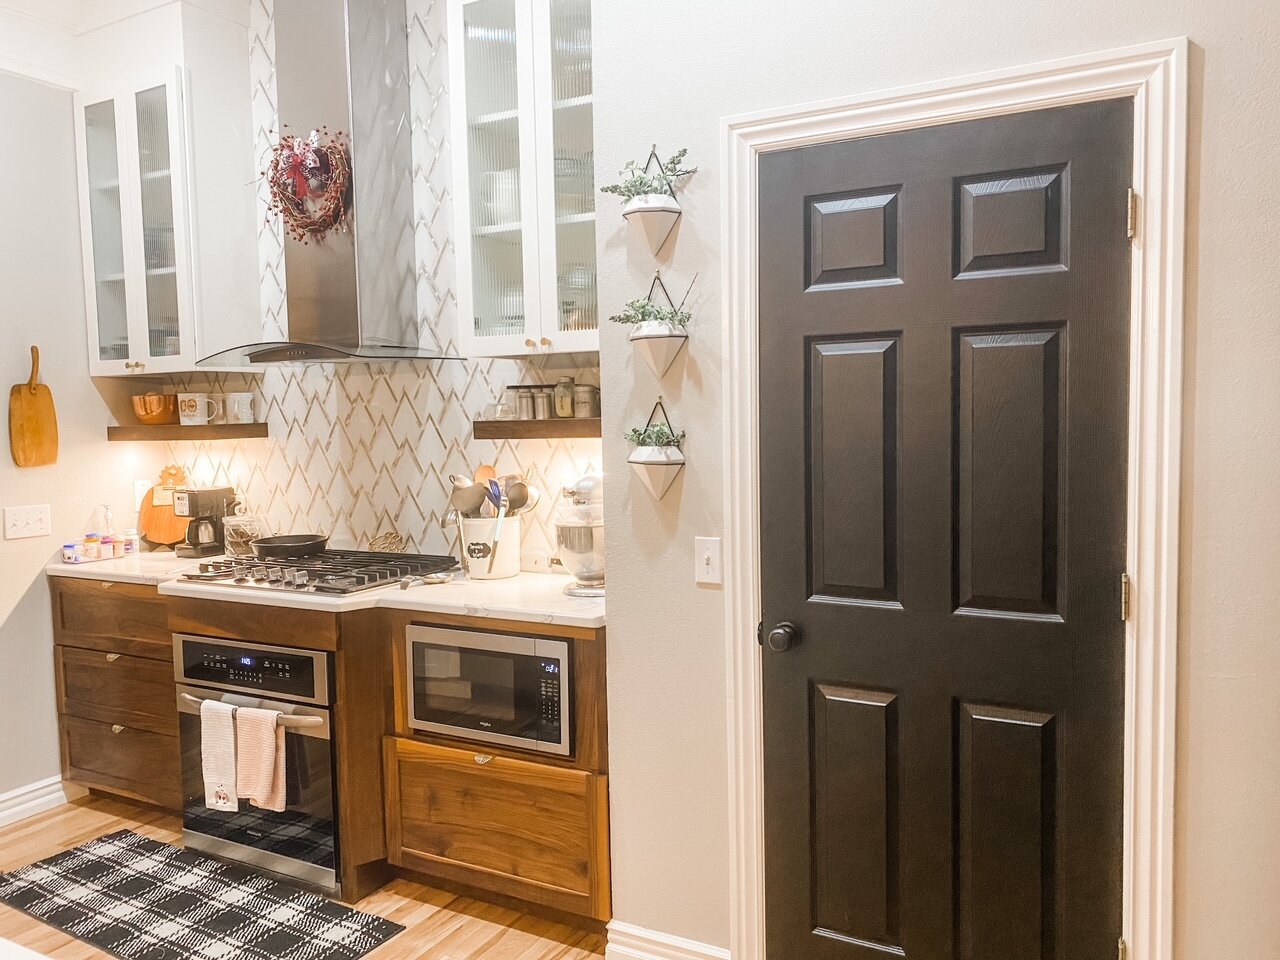
I have known from day one I wanted another door like this in my new house. I debated whether to do it with the pantry door or laundry room door.

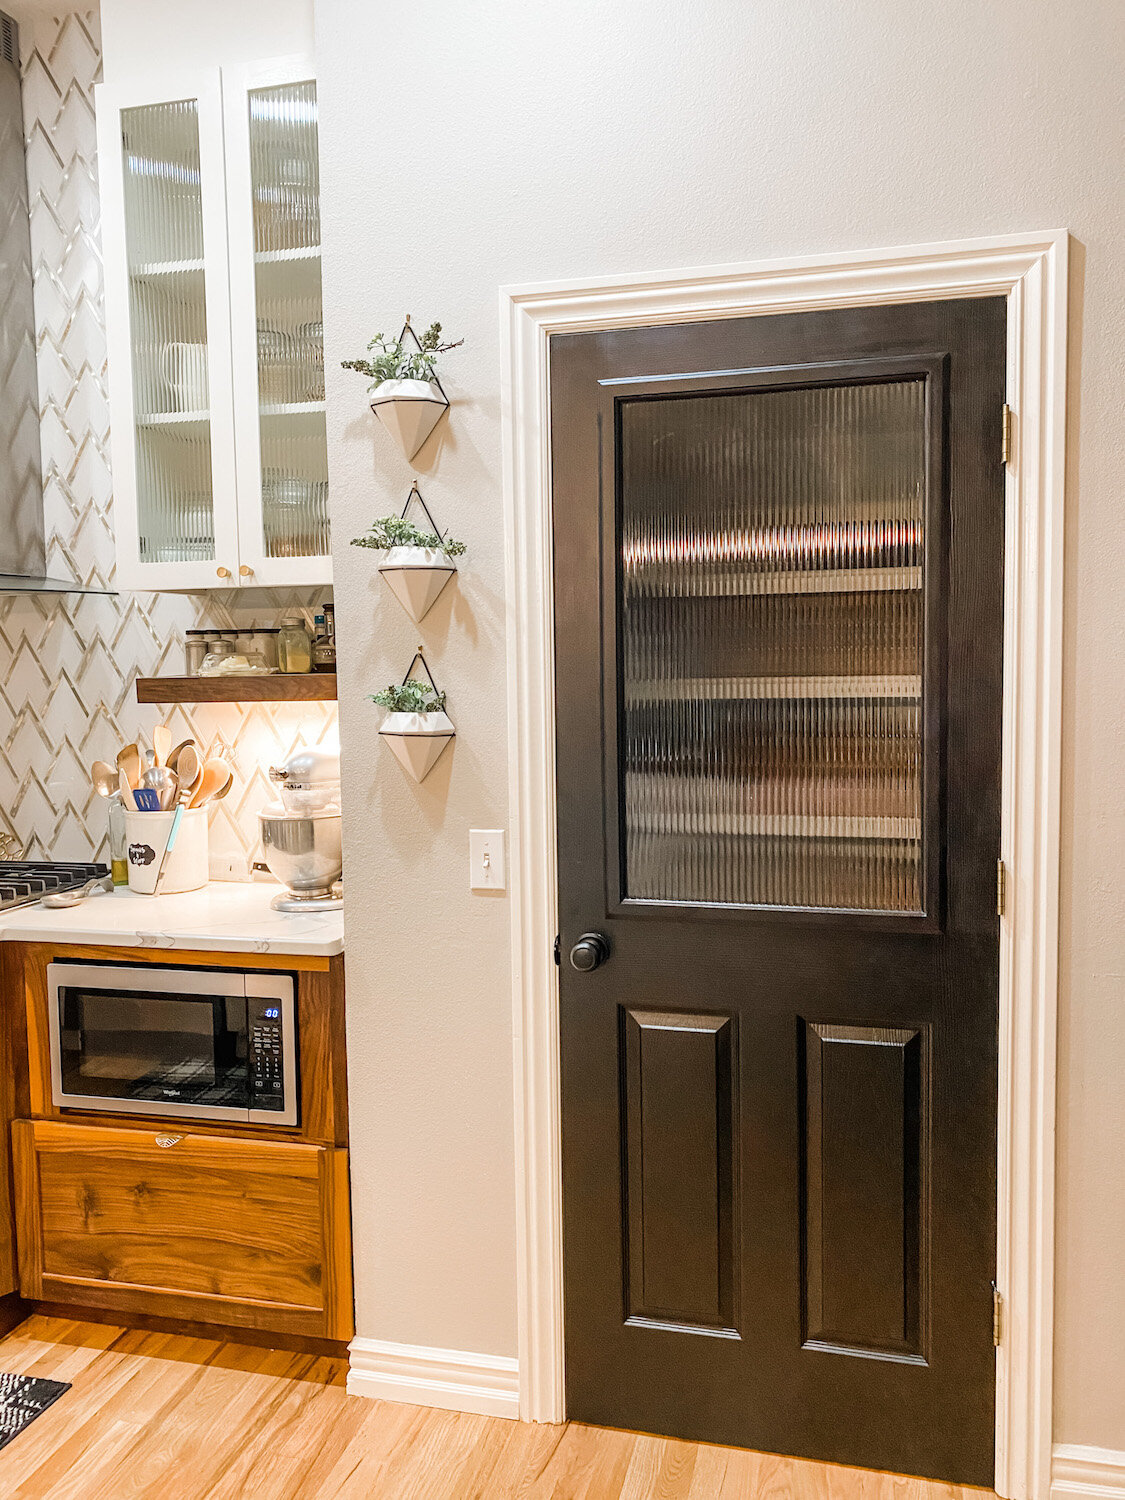
I finally decided to start with the pantry door….

IMG_1005.jpg

Primary because I used the reeded glass in the upper cabinets and I thought it would look good to have matching glass in the pantry door.

IMG_1434.JPG
IMG_1435.JPG
IMG_1432.JPG

I LOVE it! I love this pantry and the door is just the cherry on top! Eventually I may do the laundry room door as well because then the light from the window in the laundry room can filter into the breakfast room. For now I am perfectly content with the one door.
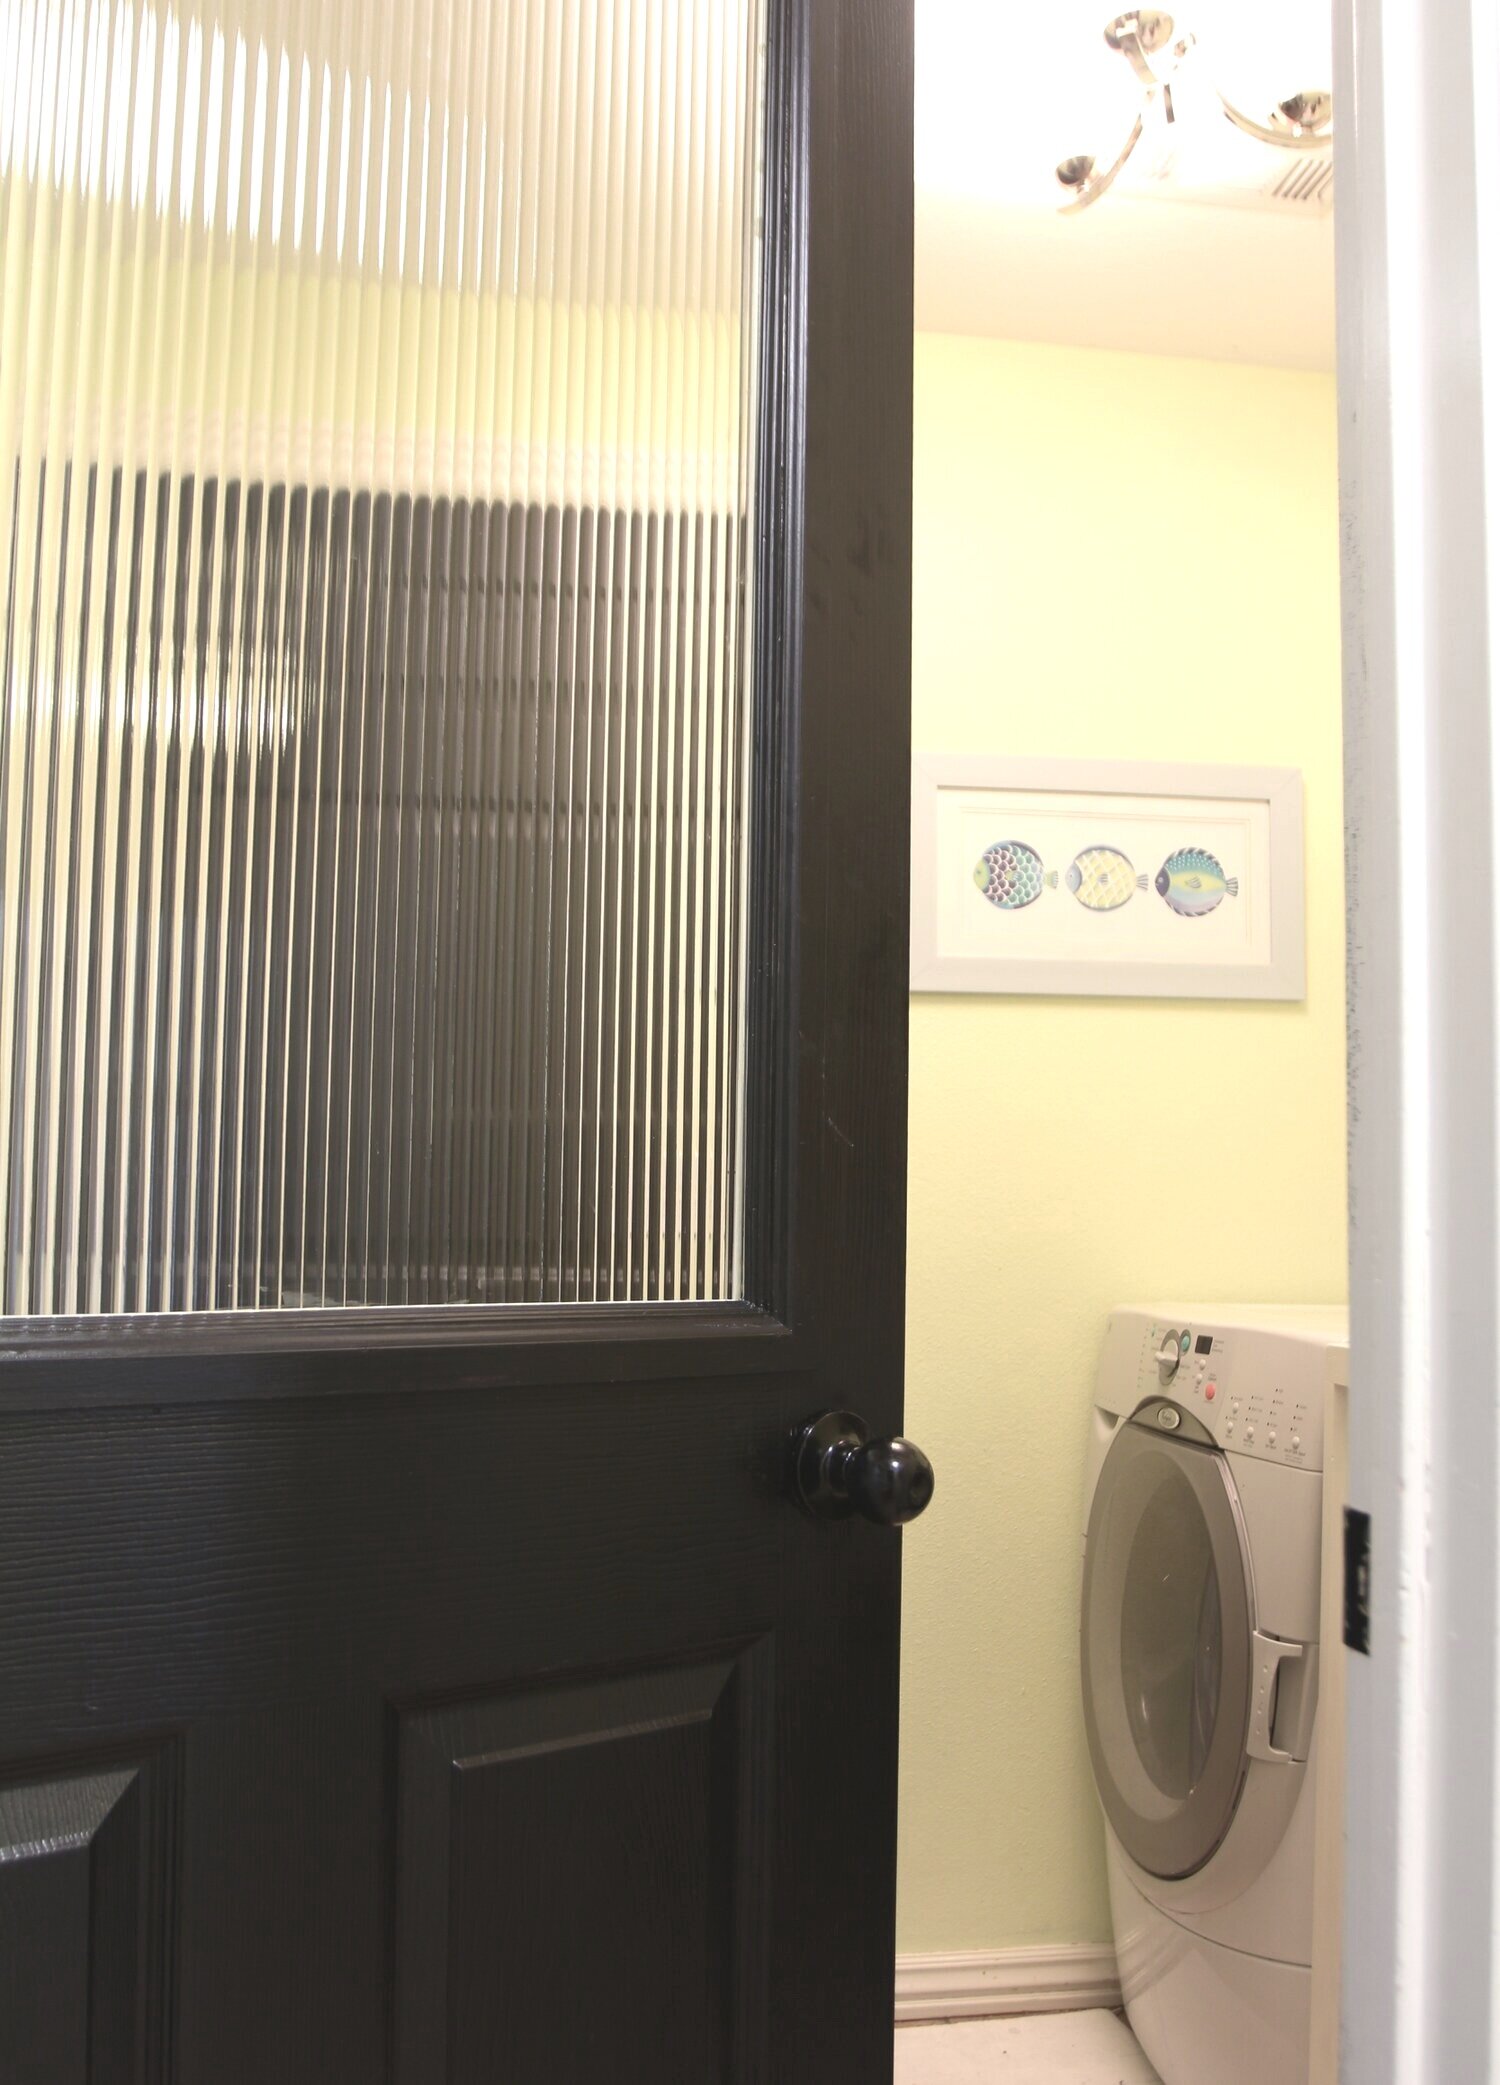
This is a MUCH less expensive option than purchasing a new glass door…and you get the option to choose the type of glass you want vs. having to get whatever “frosted” glass is in the door you purchase. And it is seriously NOT a difficult project to complete.

YOU CAN DO IT!!!!

Master bedroom reveal....

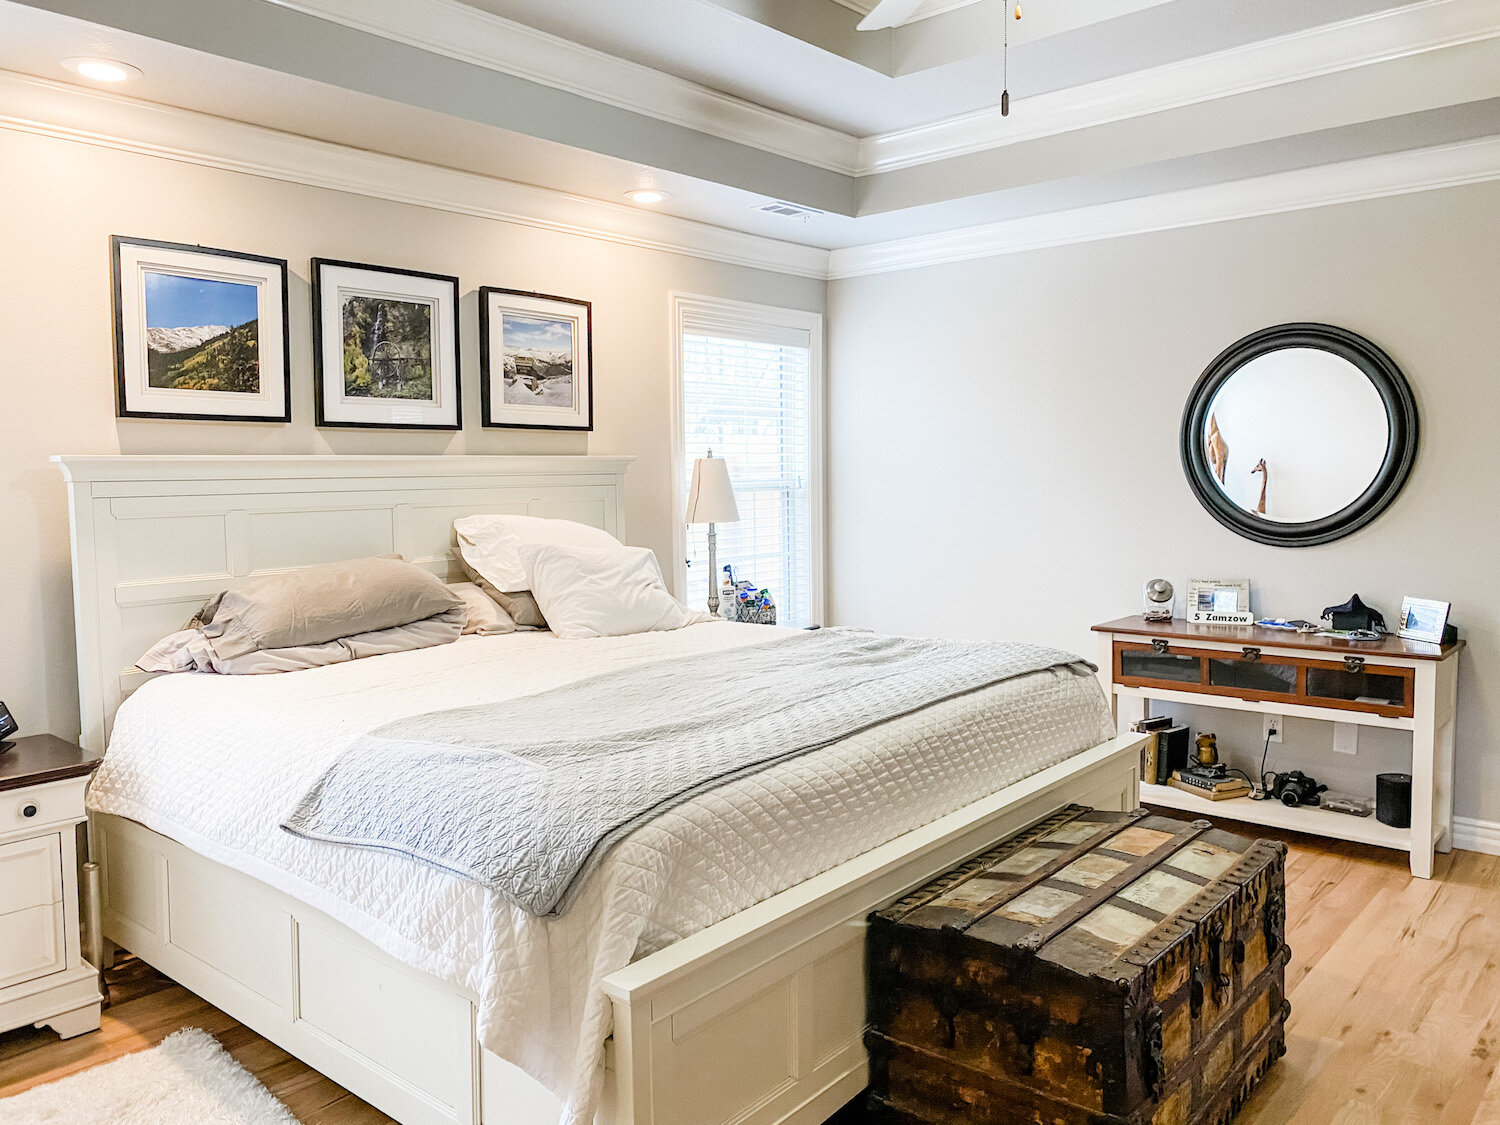
When we moved into this house in September we basically moved our old bedroom into this new house. Nice fit, but zero thought put into the “design” of the room…I basically just put furniture on the floor and a few pictures on the walls.

A few weeks ago my daughter sent me a picture of a well designed bedroom similar to ours.

IMG_0694.jpg

That’s when I realized our current master bedroom has ZERO “design character.” I hadn’t even taken the time to paint all the trim the “new” white.

IMG_1317.JPG

Twenty year old lamps, white and brass paddle fan, stacks of pillows in bleach spotted pillow cases, no curtains, scuffed and dinged furniture, clutter…

IMG_1318.JPG

The picture was perfect inspiration! The push I needed to work this space to it’s potential.

So last week my goal was to to tackle the room. Paint the trim and furniture, new curtains, throw pillows, a few little touches here and there, and declutter.

I painted my bedroom furniture (HERE) almost 7 years ago and while I still love the pieces, they have gotten quite dingy looking. Remember, whites yellow over time and of course there are chips and scratches from normal wear and tear. So it was time to give them a little paint refresher! And the side table tops…holy crud they have gotten nasty. So it was time to strip and restain the tops as well.

Of course the little “room refresh” became a three day chore!

In the end, worth every minute.

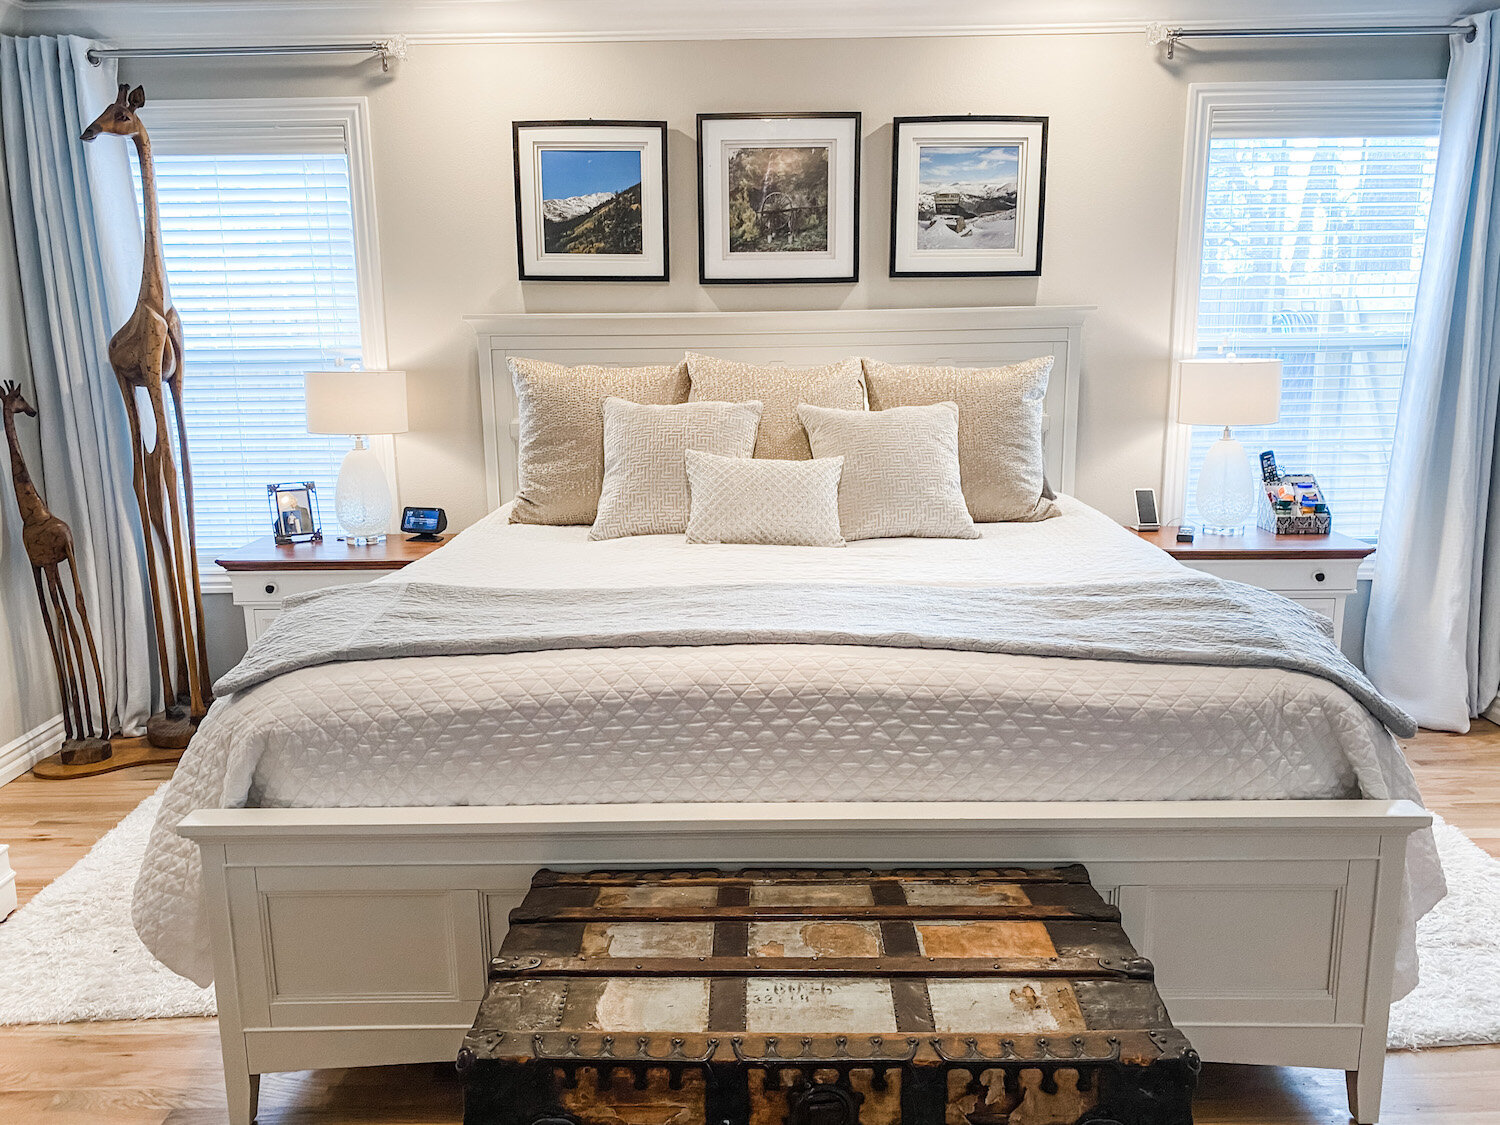
New curtains (I still need to hem them), a little wall art and a plant and new throw pillows.

IMG_1315.JPG

I stuck with my tried and true white bedspread…with a big dirty dog I need something I can bleach every week. It covers a down comforter in the cold months.

I have always loved the larger throw pillows in the guest room so I bought new for that room and put the guest pillows on our bed.

IMG_1308.JPG

(The giraffes? They were made in Africa from the root of a tree…they are Brian’s…they are different…what can I say!)

I painted the high boy and bedside tables and stripped and restained the tops of the bedside tables. ..the dark java stain has pretty much run its course. New lamps (finally!!!)

I love the look of chandeliers in bedrooms but as I have said before, I HAVE to have a paddle fan above the bed. Brandon gave us a paddle fan he took out of his house and it worked perfectly in our room.

Decluttering is always a must in any room makeover so a lot of stuff was put away.

One thing I loved in the inspiration room picture was the bed bench. My trunk belonged to my grandparents so it has to stay. You can still see my granddad’s name stenciled on the side.

I love the basket and pillows on their bench but our big dog uses this trunk as a spring board so that wouldn’t have worked out well. Sometimes you have to change up a plan to fit YOUR life-style (a.k.a. accommodate animals and kids!)

I still want to do more on the “tv side” of the room. I repainted and stripped and stained the top of THIS little side table…

Maybe add a plant…a little more wall art….a wall leaning mirror.

IMG_1306.jpg

It only took me a few decades to style the master bedroom in my last house so again, already working at warp speed here.

My next big project are the master bathroom (reveal HERE) windows…

Oh, it’s happening. I cut big holes in the wall to kind of “force the issue.” Windows are on order and the brick guy is on call.

This was the one thing I neglected to do, and my BIGGEST regret, when I remodeled this house…no operable windows in the master bath. I know from my last house that an operable window in the bathroom is a must. I have ordered two casement windows (the kind that crank out) and hope to have them by the end of the month. I have some plumbing to move (WHY IS NOTHING EASY!!!) and framing to do. These windows will look out at the large flower garden out back…I CAN’T WAIT!!!!

Wait I will though…it has been warm enough to plant a few larger perennials like azaleas and Kimberly ferns, but the threat of a freeze until mid-April prevents me from going all out with the annuals. So I sit…and wait…patiently. Okay, not so patient, but I learned the hard way not to rush the early spring planting! Pay attention to your “last freeze date”….then add a few weeks. Ours is the middle of April, but a few years ago it snowed the first week of May!

Until next week…

A kitchen makeover and painting a refrigerator...YOU CAN DO IT...and sometimes should!

My friends, Tammy and BR, have lived in their home for over 20 years…and like me they are constantly “projecting.” Tammy is the designer ( a.k.a.instigator,) BR is the muscle and craftsman, and usually I am just an advisor and cheerleader.

A few months ago, they started a HUGE project…remodeling their kitchen.

It is a project they have dreamed about and we have discussed and one their 1990s house desperately needed for years!

63279344411__FAECBF4B-CD0D-4684-9D1D-C641426B6A4A.jpg

This picture was taken after they replaced the head scratching paddle fan over the bar with a thrift store upcycled light fixture. MUCH better but as you can see, there was soooo much more to do.

Remove the funky over-the-cabinet florescent lighting and add can lighting, paint the cabinets, replace dated hardware, a new venthood, new tops and backsplash and replace the ORIGINAL almond stove.

A major list on a tight budget.

During one of our “advisory sessions” (again, my advice and opinions are always free) Tammy mentioned she couldn’t wait for her black refrigerator to go out so they HAD to replace it.

With all the other “must have now” expenses, like replacing the dated almond stove with a stainless, replacing the black refrigerator just wasn’t in the budget. They had already replaced the dishwasher and like most people (including myself) the expense of replacing all our appliances at once is often cost prohibitive.

Light bulb moment.

PAINT IT!!!

I know they have “stainless” spray paint but I seemed to recall a product specifically made for painting refrigerators to look stainless. So I started googling and found this product on Amazon….

The product had good reviews. And like I told Tammy, if it doesn’t turn out great, you can still probably sell the refrigerator on Craiglist for a hundred bucks.

So this is what we started out with…a plain ole’ black refrigerator….

IMG_1096.jpg

The first thing I did was read ALL the directions but most importantly, the Amazon reviews. The people who have used the product gave some pretty solid advise.

After reading all the reviews, we went to work. I removed the handles (even if you want to paint them, remove them), cleaned the doors thoroughly, and taped off the water dispenser and inside around the rubber gaskets. One of the sagest pieces of advice was to apply THIN coats…so after the first coat this is what it looked like…

IMG_1100.jpg

While this might not instill confidence in one’s ability to do this, I know how important it is to “trust the process.”

The second coat, a tad better….

IMG_1101.jpg

By the third coat we were all amazed at how great it looked!

BR did a great job of working Tammy’s list…he removed the over head florescent lighting and capped off the cabinets with crown and installed can lights, painted the cabinets and added new hardware,…

…. removed the old venthood and cabinet above the stove and installed a new stainless vent…

IMG_1239.jpg

….and removed the old tile backsplash and installed new.

IMG_1231.jpg
IMG_1238.JPG
IMG_1236.jpg

Quartz counter tops were a little bit out of the budget but they were able to achieve a very similar look with new formica.

Beautiful!

Tammy LOVES her new kitchen and fortunately she loves her “new stainless” refrigerator.

Would she be happier with a brand new REAL stainless fridge? Wouldn’t we all!!!! But this is a prime example of changing an element in a room that will stop the growling (and the envy and frustration) until you can afford to do what you really want to do. I have done it over the years with furniture and now I can say I have successfully done it with a refrigerator.

If you don’t love it, CHANGE IT!!!!

Pantry storage....

Winter has truly arrived and it is literally FREEZING outside…no bad winter precipitation, but frigid temperatures make going outside brutal. So inside where it is toasty warm is where I have been for the better part of the last week!

I started working on my awesome pantry and this week I finally put up some board and batten in the entry. The latter I will share when the paint dries and I am able to reset a few things.

The pantry…MAN OH MAN!!!

As I mentioned HERE I don’t need a lot of upper cabinet space because I have a super awesome walk in pantry.

IMG_0654.jpg

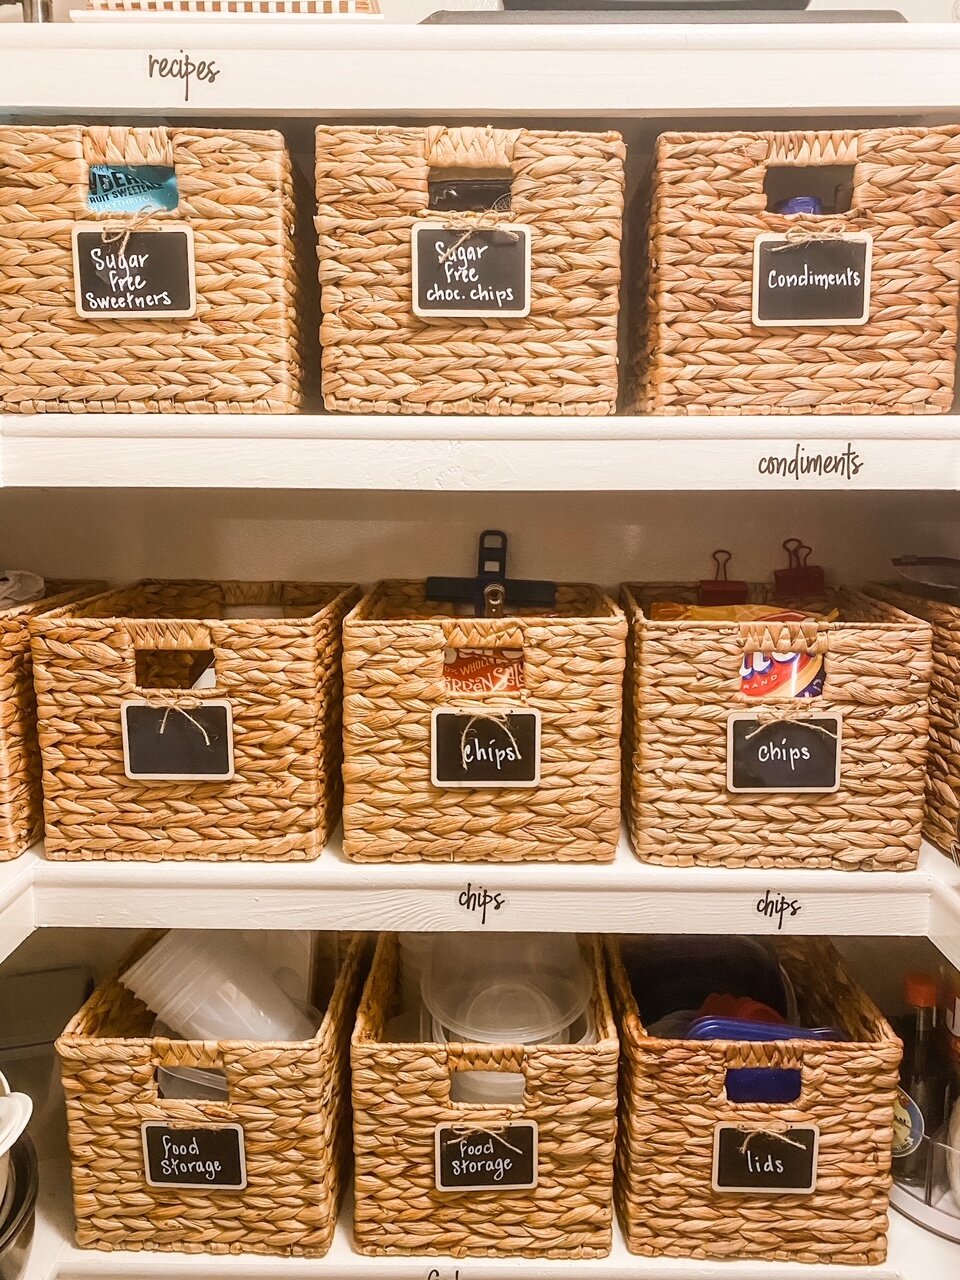
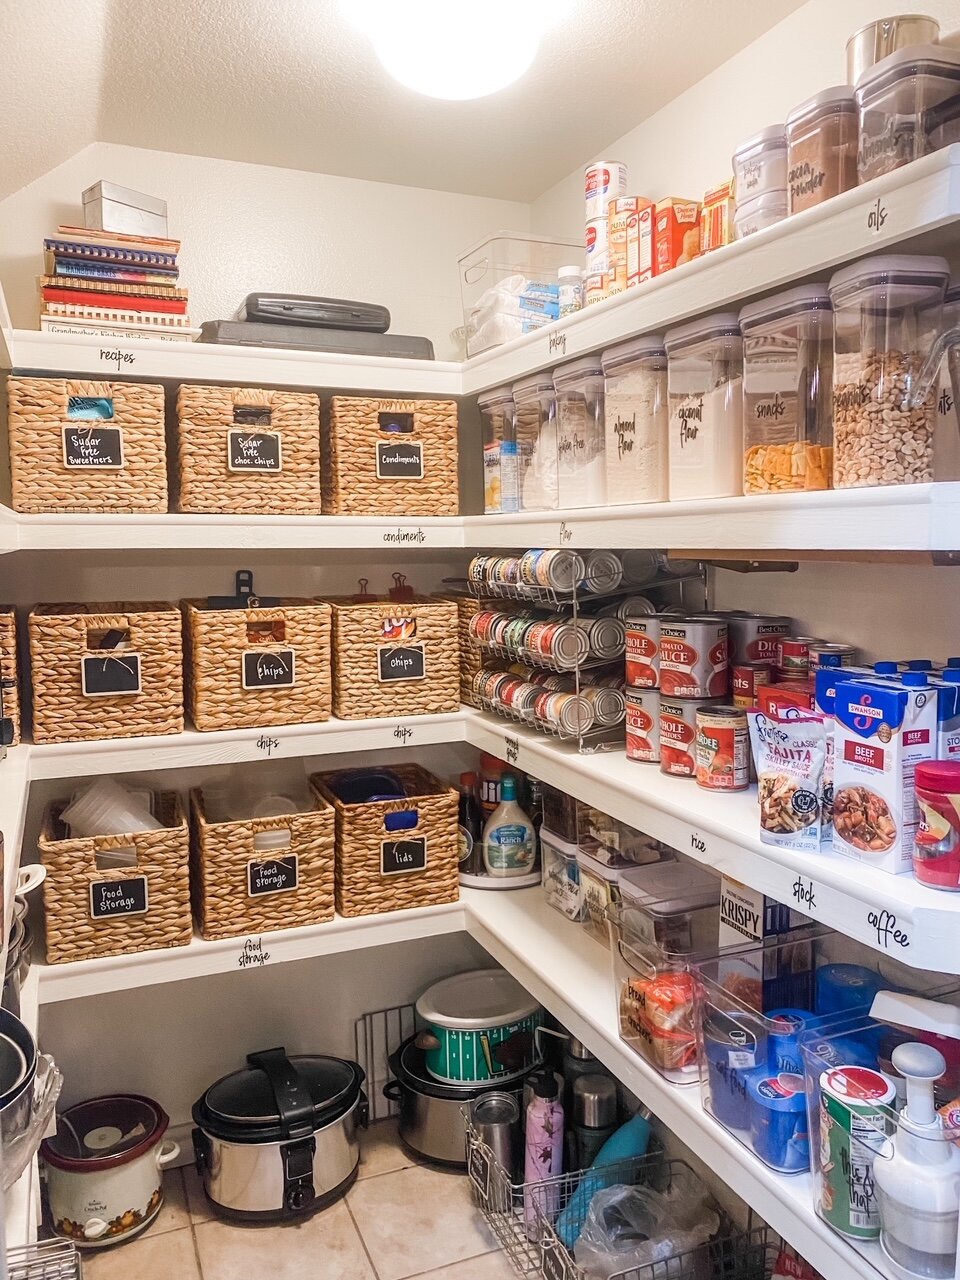
As organized as my pantry seemed to be (for ME) I decided to give it a little “facelift”….more baskets, some storage containers, labels…all the froo-froo stuff I normally don’t even bother with. But again, I am “semi-retired” now and looking for things to do until I can’t go outside and dig in the dirt!

In my last house I only had a small cabinet pantry and didn’t see the need for all the bins and boxes and “stuff.” But since I store more in this pantry, everything from food to serving dishes to cookware, I decided I wanted to get super organized.

The first thing I did was pull out everything I wanted to put in containers and baskets. Everything that wasn’t going to be put in a basket, container or bin was organized. (I also took the time to wipe down all the shelving even though it had only been 6 months since it was last cleaned!

Here is my #1 tip for organizing ANY space…figure out what storage containers you need for the items you have FIRST, then go buy your storage containers…don’t go buy a lot of baskets and bins and containers.

In my case, I already had a few wicker baskets…perfect for holding chips, storage containers and lids, seldom used sweeteners, seasonal dish towels, cookie cutters, etc. I had 7 but based on the stuff I knew I wanted to store in them, I needed a few more. Fortunately I got them at Lowe’s and they still have them!

IMG_0999.JPG


I love these little chalkboard labels I got HERE….super cute! They have a little string but I tied the string in a bow and just hot glued them directly onto the basket.

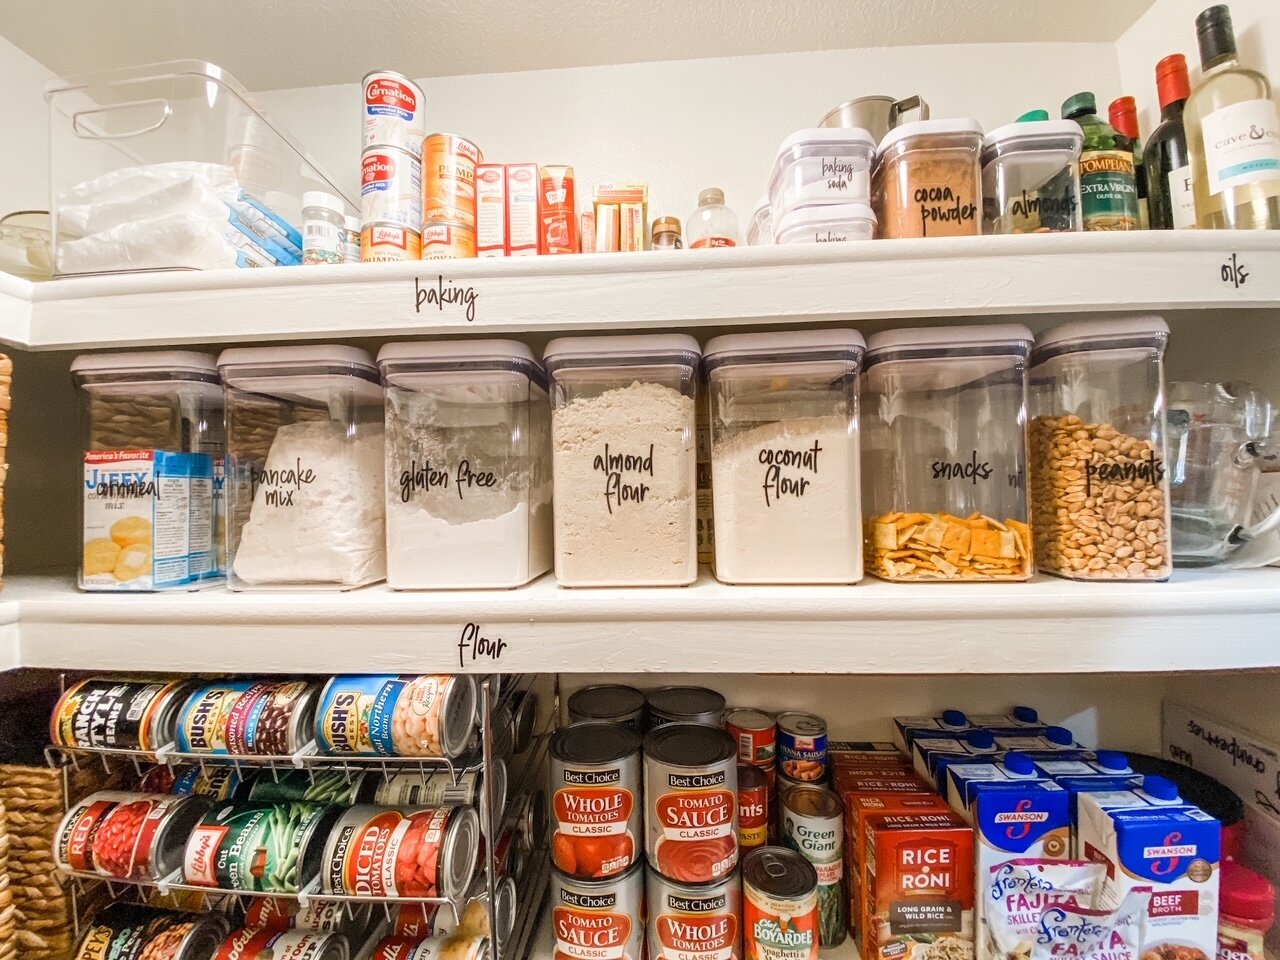
I have a lot of different flour…almond, coconut, gluten free, pancake mix, etc. I knew I would need proper storage for the flours and such.

My initial plan was to put everything in the Heritage Anchor Hocking jars…I just LOVE the look of a pantry filled with glass jars. But here’s the deal…they are heavy…and I am getting too stinking old and clumsy to be lugging around 1 gallon glass jars filled with flour.

So I wanted pretty to serve my purpose….

I found some nifty OXO storage containers at Home Goods…similar to these. I love them….I bought different sizes for the flours and mixes, baking soda and powder, cocoa powder, cornmeal, nuts, etc. The varying sizes stack neatly.

IMG_1001.JPG

I also bought three sets of labels…small for the spice jars and medium and small for the pantry containers….I got them HERE! (I went a little over board labeling the actual shelves…I’ll probably take those off.)

The can food rack is a nifty little gadget to store canned food…in theory. In the picture on Amazon it shows that it holds four cans in each section…but it really doesn’t without one of the cans being all womper jomped…meh…whatever…it will do for now!

I bought a few clear containers… the baskets are great for hiding open chip bags and random storage containers and lids but I wanted clear bins for things I use daily like cat food, bread, and a few odds and ends.

IMG_0998.JPG

As you can see I store a lot of stuff on the floor…bulky items like crock pots and big bags of animal food! I had some wire baskets I originally bought for my holiday wrapping station…perfect for holding water bottles, thermos’, potatoes and critter treats.

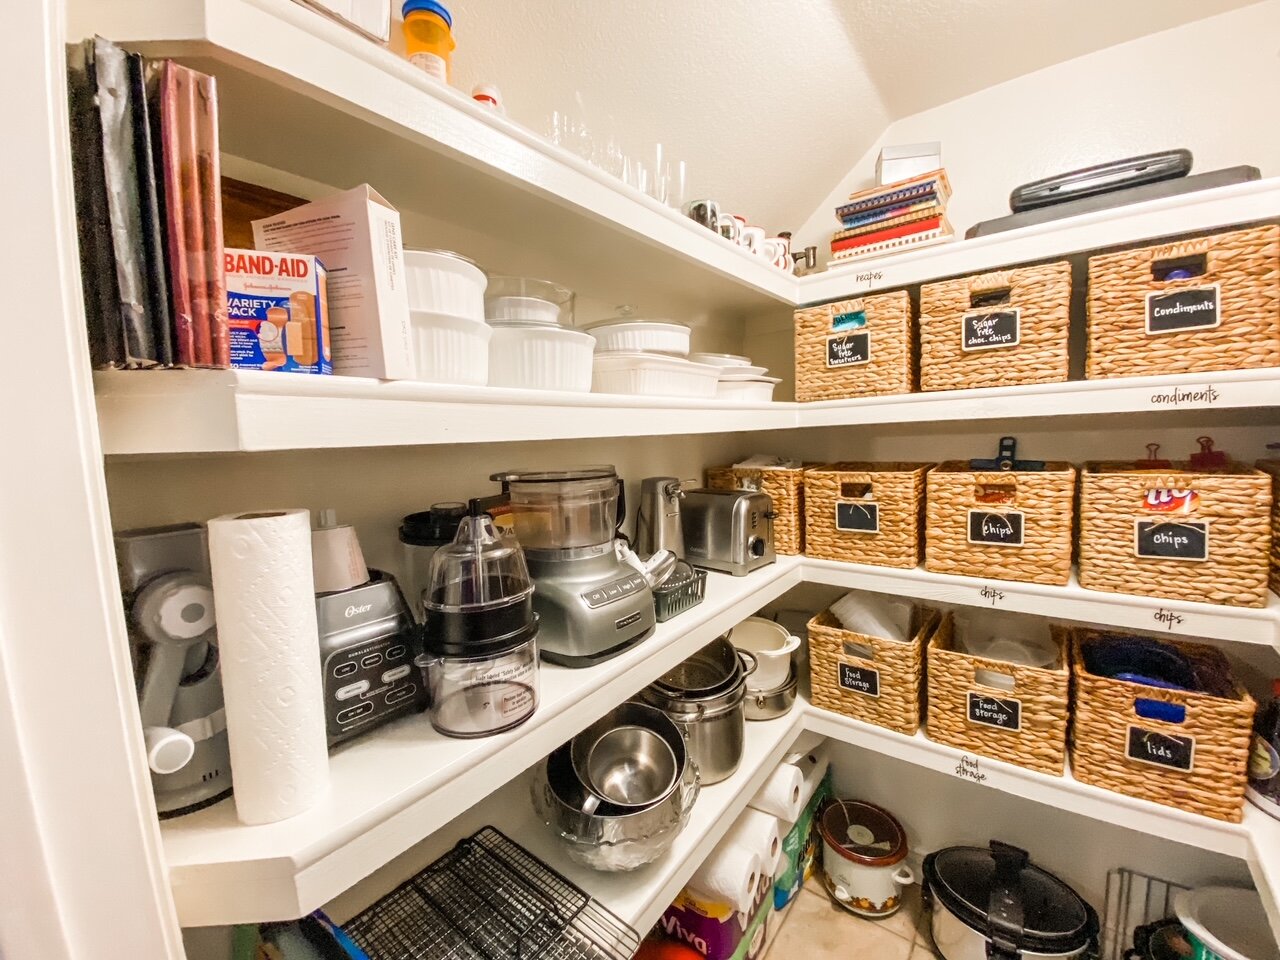
The left side of the pantry is for cooking ware…casserole dishes, mixing bowls, appliances and spare pots and pans…

One thing I LOVE about this panty…it has an outlet…so I can leave my toaster and can opener in the pantry rather than take up counter space.

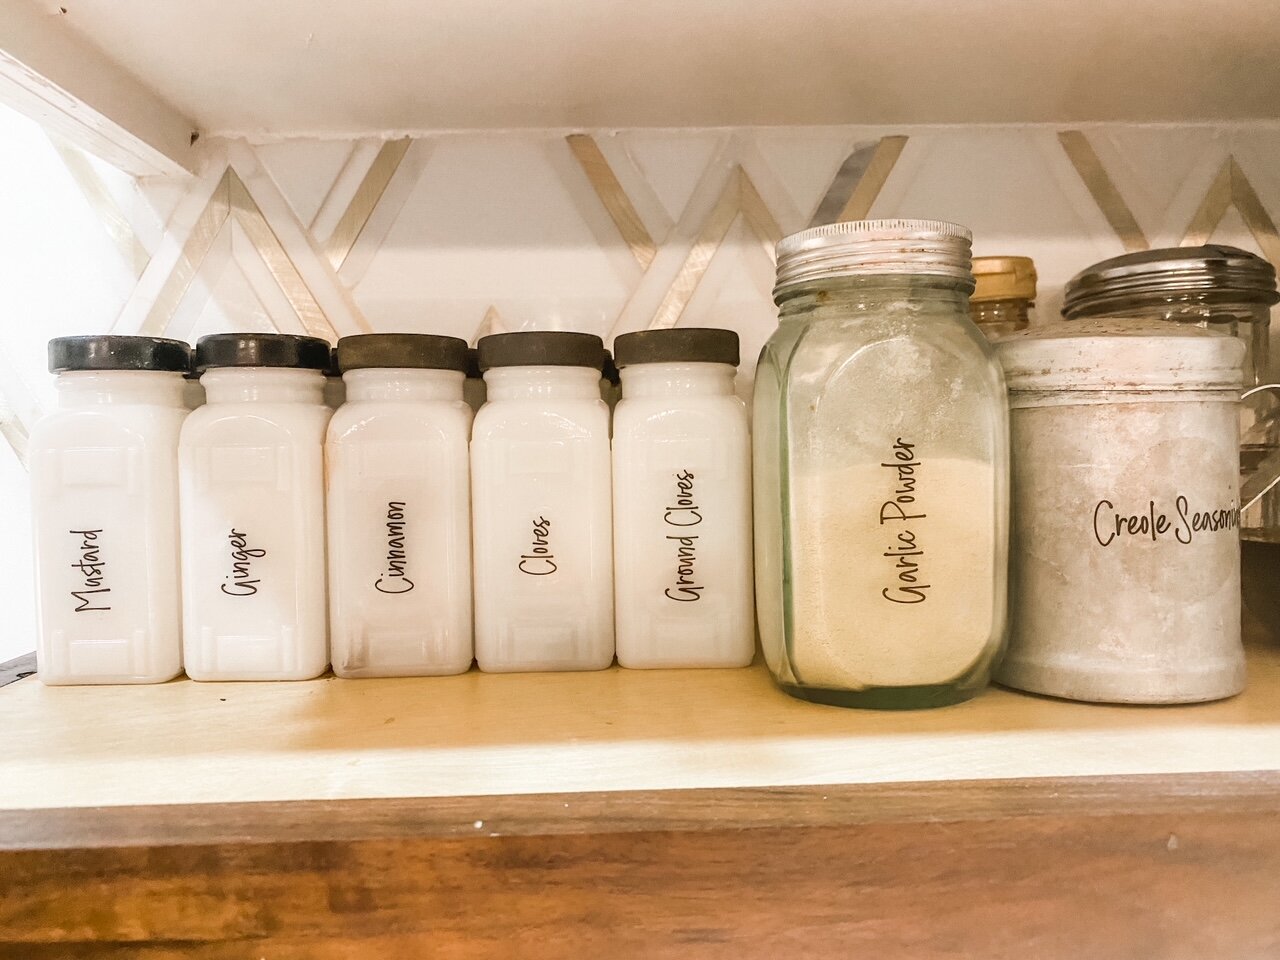
While I was organizing and labeling I decided to do all my spices as well….

IMG_1004.JPG

I had the milk glass jars but didn’t use them because they weren’t properly labeled…now they are!

At some point in the future I really want to add glass to the pantry door like I did to my laundry room door HERE.

IMG_1005.JPG

No earth shattering reason…I just think it would look awesome with the glass cabinets.

But again, winter is here and there is NO way I can do any work outside…so that little “to do” will have to wait until warmer days!

Hopefully I can share my entry next week. I THINK I like the board and batten…maybe when I get it all staged I will know for certain.

So until next week….

static1.squarespace.png


Swing pergola tutorial....

The past few months have been super busy and honestly a little over-whelming. (When I can, I will share.)

As a result I haven’t had a lot of time to do many DIY projects around the house. Which of course explains my absence last week. For now, the best I can do is link back to some of my all-time favorite projects!

One of my all time favorite projects was the swing pergola. As I mentioned in the earlier post, I have built several over the years!

This is a picture of one of the pergolas pre storage building update and we now have a privacy fence along the back of the lot. I meant to take a “current” photo, but see above!

With so many people at home looking for “projects,” this little build is perfect!

It takes a few days and will require a few sets of hands, but it is doable.

Trust me, you will get HOURS of enjoyment out of it! And maybe even a few naps!

(And remember, wear a mask when you pick up materials!)

How to paint your front door properly...

I have been super busy with things other than DIY projects. But one project I did manage to do this past week was repaint my front door…just a quick little one coat “refresher.”

My tutorial for painting an exterior door gets a lot of traffic so I though I would link back to that post just in case you need a little help.

image-asset.jpg

I also painted house numbers on the door and I shared that tutorial HERE.

Remember, not everyone will see you newly remodeled bathroom or organized linen closet…but almost every guest will see your front door…keep it nice!!!

This is just one of the little projects I managed to get worked in this past week in the midst of some “big stuff” that I will share when I can.

In the meantime, I may be linking back to some little projects ANYONE can do! So if you are new around here you might want to stay tuned for some basic tutorials!