Cute Christmas door hangers...

Last week I was looking back at some old posts and realized I had never shared THESE cute door hangers I promised to share A YEAR AGO…

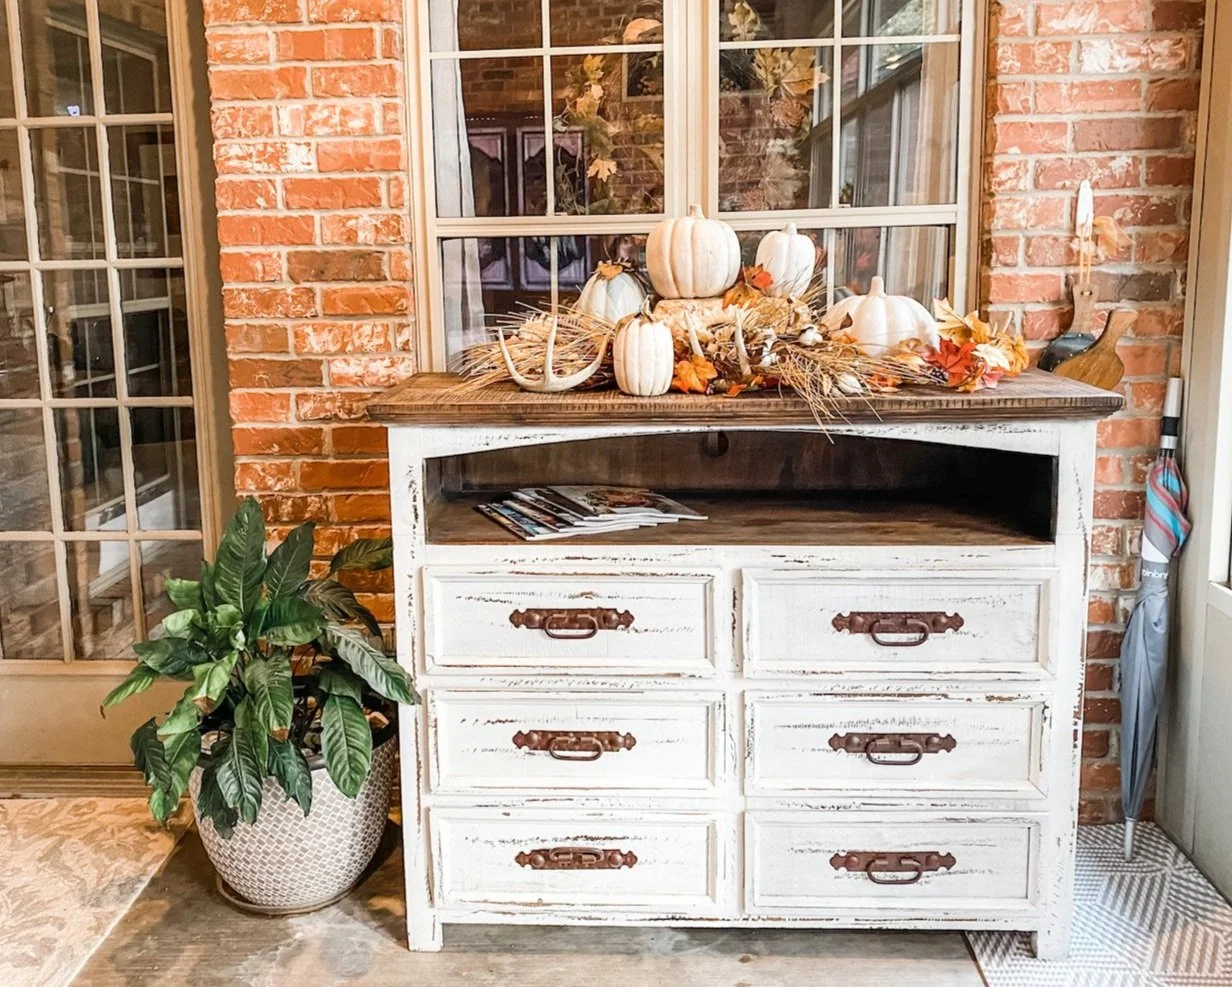
Most of my doors have the little candle wreaths but I thought these would be fun and different on the two spare room doors. (This one is my gift wrapping room!) Mix things up a bit!

Super simple to make…

I bought two little wood signs at Hobby Lobby…

I made some little “sprays” using materials leftover from some holidays sprays I made for my lanterns. I just bunched them together and secured them with a pipe cleaner and floral tape.

I drilled a hole in the top of the little wooden sign….

…then I just stuck the “spray” into the hole and secured it with hot glue.

Then I made a “funky bow” using the tutorial linked in THIS post and attached it to the spray.

Presto, bingo, cute little door signs!

A simple way to dress up the cute little signs and a great way to do something other than the expected “holiday wreath.”

This week we enjoyed a quiet Thanksgiving and a busy few days of decorating for Christmas. Not much has changed from last year so you can check out THIS post to get an idea of what is where. I did add a few trees…one in the all-season room and one in the den but nothing earth shattering. The all-season room got a “Stewart plaid” treatment…seems to be all the rage for the “in” plaid this year…but I am a true “Stewart” so it has more meaning. I want to add some lanterns and a few other little things so I may share that room in a few weeks.

Next week I will share my new “projectS.” Stay tuned!!! Exciting stuff!

All-season room reveal...again!

Last week I shared the new cabinet I bought for the all-season room and the changes I made to it to turn it into a giant litter box. Brian was a tad miffed that I would buy something only to hack it up for the kitties, but if you have ever had a litter box and all the mess that goes with it, you certainly understand my attempts to corral it.

The litter box is hidden away and the critter food is stored in the drawers!

One week later, it is working perfectly!

The outdoor couch I bought for this space arrived Friday night. I am always amazed that such a large piece can fit into a relatively small box…until I unpack it and start putting it together. Geez!

If I have learned anything in 57 years it is FOLLOW THE DIRECTIONS. While they may not make sense, they make sense. When they say “hand tighten only,” hand tighten.

It is in place and I love it!

It’s not near as plush and comfy as our living room couch but it is an “outdoor couch” so I didn’t expect it to be.

I was a tad concerned about the fact that it is a “canvas white” and the cushion covers weren’t zippered for easy removal in a house full of critters. Our new puppy (oh yes, we got a new puppy! To tired to share that news just yet!) managed to christen it within the first 10 minutes…muddy paws. Fortunately it cleaned easily!

The coffee table LOOKS like teak wood, but it is actually metal. Kind of chintzy if you ask me so eventually I want to get something a little better quality and much smaller…it is just too big for the space.

I am still debating the height of the kitty cabinet…I THINK I want to cut it down but I am living with it for the time being. One day the bug may hit me and I will drag it outside and hack on it some more!

For now I have a space perfect for watching the leaves and snow fall. In the winter I put out corn and bird seed so this will be the perfect spot for critter watching as well.

A few months ago I put a kitty door in one of the windows between the living room and the all-season room so the cats can could come and go without having to leave the door open.

Since this has turned into the “cat room” they will LOVE watching the critters. And no, the cats never go outside so the critters are safe.

Hopefully we will use the space now that the changes have been made…the cats certainly do!

Fireplace reveal...,

It is done.

As I mention HERE, I had several goals for this room.

The first was easy…replace the paddle fan. Check.

IMG_2074.JPG

The second was a tad more difficult. Reface the fireplace.

Difficult only because I couldn’t “see” what I wanted which resulted in a spur of the moment “demolition” of what was there….

As I have said time and again, often what “is there” keeps us from seeing “what can be.” I see stuff on Pinterest and in magazines all the time that I love, but I can’t visualize it in my own space because what is there clutters my vision. I have equated it to trying to paint a landscape on a canvas that already has a portrait painted on it.

That is when I advocate painting the canvas white. Base neutral. Painting the piece of furniture or wall white or taking all the furniture and fixtures out of a room so you can visualize what you want rather than what is there. Even if it is a piece of furniture you plan on keeping, take it out…that way you can “see” it in a different spot or even painted a different color.

Once I did that with this fire place, I could visualize “the plan.” Rock the bottom…big beefy walnut mantel.

I shared the stone HERE.

Last week Matt and I dragged out the table saw and chop saw and went to work on the mantel. Four coats of Waterlox (I LOVE this stuff) and presto-bingo….the vision came to life. Waterlox is my new “go to” finish…a tung oil finish that gives any wood durable protection while allowing the beauty of the wood grain to shine. And it is SERIOUSLY idiot proof! Just sand, clean the entire piece with a tack cloth and wipe it on. Use 0000 steel wool and tack cloth between each coat. I usually apply 3-5 coats. LOVE!!!

IMG_2040.jpg

I intentionally choose walnut with tons of grain and a few knots…”character.” This house doesn’t lend itself to the “farmhouse look” but I didn’t want formal and fussy either.

The final result was exactly what I envisioned…and I LOVE IT!

Here is the BEFORE (obviously last Christmas)…

image-asset.jpg

And AFTER….

IMG_2073.JPG
IMG_2071.JPG
IMG_2072.JPG

Sometimes we get so wrapped up in getting a project finished as quickly as possible, we fail to live with the results in our minds for a time. Trust me, you will love any DIY project sooooo much more if you will get rid of what is there and take time to live with what you think you want in your mind before you start slathering paint or ripping out walls.

Remember every space is different….just because something looks amazing on Pinterest or in a magazine doesn’t necessarily mean it will work for you. It might, but spend the time to tweek it in your mind before you jump head long into what can be a time consuming and expensive “oops.”

static1.squarespace.png

The fireplace makeover...Part 2...Airstone Faux rock.

The stone work is done….

…and I love it.

I highly recommend the Airstone product. At least as far as installation. It is a relatively easy product to install. Lightweight and exceptionally natural looking.

When we fire up the fireplace in a few months I will let you know how it holds up to heat.

This stone product would work well for a kitchen backsplash, fireplace face or a covered porch area. It SAYS you can use it for exterior application…I can’t attest to that since I did not use it outside.

I think this is a relatively easy DIY project.If you choose to install this product find a tutorial that works for you. More importantly though, FOLLOW THE DIRECTIONS!!!!

I do have a few tips.

Start at the top. Then the sides…them the bottom. That may seem backwards, but it is the way to do it. Start at the top by adding a temporary level brace….I just used some scrap 1x4. I let that dry over night, then did the same on each side, then the bottom. The Airstone mastic sets up fairly quickly.

IMG_2011.jpg

I used pennies as spacers between the floor and the stone. I do this because wood swells and moves and you don’t want the rock sitting on something that has movement. Same would apply if you were using it as a backsplash…don’t set any wall product (faux rock, tile, marble, etc) directly on a top or floor.

Use a tile saw to cut it. I have a wet saw so if you do not, rent one. Makes easy, precise work of tricky cuts.

Pay attention to how to apply the mastic…it’s like frosting a cupcake, not buttering toast.

The tub of mastic specific for the faux stone SAYS it does 30 s.f….it does not. Maybe I “iced” to thickly but I would suggest buying more than you think you will need…you can always return it.

Layout the rock on a template or floor before applying it on the wall and number each piece so you know how to property transfer it to the wall. Also, make sure you pull from different boxes…mix it up. Each box has several different “colors” and “textures”and each box may come from a different run…so you want to make sure you mix it up!

I used the “edge” pieces around the face of the fire box…I think it looks neat.

IMG_2025.jpg

I should have wrapped it around the entire bump out. I would have loved to take it to the ceiling. I am still debating on adding a hearth.

But the “coulda, shoulda, woulda” is always a brain worm until the project is finished.

I didn’t want to take it to the ceiling because I don’t want to remove the crown then have to paint the entire ceiling. I don’t think I want to add a hearth because this is a small space and I don’t want to crowd the space. I didn’t wrap it around the entire wall because, well, I just didn’t.

Hopefully when I get the mantle on, it will all come together.

So the mantel. I think I thought I knew what I wanted but now I not so sure.

My plan is to make a beautiful walnut mantel…smooth…perfect grain…low sheen. Now I am debating on a more “rustic” look with a lighter finish.

What to do, what to do.

As usual, I have searched Pinterest and found dozens of looks…I like them all!

This house style really does not lend itself to that “farmhouse/rustic” look so I think I am going to go with a more smooth, low sheen look. Sometimes you have to “read the room” when making decor decisions.

I bought some walnut boards (dang that stuff is expensive!) and specifically picked pieces with lots of grain and a few shallow knots. Just a smidge rustic but still the beauty of walnut. I know if I apply Waterlox (like I did here with my kitchen cabinets) it will have a dark finish. And I think I am okay with that. The stone is light and I think the dark walnut will be a nice contrast.

Now I am just waiting on my son to have a day we can work on his table saw. I shared HERE about my phobia of table saws. I bought him one for Christmas last year so I have one available and have a “saw buddy.”

Hopefully next week I will have a beautiful new fireplace to share!


The fireplace project...taking it to base neutral!

As I mentioned when I first shared the den, one of my “eventual projects” was to reface the fireplace.

image-asset.jpg

But as I have said before, often “what is there” blinds us to “what can be.” So the absolute best thing you can do with any mentally blocked project is to take it to “base neutral.” Whether it be a room, a dresser, a fireplace….take out what you don’t want or paint it all white…and start with a blank slate.

After months of being mentally blocked, I took a hammer and crow bar and took it to “base neutral.”

IMG_2004.JPG

I love that this house has two fireplaces…and the one in the living room is fine ….for the time being….

IMG_2007.jpg

(Yes, fall puked in my house!)

But the den is a “less formal” space and I really want something less formal looking…like stone and a big beefy wood mantel.

I’ve dropped a few “inspirations” into a computer file…

Screen Shot 2021-09-27 at 2.49.47 PM.png

…and I have found several looks I like on Pinterest.

I like the look of stone or brick to the ceiling but that would entail removing the crown, which would then mean I would have to paint the ceilings throughout the entire space…kitchen, den and breakfast room. And that is just not a project I want to even think about at this time.

My plan is brick or stacked rock and a big beefy wood mantel…preferably walnut. I have been researching the Airstone product (sold at Lowes) and if I go with the stone look, I may give it a shot. But I also like the brick look so I am looking at brick tile as well….

That’s the plan…I think…maybe…

I don’t know. What I do know is it will be much easier for me to visualize what can be now that what was is gone.

I better get to visualizing because as you can see, I will need both mantels for stockings in about two months!!!

static1.squarespace.png

Coffee Bar...

IMG_1824.JPG

When I looked to Pinterest for inspiration for a coffee bar I realized that there are some super serious coffee connoisseurs out there. I just wanted a nice organized place for a few coffee necessities.

My stove top area in the kitchen is a bit tight for a “coffee station”…

IMG_0684.jpg

…but we managed because I have TONS of prep space on my island. Regardless, I wasn’t happy with having my coffee maker in this area….and I didn’t want to have a full sized coffee pot taking up even more space so we would have to remake coffee all morning in our little 4 cup maker.

I decided to utilize a corner of the counter top in the laundry room for a “coffee station.”

IMG_1826.jpg

Even though we make coffee every morning, the distance from the kitchen trash can and water source was almost equal so it really was no biggy to put it in there vs. on the kitchen counter.

Right now I am on a quest to use up some of the wood and materials I have accumulated over the years. It would have been real easy to go out and buy new materials to make shelves but I decided to get resourceful.

When I remodeled Katie’s room eons ago I removed the black floating shelves she used as her makeup station….

(Man my photo skills sucked!!!!)

(Man my photo skills sucked!!!!)

I’ve kicked those things around for YEARS thinking I would eventually use them.

They weren’t the size I wanted for my “coffee station” and not even the style. But I decided I would try to make them work.

The first thing I did was cut them down. Not difficult since they are constructed out of fake wood and cardboard. I did have to take a metal grinder to one of the metal support brackets to make it shorter, but that was seriously no biggy.

I did add some wood support inside the corners of the cut down shelves because my next step was to clad them in wood.

I had some leftover “bead board planks” from another project…similar to this…

…so I used that to clad the tops and bottoms of the shelves (just glue and a few nails). Then I used some 1”x3” pine boards I had for the fronts and sides. A little stain…a little polycrylic to seal.

IMG_1822.JPG

Repurposed floating shelves…they didn’t cost me a dime because I used scrap materials I had on hand.

My goal was “rustic” shelving…I think I accomplished that.

I did purchase a few new canisters…one for coffee, decaf, and cocoa.

The old silver tureen has held my filters for years…love it.

IMG_1820.JPG

I found this cute little office supply thingy…originally labeled for paperclips, rubberbands, erasers, stamps etc.

IMG_1825.JPG

I decided it would be perfect for all the different sweeteners my family insists on…God forbid they use the one I use. I relabeled each space for my purposes.

A fake plant. (BTW I keep reading fake plants are a decor faux pas…ask me if I care!)

We did purchase a larger coffee pot.

Again, this space is right off the kitchen so it really isn’t a bother. I like that it freed up a little bit of kitchen counter space.

I would like to add that 1) I now have a HUGE laundry room and 2) it is just Brian and me so rarely are there piles of laundry demanding my attention. I can see where some may not have the room or desire to use the laundry room for this purpose! But for us, it worked out perfectly.

I am a HUGE proponent of looking to Pinterest for inspiration…but sometimes we get a little intimidated by what we see online and forget we don’t NEED all that froo-froo or even have the space for it….

783f7a78d45c3e595640ffaf03ff1841.jpg

Don’t get me wrong…I think these spaces are amazing…but for YOU are they realistic? Hopefully my tiny little corner will inspire you to “think outside the box” if you need to create a space. Know that you don’t need a huge space for a basic coffee bar if you just need a place for a few basics.

static1.squarespace.png


Making a table or bench top...

One tool I wanted for years was a “biscuit joiner.”

Screen Shot 2021-08-11 at 4.43.53 AM.png

One of the many things I love about my kids….when I ask for a specific tool for Chirstmas/birthday/Mom’s Day, they listen. So several years ago I got a biscuit joiner for Christmas!

This little tool has allowed me to make a few things I otherwise wouldn’t have been able to make. It allows me to join together several boards to make a larger board. A necessity if you want to make benches or table tops.

Let me give you a few examples….

The first was this bench….

I was able to join together the three 1”x6” boards and the ends to make a strong top.

Brandon and Taylor wanted a plain pine table and bench for their new house. I guess they could have spent a fortune like we did for a custom made table but that isn’t really an option for a young couple.

So we went to Lowes, picked out some straight, nice boards with good grain and used the biscuit joiner, glue and clamps to create a table top and bench top.

IMG_1329.jpg

After some serious construction, a LOT of sanding, a polycrylic clear coat, and some nifty bases, they have an AMAZING table and bench!

IMG_1146.jpeg
IMG_1148.jpeg
IMG_1149.jpeg

Last year I went looking for some shelving…I found one I absolutely LOVE. It was from the same company that built our dining table so I knew the quality would be amazing….but the price tag was just a tad too steep!

I love everything about this shelving unit….the look, the style, the quality.

So I went looking for a less expensive option. I found one I thought was okay on Overstock.

Waaaay less expensive…and for obvious reasons. The frame is metal vs welded steel and the shelving material is MDF vs. beefy solid wood.

The look and style is very similar…almost identical sizing…but the MDF shelving HAD to go. I knew immediately I wanted to replace them with solid walnut.

It has only taken five months to get around to this project.

The biscuit joiner was a life saver.

Walnut is a pretty expensive wood…and finding pieces wide enough for the needed 12” shelving was pretty much impossible (without a serious outlay of cash.) What I did find were 7”ish board we ran through my son’s table saw and joined together….

IMG_1740.jpg

Using a biscuit joiner is NOT difficult…just take your time and follow the directions.

One little trick I did learn was how to mark the joints so they lined up perfectly. Just put your two boards together then run a mark across the joint….

IMG_1742.jpg

Then just line the joiner up with the mark and plunge away…the joints will line up perfectly!

Always dry fit everything to make sure it all lines up perfectly before you apply glue….

Apply glue and clamp….

IMG_1745.jpg

Joiners are NOT difficult to use. Just follow the directions and watch lots of YouTube tutorials.

I sanded each piece with 220 grit sand paper, tack cloth and sealer.

I used Waterlox as a sealer…no stain…same stuff I used on my kitchen cabinets and I have been extremely pleased with it!

BEFORE

BEFORE

AFTER

AFTER

BEFORE

BEFORE

AFTER

AFTER

BEFORE

BEFORE

AFTER

AFTER

I was able to take a shelving unit fit for a dorm room and turn it into a beautiful accent piece!

LOVE!

A little tweeking to the laundry room...

There weren’t too many “structural” changes to be made in this house. Most of the big stuff was done before we moved in but there are a few little things I have been tweeking since we move in,

One is the laundry room. I installed the window before we moved in (featured HERE) , new tops and sink, shelf above the washer and dryer, and replaced the light fixture. Since we moved in I have painted the cabinets, changed the hardware, and added a coffee bar (to be featured later!)

I don’t know who the moron was who thought 4’ was wide enough for the washer and dryer opening….

IMG_1638.JPG

Why is this an issue?

And worse, I have been having issues with the dryer properly venting. Another moron ran the dryer duct under the slab of the house to the back yard, a good 40’. An absolute no-no. Why? Because the length is entirely too long for a normal dryer to push the warm damp air AND they can potentially (as mine has) take in ground water. So you end up with water in the duct and moist lint sticking to the inside of the duct. Which of course sets off your dryer and shuts it down repeatedly.

I can’t even periodically pull out my dryer to at least attempt to clear the duct work without first pulling out the SUPER heavy washing machine, then moving the dryer sideways.

Hence the problems with the narrow opening. (Thank God I don’t have a dryer with a drop down door!)

Serious pain in the rear and a problem I knew I was going to have to deal with..,..eventually.

What has been causing the serious case of procrastination is my knowledge of framing.

When you frame openings for doors and windows, you have to put a “header” above the opening….let me TRY to explain.

Normally walls have studs every 16” to carry the load of the ceiling weight. The header is to provide solid support over an opening. Now, you have to remember that a 2” x 4/6/8 is actually only 1 1/2” thick, so in order to make a “header” you sandwich two 2xs (usually 10” or 12”) and a 1/2” piece of plywood together…making a 3 1/2” thick header, the width of a 2x4 stud (because it is actually 1 1/2” x 3 1/2”). That header stretches the width of the opening and sits on a “trimmer stud,” which is attached to a “king stud.”

I suspected that when I removed the 8” of wall on the left to widen the opening, the header would be sitting on a trimmer stud, which meant I was going to have to take the entire header out and make and install a new one long enough for the new, larger opening. MAJOR pain in the rear because that meant removing all the sheetrock above the opening to the ceiling, install a new header, then repair and paint the new sheetrock.

The day came…the dryer was no longer getting it done and it was time.

I removed all the trim around the opening and cut out the wall on the left….

BY THE GRACE OF GOD the moron who framed the opening too small made the header too long!!!!!

I was able to slip a few studs in the wall under the header, trim the opening, paint and….

IMG_1725.jpg

…WALLA. Problem easily solved with no major reconstruction or sheetrock mess.

Well, not “solved” per se….I’ve really only made it easier to clean the vent periodically (and open the door all the way.) The next big chore will be rerouting the dryer vent up the wall and across the attic. A much shorter distance and should solve my problem. But it is hot…super hot…and the attic is even worse. I have no desire to pass out and fall through the ceiling so this chore will wait until it is waaaay cooler in the attic.

Now, the downside….

IMG_1729.jpg

…the flooring. When I removed the wall, I was left with this gap in the tile where they had tiled around the original framing bottom plate. Boo-hoo.,..now I might have to replace the floor tile in my laundry room! Of course I will have to conveniently forget that there is an entire box of this tile in the garage.

I want to replace the tile. I know this tile is original to the house because I used the exact same tile in my apartments 23 years ago…around the time this house was built.

So I want new…the question is do I NEED new. Or do I just replace the few pieces that need to be replaced.

Only time will tell. Knowing me I will wake up one day and take a hammer and crow bar to the tile….

But not today….today I am still recovering from getting my first Covid shot. I had Covid in December so I have used that as an excuse to not get the vaccine.

I am not a ”conspiracy theorist” and I rarely believe most of the crap posted on Facebook. And I certainly don’t believe this whole mess should have been politicized.

But this new variant has raised a few hairs on the back of my neck….and after having it and knowing how sick you can get, I decided to get the vaccine. We are also flying to Colorado in 8 weeks and at the rate things are going I worry that the airlines will require proof of vaccination to fly. I certainly don’t want to wait until the last minute.

So I got the shot….they say if you have had the virus the first shot will kick your butt. It did.

But I am much better and just about ready to take on another project. Hum…that floor is really starting to bug me….

static1.squarespace.png

My "life quandary"and FINALLY the shop reveal....

IMG_1704.jpg

Occasionally I go back and reread some of my posts from the last eight years. Man i have transformed some awesome pieces of furniture and spaces!!!

Now that I am “semi-retired” I have been trying to decide what I want to do “when I grow up.” After a year of binge watching “Gilmore Girls” and finishing the little projects around this house, I desperately need something to do.

I still haven’t decided what.

I love refurbishing furniture but honestly my body isn’t exactly cooperating these days. After just one day of projecting, I am usually hobbled for at least two days.

I don’t like to golf, I don’t knit, sewing is NO WAY JOSE, I raised four kids so while I will eventually help with my future local grand kiddos, I don’t think I want to take them on full time.

Volunteer…an option, but where. I love animals but if I volunteered at a shelter I would have a house full of critters. I would love to work at a zoo, but sadly we don’t have one!

Sick kids…they make me sad. I just don’t know if that is something I could do.

Old people. Hum….to close for comfort?

A real job? Nice idea but I don’t want to work nights, weekends or holidays. Brian and I like to take little vacations so I need lots of flexibility. Not exactly an ideal employee.

Besides I have NO idea what I want to do and I don’t want to spend 20 hours a week doing something I don’t enjoy.

I am blessed. I was blessed to own a business for 23 years that darn near killed me but allowed me to care for my family and “semi-retire” at a relatively young age.

So what do I do?

This blog is a wealth of information and I am sure there is a way I could turn it into a “business.” But truthfully, I like sharing my experiences with those who need the guidance. And I don’t want to make people pay for that help.

Which bring me back to my first love….building, creating, repairing, helping, sharing, instructing…my blog logo says it all….I hope I can share with you a passion and desire to easily create a home you will love!

All this whining and moaning to finally share one of my favorite things about this house…the shop. A space I have wanted for decades, finally got, and now really can’t use to it’s full potential!

For YEARS I worked out of my garage…what a mess. When I saw this house had an amazing shop I was stoked! A place to keep all my tools and work on a few small projects and I would still be able to park my car in the garage.

It is insulated, it has electricity, large doors, windows….the only downside was it was SERIOUSLY ugly!
Like baaaaad ugly.

IMG_0008.jpg

As with every inch of this house, I could see the potential.

I knew I had to make it pretty!

IMG_1703.jpg

The windows were old aluminum windows so those had to be replaced. I even moved the front one to the left to make it more “aesthetically pleasing.” New light fixtures inside and out were a must. The doors were aluminum and vinyl siding and not real attractive so I did just enough to make them look a little better. New cedar posts, some shutters…

And the biggy,,…brick. No I am not a brick layers so I was super fortunate to find someone who would take on a few small projects. Finding brick to match the brick on this 22 year old house was dang near impossible, but I was able to find one that was close enough and it made all the difference in the world.

We went from having a big ugly vinyl shed in the yard to having a super cute building.

The inside…it’s a storage shed in spite of what it looks like from the outside. Lawnmowers, tools, yard stuff…nothing fancy. I love the workshops that are all perfect and spotless….but it is a shop/storage shed, plain and simple. (Note Brian’s big fancy grill/smoker….God forbid it sit on the patio and get wet like a normal grill)

As I shared HERE when I spruced up the storage shed at our old house, I firmly believe storage sheds should enhance your space…not just be a big eye sore where you store you mower and shovel.

GET CREATIVE…make it pretty. Take a little time to doll it up and make it something that is aesthetically pleasing rather than just a huge eye sore in your back yard. Pinterest (my “go to” inspiration") is full of outdoor buildings that have been transformed into something other than just big ole’ eye sores!

No, you do not have to do something as fancy (or expensive) as mine…but a Pinterest search and a little “oops paint” can really make a difference.

Do a little “storage shed” search, then let your imagination run wild. Remember, we have lived in this house almost a year and I am just now sharing…transformations don’t happen over night!

Lessons in DIY....

One of the things I love about this house is the irrigation system…no more dragging hoses and sprinklers around the yard all summer.

In theory.

The system has been severely neglect for years so it has been a total rework. We finally got the two zones (there are four) working for the bulk of the front and back yard.

As usual, I did what I always do when I want to learn something new. I hover. Followed the irrigation guy around watching every move he made (for a $100 an hour I figure I should get a lesson).

I googled how irrigation systems work and how to repair and replace malfunctioning and broken heads.

I installed the Zone 3 drip system for the flower beds. Yay me!

Now I think I am an expert and thought I could tackle Zone 2 which wasn’t working at all.

Zone 2, the zone on the north side of the yard, has been a total bust. I knew there HAD to be a break in the main water line some where, I just couldn’t find it.

I am tenacious…the darn thing was broken and come hell or high water I was going to fix it.

After WEEKS of digging around and tracing lines, I found not ONE, not TWO, but THREE breaks in the water lines…..curses!

Needless to say my newly sodded yard looks like it has been hit with mortar shells.

IMG_1689.jpg

The first two breaks were relatively easy fixes….the third has been a total booger. It took three full days and at least 6 or 7 trips to Lowe’s…I repaired the same spot SIX times before I finally got it right…I think…I hope…unless one of the connections broke loose again when I covered it with dirt.

Today’s lesson on DIY. As I have said before, my daddy didn’t have time to teach me EVERYTHING I need to know about DIY. But what he did teach me was a valuable lesson. If you want something fixed, repaired, built, or changed, be willing to do the research and put in the time and muscle to do what needs to be done.

I didn’t have a clue about irrigation systems. Zip, zero, zilch. But I am not about to pay someone $100 an hour to do something as simple as change out busted heads. So I learned…and am still learning

The water line repairs….that’s another story. This was one of those times when after 3 days of crawling around in the mud and AT LEAST six trips to Lowe’s, I began to wonder if it was time to call in a professional.

I suspect it would take them all of about an hour to do what took me three days!

DIY lesson number two….know your limitations.

That’s a tough one for me.

I do get to share one little project I managed to complete while I was waiting on water line repairs to dry.

Years ago I bought these old metal wheels at an auction. Thought I might sell them but never have so they just sat in the yard with no real purpose.

This is the picture I took to post on Facebook Marketplace eons ago….

28336456_10213705878788595_1856686047250220767_o.jpg

I’m not really a “yard ornament” kinda person so the fact that I had these big ole metal wheels just sitting in my yard was, well, just not my jamb.

I moved them to the new house and set them in the back corner of the yard and thought MAYBE I could find something to do with them…..eventually.

Now I do like “sitting” areas….and the more I looked at these wheels, the more I thought, “Hum, just MAYBE I can figure out a way to turn this into some kind of bench or something.”

So last week Brian and I went out to this ratty little old “hobby mill” and picked up a live edge board, brought it home, power washed it and made a bench…I really like how it looks tucked away in the back corner of the flower garden.

IMG_1691.jpg

(The concrete “bench” in the forefront of the photo was there when we bought the house…we were told it was part of the old farmhouse that sat here originally…that sucker isn’t going anywhere! Makes a great place for squirrel food in the winter!)

IMG_1693.jpg
IMG_1694.jpg

Presto, bingo! Now instead of having some big ole’ honkin’ metal wheels in my yard that cause me confusion and grief, I have this nifty one of a kind bench in my back flower garden.

I haven’t decided whether to seal it or leave it natural.

LOVE!

We picked up another piece of milled wood just in case we needed another piece…I decided to use it to make a another bench. The concrete bases were from a bench in my Mother’s yard. It use to have a concrete top but someone (who I shall not name since it might embarrass my oldest daughter) sat on it and busted it. So these bases have just been sitting around waiting for inspiration.

I think I will seal these boards. I love how you can see the mill marks and a sealant will really make those “pop” like it did on this old wood I used to make a table.

IMG_1696.jpg
IMG_1697.jpg

Irrigation system is (fingers crossed) fixed and I managed to get a few little projects complete.

Makes for a good week!

static1.squarespace.png