Board and Batten Entry....

IMG_1171.JPG

The entry…the one place in your home EVERY guest will see. They may not see your awesome pantry…or even your darling guest bath or amazing kitchen, but when you open the door they will see your entry.

It is one reason I really stressed about what to do with this space. I wanted it to be warm and welcoming, and while it is a big space, there is very little “wall space” to allow for big credenzas or entry storage. I really don’t need either since we usually enter from the garage into the laundry room…great “drop zone” for our packages, coats, purses, shoes, etc….but I like the look of both in entry spaces!

Of course the first course of business was replacing the dated door, window and light fixture….relatively easy fixes and something I did before we moved in!

IMG_6549.jpg
This was after the window was replaced but before the door, light fixture and flooring!

This was after the window was replaced but before the door, light fixture and flooring!

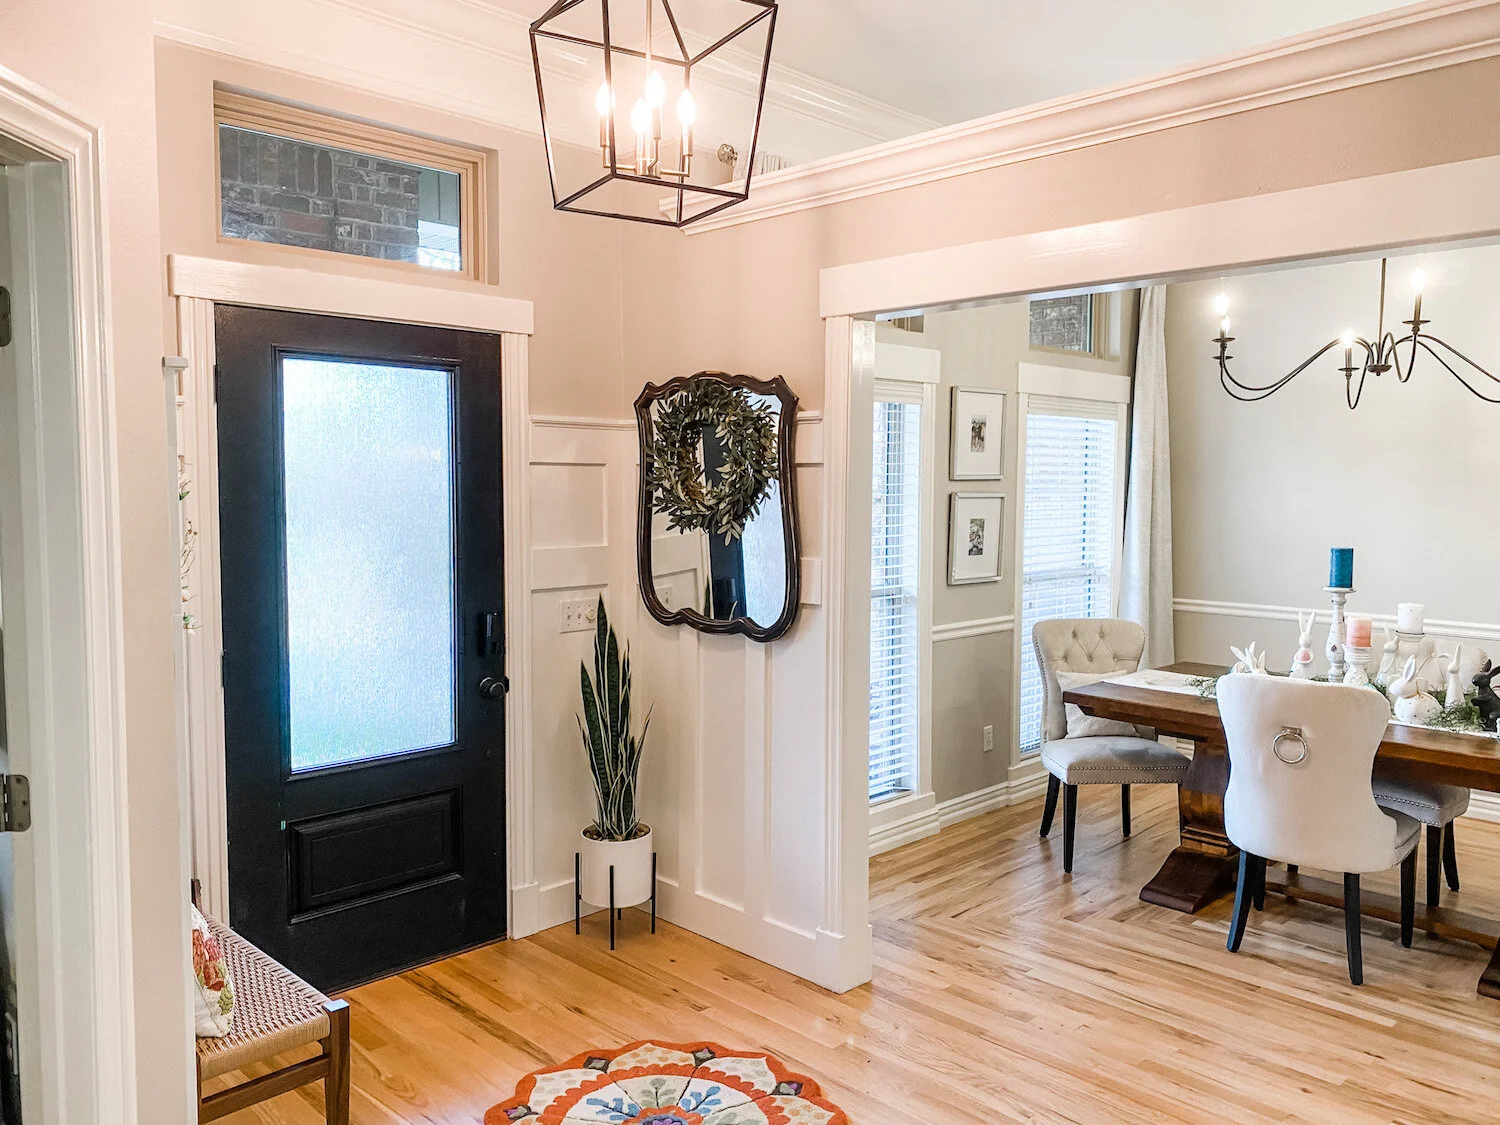
I debated on the board and batten for some time…

IMG_0580.jpg

I just felt it needed a little “something.”

It only took me 16 years to get the entry in my last house the way I wanted it…I feel like I am moving at warp speed on this one…lol!

At one point I tried a larger rug…but I didn’t like it…I honestly like the little dinky rug that is probably too small for the space. This is a prime example of doing what I LOVE vs. doing what the “design experts” tell me I am suppose to do.

A hint of trouble came when winter hit and we needed a place for visitors coats…other than putting them in the closet in the office, there really was no place to hang them.

Coat racks are a bit out dated and just hanging a wall mount coat rack didn’t trip my trigger.

Board and batten allowed me to put a few hooks on the wall.

IMG_1172.jpg


But that led to a little problem with the table. I LOVED the little walnut table, but you can’t hang coats above a table.

IMG_1084.JPG

Again, it is NOT my style HOWEVER it was my grandparent’s and it is walnut…heirloom and walnut…my two favorite elements.

Truthfully I like the look of an entry table…but I really need the hanging space so I went looking for a simple bench.

And I found it….

IMG_1172.JPG

I LOVE this bench I found on Etsy. Not the least expensive bench out there (and I paid a tad more for walnut) but the quality and craftsmanship made it worth the investment.

Since the table is a family heirloom I didn’t want to get rid of it. The little wickerish bedside table in the guest room had no sentimental value so it got hauled to the bunk room and the table is now a bedside table in the guest room…perfect!

I love the look and feel of this entry now…warm, inviting, functional.

IMG_1173.JPG

I am currently playing around with the dining room table.

When it was set the other way, facing the living room….

….there was no room on the only large wall for a buffet or credenza.

So I have turned the table the “other” way, which gives me room for a buffet or credenza along the wall…

IMG_1176.JPG

But I am not sure I like it “that way.” So it will sit while I ponder.

That is just how I roll…sometimes I have to sit and ponder, like whether to put up board and batten or whether I should turn my table a different way. Sometimes I know almost immediately I am not going to like it. Prime example, the “river rock” I put in a flower bed for drainage. I knew immediately I did not like the white rock I put down originally!

So out came the white rock and I found some that I liked better…

IMG_1174.JPG

Sometimes it is okay to sit and “ponder.” I have learned that the more I really think about something, the more I tend to like it long term. When I just jump right in and start on a project without really visualizing it, living with it in my mind for a while, I tend to not like it as well. And that is a waste of time, energy and money!

Until next time….

A new bar top and Wayfair light fixture...

As I mentioned here, change is tough for me...which is why these things haven't changed much in 19 years.

I painted the dining room light years ago (antique bronze to black)...as much as I really didn't love the actual fixture, I loved what I could do with it during the holidays....

One year I removed the little shades and I liked that a bit better, but I still wasn't digging the light fixture itself.

Just too ornate and "heavy."

But I could never find one that would allow me to decorate it for the seasons...until I did!

(As you can see, I still have the Drexel buffet...love the piece...just not the color...waiting on "inspiration.")

The install was super simple...here I share how to install a new light fixture!

Not a huge fan of the Edison bulbs, but I think those can easily be changed out...eventually. For now I can live with them knowing that come fall (right around the corner...yea!) and Christmas, I can still decorate the fixture!

I think it is more of a "farmhouse" look but the nickel accents tie in with the more "modern style" brushed nickel bar lights. So it works for me....

Which brings me to the bar top....

...it wasn't totally offensive, but in my quest to go "light and bright" in my kitchen without painting all my kitchen cabinets, I impulsively ordered a white quartz top.

Truth is, I wasn't really loving it after it was installed. Just too "stark" and soooo white! 

I painted the little support corbels the same color as the trim...more "white." (They were originally black but since I didn't damage them when I removed the old top I just primed them and painted them with the trim paint...BM Swiss Coffee.)

This is what we refer to in the design world as "OMGosh what have I done" moments.

I decided what was really bugging me was the dingy old bar stool seats. They had certainly seen their better days. The bar stools are 18 years old and I still love the style dearly...heavy iron and super sturdy...but the "grey tweed" upholstery just didn't cut it any more!

Choosing fabrics is something I really struggle with...but I know I LOVE the fabric I used on this little chair makeover

Light and bright with just a touch of grey! So I ran out and bought enough fabric to recover the bar stool seats. About 1 1/2 yards for four seat cushions. If you don't know how to figure for fabric, take your measurements with you and they will help you figure it...just make sure you add 2" on each side! (Or better yet, just take a seat with you!)

Pay CLOSE attention to the direction of the fabric. This fabric doesn't APPEAR to have a "right or wrong" way, but it does. I put a pin in the top of each piece so I would know which way to lay the fabric on the seats!

Reupholstering chair seats is a super easy DIY project...probably one of the simplest DIY projects one can tackle! And this easy little project is an excellent way to make a pretty dramatic change in any room without breaking the bank or dragging out the sewing machine! There are thousands of great tutorials online...so again, do your research and find one that makes sense to you and use it!

In this case I had no desire to paint the stools...I like the black iron...but if you want to paint a dining chair or stool, do it after you have removed the seats but BEFORE reattach them. Again, super simple project! Use the KSTP method (kilz, sand, tack, paint...here is a pretty good paint tutorial.)

I removed the seat cushions! In this case, 4 little screws! I also scrubbed down the stools...pretty nasty after 18 years of use!

Then it was just a matter of wrapping the seats with the new fabric...I didn't even remove the old fabric or bother with applying a new underside....and reattaching them.

I guess that might be an issue if you are laying on the floor looking up at the underside.

Here I do share a few helpful tips on upholstering...pretty much applies to the simplest project!

While I had the camera out I played around with a few different "centerpieces" for the bar with knick-knacks I had on hand...

But honestly, with mischievous cats who insist on knocking everything off the bar, we are better off leaving it clutter free! Same with the dining table...too many broken vases and scattered flowers!

A few relatively minor decor changes that made a subtle but significant difference!