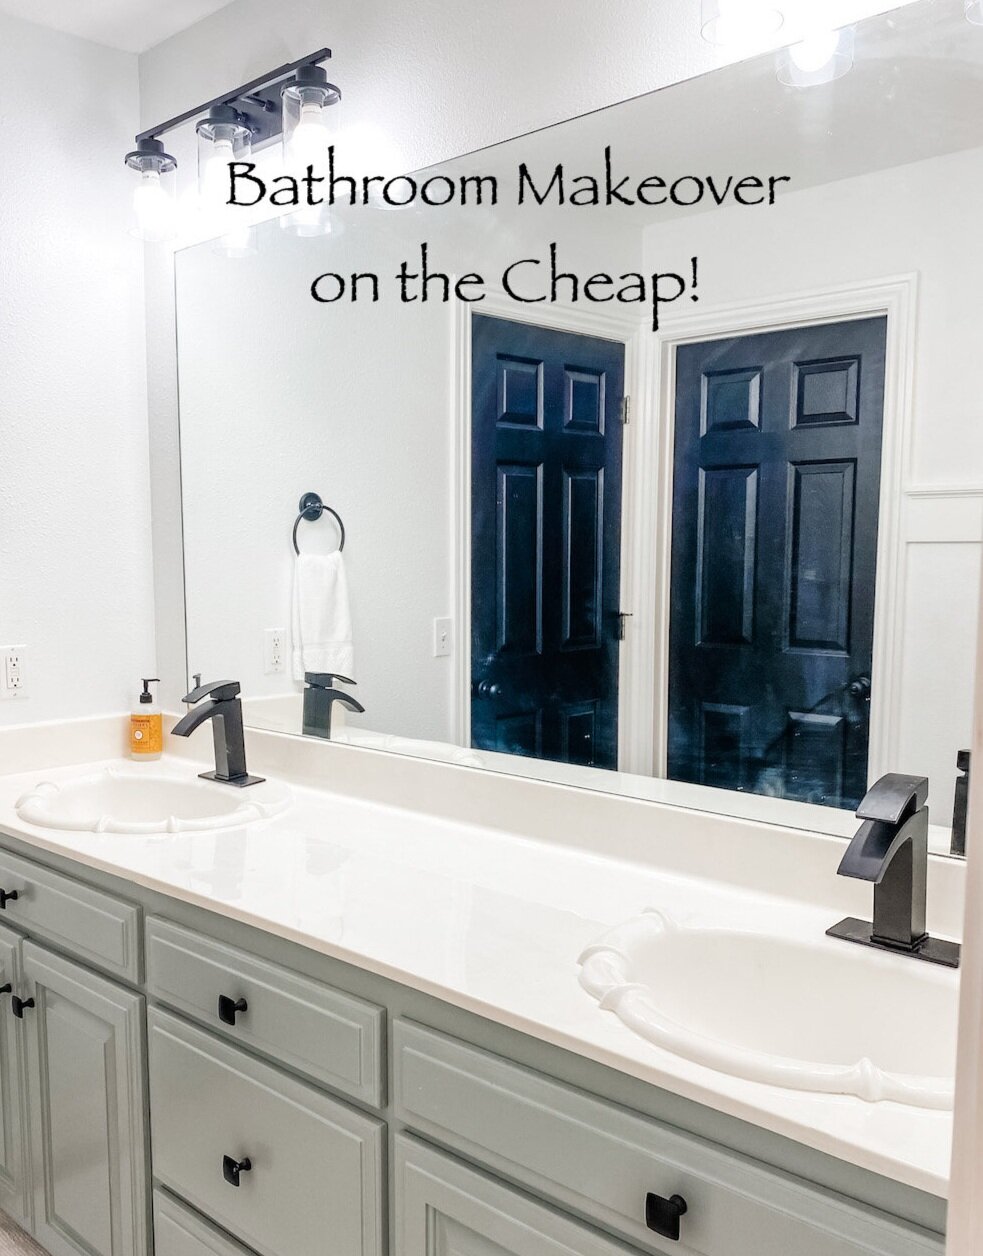
Bathroom makeover on the cheap....

IMG_1880.JPG

I consider myself “apolitical.” In other words, I have an opinion, a personal “ideology,” but I really try to avoid all the political “fodder.” It’s just too depressing, stressful, overwhelming…

It eats into my personal happiness.

But with all that is going on, I found myself sitting on the couch mesmerized by the news ALL DAY FOR AN ENTIRE WEEK!

I was so overwhelmed.

I HAD to get moving and my little morning walk and ride wasn’t cutting it…just too much time left in my day.

So I tackled a project I could not have cared less about lifting a finger or spending a dime on…the guest bath.

It gets used MAYBE 2-3 times a year when the kids come for overnight visits. I threw down a few comfy rugs, stocked it with “guest necessities” (this stuff is important) and hung a nice curtain. I would clean it when I knew we were going to have over night company…other than that…out of sight, out of mind.

The fact that few used it or saw it on a regular bases was just fine by me.

It wasn’t completely offensive.

It was just “blah.” Beige walls, off-white cabinets, dated, boring lighting and fixtures…just blah.

Again, who cares…

But I needed to get moving and put my body in motion. And this was the perfect project. Inside in the AC but away from the TV.

Inspiration…anything “unblah.”

My plan…”unblah” it.

Budget…as little as it takes to “unblah” it.

IMG_1843.jpg
IMG_1844.jpg
IMG_1842.jpg

Usually I am all for finding an inspiration, making a plan, and working with a sound budget. In my opinion, it is the only way to attack a big project like this.

But I need to move and I didn’t have the time or patience to sit and think about this for weeks. I decided my MAIN objective was to use the materials I have on hand and try to make a few changes that would “unblah” the space without breaking the bank.

First on the list…get rid of all the gold fixtures. The style wasn’t TOTALLY offensive but they are gold…gold towel and hand towel bars and gold TP holder. I decided to “repurpose” the hand towel holders and TP holder by painting them black. A little primer, a little black paint…both in my stash. Cost…zero.

IMG_1875.JPG

I also replace the faucets…the existing weren’t totally offensive but these were pretty inexpensive on Amazon…less than $50 each.

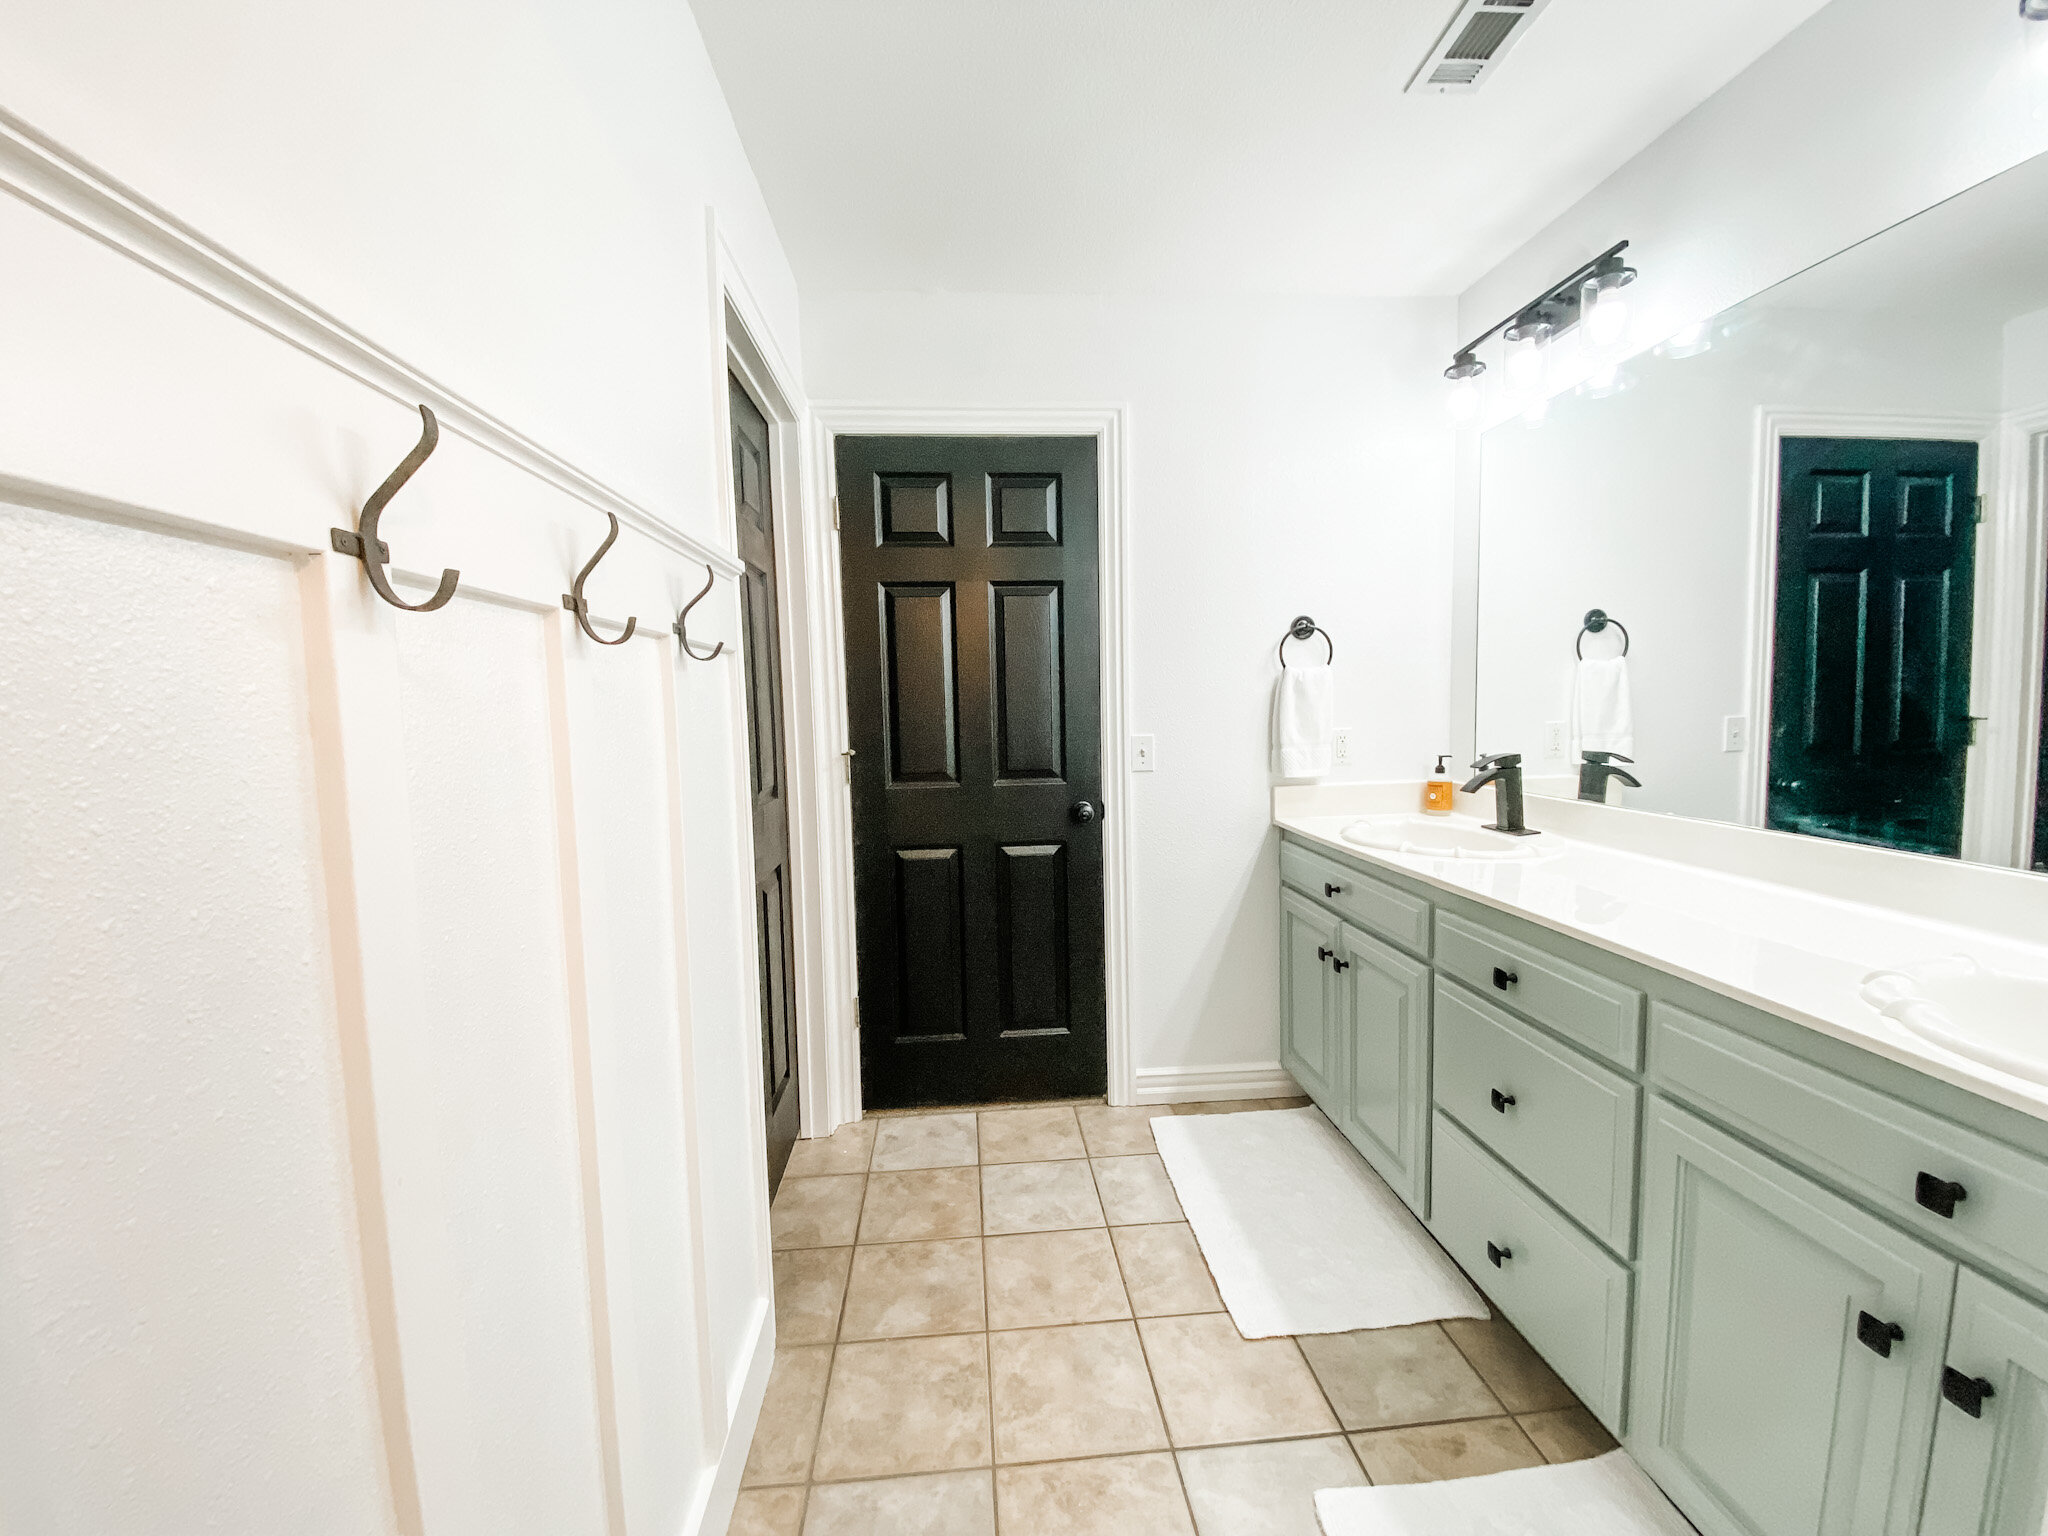
I removed the towel bar and added a little bit of board and batten with hooks for towels. Similar to my entry….super simple…again look for a tutorial that makes sense to you! Less than $50.

IMG_1886.JPG

I used some leftover trim paint to paint the board and batten and all the trim. Cost…zero.

I painted all the doors in the main part of the house before we moved in…but again, this space got completely ignored! I even ordered black door knobs but never put them on these doors. I used the left over black paint and the knobs I bought over a year ago. Cost today…zero.

The cabinets….I used the leftover paint from my master bath cabinets. Cost…zero.

I did buy new inexpensive hardware. About $4 each so less than $40. (But I could have painted the existing hardware with black paint I had on hand.)

IMG_1880.JPG

The ceiling needed to be painted. Big water spot around the HVAC vent. I sprayed the spot with some Kilz I had on hand and dug out the leftover ceiling paint! Cost….zero.

IMG_1839.jpg
IMG_1869.jpg

The beige walls needed to be “deblahed.” I painted them white…plain ole’ pure white. I only needed about a gallon and my son had some leftover from their house. Cost…zero.

IMG_1881.JPG

I would have loved to change out the 23 year old tops…maybe add a pretty tile backsplash…but the tops aren’t terribly offensive (just a bit dated) so for now they stay. Just added the new faucets.

Three new light fixtures…two vanity lights and a pendant light…again, Amazon. All three for less than $250.

IMG_1884.JPG

I could have repurposed the lights that where there with a little paint but the new were worth the investment.

Again, this space only gets used 2-3 times a years so it’s not like I need something expensive.

The flooring could stand to be changed…but again, this is a room that is rarely used….soooooo…..

The only other thing I would love to do in this room is change out the mirror…or at least frame it. I found THIS tutorial for a wall treatment I absolutely LOVE….

KM_DIYMirrorUpdate_0015.jpg

Not necessarily the gold mirrors…I think I would go with round wood framed. But I love the wood slate treatment and I may eventually tackle that project…someday…maybe when we have another national crisis and I need to focus on something constructive.

Sadly at the rate our country is going, that may be next week.

With all the negative looming over our heads…fires, hurricanes, Afghanistan, Covid, inflation….I can not stress enough how important it is to stay focused on the positives in your life. Believe me when I say I GET IT. It is hard to stay positive when people we love are sick and dying, our retirements are swirling the drain, you can’t meet you monthly financial obligations, the very fabric of our great country is being shredded.

Turn off the tv…shut down your computer….turn your radio dial. I’m not advocating bathing yourself in complete ignorance….just turn off and tune out the onslaught of negativity and focus on something that makes you happy.

The laughter of your children as they play.

The sound of the the crickets and birds on your morning walk around the neighborhood. (Get out and breath fresh air…EVERY DAY)

The babble of a brook in a nature park.

Coffee on the porch early in the morning before the heat and humidity sets in.

A tiny bit of “quiet time.” (Whether you do yoga, meditate, read your bible, just sit and stare…ALWAYS carve out a little bit of quiet, alone time EVERY DAY.)

A stroll down the aisles of Hobby Lobby…fall and Christmas are just around the corner!!!

I’ll admit it…my life isn’t all roses and peach fuzz. Somedays I really struggle to find something positive to focus on. But as I said HERE, you choose your “hard.”

Choose wisely.

Live edge tile backsplash and a dresser makeover reveal...

In my quest to make changes in my master bath, I FINALLY decided on the a sliced white pebble tile for the shower floor and niches. One decision down...too many more to go!!!

When I first remodeled the master bath, I did a glass tile backsplash on the vanity...I like it, but honestly I am no longer in LOVE with it.

And to be honest, I think the glass tile backsplash craze is running it's course. In other words, it is a fad that is fading...at least in my opinion. Besides, it had brown in it and I am moving away from browns!

Since it is such a tiny bit of tile, I decided to change it up a bit.

AGAIN WITH THE DECISIONS!!!! But I got to thinking...I love live edge wood countertops, coffee tables, benches..."live edge" wood anything is just beautiful! If you don't know what I am talking about, google it!

Why can't I make a "live edge" tile backsplash?

The pebble tile I picked out for the shower floor has a "live edge."

In other words the pebbles are laid on the sheet in such a way that the edges of each section of tile are "natural."

This vendor carries a tile border but it is only 4" tall. You can also remove each individual tile from the netting and place each individually...nah, way to much work for me!

Since I have a small backsplash, I cut each 12x12 sheet of tile in half with a wet saw. I only needed 3 sheets of tile...less than $40!

Then I had to set it on the vanity for a few days to see if I was really going to like it!

LOVE!!!

So here is a tutorial for making a "live edge" tile backsplash...

First, I had to remove the old tile. There are times when the easiest thing to do is to cut the sheetrock along the tile down to the studs and remove the whole kit-and-kaboodle! That was an option, but I decided to remove the tile and scrape the old mastic....

Since that tore up the sheetrock AND the new tile wasn't going to cover the entire section I removed, I had to do some sheetrock repair.

No biggy!

If you decide to cut the sheetrock down to the studs, here is a super simple way to "patch" the section you remove!

I didn't have to do any patching, but the basic rules apply...mud, sand, texture and paint!

Apply a coat of mud, let it dry overnight, then sand. Then another coat, let it dry and sand again. I can not stress the importance of sanding sheetrock mud smooth...FEEL IT! If you can feel it, you are going to see it when you paint it! Sand, feel, sand, feel! I used an 80 grit paper. You are better off sanding too much and having to apply more mud!

This product is one of my favorite little DIY "hacks." Sheetrock texture!

If you have properly sanded, this stuff will blend old with new! Just make sure you shake it WELL and always test spray it before you start spraying your wall. On more than one occasion I have had to wipe off the wall and start over because the texture came out to thick or too thin...so take time to test it before you start spraying it on your wall! The knob adjusts for different "textures." Follow the directions on the can.

Let the texture dry WELL before you paint!

And again, I can not stress the importance of keeping spare paint on hand. Fortunately, I just repainted my bathroom a few months ago so I had fresh paint on hand...

So, on to the fun stuff...tiling!

First, this is a "natural" stone tile (if you don't know if your tile is a "natural stone" vs. ceramic or porcelain tile, ask!) The very first thing you want to do is seal it with an "impregnator sealer." Ask...they have it at most home improvement and tile stores. Super simple to apply...brush it on...let it sit for about 5 minutes, then wipe it with a clean cloth.

I would suggest doing this before you cut it with a wet saw, but definitely before you install it and grout it!!!

Since the top edge of the backsplash is going to be the "live edge" it was important to remove any "netting" from the edge...

The net backing is what is holding all the little pebbles in place so you don't want to get carried away...just trim the netting away from the edge that will be exposed!

I used a utility knife and my little sewing scissors (and I wonder why I can't keep a decent pair of sewing scissors!)

I used a premixed tile mastic. Mastic is for small tiles...thinset for large tiles. Always use the adhesive and trowel recommended by the tile manufacturer. I coated the back of the sheet with mastic using a properly sized trowel. I used a small craft brush to apply mastic to the edge pebbles...it is okay for the mastic to "squish out" between the pebbles a tad, but you don't want it squishing out on the edge pebbles...I kept Q-tips on hand "just in case." Just make sure you get enough mastic on the back of the edge pebbles for good adhesion. 

TIP! Never set a tile backsplash directly onto the countertop...always use spacers and then after you grout you will run a small bead of caulk between the backsplash and the top. In this case I wanted a very small space so I used dimes as spacers! Thank goodness we keep a change jar and I was able to fish out a few bucks worth of dimes!

Let the mastic dry over night before grouting! 

Now this is where I tell you to "tune in next week" for grouting instructions. Why? Well because as I mentioned I needed 3 sheets of tile to complete this task and I only had the two I ordered as samples. So now I am waiting on the other sheet to be delivered so I can finish this little project. 

I know...it's annoying to get engrossed in something only to be told "to be continued." But I promise...next week I will share how simple it is to grout, seal and caulk the new tile backsplash.

Until then, I will share something I promised last week I would share!

(The grouting tutorial is up…take a look!)

A DRESSER!

I shared last week that I have been in "dresser mode" recently. I currently have FIVE dressers and chests sitting in my garage ready to roll! 

Last week I took a dresser in and it sold that day! I think it has been in my garage for over 6 months...I just never took the time to work on it.

It wasn't in horrible shape...just a really bad paint job (you could see all the brush strokes) and the hardware was pretty chippy!

I didn't change it up too much...KTSP...kilz, sand, tack and new oil based high gloss white!

The hardware got a little makeover...I primed it with metal primer and sprayed them with high gloss black lacquer.

Again, not a huge change but enough to give it a new life!

Maybe next week I'll share another one...if I can dig them out of the garage!

Well, that and the "to be continued" of the tile saga!