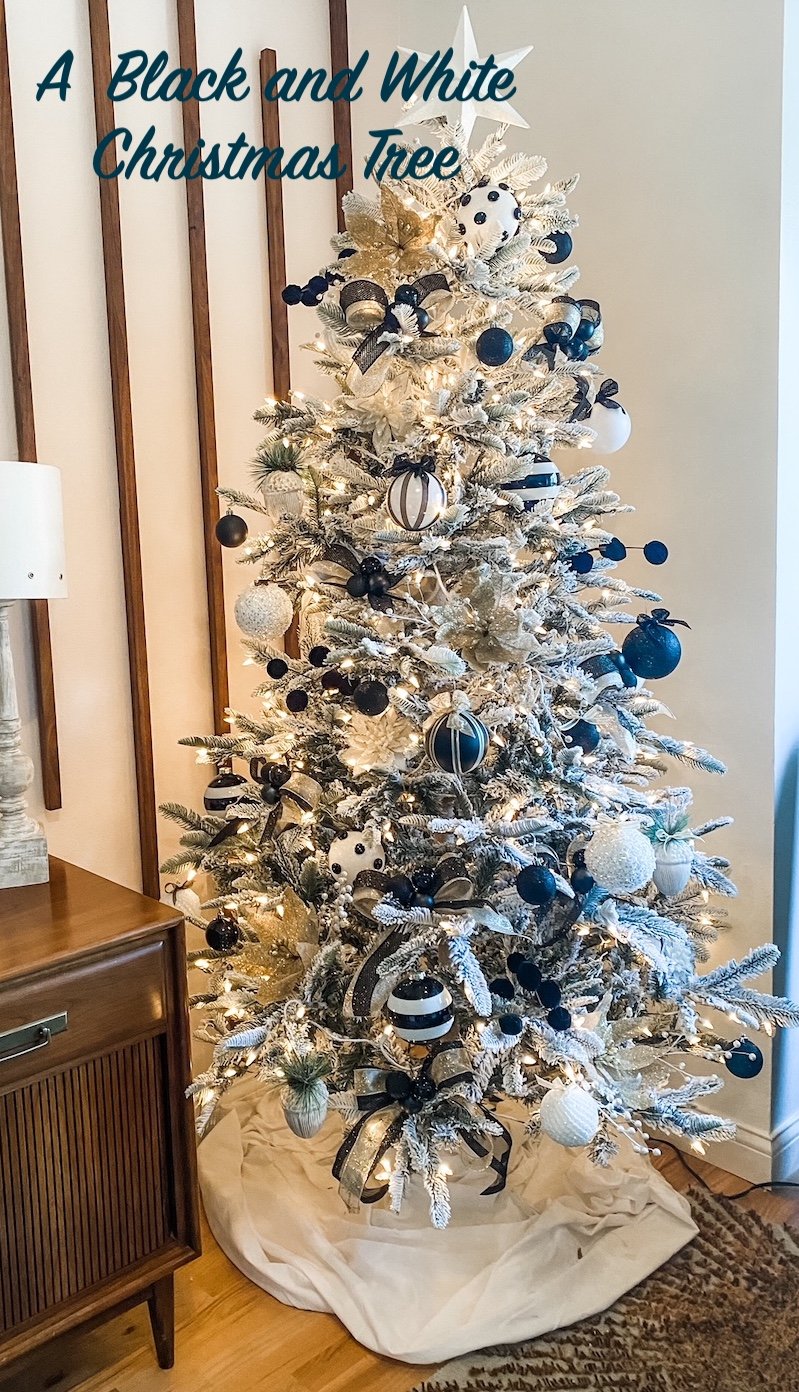
A new black and white Christmas tree...

This is our third Christmas in this house and every year I add something new.

Last year it was the “Stewart decor”….love and can’t wait to deck this room this year!

Year before was my “funky bow” obsession…still love those as well.

In both these links you can see a lot of my Christmas decor. Over the past few years I have added simple pre-lit trees to several rooms…guest room. office, all season room, dining room…most already had some “froo-froo” (flocking, berries, pinecones) so I didn’t really decorate any other than the main tree in the living room.

But while cruising Instagram I saw something that stopped me in my tracks.

This tree….

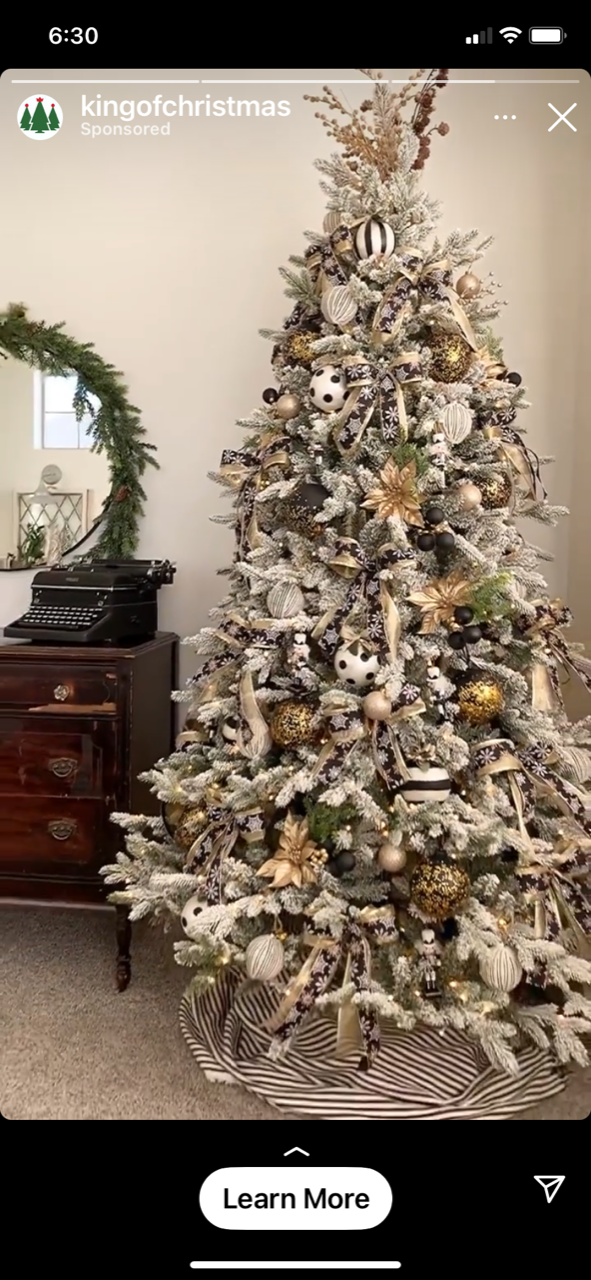
LOVE! I just think it is soooo pretty!

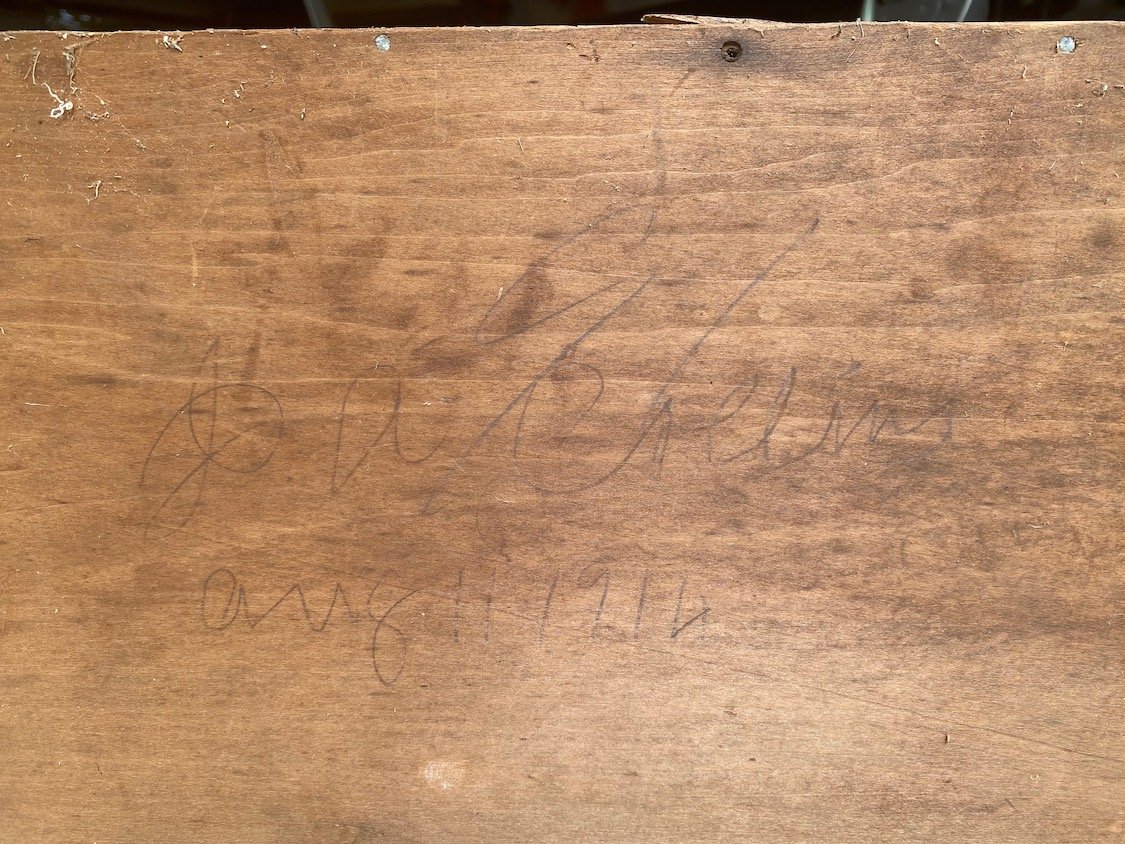
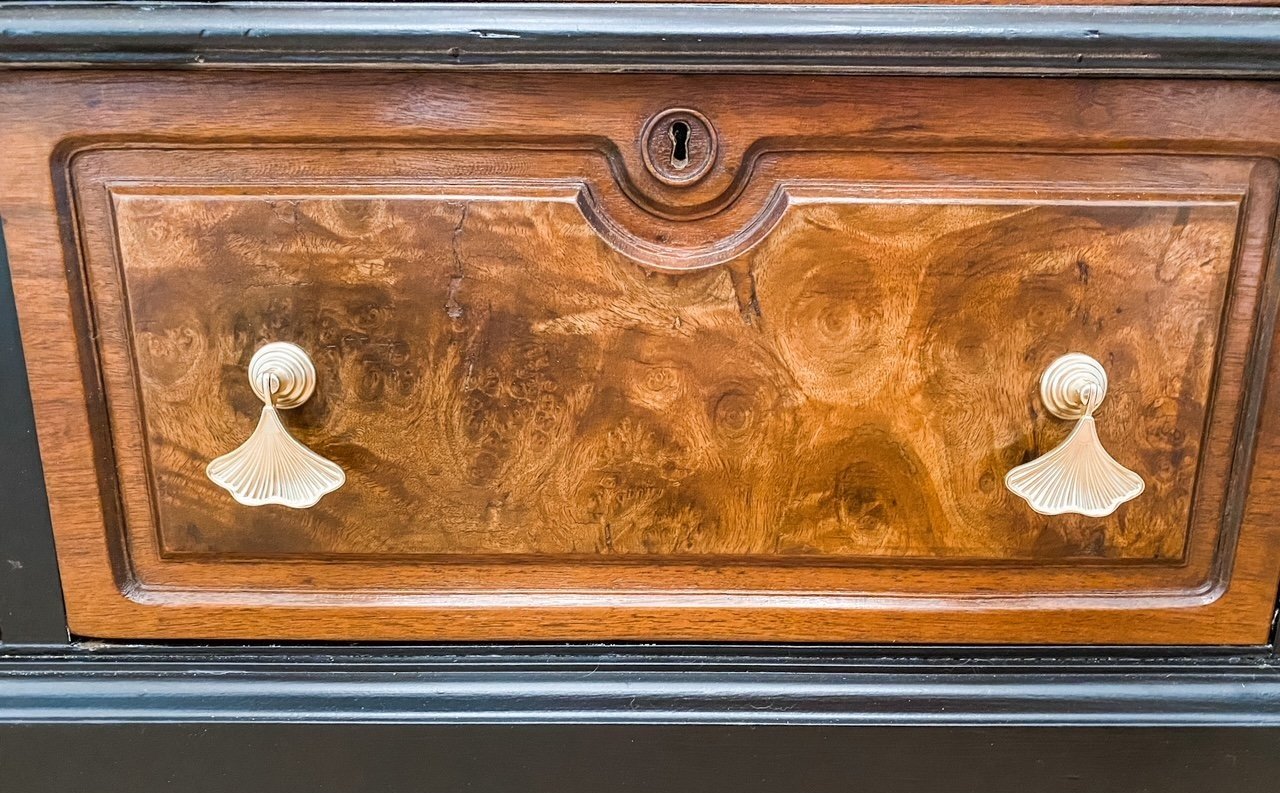
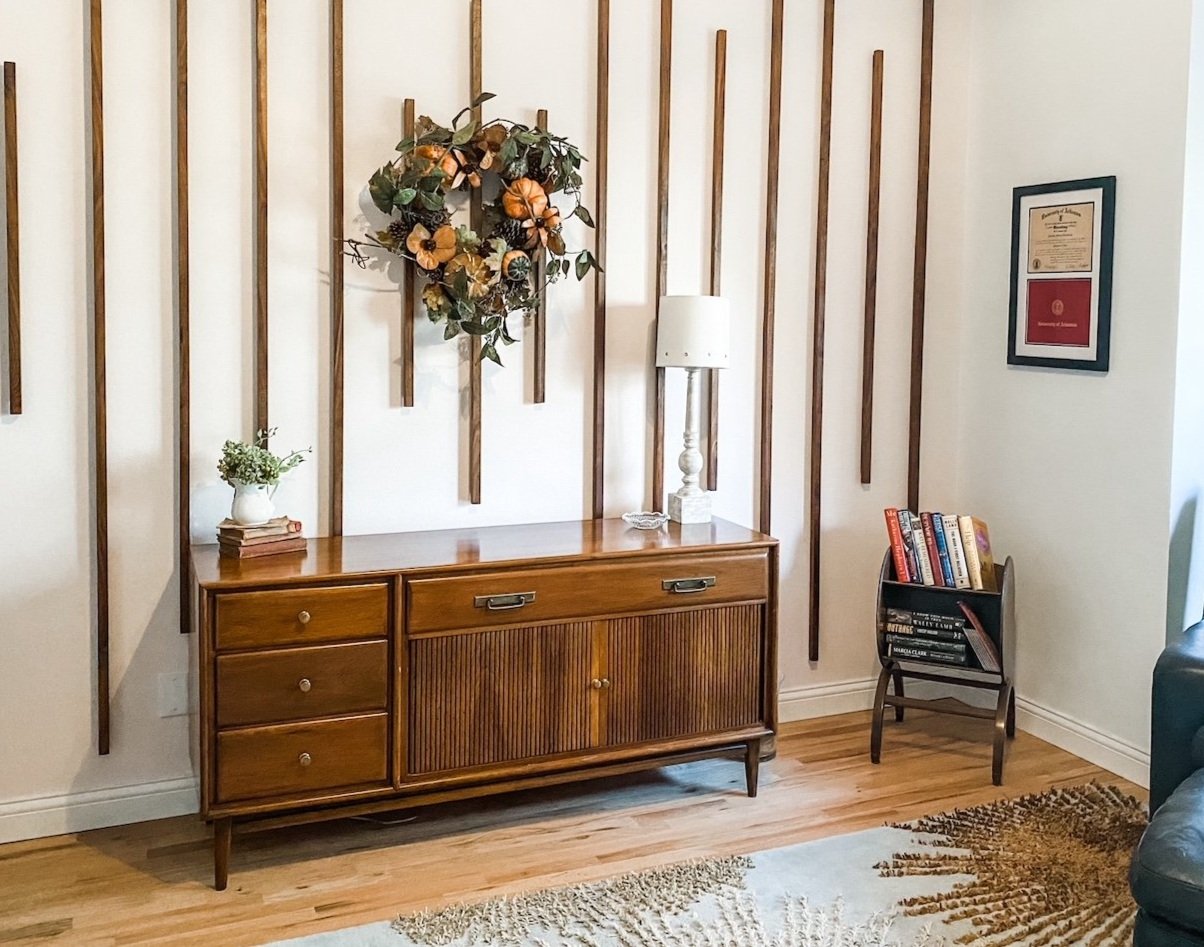
When I added the accent wall in my office earlier this year, a credenza is one element I wanted for this room. A few months ago I found the perfect credenza….a Heywood Wakefield Cliff House credenza in super awesome condition. Just happen to see it on an Instagram posting from one of my favorite vintage stores and was able to snatch it up over the phone. I can not tell you how much I love this piece….

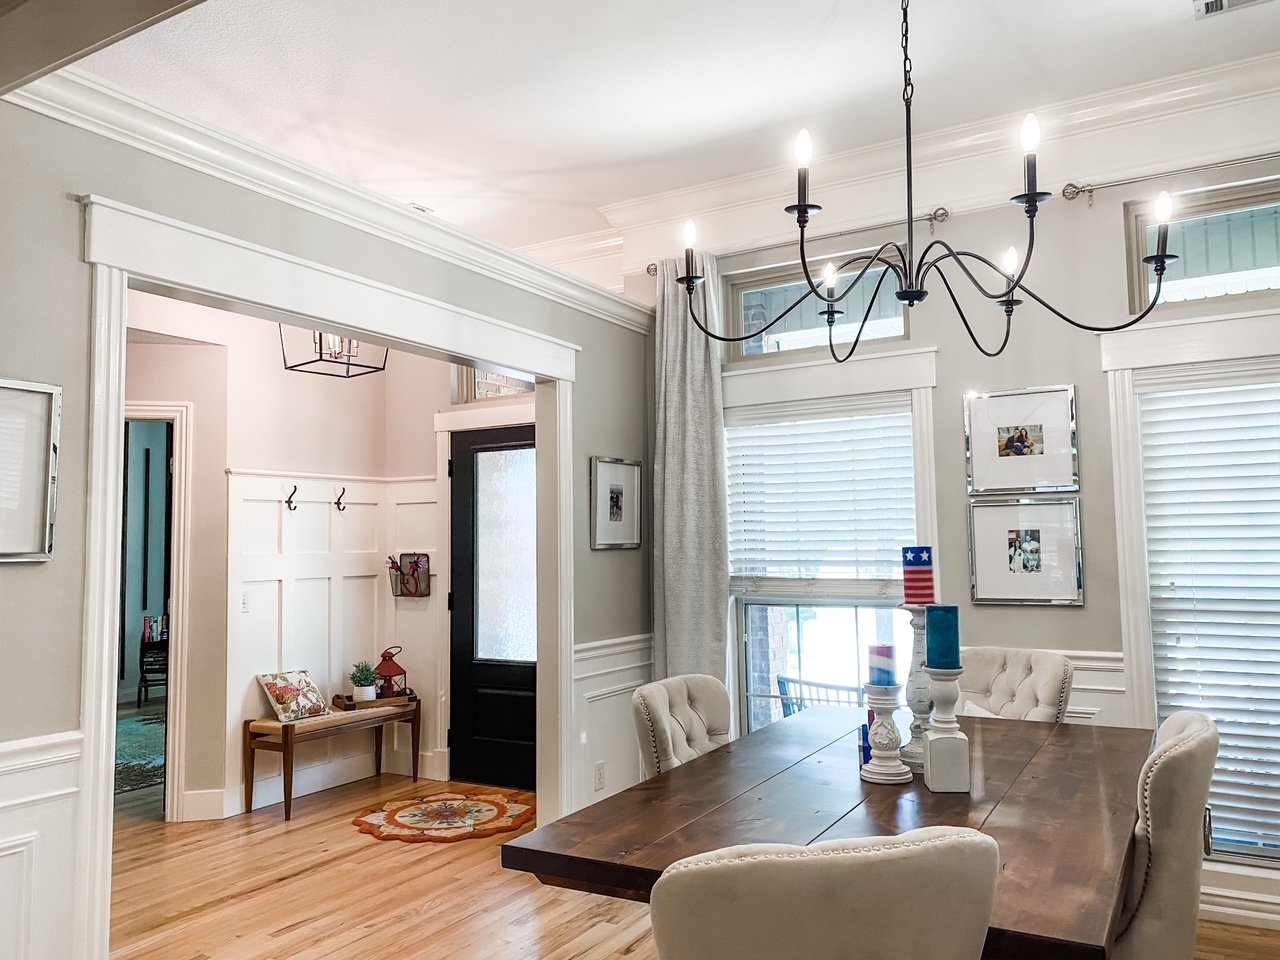
So….when I saw the black and white Christmas tree I knew exactly where I could put it. In the corner next to the new credenza in my office where it can be seem from the living room and entry!

Last year I bought a little flocked tree for this room and set it on the side table in the front window. Pretty but just okay.

So I set out to recreate the black and white tree!

First thing I did was order a simple pre-lit flocked tree…bought THIS one and I really like it.

Then I took a picture of the inspiration tree to Hobby Lobby to find each little element.

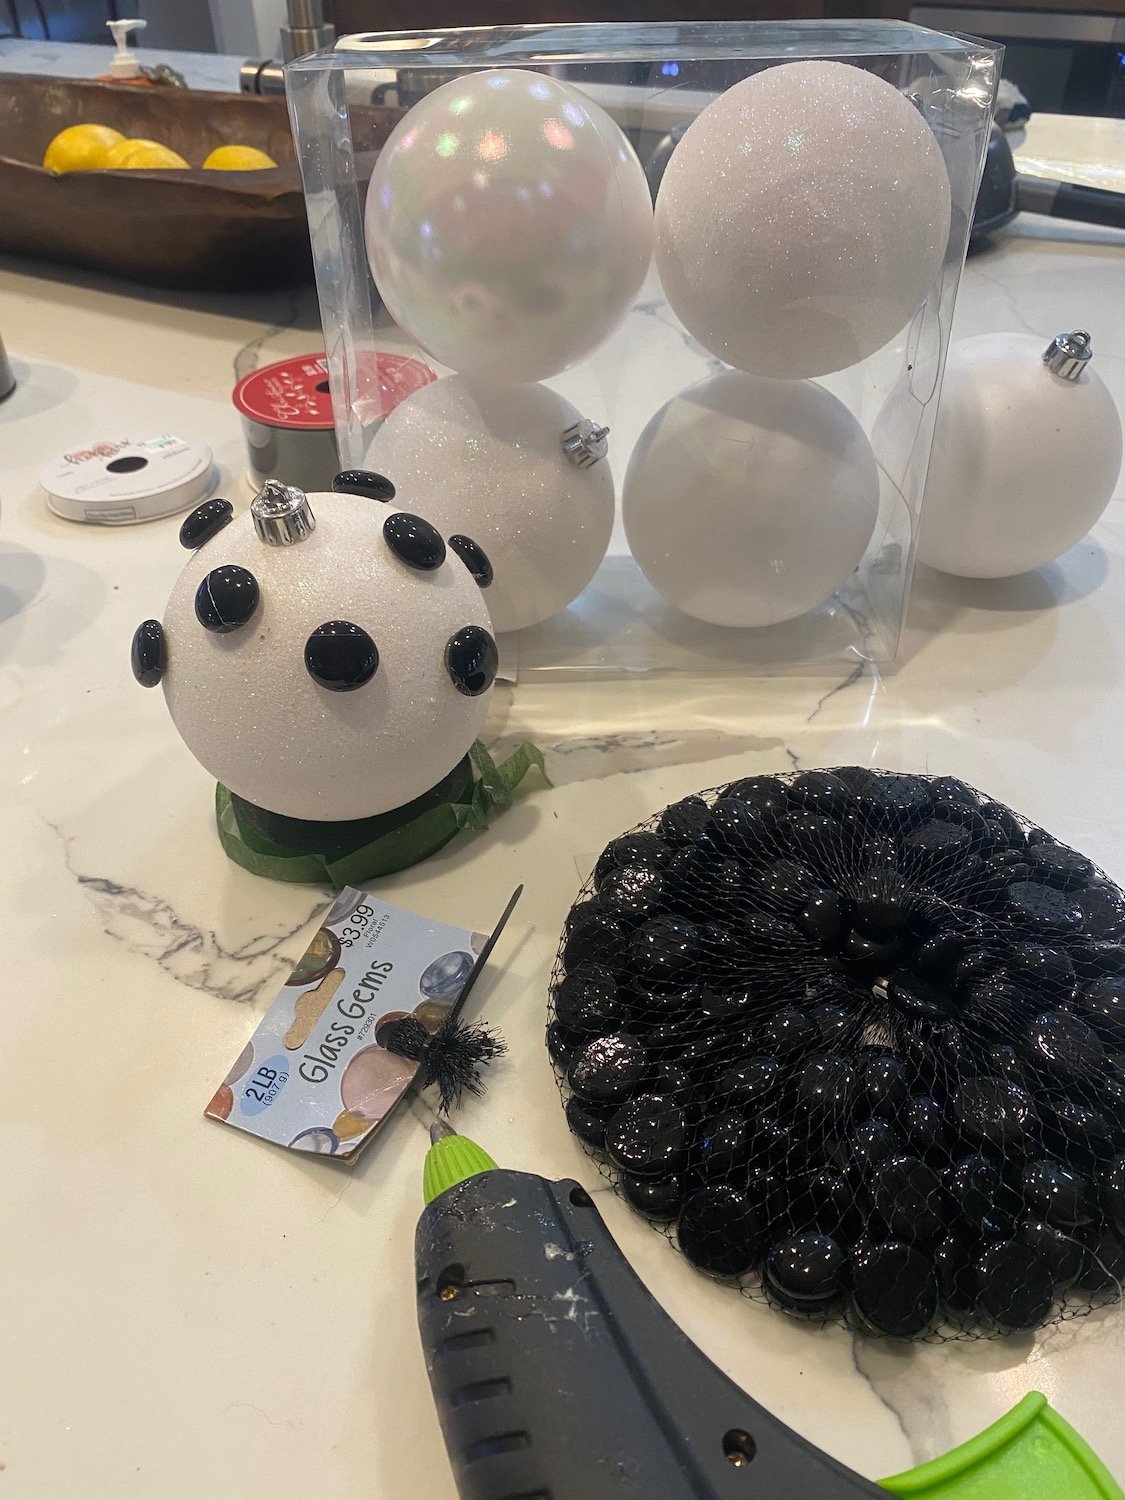
One problem I ran into was finding the different ornaments…black and white polka dot and striped ornaments are not really the “in” thing.

What to do, what to do?

Time to break out the ole’ glue gun and get creative.

I bought some plain black and white ornaments and glued black glass beads and ribbon to the white ones and gold ribbon to the black ones.

I added pretty little bows to a few ornaments..

I was able to find a few “glitzy” ornaments that I dressed up with bows, a few velvet picks and even some simple white pinecone ornaments.

I made big bows out of gold and black holiday ribbon and glued inexpensive small black ornaments together to create little clusters.

Filled in here and there with inexpensive poinsettias.

The ornaments are certainly not “keepsake” ornaments like the main tree but simple and inexpensive and will be super easy to change if I decide to go with a different color scheme later down the road.

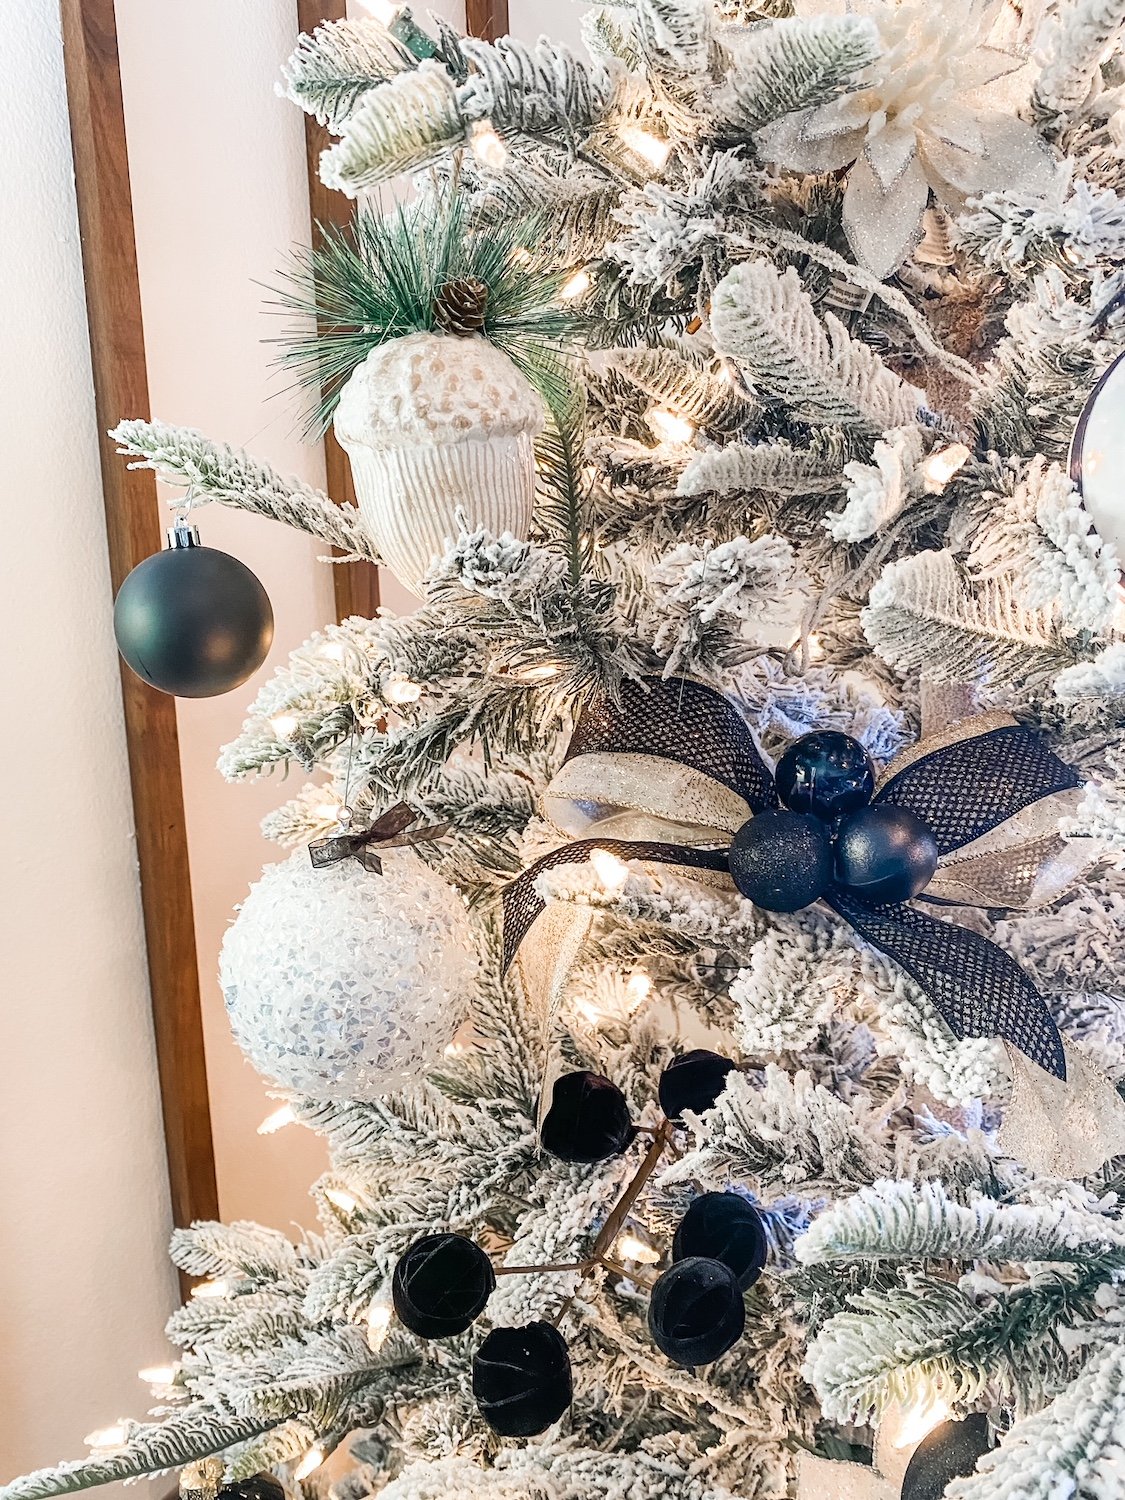
I wanted a tree that was simple but elegant.

I think I pulled it off!

I wish I had a link to the inspiration tree but it was on instagram and now I can’t find it. But there is tons of inspiration on Pinterest so look until something takes your breath away….then go out and create it!

YOU CAN DO IT!!!!

How do you eat an elephant....

I have talked often about checking off chores on my “honey do” list.

Now that I have completed a few major projects I am working my way through the list of “mundane chores” on my refrigerator….

Some people make their lists on their phones…some on erase board calendars. Me…just a plain ole’ note paper on the fridge.

It works for me. You do what works for YOU!

But just do it…make a list and complete one little chore at a time.

Whether it be repair something, paint something or clean out something.

This one has been on my fridge since this spring…nothing happens overnight!

My neighbor wants to paint the inside of her house. She doesn’t want to pay a fortune for someone else to do it but she is completely overwhelmed with the thought of painting IT ALL!

As I have said before…how do you eat an elephant? One bite at a time.

Case in point…one of the chores on my list is “paint trim.” By that, I mean ALL the trim throughout my entire house.

Why? Well I painted it lighter when we first moved in and now I found a white I like better. As I have completed a few trim projects around the house (the dining room wainscotting, the breakfast trim, the entry board and batten) I have painted them the “new” white (BM Chantilly Lace). That makes the old trim look “dingy.” Course now my kitchen cabinets look “dingy” so that will get added to the list

Holy crud what a chore.

So I have broken it down into manageable small projects. A few weeks ago I painted the trim in the entry. Then the trim in the living room and dining room. One day this week I did all the crown in the den and kitchen and the next the base and door trim. Still haven’t painted around the windows and eventually I will work my way to the master bath.

Only then will I mark that chore off the list!

I told my friend to do the same…make a list of all the rooms she wants to paint and break it down…each room…ceiling, trim and walls…then just start working the list, one area at a time. It may take a few months, but I really believe that if you break down the BIG projects into small manageable chores you are more likely to start and complete the BIG project…eventually.

So make a list and start eating…one bite at a time!

Another check mark on the "Honey-do" list...

We returned from our annual Colorado trip last Thursday. We rode trains, zipped across the Royal Gorge, rode bikes from Vail Pass, did our guided fishing trip, shopped, gambled a wee bit and drove the mountains looking at Aspens! Glorious!

Before we left I completed a few “honey-dos.” I got my fall decor up, we got our back yard sodded, I got the yard over-seeded, I painted some of the trim (repainting it with my new favorite white but still have more to go!)…just a few things on my “Honey-do” list I keep on the refrigerator.

Back home and back to work!

One of my spring projects this year was another swing pergola. I love these little projects and we sit in this swing all the time. (HERE you can find a pretty decent tutorial!)

One thing I knew I wanted to do from day one was to stain it black. I like the natural look of treated wood but it does grey over time.

I used Cabot Semi-sold stain mixed in black. I wanted black, but I also wanted to see the grain through the stain.

Almost all tutorials I have read on sealing or staining treated wood suggest you wait 3-6 months to treat it. Treated wood tends to be “wet” and it is important to give the wood time to dry out and “cure” a bit. In my case I waited around 5+ months…I would liked to have waited a tad longer but we had a super dry summer and I wanted to get it done before it gets too cold.

So this little chore has been on my fridge for 5+ months…I finally tackled it this week and was able to check off that “honey do!”

One down…so many more to go!

Fall tablescape...

I have some hard fast rules for decorating for the holidays. Fall decor goes up the week before we leave for vacation…usually the last week in September. Christmas goes up the weekend after Thanksgiving.

It’s the rules.

This past week I broke the rules.

It wasn’t really my fault. I got an At Home magazine in the mail. It had a really pretty picture of a fall tablescape and I was compelled to immediately go buy MORE fall stuff for my formal dining room. I blame it all on their devious advertising.

I went upstairs and dug around in my stash of heirloom china. I also pulled out the fall box marked “formal dining” …then I decorated my dining room.

I used my china and added little glass pumpkins, some amber stemless wine glasses and green place mats from At Home and straw placemats from Amazon

I picked up a few fall table runners but they didn’t make the cut.

i stuck a few little fall doo-dads in the china cabinet…

I made the center piece last year…fall candles, pumpkins, fall picks and some cotton stems in a round tray.

LOVE!

(You can check our the china cabinet makeover HERE!)

My son insists we use this room during our Sunday dinners. Since this china has to be hand washed, I have no doubt it won’t actually get used…we will just have to sit in the other dining room or move this fancy stuff out of the way…but it sure looks pretty.

For those who advocate using the fine china for every day use and not just for “formal”….you obviously have never had to hand wash dishes after feeding your entire family.

Right now we are having to hand wash everything anyway…our TWO YEAR OLD dishwasher isn’t working. I have no idea why…I’ve googled…could be one of four things. But after having to buy a new washing machine because we couldn’t get a simple part, we decided we would just buy a new dishwasher rather than pay $150 to have a repair main come out and tell us we can’t get a part we need. A brand new one was installed Tuesday.

So back to fall decorating. I love it and every year as soon as the temp drops below 80 degrees, I get the itch to start digging out the pumpkins and fall wreaths. But like every year, the temps climbed back into the 90s this week so now I haven the dining room decked out but the rest will have to wait a few more weeks.

That is okay! I will just enjoy the glorious summer flowers! And they are glorious this year!!

The never ending project....

Six months ago I shared a project I was working on …quilts. Sewing…UGH!!!!

As I pointed out in the original post, it was for a good cause…a way to show off the years of Christmas PJs my family wears every Christmas.

I finally finished the first SIX quilts I tackled.

Four are throws that are being given to my daughter-in-laws and my grandsons for their birthdays. I know they should probably be Christmas gifts but I want them to have them for the Christmas season. I also made a twin size and a full size for the upstairs bunk room.

This past week I added shelving and organized our spare room closet so that Brian can move all his “stuff” out of the guest room closet and into the spare room closet. While in the process I finally decided to organize the boxes of leftover fabric from the massive quilt project.

Well, low and behold, I had enough panels to make a throw for Katie…might as well whip that up…

…and Sarah wanted pillows…I didn’t have any panels for those so of course I had to whip those up as well…

…and I wanted a pillow using some scrap green velvet I found…whip that up. Two days of “whipping” and I am WHIPPED!!!

But I managed to use up a good bit of my leftover scraps and get everything organized. I still have a bunch of plaid pieces left I may do something with…someday!

It has been a few weeks of “giving what you have.”

One neighbor wanted a counter top over her washer and dryer…done!

Another wanted a walnut mantel… (similar to mine)

…and a storage divider for her baking sheets…

Done and done.

And of course I have a long list of things I want to get done before we head out on vacation in a few weeks. So little by little I am chipping away at the list on my refrigerator.

No, the closets and the sewing projects weren’t on the list.

That reminds me, I need to add them to the list so I can check them off!

The wardrobe reveal....

Last week I shared the wardrobe cabinet I planned to refinish and convert to a display cabinet….HERE.

Definitely lacking in soooo may respects. But I had a pretty good idea of what I wanted to do with it.

These “inspiration” pictures have been on my computer for over a year, just waiting on the perfect piece to transform!

The last one is probably my favorite…a Pinterest find. It was the one that influenced me the most, as you will see.

So the plan…remove the panels in the door and add glass. Remove all the shelves and add glass shelving. Lighten the back of the inside. Strip the doors and drawers and apply tung oil. Paint the rest of the outside of the cabinet black. Replace the hardware. Add a light.

So of course the first step is to deconstruct and then begin the stripping process on the doors, drawers and inside back panel.

What a chore!!!! I think someone, at some point, had applied at least 20 coats of poly. The 1/2 acetone, 1/2 lacquer thinner process I shared HERE, wasn’t cutting it. I applied Citristrip and wrapped everything in plastic wrap…that seemed to do the trick for 80% of the finish…then I was able to sand off the rest since this was mostly solid, then clean it up with the 1/2 and 1/2 mixture. Remember, you don’t want to vigorously sand veneer because it can be super thin and you can end up sanding right through it. I started with an 80 grit then finished with a 220 grit. Then I hand sanded it with 220 to get it butter smooth.

I knew this piece was old (which is why I know the poly was NOT the original finish) and that was confirmed when I checked out the underside of one of the drawers.

It was signed and dated…most likely by the person who constructed it…August 11, 1914…wow!

The other thing I discovered was the mortise and tenon peg joint. So super cool. Normally drawers are constructed using dovetail joints. This was unusual to find, but probably not unusual for the times.

I removed the doors to make it easier to work on the inside as well as make it easier to strip them. Remember to ALWAYS reenforce screw holes when you remove the screws. Not hard at all. Just take a match stick, dip it in wood glue, then insert the stick in the hole and break it off.

This will ensure that when you go to reinsert the screw, it won’t be loose or “wonky.”

I stripped the inside back panel then sanded it down. I tried lightening it with oxalic acid but it still seemed a tad to dark and a bit yellow. So I ended up applying a whitewash. Just a little white paint mixed with water, brush it on, wipe it off…like a stain. I can still see the character and grain of the wood but it lightens the interior considerably.

There was a tiny bit of veneer on the base of the cabinet and one side was in pretty rough shape. My original plan was to remove all the old veneer and apply a new piece. I planned to paint the outside of the cabinet so it didn’t matter that it would be different than the other side.

Problem was, when I went to remove the loose veneer, some of it was SUPER stuck…as in it was NOT coming off.

Soooo, punt.

I scraped off all that I could then I used wood filler to get a smooth surface.

This picture is after the 1st coat.

The whole process took a lot of time and patience. Fill, let it dry, sand…apply some more, let it dry, sand. It probably took 3-4 applications to get the side perfectly smooth and ready for paint.

REMEMBER, paint will NOT cover poorly patched or repaired areas…if anything it will highlight it. So take your time and do it right!

After patching, puttying and caulking, I primed the entire outside of the cabinet with primer, sanded it smooth with 220 grit paper and then wiped it down with a tack cloth.

I then spay painted it with a flat black paint. Remember, light coats…2-3.

The paint I used SAID it was primer and paint in one. As you may know, I do not trust that and will ALWAYS apply a good primer before paint…always.

I stripped the drawers and doors (using this process) and I used my new favorite tung oil finish to seal them.

I added new shelving support using some leftover walnut I had from my office feature wall project. I wanted good solid support since it would be holding glass shelves and china…glue and nails!

(This is solid natural walnut…no stain…just an oil finish!)

I moved it in the house before I added the glass or hung the doors…just made it lighter and easier to move…okay, RELATIVELY easy…this sucker is big!

So, my original plan was to put it in my office. But it covered too much of the feature wall I worked so hard on. I moved the Drexel server into the office and put this cabinet in the dining room.

The final touch was the hardware. My original plan was to find some simple tear drop hardware. While looking, I found these precious little ginko leaf designs on Etsy.

Back story…years ago when my kids were little we lived in a house that had a HUGE old ginko in the court yard. I have the loved these trees ever since. Kind of quirky but with a story.

I added a LED light inside the cabinet…simple!

Now I have a place to display more of our family china.

Rather than fill it with all the china I have stored away I selected a few serving pieces of each set. I like to use antique books as risers so I picked a few up at a local flea market.

The only things I purchased were the candle lantern and a fake plant. I know, fake plants are suppose to be “faux pas” these days…I don’t care…I can’t keep a real one alive and it looks lovely.

I love to decorate this room for every holiday so I can’t wait to doll this piece up for fall in a month or so…then Christmas.

I think it will be just stunning!

The wardrobe makeover....

You may have noticed I have been MIA for a few weeks. Pretty unusually for me.

It is the “dog days” of summer…just too stinking hot to do anything major outside. Really too hot to do any projecting inside that requires me to go outside. Just plain HOT!

I have been working on a few little projects. My neighbor has been using her golf cart garage as a make shift office. A tiny little garage in her house with a tiny little garage door. It is heated and cooled and is a good little space for a small office.

No I did not take before pictures. Wish I had because after she had the garage door replaced with a large slider, I spent a few weeks repairing walls, painting and changing out the lighting.

SOOOOO darling. The large slider looks out over her flower garden and the space is just wonderful!

This was one of those “Giving what you have” projects. I can paint, repair sheetrock and do minimal electrical…and that was exactly what she needed.

I also started painting my interior trim. At some point, eons ago, I painted all the trim in the house a “whiter” white. Well now I have found a white that is even “whiter” and is my new “go to” white. BM Chantilly Lace. At some point I started using it on all my trim…when I gave my master bedroom a makeover….the laundry roommy office. I used the new whiter trim paint in all those rooms. But the main part of the house all has the old white trim. When I added the wainscoting in the dining room, I used the new white. No one but me could probably tell the difference….but I could. So now I have to repaint ALL the trim. Curses.

Good project for the dog days of summer!

A few early morning yard projects…a few “give what you have” projects…but really nothing earth shattering!

But that is about to change!

As I have shared, my days of major furniture makeovering are pretty much over. The ole’ back/knees/hands just can’t take it any more. But every once in a while I decide to take on something because, well, I want it.

For over a year a few “inspiration” photos have been on my computer. I just LOVE these cabinets….

(Again, no I don’t have sources…I found them on Pinterest and dropped them onto my desktop. I think the second one is an Etsy find and the third one has her watermark on the photo! She has a pretty good tutorial for the this makeover on her website!)

I just love these pieces and always knew if I could find the perfect piece, I would get it. Never thought I would, until I did.

A local flea market posted this piece….

It just so happens that last week I finally sold one of my office pieces….this credenza has been languishing in my home office since we moved in just collecting dust.

It is one of those pieces I LOVE and spent entirely too much money on…so the thought of selling it for pennies was painful. But it had to go…it no longer served it’s purpose as a flat screen tv credenza and was taking up space. So now I have moved my desk to that wall and have nothing on feature wall.

My plan was to put a mid century style credenza on that wall…the wall treatment is kind of “mid centuryist” and I do have a lot of other pieces in that genre. I absolutely love the style and was pretty much sold on the idea. Simple, clean, sleek. No frills or froo-froo.

But when I saw this old wardrobe, I knew it was exactly what I didn’t know I wanted.

Okay, not EXACTLY…it needs some serious work!

I brought it home and parked it in my garage.

I love being able to park my car in the garage now so I RARELY use it for projecting. But this piece was just too big and hulking to haul back to my shop so I decided to give it a facelift in the garage.

The plan….remove the door inserts so I can add glass. Strip and oil the doors and drawers. Strip the interior and lighten it…either with wood bleach or a whitewash treatment. I don’t want it painted “white” but I want it lighter. Rework all the shelving and add glass shelves. Lighting is a must. Paint the cabinet black. Black cabinet, natural wood doors and drawers, lighter interior.

I THINK the doors and drawers are walnut but I won’t swear to it until I get it stripped….I CAN’T WAIT!!!!

I think it will be amazing!

Funny…I have spent the last 20-25 years leaning more towards simpler, mid-centuryish stuff. Moving away from “traditional” and all the old antique stuff I loved so much 25 years ago. Now I find myself drawn BACK to those styles.

Part of it may be this house…I have the space to accommodate larger pieces. But I think the real reason is “style influence.” As much as I THINK I do my own thing and don’t allow myself to be influenced by the trends of the day…if I was honest, I think I do. I use to believe “my style” was mostly eclectic…leaning more towards mid-century/transitional. If I REALLY look at how I have decorated this house, I think it is kind of “modern farmhouse”/traditional…still eclectic…just a different mix.

Hum…interesting.

Regardless, I still think there is something to be said for being “eclectic.” This is a piece that you wouldn’t think would work in a room with a “mid century” influence…the desk, the side table, the wall treatment. But I think it will look amazing!

But that is me…to each his own.

Maybe next week I will have this done and ready to share…maybe. It is still pretty hot outside!

The dining room wainscoting reveal...

As I mention HERE when I was looking for inspiration for my dining room, I like to keep a list of projects I want to complete so I can check them off as I go.

CHECK!

The dining room wainscoting is done.

Not sure it is really even noticeable, but to me the room looks much more “finished.”

BEFORE

AFTER

Super simple project with simple but lovely results….

The entire space is a far cry from where we started two years ago….

So another simple project checked off the list.

If you will remember, I followed Timisha’s tutorial for this molding…she really does a great job of breaking down the process! She is one of the reasons I don’t do a lot of detailed tutorials…why reinvent the wheel when I can just link you to one…lol!

I still have a few more projects I would like to complete but OH MY GOSH it is stinking hot…with NO relief in sight.

Sooooo…I am doing what I always do in the heat of the summer. I am hibernating. Well, at least after noon. Good thing I get up early…I can cram my entire day into the morning hours!

Dining room wainscoting...

I keep thinking I have no more “major” projects to complete around this house…but inevitably I find something I want to do.

The dining room…a tad formalish but we actually use the room more than I thought we would for casual dining.

Like much of this house it has evolved over the last few years….the first Christmas featuring our new tablecurtainsthe new buffet….all relatively minor.

When we first bought the house the formal dining room was pretty blah…

Right off the entry…first thing you see when you enter the house.

This is the Christmas decor…LOVE! I love decorating this space for holidays and seasons!

As I have shared before, I replaced the arched transoms with rectangular ones, removed all the crown above the doors and windows and changed the light fixtures…all in an attempt to “detraditionalize” the space. It had chair rail and it was obvious it had wallpaper below the chair rail at one time. Before we painted, I had the painter repair some damage from where the wallpaper had been removed and add texture. Then we painted.

For months I have wanted to add wainscoting or SOMETHING to jazz up the space a tad. The only problem I have is that most of the wainscoting inspiration I can find is either really traditional/formal or casual “farmhousey” (like board and batten.) While I have made some changes to detraditionalize the entire space, I don’t want to go super casual. So not formal but not casual.

Don’t get me wrong…I like board and batten wainscoting.

I added it in the breakfast room

….and entry

…and I love it.

But it just seems a tad too “casual” for a formal dining space.

So…what to do, what to do.

I did what I always do when I am looking for inspiration…cruised Pinterest and the blogisphere.

There are a few issues with this room that will influence what I can do. First, the walls do not go all the way to the ceiling…so in my opinion, I need to keep the wall color above the existing chair rail.

Second, the existing chair rail. I really don’t want to remove it because then I have to do a bunch of sheetrock repair and truthfully, I think I can incorporate it into any design I pick…at least the height of it incase I find another trim i like better.

I know I don’t want to do any picture molding above the existing chair rail…kind of formalish.

I realize I have elements in this room that make it more “formal.” But I want to tone it down a bit.

So far my favorite look is this….

Timisha has a great tutorial HERE for this look.

Easy, relatively inexpensive…kinda formal but not so much that you feel like you have to set out the fine china.

Perfect.

Hopefully next week I can share the finished project!!!

Painted bathroom litter cabinet...

I keep a list of projects I want to do on my refrigerator. Repair the irrigation line on the norths side of the house, wainscoting in the dining room, paint the trim, trim tops of windows and doors, paint the bathroom cabinet, add a flower bed around the backflow…and on and on it goes.

When something gets done, it gets marked off…when I think of something I want to do, I add it to the list!

It keeps me focused on what I want to get accomplished…eventually! And being able to check a project off my list feels amazing! (Sometimes if I do something that wasn’t on the list, I add it just so I can mark it off)

I’ve managed to get a few things done this week. The flower bed around the backflow is done. The dining room wainscoting is done (will share next week) and the littler box cabinet in the master bath has been painted.

Why did the litter box cabinet in the master bath need to be painted since I just painted it you ask?

Last year I painted the bathroom cabinets and in my opinion the two kind of clash…so it has bothered me for the last year.

So I wanted to paint the litter box cabinet but couldn’t decide on a color.

Last week I was cleaning out some drawers and found a little dish my daughter in law got me as a gift. I have no idea why it was stuck in a drawer, but it was my “inspiration” for the cabinet.

I have three cats…I would have more if Brian would tolerate it. My children know me well.

Anyway, I love pink. When I finally decorated my home office, I added a tiny bit of pink. I try not to over-saturate my house with pink because there is a guy living here, but I do like to throw it in there from time to time.

Pink…

Since I had already done all the sanding and repair and priming and all the other fun prep work before I painted it the first time (HERE I did a fairly decent tutorial for turning a cabinet into a littler box), all I did this time was remove the hardware, scuff the finish with 220 grit paper, tape off the inside and rolled and brushed on my new favorite paint…the BM waterborne alkyd.

Better than my “go to” white…not as stark as black. Shined up the brass hardware again and walla!

Love!

Check. One thing down, a dozen more to go! But that is okay…being able to check one thing off the list feels amazing!