Traditional Christmas!

My Christmas decor changes so little from year to year I hesitate to even share. (search Christmas on this site…you’ll see what I mean!)

But every year I add one tiny element.

If you follow along you know that Brian and I travel to Colorado every year in the fall. We do our annual guided fishing trip and enjoy the fall Aspens. And every year we take a few hours to walk around Georgetown. A precious little mining town just off I-70.

Every year I try to find something a little Christmasy. It is a “tradition” I started years ago.

This year I picked up this little troll.

Too cute. I guess this year Santa trolls are the “in” thing. Again I rarely go all out with the latest “fad” but I thought it wouldn’t hurt to pick up one little piece to add to my “Colorado collection.”

This year as I set out my little collection it dawned on me that I have no idea what year I bought what. So this year I started writing on the underside of each piece the year I purchased them. Not important now but maybe 50 years from now it will mean something to someone.

Here are just a few pieces I have picked up over the years….

The snow birds….

I shared here the realization that I have an obsession with little birds.

The birch Santa…

I think Birch trees are the closest thing we “low landers” can get to an Aspen…I even bought a birch candle stick when I changed out the mantel decor this year…

This little guy….the older I get the less I want to hang and fluff so I love anything I can just tuck in a corner…

I didn’t actually buy this little guy…we stayed in a condo in Frisco and this was a little gift from the owners…just precious! How did they know?!

A “tradition” has to start sometime by someone! Don’t be afraid to start your own…time flies and before you know it your great-grandchildren will be reminiscing about years past at Grammy’s and how she always had Lord ? displayed in her kitchen…

The matching pajamas she gifted every Christmas eve and how she made everyone shower and primp Christmas morning for family pictures before they could open presents…

The 9’ tree adorned with priceless ornaments given to their grandparents by their great-great grandmother!

Sticking with “traditions” is the way to go for so many reasons…

1) It cuts down on the cost of the holiday. Decorating for any holiday can be expensive…especially if you change your decor every year trying to keep up with the latest “fads.”

Years ago I contemplated changing out the colors in these bannister wreaths to blue and silver…

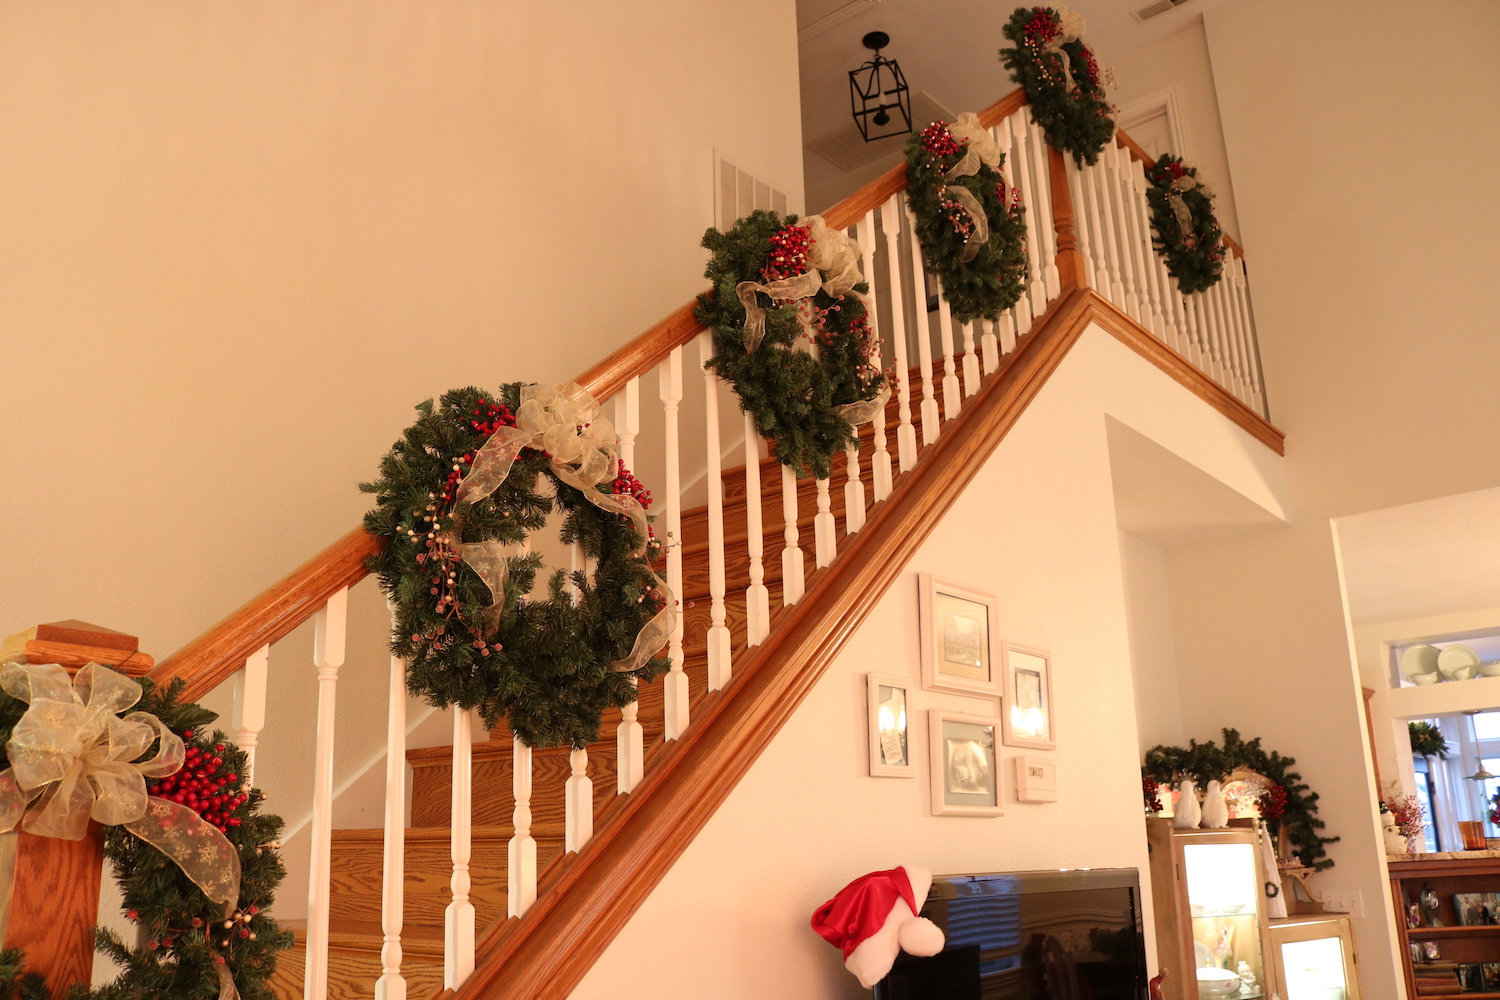
My daughter promptly reminded me that “gold and red” are traditional colors…she was right. I would have regretted spending a lot of money just to follow the “in” thing that year.
I ended up making a simple Christmas box with blue and silver and that pretty much fulfilled my desire to jump on the blue and silver decorwagon…

2) Your kids and grandkids won’t remember every gift you gave them but they will never forget the “traditions.” Whether it is the Christmas pajamas, a favorite dessert, the priceless ornaments. They don’t forget traditions…

3) While my “same-ole-same ole” holiday decor may seem a tad boring, decorating for the holiday is super simple since I pretty much know where everything goes and how everything is decorated, year to year. Little changes. It cuts down on the stress of holiday. I may pick up a few pillows or a knick-knack here and there if something strikes my fancy but most of it stays the same…i.e. easy and stress free.

This year I picked up a few “grey” holiday pillows for the couch…

But the guest bath is the “same-ole-same-ole.” I store a few trinkets under the vanity and pull it out…a festive candle, a little snowman, holiday hand towels, a holiday soap dispenser and a festive wreath I hang over the boxwood wreath. It takes me all of 2 minutes to “decorate” the guest bath.

4)Decorating for Christmas falls on the same day every year…without fail. The Friday after Thanksgiving. We fill the house with Christmas music, Brian heads to the storage building to pick up boxes while I take down all the fall decorations, and all day Friday and most of Saturday is spent decking the halls…and walls…and shelves. There is never a question of when we will find time to get ready for the holiday. Again, I may pick up a little something here and there throughout the season…but the bulk of it gets done that weekend.

Sticking with “traditional decor” (red, gold, green, silver) makes it easy to blend new with old if I see something that strikes my fancy!

5) I have no doubt that if the time comes when I can’t decorate my home myself, SOMEONE could step in and do it for me. Since little changes, all my kids know exactly how mom likes her mantle, the tree and her kitchen decorated. HOPEFULLY one of them will step up to the plate and take over the job if I am unable. Morbid? Maybe…but such is life…the day will come.

Keep the holiday decor simple and stick primarily with “traditional” vs. “the latest fad.”

These are my tips for enjoying this amazing season!

The grey couch....

If you remember, I had a booger of a time with my living room couch purchase. I ended up purchasing the “Michael” by Younger Furniture.

A year later, I love it!

One of my biggest concerns was the fact that it is grey. I wasn’t sure at the time if I was really going to like having a “grey” couch. Not grey-grey, but grey enough that I was afraid it would be dull or too trendy…or just “too.”

I felt at the time I was breaking my cardinal rule of going “trendy” on a big ticket purchase.

Truth is, it is a chameleon…it pretty much changes with whatever I throw at it. When I first got it, I had my Christmas decor up…and it looked great.

After the holidays I threw my teal and floral pillows and a teal throw on it and it looked just as awesome. (No photo…wow I need to take more pictures!)

Fall…oranges, yellows, greens, browns…wasn’t sure it was going to cut it.

But it did!

I love that it can take any color I throw at it! After the holidays I am considering transitioning to another color pallet in the living room…maybe a navy blue or olivey green. Don’t know yet but I know that whatever I do, the couch will not be a factor!

(You can see the transformations of grandmother’s chair here, the Drexel coffee table here, the club chair and ottoman here, the round walnut table here, and the large mirror over the couch here. )

And it really did turn out to be quite comfy.

Which brings me to the point I have often made…on big ticket purchases, stay neutral. I love the deep green and vibrant blue velvet couches. Beautiful! And if you KNOW you will love that couch for years to come, I say go for it. But if you just aren’t certain or you know you will want to regularly change up the look of your decor, stay neutral on the “big ticket” items and let your pillows, accent chairs, rugs, wall decor, throws, etc dictate the decor. Those elements can be easily and relatively inexpensively changed to make a big impact on the feel and look of a room!


Just another little makeover....

You are probably asking yourself “WHY?”

Why would she even mess with something so hideous?

Because I knew I could make them pretty…that’s why!!!

Truthfully these pieces didn’t have a lot going for them…but what drew me to them was the really cool hardware and they are pretty sturdy. Ugly, but sturdy!

The hardware is obviously “reproduction”…made to look like the hardware of years gone by.

They aren’t REAL flush mount ring pulls, but they are real brass so I knew with a little scrubbing, they would shine right up!

The top…fake leather…ewww!

But it was in good shape!

The front of the cabinet and drawers were solid wood but the sides were particle board…and it had some minor “water issues.” Some of the particle board had started chipping and “bubbling.”

Rather than use wood filler I decided to add a little trim piece to the bottom. Glue and trim nails…simple!

The trim covered the chipped areas and beefed up the base a tad. The minor “bubbling” on the particle board sanded smooth.

The bottom of the drawers had that “fake print” thing going on but they were in great condition. Ugly, but solid and sturdy.

I decided to disguise the “cheaponess” with paint.

First I removed all the hardware and spend a few hours scrubbing it. Again, I have no deep dark secrets for easily removing years of tarnish on brass. SOS pad and brass cleaner…and a lot of elbow grease!

I Kilzed the entire dresser…even inside the drawers.

Sanded everything smooth.

Tack cloth…always!!!!

I painted the inside and sides of the drawers with a sample pot of latex navy blue paint. (I recommend priming and painting the inside of drawers if they are “cheapos” or if you can’t remove offensive smells with a good cleaning and vinegar!)

Again, I am kind of obsessed with the white lacquer finishes especially with bright brass hardware.

The repaired sides painted beautifully!

Told you I could make them pretty!

Remember the MCM chest of drawers I featured here? I finally got the brass cone hardware from China…worth the wait!

Master bathroom reveal....

Like so much in my home, my master bathroom has certainly “evolved” over time.

Before the first “makeover.” Booooo…..

This is after the first little makeover. I removed the hideous gold shower enclosure…new cabinets and lighting…a new tile backsplash…new paint…new vanity top and sink…new mirror…new operable window (my absolute favorite change!)…nothing earth shattering but enough to give it a little update and make it more functional.

While the few changes I made on this go round SEEMED relatively straight forward, the process was messy, back breaking, expensive and worth every bit of it!

Demo and new plumbing done!

Durrock and shower pan done…

I LOVE the curbless showers…and I really thought about biting the bullet and putting one in…but that would have required busting out the slab under the shower and pouring another below the finish level of the rest of the bathroom or building up the entire bathroom floor, which would have required removing the counter tops and cabinets. That wasn’t happening…so curb it is.

Waterproofing done and tile going up! (yes, I hired the tile install…worth every penny!)

(Notice the fan hanging in the window…it is facing out. That helped pull a lot of the dust outside…not all but A LOT)

As I mentioned when I posted the first makeover, I didn’t have (nor do I really want) a big sprawling space to work with…it is a relatively tiny bathroom….and I am okay with that. I would rather have the square footage in other areas of the house. That didn’t mean I couldn’t create a space that not only suited our needs but was pretty.

I loved “the first makeover” for many years!

The time will soon come when stepping into a whirlpool tub we never use will be an issue so it was time to make some major changes…while we can still climb the stairs to the spare bathroom! I joked with Brian for years that we needed to do this before we broke a hip and couldn’t use the tub or walk upstairs…joke, right? Then our friend, BR, broke his hip and had to have a partial hip replacement…HE’S OUR AGE!!! Suddenly it wasn’t so funny and it really is a “need” vs a “want.”

First, I had to again find my inspiration…that was a tough one! I loved the tile surround and floor tile I installed 19 years ago.

Since it is a small bathroom I knew I wanted to keep it light and bright!

I brought home and ordered many tile samples and searched the internet for inspiration….

I knew the look I was going for. Light and bright and something that would carry me through another 20 years…..I didn’t want to do anything too trendy.

I love the sliced pebble tile and after using it on the tile back splash I knew I had a winner for the shower floor and niche!

I like the look of subway tile but I didn’t want the “busyness” of a small tile on the shower walls…fortunately Dal Tile makes a large 6x18 subway tile. One of the things I hated though was the small bullnose trim…usually 2x6. Fortunately the tile I choose had a large 4x12 bullnose trim…PERFECT!

The flooring…that was a real booger! Truth be told, I loved the floor tile I had…it was light and bright and had awesome “texture.” Unfortunately it was 12x12 tile with 1/4” grout lines…very 1999! I knew I wanted a 12x24 with small grout lines.

I finally settled on kind of a “greyish” porcelain tile I found at Lowe’s. But in my heart I knew I didn’t want to go with grey…just too “trendy.” While I was at the tile shop ordering the wall tile I stumbled upon a special order tile I thought I might really like. All they had was the sample board so I brought it home, looked at it for all of 5 minutes and went back and ordered it. Eck!!!!

But you know what…I LOVE IT!!!!

Originally I planned to use the bullnose trim around the window and niche. But then my “blog friend,” Cristina, shared her bathroom makeover and I absolutely fell in love with the pencil trim pieces she used! (Her bathroom is absolutely stunning and beautifully staged! Check it out!)

I immediately ran to our Home Depot only to discover THEY DID NOT CARRY IT IN STOCK! I found it online and ordered it. It arrived two days later as promised.

Broken! Eleven out of 26 of the fragile trim pieces were broken. And while I am smart enough to always order more than I think I will need, I certainly didn’t order THAT much extra.

I promptly reordered more trim. Fortunately the delay didn’t hang up my tile guys…too much! I ordered 20 more knowing I only needed 11…good thing I did because the second order had 7 broken tiles! (They really should reconsider their packaging!)

I absolutely love this trim around the window and niche!

Speaking of window…I know the glass block probably screams 1999 as well. My original plan was to change it out. Now that the tile is done, I don’t find it as offensive. It may not be the “hip” thing to have right at the moment, but I can live with it!

I decided to reuse the existing base trim. I carefully removed it during demo, pulled all the nails and sanded it. I painted it with my “go-to” trim color, BM Swiss Coffee. Then I reinstalled it, puttied the holes, caulked and gave it another coat of paint!

I debated on a glass shower enclosure but honestly, I don’t like them. Just too high maintenance…no matter what you do, there will always be water spots. I found a longer curtain online so I ordered it…nice thing about curtains, you can always take them down and wash them.

The teak bench. I didn’t add a built in bench because the only place to put one was in the back of the shower…the side wall and the back wall are on the exterior of the house so expanding “out” wasn’t an option. A bench in the back of the shower kind of defeats the purpose if you want to sit in the shower. Seriously, who does that? Brian…when he is sick he likes to sit in the shower. And I need something to prop my legs on when I shave them. So I bought a little teak bench. It looked kind of dinky sitting in the back of the shower and Mr. Jinx needs a place to sit while we shower (he use to sit on the edge of the tub…weird cat!) So for now it will sit outside the shower unless we need it (lets be honest, who really shaves their legs EVERY day?)

My super awesome son-in-law installed new lighting during the first makeover…I still love it! For now I will keep the lighting and the cabinets, vanity top and sink. All were good! (I did repaint the ceiling since I had to do a little sheetrock repair)

As you can see from these pictures I don’t do a lot of froo-froo! I’ve worked hard to create space for everything behind closed doors. Fortunately I have a large pantry space in my master closet where I store “extras.” No need for lots of extra storage cubbies and because the vanity top is relatively small, I don’t like to clutter it with stuff. I love the beautifully staged “spa retreat” mega bathrooms, but I don’t have the space or the desire…I want clean, bright and clutter free…very “utilitaryish.”

I do have bath rugs but they are plain ole’ white spa rugs so I took them up to show off the floors!

We don’t reuse towels so no need for cute hooks. We take our dirty clothes to the laundry room so no need for hampers. Everything is stored in drawers and cabinets so no need for pretty jars and baskets. And since I like to bleach all my towels and rugs I only use white rugs, towels, and wash cloths.

All in all, I’m pretty darn happy with these changes. Eventually I may change out the vanity doors and paint…I may paint the walls a different color…I may change out the block window…I may add a few more decorative elements…I may add some trim detail…I may change out the shower head to something more like a “shower” and less like “rain”…I may…I may not.

There will always be little “snafus” when remodeling…in my case there was the broken tiles and the difficulty of demo and the discovery that my “niche plan” wasn’t going to work. But in the end, it all worked out and I have a beautiful bathroom I HOPE will carry me through another 20 years!

Hopefully…maybe. Who knows! Check back with me in 20 years…lol!

A mid century chest of drawers makeover...the reveal!

When last we spoke, I shared a little “step by step” tutorial for repairing and prepping this “less-than-desirable” chest….

I can not stress enough the importance of “prep work” on any project. Again, if you don’t take the time to make repairs and properly prep (regardless of whether it is a dresser or a wall or a floor) all the “pretty” is going to be wasted.

(BTW, while cruising Pinterest I found this super awesome tutorial for repairing chipped corners with wood filler! Great suggestions!)

Make proper repairs, sand patches smooth, use the right tools and materials! Do the repairs and prep or you are wasting your time and resources making it pretty.

After all the patching and repairs, the next step is properly priming! (I had already stripped and oiled the drawers and set them aside!)

I primed the cabinet of the chest with Kilz. That is usually my go-to primer since it sands smooth and holds up well. Primer is a SUPER important step on most paint projects…unless you are chalk painting! Since this was a relatively small project I used the spray Kilz…one can.

TIP: I know a lot of paints SAY they are a “paint and primer” in one…I may eventually change my tune but I don’t believe them. I ALWAYS use a primer…always!

After the Kilz had dried well (usually overnight but several days is best), I sanded it smooth with 220 grit paper.

After sanding I checked all the areas I had repaired…there were a few little spots that needed additional putty and one I missed on the first go round…

…no biggy….I just filled them again, let it dry, sanded smooth, spritzed on a little more primer and then sanded it again after that had dried.

Tack cloth…it is an absolute necessity on any paint job. I see tutorials all the time that recommend wiping the piece with a damp cloth or even mineral spirits. Forget about it! USE TACK CLOTH! It will pick up the finest grains of whatever and will make a huge difference in the final look and feel of your paint job!

I’m kind of obsessed with white lacquer these days. i just love the high gloss finish. Spray paint is always a great option for smaller projects and you can find a multitude of colors and sheens! Just make sure you use a quality brand! You can also brush and/or roll alkyd (oil based) or latex (water based) paint. ALWAYS use an additive and use a high quality brush and 4” foam roller to apply the paint. Pay attention to the manufactures recommendation for temperature and application…it matters!

Regardless of whether you use a spray paint or lacquer, latex or oil, always apply 2-3 THIN coats, allowing dry time as recommended. Thinner is better. If you try to get a one coat finish, you will likely be disappointed and make a HUGE mess!

Spray, roll, and/or brush on the paint…a thin coat…let it properly dry, lightly sand the boogers AFTER it has properly dried with a fine grit paper (IF needed), tack and recoat. Regardless of whether you need to sand between coats, always use tack cloth before applying additional coats. I usually apply at least two coats and sometimes three.

Most paints do not need a top coat but if your piece will be getting a lot of use, I recommend a light coat of polycrylic. Polyurethane is some good stuff but it tends to “yellow” so polycrylic works great.

So…before….

…and the oh-so-better after….

You may have noticed one little missing element. The hardware! Why? Well because I didn’t pay attention when I ordered new brass cone knobs and they are coming from CHINA!!! So I should have them someday…maybe…who knows! The hard work is done…knobs are no biggy!

One of the patched areas after paint…

Dry time…IT MATTERS. I cringe when I watch DIY shows and they immediately stage all the pretty pieces they just painted. There is a huge difference between “dry to touch” and “dry to USE.” Truth is, paint and finishes need time to cure before you put all your pretties on it. You can move it in place, but give latex paint AT LEAST a week or two to cure and oil based paints a good 3-4 weeks. Otherwise you may find that your heavy lamp or knick-knacks will stick to the finish or leave a mark!

This is another dresser I finished up a few weeks ago. It didn’t have near the issues the first had, but the refinish process was the same…KSTP the cabinet and refinish the drawer fronts…presto-bingo…

Again, I know this sounds like a daunting and time consuming task…but if you take the time to do it right, you will have a piece that will last another lifetime and one you will be proud to use in your home!

Next week I hope to share my bathroom remodel. In the meantime, you can check out Cristina’s master bath…it will knock your socks off!

Until then….

Vacation and the bathroom renovation!

We returned from our vacation last week….AMAZING! One day of floating and fishing the Gunnison Gorge, one day of fishing the Colorado River and five days of beautiful Aspens in all their glory! Sadly, Brian nor I took our phones into the Gorge or I would have some breath taking pictures of some of the most beautiful landscapes this country has to offer. All I can tell you is to go see it yourself! It will not disappoint!

I knew I would have to hit the ground running when we came home. I have an apartment that needs tile repair, a cabinet rebuild and paint. And I found an amazing mid century dresser that has all the problems one might encounter with a dresser and I was excited to do a step-by-step tutorial on properly repairing busted drawers, fixing chipped veneers, stripping and painting.

But Monday the tile guys called and they are ready to start on my bathroom. Since I am too cheap to pay someone THOUSANDS to demo the old tile, I decided to tackle that chore myself with the help of my son, Matt.

And chore it was!!!! My plans to take out the wall tile in sections only worked about half the time…the other half we were beating out little chunks of tile and durrock. My plans to “pop up” the floor tiles went by the wayside when we discovered it came up in small slivers with a mere chisel and hammer.

One of the things I learned from my dad…build it to last a lifetime…and since I installed the tile 19 years ago, it was more than a booger to get up!

Thank goodness for tool rentals. This little “tile-buster-upper” thingy saved us about 2 days of work! Seriously, it was the best $60 I ever spend.

I still had to replace some insulation, add a few studs, do some floor scrapping by hand and I had to hire plumbers to move the drain and rebuild the shower valves. But all in all it is coming along nicely and HOPEFULLY it is ready for the tile guys.

As with all “best laid plans” there is one small snaffu in my plan. I had intended to do a shower niche on each side of the shower head…two shelves in each…like the one in my “inspiration picture.” Unfortunately the layout of the studs and plumbing messed up that whole plan….

…so now I can only put one on the right…que sera! Sometimes you just have to drop back and punt!

I can tile. Not a problem. Here I showed you the new backsplash I installed on the vanity! But I am glad I decided to pay someone else to tackle the bulk of this project. After two days of demo, I’m not sure I could lift a box of tile if I had to!

This is where I want to reiterate the importance of doing what YOU love! Not what is “in”, not what Pinterest says is all the rage, not even what your friends and family think you should do! I am all for “finding inspiration” for home decor and improvement projects, because let’s be honest, sometimes we just can’t find a vision for the changes we want to make. But doing what YOU love is important because otherwise you may find yourself hating an expensive change in the not so distant future!

I still love the wall tile and floor tile I picked out 19 years ago…but I know the day will come when stepping into a big ole’ whirlpool tub we NEVER use may be a major feat…a walk in shower will be, some day, a necessity!

So find your inspiration but do what you truly LOVE!

MAYBE next week I will have time to get started on that amazing dresser and I can share how easy it is to turn a trashed piece of furniture into something you will be thrilled to use in your own home!

Decorating for fall and Mr. Jinx....

Since it is time to decorate for fall and Halloween I thought I would take a minute and formally introduce one of my “rescues.” Mr. Jinx…

All fall decors should include a black cat…right?

I shared pictures of him last year at Christmas…black cats are super tough to photograph. When I look at pictures of him I understand why black is a “slimming” color…he is WAAAAY bigger than this picture reveals. The kids say he is fat…I argue he is just big boned and really fluffy.

Half the time his little fangs are showing…he can’t help it…he has big fangs. Kinda scary looking but super cute when he is stretched out on his back asleep with his little fangs and tongue sticking out…

I have more than a few pictures of him on my Iphone!


Funny story about how I acquired this kitty. He hung around the apartments for months…I knew he wasn’t a feral kitty because he was super friendly. He would rub against your legs and then roll over for a tummy rub. He loves to have his tummy rubbed!

One day I was sitting in my car talking with my manager and mentioned that we should probably take him to the shelter since he was a super friendly and beautiful kitty and someone would certainly adopt him. About that time he jumped in my car and made himself at home on my shoulder.

What was I to do?

Naturally I couldn’t bring him straight home since I didn’t know what I would be exposing my other cats to…so I took him to my vet and had him tested for all kitty diseases. Clean. My vet thought he was about 2 years old and because of his size probably a Maine Coon.

I told the vet to neuter him and give him shots.

At that point I had a small fortune invested in this cat…so I couldn’t very well take him to the shelter.

What was I to do?

Brian was NOT happy that I brought home another cat…

So I told Brian we would foster him. I promptly named him Mr. Jinx…because, well, he’s black…and black cats are suppose to be jinxed right?

This was two weeks before Christmas so with the whole family and their dogs here and all the chaos that goes with the holidays, Mr. Jinx’s nerves kicked in.

Another visit to the vet, a few nights stay, a staggering vet bill…now I REALLY had a small fortune invested in this cat.

What was I to do?

I couldn’t very well just GIVE him away…right?

Brian was still not happy there was another cat in the house (seriously, I only have four…that isn’t TOO many, right?)

But after the holidays, calm was restored and Mr. Jinx settled in…and promptly fell as madly in love with me as I was with him.

Two years later we are still “fostering” him…truth be told, you would have to pry this cat out of my cold, dead hands.

EVERYONE loves Mr. Jinx…even the dogs. He is the coolest, most chill cat I have ever owned…and while Molly was a tough cat to top, he ranks right up there with one of the best cats EVER!

Even Brian has fallen in love with this kitty!

What was he to do…lol!

DECORATING FOR FALL!

It is really tough for me to break out the fall decor when it is still in the 90s every day. But it’s my rule…the week before we leave for our annual trip to Colorado, I decorate for fall.

HOPEFULLY, when we get home it will be a bit cooler. Rarely. Usually I have to put the jeans and Ugg boots back in the depths of the closet for a few more weeks. But the decorating is done and I can sit back and enjoy my favorite time of the year!

Not much changes from year to year…a few years ago I painted these little pumpkins and changed up the window decor…

Refurbished pumpkins, deer antlers, fall picks…nothing fancy! Still like this little vignette so it won’t change this year!

A few weeks ago I changed out the dining room light fixture

I love the new fixture and I love even more that I can still add the fall garland!

I’ve added a few new elements to the den mantel…a tall vase and new candle sticks….

…but the garland and Mr. Owl are still the focal points. The same but different!

The entry…usually void of much because I still haven’t “decorated” it after it’s little makeover…but it’s a great place to infuse a little fall decor…

The seasonal box I featured here…still one of my favorite super simple projects!

I changed out a few pillows and throws….

Even grandmother’s chair got a little pop of fall…

Every year I find pieces of garland, wreaths and picks at the bottom of my storage tubs…I just scatter them here and there for little touches of fall!

Again, little changes, but I love it all the same!

So many don’t decorate for fall because of the cost of buying “stuff.” As I have mentioned before, I usually hit the home decor stores at the end of the season (which seems to be before Halloween these days) and pick up a few things here and there for pennies on the dollar! You may not get to enjoy it for a long time this year, but you will get to enjoy it for years to come!

This is also one reason I strongly recommend sticking with “traditional” vs. “fad” seasonal decor. As much as you might love those teal pumpkin pillows and chevron throws, I promise you won’t love them in a few short years.

I actually bought teal pumpkin pillows this year…

….knowing that I will tire of them quickly. No biggy…they have good forms I know I can reuse in the future!

There is no harm in spending a little money on the latest “fads” but be selective and thrifty. Create small vignettes with the latest trends but don’t blow your entire seasonal budget on it! And check out the blogs and Pinterest…there are thousands of nifty ideas for inexpensive seasonal projects that take little time, effort or money!

Fall may not be “in the air” just yet, but it is certainly “in the house.” Maybe this year it will actually feel like fall outside when we get home!

Grouting the live edge pebble tile backsplash....

Last week I shared the installation of my "live edge pebble tile" backsplash. This week I will continue that little tutorial...specifically the grouting and caulking!

Remove all your spacers and clean off any excess mastic that might have squished out or is on the face of the tile. Run a piece of tape along the counter, slipping it a tad under the tile.

It is important that you NOT get a lot (if any) grout in the space between your counter and the backsplash...again, you will run a small bead of caulk in that space when the grout is dry...caulk is flexible...grout is not. If you barely slip the tape under the tiles, it will pull out any grout that might slip in that gap when you pull up the tape.

Grouting is not hard! Quick tip...in general SANDED grout is for floors with larger grout lines...UNSANDED grout is for backsplashes and small tiles. Here is a good outline of the difference between the two...but as always I would suggest going with the manufacture recommendation for your specific tile or the advice of a PROFESSIONAL (not the kid at Lowes!)

In this case I used sanded grout. Why? Well, because that is what I had on hand and there are some pretty substantial gaps between the pebbles and it is in a wet area. But if you have small, uniform spaces between the backsplash tile or a tile that would scratch easily, I would go with unsanded grout.

Mix your grout the consistency of say, really thick peanut butter.

TIP: A little water goes a long way with grout so add a little water at a time and mix well. I used my shop spatula. I never dump ALL the grout in...save some in case you add too much water...otherwise you will have to go get more grout...trust me, been there, done that. 

Use a grout float to mash the grout between the pebbles/tiles, then wipe off the excess with the float. Make sure you fill the gaps well. I even use my fingers to mash in the grout in hard to reach areas. Again, TRY to avoid getting grout in the gap between the tile and the counter! Fear not...if you get grout in this gap it will pull out when you pull the tape up while the grout is still wet!

After you have filled all the gaps well and removed the excess with your float, use a tile sponge to gently wipe the pebbles/tiles. DO NOT use a plain ole' kitchen sponge...they "shed" and you will get little flecks of sponge in your grout...from experience. Buy a sponge specifically for this purpose.

TIP: I set aside a "gloob" of wet grout just in case I need to go back and fill in little spots here and there...just smash it in the gap, then wipe it with the sponge. 

On your first wipe, your goal is to get rid of the excess grout on the tiles...if you "gouge" the grout between the tiles just smash some more in and wipe.

After all the excess is removed, peal up the tape...it should remove any grout from the gap between the tile and counter. I take a utility knife or toothpick and "flick out" any that is still lurking. Then wipe again with your sponge!

I have found that using a "swirling" motion tends to "buff" the grout and give it a smother, more uniform finish.

Wipe well, let it sit for about 30 minutes, then go back and wipe again...keeping your sponge clean. You will want to do this repeatedly, every 30 minutes or so, until there is no more "grout film" on the pebbles/tile. 

I personally think grouting is one of the things that sets a “professional look” install apart from a “DIY” job…so take your time with this process. You want the grout to be uniform, smooth and even with or just a hair below the edge of the pebbles/tiles. You don’t want it on the face of the tile. Again, it never hurts to go back and add wet grout, then wipe again. Once the grout is dried and set, it’s a little tough to make adjustments…so take your time and do it right!

TIP: Just from past experience...don't rise your sponge in the sink...not saying it WILL clog your sink, just saying. Use a bucket, changing the water often!

After you have finished removing all the excess grout and the pebbles/tiles are sparkling clean, and you are happy with the grout lines, let it dry overnight.

After the grout has dried, put down another fresh line of tape to protect the counters and coat everything with the "impregnator sealer" (if you have natural stone) Brush on, let it dry for about 5 minutes, then wipe with a clean cloth. That will seal both the stones and the grout. Or apply a grout sealer (per the directions) if your tile is ceramic or porcelain. Let that dry well.

Then caulk...here I give you a pretty decent tutorial on caulking! Super important so make sure you do this one final step! 

Again, silicone caulk can be tricky for a novice and really not necessary in this area. I am a pretty proficient caulker, but if you are a novice I would suggest using this tape trick.

CAREFULLY tape both the tile and the counter...only leaving the "gap" exposed.

Apply the caulk, smooth away all the excess with your finger, pull the tape, and then smooth again with a clean, damp finger...you SHOULD get a nice smooth grout line.

I used white grout so I used white caulk. Most grouts have a matching caulk and you want your caulk to match your grout...worth the small investment.

And presto-bingo...a live edge pebble backsplash!

I LOVE it!

I know not everyone will love the "natural" look of a live edge backsplash...so many seem to prefer the structure of a "straight line" application. But as I look around my house I realize I really gravitate to a "natural" and random flow....

The dry stack fireplace tile....

The "randomness" of the tile kitchen backsplash...

Maybe it is all a part of my "go with the flow" attitude! I would like to think that in a world of structure and symmetry we all need a little randomness in our lives!

My son said it looks very "Coloradoish!" BINGO! That is exactly what it kind of reminds me of!

We leave next week for our annual fall trip out west! I finally get to check “a float trip down the Black Canyon" off my bucket list...we have a guided fishing trip scheduled! And then we will do our annual guided trip on the Colorado River with Cutthroat Anglers. This is a trip I look forward to every year!

I'll break out all the fall decor before we leave so I will be ready to kick back and enjoy the fall season when we get home! Hopefully the summer heat will have gone away and I will be able to pack up the shorts and flip flops for the year.

Live edge tile backsplash and a dresser makeover reveal...

In my quest to make changes in my master bath, I FINALLY decided on the a sliced white pebble tile for the shower floor and niches. One decision down...too many more to go!!!

When I first remodeled the master bath, I did a glass tile backsplash on the vanity...I like it, but honestly I am no longer in LOVE with it.

And to be honest, I think the glass tile backsplash craze is running it's course. In other words, it is a fad that is fading...at least in my opinion. Besides, it had brown in it and I am moving away from browns!

Since it is such a tiny bit of tile, I decided to change it up a bit.

AGAIN WITH THE DECISIONS!!!! But I got to thinking...I love live edge wood countertops, coffee tables, benches..."live edge" wood anything is just beautiful! If you don't know what I am talking about, google it!

Why can't I make a "live edge" tile backsplash?

The pebble tile I picked out for the shower floor has a "live edge."

In other words the pebbles are laid on the sheet in such a way that the edges of each section of tile are "natural."

This vendor carries a tile border but it is only 4" tall. You can also remove each individual tile from the netting and place each individually...nah, way to much work for me!

Since I have a small backsplash, I cut each 12x12 sheet of tile in half with a wet saw. I only needed 3 sheets of tile...less than $40!

Then I had to set it on the vanity for a few days to see if I was really going to like it!

LOVE!!!

So here is a tutorial for making a "live edge" tile backsplash...

First, I had to remove the old tile. There are times when the easiest thing to do is to cut the sheetrock along the tile down to the studs and remove the whole kit-and-kaboodle! That was an option, but I decided to remove the tile and scrape the old mastic....

Since that tore up the sheetrock AND the new tile wasn't going to cover the entire section I removed, I had to do some sheetrock repair.

No biggy!

If you decide to cut the sheetrock down to the studs, here is a super simple way to "patch" the section you remove!

I didn't have to do any patching, but the basic rules apply...mud, sand, texture and paint!

Apply a coat of mud, let it dry overnight, then sand. Then another coat, let it dry and sand again. I can not stress the importance of sanding sheetrock mud smooth...FEEL IT! If you can feel it, you are going to see it when you paint it! Sand, feel, sand, feel! I used an 80 grit paper. You are better off sanding too much and having to apply more mud!

This product is one of my favorite little DIY "hacks." Sheetrock texture!

If you have properly sanded, this stuff will blend old with new! Just make sure you shake it WELL and always test spray it before you start spraying your wall. On more than one occasion I have had to wipe off the wall and start over because the texture came out to thick or too thin...so take time to test it before you start spraying it on your wall! The knob adjusts for different "textures." Follow the directions on the can.

Let the texture dry WELL before you paint!

And again, I can not stress the importance of keeping spare paint on hand. Fortunately, I just repainted my bathroom a few months ago so I had fresh paint on hand...

So, on to the fun stuff...tiling!

First, this is a "natural" stone tile (if you don't know if your tile is a "natural stone" vs. ceramic or porcelain tile, ask!) The very first thing you want to do is seal it with an "impregnator sealer." Ask...they have it at most home improvement and tile stores. Super simple to apply...brush it on...let it sit for about 5 minutes, then wipe it with a clean cloth.

I would suggest doing this before you cut it with a wet saw, but definitely before you install it and grout it!!!

Since the top edge of the backsplash is going to be the "live edge" it was important to remove any "netting" from the edge...

The net backing is what is holding all the little pebbles in place so you don't want to get carried away...just trim the netting away from the edge that will be exposed!

I used a utility knife and my little sewing scissors (and I wonder why I can't keep a decent pair of sewing scissors!)

I used a premixed tile mastic. Mastic is for small tiles...thinset for large tiles. Always use the adhesive and trowel recommended by the tile manufacturer. I coated the back of the sheet with mastic using a properly sized trowel. I used a small craft brush to apply mastic to the edge pebbles...it is okay for the mastic to "squish out" between the pebbles a tad, but you don't want it squishing out on the edge pebbles...I kept Q-tips on hand "just in case." Just make sure you get enough mastic on the back of the edge pebbles for good adhesion. 

TIP! Never set a tile backsplash directly onto the countertop...always use spacers and then after you grout you will run a small bead of caulk between the backsplash and the top. In this case I wanted a very small space so I used dimes as spacers! Thank goodness we keep a change jar and I was able to fish out a few bucks worth of dimes!

Let the mastic dry over night before grouting! 

Now this is where I tell you to "tune in next week" for grouting instructions. Why? Well because as I mentioned I needed 3 sheets of tile to complete this task and I only had the two I ordered as samples. So now I am waiting on the other sheet to be delivered so I can finish this little project. 

I know...it's annoying to get engrossed in something only to be told "to be continued." But I promise...next week I will share how simple it is to grout, seal and caulk the new tile backsplash.

Until then, I will share something I promised last week I would share!

(The grouting tutorial is up…take a look!)

A DRESSER!

I shared last week that I have been in "dresser mode" recently. I currently have FIVE dressers and chests sitting in my garage ready to roll! 

Last week I took a dresser in and it sold that day! I think it has been in my garage for over 6 months...I just never took the time to work on it.

It wasn't in horrible shape...just a really bad paint job (you could see all the brush strokes) and the hardware was pretty chippy!

I didn't change it up too much...KTSP...kilz, sand, tack and new oil based high gloss white!

The hardware got a little makeover...I primed it with metal primer and sprayed them with high gloss black lacquer.

Again, not a huge change but enough to give it a new life!

Maybe next week I'll share another one...if I can dig them out of the garage!

Well, that and the "to be continued" of the tile saga! 

Old typewriter cart upcycled....

I am in "dresser" mode these days...lots of dressers and chest of drawers being "refinished" but after 5 years, I still can't remember to take good "before and after" pictures! So while I have refinished 4-5 dressers in the last few weeks, I have no good pictures to show for it! CURSES!

My garage is packed with dressers and chests I am working on now so MAYBE I will remember to take pictures when they are done so I can share!

One little project I DID remember to take pictures of is this old metal typewriter table....

I shared here the first little table I refinished. I have found they are perfect for my portable sewing machine. I commented on the first makeover that I wish I had one with a little drawer...low and behold I found one!

It wasn't in bad shape...just a really bad paint job. So I primed it with metal primer, sanded smooth, wiped it with tack cloth and painted it with a few coats of black lacquer....

This little table makes it super simple to store away my sewing machine until I need it...

...then I can just roll it out and set it up anywhere in the house! Just roll it out and put it anywhere...no more scratching my dining room table.

If you find one of these little metal tables that has a bit of a "rust issue" I shared here how to deal with that

I think these old metal tables can be used for many things...a portable sewing table, coffee bar, maybe even a little portable "prep" table for the laundry room, garage or kitchen. Roll it out then tuck it away when you no longer need it!

Simple!