Change is a coming...again

As much as I like to think everything stays the same around here...things do change!

Change came when Brian and I combined households. One of the many additions when he took up residence was his very large and very brown leather couch....

I featured the club chair makeover here

BB (before Brian) I had a light and bright couch....this couch went to the den....

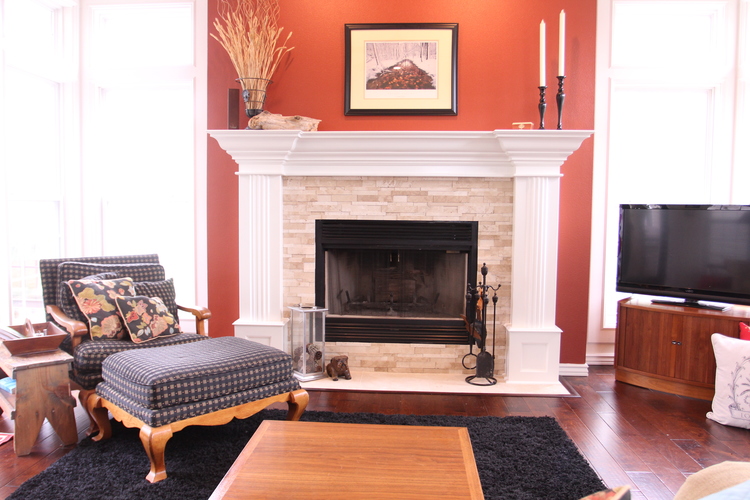
(My daughter now has this living room...the couch, the leather chair and the rug!)

...after I gave away the hulking "mustard" couch! 

The simple yellow couch went to my daughter's so for now the big brown couch has moved to the den  ....

...to make room for the NEW couch I ordered two months ago...

...and as you can see, it has still not arrived.

There was a time when I probably would have ordered off the floor because I was too impatient to wait. But wait I have...and waited and waited and waited. Fortunately, it is due to be delivered today.

The biggest problem I have right now is the "matchy matchy" of the big brown leather couch and big brown leather chair in the den...

....so the new couch may go to the den and the big brown leather couch may go back to the living room. 

Who knows...all I know is I am grateful for furniture movers and Brian's strong back and endless patience!

One disadvantage (or advantage, depending on your perspective) to going to auctions and having a resell outlet is the never ending supply of relatively affordable furniture. This Duncan Phyfe table was a fixture in my dining room for 15 years....

Then I found this really nifty antique table and shared how I refinished it here....

Then I found a really nifty trestle table and shared it's little makeover here....

I held onto this table for a time only because I thought I might follow the "farmhouse fad" and try to infuse a little in my dining area. But truth is, it always seemed a tad big...and honestly, it just isn't "my style." 

A few weeks ago I snagged this cute little antique draw leaf table at an auction....

Not sure I am in love with it, but it suits the need for a smaller table nested against the wall and it can be expanded once a year for Thanksgiving dinner. 

So, change is coming...when the couch gets here. It has been over two months since I ordered it so I hope I still LOVE it when it is delivered. Couches are one of those things I really need to love...because they are big and they are expensive and for me they are the anchor for the room. Rugs, pillows, tables and wall decor can easily be changed out to completely change the feel of a room...couches, not so much! 

Spring is ALMOST here!

Almost...who knows. Last week I was in shorts putting down mulch. Sunday we had sleet and snow. Go figure.

Here I shared some tips for prepping for spring...it will be here before you know it! 

If you plant in your beds, now is the time to compost and mulch. Empty and clean your pots. I have a pond to clean out and new sod to put down and a new fence to seal. But all that will happen over the course of MONTHS rather than weeks...getting old sure slows you down.

The only thing growing in my beds now are perennials! No more crawling around in the beds digging holes! I am a big advocate of container planting  Over the years I have collected everything from clay and plastic containers to galvanized buckets and old tea crocks.

This little chair has been in my garage for months....

It had a rattan seat but it was busted...I could have replaced the rattan but I decided to do something a little different.

I turned it into a little planter....

I cut the hole in the seat a bit bigger, trimmed it with some scrap wood (old fencing boards!) added some little slats (again, scraps of wood) on the bottom with glue and nails....

...and then chalk painted it a bright yellow! Distressed and sealed and it is ready for a little potted plant!

This is what I mean when I say "think outside the pot." You don't have to plant everything in boring old clay pots. This was a simple little project that would be perfect for a porch or even stuck in the back of a flower bed somewhere.

Simple...

Settee makeover...

As you probably know by now, upholstery is one of my least favorite things to do. One, because it requires me to do my VERY least favorite thing...sew.

Second, it hurts. Seriously after a day of pulling old fabric, staples and nails, my hands are killing me. Which is why it usually takes me weeks to complete a project.

A few weeks ago I shared a club chair I reupholstered for my living room.

I hardly had time to recover from that before I started on this Eastlake chair, and then it was time to tackle this camelback settee!

This thing was seriously hideous. But it had really good "bones" and well, it was free!

This little piece is exactly why I have vowed (time and again) to NEVER take on upholstery projects...just too much work. But how could I pass up such a neat little piece. I'm sick I tell ya! 

So I decided to pace myself and tackle a bit at a time.

First, a day of stripping stinky old fabric and a few billion staples and nails.

Then I made a few minor repairs. Then I chalk painted and distressed the little bit of wood that was showing. Then I covered the entire thing with fresh new padding and batting. Then I made the cushion covers. Then I spent 2-3 days recovering the frame. All in all, this "simple" little project took me a good week to finish.

AGAIN, I could give you a blow by blow tutorial on upholstery. But AGAIN, there are a billion really good tutorials online and your best bet is to find a piece similar to the one you want recovered.

Then be smart and take it to your local upholstery shop and don't complain about how much they charge you...trust me, it is worth every dime!!!

Course I say this EVERY time I reupholster a piece...and next thing you know I am hauling home another battered and abused couch or chair. This strange illness I have may explain why I keep hauling home abandoned cats...who knows.

I just know that occasionally I see a piece that is so different and my vision for what it COULD be is so clear, I can't help myself. 

When it was all said and done, it really was a little gem....

I threw in a few pillows I made several years ago for my den.... it sold the day after I took it to 410 Vintage. The fact that someone will love it and use it makes all the aches and pains worth it! 

Fortunately, as much as I love these pieces when they are done, I have a venue to sell them. 

The cats...well, that's another story!

Eastlake chair makeover....

A few weeks ago I questioned the need to paint an antique....seriously, is it a cardinal sin?

Most "purists" would never take a paint brush to a walnut chair or mahogany dresser...I get it...I was one of them. 

But sometimes I have to bite the bullet and go with the flow! 

I bought two Eastlake chairs at an auction a few months ago. Naturally, I neglected to take good "before" pictures because, again, I am a bad blogger.

One had arms, usually referred to as the "caption's chair"...you can get a peek of it next to the old couch (finished the couch last week...hope to share soon!) 

The other does not have arms. It has been at 410 Vintage since I bought them. 

I decided to give the caption's chair a little makeover, knowing that a true "antique purist" would stroke. But my general rule is...if changes will enhance the piece and give it another life, go for it! Keep in mind, I always do as much research as I can to make sure I am not slathering paint on a valuable piece. Eastlake pieces have some value, but right now the market in their original condition are pretty slim in our area. (Now MCM pieces...that's another story!) 

These two old chairs didn't have much of a life as they were, so...

I chalkpainted the frame....

....distressed it a tad to highlight the Eastlake detailing, applied a clear coat, reupholstered the seat and back with drop cloth and added a little graphic from The Graphic's Fairy for a touch of whimsey!

The seat of the chair was in pretty good shape, but the back needed new upholstery weaving and padding. And as with most old chairs the arms needed to be glued and clamped. No biggy, but again, ALWAYS make needed repairs before investing your time and money on paint and upholstery!

It sold the day I took it in.

I've decided to give the other chair a makeover as well....fortunately warmer weather is just around the corner!


Club Chair Makeover...

For those of you who are old enough to remember 45 records, you know what it is like to buy a record for the "A" side, only to find you love the song on the "B" side.

That is basically what I did when I found the perfect upholstery for my big club chair and ottoman....

No I did not find inspiration in a song. I brought home 4-5 fabric samples I thought I might like. IIICKKKK! They were all awful so I tossed them on the chair, only to find exactly what I wanted on the flip side of one of my selections!

Magnolia Fabric Lemuel Mushroom

I knew I needed a lighter fabric...anything dark would just be too "heavy" for the space since the addition of the brown leather couch (reasons for the hulking brown leather couch here.) "Light" is kind of a problem in a house with a dog that sheds like a dead pine tree and thinks ALL the furniture in the house is for her comfort. You think kids are a mess...HA! 

So I really couldn't go with anything "off white" but I desperately needed a fabric that was "light" and would go with any color.

This chair is really "not my style." It is oak...strike one. It is "queen anneish"...strike two. But what keeps it in the game is the comfort...this chair is soooo comfortable. I bought it 26 years ago and this is it's second makeover, the last being 16 years ago. I have read many books in this chair, watched many movies in this chair, and even spent a few restless nights in this chair!

Originally it was in the den....

...but when the "combining of the households" went down, it was moved into the living room to make room for Brian's leather chair and ottoman!

I still love the black and gold fabric but again, big brown couch! Major "dark and dank!"

Since I knew it would be a major chore to makeover, I wanted to make sure I picked a fabric that I really love, could handle a lot of wear and use and one that would stand the test of time! 

I think this fabric fits the bill...super durable, not too light and not a "fad." It coordinates with any accent color I throw at it...teal, red, black, white, whatever!

And more importantly, I really do love it! 

First I removed all the old fabric and set it aside to use as patterns for the new fabric.

To mask the "oakiness" I stripped the old finish using this process and then stained it with gel stain. I used a gel stain to ensure I would get a deep, rich color. I actually layered several different colors to finally get the look I wanted...one of the reasons I advocate using a stain without a sealer! A few coats of tung oil finish and it was ready to reupholstery.

Again, I could give you a long-winded tutorial...but every chair is different and I really think you can find a perfect tutorial just by searching for a chair/couch/bench very similar to what you have! 

In my opinion, the hardest part of upholstery is stripping the old fabric and pulling the million plus nails and staples. But it is important to remove ALL the old nails and staples! Also, don't forget...NOW is the time to make repairs...wobbly leg...glue and clamp...broken frame...glue and clamp. If it needs new springs or batting or cushions...do it NOW!

I added a little fresh batting and tightened the strapping in the ottoman...but other than that, it was pretty solid!

Make the PROPER repairs before you start upholstering! If you don't know how to fix it, google it! I promise you will find a tutorial to fix anything! 

Now that the chair is done, the other things I want to change are all the more apparent...the window seat cushions and a few accent pillows...and of course the flooring and wall color. IT NEVER ENDS!!!

As I mentioned in an earlier post, I told Brian to just take me shopping if I EVER mentioned reupholstering a piece again. But the truth is, I love this chair...not the oak, not the style...just "the chair." And now that it is recovered in a fabric I really love, I love the chair even more! So I guess the two weeks of hell was all worth the effort...

...I think!

Change is a coming....

If you have taken a peak at my "About me" page, you know Brian and I have been blissfully together for 16 years...me in my home, him in his.

This month, that all changed.

We are still blissful, but after 16 years we now have one home.

Truth be told, he's been here since his shoulder surgery in June. When you have to dress someone, put on their deodorant, cut up their food and share a relatively small bathroom, you find out real quick if you could live with that person full time. We have and we can. So over the last few months it has become apparent that living in the same household is doable and maintaining two households is a waste of time and money. 

Soooo....we took the leap. A couple of months ago he put his house on the market on a Tuesday, had two offers by Saturday and closed in three weeks. 

Wow! 

That was easy. 

The hard part was negotiating the "combining of households." And truthfully, that process really wasn't that difficult. We rented a storage building and had a massive garage sale. 

But there were still a few non-negotiables (even a few necessities).

Clothing: This is where Brian shows his "feminine" side....the man has waaaaay more clothes than I. Fortunately I am NOT a clothes hoarder and I am an "empty-nester." I donated 1/2 my clothes to free up space in the master closet. He also took over Katie's walk in closet upstairs for the clothes that didn't fit in the master closet. (I have to give him credit for scaling down from 3 to 1 1/2 closets!)

The brown leather couch and chair: First I am NOT a brown leather couch kinda gal.....not in my decor wheel-house. But honestly, it is kind of my fault. When Brian bought his house six years ago, we went furniture shopping. Being as that is not something I really enjoy, I yawned my way through most of the day. We found a beautiful couch and chair set at one store...price tag over $4500. We found another really nice couch priced around $1500. Later that day when he called for my opinion, he thought I told him to get the pricey one....I'm almost certain I did NOT! Anywho, a week later he had a $4500 couch and chair delivered....and six years later they had to come to my house! 

The black chair and ottoman will definitely need a makeover if it is going to stay in here...just too much "dark and heavy" going on. It will have to be moved out for the Christmas tree so maybe I will start on that project then...provided I can decide on a fabric!

Remember when I said something about decorating around a brown couch...yes, well, I am having to take my own advise. I am still struggling to mesh my "light and bright" quest with "humungus and dark," but somehow it will all come together...someday...maybe.

The flamingos and a frog: Not kidding. A pair of pink ceramic flamingos and a frog that lights up.

Again, my fault to some degree. He likes frogs. I found this "cute" lighted frog while picking up knick-knacks for his house. Honestly, it was kind of a joke but he loved it. The joke now has a new home....

He loves them, and I love him, and well....whatever.  

Almost forgot the massive giraffes...it's official, we have a zoo! Another auction buy. They are from Africa and were carved from some kind of tree root. They really are kind of cool, but again they will have to be relocated when I do my Christmas decorating. 

These are just a few of the "non-negotiables." There is also the massive safe that required a complete restructure of the master closet pantry. It is filled with his knife and coin collection. I had to clean out the large dresser to make room for his hoard of socks, under shirts, undies and such...I say hoard because, seriously the man has more undergarments than any reasonable human really needs. Especially considering I do laundry every other day! The Bow Flex and elliptical (we now have a "work out" room!)  His "electronic" obsession...2 computers, an ipad, blue ray players, stereo systems and OMGosh how many TVs does one person really need. 

Truth of the matter is, he made waaaay more sacrifices than I. And in the end, at our age and with the wisdom we have acquired over the years, the "give and takes" aren't really even sacrifices. 

I wish young couples REALLY understood this...

Little projects that can make a big impact!

While my garage is packed with projects I should be working on, the heat and humidity are just too much. This past week I worked on a few little projects inside!

The first is a "not so little project" but one I have been putting off for a loooong time! I shared the new living room chair I reupholstered here. I also had a little MCM chair and fabric ready to go but I could not bring myself to start the project. Upholstery is one of those things I do ONLY because I like the final results.

I was hoping duck egg blue and mauve would miraculously come back into vogue so I wouldn't have to mess with it, but that's probably not going to happen anytime soon! (Those who remember the 80s will understand this!) 

A teal club chair was one element of my den makeover plan I shared over a year ago. As I mentioned in the reveal post, not all elements of a makeover happen overnight...some may take years. Case in point!

Anywho, this wasn't technically a "little" project. I pretty much had to deconstruct the entire chair, strip and reoil the wood (beautiful!) and then reupholster. 

Once it was done....BIG impact.

But I really did accomplish two relatively "little" projects that have been on my "to do" list and that made a big impact.

The first was changing this little "gallery" wall....one of my "Things I Love" features. Family photos.

Honestly, these have not changed in 16 years but I want to change it up in my quest to "lighten and brighten" elements in my house. Since I am transitioning from the "warm" blacks and burnt reds to "cooler" reds, off-whites and teals, I decided these frames would be easy little elements to update with a little paint and new mats. Still love the pictures...just not how they are displayed

Here I shared the changes to the pictures on my dining room wall....

Just painting the frames and adding new mats made a HUGE difference in this space and cost very little.

I removed all the matting, photos and glass from the frames (good time to REALLY clean the glass!) I had mounted these pictures ON TOP of the matting so all I had to do was cut new teal matting using the old mats as a template and then reattach the photos using double sided tape. Frames are super easy to paint...a little primer and a little spray paint (Valspar Riviera Dune...my favorite off white spray paint) 

Perfect! (Um...yeah...I need to do something about the nasty looking thermostat!)

The other little project was super easy as well. I have wanted "modern" type house numbers for some time. I even painted some on my front door several years ago.

The actual house numbers that can easily been seen from the street are in the gable above the garage door...just cheapo, boring black numbers. Right now they are covered up with the "ivy" that is creeping all over the front of the house and at Christmas they are covered with a huge wreath (that warranted a visit from the code enforcer one year!) 

In my defense, this stuff usually doesn't get THIS out of control. Brian usually pulls it down every year when he puts up the Christmas lights. But last year we used one of those "star shower" thingies and didn't put any lights on the house...so...well...it is out of control! 

I have a plain "ho-hum" brick column on my tiny front porch that I thought might be perfect for a number display!

I ordered the "modern" style 4.5" numbers from Amazon. 

Somewhere along the way I picked up a plank of walnut. I've kind of been hoarding it for the last few years waiting for the perfect project and this was it.

I laid out the numbers on the board, measured and then cut the board the length I needed. Not sure how well tung oil finish will hold up outdoors, but that is what I used to seal the wood (3 coats).

Then I measured and marked where each number was going to go, drilled holes, secured the numbers using hardware screws, and then mounted it all on the brick column.

I used masonry screws to attach the board to the column. Since I didn't want the screws to show, I drilled a hole 1/4" deep with a 1" paddle bit, then pre-drilled in the middle of that hole for the masonry screws and then covered it all with hardwood plugs.

Dabbed a little tung oil finish on the plugs....cute as a bugs ear!

Doesn't look like the heat is going to let up any time soon so I have hauled several pieces into to the dining room to chalk paint! Maybe I can get a little bit of projecting done and get some room to breath in my garage! Maybe....

"New" barstools and a few dresser makeovers!

Last week I shared the prep work on the "chest of drawers from hell."  

This week I was able to get it painted and the hardware installed! Precious!

I kept the paint treatment fairly neutral with one of my favorite off-whites...."Swiss Coffee." The white and teal combo has been selling VERY quickly, but I decided to stay simple and neutral with this one! Partially because I absolutely adore this hardware and I didn't want to do anything to distract from it!!

As I mentioned last week, I painted the interior of the drawers to seal in the "funk" and make them look a little better! I used some leftover paint I had from another project...takes a few extra minutes but honestly, well worth the time and effort!

As you can see, the extra time I took to repair the damaged veneer on the top and the side really paid off!

I took this little chest to 410 Vintage...it lasted all of about 4 hours! Confirmation that all the hard work was well worth it!

I did paint one old dresser I had with the teal and white combo...

Just one of those old maple dressers...a little paint, a little gel stain on top, some new hardware and this baby sold within two hours of taking it in! (I didn't even bother to take a photo before I delivered it...this is one I snapped with my phone!)

 I also finished up another little project waiting in the wings...these old bar stools!

Certainly not something you would want in your kitchen which might explain why I was able to pick them up for a few bucks each at an auction. Pretty ratty!

But with a little KSTP treatment and a simple reupholstery job on the cushions, beautiful!

After I disassembled them, I cleaned them up, sprayed them with Kilz, sanded smooth, wiped with a tack cloth, and then I sprayed them with a satin white spray paint. I had some leftover grey herringbone material from Sister's tufted chair project (will share that soon!) so I used that to recover the seats.

Recovering barstool seats and dining room chair seats are one of the simplest "reupholstery" jobs a DIY newbie can tackle. And it can completely change the look of a stool or chair. Again, TONS of great tutorials online for this simple project!

Again (and again and again) if you have a "ratty" piece of furniture that just doesn't trip your trigger any more, CHANGE IT! Life is too short to live with ugly furniture!

YOU CAN DO IT!  

Mid Century Chair Makeover and the trick to sewing vinyl!

Recently my mother has been on a purgefest. As a result, I have inherited a few beautiful pieces of furniture and several sets of family china. 

This little table was one that belonged to my paternal grandparents and is the catalyst for my entry makeover that I will finally share next week.

Not really my style, but again, it combines two of my first loves....heirlooms and walnut! 

This little chair belonged to my maternal grandmother...so when my mom offered it to me I honestly could not get it in my truck fast enough! THREE of my first loves....heirlooms, mid century AND walnut! 

(Again, excuse the quality of the picture...this is from my phone!)

As much as I would love to keep it, Katie tagged it for her condo. Since neither of us were real keen on the finish or the fabric, I immediately put her to work stripping and oiling the frame using this process and finding a new fabric for the cushions. 

After looking online at similar mid century chairs, she decided to go with a "leather look" white vinyl. Beautiful, but the fabric has one serious drawback.

It wouldn't go through my old sewing machine! (When I say old, I'm pretty sure I bought it before my oldest son was born...28 years ago!)

I have used vinyl and naugahyde before, but always for recovering chair seats...like these mid century dining chairs! I had never actually used it for a sewing project. I discovered that the vinyl-like material was NOT going to glide through a sewing machine, which posed a real problem when one needs to make new covers for a cushion, including all the piping! 

My uber smart, engineering minded daughter came up with a perfect (all-be-it tedious) solution. Wax paper!!!! I encased the strips of material I was using to make the piping in strips of parchment paper (that's what I had on hand and it worked just as well!), and it went through the machine like butter!! 

Since the vinyl had a fabric backing, it was not an issue to sew the cushions together since I was sewing the fabric front to front...so the back of the fabric was what was feeding through the machine. The only real problem was when I was making the piping because I was having to sew on the top of the fabric....that is where the parchment paper came in handy!

I covered the old foam with new batting just to give the cushions a little extra loft! Eventually Katie wants to add two little "button tufts" to the back cushion! 

After all the tedious machine work, the cushions turned out beautiful!

Katie has stripped and oiled her new coffee table, I built a little entertainment cabinet and coffee bar and we still have another little tufted barrel chair that needs to be reupholstered. Move in day is this weekend so we may not have everything done but we are getting there! I have been buying kitchen ware at auctions and thrift stores and their kitchen should be well stocked! Exciting time for my baby girl! 

And when we get done with all our little projects, they will have one groovy pad! (did I just show my age...lol!)

Until next week when I FINALLY share my entry makeover....

The unwanted chair....

I run a shelter for unwanted furniture.... injured, abused and neglected. Before a neighbor hauls off a piece of furniture, they usually call me first to see if it is something I might want. Or they just drop it in my driveway...I have come home on more than one occasion to find an abandoned piece of furniture on my door step!

My next door neighbors brought me this busted chair a few months ago.

The chair my neighbor, Paula, brought me was a little on the "formal" side...needlepoint fabric, upholstery nail heads, intricate carvings...but it had a busted leg. . Fairly easy fix for me...a little glue and clamping! 

The hardest part of redoing these chairs is removing the billions of tiny upholstery nails. I ordered those nifty staple and nail removal tools. Forget about it! In the end I used a flat head screw driver, a hammer and needle nose pliers. 

After I removed all the nails, staples and upholstery, I chalk painted, distressed, and sealed the wood frame and then reupholstered it. These little chairs really don't take a lot of fabric so I decided to use some scraps I had on hand from another project! 

The fabric may be a tad "casual" for such a regal chair, but personally I think it brings it down a notch...not so houtie-toutie!

Rather than use upholstery nails, I went with gimp trim...much simpler!

I've been pretty swamped the past few weeks. My oldest daughter graduated from college and my youngest daughter moved home for a few weeks until her condo is ready. In the meantime, we are building, stripping, upholstering and painting pieces for her new home.

One thing about little sis...she is learning that if you want something nice, sometimes you have to roll up your sleeves and do a little work. A lesson my dad taught me! Her first major project was this oak library table....now I think she has "the bug!"

So this past week Katie has been a busy little bee (funny since she actually raises bees!) She even attempted to make a dove tail coffee table...after all, she watched youtube videos and it didn't look too difficult. I tried to tell her those guys have been doing that kind of detailed work with VERY sharp tools their entire life. After she dang near sliced two of her fingers off with a chisel she decided to put that project on hold for a time. I ended up buying a beautiful MCM coffee table and she promptly went to work stripping the old yellow finish off! I am making her entertainment cabinet and we still have a few chairs to reupholstery! 

Busy, wonderful time. I have several "resale" projects I need to be working on but I have learned that time with and for my kids is what is really important. I can't remember 1/2 of the stuff I have repurposed and sold over the years but I remember every skill my dad taught me. 

There are things that will last a lifetime...and beyond.