Swing into spring...

NOW is the time to do this project...too stinking hot in the summer and you will want to enjoy it during the lazy days of summer!​

I have built 5 of these swing pergolas...two at my house, one at my daughter's first home, one at her current home and one for a neighbor.  It is not a difficult project to built but one that requires two sets of hands and a little muscle!  ​And with everything, patience!!!

I have posted a tutorial HERE​.  It is not a terribly difficult project and one I think most DIYers could easily manage.

This is the SUPER sized pergola I built onto my house about 11 years ago...I won't even begin to tell you how it is constructed...but I can promise you, if the house is blown away, it will probably still be standing!  And notice the wisteria canopy...seriously, that stuff is CRAZY!​

Jewelry shine....

I found this awesome recipe for jewelry cleaner on line...wish I could remember where I saw it but it was one of those things I printed off and keep in my recipe scrapbook (awesome idea for all those "pinterest recipes"...I will share sometime!)  

It is super easy and a great way to shine up your rings!  ​

Boil 1 cup of hot water in the microwave.​

Put a piece of aluminum foil in the bottom of a bowl.​

Pour in hot water.  Add 1 tablespoon of salt, baking soda and dish detergent. Put jewelry on of the aluminum foil and let it soak for 5-10 minutes.  Then rinse and dry with a soft cloth.  If mine are really dirty, I take an old toothbrush to them...then rinse and dry!

HINT:​  DO NOT TRY TO RETRIEVE THE RINGS FROM THE BOWL OVER YOUR KITCHEN SINK!  ​Again, I do not tell you these things because I THINK something bad might happen.  After unsuccessfully trying to dig a family heirloom ring out of the garbage disposal, I finally had to take the entire thing apart....and of course the disposal was 13 years old so while I had the entire thing disconnected I might as well put in a new one...and of course all the hoses were old...those needed replacing.....

All because my rings were a tad dingy.  ​

Live and learn!​

USB a mess....

Everyone in my family has an IPhone, IPad AND a laptop...a few of us even have electronic readers.  I have this stuff because I get them as gifts or hand-me-downs, NOT because I intentionally go out and buy stuff that requires I learn a new skill!​ Frustrating but I eventually learn enough to make them useful!

But my biggest frustration was never having a convenient place to charge all these gadgets!  And to top it off, my kids were always stealing my charger cords and adapters when they misplaced theirs.  ​

So last year, when I was snooping around the electrical supply store looking for kitchen lighting, I found this AWESOME little outlet/USB port combo!  Totally cool and can easily be installed in an existing outlet!!!​ Not only can you use it to charge your gadgets without the bulky adapters, you still have functioning outlets!

Lowes has one that has one outlet and two USB ports, but I like this one because it has two outlets and two ports!  And seriously, YOU CAN DO THIS!!! It really is relatively easy!  I installed my daughter's today in less than 20 minutes...and took pictures while I did it!

IMG_8726.JPG

​You will need the new outlet ($20-$25, depending on the type and where you get it), needle nose pliers if you have them and a phillips and flat head screw driver.  If you have an outlet tester that is great....if not, you can use a mixer or blow dryer to test the outlet.  Also, I keep these little "head lamp" lights handy just in case I need additional light while working. Soooo much handier than a flashlight!!!

IMG_8719.JPG

After turning off the power at the box, CAREFULLY check the outlet with a tester or something (lamp, mixer, blow dryer) that requires power (I use the tester AND at least 2-3 things that require power).  Just make sure there is no power to the outlet.  And trust me, don't ask someone else to do this for you!!!​

​BEFORE YOU START ANY ELECTRICAL PROJECT TURN OFF ALL POWER TO THE AREA YOU ARE WORKING!!  ​Find your circuit box and flip the switches to OFF. If you only turn off the switches labeled for the area you are working, you are ASSUMING it is labeled correctly.  Not me!  I turn it ALL off (I need to reset all my clocks anyway!)  And if you are really paranoid, you can always call the electric company and see if they will turn off your city block.  They wouldn't do it for me, but you never know! 

IMG_8730.JPG

Once you are certain there is NO power to the outlet, unscrew the cover and remove it.  Then unscrew the two little screws holding the outlet in the box, and pull the outlet out.  You will see either 2 black, 2 white and 1 bare wire attached to the outlet, or 1 black, 1 white and 1 bare attached.  If there are two black, two white and one bare, that just means there is power "coming in" to the outlet and there is power "going out" to another outlet. ​

IMG_8733.JPG
IMG_8734.JPG

The black will be on one side and the white will be on the other.  Remove all the wires from the old outlet! Unscrew the little screws and then carefully "pry" the wires off!

This is where needle nose pliers come in handy! Normally the wires are "looped" around the screw...you may have to pry the loop open a tad to be able to slip it off the screw!  Sometimes, the wires may be stuck into the back of the outlet.  If that is the case, just loosen the screw and pull the wire out of the back!

My son-in-law Joel taught me an easy way to remember what goes where..."black to brass."  So the black wire(s) will be attached to the brass screw(s) on one side and the white wire(s) will be attached to the silver screw(s) on the other.  The bare wire (neutral) will always attach to the little green screw!  If you have two sets of wires (2 black/2white/1bare) you will use both brass and both silver screws.  If you only have one set (1 black/1 white/1 bare) you will attach one black to a brass screw, the white to a silver, the bare to the green, and just tighten down the extra brass and silver screw. 

Working with electrical wires is NOT as easy as it looks...they are very stiff and a tad difficult to manipulate.  Needle nose pliers are great if you have stiff hands like mine!  Once you get the wires "hooked" around the screws, tighten the screws down! ​

IMG_8735.JPG
IMG_8736.JPG

​After all your wires are secure, carefully insert the new outlet back into the box, secure with the two screws at the top and bottom of the outlet and put the faceplate back on! 

Now you can turn all your power back on...sometimes you have to make sure you flip the switch all the way to OFF and then flip it back to ON.!  Test your outlet again, and make sure you have power!!!​

IMG_8739.JPG

Whether you install this in your kitchen, bedroom or entry hall, you really will enjoy the convenience of being able to leave your charger cords in the ports and still have complete use of the outlet for normal stuff like lamps and clocks. 

Super easy project!!!  JUST MAKE SURE YOU TURN THE POWER OFF FIRST!!!!!​

I was featured at Creativity Unleashed!

Practically Functional

Closet madness.....

I always envy the organized closets with all the cute little matching boxes.  But I know me...if I had cute little matching boxes, I would throw crud in there, and I would have NO idea what was in each box....labels mean very little to me.  So for me, the easiest way to organize my hall closet was to use clear storage boxes. I can pretty much see what is in every box.​  If I need hot glue, I just take out the box with hot glue!

I also found this nifty closet door shelf system on http://ana-white.com/2010/09/closet-storage via Pinterest.  It was very easy to build from 1x4 and 1/2x2 boards....prime and spray paint white...anchor to the door with toggle bolts!  No biggy.

IMG_8715.jpg

I use it to store my baking pans and candles and such.  When I built it, I measured the things I knew I wanted to store in it and basically set the shelves so those items would fit...as you can see, I made a larger shelf on the bottom to accomodate the bigger serving trays and smaller ones at the top for candles and such.

However, the thing is VERY heavy...so I would not put it on a bifold or sliding doors. And I found it necessary to put an extra long screw in all three hinges on the door just to make sure it was secure.​  Most hinges on interior doors are only anchored into the 3/4" door jamb.  If you hang a heavy object on the door, it is going to cause it to "drag" on the side that closes...that is why you need to put one longer screw in each hinge...so the screw is actually anchoring into the rough frame of the door, not just the door frame.   See, they don't tell you these things so you go to all the trouble to make something like this, then your door won't close or it "drags."  And you are bummed...but it is a relatively simple fix!

I actually made two and put one in my garage for extra cleaning supplies and such.  Nifty little things that are good for storage...would be great behind a utility room door if you have the wall space or in a bedroom closet...since they are made out of 1x4 material, they are less than 4" deep!​

But again...I do envy the pretty matching boxes and the closets that make you go "AHHHHHH!"  But in a real and practical world, clear boxes that allow me to actually SEE what is in it makes more sense.  Not as pretty, but sooooo much easier to find the things I need.  I use the same system in my garage...helps me stay organized but allows me to see what I have at a glance!​

Bookcase round up....

Get it..."round up." Okay, seriously, I give up trying to come up with clever titles...they aren't clever, they are just corny! 

I love sniffing around thrift stores and flea markets.  I shop those stores like I shop for clothes and shoes....I walk through the store and wait for something to "jump out at me."  Unfortunately I have very little interest in clothes or shoes, but I LOVE unique and interesting pieces of furniture! 

Cropped Round.jpg

I have "googled" every possible description of this piece and can find nothing even close to it.  So I have no idea what style or period it is.  But I think it is so awesome and it gives me a unique and interesting way to display more of my book collection!  


I found this piece in the White Elephant Flea Market in Fayetteville and it is by far the most interesting piece I have ever discovered!  It was in mint condition so I didn't have to refinish it...and at $45, I thought it was a steal. 

Bookcase.jpg

I rarely have time to just "leisurely" shop thrift stores and flea markets!  Normally I just drop in for a quick walk through to see if there is anything new and interesting...or something that catches my fancy.  You don't have to take an entire afternoon to dig through these stores...just pop in and walk through...if a piece wants to go home with you, it will make itself known.  For me, shopping in thrift stores and flea markets is like cleaning out a closet...if I have to look at something for more than 10 seconds and ponder its usefulness, I don't need it! 

For some people, and especially novice DIYers, it may take a little longer to "see through" the grunge or imagine how a piece can be repurposed....but over time you will find that the more you have to "think" about a piece, the less likely you are to like it no matter what you do with it.   

Happy hunting!!! 

Window sills....

I've been working hard the last few days on my little garden shed...want to paint the shutters, but if I paint the shutters, I have to paint the door, but the door is rotten so it needs to be rebuilt, and while I'm doing that I might as well...blah, blah, blah.  NEVER ending.  But I'm almost done and I will share soon!​

In the mean time, I wanted to share a SIMPLE project... 

Marble window sills (or any solid surface material for that matter!)  Have you ever noticed the nasty black crud (i.e. mildew) on your window sills...or how the paint flakes and chips, especially after they get rained on a time or two.​​

IMG_8707.JPG

Easy solution!!!​ Cultured marble window sills.  Such an easy, inexpensive solution.  Now honestly, if you had to do them ALL at once, it would be a tad expensive.  But start with one or two...maybe the few that get left open the most in the spring (oops!) and over time replace all your sills with marble. I usually pay around $25 per sill.

It really is simple!  Take a VERY sharp utility knife and carefully "score" (cut through) all the caulk around the existing sill.  Basically between the existing window sill and the window, wall and trim.  ​Then take a flat tool (a chisel, flat screw driver, metal putty knife) and use a hammer to tap it between the sill and the trim under the sill.  Your objective is to lift the sill up...so however you can do that carefully....it doesn't matter if you scar up the sill, but you don't want to make too big a mess of the wall or trim.  Once you have the sill off take it to a culture marble manufacturer (easy to find in your phone book) and they can use it as a template for your new marble sill.  I usually get "white on white"...will match any white trim color.

If you are going to do more than one, make sure you number or somehow label your pieces so you will know what goes where!  You may THINK all your windows are 3' wide...trust me, there is a good chance there is a hair difference!​

IMG_8708.JPG
IMG_8709.JPG

To install your new marble sill, first "dry fit" it to make sure it fits properly!  You can make minor adjustments with sandpaper and even a skill/jig/tile saw IF you know what you are doing and feel comfortable doing so (cultured marble is NOT difficult to cut) If you can't make the adjustments yourself, mark where the cuts need to be on the marble with a permanent marker and take it back to the marble shop.

You will probably have a small gap (1/8" +/-)  all the way around...that's okay, you will fill that in with caulk.  If it fits properly,  just put a good thick "squiggly" of silicone caulk on the framing board the sill will sit on, install the sill and press firmly.   (If there is a gap between the actual window and "framing sill" you will want to run a nice heavy bead of silicone caulk to prevent air from getting in.  If the gap between the window and framing sill is BIG, you might consider stuffing it with insulation before installing your new sill!)

Now, here is the tricky part...you really should use silicone caulk to fill the gaps...and that stuff is NOT for the novice.  A 100% silicone will not clean up with water AND most are not paintable.  So if you are not a GREAT caulker, I would suggest using a "painter's caulk."  Easy clean up and you don't have to worry about it if it gets on the wall or trim...because it will hold paint.

IMG_8617.JPG

Remember my instructions about caulk...cut the tip small and at a 45 degree angle, with a very sharp razor blade.  When you caulk a gap, squeeze the gun trigger gently and keep it moving along the gap.  The deeper and wider the gap, the slower you will want to move the gun....the narrower or shallower the gap, the faster.  Again, it is a learned art....practice does make perfect.  But caulking is a necessity with MOST DIY projects!!!​

If you are really afraid you are going to make a big mess, take the time to tape off the area...run masking/paint tape along both sides of the "gap"...caulk...wipe with your finger...immediately pull up tape!!!  If you are going to attempt using silicone caulk, I would highly recommend doing this!!!  Keep mineral spirits handy for clean up!​

After you run a bead of caulk, take your finger and run it along the caulk/gap.  You want a nice, smooth "line."​

Caulk between the sill and the window/wall/trim...all the way around.​ If you are using painter's caulk, it will easily clean up with water...silicone caulk cleans up with mineral spirits. 

The entire process really isn't that difficult...and in the end you have a beautiful window sill that will never rot or chip, is super easy to clean and is very forgiving when you leave the window open during a thunderstorm!  

​BTW, if you are having a new solid surface installed in your kitchen or bathrooms I would highly recommend having the installer cut and install a new sill for any windows from the solid surface you are using...I had my granite installer cut a window sill for my kitchen window!  Looks beautiful and no more worries when I forget to shut the window before it rains!

Please sir, may I have some more pillows....

I'm telling you, even when I try to be clever with my post titles, all I do is show my age...grrr.

Pillows....LOTS of pillows. And for a reason, not just because I LIKE to sew...because honestly, I REALLY dislike sewing.  I can do it...and IMO everyone should know how to do the simplest things on a sewing machine. Sew a hem, make a decorative pillow, make curtains.  Simple stuff...not necessarily make a tailored jacket or Easter dress, but simple stuff.  My mom had me take sewing lessons when I was a teenager.  Didn't necessarily like them, but I am grateful I can use a sewing machine now.  If you can't, sign up for a class at your local craft or fabric store and learn.  Buy the cheapest, simplest sewing machine and learn how to use it. My machine basically sews straight stitch and zig-zag.  I think it does button holes too, but I don't...

So back to WHY I had to make a bunch of pillows. First, last year I decided I didn't like the big fluffy cushions on my couch.  Haven't really liked them since I bought the couch.  But they were expensive and filled with down fill.  If you have ever bought stuffing for pillows, you know it is expensive....not something to waste.  So I bought some inexpensive white cotton material, measured out 19 x 19 and 13 x 21 squares for pillow forms ( allowing for a 1/2" seam all around), sewed them together and stuffed them with the down stuffing from the too fluffy cushions.  I think they call that upcycling now....much better adjective than cheapo. I ended up with 5 oblong and 5 square ones....wow!  he reason I made and stuffed forms, is because as you may know, some down feathers are "pokey."  Having the form in the pillow helps protect your guests from being speared by a feather.  If you are just using plain old "fill" (without feathers) no need for the forms. Just make the pillows and stuff them!

Once I had all these pillow forms, I started digging through my leftover material from past projects.  Mostly upholstery projects.  I found enough to make these pillows....

IMG_8672.JPG

I had material from the dining room chair recover, the peacock chair, my wingback chair and my daughter's houndstooth chair.  The white cable knit is actually a sweater I bought at Goodwill for $2, and used to make a pillow!  ​

Depending on the amount of material I had, I cut some 19 x 19 and some 13 x 21.  Two for each pillow.  ​

I trimmed all of them (except the cable knit) with piping.  YOU DO NOT HAVE TO DO THIS!  I just like the way it looks...start simple and forget the piping if this is your first attempt!

Now piping CAN be tricky.  You can buy it already made and ready to sew into your pillow....but that is a tad expensive....they have some inexpensive premade but they also have some really nifty ones with beads and all kinds of stuff!  If you have enough material, you can actually make your own piping.  But most people don't understand that piping material MUST be cut on the bias....which means it has to be cut at a 45 degree angle across the material or it puckers reeeeal bad...which means you have to have A LOT of material to make the bias for your piping.  Confusing, I know. 

Easiest, and by far the cheapest, is buy "premade" bias tape and cover piping with it.  It comes in all colors and you are sure to find one to accent any pillow you are making!

Just iron the bias tape flat, fold in 1/2 and sew in the piping with your zipper foot (seriously, learn to sew a straight line!) and then sew it onto one side of your pillow....then pin the other side of the pillow, face down, and sew again...leaving an opening to stuff the pillow form or batting.  Then just "whip stitch" the opening. Seriously, NO biggy if you can do the basic stuff on a machine!  ​(Seriously, take a lesson or have a friend teach you!)

God knew what he was doing when he decided I would not have a lot of money.  He knows I am a creative person and would miss out on the joy of learning to do things like refinish furniture, painting a room, and designing and building if I had money to PAY someone to do it.  And honestly, if I won the lottery tomorrow, I would still do those things because I enjoy them.​

But I probably would never sew again....I just really don't enjoy it.  But I do enjoy having nice thing...little treasures throughout the house...and decorative pillows are little treasures. ​

So I sew......​

Ode to Joel....

I try to come up with clever post titles....Lindsey at Betterafter.net ​always has the most clever titles for her blog posts.  Just too much brain effort on my part.  Sometimes I am funny, but it is just because I say and do stupid things...not because I am necessarily "witty."   Besides, if you aren't over the age of 45, you wouldn't get the title of this post.  (Ode to Billy Joe....not so great song...even worse movie)

Anywho, it was one of those days I had a million errands to run, one of which was to Hancock Fabrics to pick up some piping for the pillows I am making (another post for another day...if I ever get around to it!) Always on a hunt for a bargain, (i.e. digging around on the back shelves)​ I found some 90% Christmas clearance.  CHRISTMAS IN MARCH!!! LOVE!!!   I love Christmas...I love decorating for Christmas.  And every single year I proclaim "THIS IS IT!!!  Not another thing!"  But then I find the bargains....

IMG_8640.JPG

Seriously, who wouldn't love boxes of ornaments and gingerbread cookie cutters for .59 and strings of silver beads and pearls for 1.49 a strand!!!  And those cute little metal trees for 1.69!  Seriously, who wouldn't love finding this stuff in MARCH!!??? If I didn't love spring and fall so much I would be antsy for the Christmas holiday!!!

Anywho, taking this picture reminded me of how much I LOVE MY UNDER COUNTER LIGHTING....which brings me to my "Ode to Joel."  My FAVORITE son in law in the whole wide world.  Now, he will be quick to remind me that he is my ONLY son in law, but honestly, that is not the point.  He is my favorite.​

And not just because he is an electrician who is gracious enough to work during his visits.  See, I always have some electrical issue that is just a tad over my head...or rather one that I know would take him 4 hours to complete when it would take me 2 DAYS!  And who has time for that during the holidays...seriously! ​

So for YEARS I have wanted to put can lights in my kitchen.  I just thought they were so cool looking AND my kitchen felt a bit "dark" and "smallish" because of the lack of decent lighting.  But the "in" can lights right now are a little pricey and I knew I wouldn't be happy with the ones like I  have in my den...because, after all, those are not the "in" lights right now.  The "in" can lights are like the ones Joel installed in ​my bathroom last summer...that I love...but rarely turn on because you could land a jet in there now when both the vanity and can lights are on!

So last fall,  I went to Lowes (again, my fav) and started looking at lighting options.  I have never been a fan of the little "pot" lights that go under cabinets...kind of thought they were silly looking...but I did like the LED strip lighting they had...and while an 18" strip was around $60, I only needed three!  ​And they last "a lifetime" and you never have to change the bulbs.  Hum....that is right up my alley. 

So that is what we bought.  Long story short, we created a new switch next to the disposal switch (that required adding a larger box and second switch and some unanticipated tile repair....good thing I keep spare everything!) The lighting was hardwired to the switch and Joel was able to run the wires behind the microwave and refrigerator so the wiring wouldn't show.  ​

Oh, My. Goodness!  I swear my kitchen doubled in size!!!​

IMG_5011.JPG
IMG_5009.JPG

It is just sooo difficult to appreciate what a difference this makes with pictures.  Joel installed them the day before Thanksgiving last year, and I swear my kitchen prep space doubled in size!  It made a huge difference in my usable space because the two corners were just always so dark and impossible to use as prep space. ​

Again, he only installed three...one over the coffee pot (far left), then ran the wiring behind the microwave to the left corner cabinets and installed one there, then ran the wiring behind the refrigerator to the corner in the right.  AMAZING!!  ​

I installed new granite counter tops two years ago (talk about the steal of a lifetime...for another time!) and these new lights just made them POP!!!  Seriously, it has "sparklies" in it I didn't even know were there.  Like little pieces of quartz all through it...I knew it was beautiful granite...but with the added lights, it is breathtaking...seriously! 

But the biggest difference, again, was the amount of usable counter space, which in a small kitchen is a huge plus!!!!​

So....Ode to my SIL Joel...not only is he a wonderful husband and father...but he is a pretty handy dude to have around when there is some serious electrical work to be done!  Is this a "DIY" project?  Yes...it very easily could be and I have no doubt I could have done it myself.  But honestly, he did it in a quarter of the time it would have taken me to do it, at a time when I was a bit busy making pies and stuffing.​

So in my book, that makes him the BEST SON IN LAW IN THE WHOLE WIDE WORLD!!!​

IMG_1204.JPG

Little house projects...

When you get your miter saws this year, let me know and we will start on the bookcases and fireplace surrounds.  I built all these over the years and have NO doubt you can whip one up in a matter of days....lol!  Just kidding...I would never expect the average person to tackle this size of a project...but my point is, if I can do THIS, you CAN do the smaller, simpler projects! 

And I will let you in on a little secret...when I had to do the "inside corners" of the large crown molding on the den fireplace, I went over to a house being built down the street and paid the trim guy to do it.  I know there is a trick to cutting inside corners on crown molding...something about backwards, upside down, stand on you head...but I haven't ever gotten the hang of it.  Outside miter cuts on crown...no problem.  So when I do the tutorial on building up your door trim, not a problem.  But maybe we can get a "guest"  to help us learn the art of cutting inside corners on crown molding!  Or better yet, I'll just teach you how to build those cool little corner doodads that look so classy!

In the next few days, I will post some pictures of my staircase...stripped the carpet and put in new treads and risers...seriously, it isn't THAT hard.  And when you get your new tools, you CAN do it.  I will also posts pictures of my master bath...with just a teeny effort, you can completely change the look of your bathroom.   And I promise to show you before and afters on my kitchen under counter lighting...seriously, you can't imagine the difference it makes in your kitchen!  

Until then....

My den...I painted this wall 12 years ago when I built this room...perfect example of "paint it a color you love and you will always love it!"  It is true!  I've never had any desire to change this color!   Now the TV stand...that's another story and a project I look forward to doing in the VERY near future...just have to find a piece that speaks to me...


IMG_5015.JPG

I built these built-in bookcases in my living room when the house was under construction.  Originally, there were just two walls with weird windows.  Had NO idea how to place furniture or decorate around them so I did the next best thing...just built some bookcases around them! Perfect spot for the Christmas tree, and I love decorating the arch window in the fall and at Christmas!

IMG_5021.JPG

Can you tell I read...A LOT...these are just a few!     

IMG_5025.JPG

Someday I MIGHT get around to putting up curtains...they are all the decorating rage. For now, I just enjoy waking up to the view...and the sun, if it is up before me...rare! 

My nasty little secret....

I have a nasty, dirty little secret...my friends and family know nothing about this and I never share.  It is embarrassing and something I try to ignore...once a year, I try to deal with it. Just minimally...but honestly, nothing has solved my problem. 

For a person with a touch of cleaning OCD, this is a distressing thing to have to admit.​

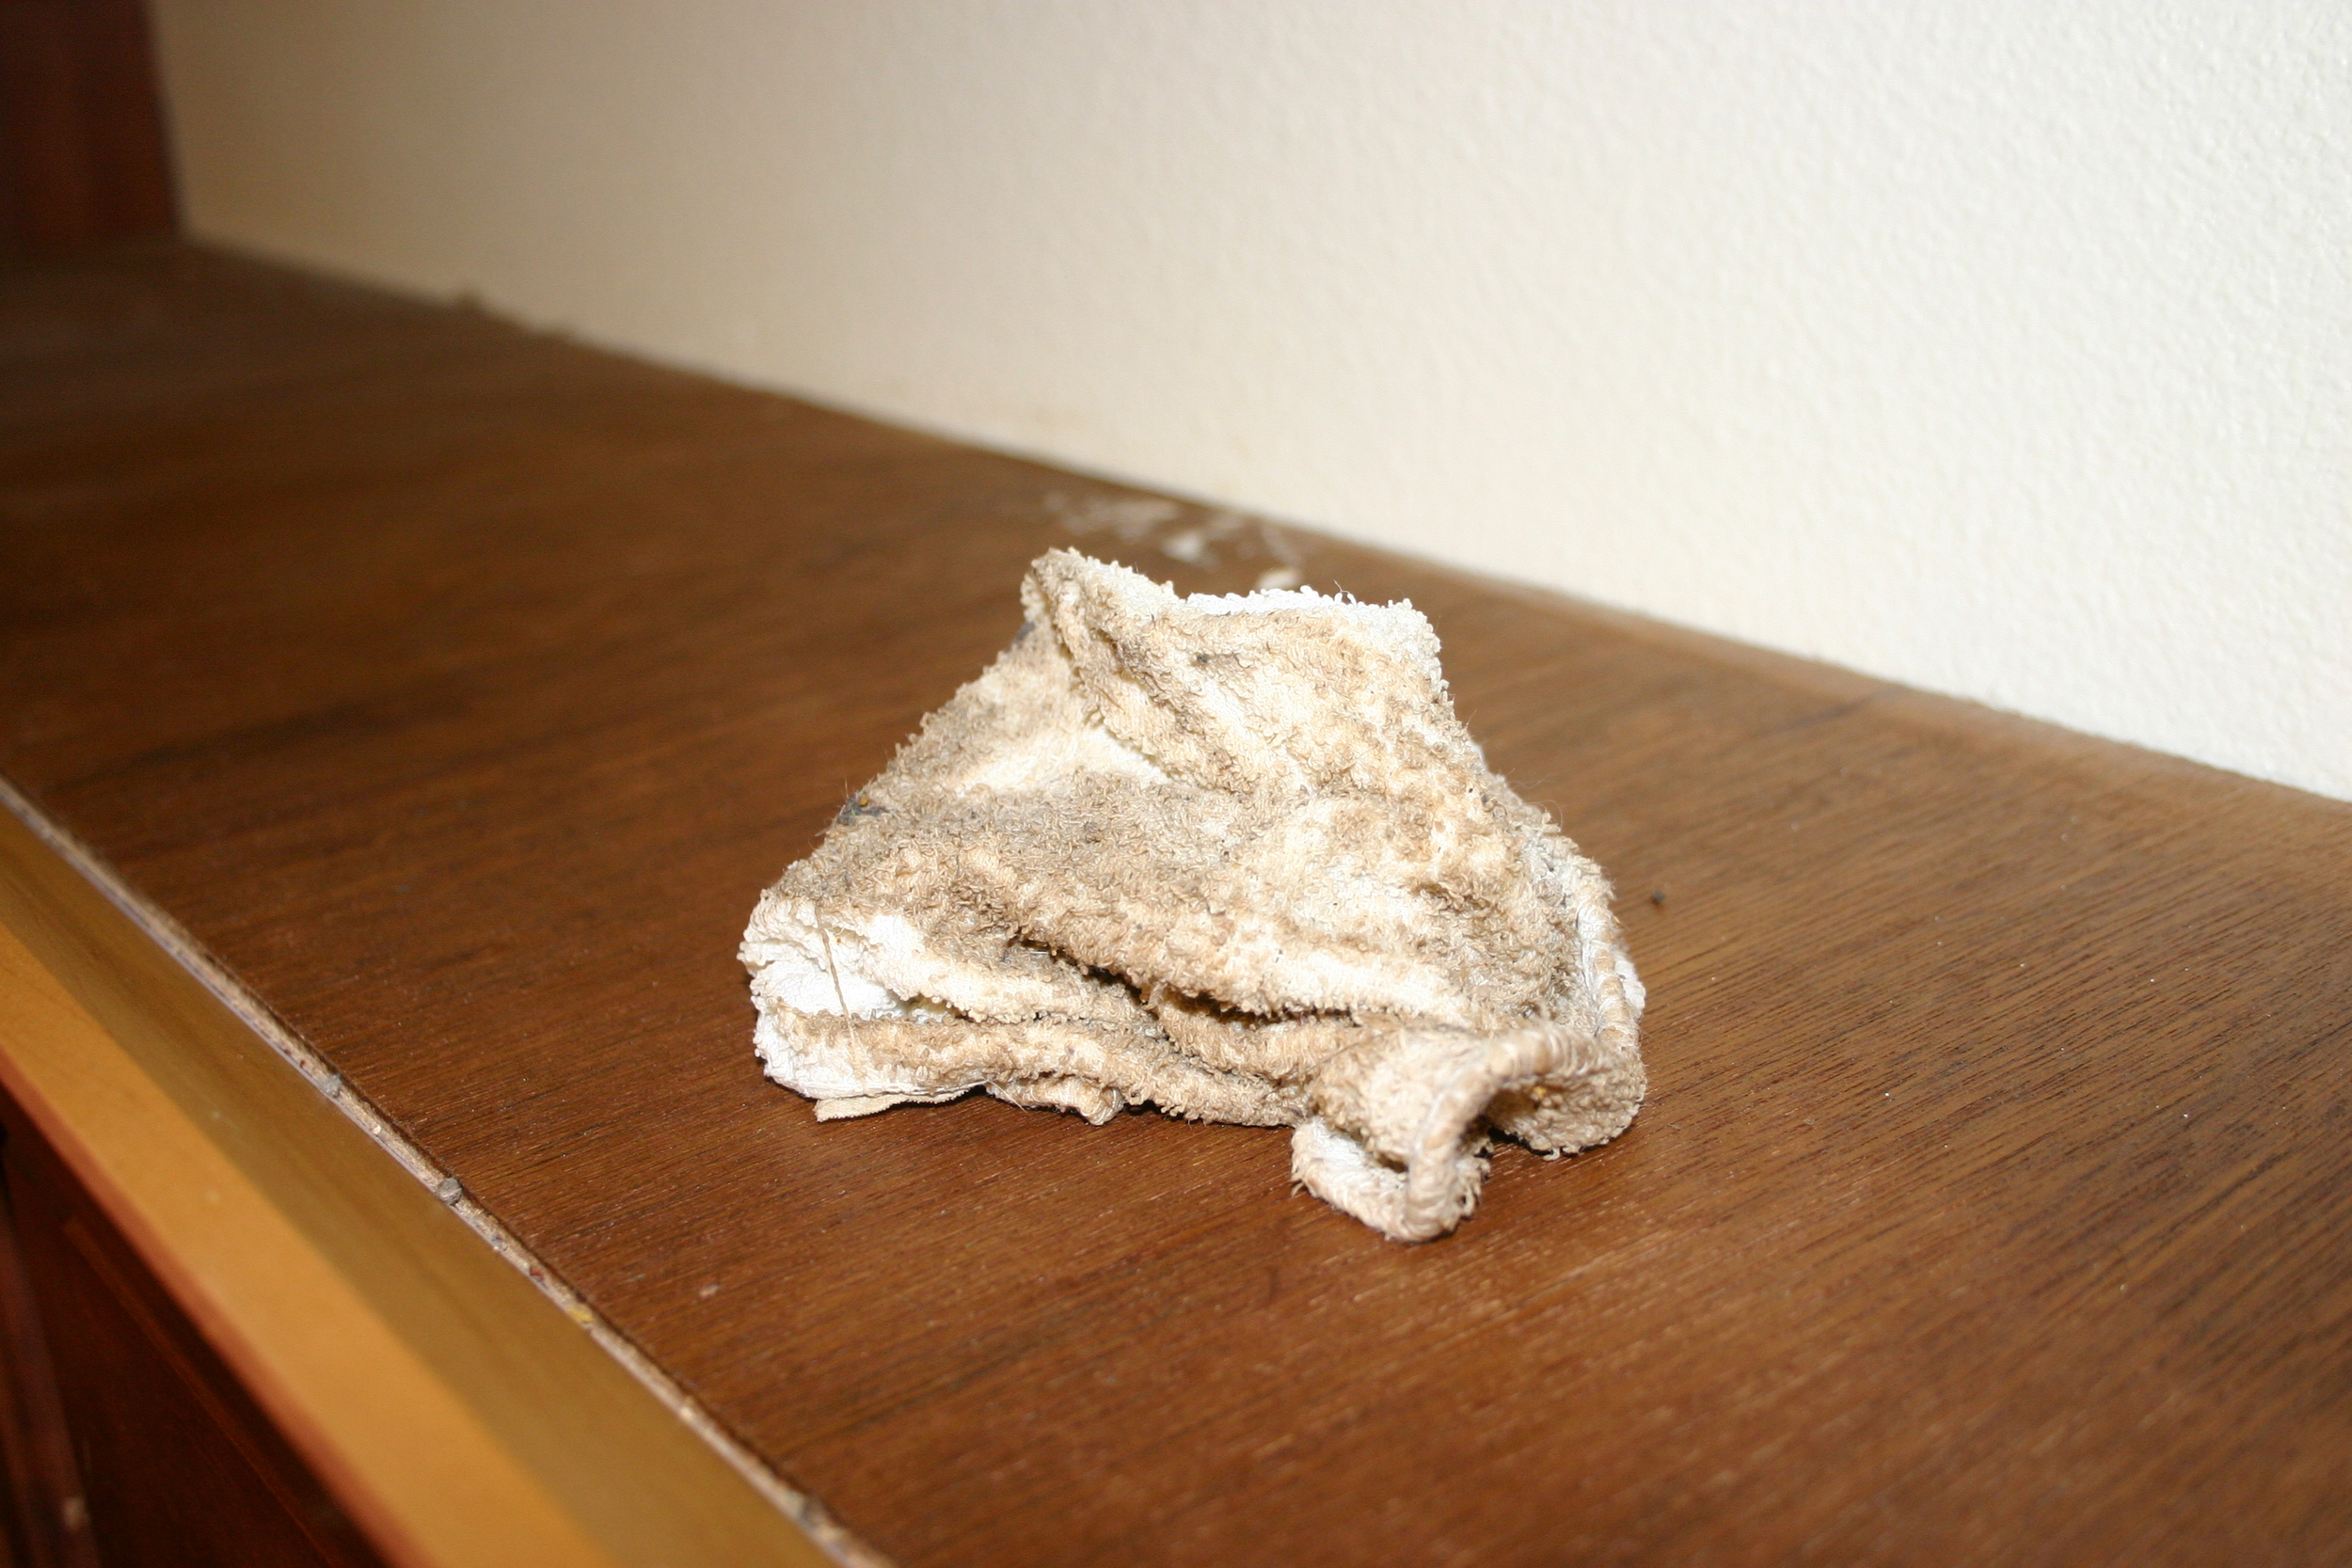
The tops of my kitchen cabinets are NASTY.  I don't mean "a little dirty"...I mean greasy, dirty, nasty.  And honestly, usually around the holidays I make an effort to take all the stuff down, clean it or run it through the dishwasher, and wipe down the tops.  But the gunk and grime is so bad I usually just say forget it and put the clean stuff back up on the nastiness.  Gross, I know.  Now keep in mind, I am the kind of person who pulls my stove, fridge and dryer out every so often and sweep and scrub beneath!  Seriously!  (The washing machine is a front loader...that sucker doesn't budge...God knows what is under there!) But the tops of my cabinets...well, lets just say...oh, what can I say to defend myself....nothing really.

​So when I saw a nifty little tip on Pinterest, I said to myself (and my cats) "Hey, I can do THAT!"  Clean and put down WAX PAPER!  And every so often, just change out the wax paper and the grime is gone!  SWEET!

The PROBLEM was getting the serious coating of grime OFF the cabinet tops before I put down the wax paper.  That took rubber gloves, straight ammonia, a mask, several rags and some serious elbow grease.  But I'm pretty sure I got 99% of the grime (and scorched my lungs) before I put down the wax paper.  ​

(BTW, being a "couponer," I bought several jugs of ammonia at Target for .12 each...yep, you read right... TWELVE CENTS.  Target's website has Target coupons...right now you can print a $2 off 2 Up and Up cleaning supplies.  Print one, make 4 copies and take it to Target.  Their jugs of ammonia are only $1.12.  So you can buy 8 jugs with your 4 coupons for .96!  Sweet deal...especially considering it took well over a jug just to clean my cabinets!! I don't use ammonia a lot, but when I need something to cut some serious grime, it's my go to..... ​)

Anywho, here are a few pictures.  Honestly, it took me less than an hour....and I know it will save me some embarrassment in the future. (I have this fear that my family will find this stuff when I die and think poorly of me...it is one reason I make my bed EVERY day...God forbid I have an accident and my house is a mess when the family comes in...forget clean undies...seriously, who's really going to notice that! But a dirty house...oh my!)

IMG_8635.JPG
IMG_8636.JPG
IMG_8638.JPG

Seriously, the camera flash does not do justice by the dirt on the rags...it was seriously nasty!​

IMG_8639.JPG

How pretty is that!  And when the holidays roll around and I climb up on the counters to get my turkey platter (ohhhh, I forgot to put that in "my favorite things"...it was my great grandmother's and we use it every year!) or the crystal tea pitcher, I will just take up the dirty wax paper, put down some clean and PRESTO...I am good to go!  ​

Come to think of it, I might even have one of my kids climb up there to get the stuff...just so they can see what a clean person Mom is  ;)​