The Birdies on a light fixture or lamp shade!

I received several positive comments about the little bird pillows featured here!  They really are darling.  I took the pillows I featured to my booth and then made two more for my den. 

I also painted the bird silhouettes on my laundry room wall...featured here. ( I would like to add...this laundry room reveal has been "pinned" and featured a BUNCH!!!  Awesome!)

When I spotted this little light fixture on clearance at Lowe's, I just knew it would be perfect for the bird silhouettes!  Simple metal base and a linen shade. The metal was "antique bronze"... not my favorite but an easy fix! (Kind of makes me wish I hadn't already set my heart on the fixture I already installed in the laundry room! )

I painted the base black. Since it is metal I first sprayed it with the auto primer and then two coats of gloss black.

If you can't easily remove the shade, make sure you tape it off REAL well! 

Then the tricky part....painting the birds on the shade.

This post gives you a step by step tutorial on painting on fabric. As I mentioned, if you screw up or get this paint on the fabric, it is NOT coming off.  Painting on a round shade is NOT easy.  So get comfy and take your time.  I basically used the same exact process I used to paint on the fabric for the pillows!

Somehow, by the grace of God, I managed to paint the silhouettes without messing it up!

I painted a silhouette on each side of the shade.  When I hung it in my booth, you can see the birds from both sides...AWESOME!!

Dressing up a basic fixture or updating light fixtures is NOT hard.  Often it costs way less than going out and buying new fixtures.  Here I featured exterior lights I purchased at a garage sale for $5.00...new glass, a little elbow grease and a little paint...as good, or better, than new!!  

Don't stop at light fixtures...updating old lamps and paddle fans can give new life to out-dated or boring fixtures! Check out how easy a little "make-over" can be here!

And if you don't know how to take down an old fixture or install a new one, just check out my tutorial here.  It is not hard and YOU CAN DO IT!!!!

FINALLY, a chair before and after!!!

I say FINALLY because as I have mentioned I have "upholstery block."  I can pick paint, I can pick stain...but I have the toughest time picking out upholstery.  Which is becoming a real problem because I have all these chairs in my garage that need upholstery work! 

Anywho, I finally picked an upholstery for these little mid century style slipper chairs.... 

I was a little hesitant to go with something so "funky."  But fact is, I don't think these chairs have a tremendous "value" so it was a perfect opportunity to do something fun with a style I love!  When I found a "'50's Paris" themed fabric at Hobby Lobby, I decided to go for it.   Who wouldn't love the Eifel Tower, 50's fashion and PINK???!!!

The legs were oak...sturdy but not my favorite, so I didn't have a problem painting them....a little primer and black satin spray paint.  I added a little batting but otherwise they were in pretty good shape!  And really comfy! The chair didn't originally have any piping, but I added a little black around the base of the seat. 

I found a black and white diamond pattern fabric I am going to make little pillows out of of...eventually.  I stuck my houndstooth pillow on there just to see how it would look...not so great, but I think the diamond pattern will look awesome!

Personally, I think they are pretty cute...we'll see if they sell...

Mid century side tables...

I have been working hard to find pieces I know others will just love!  Problem is every once in a while I find pieces I absolutely fall in love with and I know I will have a hard time letting go!  Especially after working on them all day! 

I believe these tables are black oak.  The tops, sides and drawers were veneer, but the bases were solid.  Really beautiful tables with great "bones."  

I primed and painted the boxes. Then I stripped and stained the drawers and bases and coated them with 4 coats of tung oil.  

Honestly, it will be tough letting go of these two.   

But someone, somewhere will love them....hopefully as much as I do! 

FOLLOW BECKWITH'S TREASURES ON FACEBOOK!  Now if I can just figure out how to put one of those little Facebook widgets on this blog! 

Wicker chair fit for a little ballerina...

It is so hard to take a picture of a piece of furniture that was white but is now a PALE mist green...but I tried! 

IMG_8798.JPG
IMG_8808.JPG

It may not appear in the picture to be a huge difference, but it really is!  And it is perfect for a little girl's room!  Now if I only had a "little" girl....

What is truly amazing about the color I painted the little chair (Valspar,  Mellow Spring) is it matches the color of my 60+ year old Universal Ballerina Mist stoneware to a T! 

My paternal grandmother wasn't a "china" kind of lady...so this was really all she had.  My mom bought the gravy bowl and plate, the serving platter and the tea pitcher at the estate auction after Grandma passed....while she was carrying it back to her car she dropped the pitcher!!  So when mom gave me what she had, the pitcher was beyond repair.  So I did what I always do...I Googled the pattern!   

Turns out it isn't a real expensive stoneware pattern...but the color and style is really beautiful and very "mid-century" since it was probably made and acquired in the 50s.  It is a "mist green" with a platinum band...just awesome.  So when I found more pieces out there, I bought another tea pitcher, the milk pitcher, salt and pepper shakers, a serving bowl and the sugar and creamer set.   

IMG_8814.JPG

Being the "family historian" and "archive fanatic" that I am, I carefully wrapped the broken pitcher, put it in a box, and wrote the story of why there was a broken tea pitcher in it and how I acquired a replacement.... with a Sharpie...on the box!  Hopefully my family won't think their mom was crazy for keeping a broken tea pitcher in the attic (trust me, they have enough reasons!)   

This week while I was sniffing around a new antique shop in town, I found another set of salt and pepper shakers! 

IMG_8815.JPG

Now that I have two sets, I don't mind using one...at least I know I have a replacement if they get broken!   

Oh. My. Goodness....I can't believe I found one....UPDATE!

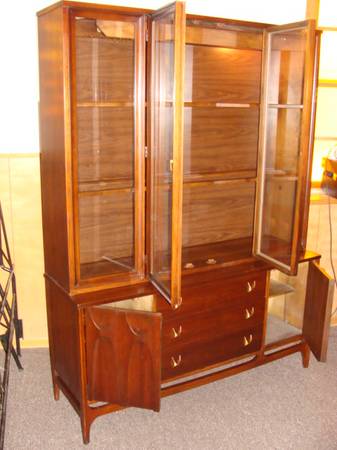
Okay, I told you about my absolute obsession with the mid century Lane Acclaim tables.  So in my quest for all things "mid century" I stumbled upon a line of furniture that literally makes me drool....Brasilia by Broyhill.  Manufactured in the 60s, this line of furniture is absolutely one of the most beautiful and desirable mid century designs floating around right now!   I have always wanted a piece of this line, but honestly I could never find one in my budget!

So when I found a Brasilia hutch online for an unbelievable price, I just knew something had to be wrong with it it!  It was at one of my favorite flea market haunts, White Elephant. Even though I was exhausted and already in my pajamas, I called my son, who lives a few blocks from the flea market, and told him to go stand guard in front of the hutch until I could get there and inspect it. 

Beautiful.  Near mint condition, less a few bumps and bings...but honestly, that is to be expected from someone in their 50s!  And even though I really don't NEED or even want a dining room hutch, I just couldn't pass it up!  Maybe I can trade it for the bedroom hutch I REALLY want!

I took a few days off this week but Monday morning, that puppy will be on it's way to my house! 

3I33Ma3pc5Fe5H45M9d3c9afd4fd51c4e17e5.jpg

It is now in my garage...it ended up costing me about $1200 damage to my truck!  The hutch is still in mint condition...the trailer I used to bring it home can handle a lot of abuse...but the truck...not so much! 

Today's lesson....do not forget you have a trailer on your truck and back out of the drive way.  The corner of the trailer can do some serious damage to a side panel.  Just another helpful hint. 

Dressing up an old dresser....

I'm tryin' here! Smarmy comes easy..."witty"...not so much! 

But it dawned on me....I have never posted my dresser makeover! 

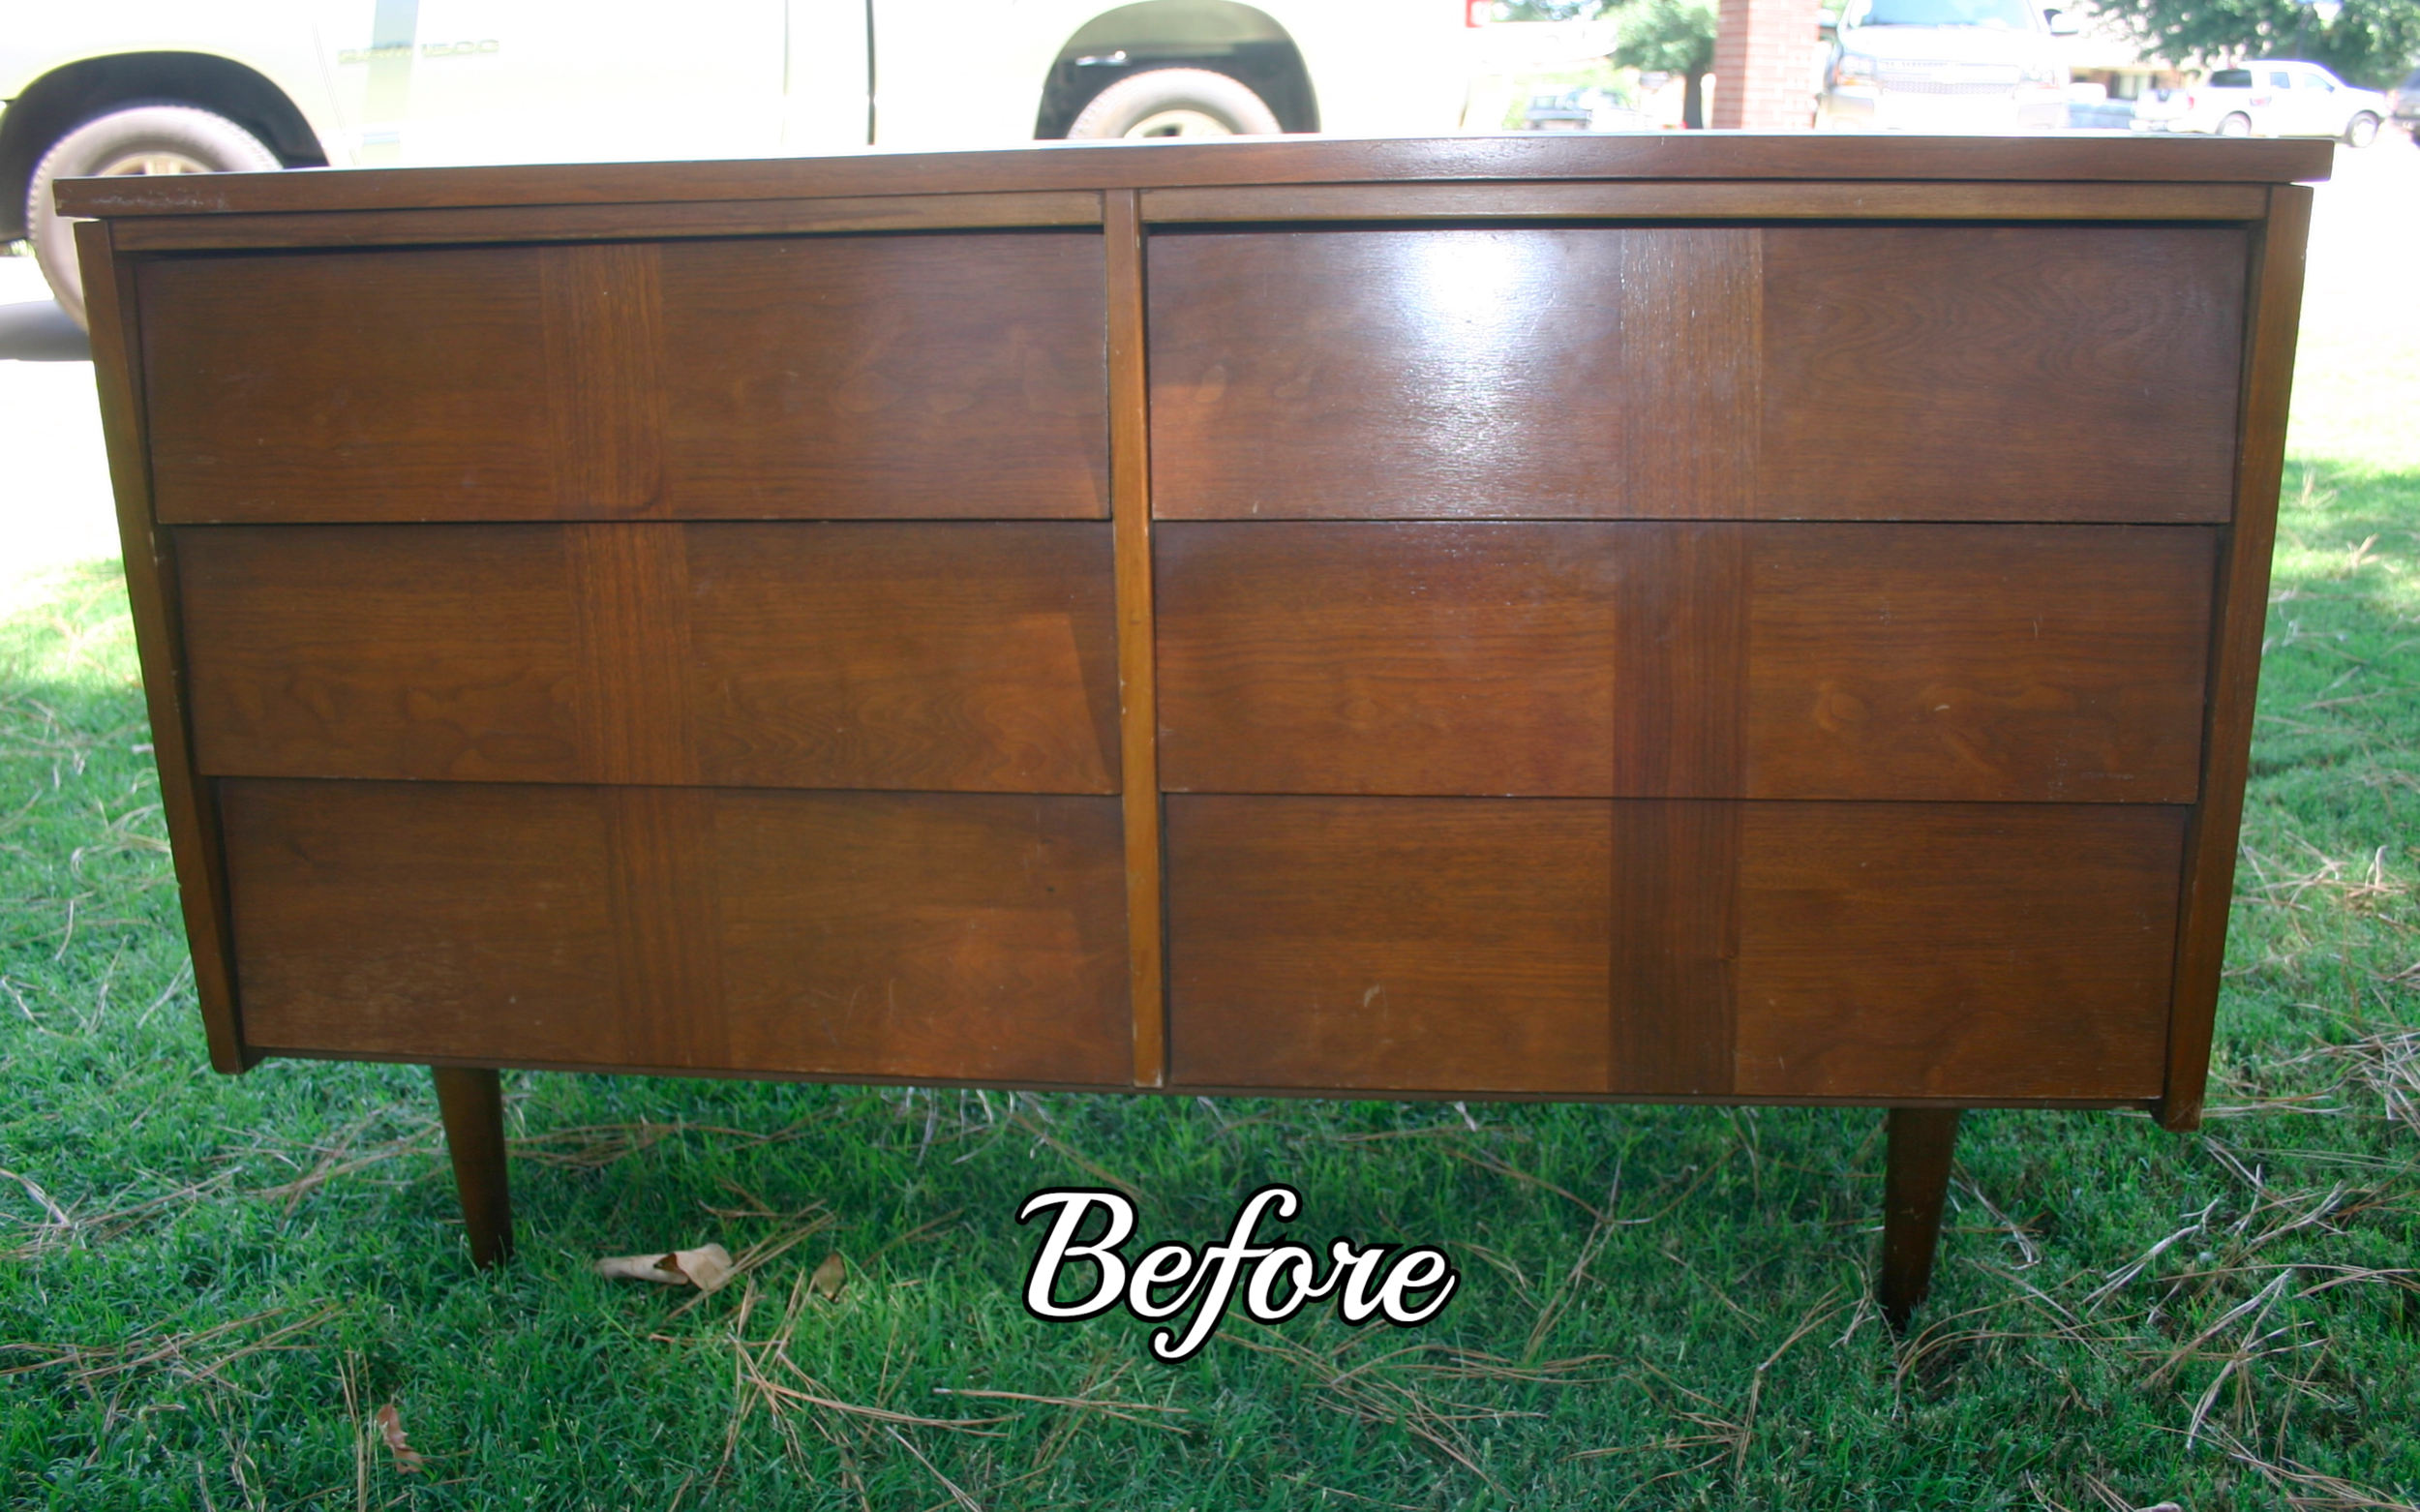
I use to have this HUGE hulking dresser in my office/dressing room.  It was a "matchy-matchy" to my bed and highboy...which I love, but the dresser was seriously huge and just seemed to shrink the entire room.  So when I was out digging around for the desk (featured earlier) I found this sweet little dresser and said to myself "Why not!" 

I LOVE the style.....kind of a mid-century modern with walnut veneer.  The top was laminate, so I knew I was going to have to paint the entire thing...and I did.  But later I found a picture online of an identical dresser and they had painted the top and sides, but refinished the wood veneer drawers...GORGEOUS! And you know how I loooove anything wood, especially walnut!  Live and learn...maybe next time! 

As with most of my furniture, I had a piece of glass cut for the top...lets me clean it with Windex! 


IMG_8157.JPG
IMG_8522.JPG

My home office....

I will try to post "before/after" projects as I muddle along and try to figure this all out.  I always have something new in the works, but a lot of the "old" projects are fun and interesting....and hopefully inspiring! 

Last year I decided I was fed up with my old office....big clunky desk, big clunky dresser, big clunky mess.  The problem is, when I first bought this house 13 years ago, my "style" was more traditional...now I am to the point where I want sleek and more "mid century."  Honestly, if the only cleaner I had in my house was windex, I would be happy....which might explain why I put glass tops on all my furniture! 

Anywho, I was digging my way through a little "junk" shop one day and stumbled upon a desk and a dresser with distinct "mid century" flare.  I couldn't get it in my truck fast enough!  This led to a complete transformation of my entire home office!!


desk.jpg
desk after.jpg

Once I got the desk home and stripped down the nastiness from the top, I knew I couldn't paint it. Less one little cigarette burn (a reminder of WHY I shouldn't start smoking again) it was beautiful!  So I coated it with 4 applications of my favorite tung oil and kilzed and painted the bottom of it.  I had the "modern" hardware leftover from my masterbath remodel, so I slapped it on there to save my nails.  The desk chair has been in my attic for 13 years...and honestly, I have NO idea where it came from or how long I have had it.  But again, after stripping it down, there was no way I was painting it....solid mahogany under all the dirt and grime!  So it too got a few coats of tung oil and a new seat cover.   

IMG_8171.JPG
IMG_8647.JPG

One of the things you will see I do through out my house, is decorate with things I love.  The large diploma on the wall (to the left) is my great grandmothers University of Arkansas diploma from 1920.  The little bulldog statue on the desk (left corner) is one that sat on my great grandfather's desk umpteen years ago....both worthy of display! 

I will feature the dresser, refurbished paddle fan, and the sitting area (including the antique wingback chair I was literally carrying to the street when I decided to experiment on it)  in later posts....this room is loaded with "charm" and almost every piece has been refinished, reupholstered, repurposed or reinvented....stay tuned!!!