Laundry room reveal! UPDATED!
My laundry room is basically a "walk-thru" from the garage to the house. Pretty ho-hum.
Even with my family dwindling, it still gets a lot of use. So it is important that it be functional AND appealing!
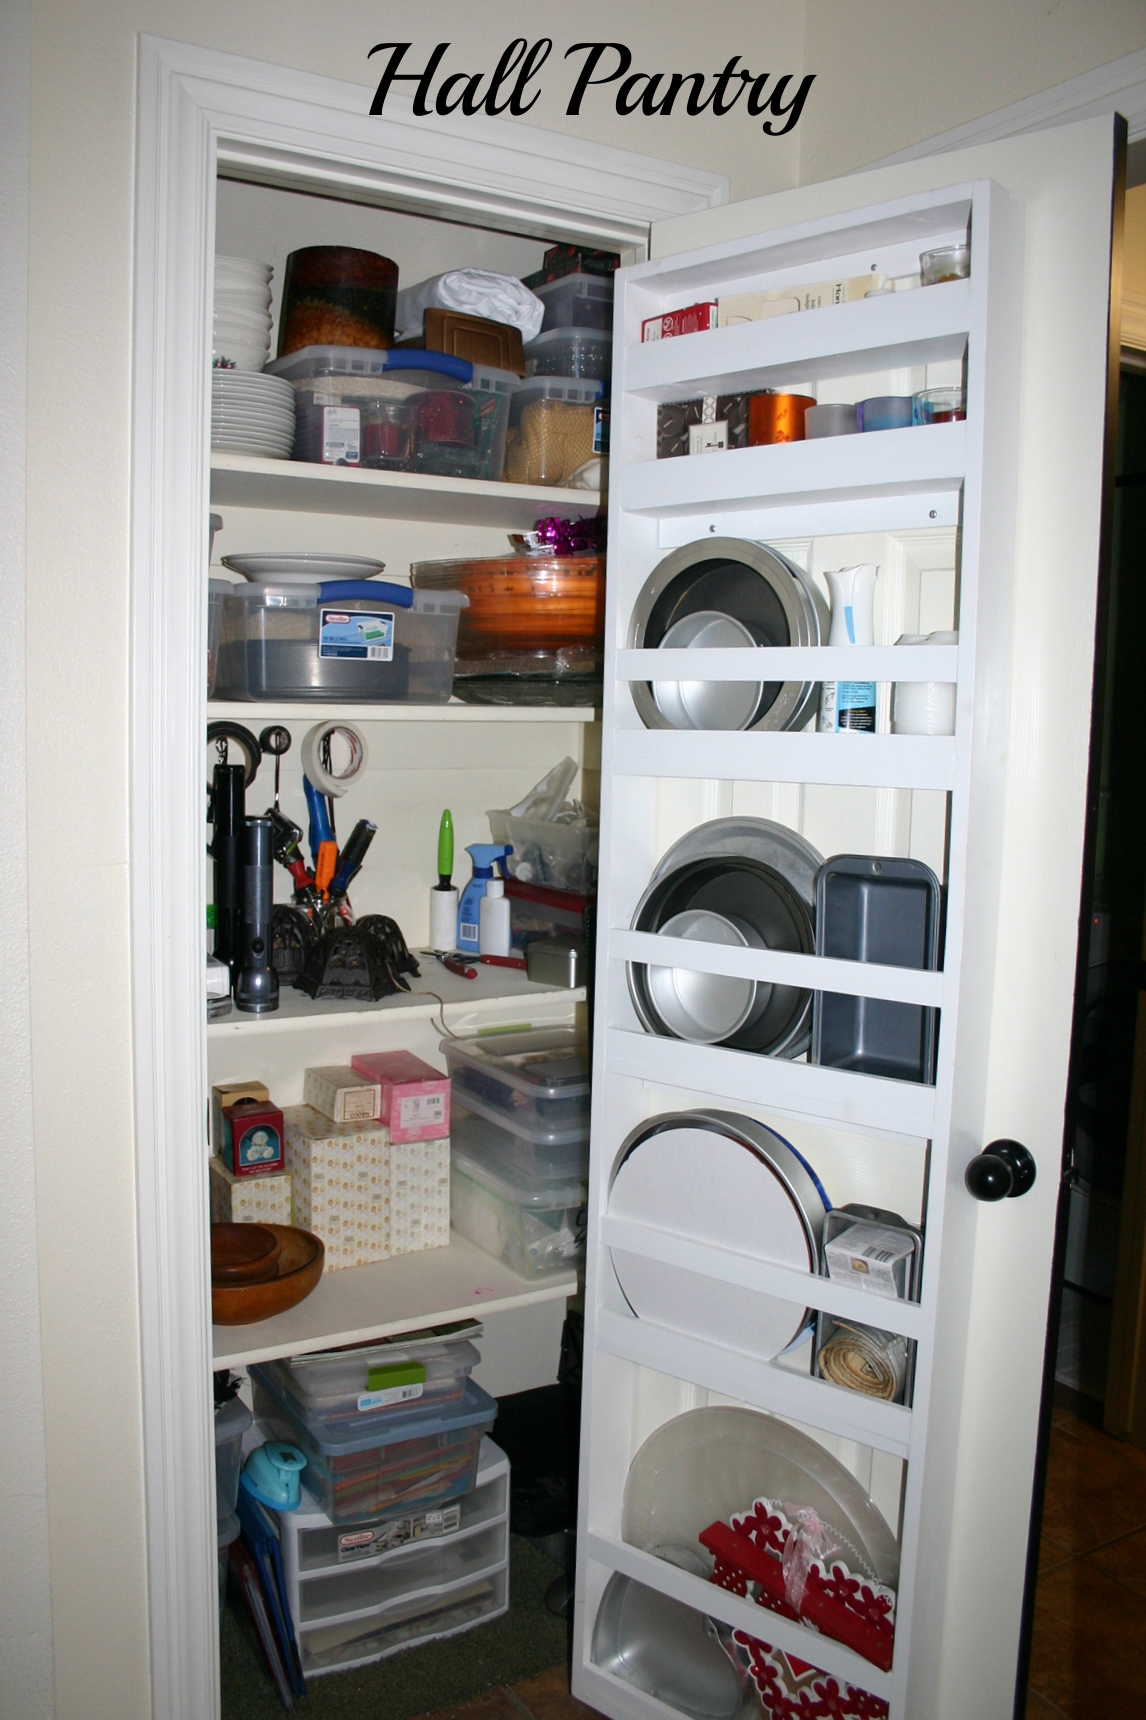
Years ago I knocked out a wall in the laundry room to open the space under the stairway into the laundry room. I put up a wall to create a pantry in the hallway. Originally, the door in the hallway just opened up to a deep "storage" space under the stairs...not very functional at all. But the "cubby" I created in the laundry room and the hall pantry with shelving gave me a great deal of functional storage space! You can see the closet door shelving I constructed here.
Over the years, I have done a few little things here and there to the laundry room...paint, a little basket for dryer sheets, a storage cabinet and new flooring in the cubby, a broom/mop hanger, painted the doors black. Just little things that helped a tad but never really gave me warm fuzzies.
Some of you may ask...why the blue cubby and green walls. Well let me tell you...this is a good example of using resources you have on hand. The blue is paint leftover from my mom's bedroom remodel and the green is from my daughter's room...the one she "hated." Funny thing is, I really like the "celery" green...unfortunately I had added some white to the original green to lighten it so finding the "right" green again was a chore (as you can see from the pictures below, I went through several mixes before I found one I liked)
I seriously envy some of the laundry rooms on Pinterest. If I could design and build my ideal laundry room it would have tons of counter space for "projecting," large operating windows to flood the room with light and fresh air, a "doggy" sink and tons of storage space for stuff that I currently store in my master closet and highboy...office supplies, sewing supplies, scrap book materials, etc.
But since that isn't happening, I decided to make due with what I have and make it function a tad better while improving the look and feel of the space.
Keep in mind, I still only want what I NEED or will use in each and every room...that includes the laundry room! So while some of the elements of this makeover enhanced the "look and feel" of the room, they must all still serve a function or purpose.
One thing I have debated doing for sometime is painting the cabinets. Now if you have been around for awhile, you know that pretty much goes against everything in me. I love my cabinets! And I love stained wood! But as small as this space is, I knew painted cabinets would look so much better and really open up the space.
Before I painted the cabinets, I wanted to "pop" them up to the ceiling. As you can see from the picture, the top of the cabinet did little but gather dust...just not "functional." I knew it would make the top shelves too high for every day items, but okay for things I only use occasionally. Popping them up gave me room underneath for open shelving above the washer and dryer that would be functional.
Most prefab cabinets (prebuilt then attached to the wall) are attached to the wall with a few screws...usually a couple in the top and a few in the underside.
Since I have done this a thousand times, I can remove and move cabinets by myself. But I HIGHLY recommend you have a second set of hands and muscle before you take on this chore least you find yourself flat on your back under the cabinet!
I would also recommend removing the doors and shelving before removing them...just to lighten the load and make it easier to wrangle them. I did remove the doors because I was painting them, but didn't think to do it BEFORE I killed myself moving the cabinets...duh!
TIP: If the cabinets have been painted or the walls were painted around the cabinet, take a sharp utility knife and run it along the joint between the cabinet and wall. This will "score" any paint or caulk that may cause the cabinet to stick to the wall and eliminate the possibility of the paint "peeling" off the wall when you remove the cabinet.
Some installers (like mine!) may add a tad of construction adhesive between the cabinet and wall...so you might have to "tug" a tad. If it still won't come loose, there is a good chance you have missed a screw. One screw can hold a cabinet tight! Just remember, the minute you remove the last screw, it is coming down...have a grip!!! If there is construction adhesive stuck to the wall after you remove the cabinet, just take a flat putty knife or dull chisel and scrap it off!
Then it is just a matter of moving the cabinet to where you want it (make sure it is level!) and reinstalling the screws. I would suggest using new screws but you can use the existing screw holes! My top screws were on the outside top of the cabinet, and since I was placing the top of the cabinet flush against the ceiling, I had to drill new holes on the inside of the cabinet...no biggy! I always locate a stud in the wall, mark that distance on my cabinet, "predrill" my holes and set the screws BEFORE I put the cabinet in place.
Once I reinstalled my cabinets flush against the ceiling, I removed the doors, caulked between the wall/ceiling and cabinets (super important!), taped and papered and then sprayed them with Kilz. I set the doors on saw horses in the garage and sprayed them with Kilz as well. TIP: if you are painting wood, always caulk, prime, sand and use tack cloth prior to painting!
I did not paint the inside of the cabinets so I made sure to tape and paper well! Since I was painting the walls, I didn't mind getting Kilz on the wall, but I honestly don't want to paint the ceiling until I can find a new light fixture (some day...I'm looking!!!)
I used my oil-based trim paint on the cabinets. Remember, if you will store your paint in the house, out of the cold and heat, it will keep for years! Swiss Coffee (my favorite "white") is actually a Valspar color but I have it mixed in Sherwin Williams ProClassic...just personal preference.
As I have mentioned, I prefer oil-based paint on cabinets, doors and trim. TIP: The trick to painting with oil based paint is a good brush, a sponge roller for flat surfaces, proper temperatures and Penetrol! This additive makes the paint easy to work with and allows the paint to "level" prior to drying and gives it a nice smooth finish without brush or roller strokes!
When painting doors, always paint the "back side" first...that way, when you turn them over, it won't be so bad if you scratch or ding it!
TIP: You can wrap your brushes and rollers with plastic wrap and put them in the freezer between coats (I've actually frozen mine for months!) Oil based paints usually take a good day to dry so it is important to carefully wrap and freeze the brush and roller or clean them between uses! And remember, oil based paints have to be cleaned up with mineral spirits...NOT soap and water.
While the cabinets were drying I did a little wall repair needed after moving the cabinets and a few other little things.
After the paint dried on the cabinets, I removed all the paper and tape and painted the walls. I also repainted the base trim! I did that the last time I painted the walls, but it needed touch up again!
I reinstalled the doors, reinstalled the hanging rod, (I have to have space to hang clothes out of the dryer...a must) and installed new hardware! I used these in my master bath and had a few extra so I put them on my cabinet doors. Gives them a little "modern" flair.
Now for the "little touches" that make a laundry room a little more appealing!
My birds...LOVE! I featured these here before the actual reveal! I just thought they were so darling! And I can not stress enough how much a simple little mural can dress up a room...and soooo easy!
I added a shelf...not a biggy but provides a little space for a little "decorating." I am not a big knick-knack person, so all the jars and boxes have a "utility purpose."
The glass jars are perfect for holding detergent packets, oxy clean, powdered detergent, etc.
I love the colored mason jars, and I buy quite a few at auctions for my booths, but never found much use for them in my decorating scheme. But they are pretty and I was able to use one as a change jar...I just punched a little slit in the lid.
I'm not quite sure what I am going to do with the humungus jar ($15 at an auction!) During the holidays it was a great place to display ornaments!! But it is a "non utility knick-knack" and I really don't want something that big that serves no real purpose!
So I pulled one of the ironstone pitchers from my flea booth...it's simple and pretty. And I think it will look pretty with some Gerber daisies...a little splash of color! We'll see....
I found another little Lane Cedar box (absolutely LOVE....$9 at a flea market), stripped and refinished it with tung oil....it is perfect for dryer sheets. It is originally from a local furniture store so it is neat to have one from our area!
I found a really cool "geometric" mirror at TJMaxx "as is." it was "as is" because the frame was scratched up pretty good...but I disliked the finish and knew I was going to paint it so I was happy to pay $10 for a $60 mirror! Mirrors are a great addition to any room and I had intended to hang it between the two cabinets...behind the hanging rod. But I just don't know...and right now it is freezing outside, so there won't be any painting any time soon.
Since I moved my ironing board into the cubby I was able to move the washer and dryer over a tad which gave me a little space in the middle. I built a custom shelf and put it on castors so I can roll it in and out. Great for storing extra detergent, dryer sheets, the iron, the sewing machine and such.
I honestly don't think I like that the front sticks out so far. I would rather it "recess" between the washer and dryer a tad...but for now, until it warms up enough for me to get out and cut it down, it will have to do!! It was a fairly easy project and one I will eventually feature!

Redoing the laundry room forced me to clean things out a bit and organize everything. I bet my ironing board cover was 20 years old...time for a new one!!! The cubby provides great storage for my ironing board and step stool, dirty clothes, the triple crock pot I only use during holidays, extra leafs for my dining table, pillow forms and stuffing and paint for the house. The new shelf between the washer and dryer frees up a lot of space in my little storage cabinet...I was originally going to use it to store my sewing stuff, but the machine is just a tad to large for the cabinet. With all the couponing I do, it won't take long to fill it up!
Just a reminder...while you have your laundry room in disarray, take time to do a little maintenance on your washer and dryer. I had NEVER cleaned out the drain filter on my washing machine...OMGosh!!! You can't imagine. A couple of dollars in change, a few bra underwires, bolts and some serious ewwwww!
I had to google where and how, and my SIL helped me...but seriously, if you have a front loader, clean out your washing machine drain filter.
And at least once a year you should clean your dryer vent...remove the vent hose from the back of the dryer and the wall and clean out the inside of the dryer AND the vent to the outside. Seriously, I found some kind of critter nest in back of my dryer...probably from when I didn't have a good cover on the outside...I don't even want to think about it!!!! Critters aside, it can be a fire hazard!!!
Just a few more little things I need to do. Mainly, I would like to add a new light fixture if I can ever find one I like...which of course will entail painting the ceiling...all in good time! (UPDATE: I found a new fixture and even posted a little tutorial to help you install your own! See here!)
Not a huge change but enough to make this room just a tad more appealing and functional...and that was my goal!

