Another flower bed...

I’m pretty much through with major projecting on this house…at least until I find something else to tear up!

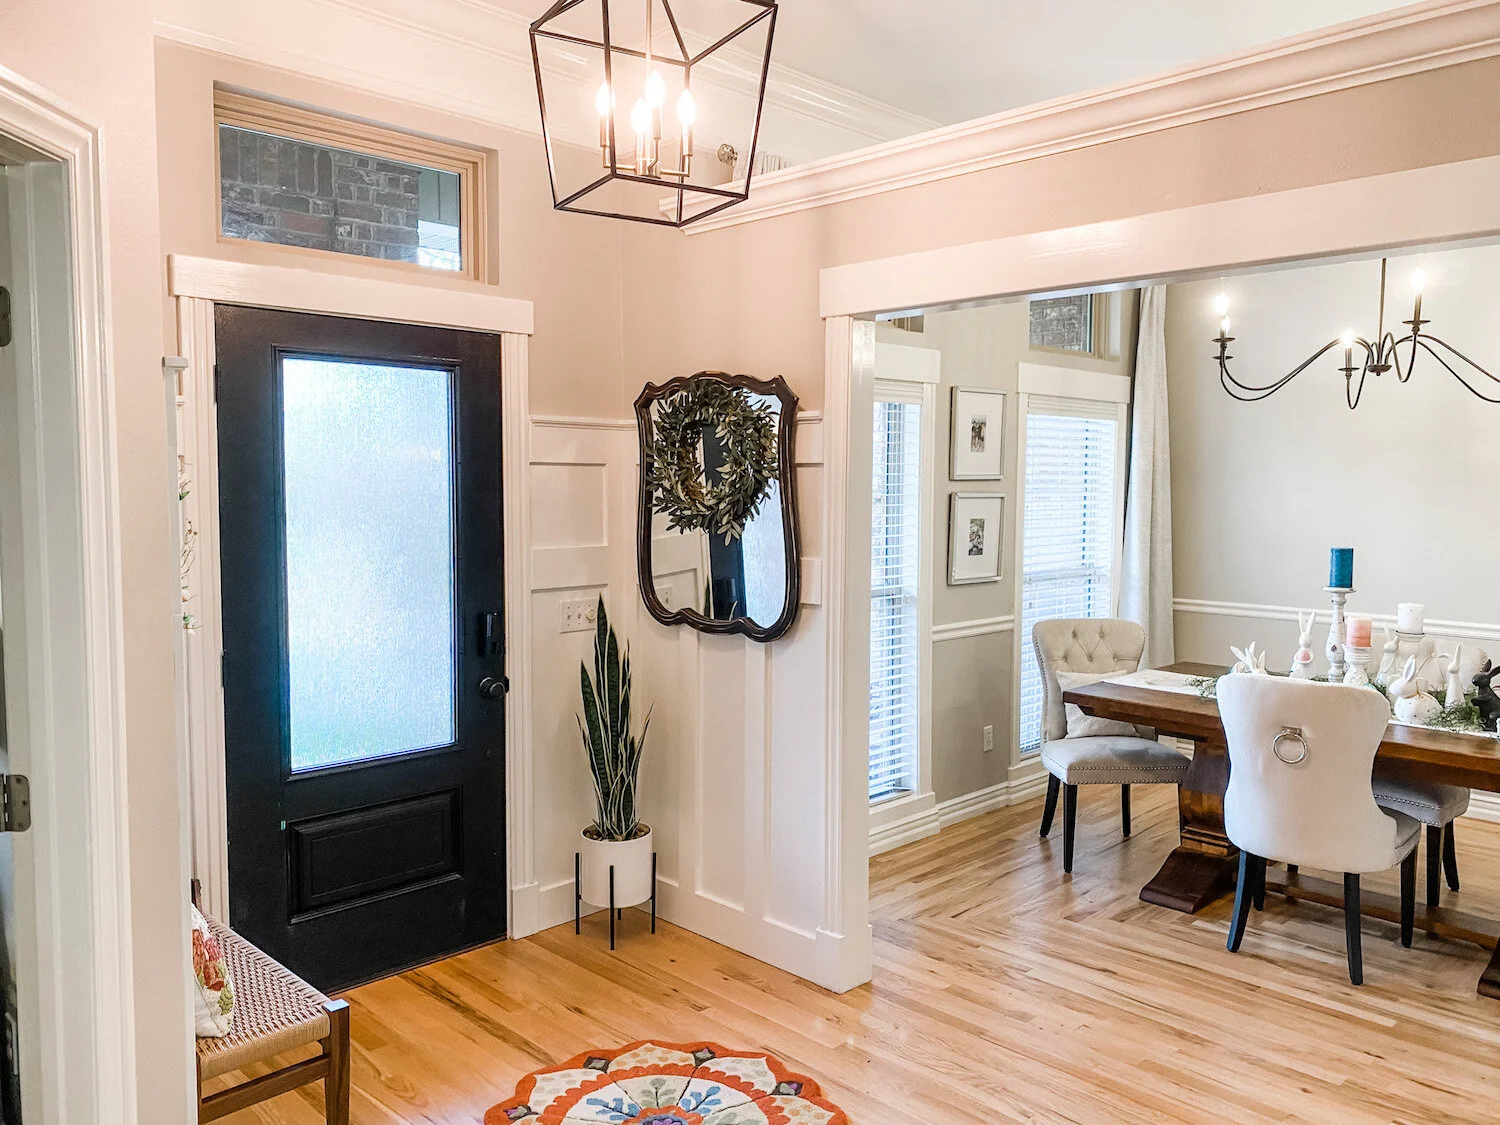
I did replace the door between the screen porch and the breakfast room.

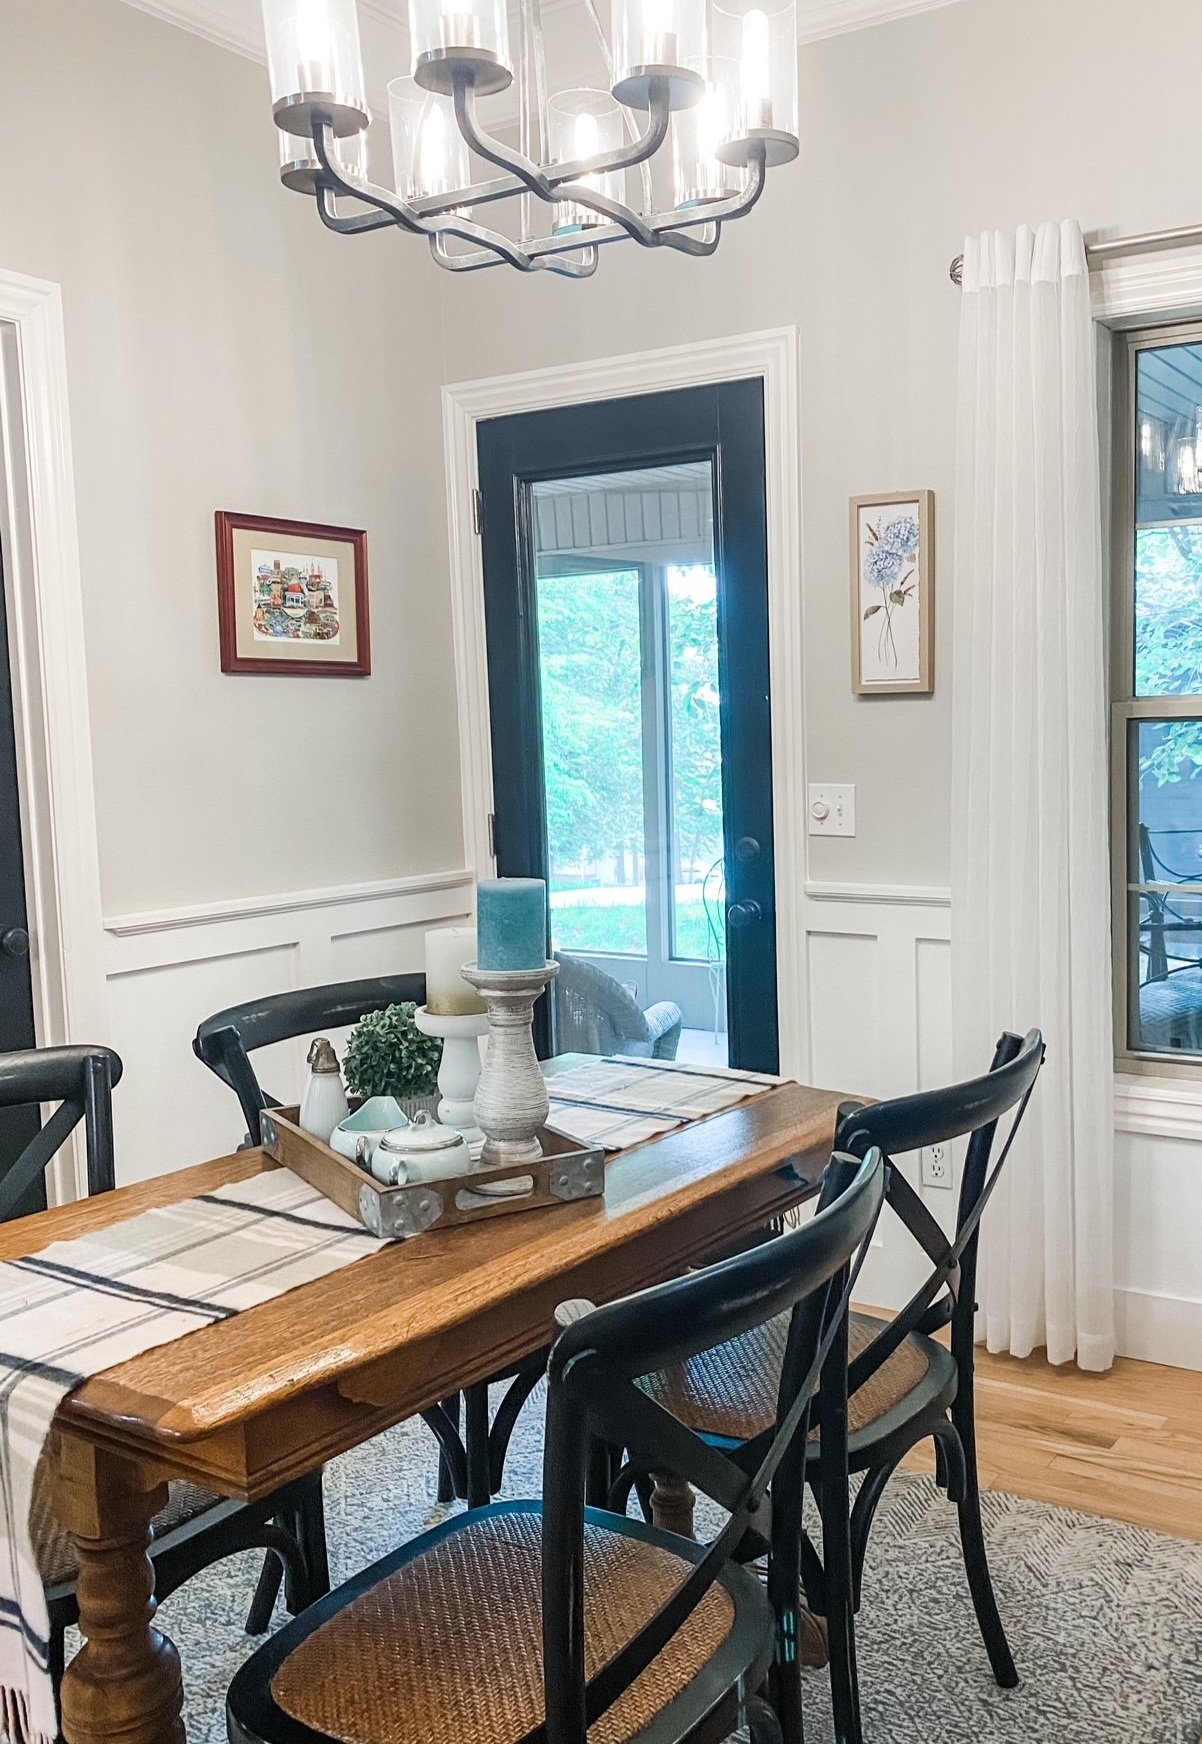
It was set a tad low and over time the “sweep” has begun to scar the wood…so I took out the old door and “lifted” the new door by adding a piece of 1/2” wood beneath the threshold. The door is also 25 years old and metal. I went with a newer, more energy efficient fiberglass door. Not a difficult project and one you can find a TON of tutorials for.

(You can see the old door with a divided light HERE.)

When I ordered the new door I decided I no longer want “divided light” …in other words “grids.” Which meant I had to replace the glass in the den door since it is divided light as well…and of course they have to match. That door is fine and I really only needed to replace the glass insert. Again, not a big deal…love the look!

As I mentioned before, one of the ways I stay busy and “give back” is to help my neighbors with their projects. In the past few months I have helped one build a wood screen around her AC units, installed a water line for a back yard faucet, hunted plants for landscape projects, help set a large pole for a hose reel, modified a metal fence to keep dogs from escaping a back yard and did some fiberglass repair on a garden fountain.

And this week I built a “garden bench” for my neighbor…I will share that soon. Too stinking cute!

Have wagon and tools, will travel!

In between dragging my wagon around the neighborhood, I managed to get a little yard work done.

I absolutely love my back flower bed and love this time of the year when it comes to life! Every time I look out my bathroom window I am so grateful for it!

This is the view from my bathroom window! When the dogwoods are in bloom…WOW!

But I have one area in my yard that bugs me…rocky and wouldn’t grow decent grass.

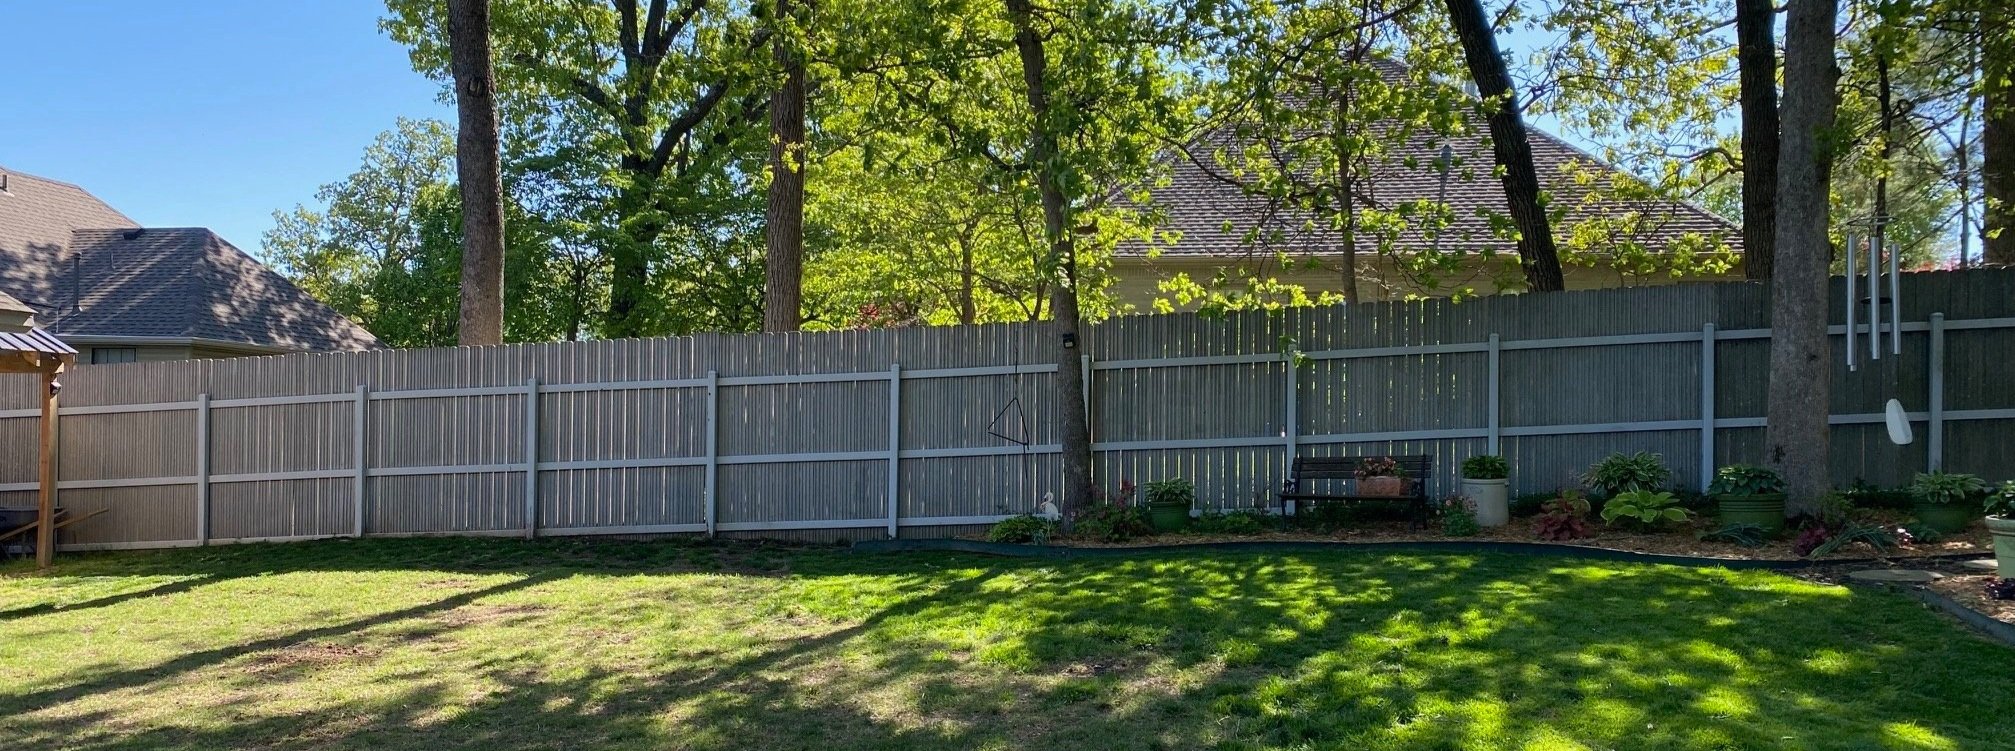
Since I have transitioned to perennials and don’t have to do as much spring planting, I decide to tackle this area and extend my back flower bed.

Why do I convince myself that ANYTHING is easy? In my mind I think, oh, I’ll just put down a little landscape edging, throw in some compost and add some plants.

Silly me.

First, this area has some massive tree roots that needed to be taken out. So I had to dig the dirt and rocks (more rocks than dirt) away from them, take a reciprocating saw and cut the roots and take them out. Sounds easy…it is not.

Oh, and I cut a buried wire while I was hacking on the tree roots. Don’t know what it is but I cut it and had to repair it.

Then I had to install the metal edging. Okay, first, that stuff use to be around $8 for an 8’ piece…it is now $30 for one piece. What the heck? Second, again, this area of the yard is really rocky so creating a little trench to set the metal edging in unearthed about 4 five gallon buckets of rocks. CURSES!!!!!

So then I decided I really should use what grass was there to fill in a few bare spots around the yard…kind of like “sod plugs.” That took two days and I think I have destroyed my elbow. Don’t ask, I don’t know.

Again, rocks. LOTS of rock. I think I raked up another 4-5 buckets and honestly I don’t think I put a dent in it. I just got it down low enough to top it with about 5-6” of compost. The booger was digging holes for new plants…AUGH!

And of course the whole irrigation thing, which will now not really work well with the new bed addition. So of course that had to be moved which entailed digging MORE rock…what a pain!

I carefully researched plants to make sure I put in perennials that can take full shade during the day with full evening sun.

Another issue…this area is under a huge black walnut. Black walnuts put off a chemical called “juglone.” Some plants can grow under their canopy but others can not! Research, research, research!

The only thing I knew for certain I wanted to plant is a pink dogwood…found a decent one at a local nursery. They didn’t bother to tell me that a tree can suffer “wind burn” if you transport it in the back of a pickup truck without a tarp.

Half the leaves are all shriveled and “dead” but they swore it will rebound next year. Guess I will find out.

I added a serviceberry, some coral bells, a few flowering bushes, and a few annuals just for summer long color. I transplanted some Stella lilies from another area of my yard where they didn’t get enough sun.

All in all I am pretty happy with it…only one regret…I should have made it bigger! But it’s done for now and maybe next year I can play with it some more…right now I am too busy icing my elbow and knees!

ANOTHER COLLEGE GRADUATE!

A few weekends ago we will celebrated my oldest grandson who is graduating from college. Hard to believe! CONGRATS CAMDEN! We are all so proud of you!

Board and Batten Entry....

IMG_1171.JPG

The entry…the one place in your home EVERY guest will see. They may not see your awesome pantry…or even your darling guest bath or amazing kitchen, but when you open the door they will see your entry.

It is one reason I really stressed about what to do with this space. I wanted it to be warm and welcoming, and while it is a big space, there is very little “wall space” to allow for big credenzas or entry storage. I really don’t need either since we usually enter from the garage into the laundry room…great “drop zone” for our packages, coats, purses, shoes, etc….but I like the look of both in entry spaces!

Of course the first course of business was replacing the dated door, window and light fixture….relatively easy fixes and something I did before we moved in!

IMG_6549.jpg
This was after the window was replaced but before the door, light fixture and flooring!

This was after the window was replaced but before the door, light fixture and flooring!

I debated on the board and batten for some time…

IMG_0580.jpg

I just felt it needed a little “something.”

It only took me 16 years to get the entry in my last house the way I wanted it…I feel like I am moving at warp speed on this one…lol!

At one point I tried a larger rug…but I didn’t like it…I honestly like the little dinky rug that is probably too small for the space. This is a prime example of doing what I LOVE vs. doing what the “design experts” tell me I am suppose to do.

A hint of trouble came when winter hit and we needed a place for visitors coats…other than putting them in the closet in the office, there really was no place to hang them.

Coat racks are a bit out dated and just hanging a wall mount coat rack didn’t trip my trigger.

Board and batten allowed me to put a few hooks on the wall.

IMG_1172.jpg


But that led to a little problem with the table. I LOVED the little walnut table, but you can’t hang coats above a table.

IMG_1084.JPG

Again, it is NOT my style HOWEVER it was my grandparent’s and it is walnut…heirloom and walnut…my two favorite elements.

Truthfully I like the look of an entry table…but I really need the hanging space so I went looking for a simple bench.

And I found it….

IMG_1172.JPG

I LOVE this bench I found on Etsy. Not the least expensive bench out there (and I paid a tad more for walnut) but the quality and craftsmanship made it worth the investment.

Since the table is a family heirloom I didn’t want to get rid of it. The little wickerish bedside table in the guest room had no sentimental value so it got hauled to the bunk room and the table is now a bedside table in the guest room…perfect!

I love the look and feel of this entry now…warm, inviting, functional.

IMG_1173.JPG

I am currently playing around with the dining room table.

When it was set the other way, facing the living room….

….there was no room on the only large wall for a buffet or credenza.

So I have turned the table the “other” way, which gives me room for a buffet or credenza along the wall…

IMG_1176.JPG

But I am not sure I like it “that way.” So it will sit while I ponder.

That is just how I roll…sometimes I have to sit and ponder, like whether to put up board and batten or whether I should turn my table a different way. Sometimes I know almost immediately I am not going to like it. Prime example, the “river rock” I put in a flower bed for drainage. I knew immediately I did not like the white rock I put down originally!

So out came the white rock and I found some that I liked better…

IMG_1174.JPG

Sometimes it is okay to sit and “ponder.” I have learned that the more I really think about something, the more I tend to like it long term. When I just jump right in and start on a project without really visualizing it, living with it in my mind for a while, I tend to not like it as well. And that is a waste of time, energy and money!

Until next time….

Another campaign dresser makeover!

If I find one, I'm gonna buy it! A campaign dresser!

This one isn't a "vintage" campaign dresser...probably an imitation but sweet all the same! Well...it wasn't when I bought it....

Structurally it was in great shape but the finish was definitely lacking. A little KSTP (Kilz, sand, tack and paint...high gloss white lacquer), scrubbed up the brass hardware, and presto....

Again, this one wasn't a REAL vintage campaign dresser...but that didn't stop someone from buying it 1 hour after taking it to 410 Vintage.

This, my friends, is a REAL campaign dresser!!

I have already scrubbed up the brass hardware (no tricks there...Brasso, Brillo and A LOT of elbow grease.) I had to order a few replacement hardware pieces...holy cow those little brass doo-dads are expensive (found them on Etsy.) I sprayed on Kilz and sanded it down. Now I just need to apply a few coats of white lacquer...I can't wait! I will make sure I share it when it is done because I know it will be beautiful!

PORCH MINI-MAKEOVER....

Now that Matt has settled into his new house, we have started on a few little projects that make his home a little bit more...well..."him." (If you search "Matt's house" on this site you can will see several of the projects we have worked on!)

The back yard was a total disaster...lots of trees and years of neglect. I wish we had been smart enough to take before and after pictures of the side yard we have been working on. We added a few flower beds, raked up a truck load of rocks and brought in four truck loads of dirt and mulch. We seeded with fescue. I know it will probably burn up this summer but he was so excited to see the little guys sprouting! We dug up some of my neighbor's lirope and transplanted it in his new flower bed....repurposed the stones that were originally used as a "pad" to make a stepping stone path....a new little Japanese maple. I think it will all be wonderful when he is finished. My yard is an oasis...I have remind him it took 19 years of hard work to get it that way!

The back patio was a tad on the blah side. I did remember to snap a few pictures with my Iphone before we added just a few little touches.

We changed out the flush mount "boob" light for a pendant light...seriously, who puts a dinky flush mount light on a vaulted ceiling?

Threw down a pretty striped rug and added a potted palm and hanging basket. Nothing earth shatter but just a few simple touches to dress the space a bit!

He still needs to change out the seat cushions and eventually I would like to add a baker's rack or build a potting bench...maybe add some kind of wall decor on the wall! We could paint the wood railing but he is determined to eventually add a large deck off the patio so no sense in putting out the effort for the time being!

A few little touches here and there can add personality and style to a space.

It takes time to make a house your home... 

Flagstone....check!

That is one project I can check off my "to do" list! It is done...the project I started here. It took three trips to the "rock store" and two trips to Meek's for sand...and two trips to Lowe's for topsoil. But whatever...it is DONE!!! 

Well, until it "settles." Seems no matter how well you pack the sand base, a few rocks always "sink" after a little rain and wear. No biggy...just pull it up, put a little sand under it and then reset it. 

We had a 90% chance of rain Thursday (didn't happen!) so I wanted to get this project finished so the sand wouldn't wash away and the rock could begin "settling." 

I had a bench sitting in one of my flower beds in the side yard...thought it would look great in the corner. The terracotta pot is one I bought at an auction last year and was just sitting around. I decided it would look better with a few plants! 

This is another area that still needs a little "something." In time...for now, I LOVE, LOVE, LOVE IT!!

Get ready for a BUNCH of pictures!!!

IMG_1765.JPG

Again, there are hundreds of tutorials online for laying flagstone...it may seem laborious, but it really isn't that difficult and you won't regret it! 

I will offer a few little "tips" for laying flagstone. Make sure you have a good sand base, well packed. After your rock is down, water the sand and rock well so the sand will wash down under the rock. After that, dump a mix of top soil and sand on top of the rock and sweep it into the joints. Then lightly water it again. Rain may wash it away a tad the first few times, so you may have to add a little more sand and soil over time....just dump the soil and sand on the rocks and sweep...eventually it will pack and stay put.

If a rock "sinks," lift it up (just pry it up with hammer), toss a little more sand under the rock to build it up and level it out, reset the rock and then fill the joint with the sand and soil mixture. 

I have a tiny front porch and I love how this has opened up the front of the house a bit! It's still not that wrap around front porch I want, but it is a lot better than it was before! It eliminates an eye sore AND the need to crawl around every year filling it with plants! I just plant the pots and I'm done! Super simple to maintain! 

I use to decorate the front of the house in the fall with hay bales, corn stalks, pumpkins and scarecrows. I quit doing it because I had to deal with mildewy hay bales after Thanksgiving...but I may have to start it again this year...this area would just be too cute with all the "harvest" decor! 

Hum...guess we will see...fall will be here before you know it!