Hutch makeover reveal....

I shared the china hutch I started HERE.

Not the prettiest piece of furniture I have ever seen but I knew it would be perfect for the space Matt and Hannah have in their dining room…with a little tweeking!

In this post I also shared a few important tips for painting any piece of furniture. Tried and true advice!

First thing I had to do was “find my inspiration.” It doesn’t matter if you are making over an entire room or a piece of furniture…you have to find your inspiration.

In this case I needed to find a similar hutch so naturally I searched Pinterest…I sent several pictures of “french provincial china hutches” to Hannah and she liked this one best (originally posted on 509 Design)…

…beautiful. I love the stained top and the Miss Mustard Seed boxwood green.

The kids did not want doors or dividers on the top so those were removed.

They also decided to paint the entire inside white.

The first thing I did was strip the old finish and stain on the top of the base. Keep in mind that the top and the base where attached pretty tight so I just left them as is and only stripped and finished the part of the top that was showing. I used this process and it literally took me less time to strip and re-stain than it did to tape it all off. I used General Finishes Brown Mahogany stain, then sealed it with poly.

After the the top had dried (a day or two) I taped and papered it well so I could prime the entire piece. I also removed the drawers and taped and papered those so I could just paint the fronts.

Removing the vertical dividers left a gap that had to be repaired…

Pretty simple fix…I just cut a piece of decorative wood from the pieces I had removed and glued and clamped it over the gap…

After primer, I sanded it well, wiped it all down with a tack cloth and then painted…first the inside of the top with satin white. After that dried I taped it off and sprayed the rest of the hutch with Kylon Satin Italian Olive paint….closest green in a spray paint to Miss Mustard Seed’s boxwood. Again, it SAYS it is a “paint and primer” in one but I always prime wood furniture with Bullseye or Kilz.

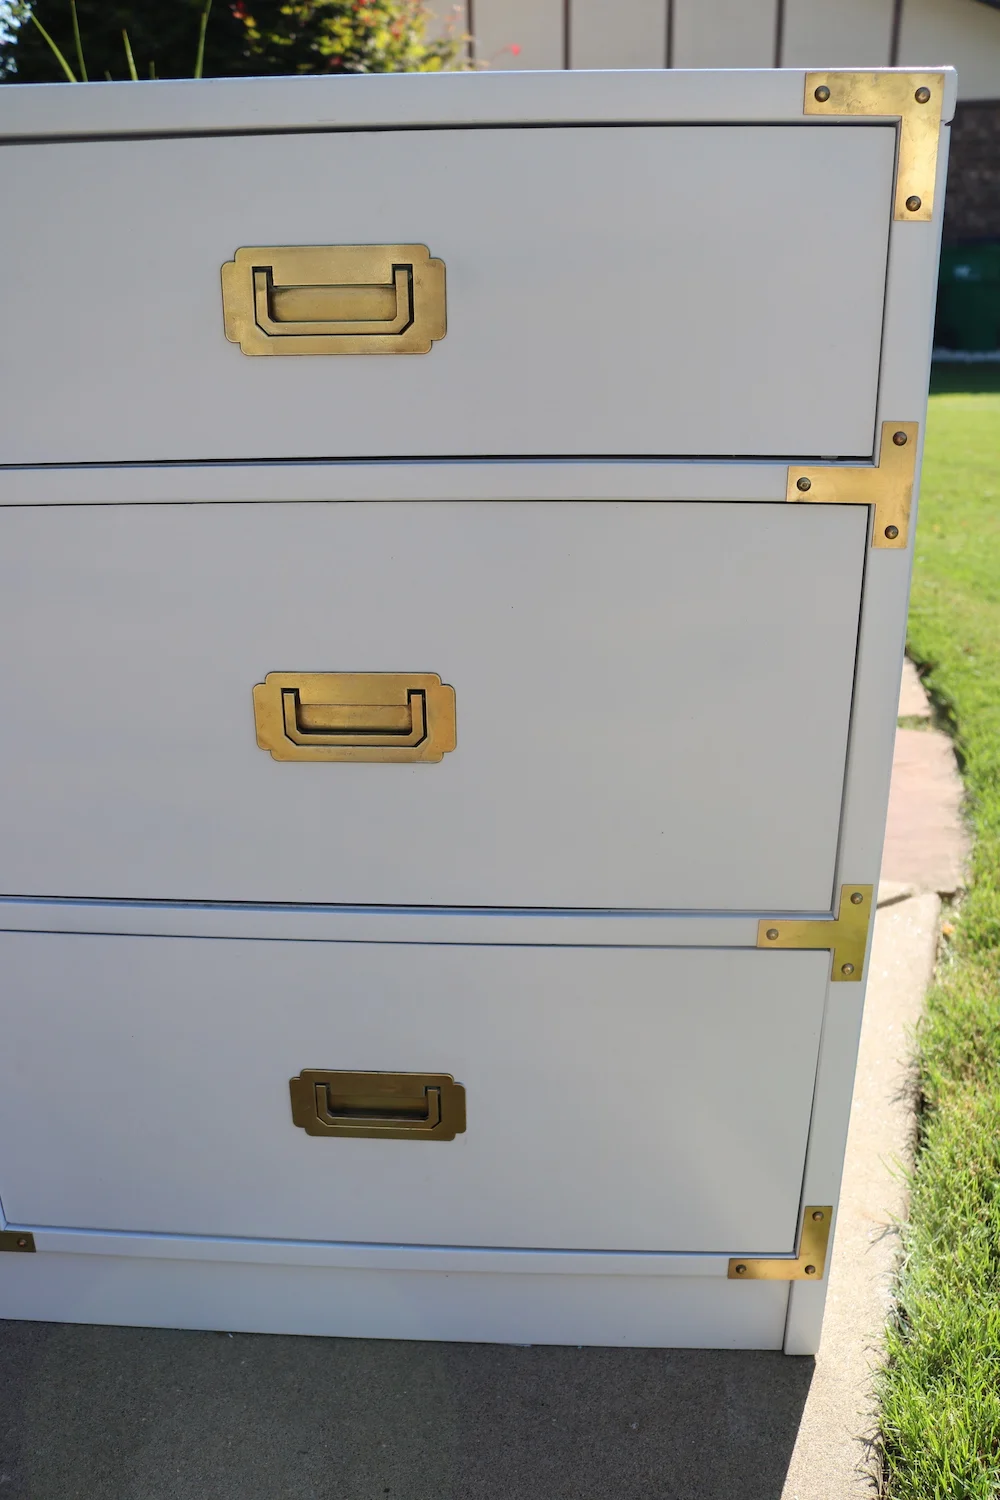
I mentioned the brass froo-froo hardware in the original post…I honestly didn’t think it would make the cut.

But after some serious scrubbing with Brasso and SOS pads, they shined right up and believe it or not, the kids loved them!

So….here is the final product in place….

The farmhouse table is one I featured HERE. I found the black chairs at the apartments and they just needed a little repair, paint and reupholstery (never featured those), the bench is one I made for Thanksgiving one year, the plaid scarf is like the ones I featured HERE and the candle sticks were used as the stands for their wedding cake! It took YEARS for all this tp come together and now that it has…cute as a bug’s ear!

I know the original brass hardware may be a tad “gaudy” but I love it!

The “gap fix” isn’t exactly perfect, but as my Daddy use to say “You’ll never notice it on a passing train!”

I love how this piece turned out…and it shows what you can do with a pretty, um, not-so-attractive piece of furniture with just a little time and paint…all in all I probably spent less than $20 on supplies!

Hannah and Matt aren’t into all the “knick-knack” and “froo-froo” stuff so I am sure they will style it to their tastes!

Today I muse....about "pet proofing" your house!

When we have babies or grand babies, we “baby proof” our house.

But what about our pets.

We know we shouldn’t feed dogs grapes or chocolate…or let them eat mistletoe.

But did you know that there could be other hazards lurking in your home that could be dangerous to your pet?

Like something as simple as a barstool.

WHAT????!!!!

I introduced you to Mr. Jinx last year….

He really is the most precious kitty.

But he has UT issues and last week had to spend 4 days in the hospital…don’t even ask how much that cost!!!

He came home Monday and seemed to be doing well but I noticed Wednesday he was limping badly. When I messed with his back leg he growled and hissed and I could tell it was swollen.

So back to the vet he went…and sure enough his little leg was broken.

What the heck.

Our vet asked if we had any “slatted” furniture. Seems this is a common injury for outdoor cats caused by lawn furniture and picnic tables….but Mr. Jinx is strictly indoors.

Our bar stools.

The cats are always jumping up onto the bar.

I think he may have jumped from the couch to the bar stool, got his little leg stuck in the gap in the armrest and broke his little leg.

The American Veterinary Medical Association provides an excellent list of home hazards for pets!

Check it out! Great information to have if you are a pet owner!

As far as the barstools…don’t know what I am going to do! I love these bar stools but I love the critters more…so something will have to be done!

Hopefully next week I will have Matt and Hannah’s china hutch finished and delivered…so stay tuned!


China hutch makeover...part 1..and paint tips!

Since I have “semi-retired” from DIY for resale, I have a little more time to take on projects for my family.

As I mentioned here, Matt and Hannah got married last month. This past summer he bought a larger home and went from a 1600 s.f. home to a 2200 s.f. home. When he bought his first home we stocked it with a few nice DIY pieces…this dresser and chest setthis oak trestle tablethis breakfast table.this dresser-turned-entertainment centerthis little vintage chair…and of course all the other pieces we have refurbished and built over the years.

A bigger house means more space and in his case he has a large dining area that has nothing but the trestle table…so it feels pretty empty.

This past week I found this “could be awesome” french provincial style china hutch on Facebook marketplace.

I can’t wait to shine up these solid brass pulls…even though I know they probably won’t make the cut!

They really need a “tall” piece in their dining room so I think with a few modifications this one would be perfect.

Of course the froo-froo doors HAD to go…when I sent a picture of the piece minus the doors and hardware, Matt messaged and wanted to know if “the pole things” could come off!

Yes they can…

…which of course means finding a way to “fix” the gap…oh well! Minor issue.

So the question then becomes….solid paint or chalk paint with distressing.

The reason this decision is important is because if you intend to paint the piece with latex or oil-based paint, you HAVE to prime it. If you are going to chalk paint and distress the piece you don’t have to prime.

It is a personal preference and one I left up to Matt and Hannah.

For chalk paint, I usually mix up a batch of homemade using flat latex paint and Plaster of Paris. The recipe I find works best for me is 5 tablespoons of Plaster of Paris, 3 tablespoons of water, mixed well then add 2 cups of flat paint…any color, any brand. I have also used a few different brands of chalk paint and found all of them to be acceptable. I use 220 grit sand paper to HAND SAND after the paint dries well and then I seal the paint with a flat clear coat. I never wax…personal preference.

Here are some paint tips I posted a few years ago for painting with latex or oil based paint. The first two tips apply to chalk paint as well!

1) Always clean the piece of any dirt or debris. Just wipe it down with a damp cloth and make sure you get all the "ick" off! If the piece is super grungy, you might want to clean it with ammonia or wipe it down with mineral spirits! If it has a lot of flaking paint or old finish, you can sand it down a bit or better yet, strip it using this process...just make sure the existing paint or finish is stable!

2) Make repairs. DO NOT waste your time making it pretty if it needs repairs. And remember, glue and clamps are your friend!!!! If you don't know how to repair something, google it or email me. MOST furniture repairs aren't that difficult...but if you do it wrong (or not at all) you will be wasting your time making it pretty! 

3) Primer....always a must if you are going to paint with spray paint or latex or oil paint. If you want your paint to stick and not chip or peel, prime. For smaller projects I use spray primer. For larger projects I roll on primer with a 4" foam roller. Even if your paint says "all in one paint and primer"...use primer.

4) Sand smooth after the primer has thoroughly dried. A 220 grit paper should do the trick...FEEL the surface...if you can feel it, the paint won't hide it. 

5) Use tack cloth. Most tutorials will tell you to wipe the piece with a damp cloth. That won't cut it! Tack cloth will pick up the finest grains of dust and debris you can't see until you paint the piece! Use it before you paint and between each coat!

6) If you are going to brush on latex or oil, use a quality brush AND TAKE CARE OF IT! I have brushes I have owned for years because I am religious about cleaning them thoroughly after use. And don't even think about using those cheap disposable brushes (chip brushes). They are great for many things, but not for getting a smooth paint finish on furniture!!!! 

7) ALWAYS use an additive....Floetrol for latex, Penetrol for oil based paints. 

8) Use quality paint. Especially spray paint. I know it is cheaper at discount stores but pay the extra few dollars and buy a quality spray paint at your home improvement store. Cheaper will NOT be better if it doesn't hold up to wear and tear!

9) I do 2-3 light coats (spray or brush) rather than trying to get solid coverage with one coat...trust me when I say, there is NO paint on earth that will get good coverage with just one coat!

10) Cure time is important. Seriously, I know they style their pieces on those HGTV shows within hours of painting a piece of furniture. Just don't! Just because the paint feels dry to the touch DOES NOT mean it has cured. Latex...a few days...oil...a week. Give your paint time to cure or it is going to peel or chip if you try to use it right away! Put the piece in place and chill!

11) Spray vs. Brush/roller. For me, it all depends. I have learned that large flat areas are tough to get an even coat of paint on with spray paint...and of course there is the expense factor for large pieces. A dresser can take 2-3 cans of spray paint. So it really depends of the piece. Sometimes I will spray the drawer fronts of a dresser and roll the top and sides. 

12) Keep a little spare paint for chips and dings...if you use latex or oil, just put a few tablespoons in a little container and stick it in the back of the drawer...just in case! If you are using spray paint, keep a can with a little paint. Manufacturer's change paint colors and you might not be able to find that awesome color in the future. Keep spare paint in the house...not the garage or storage shed!

If you follow these simple guidelines, you can update a dated piece with just a little time and effort. 

Now, back to the china hutch…at this point it is on hold…we are in a deep freeze here and there is really nothing more I can do. I did strip the top and shelves because Matt wants those stained. But it is too cold to prime or paint so I will patiently wait…not something I do well…lol! But I have learned that temperature matters so I will not rush this project!

Hopefully the weather will cooperate this week and I can share the finished project next week!

Until then….


Our annual trip out west and a little reset....

Our annual trek west! This year we had to make the trip a week early because of Brian’s work schedule so we decided to go a little bit north and try to catch the Aspens AND see a part of the country we have wanted to see for years…Jackson, Wyoming, The Grand Tetons, and Yellowstone.

The Aspens were just starting to turn so we missed them in all their glory…. but the trip did NOT disappoint! We spent a few days exploring Jackson, Wyoming, toured Yellowstone, biked in the Grand Teton National Park, toured “Mormon Row,” and took the tram to the top of Teton Village Ski Resort.

We saw critters (lots of bison, elk, mule deer, pronghorn, moose…but no bear) …

We saw Old Faithful….

We fished the Snake River IN the Grand Teton National Park…

I wish I was a “travel blogger.” I know I can not do this area justice with words or pictures. I took HUNDREDS of pictures and could post them all…but let me just say…GO!!!! See Jackson Hole, the Grand Tetons and Yellowstone for yourself! It is a trip that won’t disappoint!

As always, I love seeing new places but I am always happy to be home! And of course this trip always marks the start of my absolute favorite time of the year…fall.

Unfortunately we came home to temperatures pushing 90….YUK! Oh well, I cranked up the AC and started decorating the house for fall….

I may share a bit of my fall decor but as I have said before, little changes from year to year. I did do a little makeover in my dining room this year so I did pick up a few little things for the table and buffet.

Simple…a few faux pumpkins, faux flowers and antlers…a buffalo check cashmere scarf makes a perfect table runner.

While I was working on my fall decor I decided to rearrange one of my living room bookcases. Originally this bookcase housed one of my favorite author’s collection.

Brian has inherited his grandfather’s old cameras so I decided to try to display those…

I know I have said time and again I am NOT a knick-knack person…but I swear every single thing in this bookcase is an “heirloom.”

I like it…sometimes just moving things around gives an area of your home new life!

Happy Fall!

A dresser makeover and a few changes to an "heirloom"

As I mentioned here I am no longer doing the whole “resale/flea market” thing. I am still working on a few projects here and there because it is what I love to do!

This piece is one I bought eons ago and has sat in my garage waiting on inspiration and time.

I bought it and the matching chest of drawers at a barn auction. Yes, it had been sitting in a barn…yes, I could tell it had been infested with mice at one time. No, I was not expecting to find two mouse carcasses while cleaning it. GAG!!!!

The ONLY way I have found to rid old furniture of old furniture smells (mice, cigarettes, moth balls, etc) is to first scrub with ammonia and then vinegar (do not do them at the same time!). Sometimes I will spray the inside of the piece with diluted vinegar and just let it dry. If that doesn’t do it, then I suggest you prime and paint the inside of the drawers. Fortunately, the heavy duty cleaning on this piece worked and I did not have to paint the drawers!

The top and drawer fronts are cherry veneer. The veneer was in pretty good shape and really just needed to be stripped and oiled…I used THIS process to strip the old finish. Tried and true! I know I link to this tutorial a lot, but it works!

After stripping the veneers, I applied three coats of tung oil finish and chalk painted and distressed the cabinet!

The hardware was in pretty good condition…just icky. So I primed them with metal primer and painted them with flat black paint.

AGAIN, another example of how a very few dollars and some elbow grease can turn the ickiest piece into something pretty awesome!

While I had the “farmhouse white” chalk paint mixed up I decided to give some old frames a little makeover.

When I visited my uncle this summer he gave me two old framed portraits of my great-great grandmother and my great-great-great grandmother.

They do tend to be on the “goulish” side…but I NEVER turn down family heirlooms. When he offered me THIS china cabinet….

…I knew it wasn’t “my style” but as I said, heirlooms trump everything. So I made a few changes to make it a little more appealing…I removed the red paper on the back, added glass shelves and cabinet lighting. Then I filled it with the great’s and grand’s china…it is what it is…and heirloom piece filled with heirlooms.

I decided I might be able to make the portraits a little less “goulish” by painting the frames…they were just so “heavy and dark.”

I hung them in the GUEST ROOM….

Meh…not swooning over them but again, they are family heirlooms. (I think they need to be closer together!)


Another VW van dresser makeover.

I love this little project. I featured my first HERE. When I found another “waterfall” chest of drawers I decided to do another…they are just too much fun.

This little makeover takes a bit of patience…mainly because you have to “layer” the different paints. Each “layer” needs time to cure before you tape it for the next “layer.”

The first thing I had to do was remove all the hardware, putty the holes I would not be using, prime, sand and tack. Then it was just a matter of drawing and taping my design…

The “base layer” is white lacquer…from there I painted the teal, then the light grey “glass”…then all the outlining and detailing.

In the end you have a precious little chest!

I used some black and white I had on hand and bought a sample pot of the teal. Between the primer and paint, I probably spent less than $10.

The only “major” purchases were the VW decal (purchased HERE) and the two handles that make the windshield wipers…less than $20. (I had the round knobs in my hardware stash but you can buy them for next to nothing) All in this little project cost me the price of the dresser and less than $30 in materials.

I made a few “design changes” and truth be told I like the first one I did better….but nothing you will notice on a passing train…so I let it slide! It did affect the placement of the VW decal so I ended up having to “cut” it between two drawers…boo!

Again, one of my favorite projects and since I am no longer having to work at keeping “inventory” for a booth, I have more time to be creative and have fun!


dining room makeover...

For years my “dining room” has been little more than a pass-thru from the kitchen and living room into the den.

A few months ago I refinished a little table that is my current love…

You can see the evolution of my dining tables here. The criteria for a table is that it is compact but can expand to seat 8-10 people the one time a year we need a big table…basically Thanksgiving.

This new table fits the bill but try as I might, I could not find chairs I was really happy with. I knew what I wanted but I couldn’t find them in my normal “thrifty” way…I tried these “mid century” style chairs…

No way Jose’….super ick.

So I bit the bullet and ordered chairs from an actual retail store.

Whoa! Who knew dining chairs could be so stinking expensive!

Other than a revolving door of tables and chairs and a few changes to the art work and a new light fixture…and maybe the addition of ANOTHER buffet, the space never got a full-fledged “makeover.”

It has never really been styled as a “dining room.” Truth is, I have a bar we use regularly so other than our holiday gatherings, this space gets very little use.

I don’t really have an actual dining ROOM…it is more like a dining “space.” And again, it has always just been a thoroughfare from the kitchen to the den. So why bother styling it…

Because it is a very prominent space in my house that has been horribly neglected so it was time it got a little time and attention.

First, the table…I love the little mahogany trestle table. Maybe not specifically the style…or specifically the color…but just the whole of the sum. Don’t know how to explain it any better than that…it’s just pretty and small but easily expands.

The buffet. I love this piece…it only took me a year to figure out what to do with it, but now I love it….the style, the color, the size.

These two pieces alone are as different as night and day…one VERY traditional and antiquey looking and one very mid-century. That pretty much sums up my entire home decor…”eclectic.”

I changed up the buffet vignette a bit…just simplified it a tad…you can see HERE how I turned a candle stick into a lamp.

So, on to the rug.

What a nightmare. I THOUGHT I wanted to use this little space to infuse some serious color into my home.

Hum….not really loving it to be honest.

The first….

Wow…now that was some color.

ALL the pictures on Pinterest show rectangular rugs with rectangular table and round rugs with round tables….but because this space is a bit smallish and because we walk through this space A LOT, I tried a round rug…

Meh….

I LIKE the look of a round rug…but again, not sure I am digging all the color…even though I THOUGHT I wanted to infuse color into this space.

So I took the first one back and picked up another rectangular one with color, but a lighter background…

Hum again…

I LOVE this little scatter rug but alas it doesn’t come any bigger…curses.

I just love the colors and the amazing textures! But it did make me rethink my “color plan.”

This plain ole’ blue one….

I like the simplicity…I like the style…I like the quality. Nothing earth shattering and obviously I gave up on the idea of infusing color by putting down a “wild and crazy” rug. Oh well…I never professed to be a designer.

The wall decor. For a few decades I really liked the look of the two frames I had on this wall. They have “transitioned” over the years…first they went from the “dark and dank” to a chalk painted frame and new matting…then I changed up the matting and added botanical prints. So often I get so use to a certain look that it is difficult for me to see anything different…such was the case with these prints. I loved the pop of red of the matting and I adored the botanical prints. Unfortunately it was obvious two was not going to work…and one just looked so dinky.

Brian and I found these totally awesome mirrors.

IMO they look pretty awesome…not terribly expensive so when I tire of them I won’t feel too bad. But it took me 19 years to get rid of the two large frames so I doubt these go anywhere any time soon!

Fortunately, I LOVE the table, the buffet and the light fixture. Rugs and artwork are an easy change out if I find something I like better.

For now I will keep the little bench off to the side. It is perfect for when I expand the table and need a little extra seating.

I am excited to decorate this space for the holidays!

The only other thing I MIGHT add are curtains on the two flanking windows…or maybe shutters. Who knows…they have had blinds for 19 years…what’s the rush!

This is where I will admit I am like 90% of you out there… I just want Emily Henderson or Candice Olson or Joanna Gaines to swoop in and just do it all! I am always amazed that they can do in one hour what it has taken me 19 years to do!

I have avoided the whole “farmhouse decor” look only because I think it is a fad that will pass in short order…but this dining room gives me a little taste of the “farmhouse look” without going all out. Just a pinch and a dab that can easily and inexpensively be changed out when the time comes.

Making a lamp out of a candle stick...

Next week I hope to share my entire dining room makeover…just waiting on a rug and the chairs I ordered.

This week I want to share one tiny element.

In my quest to make a few improvements to my dining room I decided to change up the buffet vignette…specifically get rid of the floral arrangement and style it a bit differently.

(You can check out the buffet makeover HERE! )

So off to Home Goods and At Home I went. One element I wanted to add to the buffet was a tall lamp but I couldn’t find the one I had in my mind. I found some candle sticks I liked…only problem was I didn’t really like the tallest one as a candle stick…but when I stuck this little lamp shape on it I decided I kinda liked the look of it as a lamp…

Hum?

I THOUGHT the candle stick was ceramic or resin…I also thought it was hollow. So I THOUGHT I could drill a hole in the top and a hole in the base with a masonry bit, thread in some lamp cord, add a little socket and presto-bingo…a lamp.

What is the old saying about “best laid plans.”

Yeah…well…some things just don’t work out the way we THINK they should…this, my friends, is more the norm in DIY. Things often don’t go as planned….

So the first thing I discovered was that it is wood…not a biggy.

I can just drill a hole from the top to my bottom hole with one of my really long drill bits…right? Wrong. Because the drill hit metal…turns out the candle stick is actually made up of three different sections…with screws AND glue between each. Impossible to take apart so I ended up cutting the sections with my chop saw.

Fortunately it was a tad easier to drill through the individual sections than to drill through the entire tall candle stick.

Whew…that was a booger…but after that was all said and done, it was time to “repurpose” the whole thing into a lamp.

To make anything into a lamp, you will need a socket and a lamp cord…fortunately you can buy both of these things at Lowe’s.

To use the little top socket, I just removed the little screw on the side of the base…

… and drilled a hole in the top of the candle stick big enough for the base of the socket to sit in (1/2”).

To thread the new electrical cord through the stick, I threaded a thin wire (floral wiring works well) through the stick sections. Then I wrapped the thin wire around the end of the new electrical cord and pulled the wire back through.

Once the new electrical wiring was threaded through each section, I easily attached it to the new socket, set the socket into the 1/2” hole I drilled on the top section and hot glued it in.

Then to reconnect the three sections, I applied wood glue and a dab of hot glue just to hold it all together while the wood glue set up.

Presto-bingo…a lamp made out of a candle stick.

I like it.

Unfortunately I don’t think the existing art work will work with the candlestick/lamp…curses. For now I think I will just leave it be.

I took a few sprigs of the greenery from the old floral arrangement and stuck them in a little ironstone creamer…one of my little birdies…a stack of old books I had stashed away.

Trying to keep it simple for now but really looking forward to having a buffet to decorate for the holidays!

I THINK I will like the new rug and chairs I ordered…we will see. I already have one rug in the garage ready to go back to “At Home”…didn’t like it. My plan was to go with a tad more color but this rug has me second guessing that decision.

I am also contemplating curtains…I’ve had blinds for 20 years…we’ll see…one thing at a time.

It is coming along…


A few MCM makeovers and a life decision...

Again, I am a baaaad blogger. I jump head-long into a project and fail to take “before” pictures.

Prime example…

No “before” picture. It was in similar condition to THIS dresser…reeeeally bad. But of course I have no proof of that. Just take my word for it…again.

The entire piece was originally the old “natural” finish with a lot of “wear and tear.” I primed and painted the six side drawers and cabinet and stripped and oiled the top and middle drawers.

I absolutely love the wood handle “hardware” and the super nifty black concave and brass hardware. I sprayed the little concave pieces with metal primer and black paint.

The top had some chipped veneer. I originally planned to paint the top so I could repair these areas, but I just can’t resist beautiful walnut…even veneer. So I did what I often do…I just let it be what it is…an older piece with a few blemishes. You can buy replacement strips of veneer…but I would rather have flawed original…just a personal preference!

I did take a before picture of this piece….

I love the brass hardware on these pieces…again, the way to tell if it is solid brass is to use a magnet. A magnet will not stick to solid brass. Important because in order to clean these pieces I have to really scrub them with steel wool. No secret to cleaning brass hardware…lots of Brasso, steel wool and elbow grease!

Now…on to my “life decision.”

I have decided to stop doing the whole “auction/flea booth/resale” thing. I love doing what I do but doing it to “pay the rent” has become tiresome. I am just not enjoying it the way I use to.

So this past week I gave my notice at 410 Vintage and I went on a major “purgefest” in my garage (aka shop). I sold a lot of stuff on Facebook Marketplace, I donated a truck load to our local community thrift store and I took a truck load to the dumpster.

I have a friend who opened an awesome little consignment/flea market (Gathered Goods) so I took a few things to her to sell on consignment.

My garage has been a disaster for some time.

I painted the walls and cleaned all the shelving and cabinets!

I installed a Rubbermaid track system for large items….

…and we installed a nifty metal peg board system for all our tools. I knew where all my tools were but no one else could really figure out where anything was.

I even gave the door between the garage and laundry room a fresh coat of paint.

I am not “retiring” completely. I will still refinish and rehab pieces…I just won’t have to go looking for projects. If I find a project I want to work on, I can always take it to Darlene at Gathered Goods.

So fear not…I will always have a project to share here…and of course there are always my enlightened “muse” posts.

A whole lot of shaking going on!

AGAIN, I have been MIA for weeks. Trust me, I would have loved to have a day to sit and muse.

As I shared here, Matt moved into a new home and Katie moved out of her college apartment.

I laugh at people who think their “parenting” somehow ends when their kid turns 18. Trust me, that is when the REAL work begins. In my case it means helping kids maneuver through life…i.e. move, sell. buy, marry, give birth…in other words, any time they need help, Mom is here to help. The years of “rearing them up” are over, but their lives get crazy and complicated and they still need guidance and a strong back!

Soooooo, what I have I been up to?

The house Matt bought was the home of his aunt’s sister…she passed away in March. So imagine you walk out of your home and die…and everything you own is in that house. Yep…and not only is it a big house, it was PACKED FULL! No one was able to really begin sorting and packing and moving her stuff out until after Matt closed so the week before Katie moved, I was at Matt’s new house sorting and packing!

After a few days of doing that, we loaded up a 16’ moving truck with all of Katie’s belongings and her cat, Simon, hooked her car up to the back, and drove 21 hours to her new home in Delaware.

I made an instagram post about this trip…one of the hashtags was #budgetrentalssmelllikeass…enough said about that issue.

The truck did not have cruise control. I never thought of that feature as being a “must have” on a vehicle. I was wrong.

I will NEVER complain about the condition of Arkansas highways again after driving through Missouri, Illinois, Ohio and Pennsylvania.

NEVER book a motel in a city if you have no idea where their “bad side of town” is….there is a good chance the hotel will be smack dab in the middle of it.

When driving a 16’ box truck towing a vehicle DO NOT get yourself in a tight spot…only get gas where 18 wheelers get gas!

All that being said, we were extremely fortunate to find parking right in front of her apartment. Fortunate as well that she has a friend who had moved to Wilmington the week prior and was available to help unload the truck. We were able to get everything moved into her little apartment the evening we pulled into town.

Then the REAL work began.

The apartment was advertised as 700 square feet…I can assure you it is not! “Tiny living” is a real challenge, even for a recent college graduate who has few possessions. Unfortunately, that is all that is really affordable if you are looking for a safe neighborhood close to downtown in an older Northeastern city.

You have to be very judicious about possessions, you learn to be very organized and you make the most of all the space available.

So for two days we unpacked, purged, built shelving, and arranged and rearranged furniture and “stuff.” It was a challenge but in the end she has a precious “home” that is perfect for her and Simon!

The kitchen was the biggest challenge. Katie loves to cook and she buys in bulk and stores everything in mason jars. Since the kitchen only had two upper cabinets, we spend the better part of one day just building shelves to hold her storage jars, dishes and spices. (All the photos are from my Iphone, and again, I am not a travel blogger!)

The living room wasn’t as big of a challenge since it wasn’t much smaller than her college apartment!

The pen and ink drawings are of the old train depot and old post office in Fayetteville…a little token of her college town.

She finally ordered pillow covers for her throw pillows. She learned from her mama…keep the big stuff neutral and infuse color in the decor…pillows, rugs, art, etc. The pillows she ordered are bright and fun and full of color!

Two days of driving, two days of moving/building/staging/purging and then the fun begins….

NEW YORK CITY BABY!!!!!

Yep, I finally got to take my baby to New York City! We took a train from Wilmington, Delaware to Penn Station in New York City, walked 10 blocks to our hotel and spent 3 1/2 glorious days in New York City!!!

Okay, glorious is a stretch….it rained the first day and they were experiencing their first big “heat wave” of the summer….weather-wise, not so glorious.

So what did we do in the rain and the heat? AS MUCH AS WE COULD!

We saw two Broadway plays….

It was the one thing I regretted not doing when Matt and I went to NYC.

We did the whole “Rockefeller Center” thing…bought a sweatshirt in the NBC shop, went to the Top of the Rock and had coffee in the plaza.

We ate a pastrami sandwich and a HUGE slice of cheesecake in a sweet little cafe off Time Square….

We rode bikes around Central Park….keep in mind it was pushing 100 degrees so we were pretty melted. That being said, when Matt and I road around Central Park two years ago, I had to walk 1/2 the way…I was just soooo out of shape! After losing 20+ pounds and biking for the last year, I was able to ride around the entire park without stopping at all! Yay, me!!!

We ate dinner in Bryant park, took the night bus tour across the Manhattan bridge to Brooklyn, walked across the Brooklyn bridge in the rain, visited the 9-11 memorial, took the ferry to the Statue of Liberty and Ellis Island. We took the extended tour of Ellis Island. We spent a morning in the Museum of Natural History (really should have spend ALL day there), took a bus tour of Harlem, saw Grant’s tomb, visited the Federal Hall where Washington was inaugurated and the little church across from the 9-11 memorial where he prayed after his inauguration. We took a water taxi up the west side of Manhattan. We visited the church were Alexander Hamilton is buried and of course, St. Peter’s Cathedral on 5th Avenue….

Which reminds me…how many Catholics does it take to change a light bulb….

Even in the most reverent places my mind goes places. But seriously, it is BEAUTIFUL cathedral!

I know we did much more…but basically we saw as much of NYC as we could in a few short days.

Then I flew home from Laguardia and Katie returned to her new little apartment in Wilmington.

My baby has officially “left the nest.”

And while I would love to sit and “muse” about this next chapter in my life, I really didn’t have much time to dwell. I had work to do at the apartments, a pile of projects in my garage, and a son who needed help with his yard and garage at his new house.

Man I need a vacation!

Maybe in the pile of projects in my garage I will have a makeover to share next week.

Until then….