Getting ready to go retail....

Wow...getting ready to go "retail" is a LOT of hard work.  I have been going to auctions and garage sales every weekend.  And if I was a hoarder, I would be in deep doody  because there is a whole world of really nifty stuff out there. ​

I have tried to focus on things others will LOVE!  I know I love most of what I bought...but since it is all piled in my garage and I have NO place to put it, I won't have a problem parting with it.​

This weekend I scored big time on July 4th and Christmas decorations, a big mirror, frames, planters, milk glass, candle holders...you name it, I found it!  Anything I can find that I think is wonderful, at a price that hopefully will let me make a few pennies...or at least break even!!!  I don't plan on getting rich on this little endeavor.  Again, I need an outlet for my creative juices and it is wonderful to find things I know others will take home and LOVE!

And honestly, this gives me an excuse to do something I use to love to do...go to auctions!!!  I forgot how much fun they are!  Even Brian has gotten into it so it is something else he and I can do together....that is always the BEST part of any hobby...sharing it with your best friend!​ And Matt, my youngest son, comes when he is free!  Family fun!

I have found a few pieces of furniture that are inexpensive enough for me to put my "spin" on.  It is hard to pay a premium for a piece of furniture and then come home and put a lot of money and hours into it.  I probably devalue my time and labor way too much, but when I go out and buy $100 worth of upholstery for a little ottoman it makes it tough to sell it for $75...especially when it took me all day to recover it!​

So I have to be very careful when bidding on and buying furniture.​ I found a wonderful Duncan Phyfe table that would have been beautiful...but the top was in pretty bad shape and I knew it needed a great deal of time and attention!  So I set a max in my mind and I tried not to groan too loudly when it sold for $15 above my maximum! But I knew if I paid more than that, I would NEVER recoup my time and expense.  

I also have to be very cognizant of what buyers want vs. what I personally like.  I am not that big into the shabby chic/plaster paint thing...but I know the buyers love it.  ​

This oak chair is a prime example.  Kinda dated before so I knew I would have to do something with it...​

When I first started my plan was to prime, paint with high gloss black and then recover in a black and white damask...very "formal."​

But I had to do some sanding on the paint coat and before I knew it, it had a "shabby chic" flair that everyone LOVES!​

So there you have it...a little shabby chic chair flair!  

I already featured the 3-legged table with the plaster paint legs...but I also have a nifty little oak table and a few other projects I will share over the next few weeks as I get ready to fill my booth!

Course at this point, I think I have enough to fill an entire store...not just a booth.  Typical me...at some point I will learn moderation...or just quit going to to auctions and stopping at garage sales....because honestly, I am running out of room in my garage!!!!

​Love this fabric!

Wicker chair fit for a little ballerina...

It is so hard to take a picture of a piece of furniture that was white but is now a PALE mist green...but I tried! 

IMG_8798.JPG
IMG_8808.JPG

It may not appear in the picture to be a huge difference, but it really is!  And it is perfect for a little girl's room!  Now if I only had a "little" girl....

What is truly amazing about the color I painted the little chair (Valspar,  Mellow Spring) is it matches the color of my 60+ year old Universal Ballerina Mist stoneware to a T! 

My paternal grandmother wasn't a "china" kind of lady...so this was really all she had.  My mom bought the gravy bowl and plate, the serving platter and the tea pitcher at the estate auction after Grandma passed....while she was carrying it back to her car she dropped the pitcher!!  So when mom gave me what she had, the pitcher was beyond repair.  So I did what I always do...I Googled the pattern!   

Turns out it isn't a real expensive stoneware pattern...but the color and style is really beautiful and very "mid-century" since it was probably made and acquired in the 50s.  It is a "mist green" with a platinum band...just awesome.  So when I found more pieces out there, I bought another tea pitcher, the milk pitcher, salt and pepper shakers, a serving bowl and the sugar and creamer set.   

IMG_8814.JPG

Being the "family historian" and "archive fanatic" that I am, I carefully wrapped the broken pitcher, put it in a box, and wrote the story of why there was a broken tea pitcher in it and how I acquired a replacement.... with a Sharpie...on the box!  Hopefully my family won't think their mom was crazy for keeping a broken tea pitcher in the attic (trust me, they have enough reasons!)   

This week while I was sniffing around a new antique shop in town, I found another set of salt and pepper shakers! 

IMG_8815.JPG

Now that I have two sets, I don't mind using one...at least I know I have a replacement if they get broken!   

Painting light fixtures and paddle fans....

See, I'm not even trying to be clever with my titles anymore...just too much brain work!​

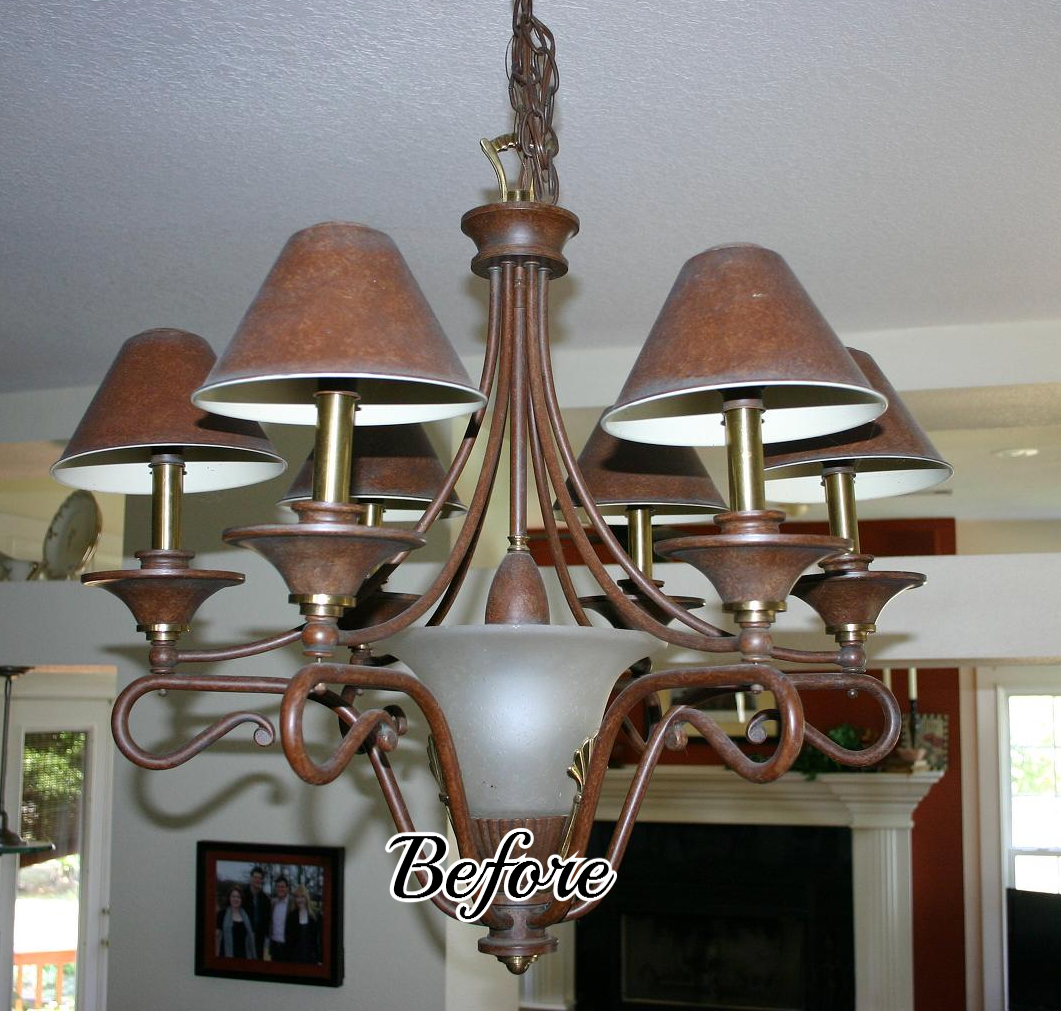
When I bought this house 13 years ago, the "bronzed" look was all the rage...not so much now, or at least not to my taste!  I'm more into light, bright and somewhat "modern" looking! 

But who can afford to change out ALL their light fixtures when the old trends sour.  Not me...so it was time to get "creative."​

Paddle fans and dining chandeliers are probably the two biggest expenses in lighting.  And naturally, those are often the most noticeable!  

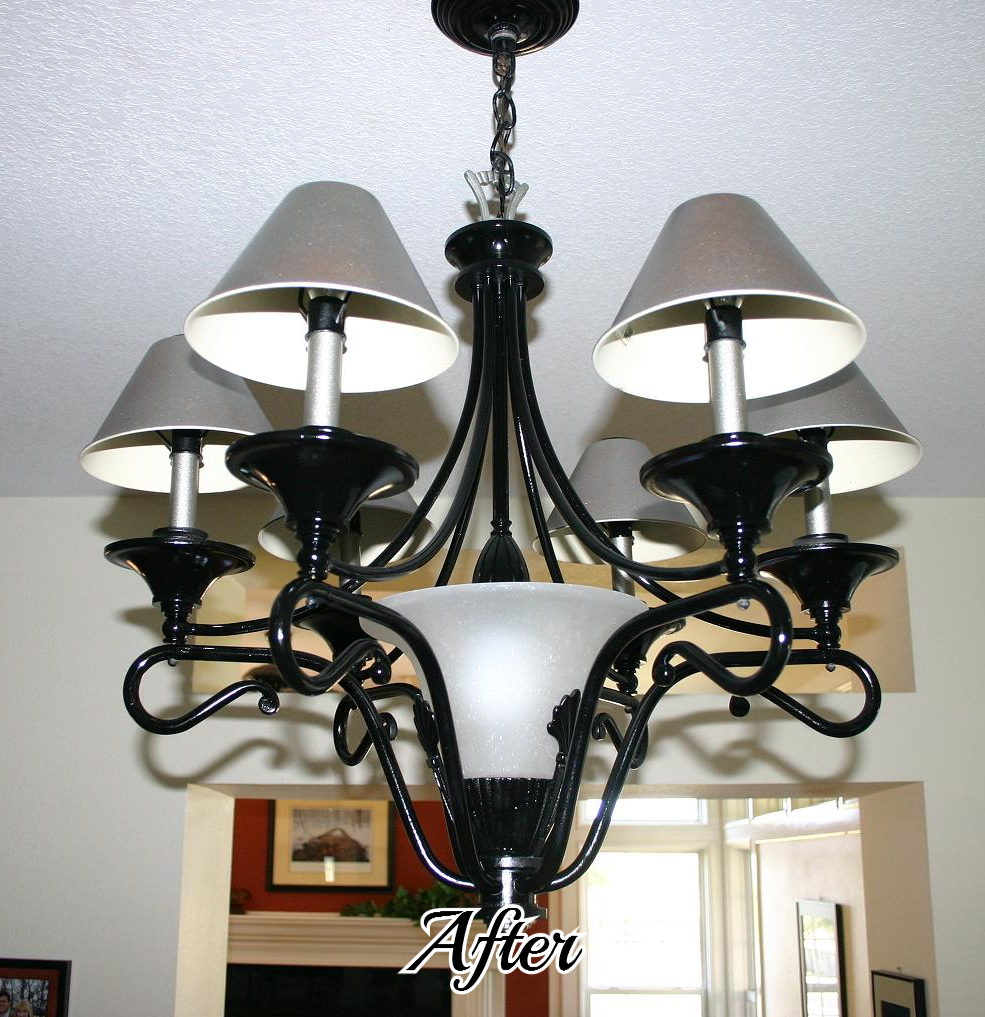
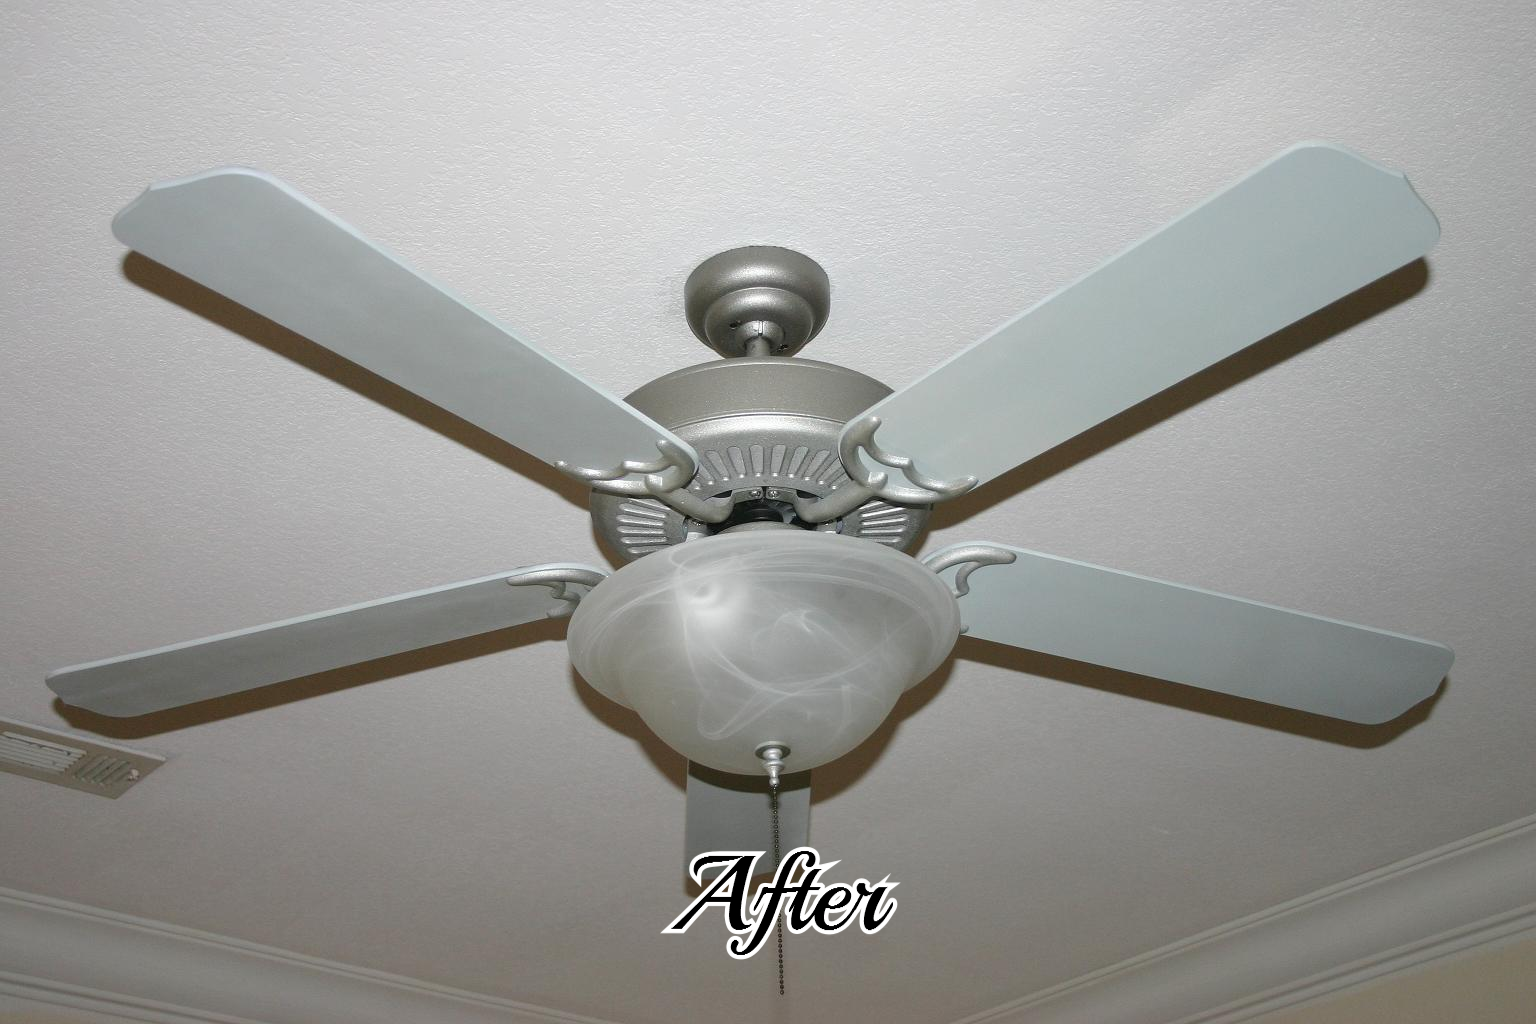
Since I was somewhat tired of the dining room light and the paddle fan in my office (and both would be expensive to replace), I didn't think I could do much damage if I took a can of spray paint to them...what is the worst that can happen...I have an excuse to buy new ones, right? ​

IMG_8223.JPG
IMG_8226.JPG
THE OFFICE AREA (3).JPG
IMG_8149.JPG

As with everything I paint, I first cleaned them and then "primed" them.  On metals, I use a metal primer...or even Kilz!  Just spray it on and then after it dries hit it lightly with 0000 steel wool...and then of course tack cloth it well before painting. (ALWAYS TACK BEFORE PAINTING!)

On the dining room light I used gloss black spray paint and the "brushed nickel" spray paint on the shades.  I used blue/grey spray paint on the fan blades...the same color I used on my dresser... and brushed nickel on the body and hardware of the fan.  I also added a new light globe to the paddle fan, just to update it a tad.

​The trick to painting light fixtures or paddle fans is taking them down and basically taking them apart...once you "disassemble" them, they are easy to paint!  BUT MAKE SURE YOU KEEP ALL THE HARDWARE AND SCREWS!  That is why I have plastic baggies on my materials list.  Any time you take ANYTHING apart, you need to put all the screws and hardware in plastic baggies and make sure you label them!  (Again, just trust me on these things!)  If you have never assembled light fixtures, and you don't feel real comfortable with the thought of getting it all back together, just take LOTS of pictures while you disassemble it.  I did that with my first upholstery job, and it helped a lot!

IMG_8141.JPG

I found that my swing pergola made the perfect spot to hang the fixtures (with a dog leash) while painting...see, you don't need anything "fancy."​

Note, I also used blue tape on both the fixture and the wires coming out of the ceiling to label what wires went where so I would know how to rewire it...AND DON'T FORGET TO TURN OFF THE POWER TO THE FIXTURE BEFORE TAKING IT DOWN OR PUTTING IT BACK UP!!!​

After 2-3 coats of paint on each of the components, I put 1-2 coats of spray on clear coat, just to give it a durable finish that would allow me to dust and clean them periodically! ​

This easy process allows you to be REAL creative!  It would be fun to paint the fan in your kid's room a fun and funky color...maybe with some interesting design element, like a chevron pattern or polka dots!  Just "think outside the box" and remember my motto...YOU CAN DO IT!  If you don't have the most creative mind, do what I do...Google it!  People post pictures of their projects...and no one is going to be offended if you "copy" their creativity!  It really is the greatest form of flattery! ​

I was kind of sick of my bedside table lamps too...and until I can afford the really awesome crystal lamps at TJMaxx, I got a little creative with those too!

IMG_8219.JPG
IMG_8220.JPG

As much as I had tired of this dining room light, it really did turn out great. And it has always been one of my favorite things to decorate during the holidays.  During Christmas it is perfect for the gold shades I painted and the garland and red berries!!  Sometimes, old is good...it just needs a little facelift from time to time!​

IMG_8312.JPG

Oh. My. Goodness....I can't believe I found one....UPDATE!

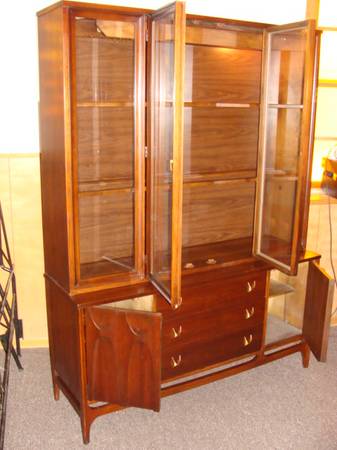
Okay, I told you about my absolute obsession with the mid century Lane Acclaim tables.  So in my quest for all things "mid century" I stumbled upon a line of furniture that literally makes me drool....Brasilia by Broyhill.  Manufactured in the 60s, this line of furniture is absolutely one of the most beautiful and desirable mid century designs floating around right now!   I have always wanted a piece of this line, but honestly I could never find one in my budget!

So when I found a Brasilia hutch online for an unbelievable price, I just knew something had to be wrong with it it!  It was at one of my favorite flea market haunts, White Elephant. Even though I was exhausted and already in my pajamas, I called my son, who lives a few blocks from the flea market, and told him to go stand guard in front of the hutch until I could get there and inspect it. 

Beautiful.  Near mint condition, less a few bumps and bings...but honestly, that is to be expected from someone in their 50s!  And even though I really don't NEED or even want a dining room hutch, I just couldn't pass it up!  Maybe I can trade it for the bedroom hutch I REALLY want!

I took a few days off this week but Monday morning, that puppy will be on it's way to my house! 

3I33Ma3pc5Fe5H45M9d3c9afd4fd51c4e17e5.jpg

It is now in my garage...it ended up costing me about $1200 damage to my truck!  The hutch is still in mint condition...the trailer I used to bring it home can handle a lot of abuse...but the truck...not so much! 

Today's lesson....do not forget you have a trailer on your truck and back out of the drive way.  The corner of the trailer can do some serious damage to a side panel.  Just another helpful hint.