Walnut MCM dresser makeover...Part 2!

You can see "Part 1" of this makeover here...a tutorial on stripping and oiling these amazing pieces!

Okay, I have to admit...EVERY time I work on one of these walnut pieces, two things happen...I fall madly in love with it and I am reminded of how much I LOVE walnut!

This little table is a prime example!

Solid walnut and an absolute true treasure! It certainly didn't LOOK like a treasure when I brought it home, but with a little time and effort, these pieces can become breathtaking additions to any home decor.

I know painted furniture is ALL the rage right now and I agree whole-heartedly that there is indeed a time and a place for painted furniture. My decorating motto...if you can ENHANCE the piece by painting it, go for it! 

Some people aren't real keen on stained furniture...and that is okay. But I believe every decor needs the warmth and beauty of a quality natural wood piece...whether it is a table or chair or whatever! Not every piece needs to be painted and no decor should have ONLY painted furniture. Of course, no decor should have ONLY stained furniture either...even I throw in painted pieces here and there...probably not enough for some people's taste, but I do like to "lighten and brighten" occasionally. I painted my bedroom furniture and my office desk and even the little side table in my den. But you may note one common element on all these pieces...I left a little bit of natural wood! (Wow, looking at these old posts I realize my photography skills have come a long way! Still a ways to go, but definitely better!) 

I decided to go with both paint and natural wood finish on this dresser. I like the way the painted "box" seems to frame the wood drawers! In my opinion, the results are A.M.A.Z.I.N.G!

So get ready for a BUNCH of pictures...because I am loving this piece!!!!

As I mention in the first post, the top had some pretty serious ink stains...

With a little "chemical" magic, gone!! When you find yourself faced with wood stains, hit the internet and search for a chemical solution. Trust me, sanding is NOT the answer, especially if you are working with veneer.

Can you even believe that this.....

...could become this. No stain...just a simple strip job and 4 coats of tung oil finish! Walnut in all it's natural glory! 

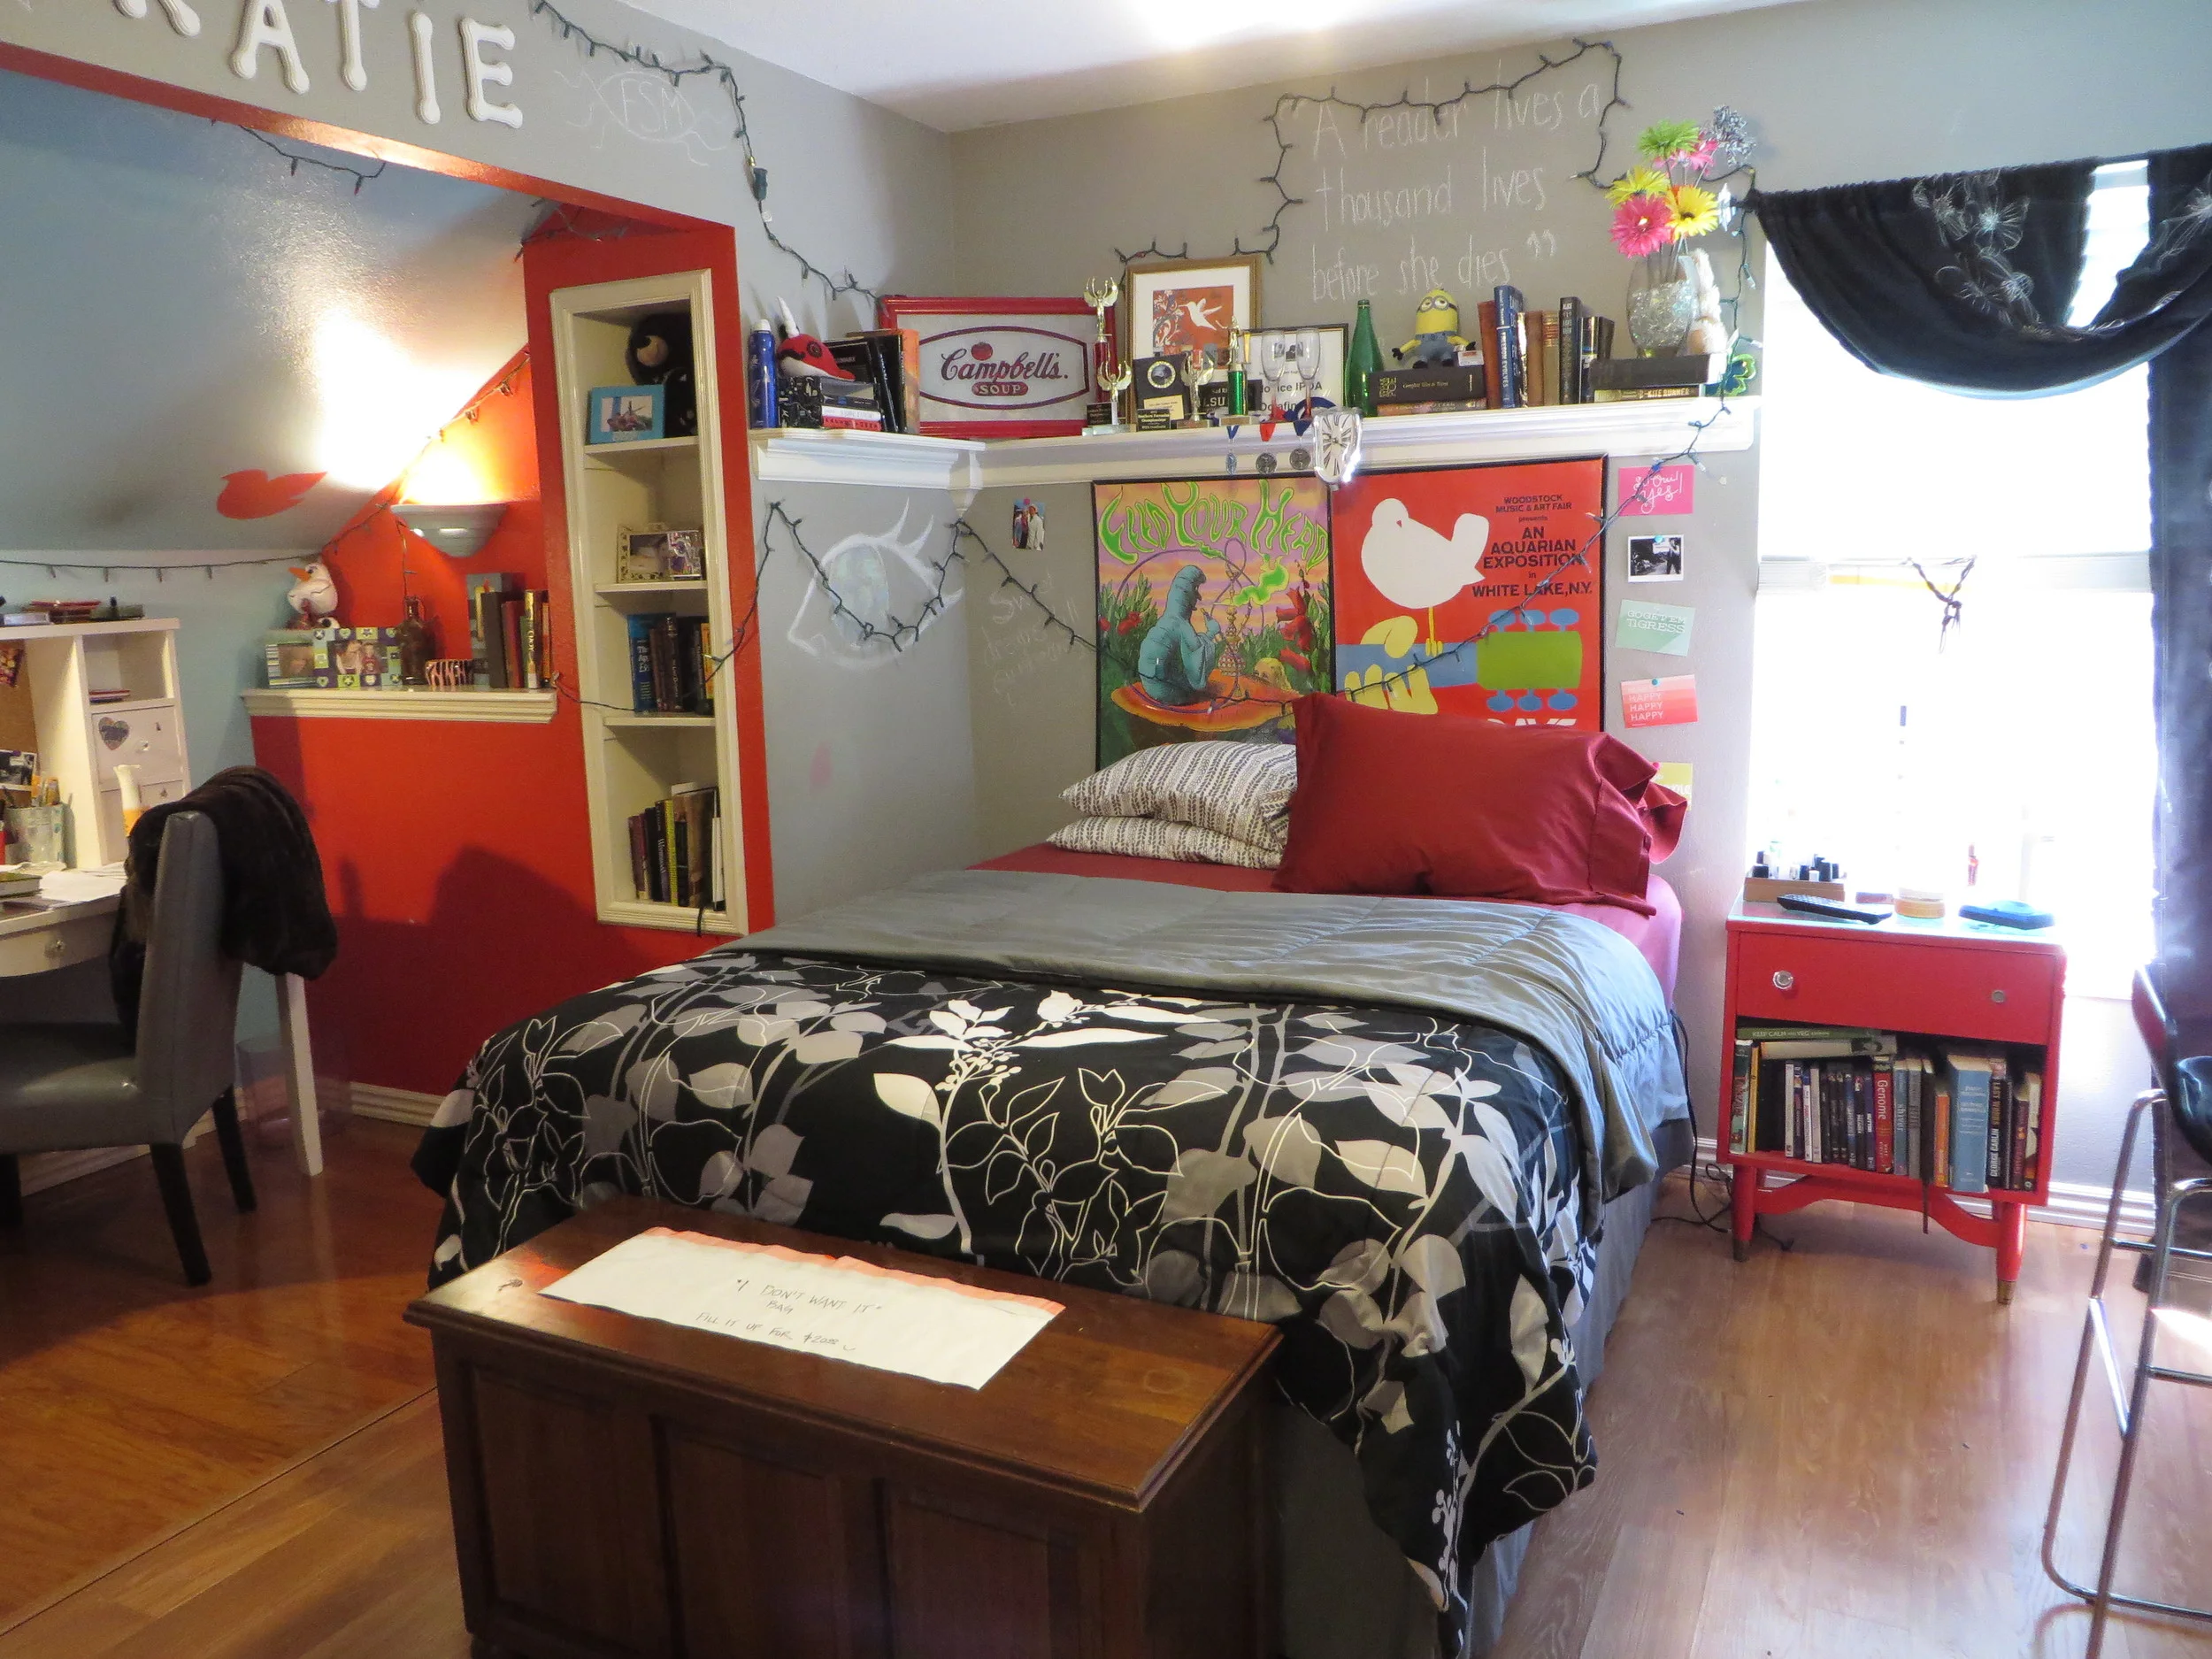
I put this dresser in my oldest son's room. He doesn't actually LIVE here, but he still has a lot of stuff here. His room serves as a guest room and a place to keep all his "stuff." The other kids call it the "museum"...trophies, jerseys, plaques, certificates..high school and college mementos covering pretty much every square inch of the wall space.

Sooooo...it was time. Time for a fresh coat of paint. Time to box up most of the "stuff." Just time. 

So later this week I will share his room makeover. 

Want to know a little secret? For the first time ever I didn't stress over paint chips trying to pick the perfect paint color. I chose a color that everyone has been raving about on Pinterest and decor blogs. I literally called the paint store and told them to mix up 2 gallons, sight unseen...and I LOVE it!

I can't wait to share!

I am sharing this project with Christine at MustLoveHome.com as well as all my favorite Link Parties!

You can see the full room makeover here!


Ugly laminate dresser before and after...

Like old maple furniture, they are a dime a dozen...old "laminate" furniture. The pieces aren't constructed near as sturdy as the old maple furniture (Here, here and here are a few maple pieces I have featured) but if you have a "boring" old laminate dresser sitting around or if you stumble across one at a thrift store or garage sale for next to nothing, it takes little time and effort to bring them back to life! 

Like most of these pieces, the top and sides (basically the "box") were all laminate. The drawer fronts were wood veneer.

What is the difference you ask? Basically, laminate is a "plastic" type material over particle board...then a "grain" is printed on to give it a "wood look." Veneer is generally constructed of a real wood top layer glued onto a wood base. It is pretty easy to tell the difference...if it looks and feels like "plastic" it is probably a laminate...if it looks and feels like real wood (but it is not a solid piece of wood) it is probably a veneer.

The biggest difference for me when redoing one of these pieces is I always prime and paint the laminate...usually spray paint. I use a chalk paint treatment on the veneer because I can "distress" it and the "real" wood grain will peek through. 

On this little dresser, both the laminate and veneer were in pretty good shape. Sometimes you will see "chipping" on either the veneer or the laminate. Both are relatively easy to repair. First, scrape away any loose pieces. Apply wood filler with a putty knife and then sand it smooth after it dries. 

Since we are in the heart of "Razorback country" I decided to give it a black and red treatment. I thought it would look cute in a boy's room or maybe in someone's "man cave" as a tv console. 

Again, super simple transformation. I removed all the drawers and then removed the hardware. Replacing hardware can get real expensive, real fast so I decided to give these little pulls a makeover as well. After I removed the pulls from the drawers, I put the screws back in them and stuck them in some old styrofoam (here is a picture example). I primed them with a metal primer and then I sprayed them with the same spray paint I used on the box. 

I sprayed the "box" with Kilz, sanded, tacked and then gave it two coats of red spray paint. I painted the drawers with homemade black chalk paint (two coats) and then distressed them a bit. I sealed all the pieces, including the hardware, with clear spray on poly. 

If you have an old dresser like this and need inspiration for color or styling, check out Pinterest. There are sooo many inspiration pieces. Some even remove a few of the drawers and add a shelf in the space so it can be used as an entertainment center for a tv and video equipment. I have done that with an old maple dresser and it turned out super cute and perfect for a living room.

I had the chest that matched this dresser...I painted the "box" off-white and the drawer fronts a pretty tealy blue. I redid it months ago and it is long gone! This poor little guy has languished in my garage for months and was one of the many projects I managed to get completed this week during our little warm spell...along with cleaning out the pond (AGAIN!) and washing exterior windows!

Good thing I got a lot done the last few days because today it feels more like winter again. 

Simple piano bench makeover.....

This will be my last post until after the New Year. Just too many things going on between now and then...Christmas with the family and all the craziness that entails...falling asleep before midnight on the New Year's Eve...and of course the cold weather that makes it a little difficult to do too much outside!

My family will be arriving Christmas eve. Sarah and her family...the boys driving in from Phoenix! Before then, I have several days of baking and house cleaning to do! Lots of fun and excitement. I also have a few new "things" happening after the New Year that I will share in due time. 

So many wonderful changes going on around here!

So...the last project of 2014 is a simple little project that anyone over the age of 40 will appreciate! 

In the warmer months I pretty much live in flip-flops! This is the time of the year when I wear my boots almost every day and the older I get the harder it is to get those suckers on. I use to be able to steadily stand on one foot while I put on my shoes or boots...these days I tend to tip over. Not sure if it is the age or the weight...lol! And naturally there is the potential to be bowled over by a spastic dog or terrorized cat!

 I have the little ottoman by the chair in that room, but it is a tad low....

...God forbid I move the ottoman and sit in the chair!

When I found this little piano bench at an auction, I immediately knew it was the perfect size to set next to the closet so I would have a place to sit and put on my shoes.

I have reupholstered and refinished several little benches over the last year...naturally when I went looking for pictures I found I had a lot of "before" pictures and a few "after" pictures but never both of one bench...seriously, what is up with that!

This bench was in obvious need of a little "makeover." The top was in pretty rough shape but it was walnut veneer and the legs were pretty much mint after a little cleaning. Structurally it was sound and solid. 

I decided to strip and oil the top and paint the legs! 

First, I removed the top. I used the acetone/lacquer thinner mixture to quickly strip all the old varnish off the top. Took all of about 15 minutes. Then I applied 4 coats of tung oil, rubbing with steel wool and wiping with a tack cloth between each coat! 

I sprayed the legs with Kilz and after it dried I gave it a quick sanding and wiped it down with a tack cloth. Then I sprayed it with 2 coats of my favorite off-white spray paint.

Cute as a bugs ear!

It is the perfect height for sitting to put your shoes on and since it is a piano bench, the top lifts up for storage...perfect for boot brushes and cleaners! (Like I ever do that...that is what my OCD son is for) I didn't refinish or paint the inside...why bother! 

I have run across several old piano and sewing benches over the years. Sometimes I paint the tops or add upholstered cushions. The larger benches are perfect for the foot of the bed. Simple and perfect for storage for an extra blanket or shoe cleaning supplies.

Next time you run across an old beat up bench, use your imagination! This little makeover took less than one hour of actual "work." Trust me...when you hit forty, you will be glad you have someplace to sit while you put on your shoes!

I hope you all have a VERY MERRY CHRISTMAS and may the New Year bring you happiness, health and wisdom! Trust me, if you have that, you have all the wealth you will ever need!

Goodbye 2014...thank you for the great times and the lessons I learned during the hard times.

Christmas pillows....

One of the great things about the "blogoshere" is all the great inspiration AND motivation!

This past week I was reading one of my favorite blogs, "The Interior Frugalista", and Marie was sharing her snowflake decorative pillows...only she calls them "toss cushions." Gotta love those Canadians...lol!

Anywho, it not only inspired me, it motivated me to do something I seriously dislike doing...sew! 

I have been scavenging down pillow forms. I wanted down forms for the decorative pillows that have poly-fill and a few extras for some holiday pillows!

As I mentioned before I like down forms because they are more comfortable and have a "designer" look! To me they just look "rich" but their price tag can reflect that and it is difficult for me to fork over twenty bucks for something I am going to have to make a cover for and something that is nothing more than a "doo-dad." 

This past week I found 6 awesome down pillow forms, in varying sizes, ALL for under $7...a few for as cheap as $5. Thrift stores and flea markets. Yep...I am buying ugly old designer pillows, removing the cover and sanitizing the forms for reuse! (just toss them in a hot dryer with a dryer sheet!) 

Since I had all these forms piled up, I knew it was time to drag out the old sewing cart and get busy!

TIP: If you have a 18 x 18 pillow form, you may be tempted to cut your cover fabric 19 x 19 to allow for the seams. DON'T. Cut the fabric 18 x 18...your cover will be about 1" smaller than the actual pillow form, but that is what will make them look super "puffy" and "full." I read that once on a designer website (no source, just info stored in the back of my brain!) and I tried it...makes a huge difference! 

I have shared "pillow tutorials" on several posts in the past (you will note I advocated cutting your cover fabric larger back then...again, don't)...you can check them out here, here, here, and here. 

There is no sense in rehashing the "how to." I've provided a tutorial and there are "how to" tutorials all over the internet. Marie does a great job of "tutorialing." (As I have said before, if you can sew a straight stitch, you can sew a decorative pillow...if you can't, now is the time to learn.) 

So I am going to share just to provide inspiration AND motivation and give you a few little tips on where you can find material to make inexpensive holiday covers. 

My first "inspiration"  came from a Pottery Barn knock-off I found on Pinterest....

This little pillow was super simple to make. I used two pillow shams that came with a white bedspread I ordered to put over my down comforter for the winter. I was never going to use them on the bed, so I decided to use the fabric for my decorative pillows. I didn't have enough for the back, so I used the leftover fabric from the tea towel pillows I will share in a bit....

As you can see, I changed things up from the "inspiration" pillow. I used green sparkly felt and rhinestones...both of which you can buy at your local craft store. I cut a bunch of "leaves" from the green felt, and used a bowl to guestimate a circle...

Then it was just a matter of filling in the "wreath" and placing a few rhinestones here and there...basically, I eyeballed it! I used fabric glue on the green leaves and "Jewel It" glue on the rhinestones and let it sit overnight before I constructed the pillow. I used a "premade" silver bias tape for the piping! 

I made this pillow out of tea towels I picked up at Hobby Lobby...

....they were around $4.50 (50% off!) for two!

One set of towels made TWO pillow covers and I used the leftover fabric for the backs of the wreath pillow! I spruced it up a bit by placing a rhinestone in the middle of each of the snowflakes and added a little piping around the edge. The piping is made out of bias tape and you can find a tutorial here on how to make inexpensive decorative piping from bias tape!

I made two pillows with this snowflake cutout table runner and a white table cloth I bought at TJ Maxx. (I would not suggest using inexpensive tablecloths for pillow projects...just seems too "thin" and tends to ravel quite a bit. Lesson learned.)

I centered the runner on the piece of fabric I cut out for the front of the pillow and basted the top and bottom to it with my machine to keep it in place. After I basted it, I used the fabric glue around the edges of the cutout to keep it "flat."

Again, I glued a rhinestone in the middle of each snowflake. I just love "sparkle!"

After making two white snowflake pillows, I had enough of the snowflake cutout to make one more pillow. I picked up a "burnt red" pillow and I kind of liked the color so I deconstructed it, made it a tad smaller so the pillow would be fuller and added the white snowflake cutout material.

I only have one, but I think it will look great in the den where I have more "fall" colors year round!

I also put zippers on all these pillow covers so I can easily remove them and reuse the forms!

I tend to be an "OCD/symmetry" kinda person so I made two of each of the decorative pillows so I will have one for each end of the couch when it is time to decorate for Christmas.

All these pillows are 18 x 18 and honestly, I don't like the three lined up together. I found two smaller pillow forms and plan on making Christmas covers for them and using one with two of the 18" pillows on each end of the sofa...maybe...someday...IF I get a little more motivation in the future! 

While I was making a mess, I decided to make another "floor pillow" for the den. I had two large poly-fill forms (actually they were Euro-pillows with ugly covers!) I bought at an estate sale and I thought they would be perfect to toss around on the den floor for tv watching! I had already made one large toss pillow and two smaller decorative pillows out of some leftover fabric from my dining chair project. 

I used the drop cloth material leftover from this chair project and an iron on graphic from The Graphic Fairy. Since the pillow was fairly large, I decided I wanted the graphic to be bigger so I pulled it up in Adobe Photoshop, enlarged it and then printed it out on four sheets of iron-on transfer paper.  Then it was just a matter of piecing the graphic together and ironing it on the fabric. There was a little "line" where two of the pages didn't quite fit together perfectly...I used a Sharpie to fill it in a tad.

I removed the "Grain" wording on banner in Photoshop and had intended to replace it with "Love Life." But I had a few issues with my printer so I ran out of transfer paper. Since I put zippers on all my pillow covers, I will just remove the cover and iron on the new words when my order of paper comes in. 

I still haven't shared my fall decor. Truthfully, it hasn't changed a whole lot from last year. But I have a few little additions and I thought it would be fun to do an entire post about the fall decor and update my Holiday Decor pictures. After all, Thanksgiving is less than three weeks away and the day after Thanksgiving, it all goes back in the attic! If you see anything that "inspires" you, it will be the PERFECT time to snag fall decor for pennies on the dollar!!! You may have to wait til next year to use it, but it is always fun to find things you forgot you bought last year!

Fall 2014

So this week...I promise! 


I'm Not a Trophy Wife


Finding inspiration for a ladder shelf!!! And my master bedroom update!

One of the awesome things about the "blogisphere" is all the great inspiration and instruction you can find for just about anything you want to do! 

A few weeks ago, my inspiration came from Kristi at "Making it in the Mountains." She built a ladder shelf for her back deck and it is awesome!!!

Someday I plan on making one exactly like this! I bought a few ladder shelves at an auction recently and when I priced them to see how much I should sell them for they were going for around $150! Craziness! And they aren't even fit for outdoor use like Kristi's!

Anywho, MONTHS ago I ended up with a beat up old desk from an auction...the auctioneers know us now so when no one bid on the poor old thing, he pointed at me and asked if I would pay a dollar...whatever...I figured I could do something with it. Heck, the awesome hardware is worth a buck!

IMG_0416.JPG

I originally planned on restoring it but truth be told, it was pretty rough and I have learned that "rehabbing" these old desks really isn't worth the time and effort for resell. The top was laminate and the drawers were veneered. The only good solid wood was the leg and it was hanging on by a few flimsy nails!

But the drawers were well constructed...and the veneer was easily "patched." 

So I decided to use the drawers and make a "modified" version of the ladder shelf...a drawer shelf! 

I think it could be used as a storage shelf in a bathroom or laundry room...maybe toy storage in a kid's room! It's pretty sturdy so it can hold a lot of "stuff." 

I painted the drawers with the "frosted berry" paint I bought for my room. Not that I think it NEEDED to be that color, but I have the paint and I like it! Rather than use the awesome hardware (I am hoarding those for a special project) or fill in the holes, I used rope on the two bottom drawers and a plain white knob on the top! It doesn't NEED pulls, but I want it to look like what it is...drawers!

I cut the top drawer down....I contemplated cutting the middle drawer down as well...no reason why I didn't...I just didn't! 

Thanks for the inspiration Kristi!!! 

(BTW, it sold within  hours of putting it in my booth! Wow!)

MASTER BEDROOM PROGRESS!

As I mentioned in this earlier post, I finally broke down and bought the laminate I want for my master bedroom! Lumber Liquidators had a deal I just could not pass up! Fortunately, it will take two weeks to get it.

"Back in the day" that would frustrate me. There was a time when I could pull the trim, remove the old flooring, lay the laminate, reinstall the trim and paint...all in ONE day...or at least a weekend. Now...not so much. I have been pulling carpet and glue-down hardwood for over a week! My back ache and sore legs make living in this disaster of destruction somewhat tolerable!

Please note that even when my room is in complete disarray, I still make my bed every day! I am thoroughly convinced that the first day I don't make my bed will be the day I die...it's a "thing" I have. (discussed in detail here)

I had to remove the base of the fireplace surround to remove the flooring. I stupidly laid the floor THEN built the fireplace surround...I know better than that. This is a prime example of WHY it is a problem to set cabinets and fireplace trim on top of flooring!!!! Chances are you will replace the flooring long before you replace cabinets or fireplace surrounds...and removing the old flooring will be very difficult if it is under the cabinets or surround!

I did find one neat thing...I guess when I built this room I painted "I "heart" you" on the floor. How sweet!

There is a downside to DIY projecting! The mess! But I have wanted new flooring for YEARS so it will be worth it!

I decided to reuse the existing trim and set it on top of the new flooring...so I have to pull all the trim, remove the nails and scrape off the old caulk. 

I also decided to do the floors in the office...but right now I am only going to do the main bedroom and get it back in order before I tackle the office. The office is ALL glue-down hardwood and it will be a booger to get it all up! I played with gel staining the existing hardwood...and it would have worked had I stained it all at once rather than doing a big "test splotch." Unfortunately, you can see the "lap over" of the stain and it looks horrid. So it all comes up and new flooring goes down! 

I am hiring my neighbor to remove all the old flooring in the office...it is a small room but after a week of working on the master bedroom and what I know will be a labor intensive 2-3 days of installing the new flooring, I am finally having to admit I am too fricking old to "do it all."

Curses.

HAPPY BIRTHDAY KATIE!!!! Tales of a teenagers room...

First, I want to say happy birthday to my baby girl! Seventeen...wow! I can't believe you are 17! 

In honor of her birthday, I am going to share her room. She is a teenager so it is rarely this organized and clean! But it is her creation and she loves her "stuff" and her space.

I featured the mural on Katie's wall here....and her "unstuffy" wing back chair here. Since we remodeled her room, she has added a lot of her own touches that make the space her own.

As with most teens, her room in a constant state of OH MY GOSH...CLEAN YOUR ROOM!!!! Dirty dishes, dirty clothes in the clean clothes basket (with the clean clothes still in it!), make-up and hair covering  the floor and trim, dust bunnies EVERYWHERE! Just a mess.

She is a busy girl. She is an outstanding student (4.2 this last semester...she rocks), she works part-time and she was the lead in the spring musical. (Seriously, the girl has some crazy chops!) 

So in spite of all my pleading, begging and bribing, her room stays in a constant state of "mess." Usually the result of just too much "stuff." So a few weeks ago, I decided to take action and tackle the mess.

Since it was in a half-way decent state, I decided it would be a good time to share pictures of ONE of the rooms upstairs! 

I also came up with an idea that MIGHT give her incentive to get rid of "stuff." Keep in mind, kids lack the ability to organize and like most of us, they hang on to stuff that they really don't need or want any longer. It is important to "purge" on a regular basis!

I left this bag on her trunk. I told her I would pay her $20 for every large trash bag she fills with clothes, shoes, books....stuff! What many don't know is you can donate "stuff" to your local non-profit thrift store (Salvation Army, church organizations, etc) and get a receipt for a nice tax deduction. So $20 for a bag of things they no longer want or need benefits both you AND your teen...you get a nice little tax deduction and they get pocket change (or gas money!)

Younger kids can be enticed into "giving" their unwanted toys to kids who NEED them. Start them young! 

I have learned that teenagers tend to be a bit more myopic and aren't as eager to clean out closets and drawers for the benefit of those in need...sad, but true! They want hard, cold cash!

So far I haven't seen the bag...we'll see. This is why I don't give parenting advise. 


Bedroom makeover...part 2? 3?

I don't know how many times I have griped about my master bedroom. So this past month I began chewing away at a few little things I dislike.

It is my favorite room in the house AND my least favorite. My favorite because it is an awesome room...big, bright, cozy. Least favorite because after 13 years, I STILL haven't decorated it the way I REALLY want it.

I blame it on the furniture.

Ornate, heavy, dark, veeeery traditional! I paid entirely too much for it, so I can't bring myself to get rid of it. One bad thing about furniture...no matter how much you paid for it, chances are you are only going to get pennies on the dollar. 

There are a few pieces I would never get rid of...my dad's walnut chair and my grandparent's old trunkThe rest of it...honestly, if I had unlimited funds, it would all go.

But I don't...so it won't. The next best thing is to change it up a bit with a little bit of paint! 

I featured the beside tables and the high boy here!

The next big project was the bed! 

Honestly, this set would be perfect for a chalkpaint and distress treatment. I painted it with Kilz and sanded it and it was so cool looking. But alas, that is not my "thang" so I just went with my go-to Valspar Dune color.

I did finally paint the top of the Duncan Phyfe drum table...bye, bye beautiful mahogany!

I still need to do some kind of little vingette around this table...in time!

I'm not real thrilled with the bed. I had originally planned on painting all the raised part of the head board and just leaving the inset stained but Brian talked me into just painting the top scrolly part...which is really the part I disliked and it seems the paint just highlighted it. (See, I take his advise!) Oh well...it is different and that will do for now!

I also picked up this darling little antique fan at an auction. I'm not really into "froo-froo" stuff just sitting around and eventually it will probably go to one of my flea booths. But I like the color and retro style and it looks kinda cool on top of the highboy...for now! Until I have to dust it!

Now that all the furniture is painted, I REALLY want to install hand-scraped laminate flooring. And I really want to reupholstery the big chairs. Someday!

I found this AWESOME color chart on Pinterest....

I have some white and tan in the throw pillows and bedding but the majority of my white is a little more "off-white" and my walls are more of a "cream" than a tan. I can live without the grey...I like black better. But the blue is the color of my fireplace wall and I am itching to throw the cranberry color in there somewhere. Maybe in the upholstery on the chairs or a large rug on my new floors!

The paddle fans? Hum...might have to do a little a little paddle fan treatment!

So much I WANT to do.

That is one thing one has to understand about home decor. Unless you have A LOT of money and can afford to have a professional designer come in and do it top to bottom (my choice would be Candice Olson!) the best approach is a little bit at a time. 

Don't be afraid to buy used and do a little work to make it your own. As much as I disliked this furniture when it was all stained and matchy-matchy, I'm kind of digging it now! Still want something different, but I like it a lot more now than I did two weeks ago! The floors will come in time and I know someday a piece of upholstery fabric for the chairs will "speak to me" ...someday.

I always tell my kids...it's a good thing we don't have a lot of money...think of all the great things we would never have learned to do had we had the money to pay someone else to do it!

Seriously how much personal satisfaction could one get from having a bazillion dollars and being able to design, built and decorate your "dream" house without concern for costs?

See what paint fumes do to you....

Ivy and Elephants

Arch window covering and temporary window coverings!

It's that time of the year...time to put up the blinds and shades to keep out the blazing sun and cool down the house a bit!

This past week Brian and I put up the outside roll-down blinds that cover the west-facing windows in my den! I love all the natural light, but when the sun hits those windows around 4:00 on a hot summer day, oh my! 

Hanging the blinds on the OUTSIDE makes a huge difference...and honestly it makes this room much more comfortable in the summer! (As you can see, I turn the couch around in the summer!)

The arch window in my living room is another story! I know....arch windows are soooo 90s. But that was when this house was built so that is what is there! It is a great place for fall and Christmas displays!

It would be very difficult to put a blind on the outside of the this window...so I had to settle with putting something on the inside. 

This is how bright it is BEFORE I put up a blind....

And AFTER...

Seriously, no Photoshop and no camera tricks. Before and After...within a few minutes. That is how much difference there is and it makes a huge difference in the temperature of the living room!

Fortunately my living room is two stories, so it still FEELS bright and airy, I just don't have the blazing sun heating up the room!

I couldn't really afford a "custom" blind for this arch. When I was searching for a solution, I stumbled across a "temporary" pleaded blind...maybe $15.00. It is perfect! When I put my fall decor up in the fall I take it down, fold it up and store it away until late spring. It has a clear plastic "base" that sits in the middle of the window and you just drop one end of the pleated blind into the holder, "fan" it out and secure the outside ends. It came with a "peel and stick" adhesive on the base of both sides, but that was pretty much shot after the first year. So now I either tape it or tack it down. Even though it is just a cheap little thing, it has lasted a good 5-6 years! Worth the small investment!

So if you have a room that is uncomfortable because of the heat generated by the summer sun, think about using temporary window treatments! You just might find the room a little more enjoyable and you will help cut down your cooling bills. 

Antique glass lamps.....to hot glue or not to hot glue...

Several months ago I bought two antique glass lamps at an auction.  They are amazing! So simple yet elegant.  Kind of a "Grace Kelly" lamp if you ask me...lol!

They have a faint decorative etching in the glass that is difficult to see...very subtle...but so pretty. 

The exposed metal on the lamps have a little "corrosion" but I have decided to leave that be for the time being. Amazingly, they don't have a chip anywhere on the glass!

I decided to keep one and replace the little round crystal lamp I have in my office.  But I wasn't real keen on the lamp shade, so I decided to keep the lamp shade from the crystal lamp....

I have some pearl froo-froo trim I bought after Christmas last year for pennies.  I decided I would gussy up the lamp shade with trim...just to give it a little more glam.  

That is where the question of hot glue vs. tacky glue comes in. 

I think hot glue has a time and place.  But whenever possible, especially on fabrics and upholstery, I always use a quick drying tacky/fabric glue.  It takes a tad longer to set up but it holds better in the long run. Sometimes I will put a tiny bit of hot glue on something just to help it hold until the tacky/fabric glue dries completely. I do the same for wood working projects...apply a little bit of hot glue just to hold something in place that can't be clamped until the heavy duty mastic or wood glue can dry completely. But hot glue can break down in extreme hot and cold temps or even with too much "stress" from use. So I rarely use it exclusively...I just think, long term, tacky/fabric glue (and liquid nail or wood glue for wood projects) is a better option. 

I see upholstery tutorials suggest hot glue for piping and trim.  I personally think that is a mistake!

On this lamp shade, I applied a line of the tacky glue along the edge and then pressed the decorative trim in place....

Again, subtle...but it is the little subtle changes and additions that can make a difference in the "big picture." 

HINT: If you use tacky/fabric glue, go back after the glue has "tacked" (10-15 minutes) and press the trim down again!  At that point the glue will have a better "grip" and the trim will press flat and adhere better.

(Yes, that is a piece of driftwood on the table...I picked it up on our fishing trip in Colorado last year and I just love the texture of driftwood...I have another piece on my mantel in the den that I picked up off a frozen lake in Georgetown, Colorado 10 years ago!)

Lamps can be an expensive accessory in a room.  But they are soooo easy to spruce up or change...just by painting or changing the shade. Several years ago I got a bit tired of my bedside lamps...too dark. So I painted the base AND the shades.  

Not a humungus difference...and I am still not real keen on the style.... but it is enough to keep me from running out and paying $200 for the two lamps I wanted.

Painting light fixtures and lamps is a great way to personalize and update a space on the cheap! I featured painted light fixtures and paddle fans here and outdoor fixtures here.

Again, give it a shot...what's the worst thing that can happen...you don't like it. So what...you don't like it as it is...before you toss it, paint it or trim it. It will fetch the same price in the garage sale regardless...lol!


Reflecting on 50 years of "decorating" life....

I started a post entitled 'Reflecting on 50 years of life."  I thought I might share all my "pearls" of wisdom. Really?  I, of all people, do not need to be giving life lessons...I'm 50 and still learning something new every day! Although I think if others would learn from MY mistakes, their lives would be a lot easier and pleasant. But truth is, everything you need to know to live a fulfilling life is either in the Bible or on Pinterest. Choose wisely (that is ONE of my "pearls"...ALWAYS choose wisely)

Anywho, I decided that I would be better off giving advice on how to make your home a place you will love. I'm not going to give you "decorator tips" because I am not a decorator...I am just a mom who has found a balance by trial and error. Besides, you can find REAL decorators all over the internet who will tell you how to decorate a room!

So here is some of what I know about "home interior decor".....

1) You won't ever wake up and say "THIS is perfect."  Your home is ever changing...families grow, kids get older, stuff gets out of date or worn...so embrace the ebb and flow of your changing life and go with it!

2) I give the same advice about major home decor purchases as I do cars...if I show you a stock and tell you that you will pay $40,000 for it today and I can GUARANTEE you it will be worth $20,000 next year, would you buy it?  Nope.  So why would you buy a brand new car or brand new anything? Personal property (furniture, cars, appliances) WILL depreciate.  Keep that in mind when making a home interior purchase.  Let someone else take the depreciation "hit" unless it is a piece you are madly in love with and you KNOW it will be in your home until...well, forever!  Here is a little trick I use sometimes...take the purchase price, divide it by the REAL number of years you think you will use that item...for example, my living room couch cost me $1500.  I knew I loved it and would use it for years...so far, I am going on 10.  So basically I paid $150 a year for this couch.  Yep, that is reasonable in my book! But the fact I have had it for 10 years is VERY unusual! Most people don't keep couches that long! Do the math...spend your money wisely!

3) With that advice in mind, whenever you can, buy used and make it your own!  Learn to paint...learn to refinish...learn to reupholster.  And if you just don't want to do that...or feel you can't...learn patience! Because I can promise you, that "vision" you have in your head for a new tv cabinet or bedroom set or chair will be out there at a garage sale or on craigslist or at a flea market....or seriously reduced at some point! 

I have wanted a coffee table like this for...well, decades.  But I never could find the EXACT coffee table I had in my mind...and when I did finally find it, it needed some attention!  But my patience and ability to DIY paid off...big time!

4) And with that in mind, NEVER BUY IT OR BRING IT HOME IF YOU DON'T SERIOUSLY LOVE IT! Or will love it with a little "tweeking," Because if you can look at it and say "Wow, I really love that!" there is a good chance it will be something you will still love years from now...you won't ever regret that purchase! My rule...if I have to think about it for more than 10 seconds, I don't need it! 

This tv cabinet was expensive...but I love it...it is 8-9 years old and I have NEVER regretted it or questioned the purchase. Great story. When I first fell in love with it, I really couldn't justify spending what they were asking...HOWEVER, they had one that was a "customer cancellation" and had a few VERY minor dings...at HALF the price of a new one. SOLD!  And the great thing was they had one of their experts fix the "dings!"

5) Use "fads" sparingly. Pillows, rugs, inexpensive pictures... basic accessories...can all be easily changed. So use "accessories" as a way to infuse "fads."  The big stuff...primarily furniture...should be something you LOVE and something you know you will probably love 10 years from now.  The only time I break that rule is if it is a second hand piece of furniture that is free or cheap that I am going to "repurpose" or "refinish"...knowing that next year I will pass it along to someone else, or repurpose or refinish it again!

As you can see in my living room I use pillows, framing and the rug to infuse the "blue and brown" that is currently all the rage.  In my den, I bought this little inexpensive side table at Salvation Army and stained and painted it.  

All can be changed or given away when I "change my style" without breaking the bank!

6) Keep "collecting" to a minimum.  Seriously, if you collect more than 1 or 2 things, choose one. Otherwise, it just becomes "clutter."  I collect hard back books.  And Lane Acclaim table...but those are part of my "timeless furniture" so I don't count them as a "collection." My point, "collections" can quickly become "clutter." 

7) If someone offers you a "family heirloom"...china, photos, knick-knacks, furniture...take it! Find a way to infuse it into your decor!  And if you just can't right now, store it away.  But take it!  My grandfathers' tools and leather case...my grandmothers' china...just a few heirlooms and THINGS I LOVE! and decorate with!

8) Pictures.  Photos of you, your family, your ancestors...surround yourself with them.  Find frames at garage sales and thrift stores and paint them...glue things to them...display them in groupings!  They are the people you love...surround yourself with them!

9) Pay attention to tips from designers.  There is a proper height for hanging pictures and a proper size rug...know them and follow those hard fast rules! I have a rug that is too small in my living room...I know it is too small and it bugs the heck out of me...which is why I just ordered a new, larger rug...can't wait to share!!!

10) Make your bedding a part of your "bedroom decor" and make it beautiful. You can buy beautiful, inexpensive bedding on Overstock and at T.J. Maxx and Marshall's. But more than anything keep it simple...and make your bed EVERY DAY! Simple is the key because if you have too much froo-froo and too many pillows you might be tempted to NOT make it because it is a tiresome chore!

IMPORTANT TIP!  Make your bedroom a "haven."  It should not be the room where you do book work, sew, fold clothes, scrapbook, etc...you should never go to bed or wake up to "work."  No matter how small your house is or how cramped you are for space, make it the one room in your house where you can "escape!"

11) Don't be afraid to TRY IT!!! If you see something you like on Pinterest, give it a shot! And if you just aren't the crafty/buildy/DIYER kinda person, find a few awesome flea markets and second hand stores to cruise through every so often...trust me, others are doing the DIY/Pinterest thing and usually you can find what you are looking for...but be PATIENT! 

12) Paint...there are so many tips and tricks to painting....again I could type a hundred posts on how to properly paint anything and everything...but they are already on the world wide web! But my best suggestion is to CHOOSE WISELY. And the only way to do that is to buy the samples pots and paint BIG swatches on your walls...then look at it...for days...or weeks...or whatever it takes to KNOW it is the color you want! I think I have shared how I choose my paint for my bedroom fireplace wall.  I THOUGHT I loved one color...but I kinda liked another too.  So I bought little samples of both, painted one half of the wall with each...and looked at it...for days.  Turns out, I liked the one I "kinda" liked better.  Had I gone with the one I thought I loved, I would have never been happy!

13) Shop thrift stores, flea markets, second hand stores, garage sales, auctions...be picky...be patient....you WILL find what you really love eventually!!!

14) DECLUTTER!!!  Clean out your closets, drawers, cabinets, pantries...GET RID OF STUFF! Don't have "stuff" just for the sake of having "stuff."  A few years ago, I opened up the cabinets under my book shelves...seriously, I bet I hadn't looked in there in 10 years.  You know what I found?  A lot of STUFF...and spiders...lots of spiders! I got rid of the stuff AND the spiders!

And before you bring more stuff home, or order it off QVC or Amazon, ask yourself..."Do I REALLY need this." Learn to distinguish between "need" and "want." And if it really isn't a "utility" item that you need, do you truly LOVE it? 

I watch those "hoarder" shows on TV and I don't get the sheer magnitude of it...because I can't understand the "mental illness" aspect of the whole thing.  But I do understand that we can get soooo caught up in the "wanties" and "gimees" and "Igottahavees" that we surround ourself with STUFF we really don't need. Or even want at some point.

It is one reason I strongly suggest using "fad" stuff sparingly in your decor....trust me, Chevron and burlap WILL go out of style...and your house will look like someone puked 2013 in your living room! It's cute...it can be fun to accent with...but use it sparingly and don't invest so much money in it that you don't feel like you can't get rid of it when it does go out of style!

EVERY SINGLE ITEM in your house should somehow enhance your life or have purpose...if it does not, get rid of it.

Am I guilty of breaking my own rules?  Are you KIDDING?  I'm just like everyone else...I make, and hopefully learn from my mistakes. I know that if I buy really expensive bedroom furniture because I just HAVE to have it right this minute, someday I will be stuck with furniture I don't really like but can't bare to part with because I paid a fortune for it! 

What do I love?  Heirlooms, furniture I was patient and waited for until I found THE perfect piece and the right price, stuff I paid little or nothing for and won't feel guilty kicking to the curb when I don't want it any more. I love my home because I have been very careful about surrounding myself with things that are timeless, things that have meaning (pictures, heirlooms, etc) and things I love. I still have a few "warts" here and there...and honestly, they are things I bought "on a whim" and/or paid too much for. But slowly I am trying to weed those things out!

ALWAYS keep your receipts.  And if it is something you can't return (from a garage sale or thrift store) make sure you pay so little you won't think twice about turning right around and donating it! 

And the NUMBER ONE RULE OF DECORATING YOUR HOME SO YOU WILL LOVE IT...get it clean and organized. Amazing how much more enjoyable your home will be when it is clean, decluttered and organized! 

signature.jpg