Another Christmas....

Ever year I feature my Christmas decor…every year I think not much has changed.

But it does change…a tad here and there.

Last year I shared a few little changes…same this year…a few things here and there.

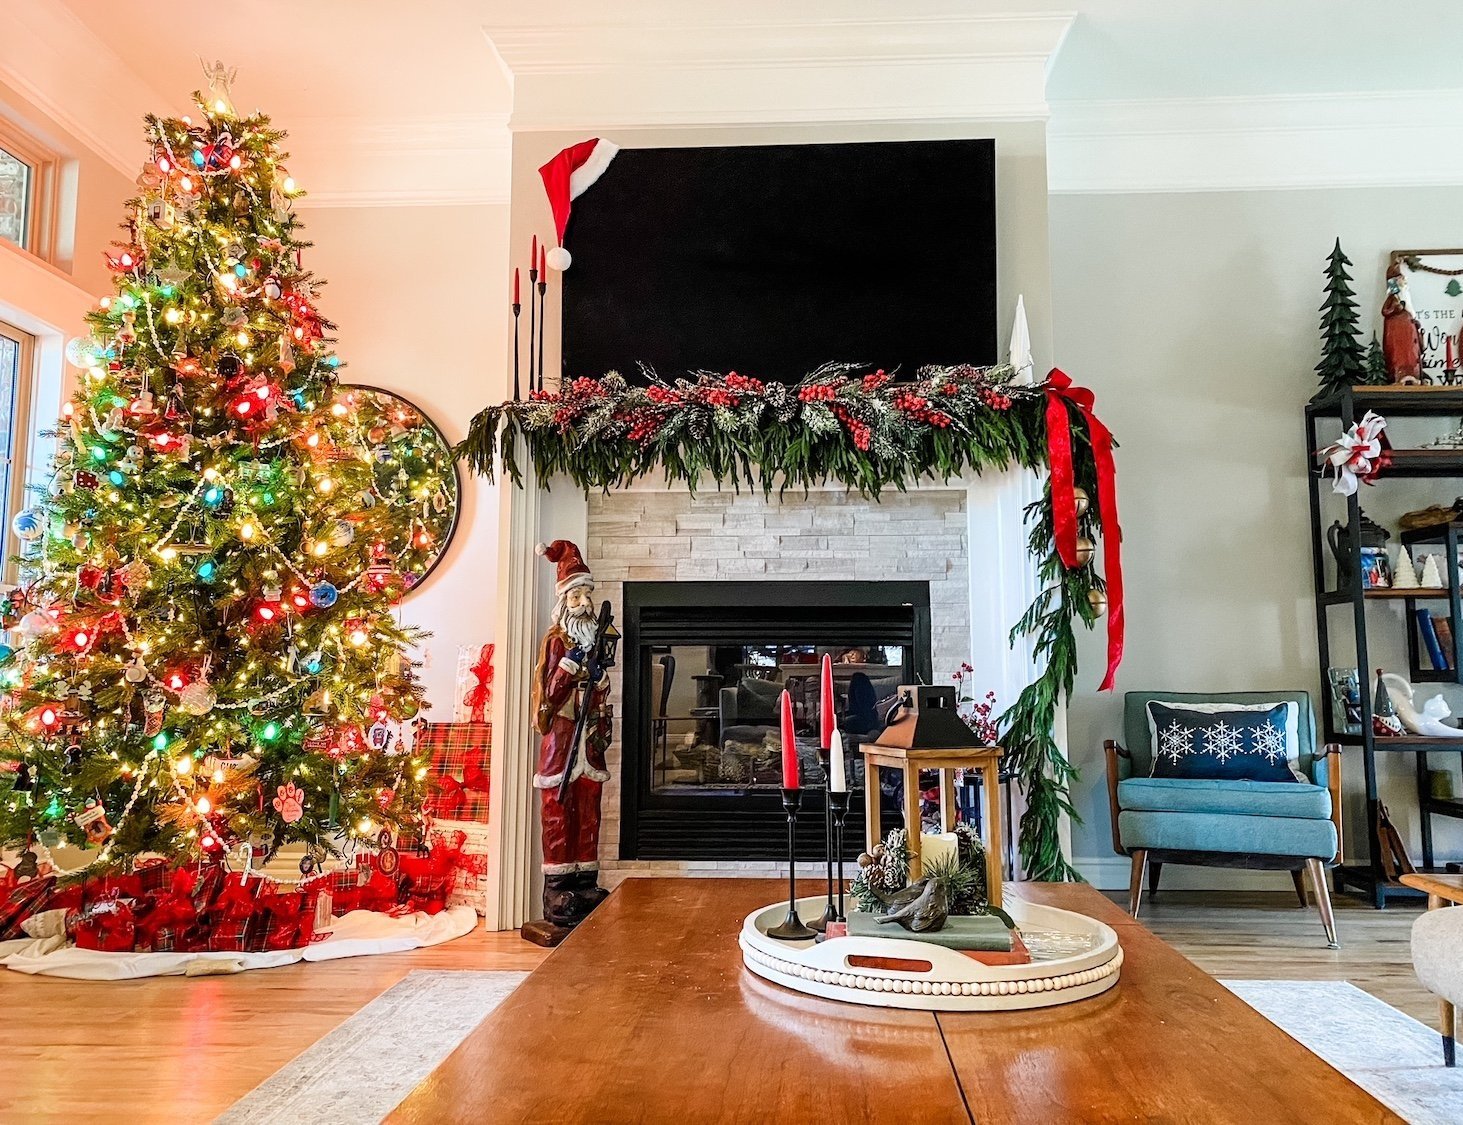
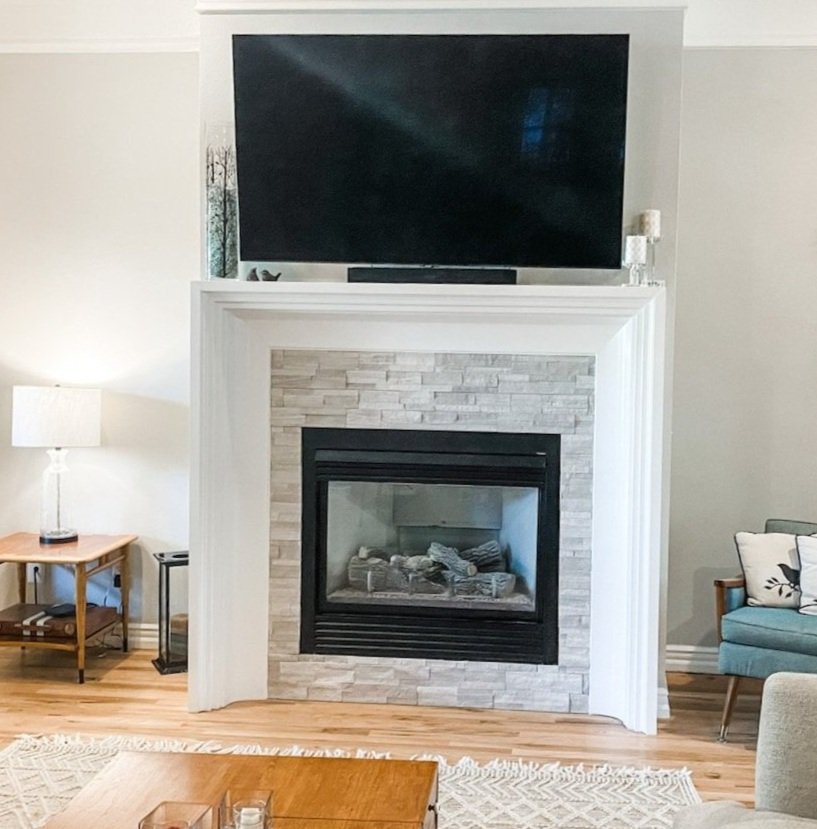
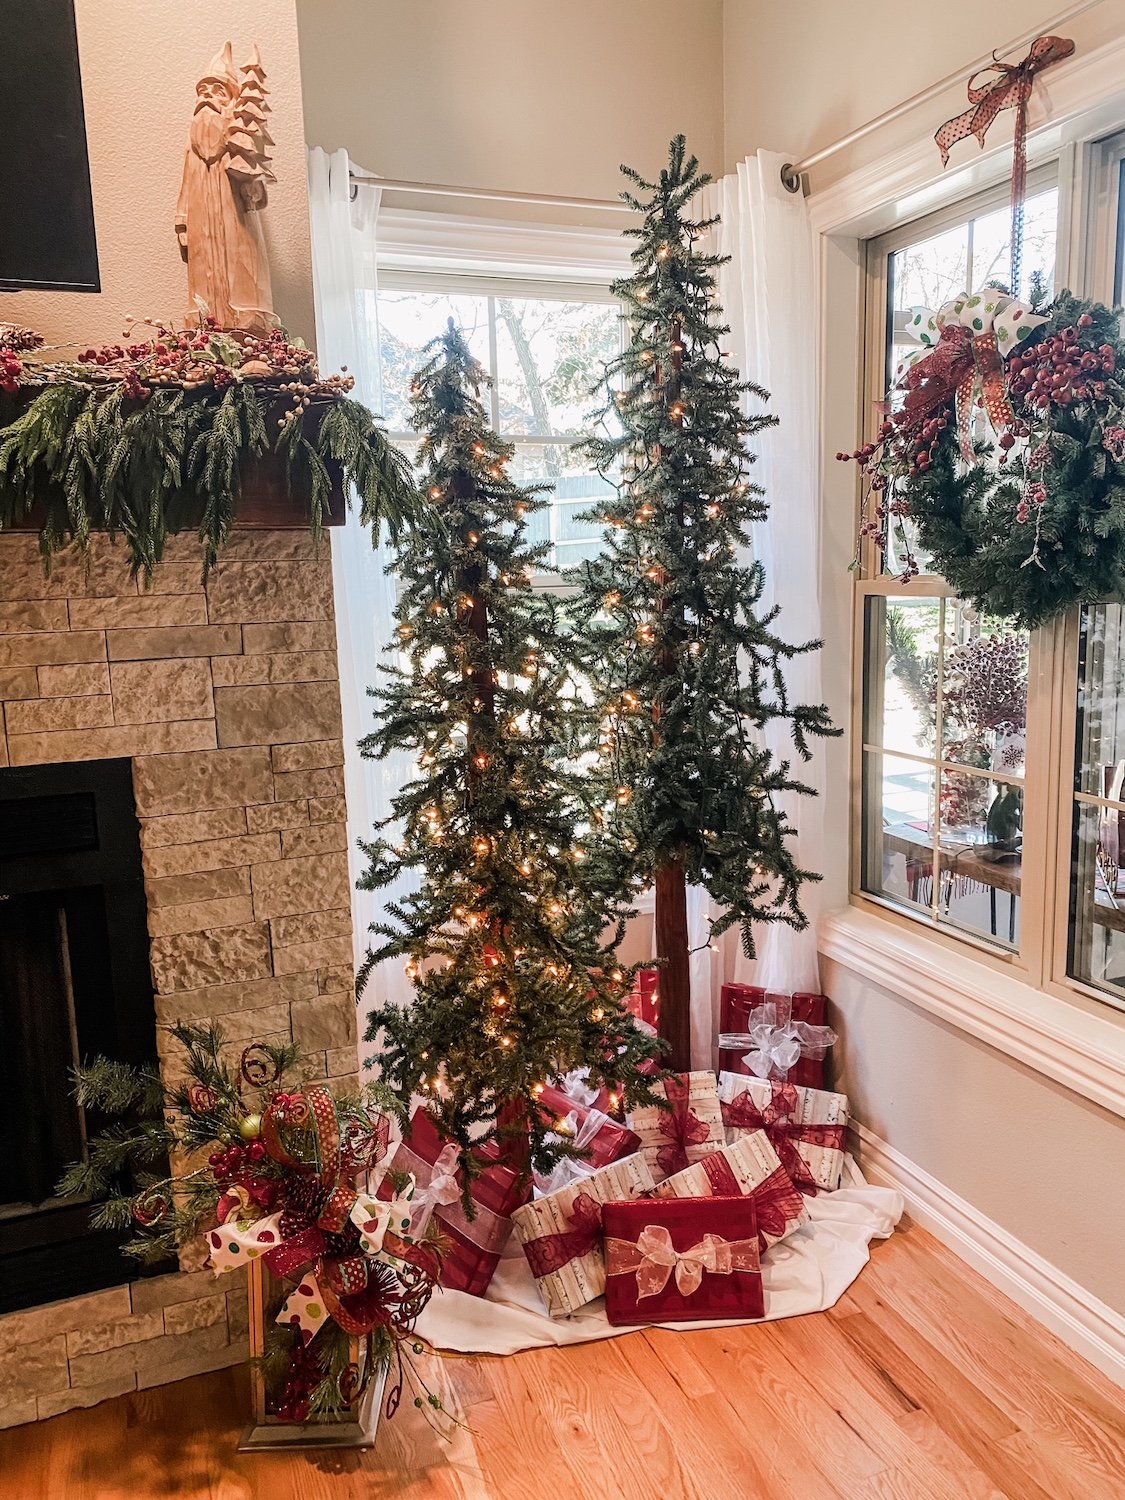
So what did I change this year? Probably the biggest change is the mantel decor….

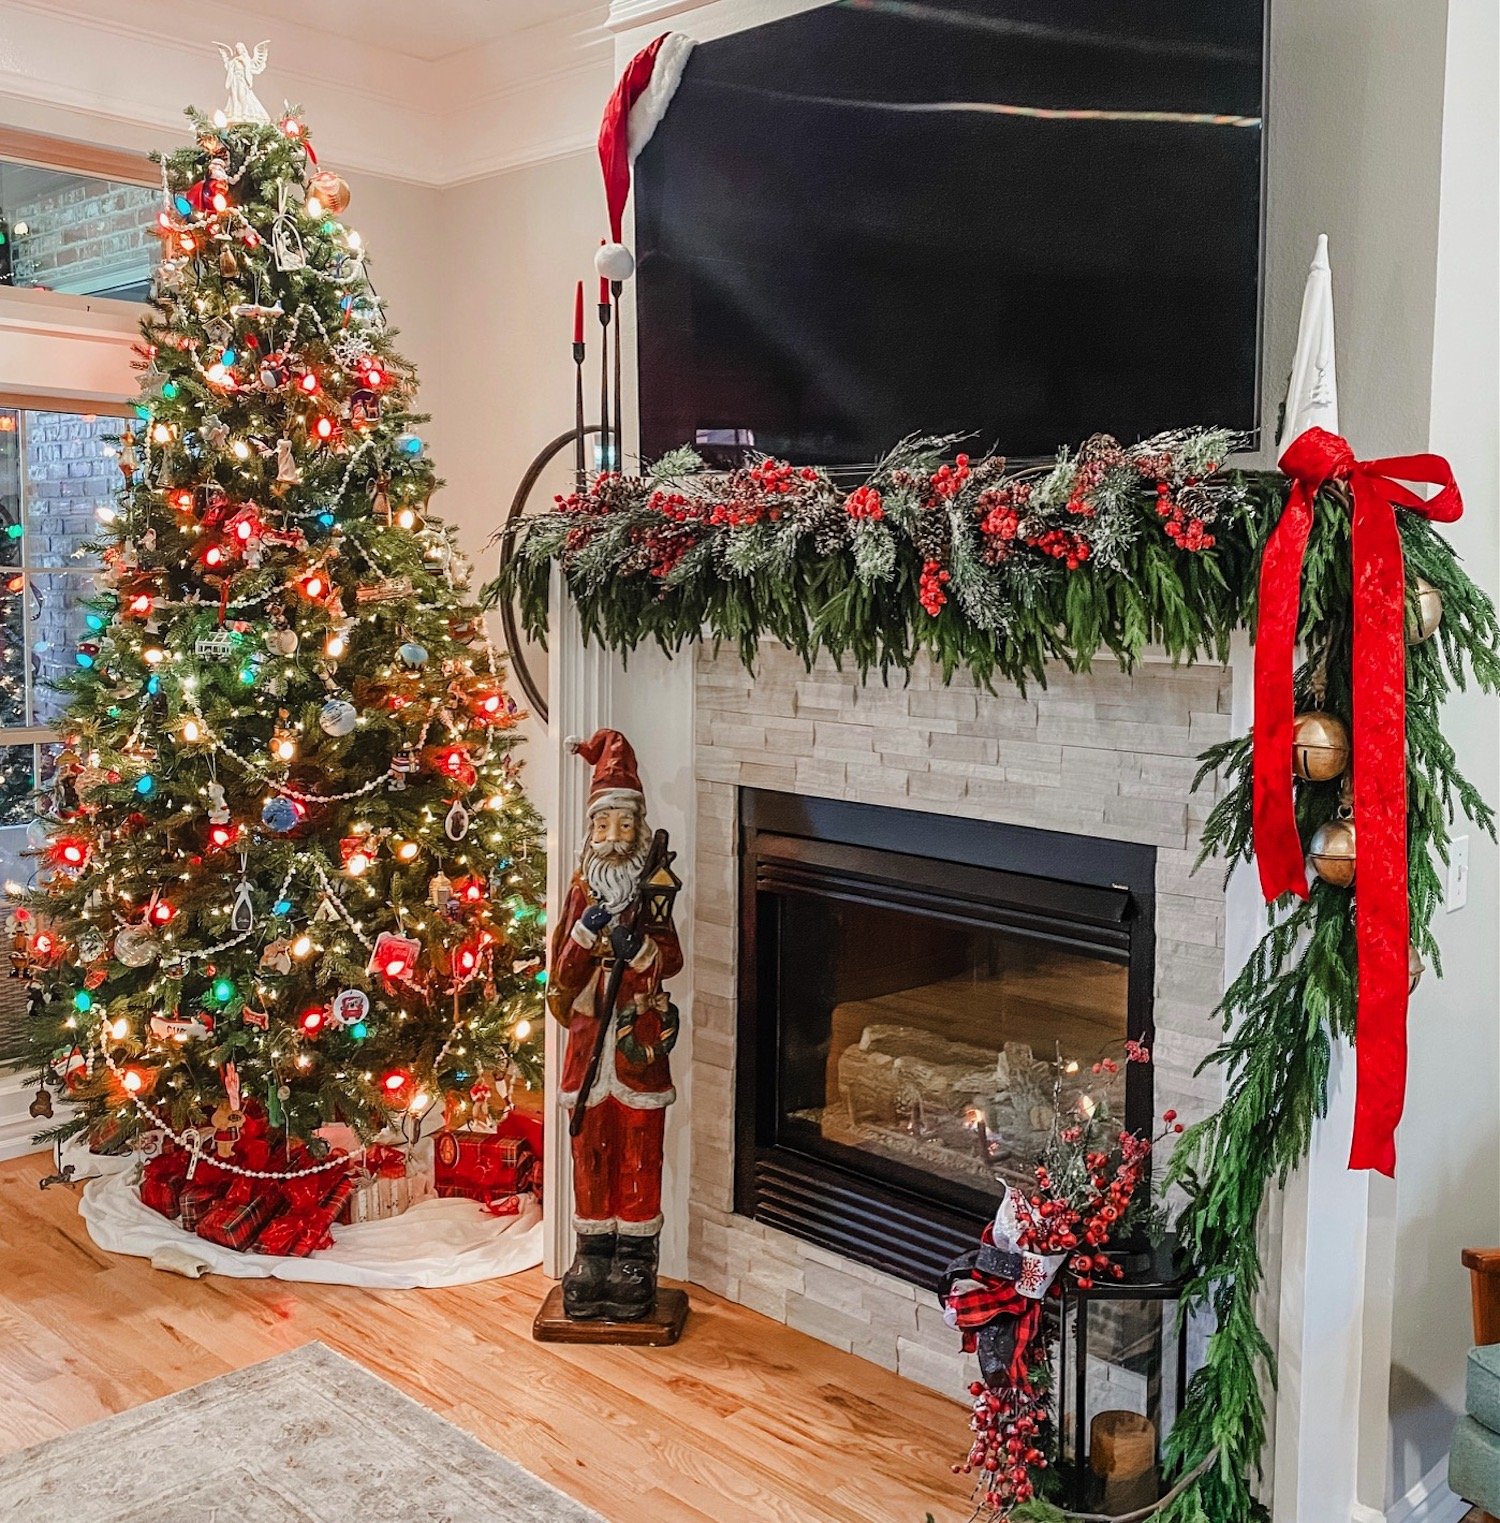
Last year THIS soft touch garland was ALL the rage…everyone wanted it. Which is why it was sold out and on Ebay for mega bucks. So I waited until after Christmas and bought it when it was back in stock. Problem was, I forgot I bought it, several times, and by the time I brought down all my Christmas decor I had 10 strands of it along with three soft touch wreaths I have NO idea what to do with!

No biggy…while it is a beautiful garland, you really have to layer it to get a good thickness. On my living room mantel I have 4 5’ strands and 1 15’ strand.

In the den I layered 5 5’ strands….

I used Command hooks about every 1-1 1'/2’ and floral wire to secure it.

I added a red velvet ribbon and these awesome bells….

I would love to link to the bells but as usual I have NO idea where I got them. I know I ordered them but from where? Not a clue!

Last year I layered the berry picks on the mantel…this year I layered them on top of the garland…just plain ole’ picks you can get at Hobby Lobby…four on each mantel.

Another new addition is this wood Santa….

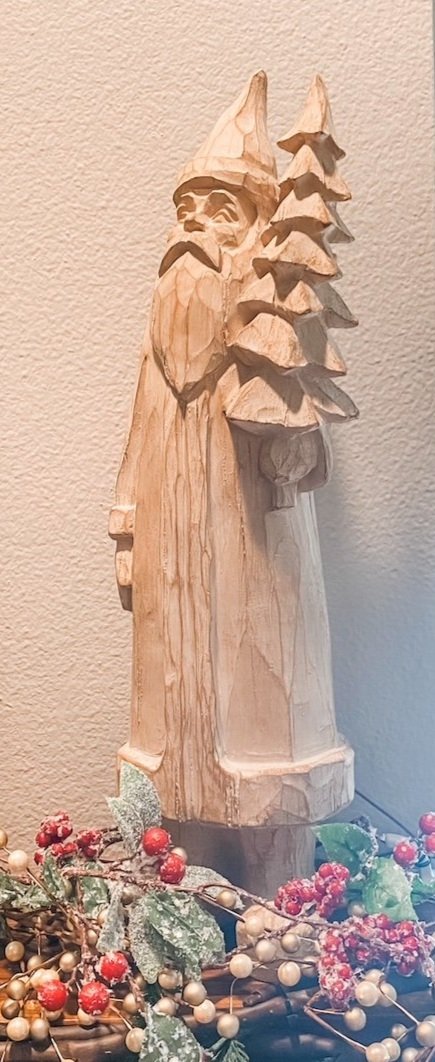
I know WHO influenced me to buy it but have no idea WHERE he came from. I follow a couple of great ladies on Instagram…Deb and Danelle…and as influencers go they get me every time. Their style isn’t necessarily my style but they feature elements I love. Truthfully I think that is where the bell inspiration came from!

What drew me to this Santa was his “girth.” He’a skinny.

Okay, so here is the deal…ALL my Santas are skinny. I have NO idea what that is all about but it seems like every time I am drawn to a Santa he is on the anorexic side.
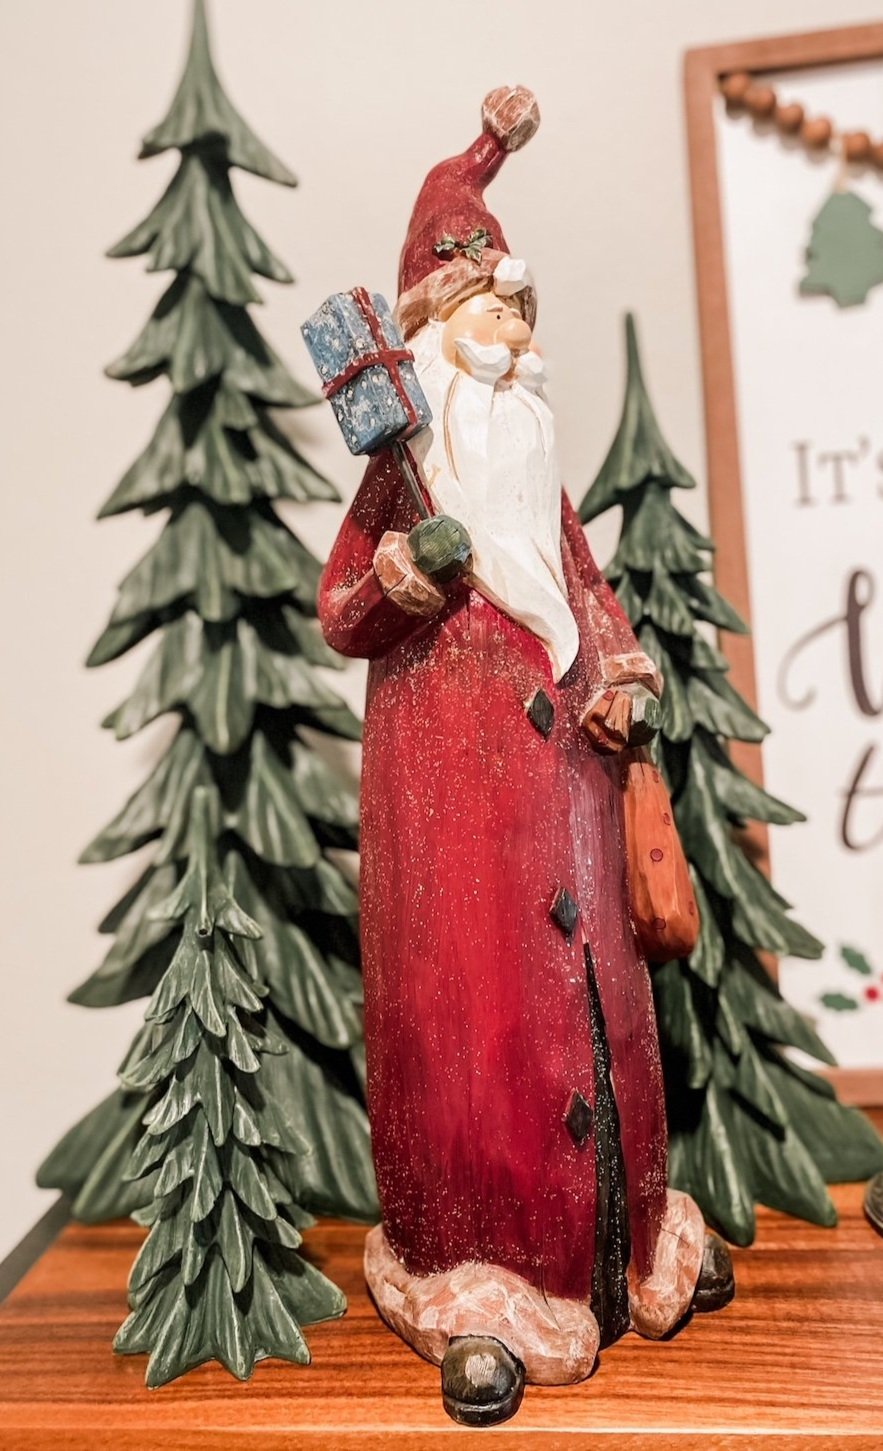
I kid you not.

Another element I added to my decor this year are the cabinets wreaths….

For several years I have wanted to add “mini” wreaths to my upper cabinets. I finally found am inspiration for what I wanted, but honestly, when I put it all together they came out a hair too big. Hardly “mini.”

So be it…maybe next year I’ll try again…for this year it is what it is….

The precious train!

This train was a gift from Brian’s grandfather to his dad in the 40’s…it was used then. Last year we displayed it above the dining room. This year we got it up and running and put it around the tree in the office.

We didn’t put it around the main tree in the living room because 1) too many gifts under that tree and 2) the SLIGHTEST bump derails it and the living room is a high traffic area.

Not sure Callum is really old enough to appreciate it but I sure love it!!!!

And now the pièce de résistance…the final tree in my life long dream of having a tree in every room!!!

For years I swore if I had the time AND the money, I would put a tree in every room of my house. Last year the goal was complete.

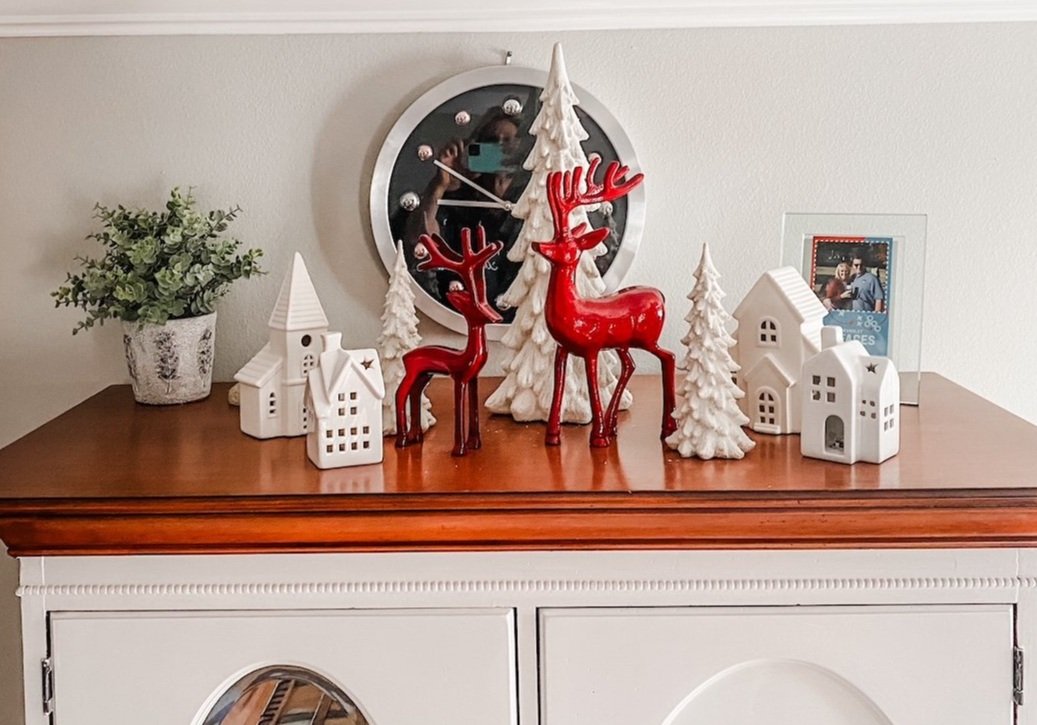
The master bedroom tree!

I added a few little knick knacks on the highboy. Just a few little things from Home Goods…nothing fancy.

The office….

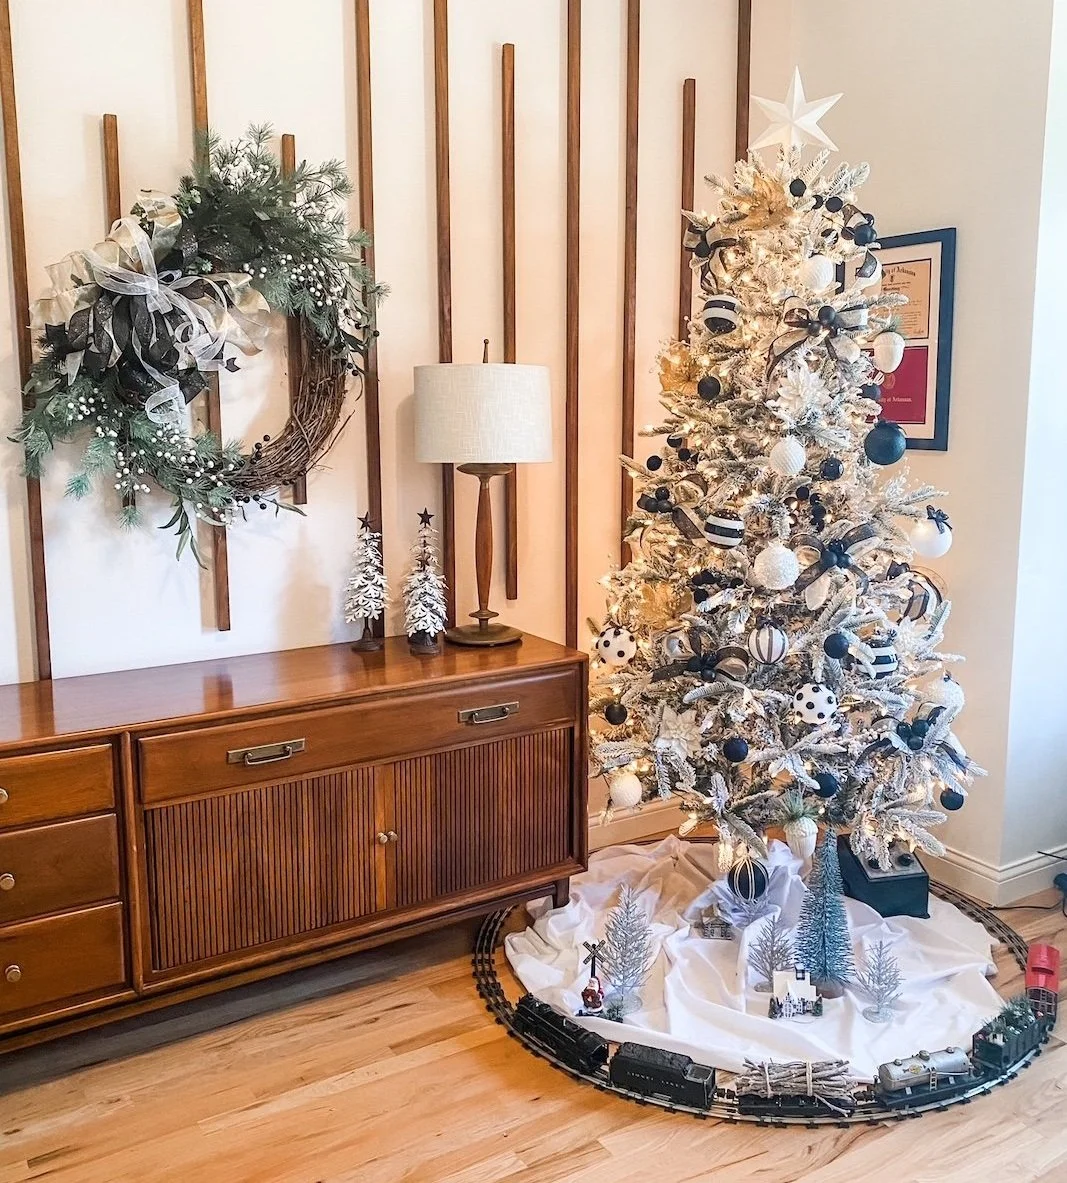
The wreath is new…a tad over powering. Again, I tend to “go big” and then I’m not so thrilled with the result. Meh…next year I’ll change it!
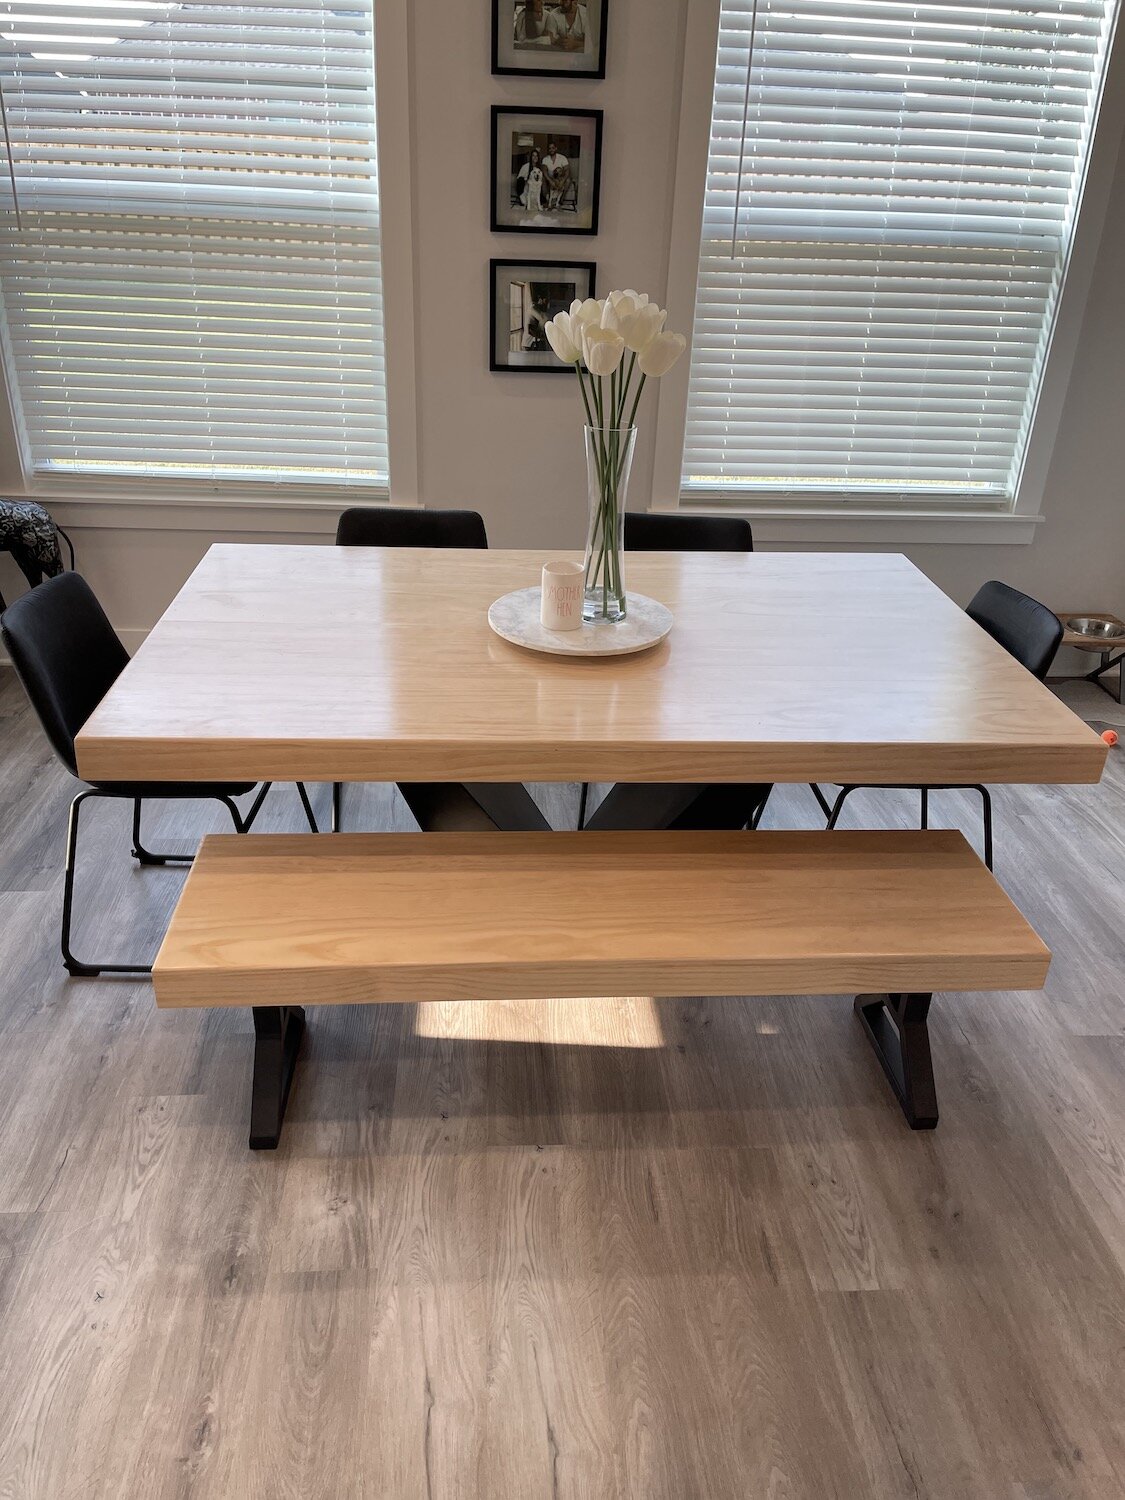
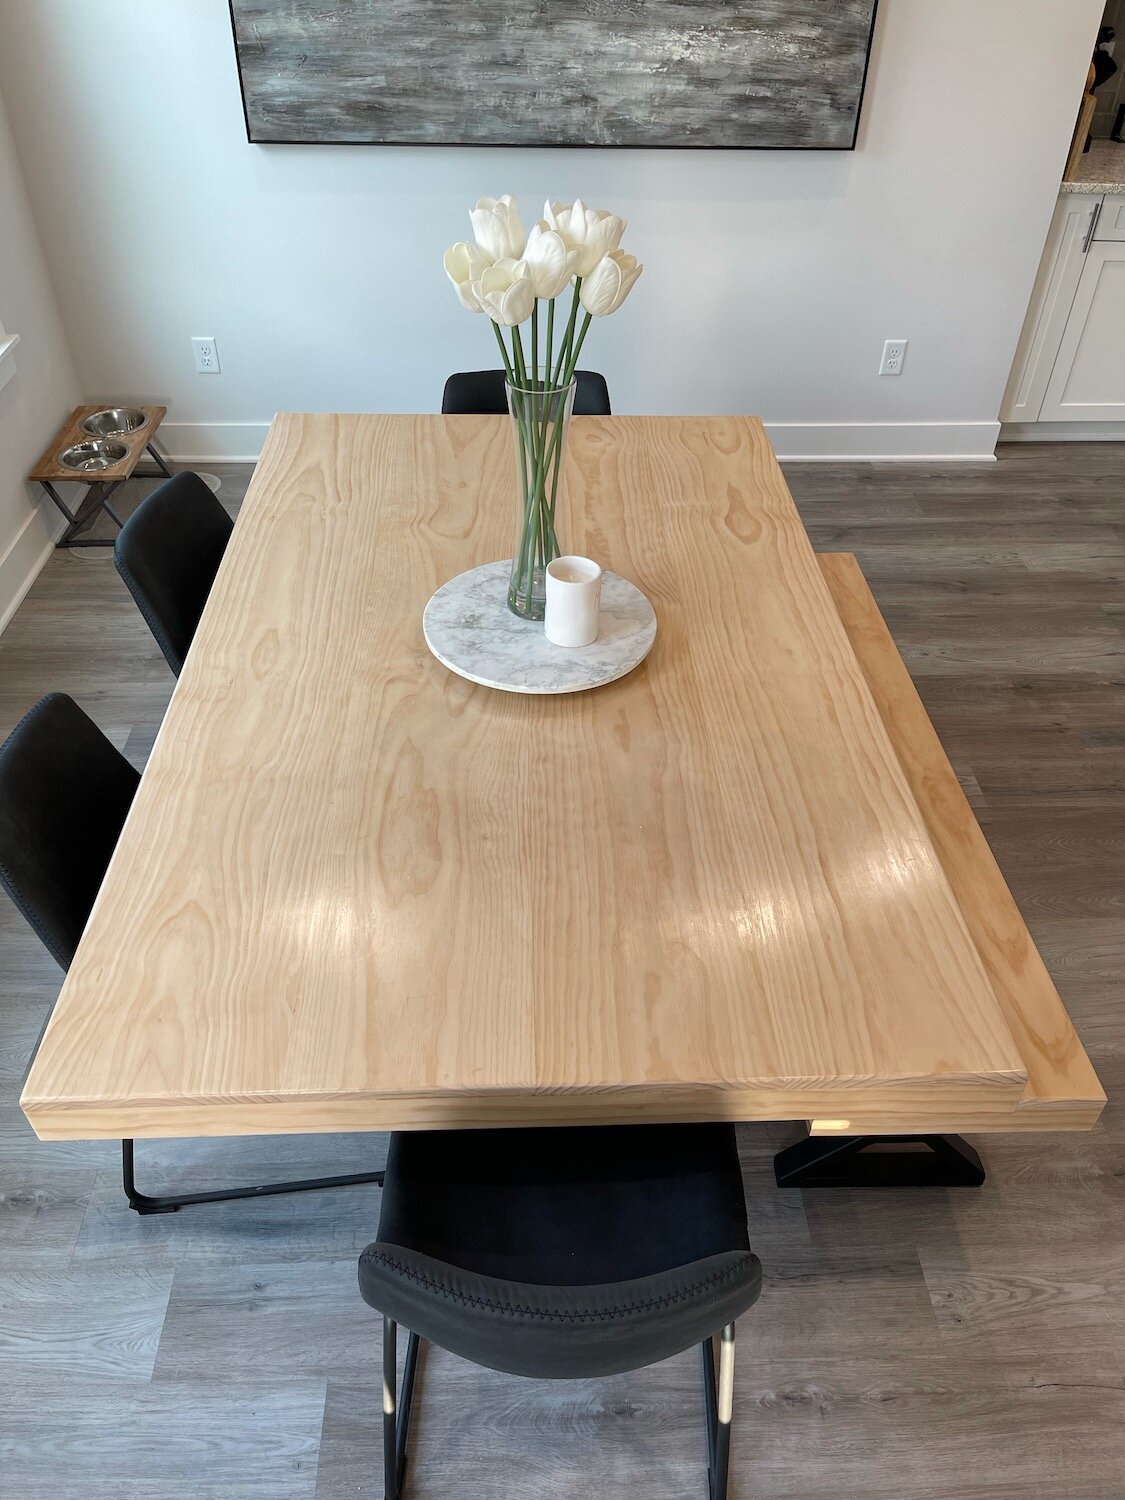
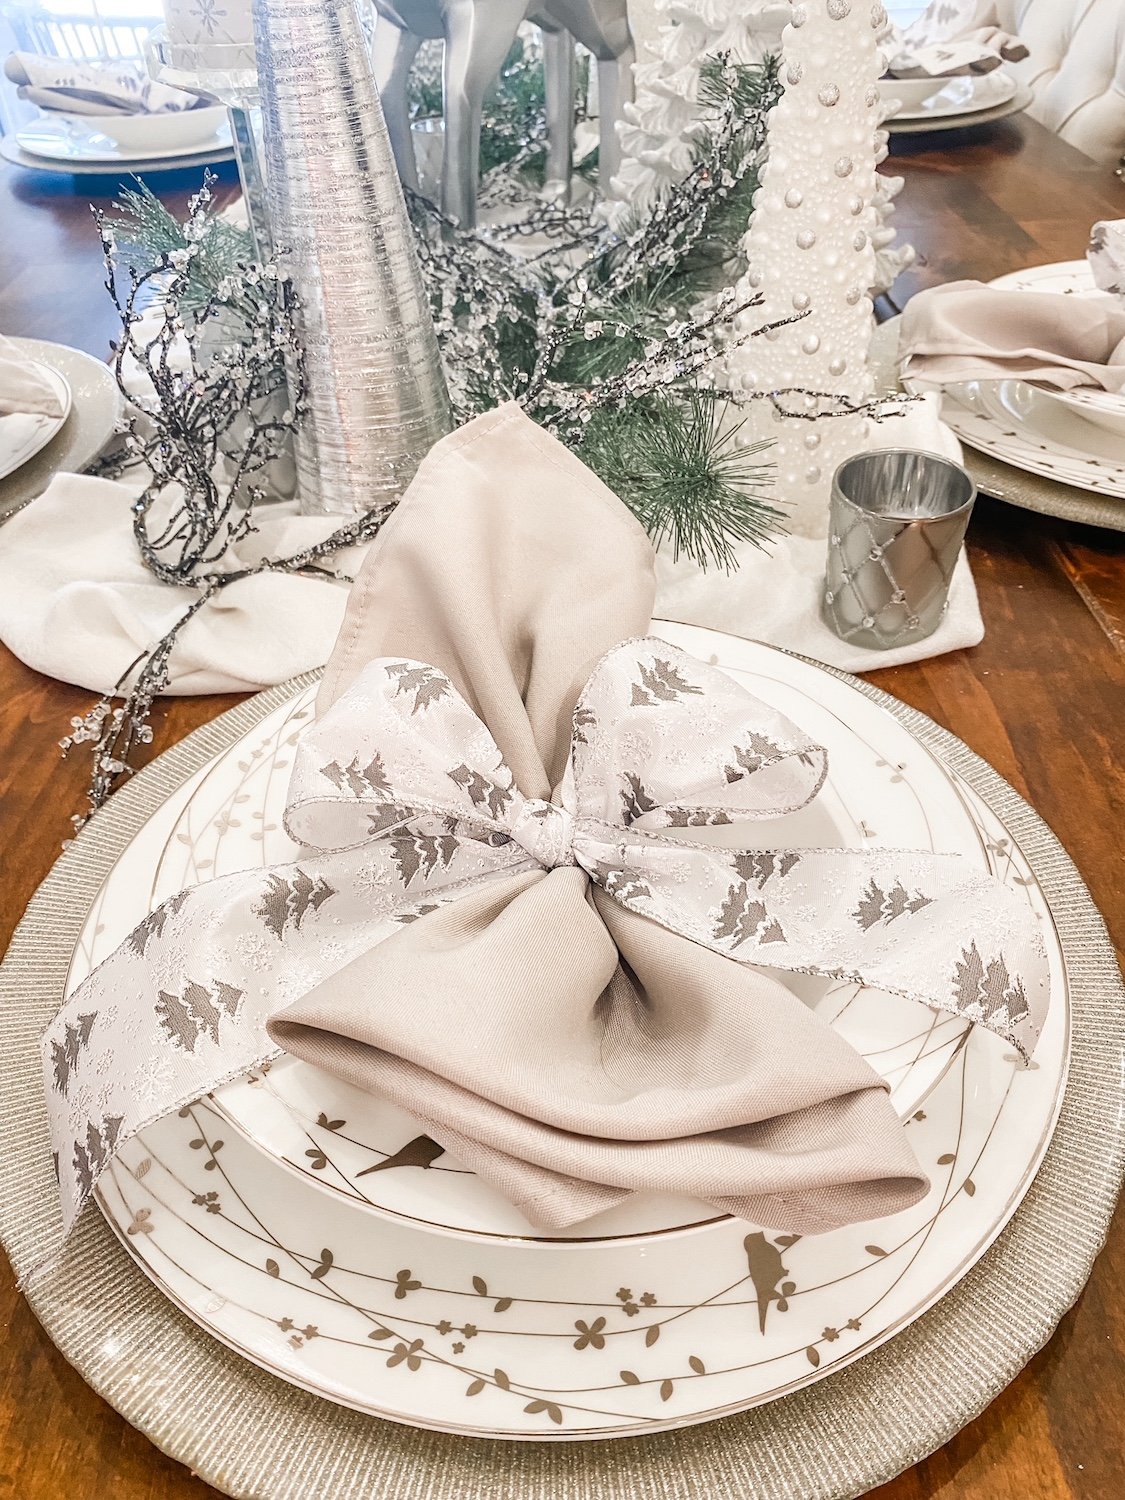
The dining room….

This is always one of my favorite rooms to decorate.. I love the neutrals even though I am drawn to all the vibrant holiday colors in the other rooms.

I like to keep the place settings out even though we don’t usually use these dishes because they have to be hand washed. Simple but elegant.

The sunroom….

I have shared this room before. It is my “Stewart plaid” room in honor of my “Stewart family.” Love it and I am always looking for more Stewart plaid elements to put in here. This year my sweet friend Carrie brought me this precious decoration from Italy!
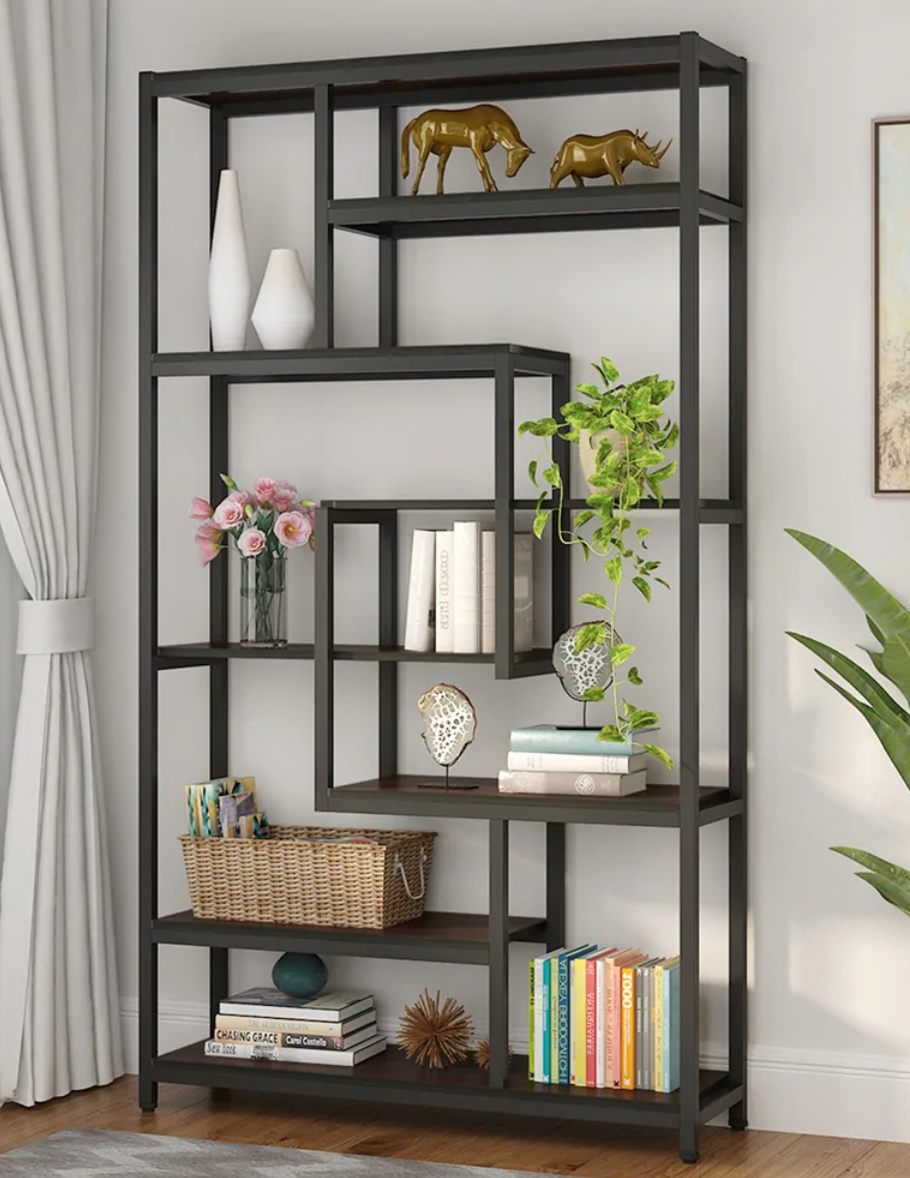
The den…

The breakfast room….

Not all the trees have decorations…some just have lights. That’s okay. They are still pretty and the four that are decorated take enough time!
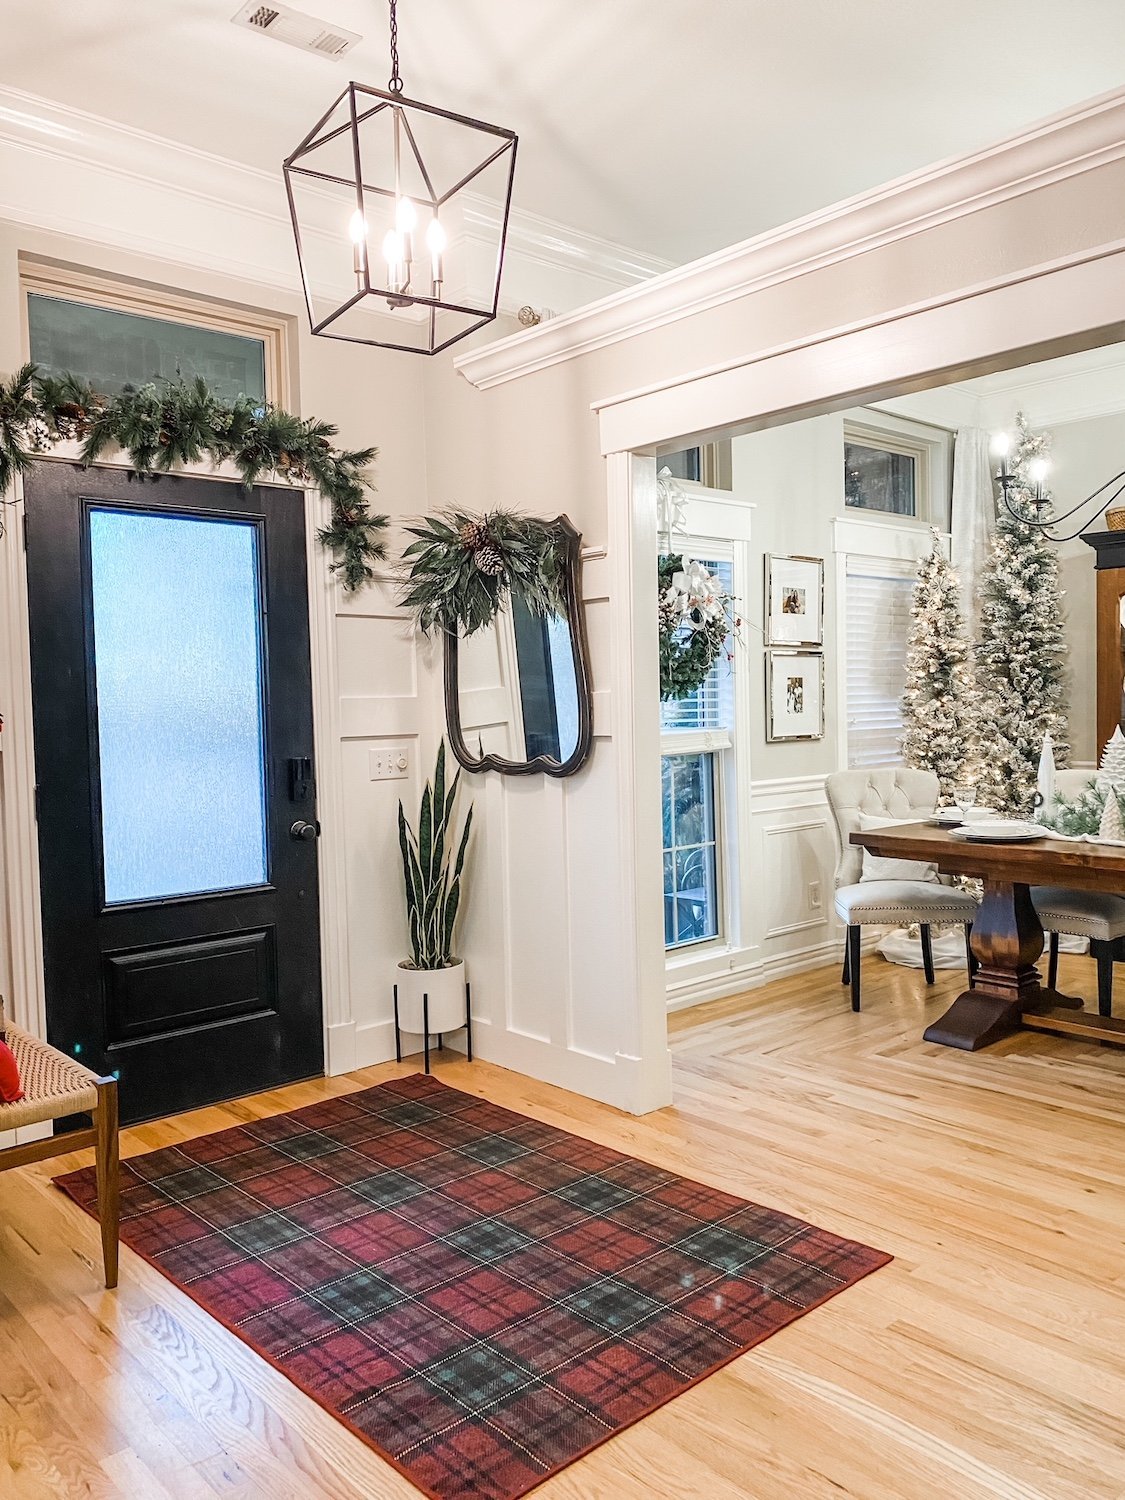
The entry…

Little has changed here…added some little wooden trees and a Christmas sign on the trim…another PJ pillow. Love the view into the office!

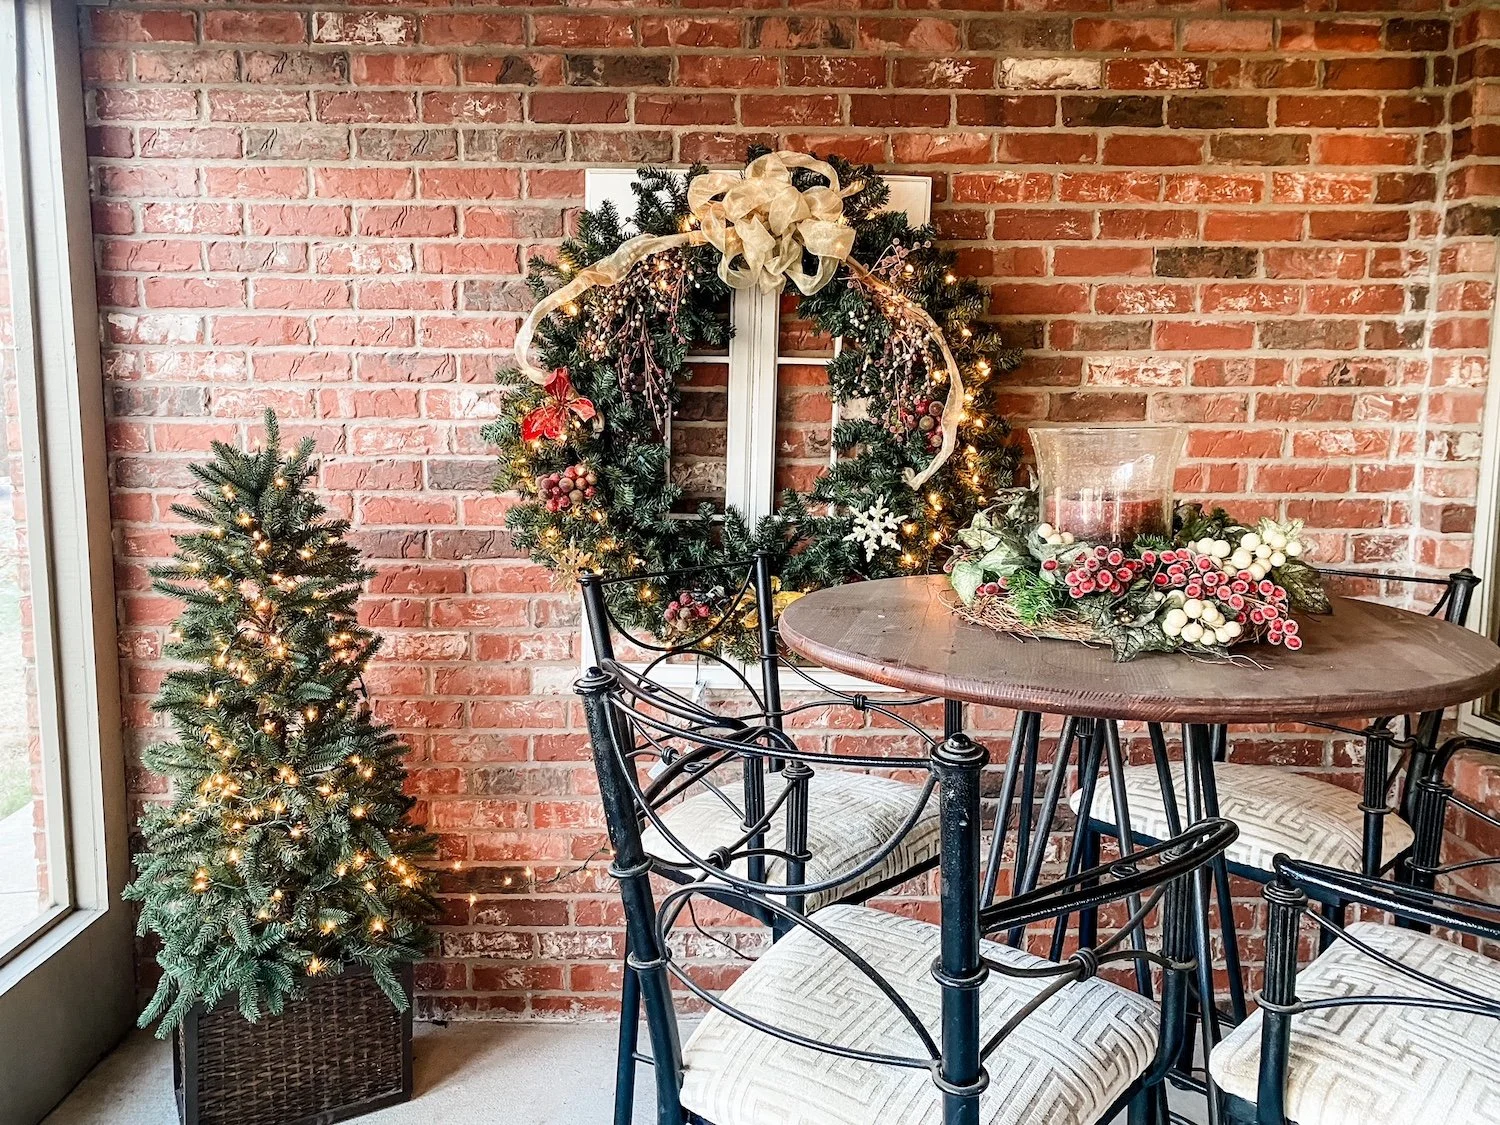
The screened porch….

And of course the main tree in the living room….

All these trees are connected to remotes (THIS is one I use and LOVE) and are turned on every day. I don’t even want to tell you what my electric bill is for the month of December. Suffice it to say it is cheaper to cool this 3500 s.f. house than to light it up…lol!!!

But I love it and as long as I am physically able to do it, I will. Then I may hire it done!

I love this holiday and it seems that year after year I do indeed add something new. I hope something I did will inspire you to add a little more to your home.

Changing dated can lights!

My wing is broken.

Poo.

It’s my elbow…it is still boogered. I am trying to “heal” it by resting it but after about a month I’m ready to give up and see what a ortho dude can do for me.

While “resting” I pretty much sit around and look for stuff to do.

Laying on the couch, looking at the ceiling, I began to obsess about my dated can lights

SUPER simple fix and on a scale of 1-10 it is pretty much a 1.

This is what I have….

…an ugly old can light with a bulb. It had obviously been painted over when the prior owner painted the ceiling. I have five in the kitchen, two in the den, four in the living room, two in the bedroom and four in the bathroom…so yes, they annoy me. But truthfully only when I am laying on the couch or in the bed looking at the ceiling.

While they are “dated,” truth be told no one really pays attention to them except of course when a bulb goes out.

This is where I want to say that when “they” say an LED bulb lasts 10 years, “they” lie.

Beside the point…point is, it is cheap and easy to replace these “dated” fixtures.

So off to Lowes I went and THIS is what I found….

When I say it was easy to replace, I am not kidding. The hardest part was climbing up and down the ladder. Just remove the existing bulb and trim piece. The trim piece is usually held in place by little springs or pinch clips.

Then just screw the new fixture into the socket (like a light bulb) then slip the little pinch clips into the existing brackets on the side of the can. Simple!!!!

The fixture has five different light settings on the back…from bright white to soft “yellowish.” I set all my living space lights on a soft setting and the three in my kitchen on a brighter white for task lighting. Perfect.

TIP! If one of these eventually goes out you can’t just replace a bulb. My suggestion is to get an extra 1-2 in case one goes out in the future and this style or brand is no longer available…that way you won’t have to replace multiples if one goes out!

Again, one of the simplest and most impactful DIY projects you can do. Don’t know why I haven’t done this in the last three years.

Oh, yeah, I know why. Rarely do I lay on the couch and look at my ceiling lights.

Where have I been?

I know…I have been MIA for over a month.

When I first started this blog, I posted every day. That was just too difficult so I started posting twice a week. That was even taxing so I started posting once a week.

And now here we are…over a month later.

Truth be told, the holidays are a super busy time for me.

All the decorating, baking, entertaining.

And of course the sitting and staring at the Christmas tree. I do that A LOT. The season is just so short since I have a hard fast rule to NOT decorate for Christmas until after Thanksgiving…I want to soak it all in.

I get up every morning and turn on all the Christmas lights and they stay on until I go to bed. I don’t even want to tell you what my electric bill is that month…wowza!

This year I added ANOTHER decorated tree in my bedroom…I’ll have to share that next year. I featured my new black and white tree in my office HERE . Now I am one step closer to having my dream of having a decorated Christmas tree in every room. Upside…it is AMAZING…down side….what a chore to take it all down!

The MOST WONDERFUL TIME OF THE YEAR is in the books and time to move into the new year.

First up…a baby shower for my daughter in law.

Everything was beautiful and of course hosting this special event gave me a reason to do a super deep clean on my house.

Breath….

Now on to something that has been bugging me for several months.

The living room rug.

I bought a new rug before Christmas. I loved the old rug….

But after a few years and a puppy, it was ready to go. Rolled it up and hauled it to the trash can.

I tried a holiday Ruggable rug in my entry this year….

…I loved this rug…very durable and at the end of the season I picked it up and threw it in the washing machine! Sweet!

So I decided to try a washable rug in my living room. I couldn’t find one I liked on Ruggable so I checked out Tumble, another washable rug.

I found one I thought I liked, ordered it and put it down.

I didn’t even take pictures of it because I knew the minute I rolled it out it was all wrong!

Do you ever have one of those “design choices” that you get all done, stand back and go ICK!?

Yeah…that was my reaction to this rug!

It is a beautiful rug. And with 3 cats and 2 dogs, and a slew of granddoggies, I love the fact that I can pick it up and throw it in the washing machine.

But it just didn’t work.

The problem was the color…the rug is what I call a “cool” color and everything in my living room is “warm.”

I don’t have a problem mixing “cool” and “warm” decor….if it is done right.

But this just wasn’t right. All this rug did was make my couch look dingy and dirty…and it is not either.

Sooooooo…..what to do, what to do?

First, I do what I always do…I let it be for awhile. I live with it.

A few weeks later…I still dislike it immensely.

I couldn’t send it back because I had “let it be” for a few months and by then…well, life. Rolled it up, tore the bed apart and put it down in my bedroom.

I’m not swooning over it but I’m not growling at it every time I walk through the room… (yes, it looks lavender…but it is actually kind of a taupy/grey/blue kinda color…which makes it appear lavender)

So now I had to find a new living room rug…OH MY GOSH!!!! I can do a lot of things but choose a rug is not something I do well.

I went to 6 different stores…found a few I loved but not enough to justify the price. I know me…in a year I will tire of it and I will want something different. Rugs and pillows are something that is easy to change so I try to keep the cost on those in the reasonable range.

A $3000 rug in a house full of critters and traffic is probably not reasonable.

Finally settled on a new rug…

Meh…again, not swooning but …. (again, it APPEARS browninsh but it is more of a warm grey/copper/blueish color)

So, on to the new year.

So far I only have a few projects online.

A “mudroom” bench and storage for my daughter-in-law’s sister.

She found her inspiration…..

I took measurements, I drew up a plan, and made a material list.

We were going to start that project this week but we got 5” of snow Tuesday so that got pushed to next week.

Definite share when I get it done!

My neighbor wants to redo her pantry like I did mine (shared HERE). She has some family obligations for the next few weeks, so that is on hold.

We are only a few months away from potting, mulching and planting! But as I said, snow…and cold…sooooo….

So I am doing what I always do in January and February….I am hibernating.

I need these few weeks to decompress…and breath!


The living room fireplace reveal....

FIREPLACE MAKEOVER!

I have known from day one that I wanted to give each of the fireplaces a little makeover.

HERE I shared the den fireplace….

Now it was time for the living room fireplace.

The original fireplace wasn’t totally offensive. It just wasn’t “my thing.” Whatever that is! A little dated…just blah.

My original plan was something like this…

SOURCE

I really loved this “cove molding” look but this surround is stone…and SUPER expensive. I decided to try to recreate the look with wood.

First thing I had to find was the “cove crown.”

I found it HERE. The only issue I had with it was the fact that it is a “polyurethane” material…basically styrofoam with a plasticish shell…hum. I did some research and it is SUPPOSE to withstand heat up to 200 degrees. That should hold up to the heat put off by my fireplace….should. I guess I’ll find out next year!

So as I mention HERE, I found my inspiration, took measurements and made a tentative plan.

What is the old saying about “best laid plans?”

No matter how carefully we plan, not all will go right.

Case in point.

So I started by removing the old surround….

TIP! When you remove wood trim from a wall, first score the joint between the wood and the wall with a utility knife. It should have caulk between the wood and the wall and if you don’t score it, you may tear the paint finish. If there is still caulk on the wall, just take a chisel or putty knife and gently scrape it off. Also use a board behind the pry bar so you don’t bust through the sheetrock…I did it just for demonstration purposes…NOT!

When I removed the old surround, I discovered this….

I forgot this room originally had carpet. When they added the hardwood, they had to work around the existing fireplace surround which sat on the slab, so of course when I removed it there was a gaping hole in the hardwood flooring.

“Best laid plan” #1….

Not a big deal for me. First, I always keep “spare.” The problem was remembering where I put the spare pieces of hardwood. Once I dug it out from behind all the stored Christmas decorations I went to work patching these floors. Since much of it was going to be covered by the new surround, I didn’t worry about “lacing” it in like you would a prominent area. I glued and laid some 3/4” material as a subfloor, then cut a few pieces of the oak and glued them to the subfloor with construction adhesive, using wedges between the wood and the wall to fit them tight until the glue set up. I sanded and applied one coat of polycrylic before installing it. After installing it, I used wood filler to fill the gaps, gave it a light sanding, then applied another coat of polycrylic.

Hardly noticeable…or as my daddy use to say, “You’ll never notice it on a passing train!”

I decided to build the surround on the wall vs. building it as a unit and then attaching it to the wall. Just personal preference honestly.

I used a stud finder to find all the studs and marked them on the wall.

I put up 2 x 4 “bracing/supports” on the wall using THIS construction adhesive and deck screws. I was able to hit a few studs, but not as many as I would have liked…hence, the adhesive. I like this construction adhesive better than most because I have found it is tackier and less likely to “slide” before it dries.

Since these were the “supports” that all else would be attached to, I made sure they were perfectly straight and level.

I strongly suggest priming and sanding all your materials before installing it…this will save you from a serious dust storm IN the house! First course of business.

I began building the surround by attaching 1x material to the supports I had secured to the wall, using adhesive and nails. I used 1 x 8” poplar material on the outside and faced the edge with 1 x 2 poplar. I attached a 1 x 4 pine on the inside of the supports. Then I added spacers between the two to provide additional support and nailer for the trim.

(At this point the cove crown is just “propped up”…not attached.)

My “best laid plan” was to use crown between the outside board and the inside board….

Okay, here is the problem and where my “plan” completely fell apart.

I was THINKING I would just take plan ole’ crown and “cope” the inside corners. Works on a ceiling, right?

Right…but on the inside corners of a wall/ceiling, you have two pieces of crown joining in the corner, both laying “horizontal.” On the inside corner of this fireplace, you have one piece laying horizontal and one piece laying vertical.

Now, you might not think that is a big issue.

Well it evidently is. I googled, I cut, I made mock ups…I spent an entire day trying to make this work. Evidently this is not a “doable” thing…at least not what I could find.

This might explain why ALL my inspiration pictures were stone or masonry.

I think the reason it worked a bit with the cove crown ( I say a bit, because there were still gaps I had to sculpt with putty and caulk) was because it didn’t have the “fancy” profile of a crown. Smaller cove molding will cut on a 45 on inside corners without coping. The larger cove molding had minimal “gaping.”

If you know anything about cutting trim and coping you know exactly what I am talking about. If you do not, do a TON of research before attempting to trim inside corners…or you too will learn the hard way!

Soooooo….best laid plans.

I rarely just give up, but…..

Time to punt.

I found another “inspiration” that appeared to be “less decorative.” I decided to give this look a shot since it would entail using basic 1x material vs. crown.

Truth is, this is one of those “happy accidents.”

I like the look more than I did the original plan!!!!

I used a 1 x 4 material, then stacked on a 1 x 3 material, then a small cove molding…LOVE.

Moving forward….it was time to attach the large cove crown.

First issue. In all my inspiration photos, I really like the “one piece” look. Since again, they were all stone, the material adjacent to the fire box was the same as the surround. If I recreated that look I would have to use painted wood adjacent to the fire box, and I just didn’t feel comfortable with that. Not that this box gets terribly hot, but it does get a tad warm.

Soooo….what to do. I really wasn’t loving the look of high contrast tile between the box and the surround.

When I was looking at tile, I found a split face travertine tile I really liked.

If you remember the Lankford house den fireplace I installed split face travertine…and I LOVED it. I still do…so I went with it.

Now, travertine is not “all the rage.” So this is a prime example of doing something I LOVE vs. doing the in thing.

Since I decided to go with tile, I used a 1x material for the inside of the cove crown to sit on…just to give it some lift so that the tile wasn’t butting up against it’s 1/4” edge. I glued and nailed 1 x 4s on the wall, then installed the cove crown on top of that.

Second issue…since the cove crown is “polyurethane” and not wood, I couldn’t attach it using a trim nailer. Trust me, I tried. I had to use construction adhesive, then tape it and constantly “press” it until the mastic finally set up. Pain.

Once all that was done, I caulked all the joints, puttied holes, gave it a little sand and then painted it BEFORE I installed the tile surround.

I used a latex paint because my research said that latex is a better product to use in areas where “heat” might be a factor…I guess it has a tad more flexibility. Makes sense.

Don’t forget the Floetrol…makes a world of difference in your paint finish.

After the paint had cured, I installed the tile. Again, there are amazing tutorials out there for installing tile…find one that makes sense to you! Installing tile around a fire box is NOT a difficult DIY project. But you want to make sure you have the right tools (wet saw, properly sized trowel, etc) and that you use a thin set or mastic that works with the type of tile you are using and is heat resistant. RESEARCH!!!!!!

There were a couple of scuffs and marks on the black fire box from scraping the old mastic off. I used a black Sharpie to cover those…works like a charm.

And presto, bingo….a new fireplace surround.

I like it much better than the old one. Bigger but simpler. Not quite so “traditional” looking. Again, I like it much better with the “stacked edge” than I would have with the crown. See, no mistakes, just learning as I go. A lifetime of doing this stuff and I am still learning!

I am EXHAUSTED (just look back at all the projects in the last few months) so I doubt I will be starting any new major projects anytime soon. Course I say that and I am already eyeballing and sketching a few things I have been thinking about starting. Hum….

So until next time…

Another fireplace makeover....

It is time.

Time to give the fireplace in the living room a little facelift.

Like the fireplace in the den, I have known from day one the living room fireplace would someday get a little makeover.

Its not totally offensive…it’s just…well…I just don’t like it much.

(I didn’t have to tear out what is there to get a good visual like I did in the den).

So the first thing I did was “find my inspiration.”

I did what I usually do…scoured Pinterest and the webisphere and dropped pictures I liked into a computer file….

In it are pictures of fireplaces that have at least one element I like.

I would post all the pictures of individual ones that really struck my fancy but again, I am HORRIBLE at keeping the original source to link back to…but this is my inspiration file.

This is one I like best…

SOURCE

You may notice this is a “stone” fireplace surround…but I think I can make something similar out of trim and paint it.

One thing I know for certain…I want “more formal” than the rock and walnut mantel I put in the den but less that the formal froo-froo in more formal living rooms. Simple but with a little class.

The den, kitchen and living room are all “open space.” The den is our “casual” space and the living room is the more “formal” space…and since you can see both fireplaces from just about any spot in all the rooms, it is important that they be different to reflect their individual purposes but not clash.

Does that make any sense at all?

So, I found my inspiration…or at least 20-30 I can combine to get the look I want.

The next step is to “make a plan.”

To do that, I measured the space (wall width and height, floor to bottom of TV, firebox) and drew it out on graph paper. That way I know exactly what my measurements are.

Again, most of the “inspiration” pieces I like were stone…but those are super expensive and I really think I can achieve a similar look with wood trim.

I haven’t yet decided on what tile I want between the fire box and surround. Or if I even want tile at all…I like the solid look. I think I may have to wait til I get the surround up to get a good visual.

This is definitely one of those “fly by the seat of your pants” deals.

Again, I know I do not want a hearth. This is a gas log firebox enclosed in glass….so no “need.” There isn’t one now so I know we can live without it. Since I went with the stone and natural wood in the den I’m pretty sure I am going to stick with painted.

So…inspirations in hand…check. Measurements taken…check. Set plan…well that is still a work in progress. I ordered the large concave (cove) crown and I will take a piece of that and build around it to find a look I like. I believe this is what they call a “fluid” plan.

This week the ladies in the neighborhood are building a deck. MAJOR chore…but by goshy we are getting it done! It is part of my “give what you have” plan for my life. I get to share a skill set, the ladies are learning something new and the fellowship is wonderful. So far, so good!

Hopefully next week I can get started on the fireplace!

The fireplace makeover...Part 2...Airstone Faux rock.

The stone work is done….

…and I love it.

I highly recommend the Airstone product. At least as far as installation. It is a relatively easy product to install. Lightweight and exceptionally natural looking.

When we fire up the fireplace in a few months I will let you know how it holds up to heat.

This stone product would work well for a kitchen backsplash, fireplace face or a covered porch area. It SAYS you can use it for exterior application…I can’t attest to that since I did not use it outside.

I think this is a relatively easy DIY project.If you choose to install this product find a tutorial that works for you. More importantly though, FOLLOW THE DIRECTIONS!!!!

I do have a few tips.

Start at the top. Then the sides…them the bottom. That may seem backwards, but it is the way to do it. Start at the top by adding a temporary level brace….I just used some scrap 1x4. I let that dry over night, then did the same on each side, then the bottom. The Airstone mastic sets up fairly quickly.

IMG_2011.jpg

I used pennies as spacers between the floor and the stone. I do this because wood swells and moves and you don’t want the rock sitting on something that has movement. Same would apply if you were using it as a backsplash…don’t set any wall product (faux rock, tile, marble, etc) directly on a top or floor.

Use a tile saw to cut it. I have a wet saw so if you do not, rent one. Makes easy, precise work of tricky cuts.

Pay attention to how to apply the mastic…it’s like frosting a cupcake, not buttering toast.

The tub of mastic specific for the faux stone SAYS it does 30 s.f….it does not. Maybe I “iced” to thickly but I would suggest buying more than you think you will need…you can always return it.

Layout the rock on a template or floor before applying it on the wall and number each piece so you know how to property transfer it to the wall. Also, make sure you pull from different boxes…mix it up. Each box has several different “colors” and “textures”and each box may come from a different run…so you want to make sure you mix it up!

I used the “edge” pieces around the face of the fire box…I think it looks neat.

IMG_2025.jpg

I should have wrapped it around the entire bump out. I would have loved to take it to the ceiling. I am still debating on adding a hearth.

But the “coulda, shoulda, woulda” is always a brain worm until the project is finished.

I didn’t want to take it to the ceiling because I don’t want to remove the crown then have to paint the entire ceiling. I don’t think I want to add a hearth because this is a small space and I don’t want to crowd the space. I didn’t wrap it around the entire wall because, well, I just didn’t.

Hopefully when I get the mantle on, it will all come together.

So the mantel. I think I thought I knew what I wanted but now I not so sure.

My plan is to make a beautiful walnut mantel…smooth…perfect grain…low sheen. Now I am debating on a more “rustic” look with a lighter finish.

What to do, what to do.

As usual, I have searched Pinterest and found dozens of looks…I like them all!

This house style really does not lend itself to that “farmhouse/rustic” look so I think I am going to go with a more smooth, low sheen look. Sometimes you have to “read the room” when making decor decisions.

I bought some walnut boards (dang that stuff is expensive!) and specifically picked pieces with lots of grain and a few shallow knots. Just a smidge rustic but still the beauty of walnut. I know if I apply Waterlox (like I did here with my kitchen cabinets) it will have a dark finish. And I think I am okay with that. The stone is light and I think the dark walnut will be a nice contrast.

Now I am just waiting on my son to have a day we can work on his table saw. I shared HERE about my phobia of table saws. I bought him one for Christmas last year so I have one available and have a “saw buddy.”

Hopefully next week I will have a beautiful new fireplace to share!


Making a table or bench top...

One tool I wanted for years was a “biscuit joiner.”

Screen Shot 2021-08-11 at 4.43.53 AM.png

One of the many things I love about my kids….when I ask for a specific tool for Chirstmas/birthday/Mom’s Day, they listen. So several years ago I got a biscuit joiner for Christmas!

This little tool has allowed me to make a few things I otherwise wouldn’t have been able to make. It allows me to join together several boards to make a larger board. A necessity if you want to make benches or table tops.

Let me give you a few examples….

The first was this bench….

I was able to join together the three 1”x6” boards and the ends to make a strong top.

Brandon and Taylor wanted a plain pine table and bench for their new house. I guess they could have spent a fortune like we did for a custom made table but that isn’t really an option for a young couple.

So we went to Lowes, picked out some straight, nice boards with good grain and used the biscuit joiner, glue and clamps to create a table top and bench top.

IMG_1329.jpg

After some serious construction, a LOT of sanding, a polycrylic clear coat, and some nifty bases, they have an AMAZING table and bench!

IMG_1146.jpeg
IMG_1148.jpeg
IMG_1149.jpeg

Last year I went looking for some shelving…I found one I absolutely LOVE. It was from the same company that built our dining table so I knew the quality would be amazing….but the price tag was just a tad too steep!

I love everything about this shelving unit….the look, the style, the quality.

So I went looking for a less expensive option. I found one I thought was okay on Overstock.

Waaaay less expensive…and for obvious reasons. The frame is metal vs welded steel and the shelving material is MDF vs. beefy solid wood.

The look and style is very similar…almost identical sizing…but the MDF shelving HAD to go. I knew immediately I wanted to replace them with solid walnut.

It has only taken five months to get around to this project.

The biscuit joiner was a life saver.

Walnut is a pretty expensive wood…and finding pieces wide enough for the needed 12” shelving was pretty much impossible (without a serious outlay of cash.) What I did find were 7”ish board we ran through my son’s table saw and joined together….

IMG_1740.jpg

Using a biscuit joiner is NOT difficult…just take your time and follow the directions.

One little trick I did learn was how to mark the joints so they lined up perfectly. Just put your two boards together then run a mark across the joint….

IMG_1742.jpg

Then just line the joiner up with the mark and plunge away…the joints will line up perfectly!

Always dry fit everything to make sure it all lines up perfectly before you apply glue….

Apply glue and clamp….

IMG_1745.jpg

Joiners are NOT difficult to use. Just follow the directions and watch lots of YouTube tutorials.

I sanded each piece with 220 grit sand paper, tack cloth and sealer.

I used Waterlox as a sealer…no stain…same stuff I used on my kitchen cabinets and I have been extremely pleased with it!

BEFORE

BEFORE

AFTER

AFTER

BEFORE

BEFORE

AFTER

AFTER

BEFORE

BEFORE

AFTER

AFTER

I was able to take a shelving unit fit for a dorm room and turn it into a beautiful accent piece!

LOVE!

Curtains...

Last week I concentrated on hanging curtains in a few windows.

I have a “list of things to do” but it is still pretty cold outside. I need to paint the trim in the office, master bedroom and laundry room. I am using oil base paint and as you know, cleaning brushes with mineral spirits can take a bit of time outside. I want to do some trim work in the entry, but again, outside work. I may tackle the pantry this week but not sure exactly what I want to do…I ordered some jars and labels.

I have Raynaud’s which is this stupid circulation thing with my hands and feet. No biggy except whereas a “normal” person could probably work out side for short periods of times when it is below 65 degrees, I can not. It causes great pain and distress and is frustrating as heck!!!

I’m still adjusting to being “semi-retired.”

For those of you who grind it every day like I did for years, the idea of “retiring” may seem appealing. If you like waking up on Monday morning with little purpose for the week, go for it. If you like sitting around reading or binge watching 10 year old TV programs days on end, go for it. If you think you are going to volunteer, forget it. They don’t want you during a pandemic. If you think you are going to garden all day or project outside, make sure you have a library ready for the three or four months out of the year you can’t get outside.

The highlight of my entire week was the little warm up we had. I was able to get out and reorganize my garage.

Seriously, that was the highlight of the ENTIRE week.

I knew finding a “purpose” would take time….it’s still taking it’s time…lol!

Enough of my pity party…on to the curtain adventure!

So as you may know from my last house, I am not a big “curtain person.” Every single window in this house has 2” mini blinds…which are nice but they are just so….”mini blindish.”

One of the really awesome things about this house is that no window gets direct sunlight, so no window really needs to filter out hot sun. Also, no window is really “open to the public” so privacy is not a huge issue.

The windows in the living room and den adjoin the all-season room.

The windows in the breakfast room adjoin the side screened porch.

The windows in the dining room face west…

… but are shaded by the covered front porch and the large trees in the front yard. There is a bit of a need for “privacy” since they face the street…but not much. You would have to be on our front porch to see in and truthfully I am rarely in a state of “need for privacy” in my dining room!

So basically the need for curtains boil down to aesthetics…I look at curtains kinda like lipstick. You don’t HAVE to have it but it kind of dresses things up a bit and finishes off the “look.”

For the record, I rarely wear lipstick either!

But since I want to really make an effort on this house and since I have WAAAAY too much time on my hands, I decided to tackle a few windows…put a little lipstick on the rooms so to speak.

So off to the home decor store I went.

Again, I don’t really NEED curtains in the dining room but I found a set I really like.

(I notice I need to make some adjustments…especially to the curtain on the left.)

I decided to leave the blinds in place for now just incase we do need privacy or to block the sun…eventually I may do something different but not sure what. I do love the curtains and they work well with the “glitter/monotone” vibe I am going for in this room.

I did have a debate as too where to hang the curtains…above the transom or between the transom and the window. I looked on Pinterest and decided I actually like the look of curtains above the transom…so that’s where I hung them.

My plan is to make this table my “seasonal decor” spot. Since we rarely use this table, it is the perfect place to go all out…kinda of like I did for Christmas….

I plan to do this for every holiday. I picked up a bunch of stuff for Easter but can’t find anything I really like for Valentine’s Day so right now it is kind of bare.

I am a big fan of Pinterest. If you are looking for inspiration…what color or how high…just search and cruise. I promise you will eventually see a pattern to what you do and don’t like.

Went with simple for the den and breakfast room…I removed the blinds and added plain ole’ white sheers. Neither of these windows need shading or even privacy for that matter and I thought this simple look was like a bit of lip gloss. Simple and understated.

I found curtains for the office but still have to get another curtain rod…another project for another day!

So I made an effort and I like the little changes. The major change will be the living room windows. I tried just removing the blinds…I like it…Brian doesn’t. I thought about shutters but when I looked at “shutters” on Pinterest I realize I really didn’t like the look. I may try tall curtain panels across the entire wall but then the big question becomes “what fabric…what color…blah, blah, blah”

I may have to save that for another week…between the afternoon of rearranging the garage and my eye appointment on Tuesday I am plum worn out.


Another new living room rug and my thoughts on board and batten...

Over the years I have been able to remove all the wall-to-wall carpeting and install hardwoods. I learned the hard way (after raising 4 kids and several puppies) that I never want to spend a lot of money on area rugs.

Unfortunately they are a necessity on hardwood and tile. What isn’t a necessity is spending A LOT of money on something that gets tons of wear and tear and may go out of style on a whim. So several years ago I started experimenting with indoor/outdoor rugs…and honestly., I have found that I get serious bang for the buck!

It started with this rug…

….an indoor/outdoor rug I picked up at a big box store for less than $100. I just needed something simple to pull the room together. Since this room only gets used a few times a year, I wasn’t too terribly concerned with having “super comfy” under foot!

I was so impressed with the quality and look of the rug I decided to give the “indoor/outdoor” thing a shot in the den! Let’s be honest…the den is really just a big romper room for the dogs! One reason we don’t even have a coffee table in the room!

I picked up this indoor/outdoor rug at my favorite home improvement store!

Not super comfy but it is neutral and has held up well. If I want “comfy underfoot” I wear my Ugg slippers.

I spent a little more and went a little more “fancy” on the dining room

…this rug doesn’t get a lot of wear and tear so I was okay spending a tad more. Still love this rug!

When it was time to change out the rug in the living room I found a really pretty and simple indoor/outdoor rug at a local home decor store.

I knew the minute I unrolled it I had a problem.

It was stiff and not at all pliable. It had some serious “crease marks” from being rolled up and the edges curled up. I went ahead and put it down and hoped and prayed the creases and rolled edges would eventually go away.

Nope.

Honestly, I think they got worse and I’m lucky I didn’t break a dang hip on the thing.

I tried steaming the edges and curling them the opposite way…nothing worked.

The rug just plain sucks.

If a rug looks like crud when you lay it out, good chance it isn’t going to get much better. I should have rolled it up and taken it back but noooooo….I just crossed my fingers and hoped it would get better.

So now that the holidays have passed and everything is back in order I decided it was time to find a new rug that wasn’t a tripping hazard.

Again, I just wanted something inexpensive that would pull the space together. We have moved the big (ick) brown leather couch back into the living room so I really wanted something relatively neutral. (Why do I still have the big (ick) brown leather couch…because it is Brian’s and he spent a ton of money on it so I can’t bring myself to get a different one)

I try to keep the furniture and rugs in this room relatively neutral so I can add splashes of color with pillows and throws…right now I am enjoying a “pink phase.”

Two major changes coming in this space…first, I have FINALLY ordered new windows for the front…the old ones are the 20 year old original aluminum windows that are terrible…can’t hardly open them and they leak some serious air! And as you can see they dominate this space!!

I would love to change the 1990s arched window to a simple transom but unfortunately I can’t get my brick anymore and changing out the shape of the window would require additional brick…curses!

Regardless, the window seal has broken in the arch window and there is condensation between the panes…nothing you can do about it but replace the window.

I COULD just buy a new window insert but since I am replacing the bottom aluminum window with vinyl I decided to change out the arch window as well.

I changed things up a bit on the style and design and I can’t wait to share! Hopefully those will be here in the next week or so and we will have a decent day to install them!

The second change is the entry. I shared it here….

I’m looking at the date of the original post…3 1/2 years ago….and sadly, little has changed.

But last fall I bought a nifty antique mirror at a local market…at Christmas I put a wreath on it, and honestly, I kinda like the look. So when I took Christmas down, I hot glued a hook onto the mirror and hung an olive branch wreath on it…

Hum…kinda like that look too.

So it looked funny to have a mirror on that side of the entry AND still have the blue “moroccanish” mirror behind the door, so I took that mirror down and gave it to my daughter!

So now I have a blank wall.

So change is coming…maybe…I think…some day. It only took me 3 1/2 years to get this far so what’s a few more years.

Truthfully I am kicking around the idea of extending the board and batten to this wall…from the door to the stairs. And then maybe put some little hooks on it to hang purses and such. I can’t do anything too bulky because the door swings into that wall.

My ONLY issue with board and batten is that I know it will go out of style in the coming years…and while I have the energy and time to install it today….what if I don’t have the time, energy or money to remove it in 5-7-10 years?

I know, I know….”Board and batten is timeless…it will never go out of style.”

Bull…hardwoods are timeless…but yet 40 years ago people covered them with wall to wall carpet. Subway tile is timeless…yet decades ago people ripped it out and put up olive green and harvest gold 4x4 tile.

My point, just because something was popular 100 years ago and came back around, doesn’t mean it is “timeless.” Trust me, something different will come back around and all those painted white cabinets and rooms full of board and batten will be the bane of our existence.

I’m not saying you should live with a dated carpet, tile or wall treatment if it makes you crazy. I’m just saying think carefully and spend wisely when “updating” your home decor!

And if you are like me and procrastinate long enough, you may miss the current bandwagon…but trust me, another will come along!

The upside is I save myself a lot of work AND money by being somewhat indecisive…lol!

UPDATE!!! I WROTE THIS POST WHILE I WAS ALL COMFY IN BED. I got up, put on my grubby paint clothes and had time on my hands.

Something is going down!!!!

Or rather UP!

Yep, board and batten in the entry!

And you know what, I’m kinda glad I did it. It only took about 2 hours to install it and another hour or so to paint it.

There are dozens of tutorials for installing board and batten…much better than anything I can do.

If you want it, JUST DO IT!!!!

And yes…I still believe it will go “out of style” in a few years but whatevs.

See, even I don’t take my own advise…so “grain of salt” people…lol!

Lego table project!

One of the “littles” in our family LOVES Legos. Course I am all for any child’s entertainment that doesn’t involve electronics.

Believe it or not I managed to raise four intelligent, college educated children without video games or smart phones…imagine that!

When I heard she has to commandeer the family room coffee table to build her Lego sets, I decided she needed her own personal space!

I looked at buying a Lego table as a Christmas gift…but as with much of the furniture today, they were all cheaply made and didn’t seem very sturdy…certainly not pieces a child could lean on for hours.

So I decided to build one!

First thing I had to do was locate “Lego flats.” I found these on Amazon…perfect!

The package SAYS they are 10x10 but when I laid out 3 wide I discovered the measurement was actually 30 1/8” …good to know! I decided to build a table that would hold 3 wide and 2 deep…and knowing the exact measurement of them laid out is important. The inside measurement of the trim on the top will be 20 1/4” x 30 1/4” so there is room for 6 total interchangeable flats.

I constructed the table out of 1/2” plywood, 14” furniture legs, 1x3 pine boards and 3 1/4” trim.


I bought a piece of 24” x 48” 1/2” plywood and cut down the width to 34”.

When cutting plywood with a skill saw, make sure you “score” the line you will be cutting with a utility knife…

…then cut on the OUTSIDE of the scored line…this will keep the plywood from “splintering” when you cut it with a skill saw.

After cutting the plywood 24” x 34” I “banded” the entire board with 1x3 pine… then added the leg brackets to each corner. The legs just screw into the brackets.

Banding the plywood top with 1x3 pine does several things…it increases the width and length of the table by 1 1/2” …remember 1”x3” boards are actually 3/4” x 2 1/2”. It also strengthens the plywood and the “skirt” it creates will hide the leg brackets.

Also remember…glue AND nails. ALWAYS USE GLUE!!! The glue is what actually holds everything together!

After the base of the top was constructed, I flipped it over and added the trim to the top…cutting it so that the opening on the table top would be 30 1/4” x 20 1/4” to accommodate 6 flats with a smidge of wiggle room so they can easily be changed out.

Once it was all constructed, I puttied all the holes and caulked all the joints. I primed it with primer, sanded everything smooth, tacked and painted it with Krylon satin white.

A few of the tables I looked at had storage drawers or the tops lifted for storage…cute idea and something I could have incorporated into the design…but truthfully if you have a “lego kid” you know the table would have to be the size of Montana to hold all their pieces…so you are better off finding bins or stackable containers that suit your needs!

This table is strictly so the little doesn’t have to clutter up the family coffee table when she wants to build and tear it all down when it is time to put it away…she can just remove the legs and slide it under the couch or bed!

Super cute and hopefully sturdy enough for hours of leaning.