Repairing and painting the worst!
Here is a tutorial for making repairs and prepping an old chest of drawers with some serious damage!!!
Lesson for the day...YOU CAN DO IT! And here is how!
Here is a tutorial for making repairs and prepping an old chest of drawers with some serious damage!!!
Lesson for the day...YOU CAN DO IT! And here is how!
Here you can check out a tutorial for constructing floating shelves anywhere!
This week I posted a tutorial on installing a glass window in an interior door. You can check out the tutorial here!
Here is great tutorial for beefing up your door trim. Super simple project that makes a huge statement!
This week I stripped this beautiful dining room table...you can see the tutorial and transformation here.
Here is a tutorial on refinishing an old dresser. This is a tiny little "table top dresser" but the same process applies whether the piece is large or small!!
If your dresser needs veneer and drawer repairs, check out this tutorial!
Think twice before you toss and old dresser or pass one up at a garage sale! With just a little time and effort you can turn a piece of trash into a real treasure!
It is a super simple thing to do...but something we are afraid to tackle because...well, let's be honest, it entails messing with electric. And who isn't terrified of electricity. Well, maybe not everyone...maybe just me. I tried to get the electric company to turn the power off in my part of town when I wanted to do some electrical work. They won't do it.
Anywho, light fixtures are easy to change out. If you turn off ALL the little switches in your breaker box it's no biggy. Just make sure you have a flashlight handy!
Here is a great tutorial on changing out a light fixture.....
Here is a little tutorial on painting your front door! So simple!
I have read about painting fabric and since I found these darling little birds, I was anxious to try a new project....
I used these little birds on my laundry room wall featured here! I thought they would be cute on a pillow. (Feel free to click on them, size them and print then off...I have no idea where I got them so I hope I don't get sued!)
The great thing about wall murals and painted pillows is you are only limited by your desire and imagination...and google! Google images you like and print them off. While I am not going to advocate "pirating" copyrighted material, I honestly don't think the Disney police are going to storm your home if you paint a princess silhouette on a pillow!
Months ago I bought several drop cloths. You can find them in the paint section at your home improvement store or paint store! Just plain ole' drop cloths! I washed them several times in bleach, dried and ironed them. I used some of the fabric to cover an ottoman. The fabric is very durable and washable and I knew it would be perfect for pillows!!
So here is a little tutorial on making painted fabric throw pillows....
Find a good fabric...again, I really like the drop cloths! And if this is your first shot at painting fabric, or making pillows, it is an inexpensive fabric to practice on. It is neutral and also paints well so it is a perfect template for a paint design! I would also recommend "duck cloth" fabric.
I had two 18x18" feather pillow forms on hand. You can use pillow forms or stuffing...which ever you prefer!
HINT: shop garage sales for pillow forms. The fabric on the pillow may be "undesirable", but the pillow form is worth a fortune! If you can buy a pillow (ugly fabric and all) for under $5, it is a bargain if it has a really good pillow form. Especially a feather pillow! Just make sure they are clean or washable! I picked up 4 really nice pillows at an auction for $4! I just removed the "outdated" (nice way of saying ugly) fabric and BAM! Cheap pillow forms....
If you want piping around the pillows you will need bias tape and cording. I posted a little tutorial here on how to make inexpensive piping! If you don't want to mess with it, no biggy!
You will need whatever color latex paint you want to use and textile medium.
Since I was using my little bird silhouettes, I knew I wanted to use black piping and black latex paint. Naturally I always have black paint on hand.
What I didn't have was the textile medium. It can be found in any craft store and isn't that expensive. This little bottle was around $6 (use your coupons and get it cheaper!) and it goes a loooong way. For these two pillows, I probably only used about 3 teaspoons of paint and medium. This medium calls for a 2:1 ratio...two parts paint to one part medium (3 teaspoons). Read and follow the directions on the bottle!!!
My forms were 18x18" so I made a little "pattern" out of paper. This is where a carpenter's square really comes in handy! I made the pattern 19x19" to allow for a 1/2" seam all the way around!
I used brown paper...newspaper works great too!
Once you have made your pattern, pin it to the fabric and cut out two pieces for each pillow! That is another great thing about drop cloth fabric...it really has no "front and back."
After you cut the material, make sure the fabric is wrinkle free (iron it NOW if needed), then transfer your "design" to one of the pieces of fabric.
The best way I know to transfer designs (to walls or fabric) is to trace it using sewing trace paper. First, tape the trace paper on the back of your design, then flip it over and position it on the fabric (trace paper down), pin it securely to the fabric and use a pen to trace the design.
My trace paper was a little light, so I went over it with a pencil. Be careful if you do this...the "trace" will easily wipe off after you paint...the pencil marking will not!
When you have your design transferred to the fabric, I strongly suggest you securely pin the fabric to either cork board or foam board...or even cardboard from a box. Just something to keep the fabric "taunt" and in place while you paint. I used some cork I had laying around!
Once you have the fabric secured, you can begin painting. I would strongly suggest starting at the top and work your way down and towards your dominant hand...you don't want to drag your hand in wet paint. Also, I have a bazillion little craft paint brushes. For this design I used a 1/2" angle brush.
Again, I am not left handed....I just can't take a picture with my left hand. And obviously not a very good one even with my right hand!
DO NOT, I repeat, DO NOT drip paint on the fabric. And DO NOT drop the fabric on the floor while the paint is still wet. Again, I do not tell you these things because I fear something MIGHT happen....
If you get this paint on the fabric where you don't want it, it's not coming off...and you WILL have to start all over. Don't ask...just don't.
Oh, and don't do this after a few cups of coffee...again, just trust me!
My fabric medium directions say you should dry iron the paint AFTER it has dried. Let it dry. Don't move it until it dries! Again, trust me! But ironing it is a good idea, just to set the paint! Just don't mess with it until it is completely dry!!!
Once the design is dry and you have ironed it, it is just a matter of constructing it just like you would any pillow. I could post a whole tutorial on constructing a throw pillow but there are a bazillion of those on the web. If you can't sew a simple pillow, I strongly suggest you take some sewing lessons at your local fabric or craft store. Seriously, making a throw pillow is the simplest DIY project and something you really should know how to do. I understand the piping thing may be a tad more difficult but a simple pillow is DIY 101!
If you simply can not sew a pillow or hate sewing more than I do (that is just NOT possible)I really believe this project is one that can be done on a plain cotton pillow case or maybe even a pre-made throw pillow. It might be a tad difficult to transfer a design and paint on a pillow that is already stuffed, but it is doable. Just be warned AGAIN...if you get this paint on fabric (i.e. drips or you just mess up) it is NOT coming off!
And there you have it.
Painted throw pillows. Seriously, it is simple!
And again, the possibilities are limited only by your imagination! How cute would baby feet and hand print pillows be in a nursery...or as a gift for grandma! You could do a round pillow painted as a baseball or one shaped like a football! A pink princess silhouette with pink piping? A navy sail boat with navy piping... And imagine the possibilities during the holidays!!!
If you can imagine it, cut it out of a piece of paper, or print it on your printer, YOU CAN DO IT!!!!
Here is a tutorial on making fall floral urns...an easy and beautiful project for the season!! Enjoy....
After a very unfortunate incident, I have several holes in the sheetrock in my closet that need repair.
So it is a perfect opportunity to share with you the easiest way to repair sheetrock.
Doorknobs and teenage boys wrecked havoc on my sheetrock. And of course I always have damaged sheetrock at my apartments. So I was fortunate when a painter friend showed me an easy way to repair sheetrock without having to mess with sheetrock tape and having to cut back to a stud to support a patch!
The tools you will need should all be in your Tool Box. You may need to buy a piece of sheetrock, sheetrock mud (joint compound) and spray texture. Lowe's has it all! Sometimes they have small pieces of sheetrock so you don't have to buy a huge 4'x8' sheet! (Here's a little hint...if you just need a small piece, check out a new construction job site where they have just installed sheetrock...they usually have TONS of scraps laying around!) Sheetrock comes in several thicknesses, so measure the thickness of your sheetrock...usually if it is an outside wall, it will be 1/2"...inside walls are usually 3/8".
If you don't have drywall broad knives, you can buy inexpensive plastic ones that will work just fine for a small repair. I would suggest getting one as wide as possible.
First thing you want to do is cut the damaged area in a square or rectangle and trim off the excess around the edges....doesn't have to be perfect but you want it fairly "square." You can use a utility knife or a sheetrock knife.
I would also recommend sanding down the wall texture about 2-3" around the hole....especially if you have a heavy texture on your walls. This helps the new patch lay a little smoother. You can use regular 60-80 grit sandpaper....
After you have cut a decent "square" around the damage, measure the width and the height. Then mark the sheetrock, adding about 3" to that measurement!
For example, my hole was 8"x11". So I marked and cut a piece of sheetrock 11x14"...3" bigger than my hole. This will give me 1 1/2" on each side of my patch to act as my "tape."
Sheetrock has a paper backing on each side so it is very easy to cut...basically all you have to do is "score" the back side (usually the side that is brown) with your utility knife then just "snap" it. Then take your knife and cut through the paper on the other side.
(Did I mention I am NOT left handed...but my camera is "right handed" so in order to take a picture I have to hold the camera in my right hand and pretend with my left!)
After cutting a piece 3" larger than your opening, you will want to mark the actually opening size on the back side of the sheetrock, leaving 1 1/2" on all four sides. This is where a little "square" tool will come in handy! I always make my mark and cut about 1/4" smaller than my actual measurements just to give myself some wiggle room!
(This is where you will notice I am using "green board" sheetrock. It is usually used in wet areas but you can use it on patches...no biggy. Regular sheetrock is white on the front and brown on the back)
After you have made your mark, you will want to score the marks. You will make your "score line" from edge to edge of the board.
After scoring, "snap" one side at a time and carefully peel the "core" (the chalky inside) of the sheetrock and backing off the paper on the front side. You will do this on all four sides. After you are all done, it should look like this.....
I also take my utility knife and make a "miter" cut at each corner...just a little slit from the corner of the board to the corner of the paper.
Basically, what you have done here is create a built in sheetrock tape...so there is no need to tape the gap around the patch and no need to try to put backing behind the board where you are patching...it is "ALL IN ONE!" Nifty, huh?
Before putting joint compound in and around the hole, "dry fit" your cut piece and make sure it will fit in the hole. If it seems to stick, you can shave a little off the edges with a utility knife. If you cut the piece about 1/4" smaller than the hole, it should fit right in.
After you make sure your cut piece will fit properly, mud the edges of the hole and the wall about 2" around the hole. (I didn't realize it, but the joint compound I bought was pink while wet and dries white... it sure makes taking pictures easier!)
Set your cut piece into the hole and use your broad knife to smooth out the paper and push the excess mud out from underneath the paper edging with your broad knife so the paper lies flat. Then put more mud on your broad knife and lightly coat the entire piece. Try to lightly skim it and "feather" the edges where the new mud meets the wall. Coat the new mud a few inches onto the wall. The less mud you leave on the patch and the wall, the less you have to sand! It is okay if you can still see the paper and board through the first coat...no biggy!
HINT: Some mud can be pretty thick. You can mix it with a little water and thin it down a bit...makes it easier to work with...but don't make it too runny!
I usually let this first application dry overnight. That is the beauty of this colored compound...it dries white so you know when it is dry. Remember, there is a bunch of mud along the edges that is basically "glueing" the patch in place. You want to let that dry well before you start sanding.
After this first coat of mud dries, sand it as smooth as possible. Don't panic if you sand into the paper coating the sheetrock...it happens!
I have a special sander specifically for sheetrock. Unfortunately I forgot to get it from my apartment storage. But good ole' sandpaper will work...80-120 grit. I always wrap my paper around a sponge sanding block...it helps you sand flat. Sand it as smooth as possible and make sure you "feather" the edges so that you don't have any heavy mud lines showing. Don't panic if you feel like you have sanded "too much"...you really can't.
FEEL the area with your bare hands...if you can feel the lumps and bumps and lines, you are going to be able to see them...so sand away!! (I can not stress this enough...SAND IT SMOOTH...CLOSE YOUR EYES AND FEEL!!!!)
After sanding it REAL smooth, put another coat of mud over the area. Again, the smoother you coat it, the less sanding you have to do! Be sure to feather the edges by mudding 2-3" around the repair area. This is where the broader broad knife really comes in hand!
After this second coat dries, sand again....sand it as smooth as you can. Again...if you can FEEL lumps, bumps and lines, you are going to be able to see them...so sand it smooth and make sure you feather the edges. This really is the "trick" to getting a good repair!
I can usually get by with two coats of mud...and that should be plenty. If you feel you have had to sand down too much and need to add a light third coat, go for it. Just make sure you let it dry well and sand BEFORE moving on to the next step.
After the patch and the surrounding area is really smooth, it is time to put on the spray texture.
I usually wait to tape off the surrounding area until AFTER I sand the patch. Joint compound will clean off easily with a wet towel but the spray texture is pretty tough stuff. So lay down a drop cloth (or newspaper) under the patch and tape off any trim BEFORE applying the spray texture.
Most wall textures these days are what we call "orange peel." But you might also have "knock down." If the texture on your walls is just kind of bumpy, you probably have "orange peel." If you have heavy blotches, you have knock down.
You can buy cans of texture at Lowe's and they come in both orange peel and knock down. FOLLOW THE DIRECTIONS ON THE CAN CAREFULLY! If you have orange peel you will just spray it on the patch and surrounding area (using a circular motion to eliminate "lines" and spray "outside" the patch area) If you have "knock down" texture, you will have to spray it on the patch and surrounding area, let it sit per the cans instructions and then take your broad knife and "knock down" the new texture after it has dried a bit. Follow the directions on the can for proper application and dry times for both!
Lighter is better....this stuff dries rather quickly, so if you think the texture is too light, go back over it AFTER the first coat has dried. It is always easier to add a little texture than to deal with texture that is too heavy....so go light and reapply if necessary.
If the spray texture appears a little "bumpier" than the wall texture, you can always take a piece of sand paper and LIGHTLY run it over the new texture AFTER IT HAS DRIED and before you paint. ONCE YOU PAINT IT WILL BE REAL TOUGH TO MAKE ANY ADJUSTMENTS TO THE TEXTURE SO DO IT BEFORE YOU PAINT!!!
Now this is where that can of leftover paint you stored away will come in handy! Unfortunately, I didn't have any leftover paint for this wall because I did a little "custom" mix job and I used all of it. So I cut a little piece of the wall color from the wall where the trim was going to cover it and took it to Lowe's to match. Sometimes they can mix a color that will match your wall, but odds are you aren't going to get a perfect match unless you have the spare paint! (Seriously, I can not stress enough how important it is to keep "spare" paint....store it somewhere in the house, clearly marked!) In my case I had to match the paint color the best I could and then paint the entire wall. I only needed a little bit so I bought one of the little sample pots and had them color it!
You will probably need 2-3 coats of paint to cover the patch since you are painting over "raw" sheetrock and texture. I used a little 4" sponge roller and brush.
If you sand well and applied the texture properly, you shouldn't even be able to tell where the patch is!
This does take a little practice. And after owning apartments and raising teens, I've had a LOT of practice. But if you take your time, use the proper tools and really pay attention to details you should be able to do this little DIY project yourself!
I could spend a great deal of time telling you all you need to know about painting furniture. And I will tell you what I do on the pieces I feature.
But before you tackle your first paint job, take time to scroll through this website. Paintedfurnitureideas.com
The information there is wonderful and VERY helpful!
Not sure I agree with ALL the information they provide, but I will always stress the points I think are mega important! Like tack cloth...can't stress it enough!
Another great tip I haven't seen on their site....
If you are trying to clean any hardware (knobs, cabinet pulls, etc) drop them in a crock pot full of water, add a little liquid detergent, turn it on high and let them soak...the longer the better. Most paint and crud will just melt off!
Give it a shot. And make sure you drop by paintedfurnitureideas.com!
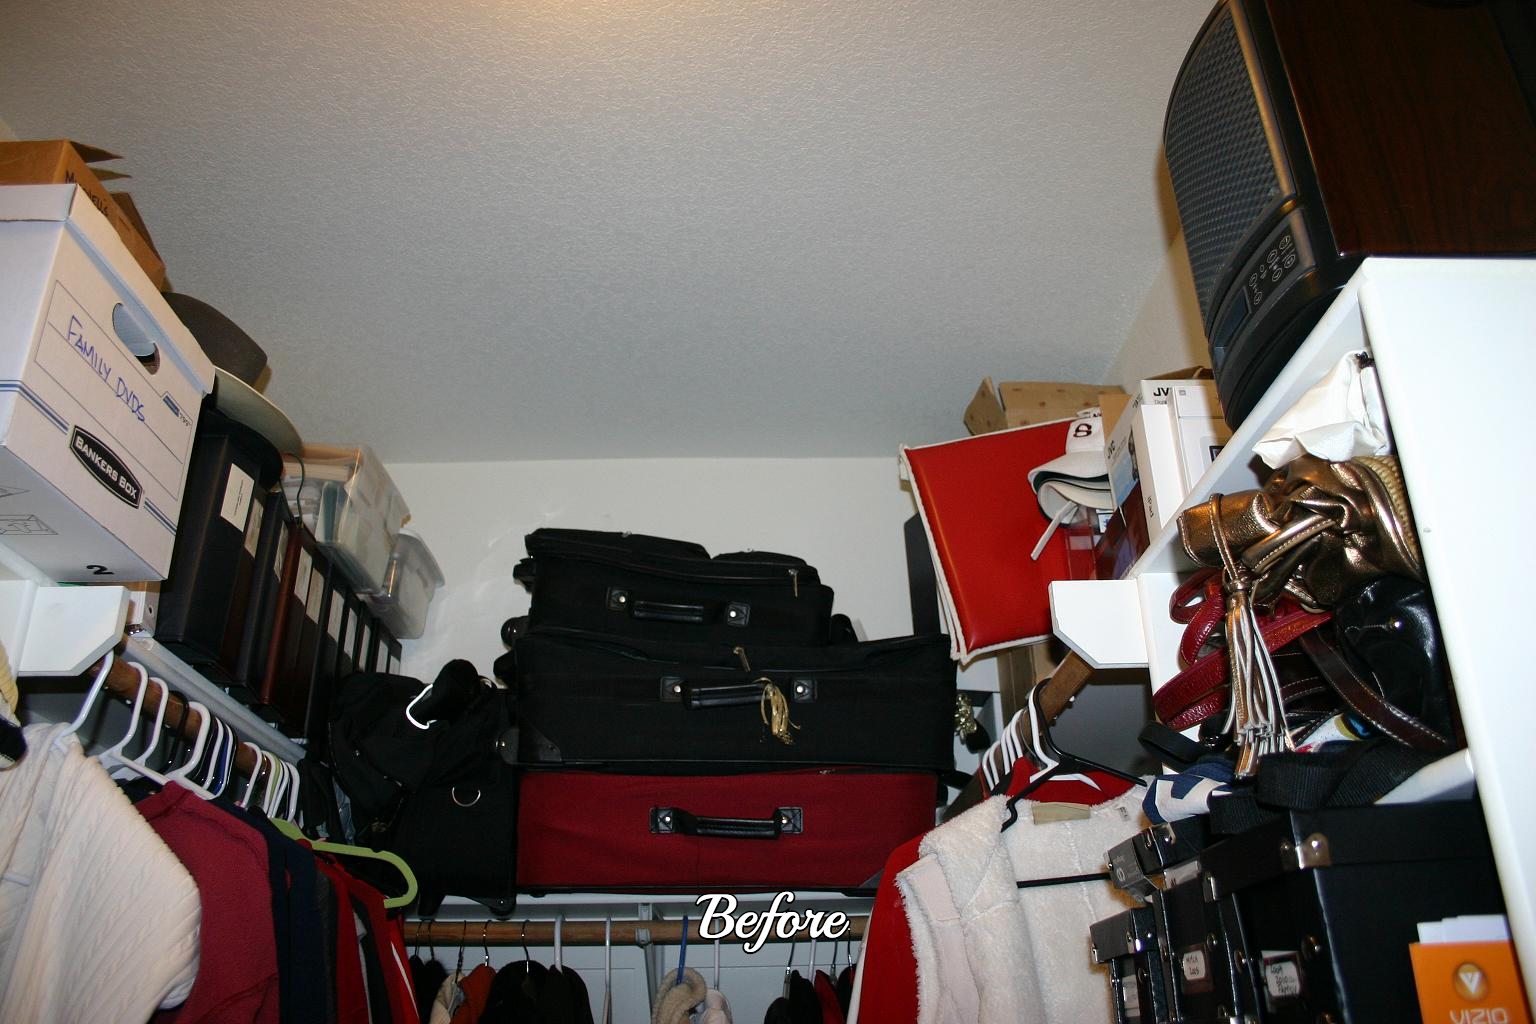
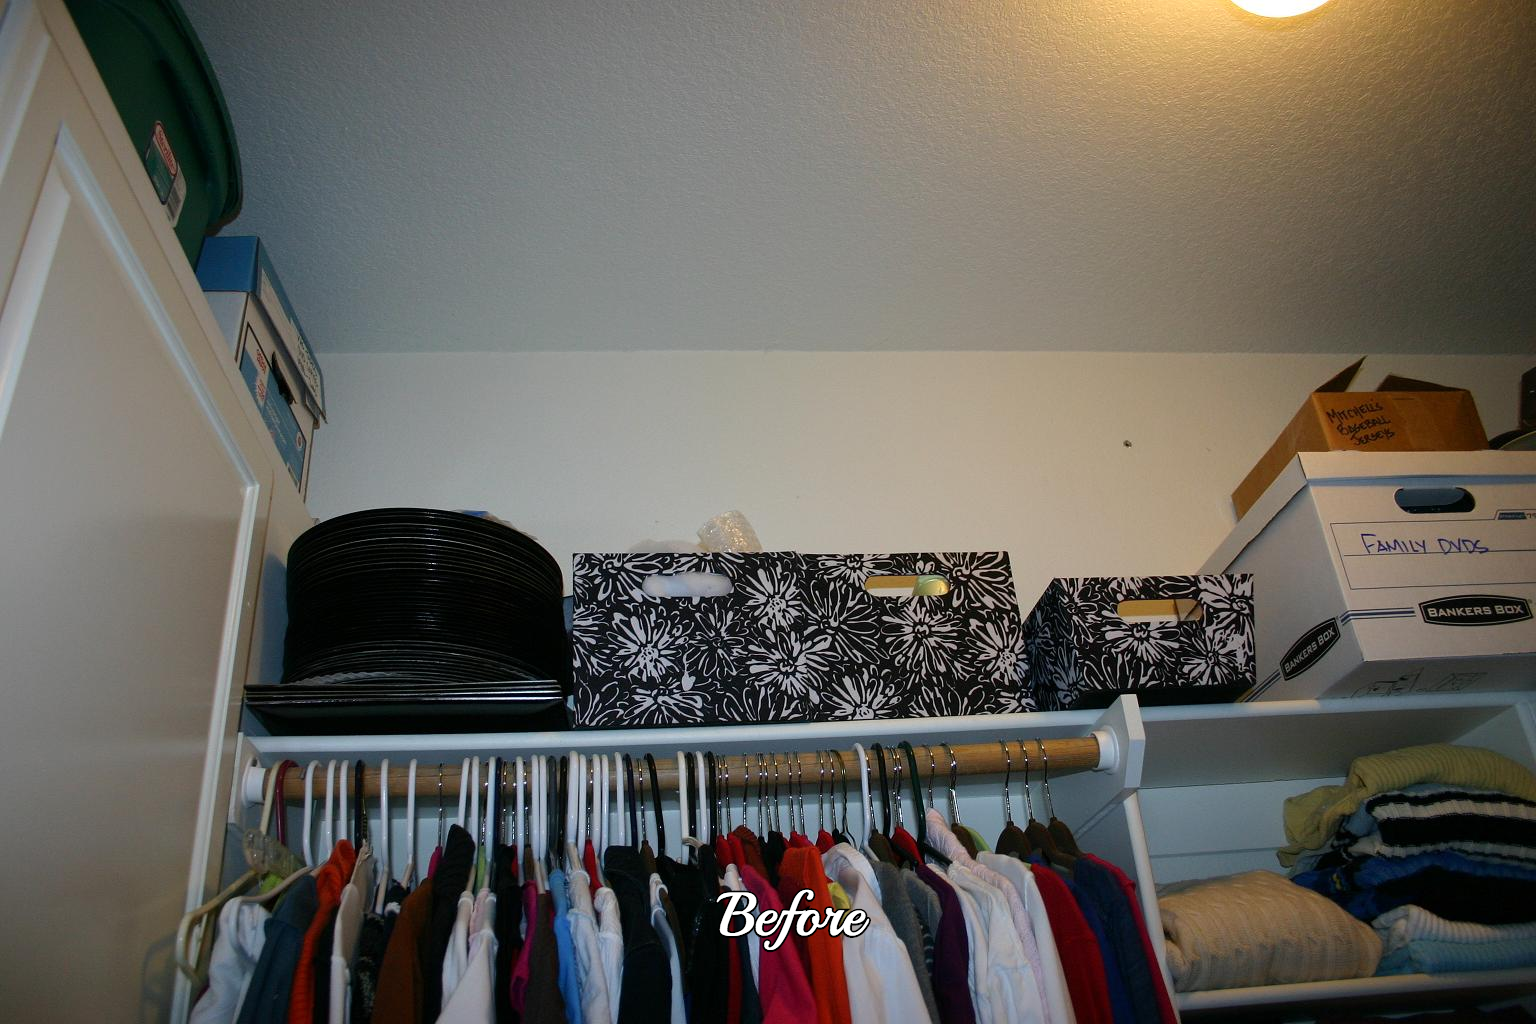
No matter how big or small the closet, you need to completely empty it to organize and/or paint it...EVERYTHING has to come out. And while everything is out, it is a great time to purge the items you don't need. If you want to keep it for keepsakes sake, box it up, label it and move it to the attic. But the best rule of thumb...if you haven't missed it while it was buried in your closet, you probably don't need it!
I have more than just clothes and shoes in my closet...it also doubles as storage for my business and personal financial files, my coupon stash and my family archives. But for now I will just concentrate on showing you what I did to give my closet a functional makeover. Later I will give you some tips on organizing all those pesky things like photos, financial records and tax stuff!
As with all major projects, I first define my "goals"...what exactly do I want to accomplish in this space! I even write it down! (And honestly, this list may stay in my purse or on my refrigerator for months before I actually get to a project)
My goals for my closet....add more shelving, paint, new flooring, new light, and rearrange hanging space.
Then I took measurements and drew it out on a piece of paper.
Even if you are not a good draftsman, it always helps to draw your space and show all the measurements. I just take it for granted that everyone knows how to figure square footage for flooring or linear feet for shelving or how much paint to buy...but that is NOT the case. But your friendly people at your local home improvement store (mine of course is LOWES) will always help you figure out exactly what you need...whether it is flooring, paint or shelving. So draw it up, take measurements, and carry that with you when you go shopping.
Once you have your goals, layout and measurements, the next thing to do is list the supplies you will need. I knew I needed paint, flooring, shelving, hanging rods and hardware, and a new light. I also wanted to add a few hook thingies for purses. You might think this is a good time to buy boxes and storage stuff. IT IS NOT! Just follow me here!
Time to take out the old.... (again, take EVERYTHING out of your closet!)
In my case I knew I was replacing flooring and rearranging the shelving and rods...so I took up the carpet and trim and took out the rods and shelving I did not want.
If you are putting down tile or wood or laminate, you will need to remove the base trim. If you will remove it carefully and pull all the nails, you can easily reuse it. Painted trim will have a bead of caulk along the top, between the trim and the wall. DO NOT try to remove the trim without first scoring that joint with a sharp blade. Trust me! If the house is not that old, the trim carpenter probably used a trim nailer...those little nails are easy to pry loose. If the house is older and they used good ole' trim nails and a hammer...your job just got a tad tougher. I would suggest locating the studs in the wall (this is where your stud finder comes in handy) and ONLY use your pry bar where there is a stud! If you don't, there is a good chance you will bust right through the sheetrock or plaster! Take your time and don't get impatient! Once the trim is removed, use needle nose pliers to remove the trim nails FROM THE BACK OF THE TRIM! If there are nails in the wall, use a hammer to remove them or just hammer them into the wall!
Most carpet has foam padding under it that has a little bit of glue holding it to the floor...just tear it all up and scrape as much of the glue off as you can.
TIP...use your box knife to cut up the carpet into manageable pieces...don't try to carry a big ole' roll of carpet out of the house....just cut it into 3-4' pieces, roll that up and take it out piece by piece...so much easier. Most carpet is put down with tack strips along the base. Just use your pry bar and hammer and "pop" it up. CAREFUL, it will bite you! There is a chance you will pry up chunks of your concrete slab...no biggy! It happens! If you are going to have carpet put back in and the tack strip looks in good shape, just leave it!
I was adding new shelving, so I decided to use what was there...MDF. You may have wire shelving or some type of shelf system. Your best bet is to stick with what you have! Again, just take your measurements and drawing to your home improvement store, show them what you have and show them what you want. They will fix you right up!
Since I was using MDF shelving, I pre-primed everything before I cut it...just easier that way. Then, after it was installed, I caulked it and painted it the color of the existing shelving. Then I painted my walls. If you are installing wire shelving, you may want to paint the walls first, then install your system.
Either way, you want to get the majority of the painting done BEFORE you install the flooring! And don't forget your ceilings!
In my case I had tons of leftover paint from different projects. I thought I would mix a little brown in some biege to get a nice taupe. NOT! I ended up with PURPLE...what the heck!? Mixing paints has to be some kind of learned skill...and I definitely do not have that skill! So I found some leftover white and ended up adding a tad of the mixed purple to it and got a nice soft pink. Pink is not great, but I can live with it! Just remember, closets are small and when everything is back in it, you won't see much of the wall color. It's a good place to use leftover paint! My closet is about 10 x 6 and I used less than a gallon!
TIP: Keep an eye out for "mismixed" paints at the home improvement and paint stores. Lowes will mark their gallons of mismixes for $5 - $10....serious bargain. And again, you aren't really going to see much of the paint color when it is all said and done...so why spend $40 on paint! And most of the stores will even add color to a paint if you want to tweek it a bit.
To install just about any shelving system, whether it is wood or a wire system, your best bet is to locate and mark your wall studs! This is where your "stud finder" will come in handy....
Just run it along the wall...the little light will flash and it will beep when you hit a stud...mark the outside of each stud and then put a little x in the middle.
Once I got my shelving in place and everything painted, it was time to install the laminate. Again, I didn't need a lot so I was able to find some good quality laminate discounted at Lumber Liquidators that was perfect for around $1.60 a square foot. If you know you are going to be doing a small project like this, keep an eye out for discounted or closeout flooring! My closet is only 6 x 10 and if I wanted to go with carpet, I could have probably found a remnant that would have worked as well.
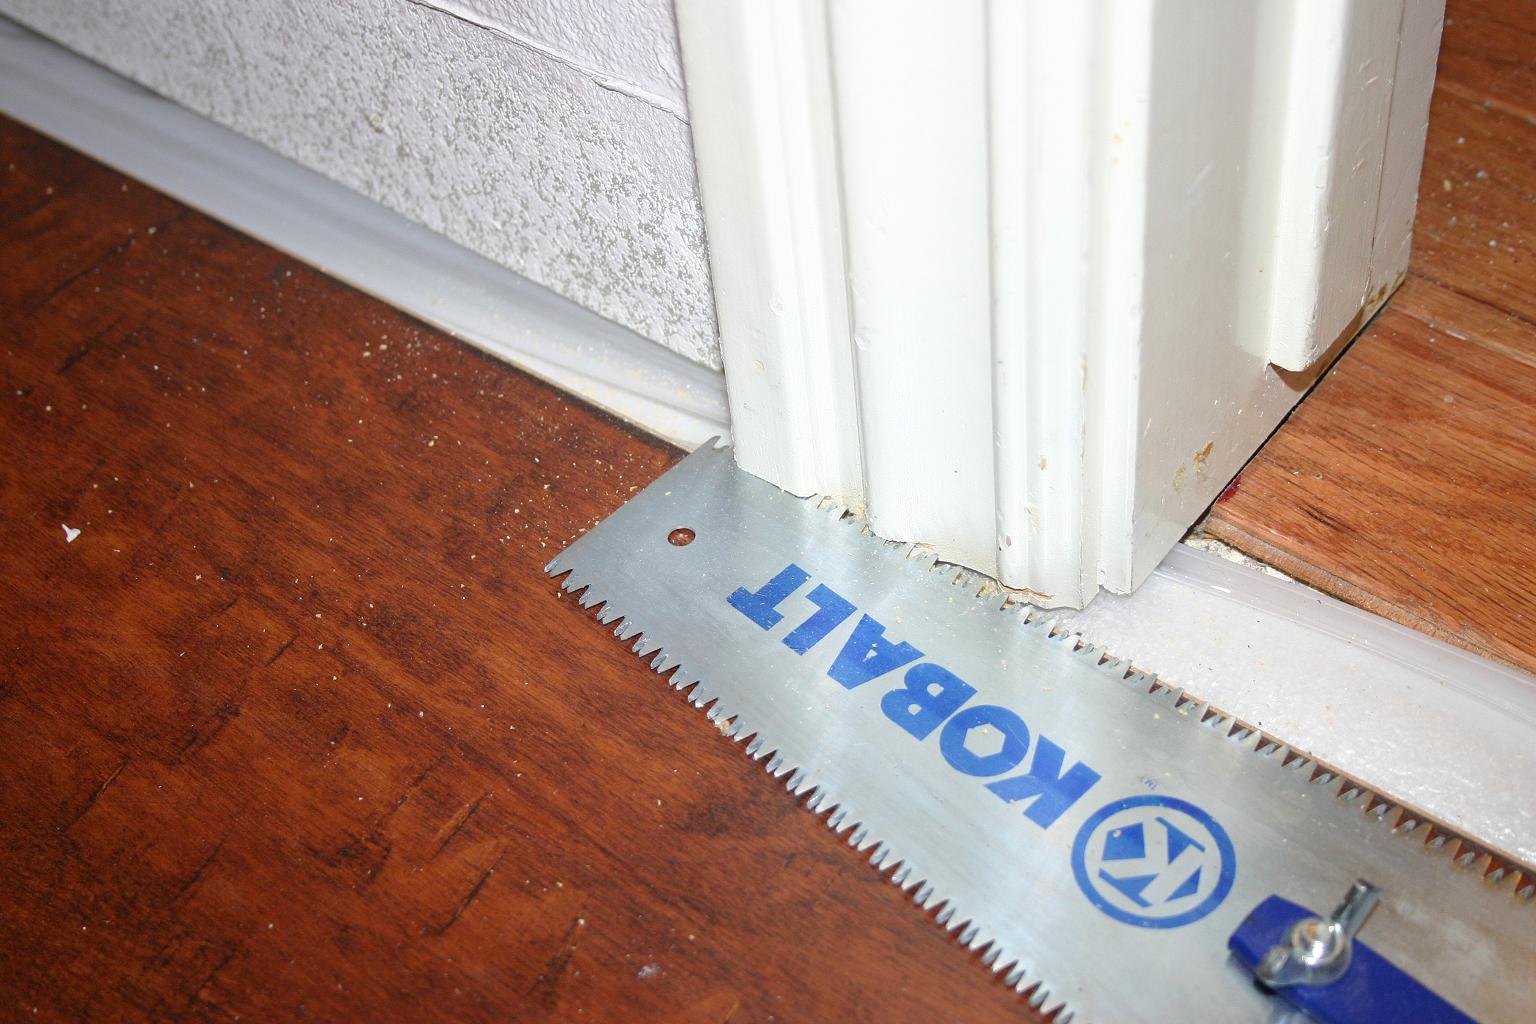
Whether you are installing laminate or tile, there is a good chance you are going to have to cut your door trim. For years I struggled with this and there were times I even removed the trim and cut it down! If ONLY I had known about this little trim saw! Awesome little gadget and worth the few bucks it cost! Just lay your flooring down nest to the door trim (tile or laminate or wood) and then just saw through the door trim. Awesome! Your flooring will slip right under the trim and it will look like it was cut specifically for that flooring.
There are a million tutorials on the world wide web that tell you how to do everything you could possibly want to do. If you are laying laminate or tile for the first time, just google it. Look at several sites...and find one that makes sense to YOU!
If you have installed new tile or laminate, you can reset the baseboards...just put them back where they were, shoot them with a nail gun, recaulk and paint! Simple! By reusing the old trim and setting it on top of your new flooring, you eliminate the need for baseshoe (whole nuther song and dance...just again, trust me!)
After my shelves and rods were installed, paint was done and flooring was down, I replaced the light fixture. I waited until last because I know me...one good swing of a shelf or piece of laminate and bye-bye fixture...so I did it last! Just in case....
I also built a little shoe shelf out of some leftover MDF shelving! Not difficult for me, but if you aren't comfortable with your chop saw or nail gun just yet, just buy some little shoe shelves if you need them!
Now here is the REALLY tricky part....putting it all back. The trick to it, is NOT to put it all back! And again, there are a million sites that tell you how to "organize" your closets. My suggestion...do what works best for YOU! Find a system that works with your mindset and life style. But one hard truth always prevails...don't keep what you don't REALLY need! Most people don't know this but you can get a really great donation deduction every time you donate to a non-profit. So all those clothes and shoes you really don't NEED can score a really significant tax deduction!
After you hang up your clothes and organized your shoes, THIS is when you want to look at what is left and figure out what boxes you will need. If you try to buy BEFORE, you will end up with boxes that don't work for what you have. So take inventory and take measurements. Make sure you have the measurements for the self space you have so you don't end up buying boxes that are too big or even boxes that are too small. Boxes that are too small can waste precious space!!! And as I have mentioned before, while I think all those decorative boxes are pretty, plastic storage bins are always better in my opinion. But again, do what works for YOU!
Over a year ago my mom was out of town for a few weeks. I took the opportunity to sneak in her house and completely gut her bedroom and bathroom...and when I say gut, I mean I took it down to bare bones. I spent three days just stripping wallpaper and then I had to retexture the walls!
She lives in a tiny little house and her bedroom has two tiny little closets. Why my dad never remodeled their closets is beyond me...for over 40 years she lived with just a single rod with a shelf in both...and while they were tiny little closets, there was soooo much that could be done to maximize the space she had...so I did it!
Just a few little changes basically doubled her usable space and gave her some much needed shelving!
Even if you don't have huge walkin closets, you can still maximize the space by adding well designed shelving. And if you just don't know WHAT you need to maximize the space, ask the experts...most home improvement stores will be happy to help you design a space! (Heck, email me...I love telling people what to do...lol!)
But remember, you can't do this if you aren't willing to dig in there and drag it ALL out...and then get rid of the things you DON'T NEED!!!
YOU CAN DO IT!!!
I have built 5 of these swing pergolas...two at my house, one at my daughter's first home, one at her current home and one for a neighbor. It is not a difficult project to built but one that requires two sets of hands and a little muscle! And with everything, patience!!!
This is the swing today...I had to take pictures now before the wisteria bloomed...once that stuff takes off in the summer it covers the entire top and it would be difficult for you to see how the pergola is constructed! Wisteria makes a great canopy on pergolas but it is definitely high maintenance. You have to trim it a few times a year or it just goes crazy!
Okay, so let me see if I can explain how to make one of these puppies. The wood and fasteners should cost you less than $200...plus the cost of the swing. It is a two day project and you should have all the tools you need in your toolbox.
Lesson in lumber: First, lumber is notoriously crooked, warped and dinged...always try to find the straightest, best boards you can! Second, a 2 x 4 or 2 x 6 or 2 x 8 is referencing the thickness and width of the board...but it is ALWAYS 1/2" less than what is advertised...in other words, a 2 x 4 will actually be 1 1/2" x 3 1/2". Keep that in mind when measuring. The 3rd number (say 2 x 8 x 10') is the length of the board...it is accurate.
Materials:
8 rebar or wood stakes
A roll of twine or yarn
4- 4 x 4 x 10 treated posts
9 bags of concrete
3- 2 x 8 x 12 treated lumber
8- 2 x 6 x 8 treated lumber (7 for the top boards, one for the center cross board the swing will attach to)
16 1/2" x 6" carriage bolts with washers and nuts
2 1/2" x 6-8" "I" bolts with washers and nuts
2 joist hangers for 2 x 6 joists
A box each of 1 1/2" and 3" deck screws
Day One: This has to be right. Screw up here and you will have a mess on your hands that is NOT easy to fix. The 4 x 4 posts need to be set in concrete and they need at least a day to set and dry before you begin actual construction.
The posts are going to be set 8' apart in the front and back and 6' apart on the sides, measuring from the OUTSIDE corners of the posts. So, you are going to create a 8' x 6' rectangle using your string and stakes. This rectangle needs to be square...measure carefully and make sure you have 8' across in the front and back and 6' from front to back on both sides. A trick to see if you're rectangle is "square" is measure diagonally across...if that measurement is the same from corner to corner, you are square. Using the stakes and string make it easy to make adjustments...just pull them up and reposition.
The INSIDE corners where the string intersects are where your posts are going to set. At this point, I found it easier to mark the corners with spray paint, pull the stakes and string and dig my holes. You want your holes to be at least 18" to 2' deep (depending on your soil) and about 1'-2' in diameter...minimum! Save the dirt!!! Once the holes are dug, restring the stakes and string, again making sure they are completely square...this is CRITICAL!!! Now, set the first 4x4 post in the ground in the front corner of the string and mix and pour your concrete into the hole...it will probably take at least 2 bags per hole...you will want to fill the hole with concrete about 2" below the ground level! NOW, MAKE SURE YOUR POST IS PERFECTLY LEVEL ON ALL FOUR SIDES (I used a 3' level for this project) Again, if you mess up here, it throws the entire project off. Use a hammer and muscle to adjust the post and make sure it is perfectly level on all 4 sides!! Now, keep in mind that lumber is not perfectly straight. But you should be pretty darn close!
The height of the pole is not important at this point...as long as you have at least 7' from ground level to the top, which you should have if you set a 10' pole 1 1/2' to 2' into the ground. The post tops will NOT all be at the same height when you set them...you will cut them later!
My daddy always taught me "measure twice, cut once." This is true of any project requiring precise measurements. So measure from the outside edge of the 4x4 post, which should be resting just inside the string corner, to the next corner in the front...it should be 8'. This is where you will set your second pole...then set the 3rd and 4th...each time, making sure that your pole is 8' across the front and back and 6' on the sides and are level. You may want to check that occasionally and make adjustments...at least until the concrete hardens up enough to keep them pretty set.
Now...leave it alone until tomorrow!!!! Let the concrete set. Until it really starts to set hard, you might want to occasionally check and make sure your posts are level.
Wood is somewhat flexible...so even after the concrete has set, you can "pull" the posts to bring them in or out a hair...but it is best if they are level and square to start out!
NOW IT IS TOMORROW! Time to start constructing the actual pergola.
I designed this so you would have to do minimal cutting.

Step ONE: Now, as you can see, I put fancy little "scroll" designs on the ends of each of the boards. THIS IS NOT HARD! Remember the little jig saw I told you you MIGHT want...this is where those nifty little tools come in handy. I use my small square to measure 1" across, 1" up, and then I used a paint can to draw a radius. Then I cut it out with a jig saw.
I used the same measurements for the ends of TWO of the 2x8x12 header board . The easiest way is to make a cardboard template, draw it on the end of the board and then cut it out with a jig saw. You will want to make a similar but smaller template for the 7 boards you will use on top (2" x 6" x 8')
Do this BEFORE you install the headers and top
boards! You might also notice that I have used a router on the edges
of all my boards to give them even more dimension...I'm trying to make
this easy on you and not blow your mind. If you have a router and know
how to use it, it looks good. If you don't, trust me, no one will
notice either way!
Step TWO: Set the front header. Put a pencil mark on the left front 4x4 post at 7'. If you have a VERY tall person in your home, you might want to set it a smidge higher but I set the top of my header at 7'. The header is 2 x 8 so that means the bottom of the header is at 6'4 1/2" (remember a 2 x 8 is actually 1 1/2" x 7 1/2")
(This is where two
hands comes in REAL handy!) Each end of the 2x8x12 header is going to
hang over the outside of the 4x4 post by about 2' on each side! While
holding the board up with the top even with the mark on the post, put a
3" screw through the header and left post. Then, use your level to make
sure the board is level, before putting a screw into the right side,
through the header and into the right post. IT IS IMPORTANT THAT YOUR
FIRST BOARD IS LEVEL!! It may not seem level if your ground has any
slope to it and if the posts are set at different heights, but you have
to use your level...not your eye! This is the board height you are
going to use as you "wrap around" the entire structure with each
board...so it needs to be completely level! Once it is level and the
two screws are anchoring it in place, put another screw in each
post...this is just to hold it up while you are putting it all
together...we will come back and put bolts in the entire thing at the
end!
Step THREE: Take the 2 x 8 x 12' board
you did not "scroll" and cut it in half...you want 2-6' boards. Those
are your side headers. Install the left side at the same height as the
front, making sure it is perfectly level and at the same height as the
front header. Then install the back header, and the last side header.
Stay level!!!! Once the last side (the right) is installed adjacent to
the front header, it should be level and at the same height as the
front header...if it is not, the screws make it easy to make small
adjustments!!! Just unscrew them and adjust your headers so they match
up! If you have to adjust more than 1/2", you have NOT kept the boards
level!!!
Once this is all done and secured with screws, you can cut the 4x4 posts flush with the top of the headers. You can a chainsaw or a reciprocating saw or a hand saw. Whatever works...honestly, you will never really notice it! Just make sure you don't hack into your headers!
Step FOUR: Install the "cross board." This is the board that your swing will attach to. Your measurement between the two side headers SHOULD be 8'. Measure the sides from the INSIDE of the 4x4 posts and mark the center of each side...inside. This is where you will install joist hangers. Secure the joist hangers to the side header with 1 1/2" screws and then set your 2 x 6 x 8' board into the hangers and then secure that with screws! I also ran 2-3 3" screws from the outside of the side header into the end of the board...just for the sake of overkill!
Step FIVE: Now it is time to set the TOP BOARDS! Again, use a template to make little "scrollies" on the ends...whatever trips your trigger. I made mine pretty identical to the header boards, but keep in mind these are 2x6 boards, so they will be a tad different. Cut each end of every board BEFORE installing!
I actually cut little "notches" in top boards where they intersect with the front and back header so they sit down onto the headers...you don't HAVE to do this...you can set them on top of the headers and then just "toe nail" screws into them. (That means putting the screws threw the top board, into the header, at an angle) I prefer cutting the notches. IMO, it just makes the structure more "sturdy." I've done it both ways so I'm not sure it makes that big of a difference! Even when I use the "notch" method, I still secure each board by "toe nailing" screws into the board and headers!
The easiest way to install the top boards is to first set the center board. Find the center of both the front header and the back header...then set the board on that mark. Make sure you are "hanging over" the same on the back and front. Basically, the center of your top boards should be right over your middle board that is set in the joists hangers.
Then I set one about 1" on the outside of each side header...then the other two are spaced at equal distances between the center and the outside boards.
Once all your boards are in place and all are secured with wood screws, it is time to put in the long bolts. Drill 1/2" holes through the headers and posts, insert the bolts and then place the washers and bolts...tighten down with a wrench or driver! Your bolts are going through a 1 1/2" thick board and a 3 1/2" thick post....5" total...so a 6" carriage bolt should work great!
If
you already have a swing, you can now install your "I bolts." Just
measure the distance between the arms of your swing where the
chains/hardware attaches. Find the center of the center cross board
(the board attached to the joists) and then measure from the center 1/2
that distance. Use a 1/2" drill bit to drill a hole up through the
board...this can be tricky so drill carefully and keep your bit
straight! Once you have drilled through, insert the I bolt and secure
it on the top with a washer and nut!
Fill the holes around the 4x4 posts with the leftover dirt...this is also a great place to hide rocks ;)
NOW YOUR SWING IS READY TO INSTALL!!!!
For some women it is the mall...others it's the outlets...me? Lowes! Hands down my favorite place to shop. So when I decided I needed to post a "picture tutorial" on the supplies you will need to paint or refinish a piece of furniture, it was a good excuse to run in and buy all new stuff...after all, who wants to take a picture of all their old nasty stuff!!!
Not that I need an excuse...because of the apartments, I am pretty much in Lowes every day...which is why I like it...I know where EVERYTHING is. And if I don't know, they always have nice people to help me.
So here is a picture "shopping list." These are the supplies you MUST have on hand if you intend to paint or refinish a piece of furniture. I'm sure I am forgetting SOMETHING! But I'll figure it out eventually and let you know.
One thing I want to tell you...DIYers NEVER throw away coffee cans/tubs or old towels or tshirts. You will go through many, so just keep a plastic tub in your garage for these items....rip or cut them up into "hand towel" size pieces!
WORD OF WARNING!!! IMPORTANT!! Towels or rags with any kind of chemical on them should be laid out in the drive or lawn FIRST and allowed to dry. Then place them in an open container outside until trash day! DO NOT put chemical soaked rags in a garbage can or leave them in your garage....they can catch fire. Trust me...
These are the materials you will need for both painting AND refinishing. I usually store all of mine in those nifty little plastic containers so I can see everything. I have one for rags, stain, tape/paper, paint supplies, etc. Make a system that works for you but if you store them in the plastic containers they will stack nicely on garage shelves and you will still be able to see everything!
Remove all hardware and hinges: That is what the ziploc bags are for. Put each type item in a bag and then label. You think you will remember where everything goes...you will not. The fumes do that to you!
Also, if you are going to be using new hardware, MEASURE!!! If it is a "one holer" it is not a problem...but if it has two holes, it could be and might limit the hardware you can get. I buy my hardware at myknobs.com. Best selection and prices anywhere! Check them out!
Lysol spray/wipes (not pictured): I wipe everything down with sanitary wipes and spray all drawers/inside cabinets with a disinfectant spray. If you still have an odor problem, you might try a vinegar spray (50/50 vinegar and water in a spray bottle). If all else fails, plan on kilzing and painting the inside of the drawers/cabinets/etc.
Appropriate stripper/glove/plastic putty knife: If you are painting a piece that has chipped or peeling paint, and it can't be sanded smooth, I am going to suggest stripping the old paint/finish off. For that, buy a paint stripper appropriate to the finish that is on the piece and FOLLOW THE INSTRUCTIONS VERY CAREFULLY! Seriously, break out the readers and follow them to a T! Once you have done that, "wash" the entire piece with steel wool and mineral spirits, changing out your rag often to make sure you get all the gunk off! Remember, you are going to sand the piece, so a "little" gunk is okay....but try to get the bulk off of it with a stripper!
Glue/clamps (not pictured) If you don't have clamps, invest in some....they aren't cheap but honestly, they are VERY necessary!
I use good ole' wood glue. Some brands of glue I will not use because it expands and "bubbles" and then dries like concrete...and will NOT come off, which makes it impossible to stain or even sand. But MOST DIY project pieces need some repairs and you must glue and clamp everything before you proceed. If necessary, carefully "pry" apart the loose joints and take a razor blade to them to clean off the old adhesives. Then reglue and clamp.
Your piece should be repaired and feel "solid" and should be allowed to dry overnight.
Wood filler/putty knife. Chipped veneers and laminate should be filled with wood filler prior to priming. Just use the putty knife to fill in the chips, hardware holes (if you are using different sized hardware) and any cracks! It doesn't have to be perfect because you are going to sand it. But try to make it easy on yourself...put the putty into the crack/chip/hole with a putty knife and then hold the knife at a 45 degree angle and run over it. Sometimes you might have to do two coats of this process...but you will know after it dries and you sand. If it looks or feels rough after drying and sanding, repeat this process!
Painter's Caulk/caulk gun (not pictured): (Do NOT use silicone caulk) If the piece is stained and you are going to be painting it, YOU MUST CAULK EVERY JOINT AND SEAM!!! Sorry...if you don't it will show BIG TIME after you paint! When you Kilz, you will see what I mean. But try to get as much of it done now, before you put the first coat of primer on! The trick to caulking....cut the caulk tube tip at a 45 degree angle and don't cut the hole too big! The little caulk gun poker thingy (technical term) should barely fit in the hole. Use a sharp razor blade, not scissors. (BTW, I keep a utility knife and replacement blades handy at all times...HOWEVER get the kind that has an easy blade change...don't get the kind with the little screw and if you do, don't use an electric drill to tighten the screw....it turns into a propeller and will result in a trip to the ER....trust me, some things are learned the hard way) The less that comes out, the less mess you make to clean up. And it always helps to have one broken nail so you can run your finger along the caulk line to smooth it out....if you don't have one bad finger (hehe) use a smooth, very slightly damp sponge...just keep it clean. Damp paper towels will come in handy during this process...caulking is an art form and takes many years of practice and patience...but it is a necessary evil!
(Oh, BTW, ALWAYS wear nasty clothes and shoes when projecting....you WILL get caulk, paint, finish on you intentionally or unintentionally!!!!! I buy old jeans and shirts at the thrift store just for this purpose!)
Sand block/sand paper: After a day of all repairs and wood filler drying, sand the spots you repaired WELL! If you have a lot of "stuff" to sand off, use a lower grit paper, but work your way to a 220 grit. Sand paper goes from low (40/really rough) and up....220 is a fine grit. I usually keep a variety of grits on hand....
I have learned that prepping/painting/refinishing has a lot to do with "feel.". Close your eyes and "feel"...if it feels rough, it will look rough after you paint it. Sand it til it is smooth!!! Use this time to meditate and reflect...close your eyes, feel the wood, sway with the paper.
Most wood glue can be cleaned up with a damp warm cloth. Best to try to get as much off as you can AFTER you clap it...but that's not always possible. Sand those areas and you may even have to use some wood filler to fill cracks where you had to repair. Sometimes repairing can take a day or two....PATIENCE!!!!! The more time you spend prepping, the better your project will turn out!
Now sand the entire project with 220. Again....feeeeeel the piece. This is NOT the time to have on gloves. The hardest place are the corners and where pieces of wood join...always crumbs and gunk lurking there. You can use a fine grit on an electric palm sander IF you are very careful and IF you really need to. But I am going to caution against this because many veneers are very thin and can easily be sanded through. You aren't trying to sand it down to the natural finish...just get it smooooooth!.
NOW, HERE IS A STEP THAT MANY DO NOT DO AND IT IS NECESSARY!!! Seriously, I see lots of tutorials that don't mention this step or gloss over it. Invest is TACK CLOTH!!! Lots of it! Doesn't matter what brand, just buy it and use it religiously. Every time you sand and before EVERY coat of paint, run a tack cloth over the entire piece.
I will usually take my compressor and blow all the dust and debris off first...especially out of the drawers and cracks, even where you don't think you will be painting. The air flow from an aerosol spray can cause "debris" to fly up and coat your piece....NASTY! You can use a blow dryer or whatever you have handy...but regardless, USE A TACK CLOTH ON THE ENTIRE PIECE BEFORE AND BETWEEN EVERY COAT OF PAINT!!!
Here is a challenge....blow off the piece, wash it with mineral spirits, clean it with a clean cloth...then "tack" it. I PROMISE you will get dirt and gunk...and that is the stuff that will be under your paint and ruin your finish if you don't get it off!!!!
Okay, have your eyes glazed over yet? And we haven't even started painting yet...told you....the key to a great DIY is in the preparation!!!!
Now you can PRIME!!!! Doesn't matter if you are painting over good old paint or finish...you still need to prime...period.
Okay...there is a debate raging in today's world of DIY....what is the BEST primer/undercoat. For my money, time and effort, it is Kilz...hands down. Yes, it stinks...yes, it usually leaves a "gritty" feeling....but it is good and it does the job a good primer should do! Period. End of discussion in my book! Only thing better is a lacquer undercoat and that needs to be put on with a professional spray rig. I have one...most people don't...and a can of Kilz is a lot easier to toss in the recycle than a spray rig is to clean up!
Now, you can either spray it on with the cans of Kilz...or you can roll it on with a little 4" sponge roller...the latter is cheaper honestly...but a pain to clean up and not good on anything but flat surfaces unless you are really good like me. Again...go easy and you will enjoy it more!
Light coat of Kilz, dry, sand, tack. Do this twice and your piece should be good to go!
After the first coat of Kilz is the time to look for cracks and holes that you may have missed...caulk and putty NOW, and let it dry before you sand and tack and reprime.
Now, tack, tack, tack. Before you spray or brush your first coat of your final paint color make sure everything is filled and sanded and tack it like an OCD crazy woman!
Another debate....roll/brush on or spray on. If you are a novice, I say go to Lowes and buy a can of spray paint....the color selections are AWESOME!!! I have my favorites...but honestly, other than dry time and color selection, I don't see much of a difference. If you are going to roll/brush on, use a latex additive like Floetrol (per directions) Always use it if you are rolling/brushing your project!!!
Now, there was a time when no piece of wood would have been coated with a latex paint in my house. I use oil based (alkaline) paint on all trim and doors...and I use to use it religiously on all furniture...if I even dared to paint a piece. I know this is old school...my father's influence....but latex paints are more durable these days and you should, if you prepped and primed properly, get excellent results with a latex paint.
Pay attention to the temperature...light coats...most paints can be recoated in a short amount of time....basically, follow the directions on whatever paint you use as far as coating.
Clear coats for furniture getting a lot of use is necessary in my book. Most brands of spray paint have a clear coat available...doesn't really matter IMO which one you use...just put on a few coats of clear to protect the finish!
And you are done....and I don't care WHAT the can says....let it sit for at least a day or two before you drag it in the house and load it with your goodies...give it time to "cure." (I watch these DIY shows on HGTV and cringe every time I see a freshly painted book case or desk with crap all over it....two hours after it was painted...REALLY!?)
I know there are things I have neglected to share....again, when I start the dresser project, I will remember and share more.
And in our next post, I will share with you the steps to refinishing, rather than painting...different process, different rules....but always beautiful results!!!
Today was one of those days....an apartment full of nasty furniture. But in the mess of trash, I found a few items with the potential to be treasure. A fairly solid oak dresser and a three legged table. I know...WHAT WAS I THINKING!!!??? That's what most of my family use to think when I would hall this garbage home rather than taking it straight to the dump. But the dresser can be "something" wonderful with a LOT of TLC and the 3-legged table...well, lets just say it has potential...somewhere...for some purpose.
I plan on painting the dresser, and refinishing the little table. Both are in need of some serious repair...as you can see, the little table has issues with his legs and the dresser needs all her drawers rebuilt! But it is all doable!
What a PERFECT opportunity to share with YOU how to turn ANY piece of trash into a treasure! So when it warms a bit and I can get started (hopefully this weekend), I will post step by step pictures of these two projects, along with instruction, on how to paint and refinish and restore old pieces you might find along your path!
For now, suffice it to say that the outcome of ANY project all depends on the PREPARATION!!! How well you fix, fill, mend, putty, prime,and sand a piece before you ever go near it with paint or finish!
There are a lot of people out there who will tell you all the "tricks and shortcuts" to refurbishing a piece of furniture....honestly, there are none. You do it, and do it right from the beginning, or you will have wasted a lot of time, money and materials on something that is nothing more than a piece of trash, just a different color.
So gather up your "trash!" I look for solid pieces, with solid woods. Particle board goes in the dumpster....but even pieces that have laminate or veneers are salvageable. Busted drawers or drawer tracks can be fixed, flaking veneer can be puttied, missing knobs can be replaced. Its hard to visualize something so old and beat up becoming something beautiful and treasured....but you CAN do it!
If you have any questions before we get started, feel free to post them in the comment section...or email be at beckcampbell@att.net!
.