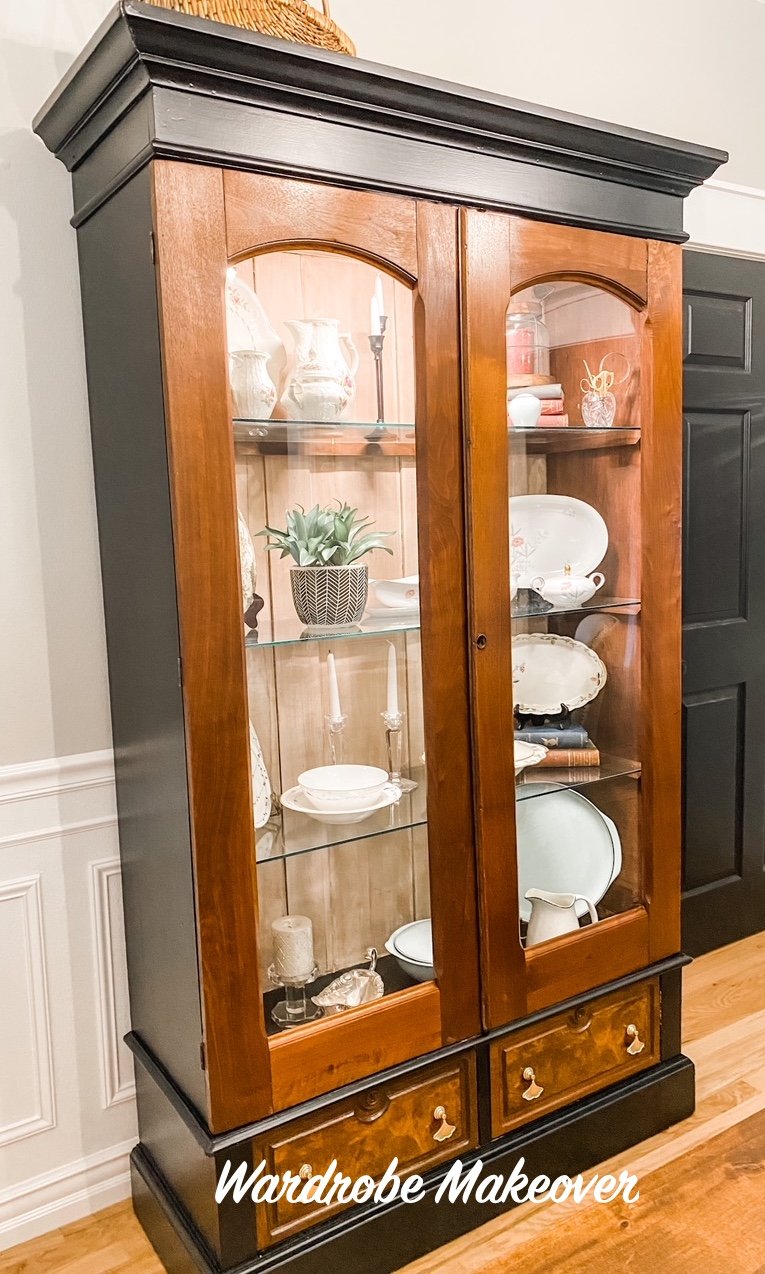
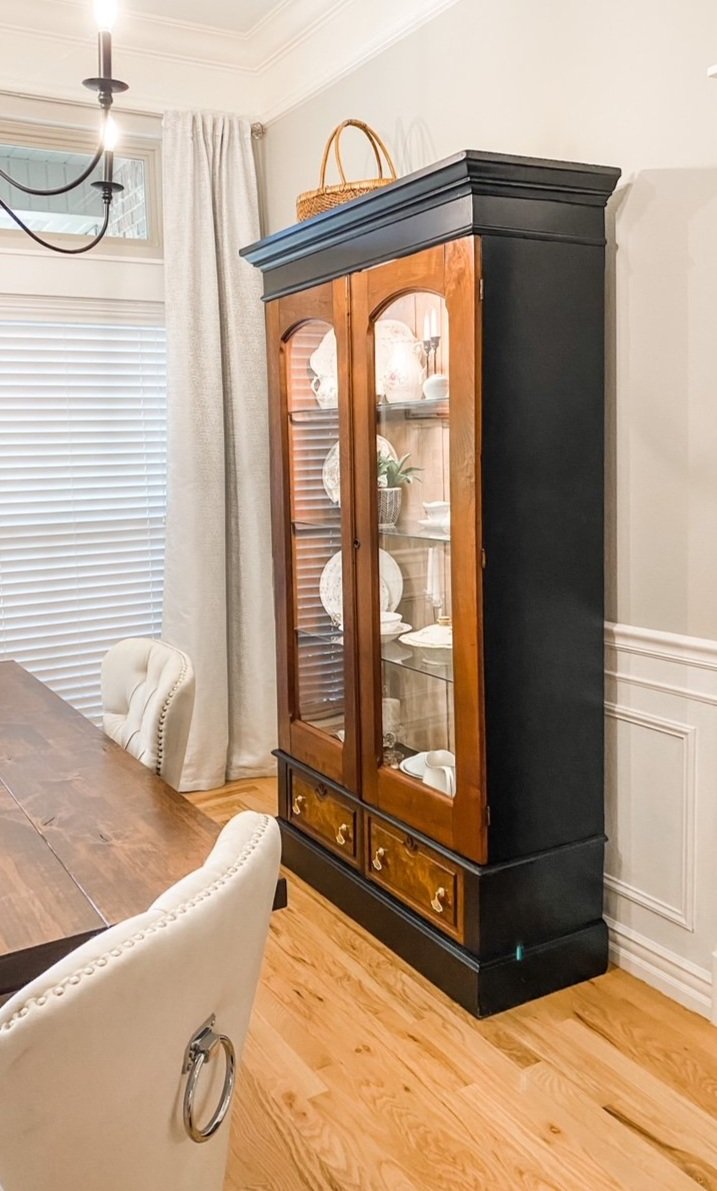
The wardrobe reveal....

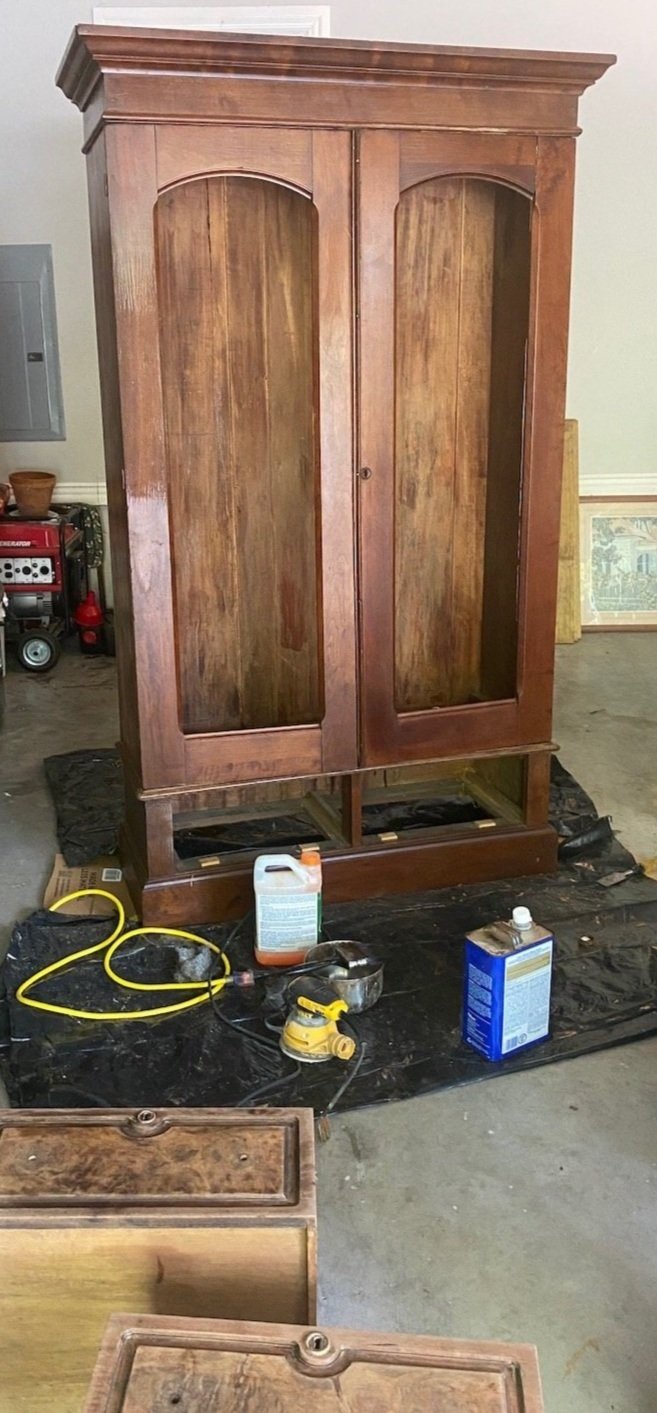
Last week I shared the wardrobe cabinet I planned to refinish and convert to a display cabinet….HERE.

Definitely lacking in soooo may respects. But I had a pretty good idea of what I wanted to do with it.

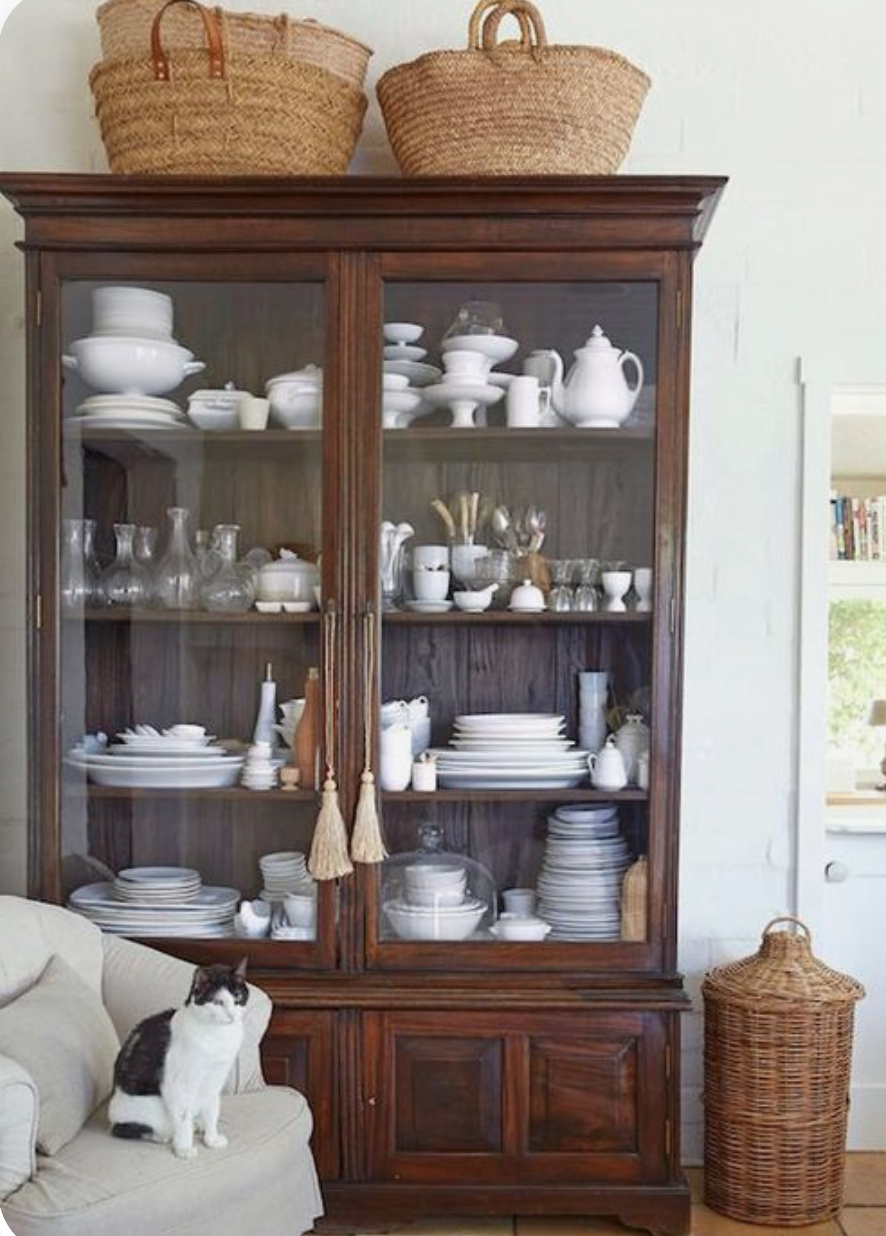
These “inspiration” pictures have been on my computer for over a year, just waiting on the perfect piece to transform!

The last one is probably my favorite…a Pinterest find. It was the one that influenced me the most, as you will see.

So the plan…remove the panels in the door and add glass. Remove all the shelves and add glass shelving. Lighten the back of the inside. Strip the doors and drawers and apply tung oil. Paint the rest of the outside of the cabinet black. Replace the hardware. Add a light.

So of course the first step is to deconstruct and then begin the stripping process on the doors, drawers and inside back panel.

What a chore!!!! I think someone, at some point, had applied at least 20 coats of poly. The 1/2 acetone, 1/2 lacquer thinner process I shared HERE, wasn’t cutting it. I applied Citristrip and wrapped everything in plastic wrap…that seemed to do the trick for 80% of the finish…then I was able to sand off the rest since this was mostly solid, then clean it up with the 1/2 and 1/2 mixture. Remember, you don’t want to vigorously sand veneer because it can be super thin and you can end up sanding right through it. I started with an 80 grit then finished with a 220 grit. Then I hand sanded it with 220 to get it butter smooth.

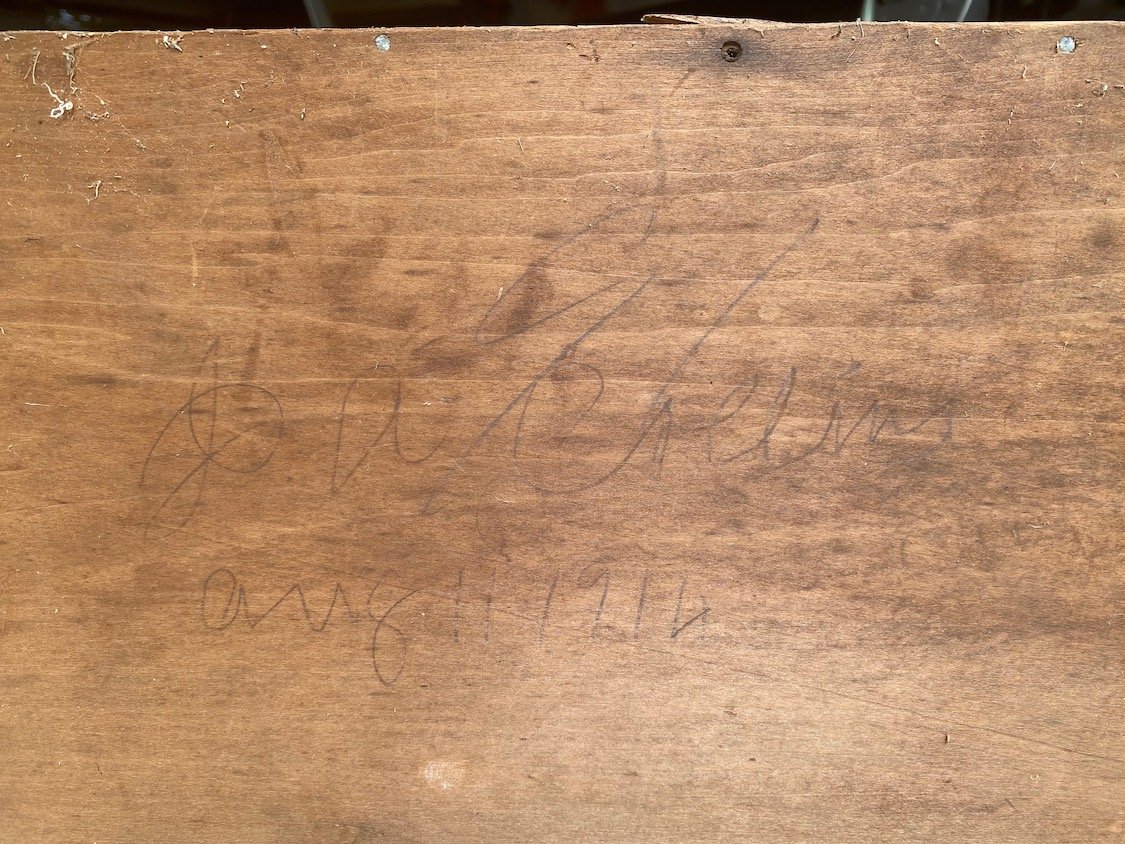
I knew this piece was old (which is why I know the poly was NOT the original finish) and that was confirmed when I checked out the underside of one of the drawers.

It was signed and dated…most likely by the person who constructed it…August 11, 1914…wow!

The other thing I discovered was the mortise and tenon peg joint. So super cool. Normally drawers are constructed using dovetail joints. This was unusual to find, but probably not unusual for the times.

I removed the doors to make it easier to work on the inside as well as make it easier to strip them. Remember to ALWAYS reenforce screw holes when you remove the screws. Not hard at all. Just take a match stick, dip it in wood glue, then insert the stick in the hole and break it off.

This will ensure that when you go to reinsert the screw, it won’t be loose or “wonky.”

I stripped the inside back panel then sanded it down. I tried lightening it with oxalic acid but it still seemed a tad to dark and a bit yellow. So I ended up applying a whitewash. Just a little white paint mixed with water, brush it on, wipe it off…like a stain. I can still see the character and grain of the wood but it lightens the interior considerably.

There was a tiny bit of veneer on the base of the cabinet and one side was in pretty rough shape. My original plan was to remove all the old veneer and apply a new piece. I planned to paint the outside of the cabinet so it didn’t matter that it would be different than the other side.

Problem was, when I went to remove the loose veneer, some of it was SUPER stuck…as in it was NOT coming off.

Soooo, punt.

I scraped off all that I could then I used wood filler to get a smooth surface.

This picture is after the 1st coat.

The whole process took a lot of time and patience. Fill, let it dry, sand…apply some more, let it dry, sand. It probably took 3-4 applications to get the side perfectly smooth and ready for paint.

REMEMBER, paint will NOT cover poorly patched or repaired areas…if anything it will highlight it. So take your time and do it right!

After patching, puttying and caulking, I primed the entire outside of the cabinet with primer, sanded it smooth with 220 grit paper and then wiped it down with a tack cloth.

I then spay painted it with a flat black paint. Remember, light coats…2-3.

The paint I used SAID it was primer and paint in one. As you may know, I do not trust that and will ALWAYS apply a good primer before paint…always.

I stripped the drawers and doors (using this process) and I used my new favorite tung oil finish to seal them.

I added new shelving support using some leftover walnut I had from my office feature wall project. I wanted good solid support since it would be holding glass shelves and china…glue and nails!

(This is solid natural walnut…no stain…just an oil finish!)

I moved it in the house before I added the glass or hung the doors…just made it lighter and easier to move…okay, RELATIVELY easy…this sucker is big!

So, my original plan was to put it in my office. But it covered too much of the feature wall I worked so hard on. I moved the Drexel server into the office and put this cabinet in the dining room.

The final touch was the hardware. My original plan was to find some simple tear drop hardware. While looking, I found these precious little ginko leaf designs on Etsy.

Back story…years ago when my kids were little we lived in a house that had a HUGE old ginko in the court yard. I have the loved these trees ever since. Kind of quirky but with a story.

I added a LED light inside the cabinet…simple!

Now I have a place to display more of our family china.

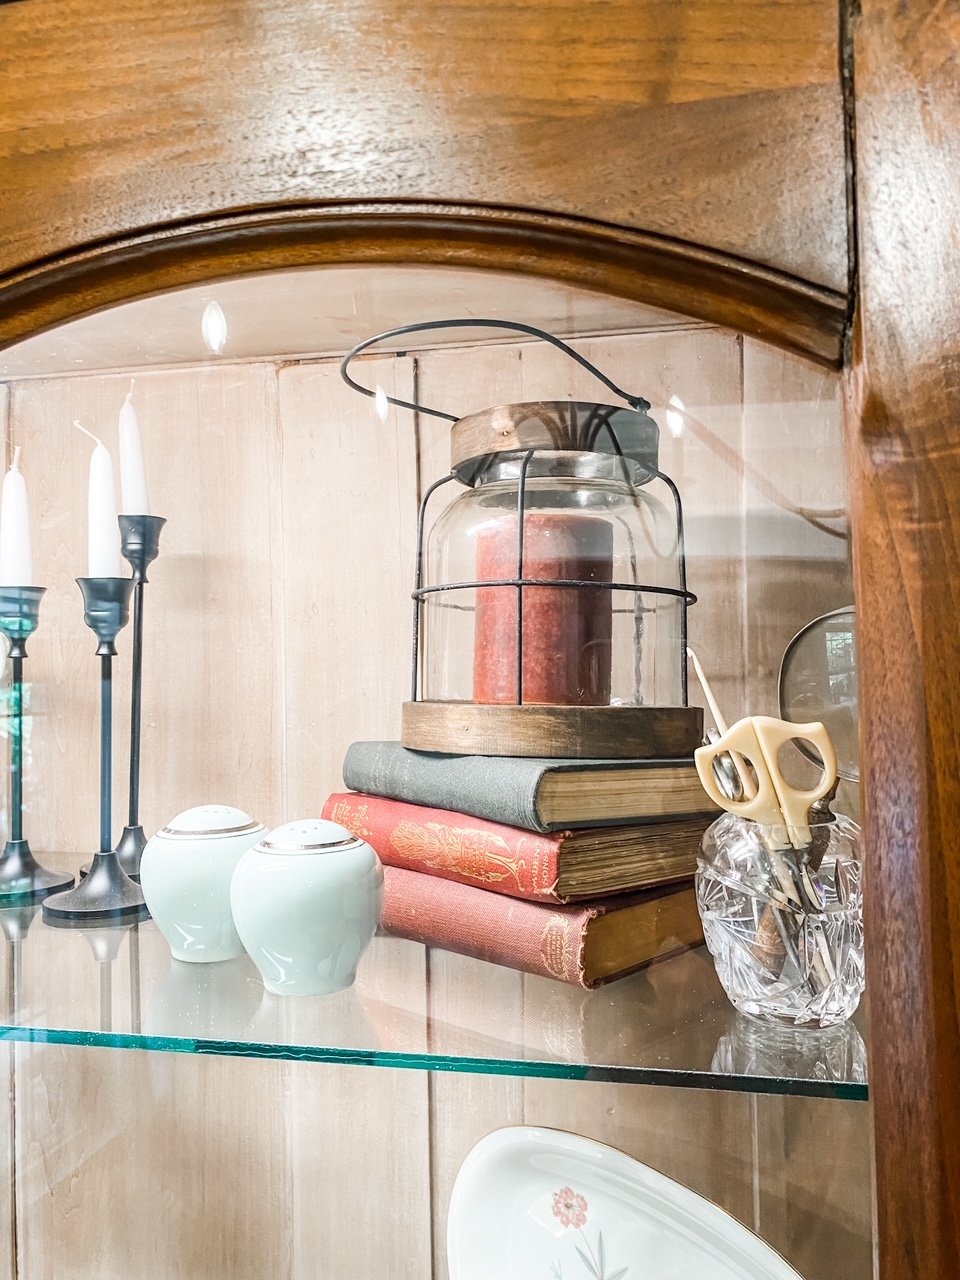
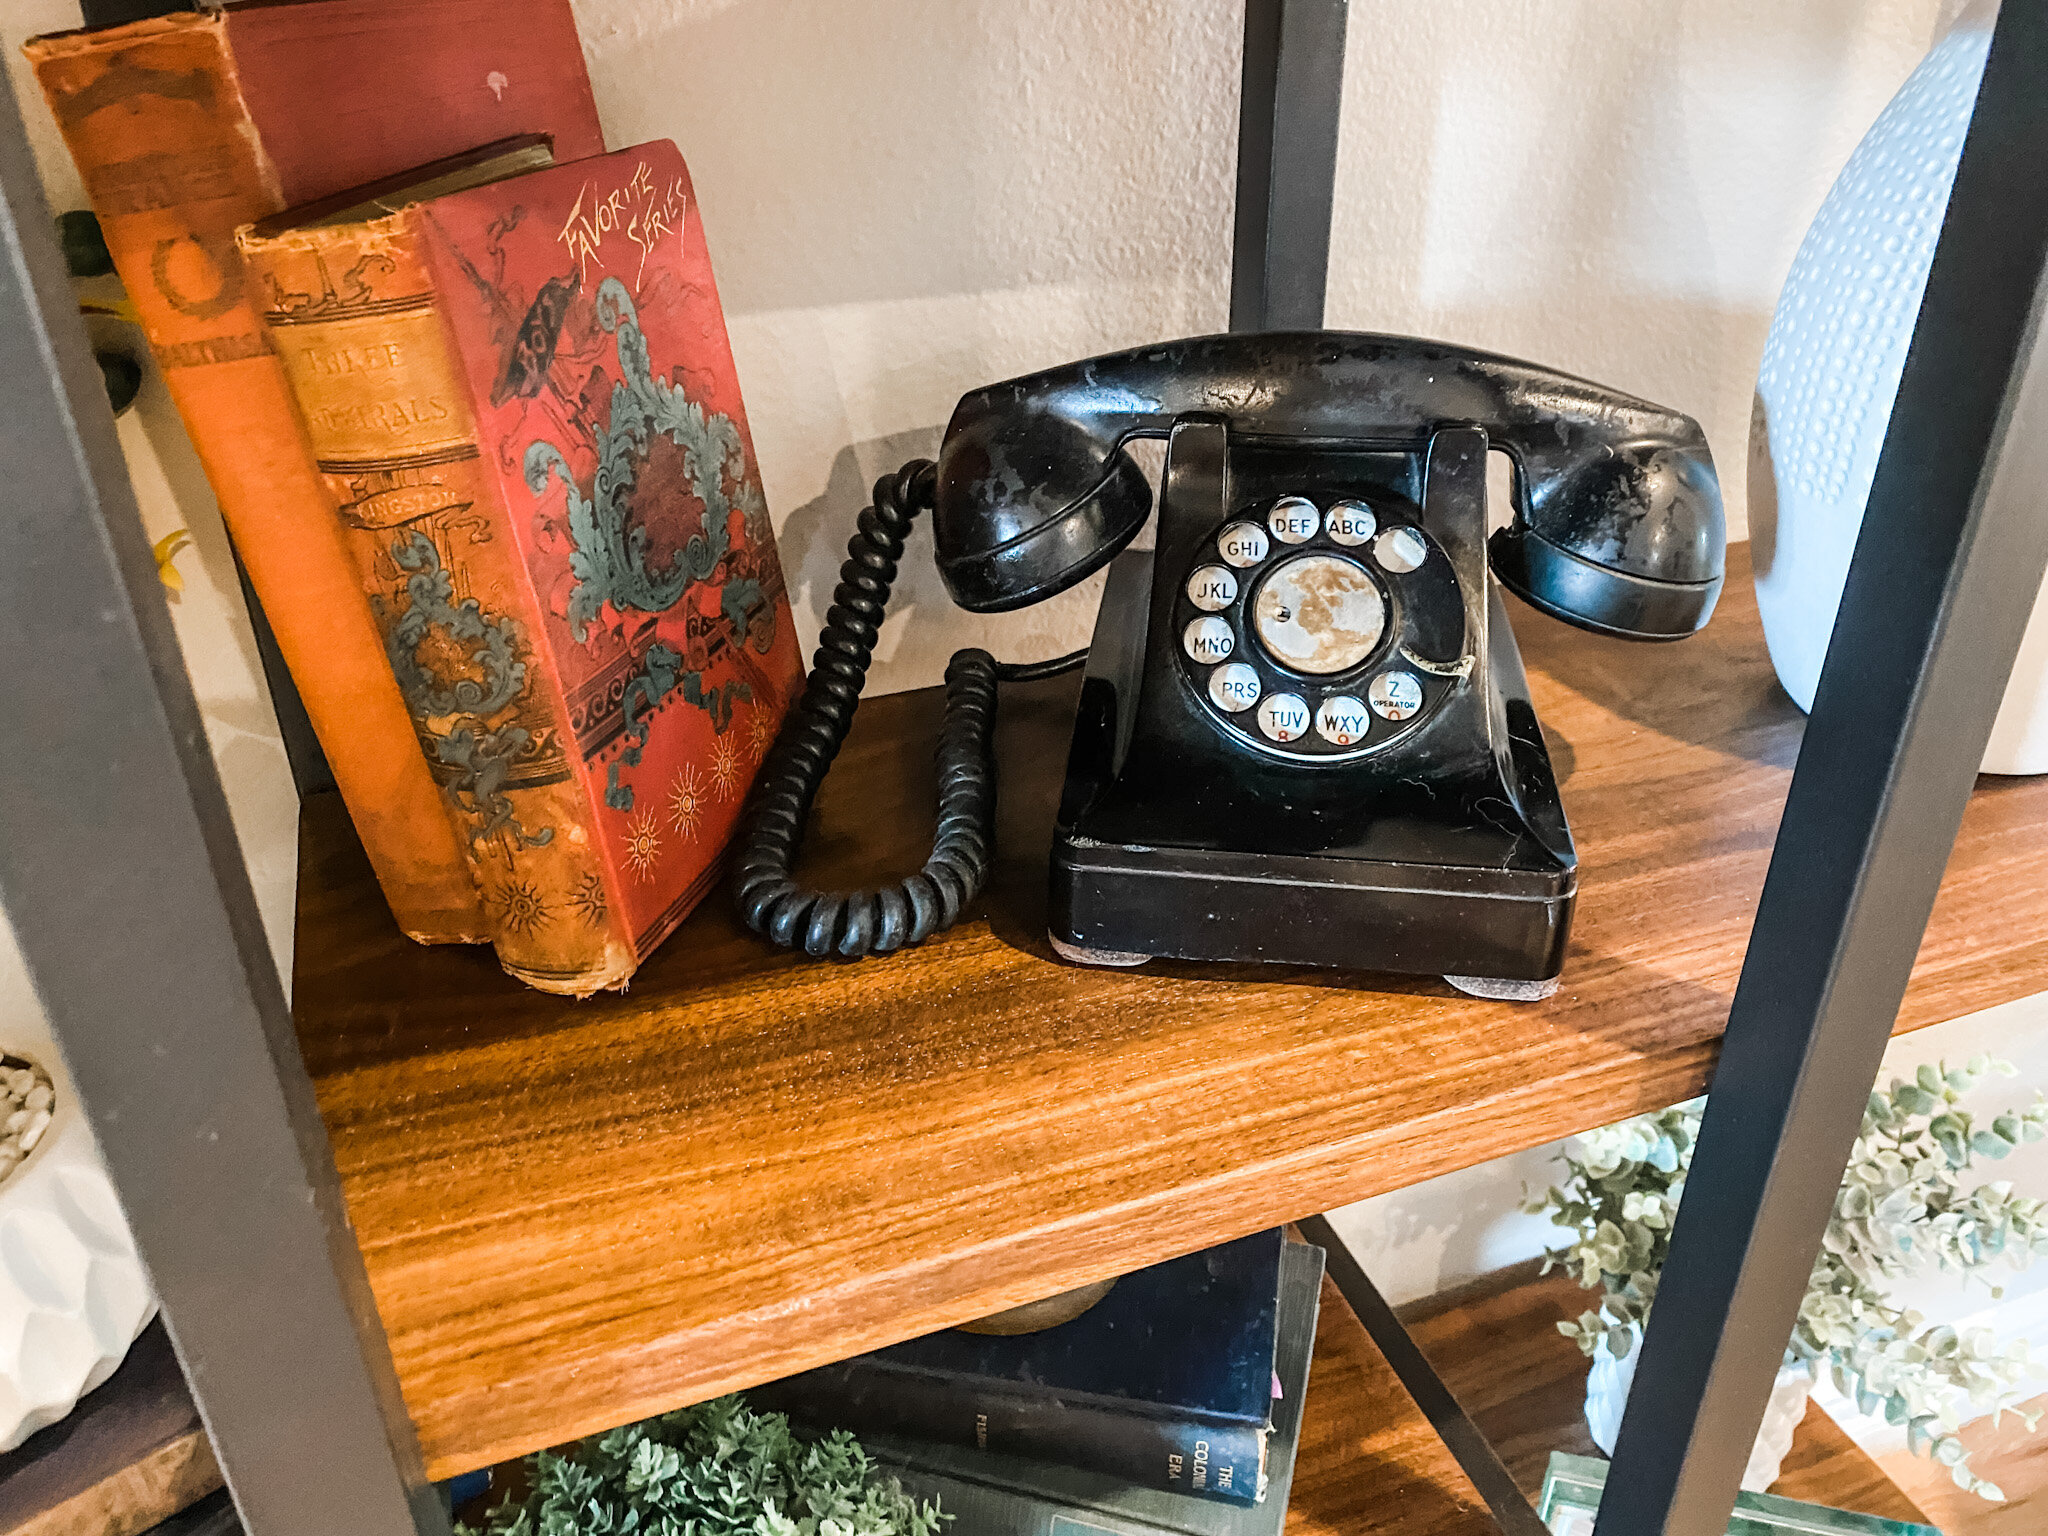
Rather than fill it with all the china I have stored away I selected a few serving pieces of each set. I like to use antique books as risers so I picked a few up at a local flea market.

The only things I purchased were the candle lantern and a fake plant. I know, fake plants are suppose to be “faux pas” these days…I don’t care…I can’t keep a real one alive and it looks lovely.

I love to decorate this room for every holiday so I can’t wait to doll this piece up for fall in a month or so…then Christmas.

I think it will be just stunning!

Another Drexel server....

Several years ago I shared a Drexel server I repurposed for my dining room

The “breakfast room” in our new house is almost identical to our old dining room.

Including the Drexel server.

I love it…it is one of my favorite pieces.

So when I spied ANOTHER Drexel server on Marketplace I could not help myself.

As I have mentioned, I have pretty much retired from the whole repurpose/upcycle/refinish business. My hands and back just can’t take all the work that goes into refinishing pieces on the scale I have in the past.

I have refinished a few doozies…just looking back at all the pieces I have shared on this blog blows my mind. There were some pretty nasty pieces that were beautifully refinished and restored and readied for another life-time of love!

When I saw this piece I couldn’t help myself. I had to have it and I wanted desperately to work a little magic on it.

Here is my plan…MAYBE I can discipline myself enough to pick up just one piece at a time, refinish it, sell it, then pick up another…just one at a time. Just one dresser/buffet/nightstand at a time.

Hum…I’m a pretty “self-disciplined” person so I am going to start with this one.

One week into this plan…I have failed. Last week I picked up ANOTHER piece that needs a little TLC….a pretty beat up china hutch.

I have these creative juices in me that have just been screaming for a project.

So, “the plan” ….specifically for the vintage Drexel piece. Strip and oil the drawer and door fronts using THIS process. Shine up the brass hardware….no secret there, just lots of Brasso, steel wool and elbow grease. Prime and paint the “cabinet” a high gloss black lacquer.

For the china hutch…I went to Etsy for inspiration and looked around. There are some beautiful china hutches that have been painted black with the insides painted white…LOVE them.

I THINK that is what I want to do. Sometimes the process takes on a life of its own and I find myself drifting in another direction. We will see.

Right now they are sitting in my AMAZING shop. I was in there last week rearranging everything so I will MAYBE have room to make some kind of paint booth. The shop has electricity and I can easily heat and cool it for temperature control but just not sure I will have enough room since we do use it for mower/yard equipment storage as well.

I can’t wait…this is a “job” that doesn’t really pay well, but it is one I do love.

The fireplace makeover...Part 2...Airstone Faux rock.

The stone work is done….

…and I love it.

I highly recommend the Airstone product. At least as far as installation. It is a relatively easy product to install. Lightweight and exceptionally natural looking.

When we fire up the fireplace in a few months I will let you know how it holds up to heat.

This stone product would work well for a kitchen backsplash, fireplace face or a covered porch area. It SAYS you can use it for exterior application…I can’t attest to that since I did not use it outside.

I think this is a relatively easy DIY project.If you choose to install this product find a tutorial that works for you. More importantly though, FOLLOW THE DIRECTIONS!!!!

I do have a few tips.

Start at the top. Then the sides…them the bottom. That may seem backwards, but it is the way to do it. Start at the top by adding a temporary level brace….I just used some scrap 1x4. I let that dry over night, then did the same on each side, then the bottom. The Airstone mastic sets up fairly quickly.

IMG_2011.jpg

I used pennies as spacers between the floor and the stone. I do this because wood swells and moves and you don’t want the rock sitting on something that has movement. Same would apply if you were using it as a backsplash…don’t set any wall product (faux rock, tile, marble, etc) directly on a top or floor.

Use a tile saw to cut it. I have a wet saw so if you do not, rent one. Makes easy, precise work of tricky cuts.

Pay attention to how to apply the mastic…it’s like frosting a cupcake, not buttering toast.

The tub of mastic specific for the faux stone SAYS it does 30 s.f….it does not. Maybe I “iced” to thickly but I would suggest buying more than you think you will need…you can always return it.

Layout the rock on a template or floor before applying it on the wall and number each piece so you know how to property transfer it to the wall. Also, make sure you pull from different boxes…mix it up. Each box has several different “colors” and “textures”and each box may come from a different run…so you want to make sure you mix it up!

I used the “edge” pieces around the face of the fire box…I think it looks neat.

IMG_2025.jpg

I should have wrapped it around the entire bump out. I would have loved to take it to the ceiling. I am still debating on adding a hearth.

But the “coulda, shoulda, woulda” is always a brain worm until the project is finished.

I didn’t want to take it to the ceiling because I don’t want to remove the crown then have to paint the entire ceiling. I don’t think I want to add a hearth because this is a small space and I don’t want to crowd the space. I didn’t wrap it around the entire wall because, well, I just didn’t.

Hopefully when I get the mantle on, it will all come together.

So the mantel. I think I thought I knew what I wanted but now I not so sure.

My plan is to make a beautiful walnut mantel…smooth…perfect grain…low sheen. Now I am debating on a more “rustic” look with a lighter finish.

What to do, what to do.

As usual, I have searched Pinterest and found dozens of looks…I like them all!

This house style really does not lend itself to that “farmhouse/rustic” look so I think I am going to go with a more smooth, low sheen look. Sometimes you have to “read the room” when making decor decisions.

I bought some walnut boards (dang that stuff is expensive!) and specifically picked pieces with lots of grain and a few shallow knots. Just a smidge rustic but still the beauty of walnut. I know if I apply Waterlox (like I did here with my kitchen cabinets) it will have a dark finish. And I think I am okay with that. The stone is light and I think the dark walnut will be a nice contrast.

Now I am just waiting on my son to have a day we can work on his table saw. I shared HERE about my phobia of table saws. I bought him one for Christmas last year so I have one available and have a “saw buddy.”

Hopefully next week I will have a beautiful new fireplace to share!


Coffee Bar...

IMG_1824.JPG

When I looked to Pinterest for inspiration for a coffee bar I realized that there are some super serious coffee connoisseurs out there. I just wanted a nice organized place for a few coffee necessities.

My stove top area in the kitchen is a bit tight for a “coffee station”…

IMG_0684.jpg

…but we managed because I have TONS of prep space on my island. Regardless, I wasn’t happy with having my coffee maker in this area….and I didn’t want to have a full sized coffee pot taking up even more space so we would have to remake coffee all morning in our little 4 cup maker.

I decided to utilize a corner of the counter top in the laundry room for a “coffee station.”

IMG_1826.jpg

Even though we make coffee every morning, the distance from the kitchen trash can and water source was almost equal so it really was no biggy to put it in there vs. on the kitchen counter.

Right now I am on a quest to use up some of the wood and materials I have accumulated over the years. It would have been real easy to go out and buy new materials to make shelves but I decided to get resourceful.

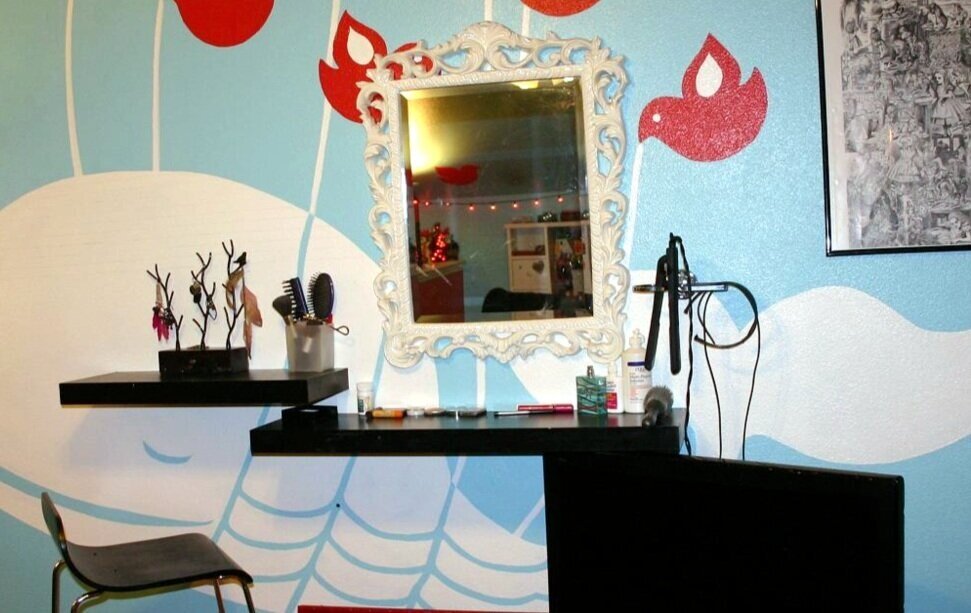
When I remodeled Katie’s room eons ago I removed the black floating shelves she used as her makeup station….

(Man my photo skills sucked!!!!)

(Man my photo skills sucked!!!!)

I’ve kicked those things around for YEARS thinking I would eventually use them.

They weren’t the size I wanted for my “coffee station” and not even the style. But I decided I would try to make them work.

The first thing I did was cut them down. Not difficult since they are constructed out of fake wood and cardboard. I did have to take a metal grinder to one of the metal support brackets to make it shorter, but that was seriously no biggy.

I did add some wood support inside the corners of the cut down shelves because my next step was to clad them in wood.

I had some leftover “bead board planks” from another project…similar to this…

…so I used that to clad the tops and bottoms of the shelves (just glue and a few nails). Then I used some 1”x3” pine boards I had for the fronts and sides. A little stain…a little polycrylic to seal.

IMG_1822.JPG

Repurposed floating shelves…they didn’t cost me a dime because I used scrap materials I had on hand.

My goal was “rustic” shelving…I think I accomplished that.

I did purchase a few new canisters…one for coffee, decaf, and cocoa.

The old silver tureen has held my filters for years…love it.

IMG_1820.JPG

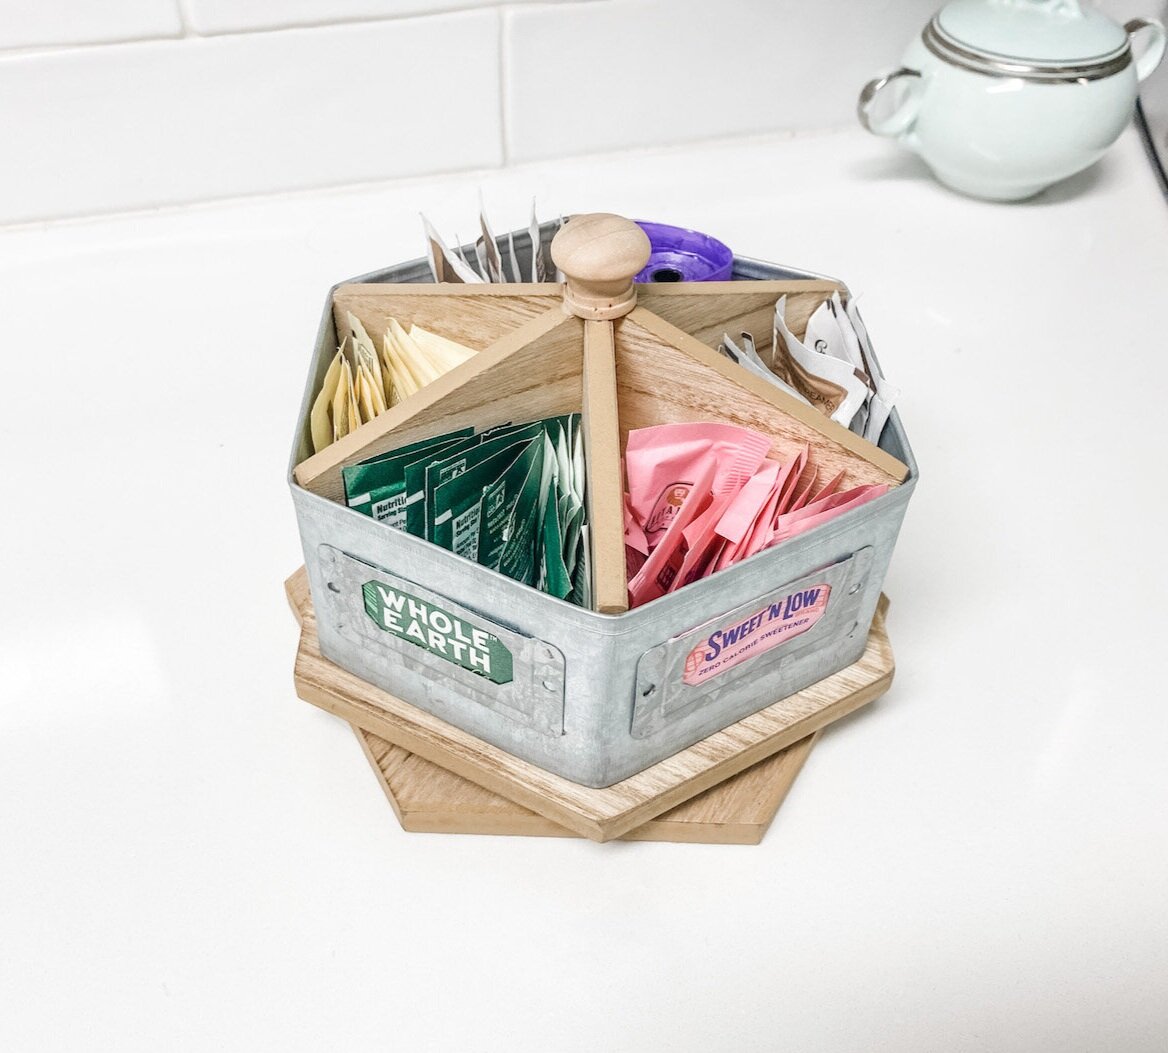
I found this cute little office supply thingy…originally labeled for paperclips, rubberbands, erasers, stamps etc.

IMG_1825.JPG

I decided it would be perfect for all the different sweeteners my family insists on…God forbid they use the one I use. I relabeled each space for my purposes.

A fake plant. (BTW I keep reading fake plants are a decor faux pas…ask me if I care!)

We did purchase a larger coffee pot.

Again, this space is right off the kitchen so it really isn’t a bother. I like that it freed up a little bit of kitchen counter space.

I would like to add that 1) I now have a HUGE laundry room and 2) it is just Brian and me so rarely are there piles of laundry demanding my attention. I can see where some may not have the room or desire to use the laundry room for this purpose! But for us, it worked out perfectly.

I am a HUGE proponent of looking to Pinterest for inspiration…but sometimes we get a little intimidated by what we see online and forget we don’t NEED all that froo-froo or even have the space for it….

783f7a78d45c3e595640ffaf03ff1841.jpg

Don’t get me wrong…I think these spaces are amazing…but for YOU are they realistic? Hopefully my tiny little corner will inspire you to “think outside the box” if you need to create a space. Know that you don’t need a huge space for a basic coffee bar if you just need a place for a few basics.

static1.squarespace.png


Making a table or bench top...

One tool I wanted for years was a “biscuit joiner.”

Screen Shot 2021-08-11 at 4.43.53 AM.png

One of the many things I love about my kids….when I ask for a specific tool for Chirstmas/birthday/Mom’s Day, they listen. So several years ago I got a biscuit joiner for Christmas!

This little tool has allowed me to make a few things I otherwise wouldn’t have been able to make. It allows me to join together several boards to make a larger board. A necessity if you want to make benches or table tops.

Let me give you a few examples….

The first was this bench….

I was able to join together the three 1”x6” boards and the ends to make a strong top.

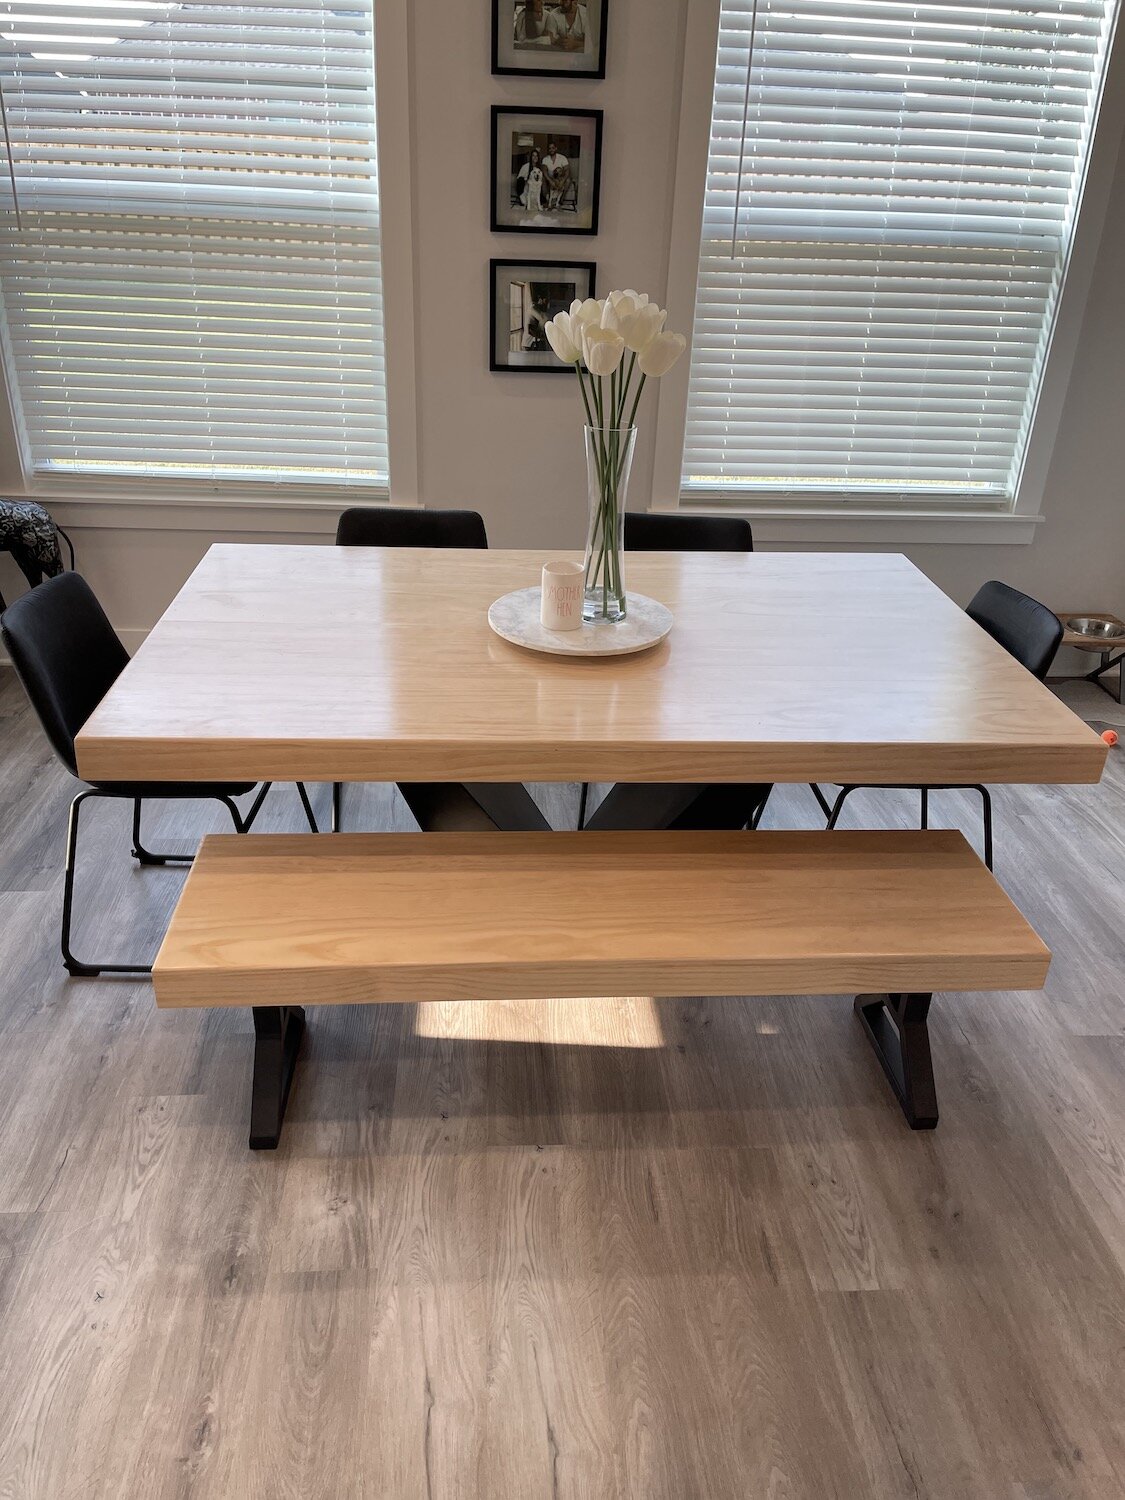
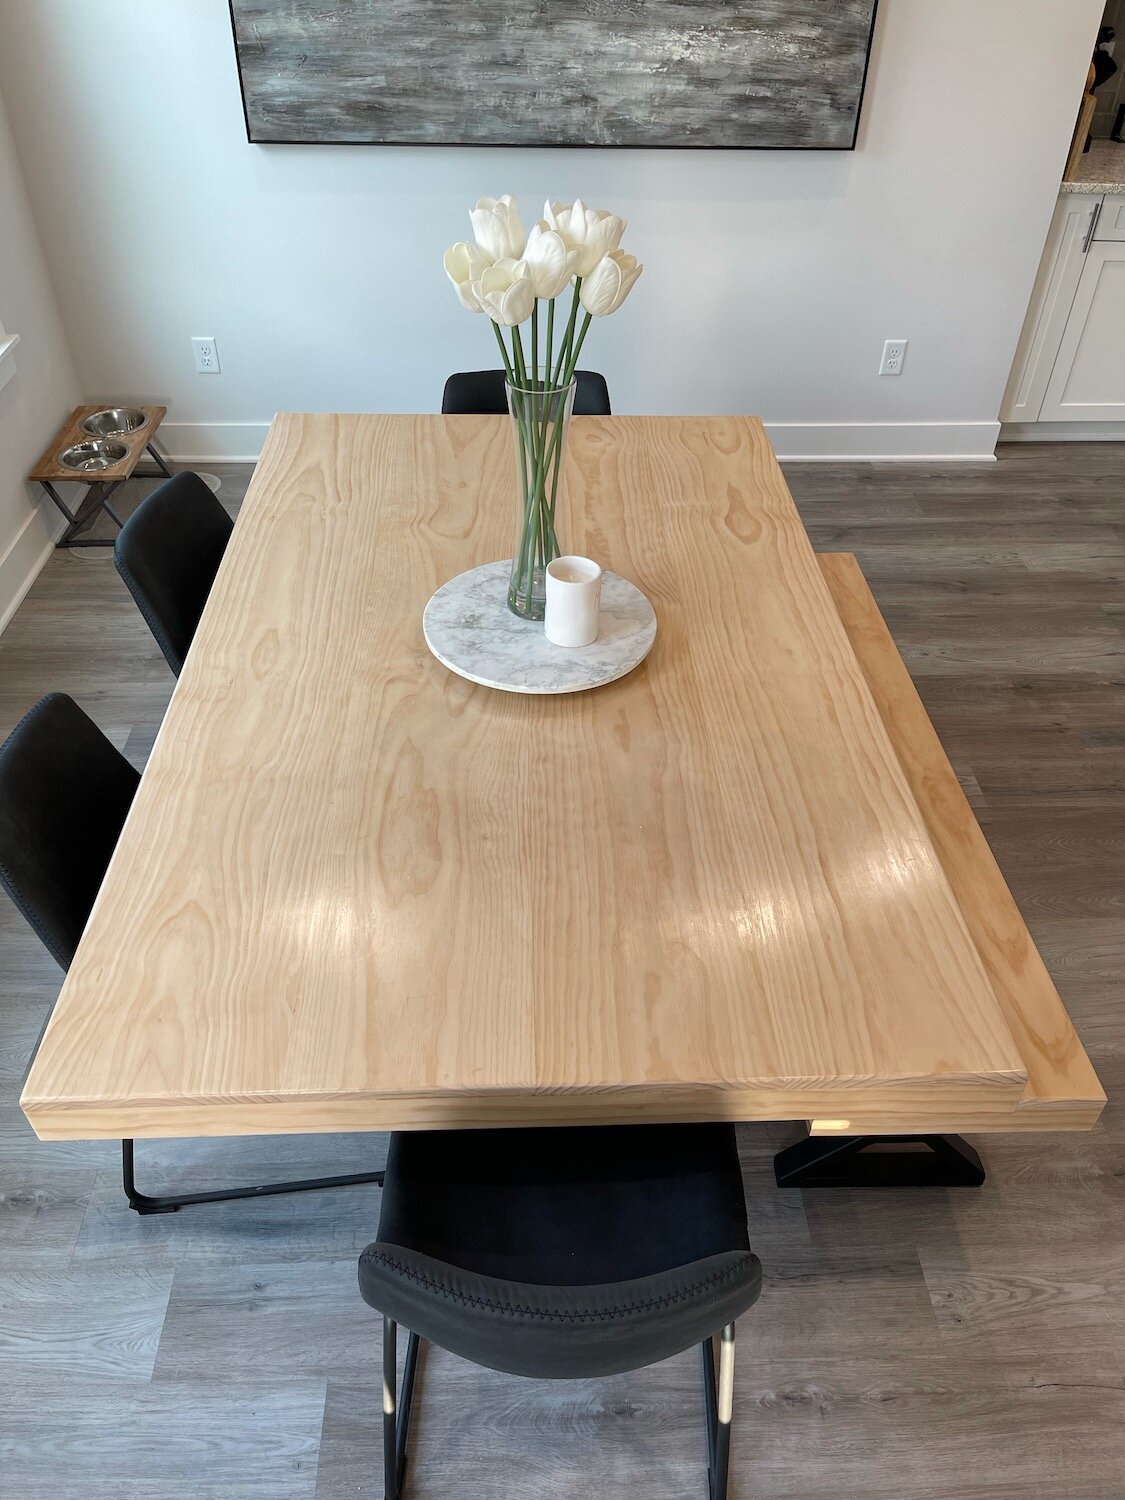
Brandon and Taylor wanted a plain pine table and bench for their new house. I guess they could have spent a fortune like we did for a custom made table but that isn’t really an option for a young couple.

So we went to Lowes, picked out some straight, nice boards with good grain and used the biscuit joiner, glue and clamps to create a table top and bench top.

IMG_1329.jpg

After some serious construction, a LOT of sanding, a polycrylic clear coat, and some nifty bases, they have an AMAZING table and bench!

IMG_1146.jpeg
IMG_1148.jpeg
IMG_1149.jpeg

Last year I went looking for some shelving…I found one I absolutely LOVE. It was from the same company that built our dining table so I knew the quality would be amazing….but the price tag was just a tad too steep!

I love everything about this shelving unit….the look, the style, the quality.

So I went looking for a less expensive option. I found one I thought was okay on Overstock.

Waaaay less expensive…and for obvious reasons. The frame is metal vs welded steel and the shelving material is MDF vs. beefy solid wood.

The look and style is very similar…almost identical sizing…but the MDF shelving HAD to go. I knew immediately I wanted to replace them with solid walnut.

It has only taken five months to get around to this project.

The biscuit joiner was a life saver.

Walnut is a pretty expensive wood…and finding pieces wide enough for the needed 12” shelving was pretty much impossible (without a serious outlay of cash.) What I did find were 7”ish board we ran through my son’s table saw and joined together….

IMG_1740.jpg

Using a biscuit joiner is NOT difficult…just take your time and follow the directions.

One little trick I did learn was how to mark the joints so they lined up perfectly. Just put your two boards together then run a mark across the joint….

IMG_1742.jpg

Then just line the joiner up with the mark and plunge away…the joints will line up perfectly!

Always dry fit everything to make sure it all lines up perfectly before you apply glue….

Apply glue and clamp….

IMG_1745.jpg

Joiners are NOT difficult to use. Just follow the directions and watch lots of YouTube tutorials.

I sanded each piece with 220 grit sand paper, tack cloth and sealer.

I used Waterlox as a sealer…no stain…same stuff I used on my kitchen cabinets and I have been extremely pleased with it!

BEFORE

BEFORE

AFTER

AFTER

BEFORE

BEFORE

AFTER

AFTER

BEFORE

BEFORE

AFTER

AFTER

I was able to take a shelving unit fit for a dorm room and turn it into a beautiful accent piece!

LOVE!

Master bedroom reveal....

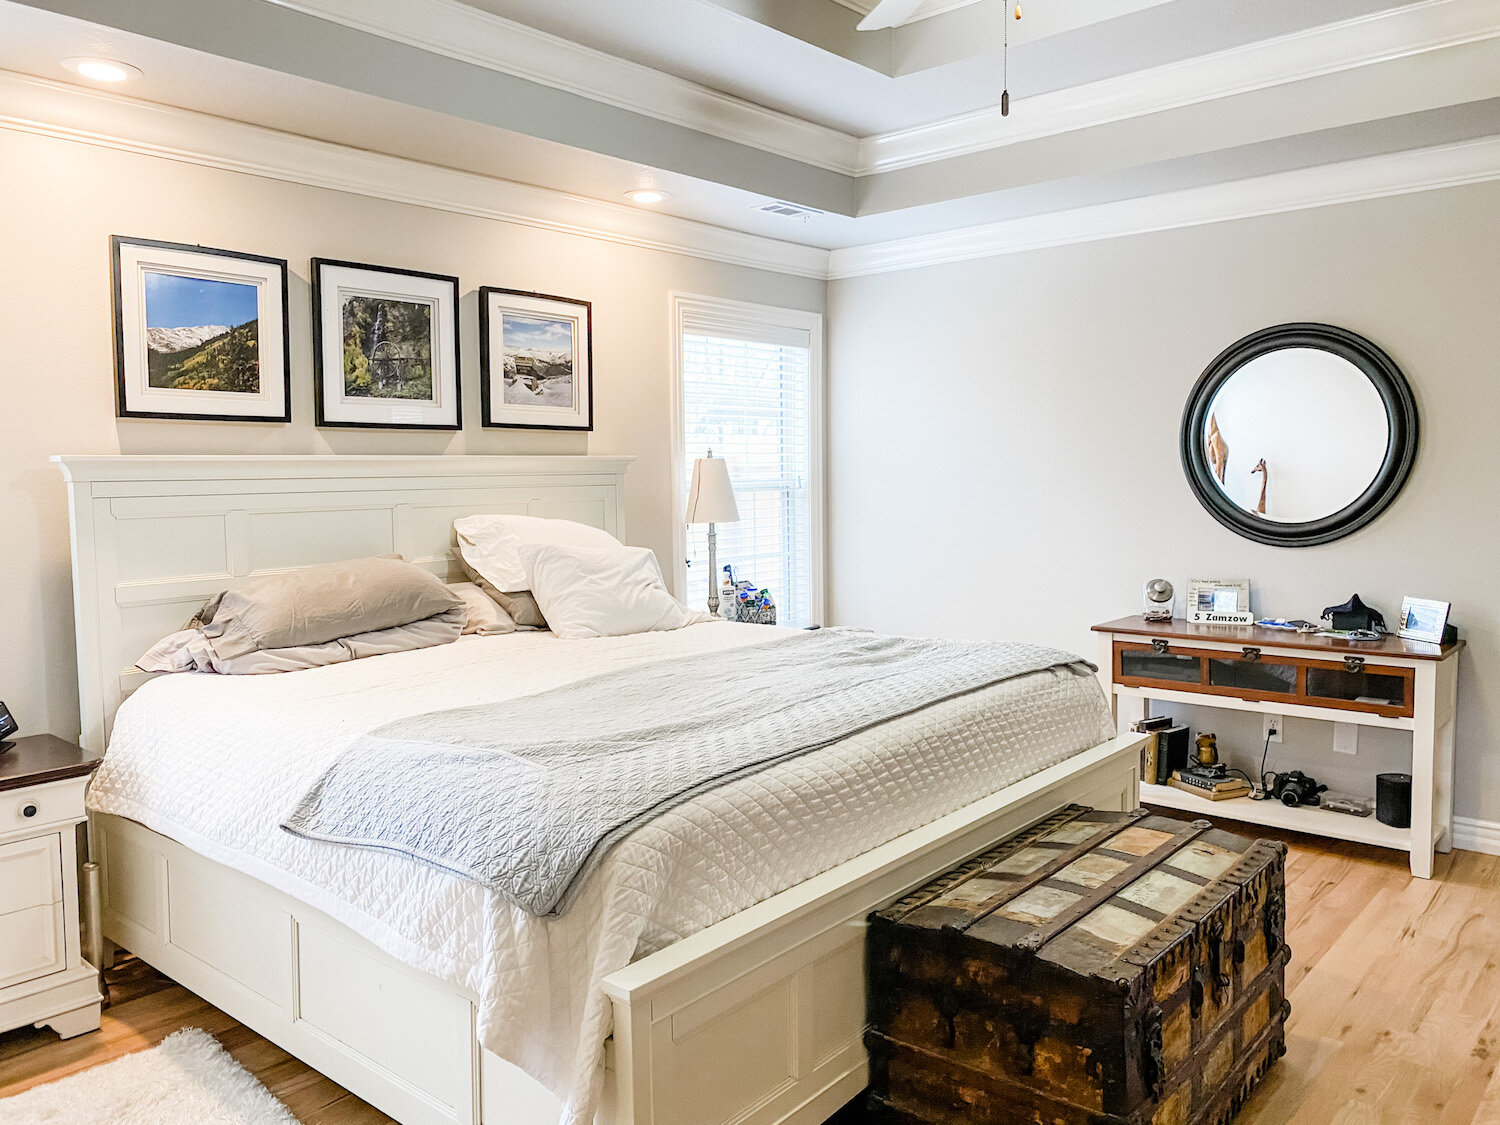
When we moved into this house in September we basically moved our old bedroom into this new house. Nice fit, but zero thought put into the “design” of the room…I basically just put furniture on the floor and a few pictures on the walls.

A few weeks ago my daughter sent me a picture of a well designed bedroom similar to ours.

IMG_0694.jpg

That’s when I realized our current master bedroom has ZERO “design character.” I hadn’t even taken the time to paint all the trim the “new” white.

IMG_1317.JPG

Twenty year old lamps, white and brass paddle fan, stacks of pillows in bleach spotted pillow cases, no curtains, scuffed and dinged furniture, clutter…

IMG_1318.JPG

The picture was perfect inspiration! The push I needed to work this space to it’s potential.

So last week my goal was to to tackle the room. Paint the trim and furniture, new curtains, throw pillows, a few little touches here and there, and declutter.

I painted my bedroom furniture (HERE) almost 7 years ago and while I still love the pieces, they have gotten quite dingy looking. Remember, whites yellow over time and of course there are chips and scratches from normal wear and tear. So it was time to give them a little paint refresher! And the side table tops…holy crud they have gotten nasty. So it was time to strip and restain the tops as well.

Of course the little “room refresh” became a three day chore!

In the end, worth every minute.

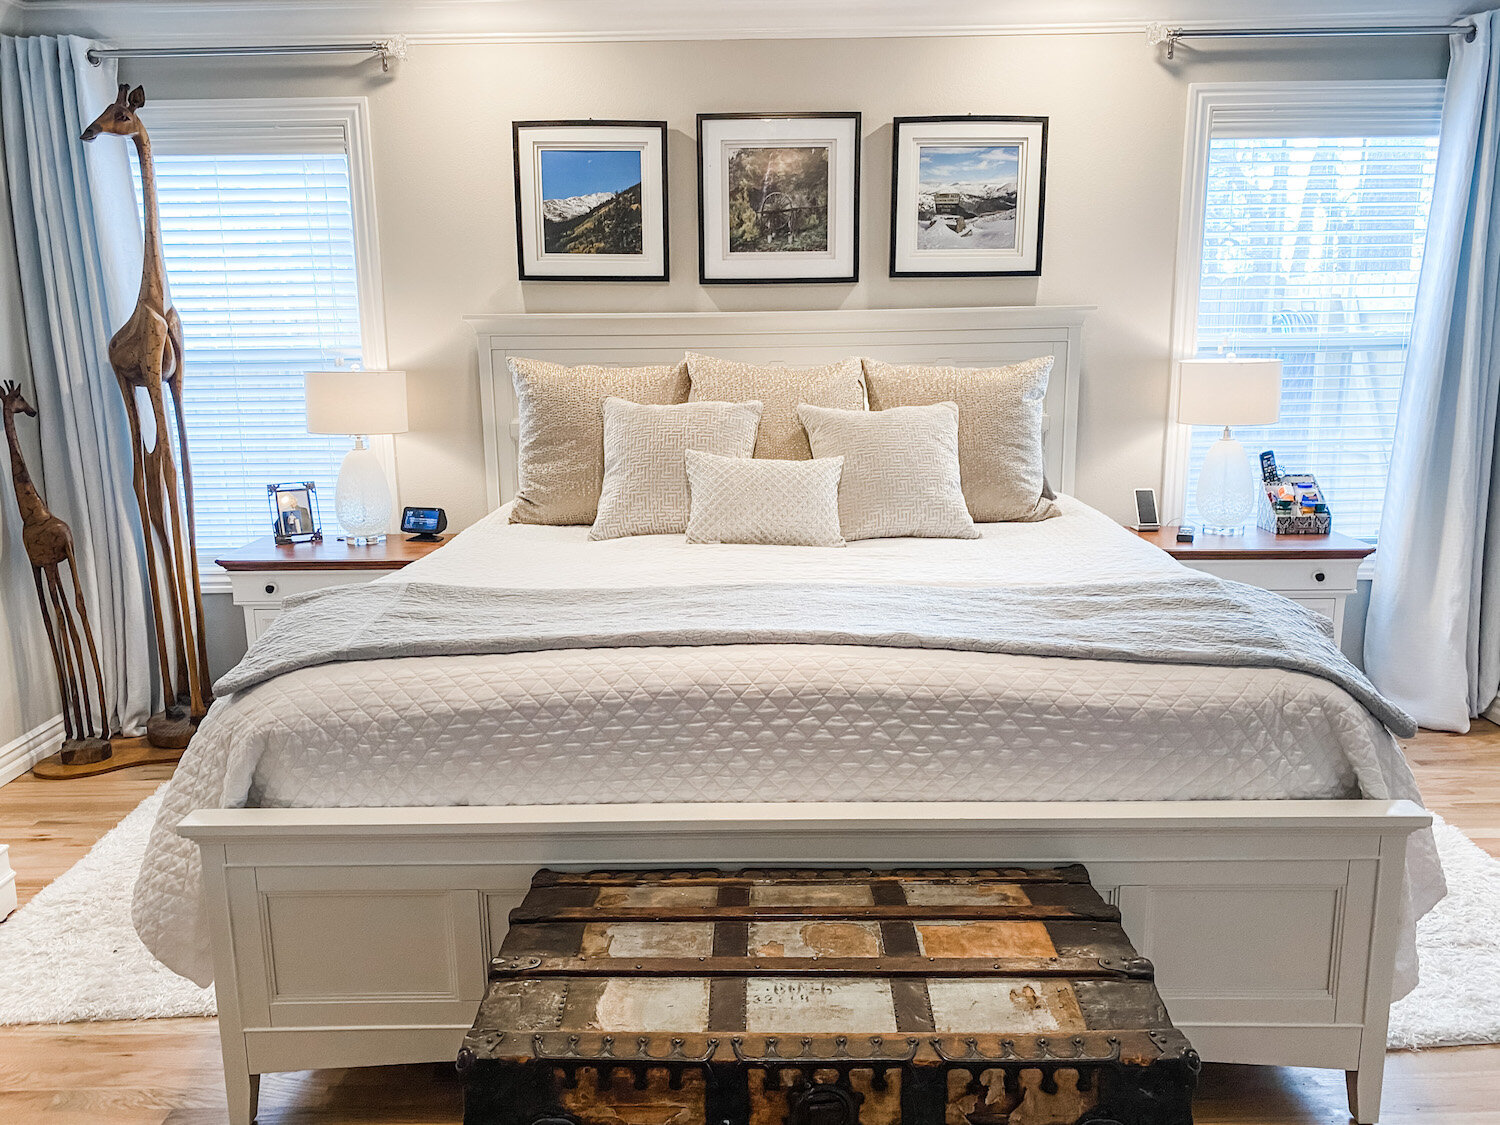
New curtains (I still need to hem them), a little wall art and a plant and new throw pillows.

IMG_1315.JPG

I stuck with my tried and true white bedspread…with a big dirty dog I need something I can bleach every week. It covers a down comforter in the cold months.

I have always loved the larger throw pillows in the guest room so I bought new for that room and put the guest pillows on our bed.

IMG_1308.JPG

(The giraffes? They were made in Africa from the root of a tree…they are Brian’s…they are different…what can I say!)

I painted the high boy and bedside tables and stripped and restained the tops of the bedside tables. ..the dark java stain has pretty much run its course. New lamps (finally!!!)

I love the look of chandeliers in bedrooms but as I have said before, I HAVE to have a paddle fan above the bed. Brandon gave us a paddle fan he took out of his house and it worked perfectly in our room.

Decluttering is always a must in any room makeover so a lot of stuff was put away.

One thing I loved in the inspiration room picture was the bed bench. My trunk belonged to my grandparents so it has to stay. You can still see my granddad’s name stenciled on the side.

I love the basket and pillows on their bench but our big dog uses this trunk as a spring board so that wouldn’t have worked out well. Sometimes you have to change up a plan to fit YOUR life-style (a.k.a. accommodate animals and kids!)

I still want to do more on the “tv side” of the room. I repainted and stripped and stained the top of THIS little side table…

Maybe add a plant…a little more wall art….a wall leaning mirror.

IMG_1306.jpg

It only took me a few decades to style the master bedroom in my last house so again, already working at warp speed here.

My next big project are the master bathroom (reveal HERE) windows…

Oh, it’s happening. I cut big holes in the wall to kind of “force the issue.” Windows are on order and the brick guy is on call.

This was the one thing I neglected to do, and my BIGGEST regret, when I remodeled this house…no operable windows in the master bath. I know from my last house that an operable window in the bathroom is a must. I have ordered two casement windows (the kind that crank out) and hope to have them by the end of the month. I have some plumbing to move (WHY IS NOTHING EASY!!!) and framing to do. These windows will look out at the large flower garden out back…I CAN’T WAIT!!!!

Wait I will though…it has been warm enough to plant a few larger perennials like azaleas and Kimberly ferns, but the threat of a freeze until mid-April prevents me from going all out with the annuals. So I sit…and wait…patiently. Okay, not so patient, but I learned the hard way not to rush the early spring planting! Pay attention to your “last freeze date”….then add a few weeks. Ours is the middle of April, but a few years ago it snowed the first week of May!

Until next week…

Guest bath makeover....

I’m trying to complete a few small projects…a few weeks ago it was my laundry room.

This past week it was my guest bath.

The guest bath is right across the hall from the laundry room…since I painted the laundry room a pretty “sagey green” I decided to tone down the blue in the guest bath. While I was at it, I decided to change out the counter top and backsplash.

I installed a glass vessel sink, a super awesome faucet and new lighting when I gave the room a little makeover a few years ago (probably a decade ago!) and I still love them so I didn’t need new ones.

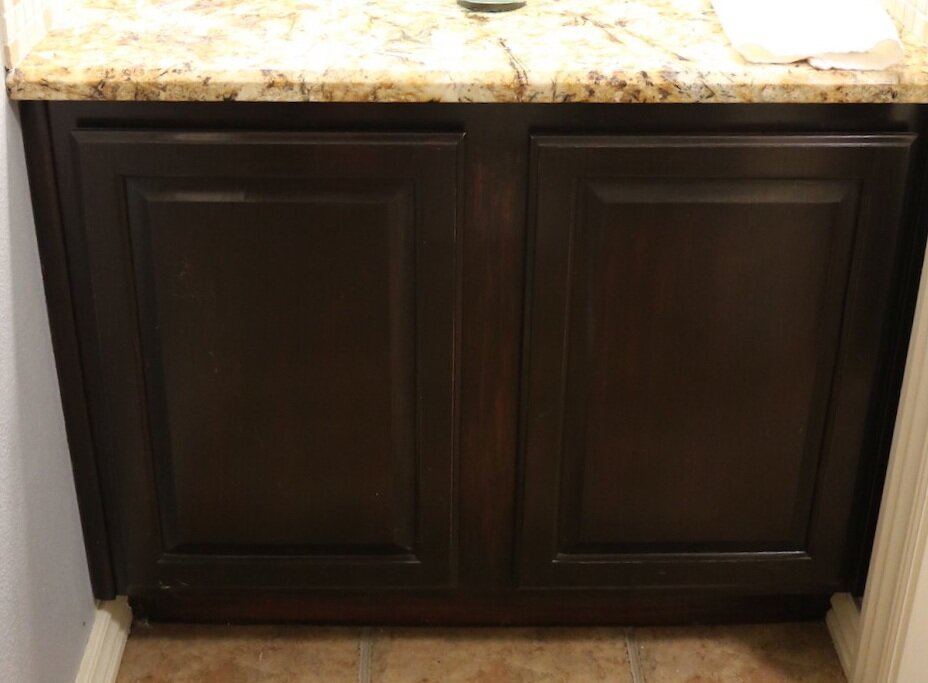
(My dismal attempt to photograph dark cabinets with no natural light!)

The wall decor over the toilet had yellowed a tad because I sealed it with poly. (Yes, poly yellows…to avoid, use polycrylic or a clear coat sealant)

My “plan” was to paint the walls and trim, change out the top and backsplash, strip the cabinet and mirror frame for a “lighter” wood stain and repaint the wall decor.

After painting the room a lighter color and installing a lighter top (white quartz) and white backsplash and lightening the wall decor with a fresh coat of white chalk paint, I decided to stick with the vanity cabinet and mirror “as is” for the time being. I had stained the vanity “java” with gel stain years ago and I think it looks fine (but impossible to photograph!)…the mirror has a “java” stain finish, so it coordinates well with the vanity.

Just these few easy changes made a huge difference…the paint really lightened and brightened it.

Still love the Devoe prints I added two years ago!

One of my favorite little projects…a TP cubby! Super simple!

Fresh white chalk paint with a tiny bit of distressing…this time I sealed it with a clear coat so hopefully it won’t yellow again!

I would like to mention my trim paint…I painted it the same color as ALL the trim in my house. White would have been great but I decided to stick with the color of the trim throughout the house…just my personal preference.

Paint.

A must when you want to change a room! Whether you paint the walls or furniture, JUST DO IT! Paint is relatively cheap (only took 1/2 a gallon for this room) and if you don’t like it, you can always change it!

I love this little makeover. I have been coveting white quartz for my kitchen tops and this tiny bit has REALLY stoked the fire.

Who knows….

Another family heirloom...a desk makeover.

As I have mentioned a bazillion times I am all about family heirlooms.

So when my mother offered me “dad’s desk” I didn’t hesitate…even though I have absolutely no use or room for it.

If I remember the story right my dad built this desk when he was 12…he would have been 79 this year…that makes the desk 67 years old…something my dad made when he was a boy….yes, I want it!

Fortunately my son Matt loves family heirlooms as well and since he just moved into a larger home, he has the space and need.

The desk was sporting green. I THINK it is green because at some point I did have it and I painted it green for Matt’s room. When the boys were younger everything in Mitchell’s room was blue and everything in Matt’s was green!

I guess at some point I gave it back to Mom.

Originally the desk would probably have been stained. I remember a time in the 70s when it was red. Then there was the “mauve” phase in the 80s. In other words, I knew there were at LEAST four layers of finish on it!

My original plan was to strip it down to bare wood and stain it.

What is the old saying about “best laid plans….” Yeah…that wasn’t happening.

There was the green…then the mauve…something white I suspect is a primer that was painted over the red…the red was painted over the original finish…whatever that may have been

I used every trick in my arsenal and still could NOT get all the paint off. Industrial stripper, my 1/2 and 1/2 mixture and even sanding.

One thing I will say about both my dad and I…when we do something, we do it to last!

After a few days of stripping and sanding I was able to get all the paint off the top but finally gave up on the rest of it…it wasn’t happening without doing serious damage to the wood itself.

I decided to stain the top and paint the base.

I sanded everything as smoothly as possible, primed it, sanded again, rubbed it down with tack cloth then painted it with a white enamel.

I stained the top with a java stain and sealed it with poly.

It is not exactly what I wanted but Matt and I both love the way it turned out. Right now he is using it as a tv stand in his den.

I was only able to snap a quick picture with my phone but as you can see, it turned out pretty cute.

We are in the process of making some major changes in his new house…new flooring, paint, shelving, etc.

Our plan is to eventually makes some major changes to his kitchen and den and when we do, hopefully I can get some good, staged pictures!

Until then I just wanted to share what one can do with older pieces…and also show that even we “old pros” get stumped occasionally…and when we do, we just drop back and punt!

Hutch makeover reveal....

I shared the china hutch I started HERE.

Not the prettiest piece of furniture I have ever seen but I knew it would be perfect for the space Matt and Hannah have in their dining room…with a little tweeking!

In this post I also shared a few important tips for painting any piece of furniture. Tried and true advice!
First thing I had to do was “find my inspiration.” It doesn’t matter if you are making over an entire room or a piece of furniture…you have to find your inspiration.

In this case I needed to find a similar hutch so naturally I searched Pinterest…I sent several pictures of “french provincial china hutches” to Hannah and she liked this one best (originally posted on 509 Design)…

…beautiful. I love the stained top and the Miss Mustard Seed boxwood green.

The kids did not want doors or dividers on the top so those were removed.

They also decided to paint the entire inside white.

The first thing I did was strip the old finish and stain on the top of the base. Keep in mind that the top and the base where attached pretty tight so I just left them as is and only stripped and finished the part of the top that was showing. I used this process and it literally took me less time to strip and re-stain than it did to tape it all off. I used General Finishes Brown Mahogany stain, then sealed it with poly.

After the the top had dried (a day or two) I taped and papered it well so I could prime the entire piece. I also removed the drawers and taped and papered those so I could just paint the fronts.

Removing the vertical dividers left a gap that had to be repaired…

Pretty simple fix…I just cut a piece of decorative wood from the pieces I had removed and glued and clamped it over the gap…

After primer, I sanded it well, wiped it all down with a tack cloth and then painted…first the inside of the top with satin white. After that dried I taped it off and sprayed the rest of the hutch with Kylon Satin Italian Olive paint….closest green in a spray paint to Miss Mustard Seed’s boxwood. Again, it SAYS it is a “paint and primer” in one but I always prime wood furniture with Bullseye or Kilz.

I mentioned the brass froo-froo hardware in the original post…I honestly didn’t think it would make the cut.

But after some serious scrubbing with Brasso and SOS pads, they shined right up and believe it or not, the kids loved them!

So….here is the final product in place….

The farmhouse table is one I featured HERE. I found the black chairs at the apartments and they just needed a little repair, paint and reupholstery (never featured those), the bench is one I made for Thanksgiving one year, the plaid scarf is like the ones I featured HERE and the candle sticks were used as the stands for their wedding cake! It took YEARS for all this tp come together and now that it has…cute as a bug’s ear!

I know the original brass hardware may be a tad “gaudy” but I love it!

The “gap fix” isn’t exactly perfect, but as my Daddy use to say “You’ll never notice it on a passing train!”

I love how this piece turned out…and it shows what you can do with a pretty, um, not-so-attractive piece of furniture with just a little time and paint…all in all I probably spent less than $20 on supplies!

Hannah and Matt aren’t into all the “knick-knack” and “froo-froo” stuff so I am sure they will style it to their tastes!

China hutch makeover...part 1..and paint tips!

Since I have “semi-retired” from DIY for resale, I have a little more time to take on projects for my family.

As I mentioned here, Matt and Hannah got married last month. This past summer he bought a larger home and went from a 1600 s.f. home to a 2200 s.f. home. When he bought his first home we stocked it with a few nice DIY pieces…this dresser and chest setthis oak trestle tablethis breakfast table.this dresser-turned-entertainment centerthis little vintage chair…and of course all the other pieces we have refurbished and built over the years.

A bigger house means more space and in his case he has a large dining area that has nothing but the trestle table…so it feels pretty empty.

This past week I found this “could be awesome” french provincial style china hutch on Facebook marketplace.

I can’t wait to shine up these solid brass pulls…even though I know they probably won’t make the cut!

They really need a “tall” piece in their dining room so I think with a few modifications this one would be perfect.

Of course the froo-froo doors HAD to go…when I sent a picture of the piece minus the doors and hardware, Matt messaged and wanted to know if “the pole things” could come off!

Yes they can…

…which of course means finding a way to “fix” the gap…oh well! Minor issue.

So the question then becomes….solid paint or chalk paint with distressing.

The reason this decision is important is because if you intend to paint the piece with latex or oil-based paint, you HAVE to prime it. If you are going to chalk paint and distress the piece you don’t have to prime.

It is a personal preference and one I left up to Matt and Hannah.

For chalk paint, I usually mix up a batch of homemade using flat latex paint and Plaster of Paris. The recipe I find works best for me is 5 tablespoons of Plaster of Paris, 3 tablespoons of water, mixed well then add 2 cups of flat paint…any color, any brand. I have also used a few different brands of chalk paint and found all of them to be acceptable. I use 220 grit sand paper to HAND SAND after the paint dries well and then I seal the paint with a flat clear coat. I never wax…personal preference.

Here are some paint tips I posted a few years ago for painting with latex or oil based paint. The first two tips apply to chalk paint as well!

1) Always clean the piece of any dirt or debris. Just wipe it down with a damp cloth and make sure you get all the "ick" off! If the piece is super grungy, you might want to clean it with ammonia or wipe it down with mineral spirits! If it has a lot of flaking paint or old finish, you can sand it down a bit or better yet, strip it using this process...just make sure the existing paint or finish is stable!

2) Make repairs. DO NOT waste your time making it pretty if it needs repairs. And remember, glue and clamps are your friend!!!! If you don't know how to repair something, google it or email me. MOST furniture repairs aren't that difficult...but if you do it wrong (or not at all) you will be wasting your time making it pretty! 

3) Primer....always a must if you are going to paint with spray paint or latex or oil paint. If you want your paint to stick and not chip or peel, prime. For smaller projects I use spray primer. For larger projects I roll on primer with a 4" foam roller. Even if your paint says "all in one paint and primer"...use primer.

4) Sand smooth after the primer has thoroughly dried. A 220 grit paper should do the trick...FEEL the surface...if you can feel it, the paint won't hide it. 

5) Use tack cloth. Most tutorials will tell you to wipe the piece with a damp cloth. That won't cut it! Tack cloth will pick up the finest grains of dust and debris you can't see until you paint the piece! Use it before you paint and between each coat!

6) If you are going to brush on latex or oil, use a quality brush AND TAKE CARE OF IT! I have brushes I have owned for years because I am religious about cleaning them thoroughly after use. And don't even think about using those cheap disposable brushes (chip brushes). They are great for many things, but not for getting a smooth paint finish on furniture!!!! 

7) ALWAYS use an additive....Floetrol for latex, Penetrol for oil based paints. 

8) Use quality paint. Especially spray paint. I know it is cheaper at discount stores but pay the extra few dollars and buy a quality spray paint at your home improvement store. Cheaper will NOT be better if it doesn't hold up to wear and tear!

9) I do 2-3 light coats (spray or brush) rather than trying to get solid coverage with one coat...trust me when I say, there is NO paint on earth that will get good coverage with just one coat!

10) Cure time is important. Seriously, I know they style their pieces on those HGTV shows within hours of painting a piece of furniture. Just don't! Just because the paint feels dry to the touch DOES NOT mean it has cured. Latex...a few days...oil...a week. Give your paint time to cure or it is going to peel or chip if you try to use it right away! Put the piece in place and chill!

11) Spray vs. Brush/roller. For me, it all depends. I have learned that large flat areas are tough to get an even coat of paint on with spray paint...and of course there is the expense factor for large pieces. A dresser can take 2-3 cans of spray paint. So it really depends of the piece. Sometimes I will spray the drawer fronts of a dresser and roll the top and sides. 

12) Keep a little spare paint for chips and dings...if you use latex or oil, just put a few tablespoons in a little container and stick it in the back of the drawer...just in case! If you are using spray paint, keep a can with a little paint. Manufacturer's change paint colors and you might not be able to find that awesome color in the future. Keep spare paint in the house...not the garage or storage shed!

If you follow these simple guidelines, you can update a dated piece with just a little time and effort. 

Now, back to the china hutch…at this point it is on hold…we are in a deep freeze here and there is really nothing more I can do. I did strip the top and shelves because Matt wants those stained. But it is too cold to prime or paint so I will patiently wait…not something I do well…lol! But I have learned that temperature matters so I will not rush this project!

Hopefully the weather will cooperate this week and I can share the finished project next week!

Until then….