Dining room wainscoting...

I keep thinking I have no more “major” projects to complete around this house…but inevitably I find something I want to do.

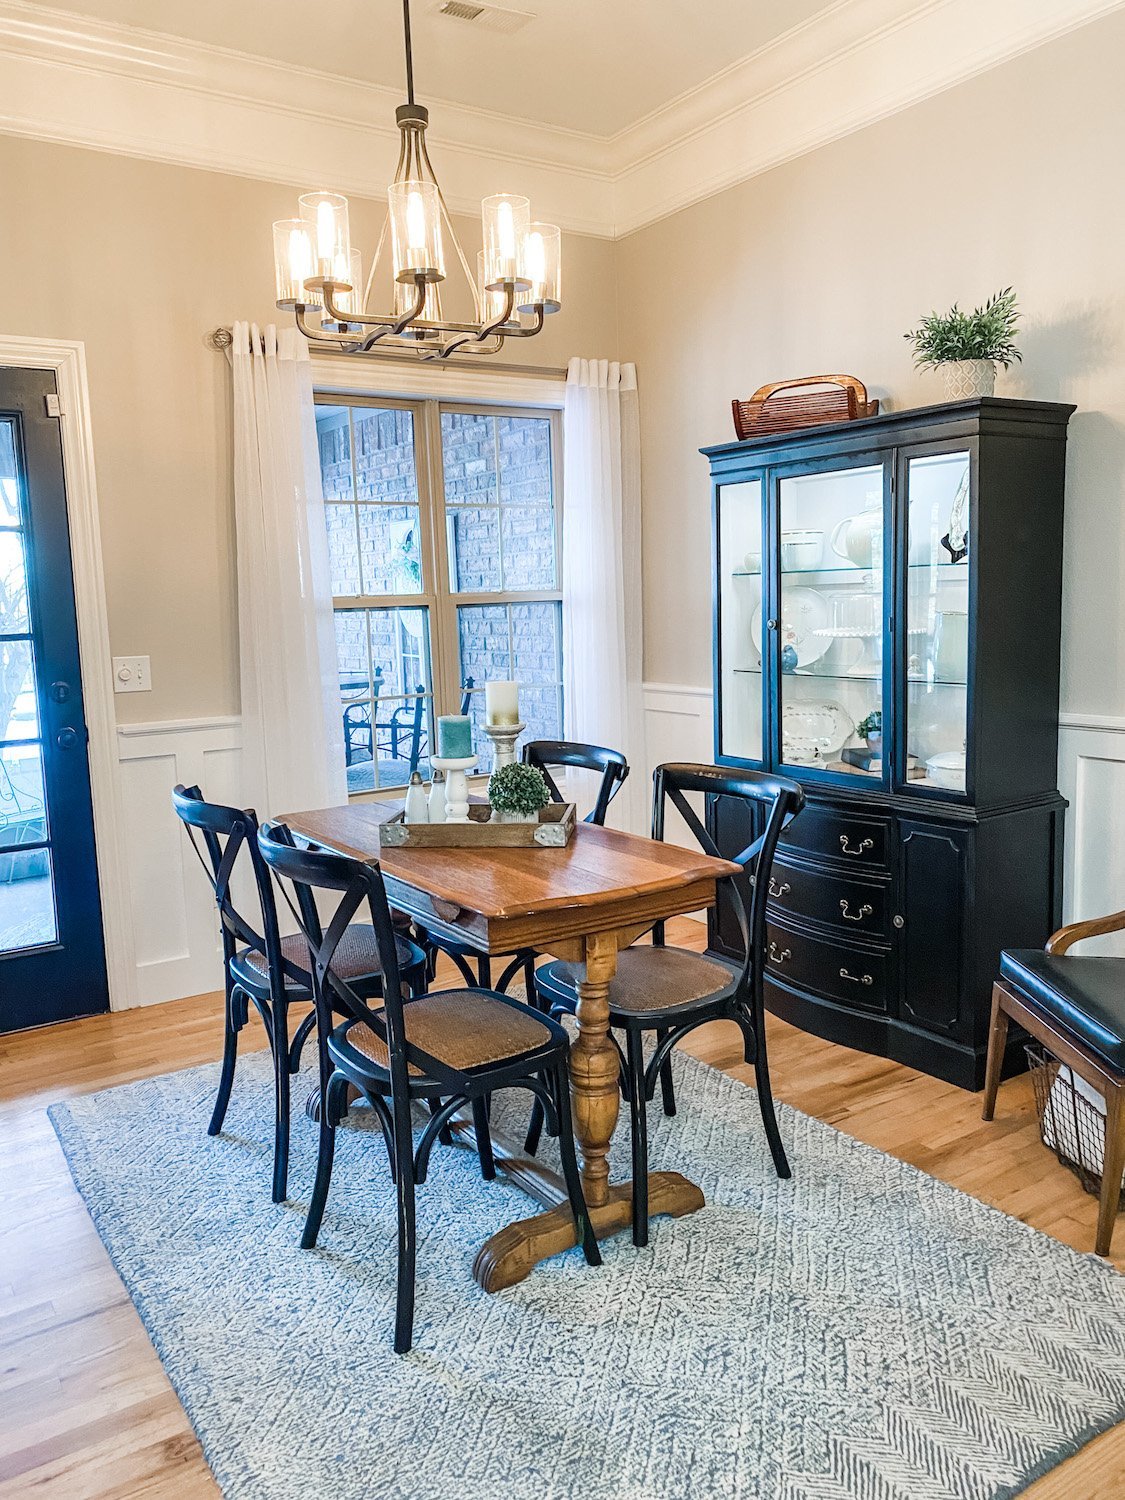
The dining room…a tad formalish but we actually use the room more than I thought we would for casual dining.

Like much of this house it has evolved over the last few years….the first Christmas featuring our new tablecurtainsthe new buffet….all relatively minor.

When we first bought the house the formal dining room was pretty blah…

Right off the entry…first thing you see when you enter the house.

This is the Christmas decor…LOVE! I love decorating this space for holidays and seasons!

As I have shared before, I replaced the arched transoms with rectangular ones, removed all the crown above the doors and windows and changed the light fixtures…all in an attempt to “detraditionalize” the space. It had chair rail and it was obvious it had wallpaper below the chair rail at one time. Before we painted, I had the painter repair some damage from where the wallpaper had been removed and add texture. Then we painted.

For months I have wanted to add wainscoting or SOMETHING to jazz up the space a tad. The only problem I have is that most of the wainscoting inspiration I can find is either really traditional/formal or casual “farmhousey” (like board and batten.) While I have made some changes to detraditionalize the entire space, I don’t want to go super casual. So not formal but not casual.

Don’t get me wrong…I like board and batten wainscoting.

I added it in the breakfast room

….and entry

…and I love it.

But it just seems a tad too “casual” for a formal dining space.

So…what to do, what to do.

I did what I always do when I am looking for inspiration…cruised Pinterest and the blogisphere.

There are a few issues with this room that will influence what I can do. First, the walls do not go all the way to the ceiling…so in my opinion, I need to keep the wall color above the existing chair rail.

Second, the existing chair rail. I really don’t want to remove it because then I have to do a bunch of sheetrock repair and truthfully, I think I can incorporate it into any design I pick…at least the height of it incase I find another trim i like better.

I know I don’t want to do any picture molding above the existing chair rail…kind of formalish.

I realize I have elements in this room that make it more “formal.” But I want to tone it down a bit.

So far my favorite look is this….

Timisha has a great tutorial HERE for this look.

Easy, relatively inexpensive…kinda formal but not so much that you feel like you have to set out the fine china.

Perfect.

Hopefully next week I can share the finished project!!!

Antique glass lamps.....to hot glue or not to hot glue...

Several months ago I bought two antique glass lamps at an auction.  They are amazing! So simple yet elegant.  Kind of a "Grace Kelly" lamp if you ask me...lol!

They have a faint decorative etching in the glass that is difficult to see...very subtle...but so pretty. 

The exposed metal on the lamps have a little "corrosion" but I have decided to leave that be for the time being. Amazingly, they don't have a chip anywhere on the glass!

I decided to keep one and replace the little round crystal lamp I have in my office.  But I wasn't real keen on the lamp shade, so I decided to keep the lamp shade from the crystal lamp....

I have some pearl froo-froo trim I bought after Christmas last year for pennies.  I decided I would gussy up the lamp shade with trim...just to give it a little more glam.  

That is where the question of hot glue vs. tacky glue comes in. 

I think hot glue has a time and place.  But whenever possible, especially on fabrics and upholstery, I always use a quick drying tacky/fabric glue.  It takes a tad longer to set up but it holds better in the long run. Sometimes I will put a tiny bit of hot glue on something just to help it hold until the tacky/fabric glue dries completely. I do the same for wood working projects...apply a little bit of hot glue just to hold something in place that can't be clamped until the heavy duty mastic or wood glue can dry completely. But hot glue can break down in extreme hot and cold temps or even with too much "stress" from use. So I rarely use it exclusively...I just think, long term, tacky/fabric glue (and liquid nail or wood glue for wood projects) is a better option. 

I see upholstery tutorials suggest hot glue for piping and trim.  I personally think that is a mistake!

On this lamp shade, I applied a line of the tacky glue along the edge and then pressed the decorative trim in place....

Again, subtle...but it is the little subtle changes and additions that can make a difference in the "big picture." 

HINT: If you use tacky/fabric glue, go back after the glue has "tacked" (10-15 minutes) and press the trim down again!  At that point the glue will have a better "grip" and the trim will press flat and adhere better.

(Yes, that is a piece of driftwood on the table...I picked it up on our fishing trip in Colorado last year and I just love the texture of driftwood...I have another piece on my mantel in the den that I picked up off a frozen lake in Georgetown, Colorado 10 years ago!)

Lamps can be an expensive accessory in a room.  But they are soooo easy to spruce up or change...just by painting or changing the shade. Several years ago I got a bit tired of my bedside lamps...too dark. So I painted the base AND the shades.  

Not a humungus difference...and I am still not real keen on the style.... but it is enough to keep me from running out and paying $200 for the two lamps I wanted.

Painting light fixtures and lamps is a great way to personalize and update a space on the cheap! I featured painted light fixtures and paddle fans here and outdoor fixtures here.

Again, give it a shot...what's the worst thing that can happen...you don't like it. So what...you don't like it as it is...before you toss it, paint it or trim it. It will fetch the same price in the garage sale regardless...lol!