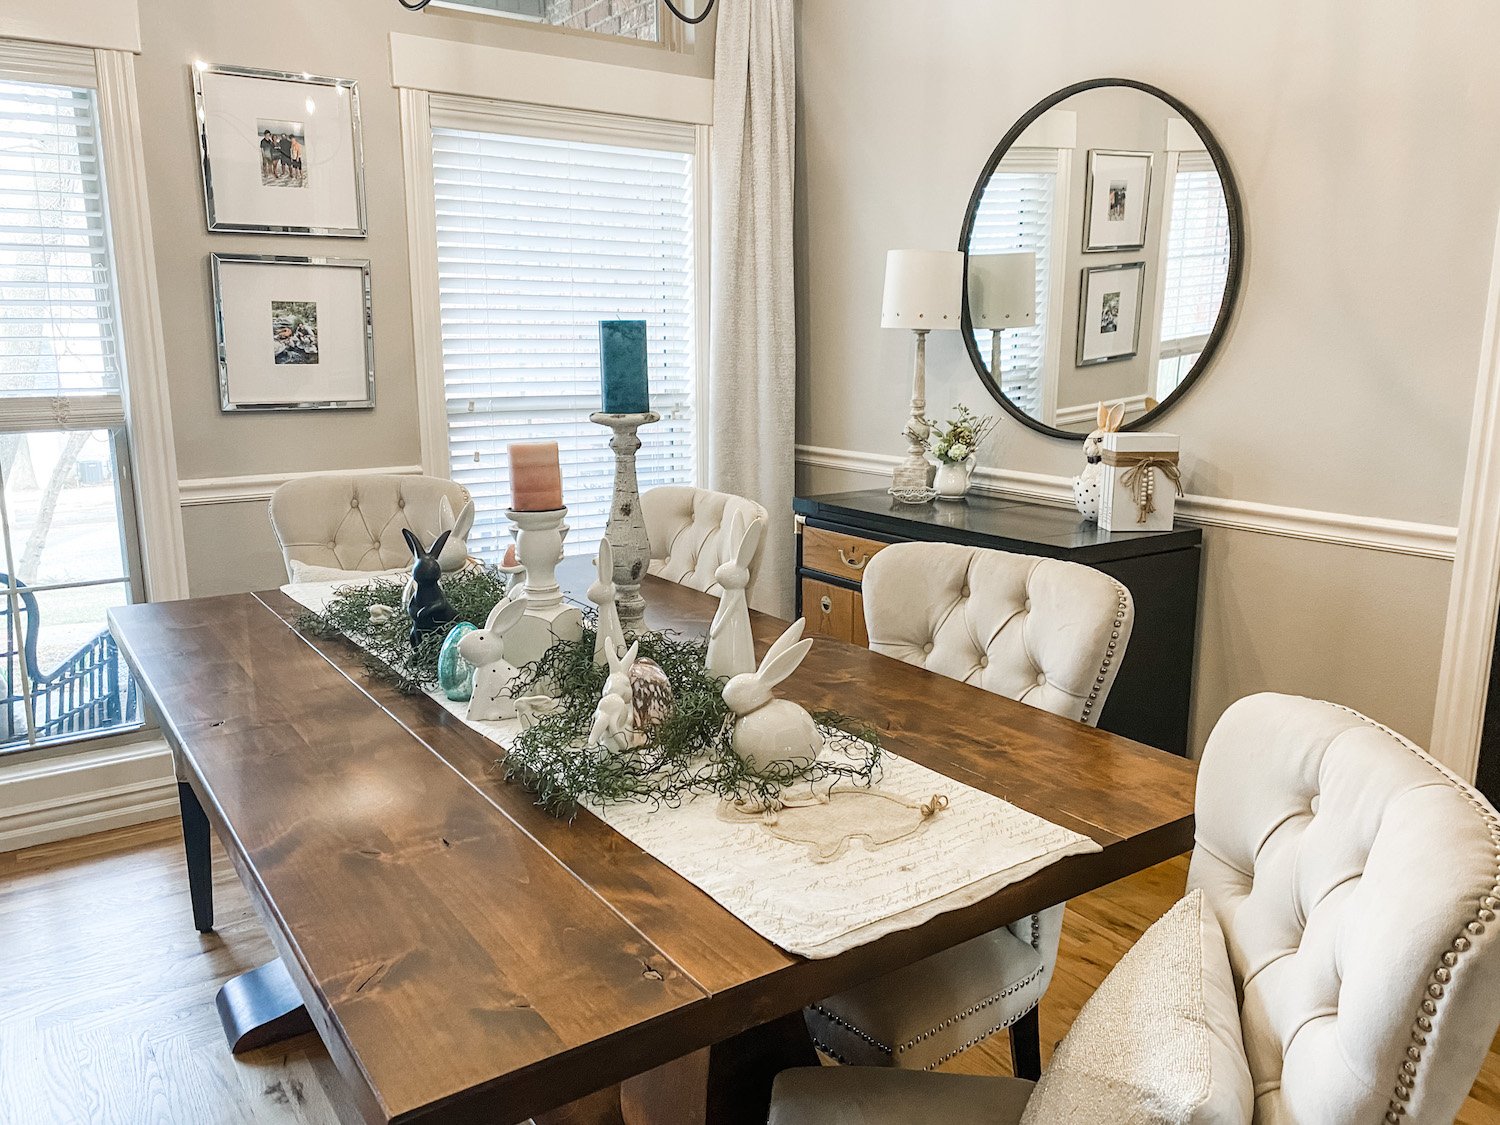
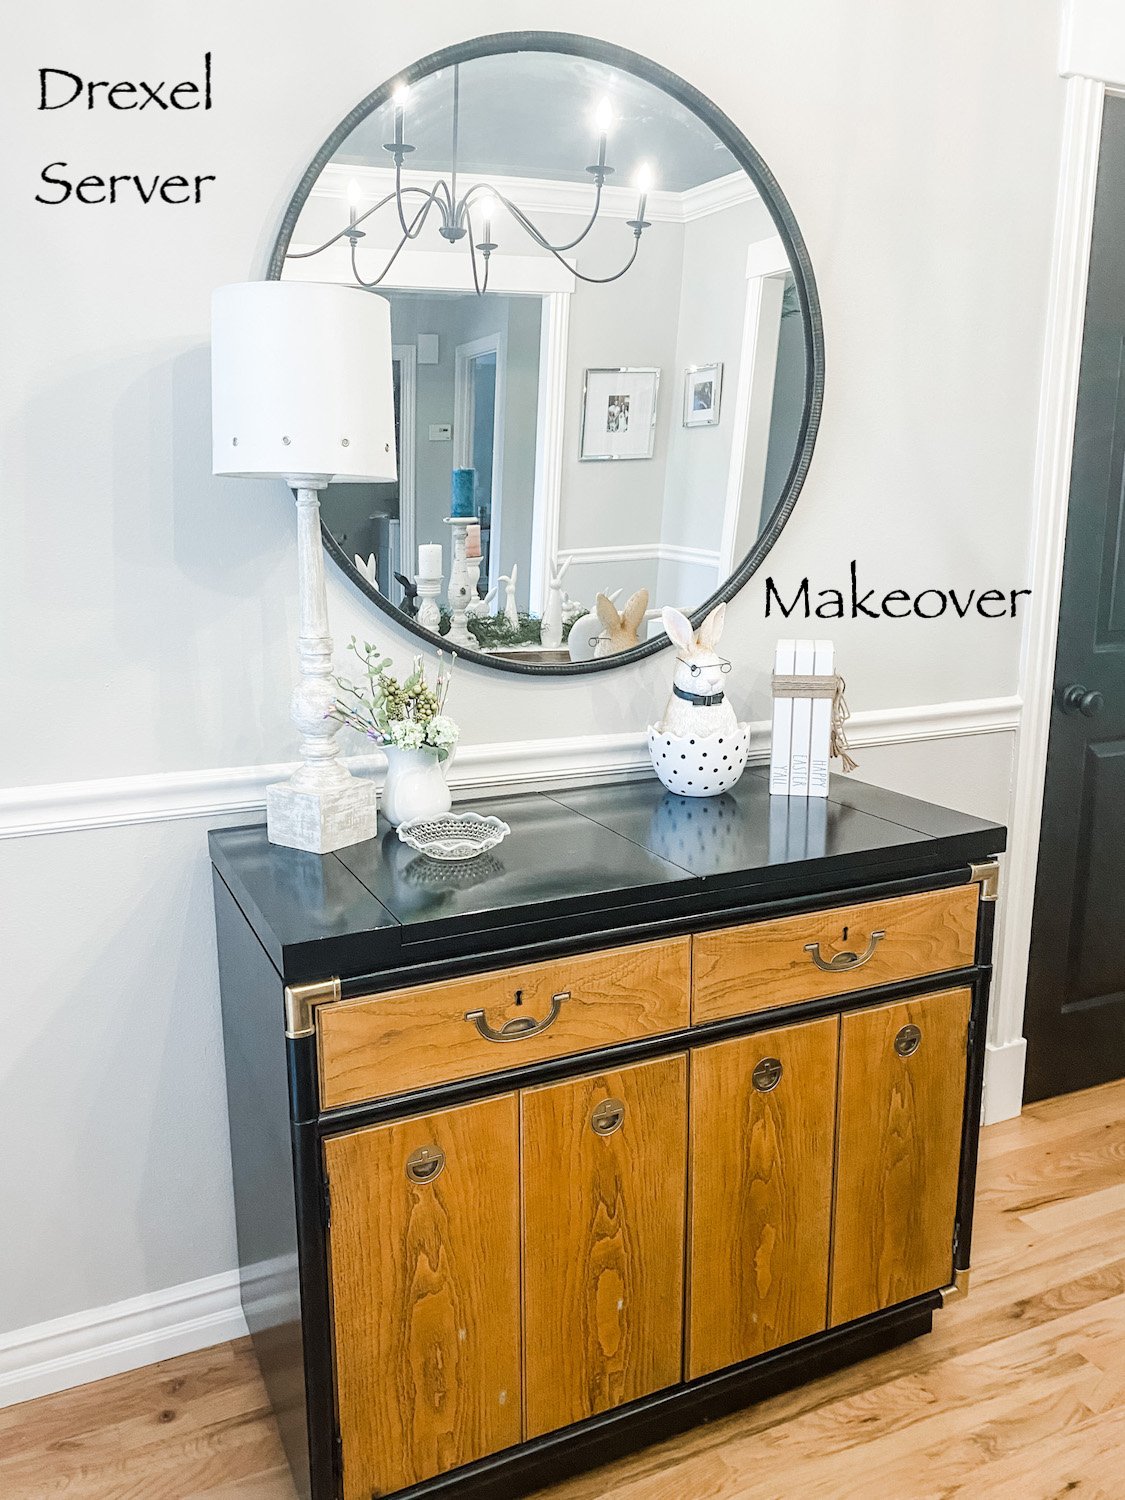
The "new" Drexel server....

I shared my plan for this wonderful vintage piece HERE….

I know purists cringe when people even talk about painting vintage pieces.

This is a prime example of “doing what you love.” If a piece will be more loved and treasured in a different state then go for it.

I painted the first one I found years ago and have had it in my dining/breakfast room…

…I recently swapped it out for the china hutch (featured HERE) and sold it.

Now this piece, a Drexel Accolade, has some value as is….if you do a little research you will find they sell for hundreds. But for me “hundreds” is not a value that will keep me from giving a piece a little makeover. If we were talking tens of thousands, yeah, no.

I also have a Drexel nightstand I refinished and shared HERE.

I planned to sell this piece after it’s makeover but I have moved it into my dining room and now I am kind of liking it…hum…guess we will see.

So…what did I do to give this thing a little more appeal?

First, I removed all the old hardware and brightened it up.

The hardware on these pieces are solid brass but after a few decades of neglect it is hard to tell. You can tell if something is solid brass with a magnet. A magnet WILL NOT stick to solid brass.

If the hardware is solid brass, the only way I have found to really brighten it up and get the decades of grime off is with Brasso and SOS pads.

Coat each piece with Brasso. I use a little chip brush to coat the pieces. After that sits for awhile, take an SOS pad and scrub away. You may need to repeat this process a time or two. I also use an old toothbrush to get in all the nooks and crannies.

After all the pieces are really clean, I scrub them with “Never Dull.” It seems to get the last layer of grunge off and gives them a little bit more “brightness.”

Not the easiest or fastest way to clean brass hardware but I just don’t think you can beat beautiful brass hardware.

Now, if the hardware is NOT brass and you want to spruce it up (without the cost of replacing) you can always give it a good scrubbing, prime it with metal primer and then paint it with spray paint. (TIP: put the screws back into the screw holes so that you don’t get paint in the threads.)

I shared another brass hardware restoration project HERE.

So, the hardware is done. If you find a Drexel piece and it is missing any of it’s original hardware, you can find replacements on Ebay…but be prepared to pay dearly for it! Each pull can range from $30 to $110 EACH!!!

I decided to strip and oil the drawer and door fronts. On the last Drexel makeovers (the bedside table and server) I painted the entire piece. This time I decided to shake things up a bit.

While I like wood grain, I am not a huge fan of oak. No biggy since, again, my original plan was to sell this piece. To highlight the pretty wood grain, I stripped the drawer fronts and doors using my trusty 1/2 and 1/2 mixture. 1/2 acetone, 1/2 lacquer thinner. HERE I posted a pretty lengthy tutorial on how to use this mixture to strip even the most stubborn finishes!

After stripping off the old finish I gave the drawers and doors a little mineral spirit wash, lightly sanded, wiped with tack cloth, then applied 3 coats of tung oil finish…my current favorite being Waterlox.

After that had dried and cured well, I taped and papered the doors and began prepping the cabinet for paint. (I removed the drawers to strip and oil them!)

I didn’t need to paint the inside of the cabinet so I taped that off, along with the black laminate under the flip top. I primed with Bullseye primer, then sanded smooth with 220 grit paper and wiped it all down with tack cloth.

I decided to paint the cabinet with high gloss black lacquer spray paint. I am obsessed with the high glass finish on these pieces. I just think it really makes a huge impact, especially with the bright brass hardware.

(You may notice I am all decked out for Easter…that is my new thing…decorating for each holiday/season. Next up will be Memorial Day/4th…patriotic stuff…then “summery”…then fall…then Christmas…then Valentine’s and back to Easter. See what happens when you “retire.”)

The trick to a flawless spray paint finish is LIGHT COATS…lightly spray, let it dry, spray again. It may take 3-4-5 coats but it dries quickly and in the end you will have a beautiful finish. If you go heavy handed you will have drips and runs and will be hugely disappointed!!!

Also pay attention to the temperatures and humidity. If it is too hot or too cold, or if the humidity is really high, you may have issues!

HERE you will find some additional tips on how to property paint furniture…very helpful!

After the paint had properly cured (gave it a good day or two) I replaced the hardware and OH. MY. GOSH!!! I seriously love this piece. Even though I am not a huge oak fan I am really loving it!!!

So the past few weeks I have been tackling a MAMMOTH project. Maybe next week I can share it. Hint, in entails A LOT of the thing I hate most….but man will it be worth it…I think…I hope….

Entry cabinet/console/buffet makeover...

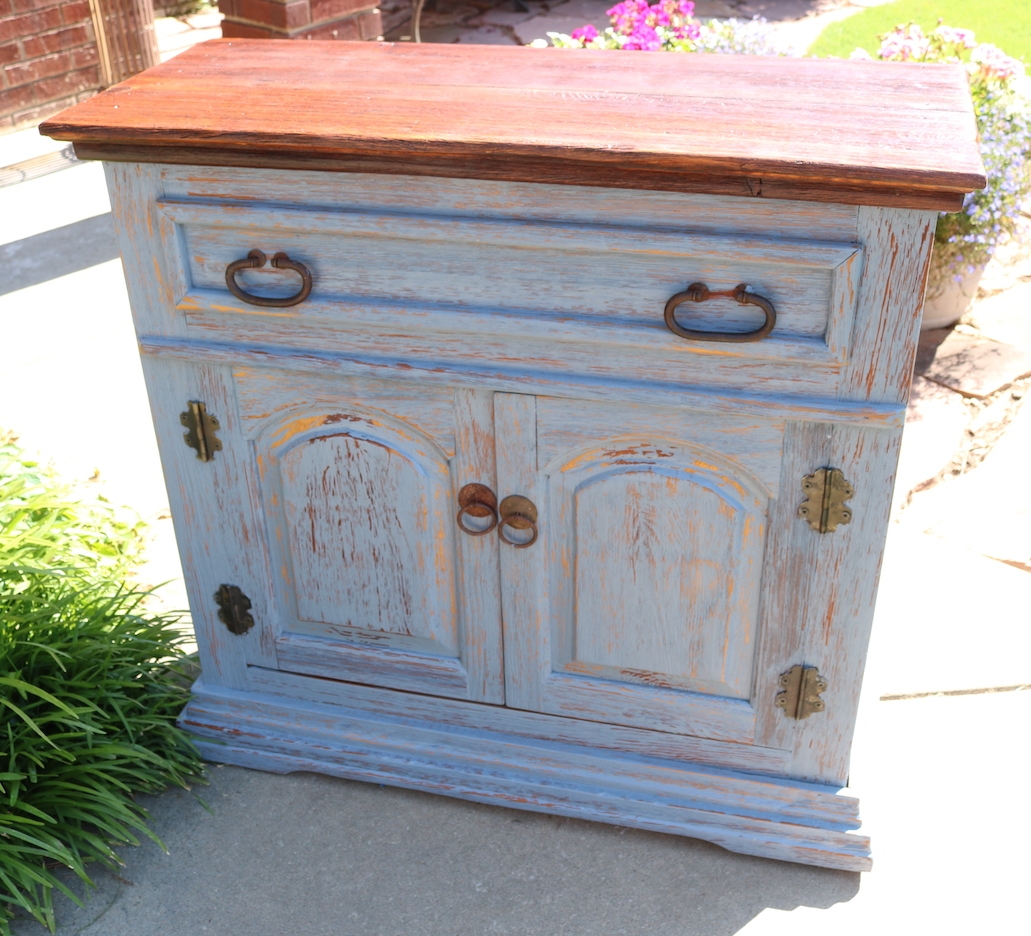
Occasionally I will buy something at an auction for resale I THINK I won't need to do anything to! Example...this nifty "primitive" cabinet/console/buffet...

It could be used for many things...hence the cabinet-slash-console-slash-buffet.

It would make a darling entry table. Or a tv console. Or even a small dining buffet.

The wood is really rustic and rough...nifty iron hardware.

But alas, no one shared my vision and it sat in my space at 410 Vintage for MONTHS!

Last week I did a little reset...technical word in the world of retail for "move stuff around." Since this little cabinet/console/buffet had been hanging out for quite some time I decided to bring it home and give it a little facelift.

Darker gel stain on the top and a grey/blue chalk paint and distress on the base.

I think it is darling and HOPEFULLY someone else will agree! 

Another example of how easy it is to change things up a bit with just a little effort!

Another Drexel Accolade addition to the family....

It has actually been in the garage for months...but when I needed a large piece in my space at 410 Vintage Market and dug it out,I couldn't bring myself to turn loose.

A Drexel Accolade dry bar/server. The top actually flips open.

It isn't the first piece I bought for resale that wormed it's way into my heart...no secret that I love mid century pieces.

But this Drexel Accolade bar is more of the "Hollywood Regency" style. Identical to this little Drexel side table I painted with a high gloss lacquer and love in my den....

There is a good chance I will paint it if I decide to keep it...for now I have shined up the brass hardware and will leave it at that.

Over the years I have snagged some amazing bargains at auctions and on Craigslist...a little DIY magic and they are stunning additions to any home!

This Drexel coffee table....

My growing collection of mid century dressers...

This one is Matt's...I just don't have any more room!

My never ending collection of side tables!

I started collecting Lane Acclaim tables years ago...I think between the kids and I we are up to 10! That doesn't include the 2 walnut Lane coffee tables and the end table I just refinished for Katie and Matt!

Chairs...

Odd little bookcases are always fun!

If you walked through my home you might think I lean more towards the "traditional" side of home decor at a glance...but all these pieces have blended in to created a cohesive "eclectic" style. This "style" of home decor allows me to infuse pieces I love without worrying too much about whether I am breaking a "decorating rule" for a specific style!

So...back to the amazing Drexel Accolade console/bar...

In my opinion, there is too much "wood tone" in this space...I absolutely love the wood grain on this piece but there has to be a good balance...it just doesn't feel "balanced."

So there is a good chance that IF it stays, it will get painted. Again, that is a big "if." I think I have had no less than 5 different buffets and hutches in this space at one time or another and I always end up moving them out and moving the table back against the wall...as I mentioned before my toes tend to find anything out of place, and since the dining table has been against the wall for the better part of 19 years, it may not work well in the middle of the dining room where it REALLY belongs!

We'll see...that is one of the beauties of learning to DIY furniture...you can buy it cheap, paint, upholstery or refinish it and promptly move it out if it doesn't suit your needs. Without the guilt of having to live with something you hate because you paid a fortune for!!!!

OR it can find a permanent home where it can shine for another lifetime!

Paint...the easiest way to update a piece!

When I first started this site I posted every day. Seriously. Every. Single. Day. 

That's okay when you are trying to catch up on 30 years of DIY projects...but after awhile it gets a tad tiresome. For a time I posted twice a week...very doable and since I usually have 2-3 projects a week in the pipeline, I always have something to share. 

But life has gotten pretty busy around here the last few months. Katie's senior year (and all the hoopla that goes with that!) and then she and Matt's graduations....

Matt graduated from the UofA with his master's degree and a week later Katie graduated from high school with "highest honors."  Precious....

And of course the apartments...seems the work around there hits in tidal waves...not just "waves" but darn near tsunamis. So the last few months I only found time to post about once a week...which means the projects have been piling up in my "blog files." 

Right now I have hutch tops-turned-display cabinets, an antique dresser, a mid century dresser, an antique table, a side table, two chairs and much more...all piled up in the garage, finished and ready to share!

Today I thought I would share a few projects to show that a little bit of time and paint can completely change the look of a piece. I've shared similar projects in the past (tons to be exact...just cruise around this site!) but time and again I see people posting on several blog sites questions about "what can I do to make this better"..."help"..."blah, blah, blah.... bitch, bitch." 

Dude. Seriously. Go buy a stinking can of paint! It really isn't hard to take a simple, "blah" piece of furniture and turn it into something worth having in your home.

Take this table for example....

...I see little tables like this at thrift stores and auctions for next to nothing. Or maybe your parents or grandparents gave you one when you started furnishing your own home. Solid little tables...usually in mahogany or walnut or even oak. (I have a similar one in my den that I painted and feature here.)

Let's be honest...not real appealing. I think this one sat in my booth for MONTH before I brought it home and gave it a bright chalk paint/distress treatment (My recipe for "chalk/plaster paint"... 2 1/2 TBS of Plaster of Paris, 1 1/2 TBS of water, mixed well then add 1 cup of latex paint)

I stuck it back in my booth and it only lasted a couple of days. Notice I didn't even invest in new hardware...I spray painted the existing handle with off-white paint!

This antique oak buffet was pretty "dated" as well. Again, something you might inherit from a family member or find in a thrift store or on Craigslist for not a lot of money!

(I took the picture after I had removed the mirror in the top piece)

Some people like the antique wood look and these pieces can be beautifully restored if you use this process. 

I chose to restore the top since it was solid wood and paint and distress the rest of it....

I changed out the hardware...again, it only lasted a few days.

And another....

Sorry for the picture quality...phone camera!

This empire dresser was, as you can see, a hot mess. Literally falling apart but nothing a little glue and clamps couldn't fix right up. 

Which reminds me...I was working on another dresser this week. Seriously people...dove tail joints were not nailed FOR A REASON!!! So don't try to fix them with nails. And silicone is NOT glue...so don't try to fix loose joints with silicone. My point, if you are going to fix something, fix it RIGHT. I spent over an hour just "undoing" someone else's "fix." If you don't know how to fix it right, GOOGLE IT! My daddy didn't teach me everything I needed to know about DIYing...but he did teach me to use my head and use available resources to find out how to do it RIGHT. And he didn't even have the internet!!!

Okay, rant over. So after some "rebuilding" and repairs on this dresser, I chalk painted and distressed it (again, Google it...you'll get around 1,170,000 results on chalk or plaster paint...I'm not kidding...I googled it and that is how many results I got)

The piece had nifty wood knobs...several were missing so I used a few from the buffet. I decided to give them a little facelift so I primed them and sprayed them with light blue spray paint. 

I think it lasted a week!

And lastly, a mirror. I have featured a number of mirrors on here. IMO, they are one of the easiest things to update. This wood mirror had some interesting and intricate carvings but it was a bit dated and dark!

I decided to forgo my usual "boring off white" and give it a little pop of color.

For the time being, it is hanging behind the front door in what little "entry way" I have. Not sure I actually love it there but that is where it is...for now....

My point...stop looking at your dated, drab furniture and growling at it. Find some inspiration and roll up your sleeves.

Don't turn your nose up at those "dated" pieces your mom and grandmother want to give you...take them...again, find some inspiration and give them a simple facelift. There are countless super awesome ideas out there for every kind of project!

There are also unlimited tutorials out there on how to repair, paint, refinish, decoupage...if you can imagine it, a tutorial is out there to tell you how to do it!