Lessons in DIY....

One of the things I love about this house is the irrigation system…no more dragging hoses and sprinklers around the yard all summer.

In theory.

The system has been severely neglect for years so it has been a total rework. We finally got the two zones (there are four) working for the bulk of the front and back yard.

As usual, I did what I always do when I want to learn something new. I hover. Followed the irrigation guy around watching every move he made (for a $100 an hour I figure I should get a lesson).

I googled how irrigation systems work and how to repair and replace malfunctioning and broken heads.

I installed the Zone 3 drip system for the flower beds. Yay me!

Now I think I am an expert and thought I could tackle Zone 2 which wasn’t working at all.

Zone 2, the zone on the north side of the yard, has been a total bust. I knew there HAD to be a break in the main water line some where, I just couldn’t find it.

I am tenacious…the darn thing was broken and come hell or high water I was going to fix it.

After WEEKS of digging around and tracing lines, I found not ONE, not TWO, but THREE breaks in the water lines…..curses!

Needless to say my newly sodded yard looks like it has been hit with mortar shells.

IMG_1689.jpg

The first two breaks were relatively easy fixes….the third has been a total booger. It took three full days and at least 6 or 7 trips to Lowe’s…I repaired the same spot SIX times before I finally got it right…I think…I hope…unless one of the connections broke loose again when I covered it with dirt.

Today’s lesson on DIY. As I have said before, my daddy didn’t have time to teach me EVERYTHING I need to know about DIY. But what he did teach me was a valuable lesson. If you want something fixed, repaired, built, or changed, be willing to do the research and put in the time and muscle to do what needs to be done.

I didn’t have a clue about irrigation systems. Zip, zero, zilch. But I am not about to pay someone $100 an hour to do something as simple as change out busted heads. So I learned…and am still learning

The water line repairs….that’s another story. This was one of those times when after 3 days of crawling around in the mud and AT LEAST six trips to Lowe’s, I began to wonder if it was time to call in a professional.

I suspect it would take them all of about an hour to do what took me three days!

DIY lesson number two….know your limitations.

That’s a tough one for me.

I do get to share one little project I managed to complete while I was waiting on water line repairs to dry.

Years ago I bought these old metal wheels at an auction. Thought I might sell them but never have so they just sat in the yard with no real purpose.

This is the picture I took to post on Facebook Marketplace eons ago….

28336456_10213705878788595_1856686047250220767_o.jpg

I’m not really a “yard ornament” kinda person so the fact that I had these big ole metal wheels just sitting in my yard was, well, just not my jamb.

I moved them to the new house and set them in the back corner of the yard and thought MAYBE I could find something to do with them…..eventually.

Now I do like “sitting” areas….and the more I looked at these wheels, the more I thought, “Hum, just MAYBE I can figure out a way to turn this into some kind of bench or something.”

So last week Brian and I went out to this ratty little old “hobby mill” and picked up a live edge board, brought it home, power washed it and made a bench…I really like how it looks tucked away in the back corner of the flower garden.

IMG_1691.jpg

(The concrete “bench” in the forefront of the photo was there when we bought the house…we were told it was part of the old farmhouse that sat here originally…that sucker isn’t going anywhere! Makes a great place for squirrel food in the winter!)

IMG_1693.jpg
IMG_1694.jpg

Presto, bingo! Now instead of having some big ole’ honkin’ metal wheels in my yard that cause me confusion and grief, I have this nifty one of a kind bench in my back flower garden.

I haven’t decided whether to seal it or leave it natural.

LOVE!

We picked up another piece of milled wood just in case we needed another piece…I decided to use it to make a another bench. The concrete bases were from a bench in my Mother’s yard. It use to have a concrete top but someone (who I shall not name since it might embarrass my oldest daughter) sat on it and busted it. So these bases have just been sitting around waiting for inspiration.

I think I will seal these boards. I love how you can see the mill marks and a sealant will really make those “pop” like it did on this old wood I used to make a table.

IMG_1696.jpg
IMG_1697.jpg

Irrigation system is (fingers crossed) fixed and I managed to get a few little projects complete.

Makes for a good week!

static1.squarespace.png

Thanksgiving bench....

Last year I shared a couple of little benches I whipped up out of necessity! 

My dining table spends 364 days a year against the wall with nothing more than a couple of chairs.

Since I host Thanksgiving dinner, the table is extended and pulled into the middle of the dining room so I need the additional seating!

It is no secret that I tend to stick with what I know so when it was time to pull out the table and get ready for Thanksgiving dinner last week, it was back to the garage to build another bench for the holiday!

Since I had already designed and built a few last year, I really didn't need to draw up new plans...I just needed to dig around in my scrap wood and find a few pieces I could use to construct a new bench.

That was pretty easy considering I had some oak left over from my stairway demo earlier in the year!  I found an old pine dresser at the apartments that was missing the drawers, but the sides and top were perfect slabs of solid wood for the top of the bench. I also had some trim from who knows what project. I always have paint and stain on hand! I had to pull a few nails and sand off some old mastic, but other than that I had everything I needed! In the end, the bench cost me nothing more than a little bit of time!

It's no secret that oak is not my favorite wood but since I just need this little bench for the day, no biggy! The benches I constructed last year served their purpose and then where promptly sold in my booth, which explains why I had to build a new one!

I hope everyone had a great Thanksgiving! After a day of stuffing our faces with turkey and EIGHT pies, I spent the weekend decorating for Christmas! Some people start off the holiday season fighting the crowds at the mall on Black Friday, I start mine wrestling with strings of lights and yards of garland...fun time! 

Little changes from year to year...rarely do I tackle holiday projects. Here I shared a cute little project made out of a butter dish ...

...and here you can see how I made this versatile primitive box display...

....but all in all things pretty much stay the same. 

Well, except the constant changes I keep making....

A little stool project and a time to be thankful!

I spend several days preparing for our family holiday dinner...shopping, baking, cleaning...the usual. 

This year I added another little project to my long list of "to dos!"

A cute little bench to add additional seating to my Thanksgiving table.

Since we have the bar and rarely use the table, it usually sits against the wall in the dining room with only two chairs. For the holiday dinner, I pull it out and add the leaves. This year I have several sets of chairs in the garage waiting to go to the booth, so I pulled one set in. I like the red, but I didn't like all four of them....

...just "too much" for a smallish table.

I decided I wanted a bench. I searched around a few flea markets, but could never find anything that was just right. 

Even though they weren't the perfect size, I took note of how each was constructed and decided to build what I wanted so I would have the perfect width and height! 

Just one of the MANY things I am thankful for, year round. The ability to make what I need...

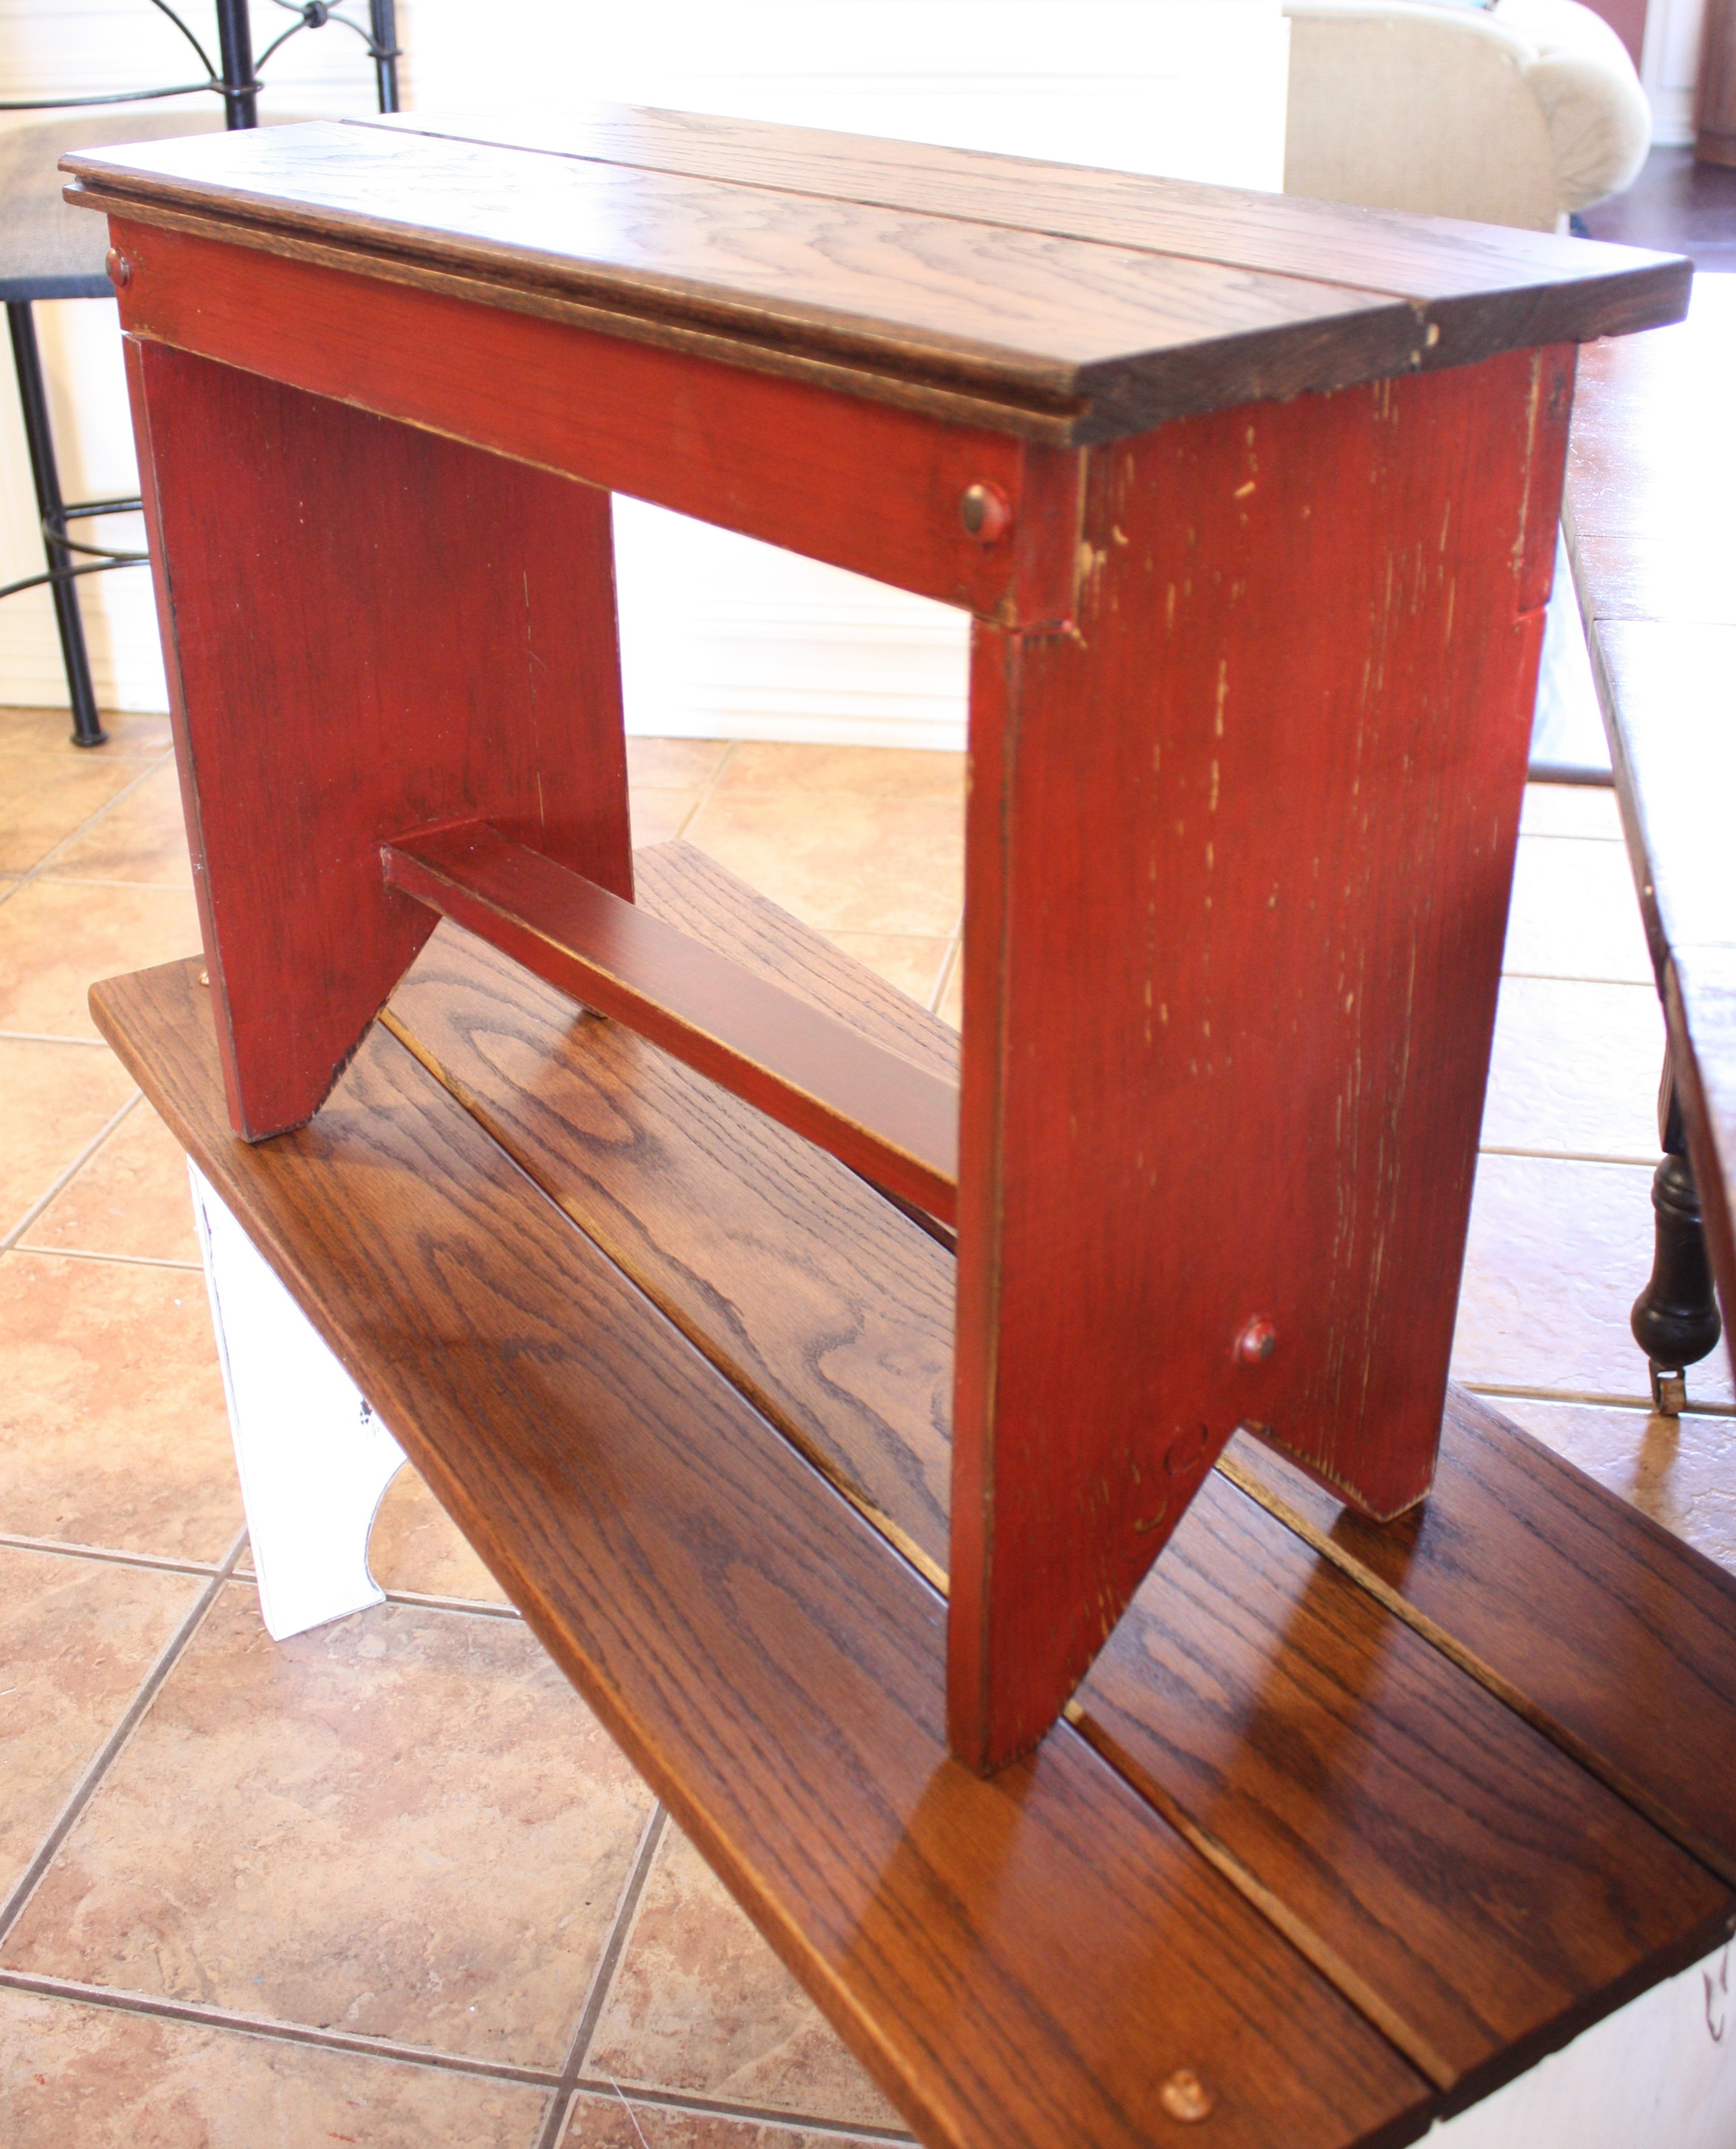
I wanted a bench that would fit under the table when not in use so I went with 36" wide. I wanted the same height as a normal dining room chair so I went with 18" tall. The depth of the bench was determined by the material I had for the top...solid oak planking I used on these tables here and here! Although I am not a huge fan of oak, I had a few pieces and it is solid and sturdy and perfect for a bench. Since I plan on selling these little benches after the holiday, it was perfect!

I used stock pine boards for the base since I knew I would be painting it!

The first thing I did was draw out the bench so I knew exactly what materials I would need, how I would construct it and what my cuts had to be. Again, nothing fancy...just paper and pencil! 

(Two buttons looked like a "sad face" so I ended up only adding one...lol!)

Keep in mind that most stock material will actually be LESS than the stated board size...for example a 1 x 4" will actually be 3/4" x 3 1/2". Make sure you take that into consideration when drawing out your "plan." 

The width of the material I used for the legs was a true 12" since I originally planned to use "craft board" as the top. Since I was using the oak planking I had on hand, three pieces of planked together ended up being 15" wide...perfect! So I used the 1 x 12 for the legs!

I ended up with enough "scrap" material to build a smaller bench as well! No need to waste good wood!

I used my chop saw to cut the lengths I needed and a skill saw to cut out the detail on the legs...nothing fancy!

After cutting and assembling all the pieces, I stained the top and base. Even though I was going to paint the base, I knew I would be doing a "distress" treatment on it and wanted the wood that showed through to be darker than natural pine. I did not sand the boards or fill the knots before I painted them so the grain really came out when I "distressed" the painted wood!

I used glue and my trim nailer to assemble everything. I ended up adding little wood "buttons" on the joints. Super easy. Measure and mark were you want the buttons, drill a hole with a tiny drill bit, then use a 1/2" paddle bit to make a 1/8" deep hole on top of the tiny hole. Put a sheetrock screw into the tiny hole, put a dab of glue on top of that, then insert the "button." Since I already secured the joints with glue and trim nails, the screws just add a little bit of stability and the buttons are purely decorative! Not a "have to" but they give the joints a little extra "pop." 

I didn't attach the tops until after I chalk painted and distressed the bases.

I painted the larger bench I will be using at the table my got-to "off white" and I painted the smaller bench red. After I painted and distressed them both, I wiped the red one down with walnut stain...it deepened the color of the wood showing through the "distressing" and darkened the red a bit. 

After the bases were painted and distressed, I attached the tops, again using glue and trim nails. I added a couple of oak buttons to the top of the larger bench just to give it a tiny bit more flare. After they were all assembled, I sprayed them both with poly. Again, I don't wax chalk paint...I like the durability of the clear coat!

IMG_7434.JPG

Perfect.....

I planned to make a really cute little center piece for the table this year. I even went out and knocked pine cones out of my pine trees...goodness knows I have plenty!

I wanted a few additional "fallish" things to add to my pine cones....maybe some reddish berry garland or rusty red flowers to tie the red in. But when I went to the craft store Tuesday, the only "fall" things left were a few ratty scarecrow. Curses! Made me want to drop kick a Christmas ornament across the store. Seriously people, can we not get through Thanksgiving before we drown ourselves in Christmas stuff!

Whatever. I am thankful I have the centerpiece I have!

For me, being "thankful" is not just a one day deal. It is something I TRY to do every day...it is what gets me through the tough days and what I have found makes my life so much happier!

If we would focus on what we are thankful for EVERY day, our lives would be so much easier. I tell my kids often...some days you just have to get up and put one foot in front of the other and force yourself to really focus on what you are thankful for! A beautiful blue sky. The blazing reds of the fall maples. The smell of a neighbors fireplace. Your home. Your family. Your God.

When we focus on the positives, even if we have to force ourselves, there is no room in our brains for negatives. Have you noticed that dwelling on the negatives seem to wear you out whereas focusing on the positives in your life lift you up and give you energy. Yep...that's the power of positive thinking! 

This week is the week we share one day of "thanks" with our friends and family!

This week, really focus on what you are thankful for...and then try to keep those positive thoughts in your head every day, all year!

When you find yourself immersed in your own private pity party, force yourself to focus on the positive.

Being happy, being thankful, loving the life you have...it is a choice. No matter what your circumstances are in life, there is ALWAYS something to be thankful for...find it, embrace it, dwell on it. 


Simple bench or stool makeovers...

At least once a month I run across pathetic little benches or stools at the auctions or in thrift stores. I have featured a few in the past....

...this cute little piano bench here....

A bench I made for my daughter out of an old coffee table here....

My dad's old tool bench....

I use it as a little side table next to the chair in the den! This is one of those things that serves a purpose and has tremendous "sentimental" value as well! 

And at least a dozen or more I failed to take either before or after pictures of over the years! I'm a baaaad blogger!

Trust me....they are super simple to makeover with a little paint and fabric and always turn out precious! 

Recently I did a little footstool and bench and actually remembered to take a before AND after picture!

This little foot stool was pretty pathetic in it's original state....

I stripped the fabric (and removed at least 2,483 staples), chalk painted the base, distressed a bit and sealed with poly (gives lighter paint an "aged" look), added a little bit of foam to "fluff" it, new fabric and new "gimp" trim.

Cute as a bugs ear!

I found this old icky coffee table at the apartments. Like the old coffee table I turned into a houndstooth bench for my daughter, it was pretty worthless for it's intended use...a coffee table. 

I removed the top (super simple...a few screws), added foam padding and batting and covered it with fabric and gave the base a little KSTP treatment.  Reattached the top to the base with screws. Super simple! 

Both are now in my new flea market booth at 410 Vintage in Fayetteville! Awesome place so make sure to drop in sometime and check out all the AMAZING treasures! 

Next time you see a ratty old foot stool or a dated old coffee table, see it for its potential! They are super simple to make-over and are perfect for additional seating or a place to throw your clothes at the end of the day...and of course, they are the perfect little touch to add character to your home!