The hardware sets the tone...dresser makeovers!

We have been pretty busy this past month so I haven't been able to go to too many auctions. I was forced to scrounge around on Craigslist and online garage sale sites to find a few pieces to work on..

They did not disappoint!

As usual, I am drawn to the "nobody wants me because I am totally ugly" pieces of furniture.

I like different and unusual.

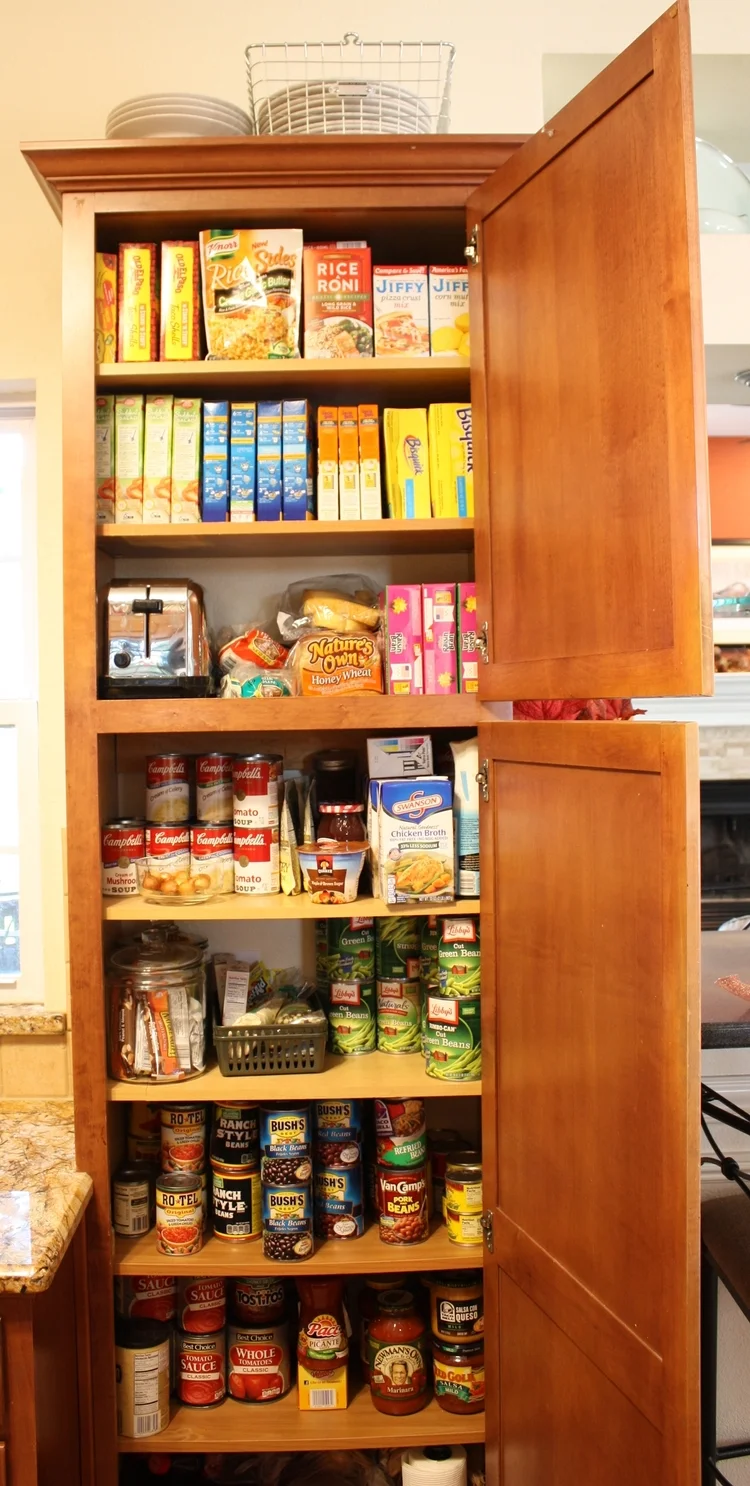
This chest and side table checked off all the boxes...kinda ugly and unusual.

The ugly part is pretty obvious but they do have nice "bones." Solid and sturdy!

The unusual part was the hardware. I love unusual hardware. Sometimes the hardware dictates what direction I go with a piece.

In this case the heavy black handles pushed me towards blue/gray. A friend asked me what paint color I used. Well, let's see...I had some blue, I threw in some black...too dark, so I added some white. 

So I have no idea what color it is....blue/gray!

They had some detailing so I decided to do a chalk paint and distress treatment. I usually save that for pieces that have good detailing that will "pop" when I distress it. 

Two coats of chalk paint, a little distressing and sealed with poly. The hardware just needed a little cleaning and it was good to go!!!

Hardware can be a booger when it is missing. I picked up a campaign dresser last week and the brass hardware was amazing. The only problem was it was missing one handle and they are next to impossible to replace.

I really wanted to stay "true" to the style of this dresser...a mid century campaign. But the old finish was pretty dark and dated. (did I take a before picture like a good blogger...um...no!) 

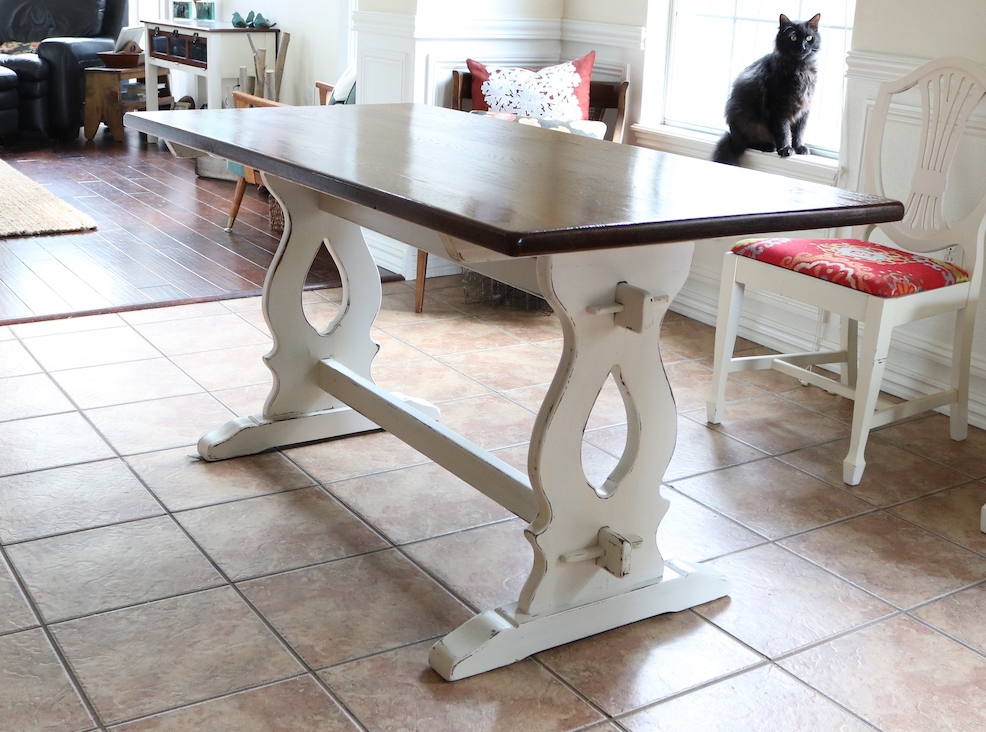
Very similar to this little side table I recently refinished. 

I decide to shine up the brass hardware and give the piece a sleek new look with gloss white paint.

The missing handle, however, posed a real challenge!

I knew I was going to have to scale back to one handle on each of the top drawers but I couldn't just patch little screw holes because the handles actually "inset" into the face of the drawer. 

The thickness of the hardware was 1/4"...so I bought 1/4" pieces of craft board....

....cut out a hole big enough for the hardware to sit in and then attached the boards to the face of the drawers with wood glue to cover the existing cut outs! 

KSTP (Kilz, sand, tack and paint!) treatment, reinstalled the spiffed up hardware and.....

Perfect! Obviously someone else thought it was perfect because it sold the day I took it in!

Until next week....

Oak dresser makeover....

I shared here how I scored a new bed frame for my master bedroom!

I bought the entire set which included a chest of drawers and two nightstands. Since I am not into "matchy-matchy" and didn't need the chest and nightstands, I decided to do something to mask the "timeless" honey oak of the remaining pieces....

Notice the use of "quotes" on "timeless." I have lived long enough to know that NOTHING is timeless. Nothing. Not subway tile, trestle tables or hardwood floors.

Why? Because while they date back decades, there was a time when those now-popular must haves in the decor world were seriously out of favor. Had you bought a house with subway tile and hardwood floors in the 70s, you would have immediately replaced them with wall-to-wall carpet and olive green 4x4 tile. 

Not saying you shouldn't decorate with the times, just don't expect it to be the "in thing" 15 years from now!

Anywho, back to the chest and side table make overs! 

As always I have to have my "stain" fix. Occasionally I will paint an entire piece, but if there is some redeeming wood on a dresser or table, I want that mix of stain and paint. These piece are oak, but the color of the oak was the dated "honey oak." So I used gel stain on the tops and drawer fronts and painted the "cabinet."

Gel stain is super easy to use and allows you to change the color without having to strip the old finish.

I always stain before I paint. Primarily because after the stain and finish cures, you can tape it off to paint!

Again, no stripping or sanding. I have tried every gel stain on the market....General Finishes brand is the ONLY gel stain and finish I would recommend for this process. It comes in a variety of colors and sheens.

First, knock the sheen of the old finish off by lightly sanding with 220 grit paper...you don't need to get it ALL off...just a light sanding (WITH THE GRAIN!), then wipe it all down with a tack cloth. Wipe on the first coat of stain with an old athletic sock (I put on a disposable glove first)...let it dry for 24 hours, then wipe on the second coat with a fresh old sock...dry 24 hours...then wipe on the 3rd coat (again, fresh sock).

The first two coats will leave you in a panic...don't. I promise you will have the look you want after three coats.

Keep in mind, it is stain...NOT paint. So don't be heavy handed with it or try to get perfect coverage with the 1st and 2nd coats. Keep it thin and translucent. And ALWAYS wipe with the grain of the wood! After 3 coats of stain, I seal it with the General Finishes wipe-on poly!

If you goof, the stain will easily wipe off with mineral spirits BEFORE you seal it with the poly.

Let the poly cure well, at least 4-5 days before taping it off for paint.

This is what my "assembly line" process looks like when I prime several pieces....

I had four dressers that needed priming. This is also what I call taking a piece to "base neutral." Sometimes I have no idea what color I want to paint a piece until I can get the old crudy finish covered. I prime and sand and then wait for inspiration.

When it was all said and done, the oak dresser and side tables got plain ole' "off white." Classic. 

And of course, new hardware.

Obviously I did something right...the chest of drawers sold immediately. 

If you have a piece that has a "dated" finish, try using gel stain to update the stain color. Every decor needs the warmth of a wood finish...so don't be so quick to slather paint on every piece! 

Until next week....

Maui Wedding!

This past week Brian and I went to Maui for Brandon and Taylor's wedding. Sunset on the beach...

A destination wedding is, hands down, the way to go! Ten of us (all family) traveled to Maui and we all had an amazing vacation for what it would cost to have a fancy-shmancy wedding at home. No, MOST of your friends and relatives might not be able to go, but the people who matter will be there...whether in person or spirit. Those who can not be there will be thrilled you had the wedding AND a vacation of a lifetime.

The minister performed a Christian ceremony decked out in his Hawaiian regalia! A friend of Brian's had his sister bring the entire wedding party Hawaiian leis! It was a touching and beautiful ceremony!!!

Brian and I stuck with the "land" tours.

A tour of Pearl Harbor and the island of O'ahu. The Arizona Memorial is a must see....

The tour around the island of O'ahu included lunch at the ranch with a view of the "Jurassic Park" mountains..,seriously, this is where they filmed the mountain scenes!

A private zip line excursion along the mountains in Wailuka....

I'm telling you...zip lining is for young and old!

We drove around to the northern point of the island and the "road to Hana" in a convertible.

We watched the sun set on the beach.

While we didn't venture into the waters, we did visit the Maui Ocean Center where we saw all the native tropical fish, rays, sharks and turtles! (Without risk of being eaten by a shark! Yes, I have a few phobias!)

We went to a luau...the food was so-so but the show made up for it...amazing!

The only thing I didn't get to do, that I desperately wanted to do, was the helicopter tour around the island...we booked it but it was cancelled the day before we left...curses! But that one hiccup didn't distract from an amazing week!

This is a trip we probably never would have taken. I feel so honored, and am so grateful, that Brandon and Taylor asked us to share their special day!

As wonderful as the week was, I am glad to be home. So far I have spent the week just trying to catch up...not there yet!

So until next week when I will return to our regularly scheduled program....

Take time to focus on that which is beautiful!

I've worked on a few projects over the past few weeks, but "life" has kept me super busy. I literally forgot to post anything this past week!

This week we are off to Hawaii for Brandon and Taylor's wedding so between home and the apartments, I've had my hands full prepping for a week off.

One of the minor frustrations of a vacation is the need to shop. I really dislike clothes shopping. Especially since I never managed to loose those extra 30 pounds I promised myself I would loose when we booked this trip last December.

I have to remind myself that "it is what it is" and there isn't much I can do about it now...except spend three days trying to find decent clothes that fit. Can't really show up at a wedding on a Maui beach in shorts and 10 year old football t-shirts. Well I guess I could but....

So along with my "normal" day to day chores, there is all the preplanning and shopping and packing and scheduling animal care and.... SO MUCH TO DO!!!! Recipe for stress!

Stress can be overwhelming...sometimes I just have to stop, breath, and find something beautiful or positive to focus on.

Thank goodness the gladiolas are blooming!!! 

Doesn't matter what is causing the stress in your life...school, job, kid, mother-in-law, spouse....or even a pending vacation! Fact is, stress can have a very real negative affect on your physical and psychological well-being so it is important to find something positive or beautiful to focus on any time you are feeling stressed or overwhelmed...even if it is just for a few moments. 

A vase of beautiful flowers is just what I need.

Sometimes I just have to force myself to stop and marvel at the sheer beauty of this flower. 

And breath.

Camden's Eagle!

I always have several projects in the pipeline I can share but this week I want to share a very special "project" and accomplishment.

This past month my grandson, Camden, earned his Boy Scout Eagle award. It is the highest rank a Boy Scout can earn.

HUGE accomplishment and one we are all very proud of!

Less than 5% of all Boy Scouts earn their Eagle rank. Camden has worked very hard to reach this goal and this past weekend we celebrated the honor.

Congratulations Camden! You are an amazing young man! 

(I would like to mention that as part of his "Eagle project" he painted play ground equipment and built buddy benches for an elementary school. I think he gets that from his Grammy...lol! )


Purging...

I really do try to "purge" on a regular basis and stay organized. I do it more out of necessity than anything...the more "stuff" I have the more unorganized I seem to be. So I make it my mission to get rid of stuff I don't use and keep storage areas clean.

I'm not real big on the pretty "basket and bins" storage system. They look awesome but I like to be able to see what I have so I just make sure I stay organized.

Even if a space doesn't necessarily need to be "purged" I try to clean and organize spaces from time to time. This weekend I pulled everything out of my little storage building, sprayed the ant invasion and scrubbed up all the oil and gunk of the floors.

People assume this is a cute little play house or something...I dolled it up a bit (here) so it doesn't look like a boring old storage shed. But inside...that's exactly what it is...a "yard" shed!

I managed to toss a few things but a good scrubbing and organizing all the "stuff" made a huge difference! I try to do this every couple of years because it can get pretty dirty and cluttered! When buckets of ants start falling on my head when I pull something down and spiders skitter across the floor when I get the mower, it is time! Past time!

My general rule is if I haven't seen it or used it in over a year, it is out of here. But occasionally something hangs around a few decades too long.

This stuff is a prime example. Probably 10+ years ago I went through a scrapbooking phase. Then I archived all our old family photos. 

I had carefully organized and stored the mountains of leftover paper and scrapbook tools in plastic containers...and there it has sat for Lord knows how many years.

As you can see, the floor had also become a magnet for some pretty nasty stuff!

On very rare occasions I might need ONE piece of colored paper. Guess what....I have TONS of it. Which I think is why I tend to occasionally hoard "stuff." God forbid I need ONE piece of paper and don't have it...so let's keep 5 reams of colored paper...just in case. Or what if I decide to start scrapbooking again...certainly I will need all those scraps of paper with Easter bunnies on it! 

So here is the deal...I honestly haven't needed it for TEN years. And the chances of me scrapbooking again are pretty slim...that phase is over...kind of like my size 6 jeans phase. 

So why keep it and take up valuable real estate that could be better utilized for something else! 

I kept a few things I thought I might need eventually...heavy stock paper and some archive slips and of course the paper cutter that I do use...but the rest will better be served elsewhere. Fortunately I know a few teachers and this is "stuff" I know they can use in their classroom!

Old blankets, sheets and towels.....donate to your local animal shelter. Clothes and toys...women and children shelters. Canned and boxed food items...church pantries. Athletic gear...your local youth center! Paper and craft stuff...drop it off at your local elementary school! 

All that "stuff" you have crammed in closets is needed by someone NOW! Why store it "just in case" when it can be put to use now?

Purge and clean one closet, cabinet or drawer a month and within a year you will be surprised at what you don't miss AND you will find your closets and drawers manageable...and will have plenty of room to bring in more "stuff." LOL! 


Your yard may need a new "rug!"

As I mention here (when I ranted about my neighbor's trees!) my yard is an extension of my home.

I obsess when it is time to replace a rug or flooring...I cruise the internet, pin every room that catches my eye on Pinterest, and spend months bringing home hardwood and tile samples! (Stay tuned for the drama of the new couch selection!)

But what about our yards...does your yard need "new flooring?" Mine sure as heck did!

It's not like I have ignored it....I have resodded this area at least 5 times in the last 17 years...most recently just last year. But it never thrived because I kept putting down the wrong sod...Bermuda and Zoysia...both of which need sun and this area of my yard did not get enough.

I resisted putting down the sod I KNEW I needed...Fescue. Silly reason actually. Most of my yard gets tons of sun and the Bermuda has thrived. Bermuda goes dormant in the winter and turns brown. Fescue does not...it pretty much stays green year round. The thought of having two different types of grass was more than my OCD could tolerate.

The fact is, after years of failure, there really was no other option...dirt or grass. No brainer really, but the grass I WANTED to grown wasn't going to survive the shade! Want in one hand, poo in the other.

Fescue it is...and it made a HUGE difference. 

Just showing off some of my pretty potted plants!

The MAJOR upside to sod is instant gratification. A day of hard labor and you have a beautiful yard that will not wash away!

Sod vs. seed. In my opinion, the difference financially is really minimal longterm. Yes, the upfront cost of sod may seem substantial. I probably spent $600 on 4 1/2 pallets of sod and some top soil.

You have to top seed with straw. You will have to hope and pray you don't get a heavy rain that will wash away the seed (we have had more than a few of those in the last month!)...and of course there are always the birds who find it very tasty! Yes, you have to water sod, but you will water much more to establish seed and even then you might have a tough time nurturing it through the hot dry months of the summer! Seeding in the spring just does not give new grass time to get a good root system before the heat of summer! 

In my opinion, sod is the only way to go if you have the ability to put it down yourself...and trust me, it takes very little "skill!" Just a strong back and clothes you don't mind getting dirty (REAL dirty!)

By the end of a back breaking day I had a beautiful new "rug" for my yard...and hopefully THIS time it will survive! 

Life....

I have lived in this home for almost 18 years...and I have spent 17 years and thousands of dollars landscaping my yard...it is, after all, an extension of my home!

One of the areas I first landscaped was behind a massive row of pine trees in my side yard (I live at the end of a cul-de-sac so my side yard is adjacent to my neighbors back yard)....

This area got zero sun and the soil was really too acidic due to the pines to grow much. The trees on the left were large oak and wild cherries in my neighbors yard...the pines and Bradfords on the right are mine. The two lines of trees provided ample shade from noon on. I built my first swing pergola for shady afternoon lounging, laid Lord knows how many tons of flagstone and filled the beds with shade loving ground cover.

Another area I have carefully cultivated because of all the shade....

Because of the pines, the pin oak and the smaller Purple Plums in my yard and the row of mature tree in the neighbors yard, the little bed got very little sun. Perfect for tender hostas.... and they have thrived!

Several weeks ago, I spend a fortune and a few hard days of labor laying new Fescue sod. Between years of erosion and the new fence, it was time! Fescue is perfect for shady areas and like hostas it can not tolerate too much sun. 

Which brings me to "life." 

The neighbors cut down ALL their trees...ALL of them! The entire row of mature oak and wild cherry trees that ran along their fence, that shaded my yard and flower beds...gone! 

In one fell swoop, my hostas, ground cover, new fescue lawn and even my pergola is now exposed to full blown sun from late morning on.

I am devastated...WHY would you do that? Why would you cut down an entire row of beautiful, mature trees.

I know....they aren't my trees and they can do as they please....and just because it destroys 17 years of careful landscaping is not their problem!

This is life....when you depend on others to "cultivate your garden" you take a big risk...because in one fell swoop they can alter their life so drastically, it can have a devastating affect on your life.

IF you choose to see it that way. Truth is, the only thing we control in our lives is how we CHOOSE to react to what happens around us...and our attitude. Period. End of story.

I want to pout, and scream, and go beat up my neighbor. But the truth is, it won't bring back the trees they cut down. It won't save my hostas or keep my grass and ground cover from burning up this summer. 

So what choice do I have? That's what I am working on this week...planting new trees, moving my hostas, watering the heck out of my tender new grass. 

I cut a poem out of a newspaper 30+ years ago...I probably didn't even realize at the time what it REALLY meant...but I do now and it hangs on my office wall....

After a while you learn the subtle difference

Between holding a hand and chaining a soul

And you learn that love doesn't mean leaning

And company doesn't mean security

And you begin to learn that kisses aren't contracts

And presents aren't promises

And you begin to accept your defeats

With your head up and your eyes open

With the grace of a woman, not the grief of a child,

And you learn to build all your roads on today

Because tomorrow's ground is too uncertain for plans

And futures have a way of falling down in mid-flight

After a while you learn

That even sunshine burns if you get too much.

So you plant your own garden and decorate your own soul

Instead of waiting for someone to bring you flowers

And you learn that you really can endure....

That you really are strong

And you really do have worth

And you learn and learn

With every goodby you learn.

Life and landscaping...learn from your mistakes, don't depend on other's to cultivate your happiness, when others actions affect your life put on your big girl panties and get to work doing what you need to do, and as frustrating as it can all be, keep a good attitude! Because shit happens and you can't let your bad attitude kill your happiness.

That's right...it isn't the actions of others that will kill your spirit or make you happy...it is the choice YOU make...it is YOUR attitude...

Drexel Accolade Nightstand makeover....

I cringe when I even think about painting any MCM piece but occasionally I bite the bullet and paint. Painted this MCM dresser and chest and have never regretted it...yet.

These little Drexel Accolade campaign "nightstands" are described as "MCM" but my research shows they are from the 1980s...so at best they are "vintage." (I cringe even more describing anything from the 80s as "vintage" since I graduated from college in the 80s!)

These little tables vary in "value." Originally my intent was to sell both as-is. But one had some serious "splash marks" all over it and as much as I tried I could not get it off. My only option was to completely strip and refinish the piece...or paint. 

Since I am AGAIN working on the final stages of my den makeover, I decided to paint the one with the serious flaws and use it as a side table. I started to strip and stain it, but I really need a painted piece rather than stained....just my preference. I believe it is important to have a balance of paint and natural wood in any decor and in this case the scales tipped toward paint.

(I will remind you to use extreme caution when painting "vintage" or "antique" pieces...do your research and know what you have FIRST! Make an informed decision before you refinish or paint...you don't want to find out later that you slathered paint on a 1796 colonial side table or spray painted a Hans Wegner chair...just watch "Antique Roadshow")

You can use ketchup or lemon based cleaners to clean brass. Just Google!

The brass hardware on these little tables needed some serious attention!

One interesting tidbit I ran across was how to determine if you have solid brass or brass plated...a magnet...magnets won't stick to solid brass...if it sticks, it is plated...interesting. Mine are solid so that determined how "aggressive" I could be cleaning them.

I'm not sure if a "clear coat" was sprayed on this hardware or age had taken a toll (maybe both), but even my 1/2 and 1/2 mixture didn't cut it. In the end I used a toothbrush, 0000 steal wool, a heavy duty brass cleaner and a ton of elbow grease.

Then I gave the entire piece a little KSTP treatment...Kilz, sand, tack cloth and then paint. 

I really like the look of "high gloss" so I went with a high gloss lacquer white...I think the brass really pops against the gloss white and hopefully it will look good with whatever couch I finally set my sights on!

One word of warning I hope all will take seriously...give paint time to "cure." Nothing is more frustrating than spending time and effort making a piece pretty with paint, only to mess it up by putting doo-dads on it too soon! Cure time IS important!!!! 

I cleaned up the other and it may be sold...I may hang onto it for the time being to see if I can use it in the den...but I am not really into "matchy-matchy" so I may not use it...who knows. And besides, that brass is a booger to shine up so I'm not really looking forward to doing that again any time soon!!!

You may notice I have a mix of MCM and "traditional" in my den...and that is honestly how I would describe "my style"....eclectic or maybe "transitional"...a little of this and a little of that. It allows me to add elements I love without having to worry too much about the actual "style" of each piece. 

Until next week....

Oak trestle table makeover...

I bought a table at an auction this past weekend that may be difficult for me to sell...

Hang with me...I know it didn't look like a winner when I brought it home, but the vision was there.

The reason it may be difficult to turn loose of is because I have been contemplating giving my dining room a little "farmhouse" flare.

Again, that is not "my style." But if I can infuse a little bit of the current craze into my decor without a lot of expense and time (like I did here with my bed), I am willing to give it a shot.

For 17 years, my dining room has basically been a "walk through"...from the living area, to the kitchen, to the den....we always use the bar for meals. The table (that got a makeover here) is pushed against the wall for 364 days out of the year and only comes out for Thanksgiving dinner. With the inserts added it easily seats 6-8 with the addition of a few chairs and a bench

But the antique trestle table fits right into my "I think I might" plan. It is the perfect size and style, just needs a little face lift.

The first draw back is it is oak. Again, NOT my favorite wood, but honestly oak is a great "farmhouse" wood to work with.

Second, I like my toes...they aren't the greatest toes, but they always seem to find anything that is out of place...vacuum cleaners, chairs, tables, an animal...whatever is NOT suppose to be there, the toes will find it. One of the reasons I am super careful moving furniture around.

The fact that there has not been a table in the middle of this room for 17 years may pose a problem for my toes.

To complete my vision, I would need the perfect chairs...not a huge deal because I see awesome chairs all the time at auctions. I may have to find a buffet for the wall...had one a few years ago and I kind of liked having a place for a little "fluff." And then there is the whole window, wall, rug, trim detail thing...hum. 

Regardless of what I do in my own home, I know the table needs a little love and attention. So that was the project this week...give this little table a makeover as if it were going into my own home. Then if I decide to actually move forward with my vision for the dining room, I have the table...if not, someone else will get a beautiful antique dining table!

I easily stripped the top using this process...not a lot of finish left on this old beauty but it did have dark "water rings." 

Several months ago a very wise reader commented on another table project and suggested using oxalic acid on water rings. I have never tried it and always just "embraced" the imperfections on antique pieces since nothing I tried worked well. But I did order the acid and had it on hand.

WOW!!!! Just wow. Worked like a charm. I made a paste with the acid crystals and water, dabbed it on the ring, and within 30 minutes, gone! I was a little miffed at first because it "bleached" the wood, but I scrubbed it with my 1/2 and 1/2 mixture and that disappeared as well!

I stained the top and applied three coats of tung oil finish...my favorite! I painted the base with homemade chalk paint, distressed a bit and sealed with polycrylic.

Just beautiful....for now I am going to take my daughter's advise...set it in place and mull it over. Maybe see how many times my toes find it!!!! No harm in letting it hang out for the time being (except for maybe a few toes!)

Right now my den is in disarray and I am trying to decide what I want to do. I gave my couch to my daughter so now I have no choice but to buy a new couch...part of the "den makeover" plan that started several years ago (remember, if you can't "see" it, get rid of what is there and live with a blank slate for a time) Since the reveal, the club chair has been reupholstered and moved to the living room to make room for Brian's big leather chair. The coffee table is laying on Mitchell's bed because we needed more room for Cleo and our grandpuppy, Zoey, to wrestle! There is a new rug...

The jury is still out on it...doesn't seem to be wearing well and not real comfy...hum. I like the look, just not sure I like THIS rug!

So taking on a dining room makeover just isn't on my priority list right now. I know if I am ever going to do it, I should probably hang onto this table since they cost a pretty penny new. But I also know that if I take the plunge I will have a sizable project on my hands...and my hands are pretty full right now.

Maybe it can just hang out for the time being! Never know when a bug attack!

Until next week....