Oak trestle table makeover...

I bought a table at an auction this past weekend that may be difficult for me to sell...

Hang with me...I know it didn't look like a winner when I brought it home, but the vision was there.

The reason it may be difficult to turn loose of is because I have been contemplating giving my dining room a little "farmhouse" flare.

Again, that is not "my style." But if I can infuse a little bit of the current craze into my decor without a lot of expense and time (like I did here with my bed), I am willing to give it a shot.

For 17 years, my dining room has basically been a "walk through"...from the living area, to the kitchen, to the den....we always use the bar for meals. The table (that got a makeover here) is pushed against the wall for 364 days out of the year and only comes out for Thanksgiving dinner. With the inserts added it easily seats 6-8 with the addition of a few chairs and a bench

But the antique trestle table fits right into my "I think I might" plan. It is the perfect size and style, just needs a little face lift.

The first draw back is it is oak. Again, NOT my favorite wood, but honestly oak is a great "farmhouse" wood to work with.

Second, I like my toes...they aren't the greatest toes, but they always seem to find anything that is out of place...vacuum cleaners, chairs, tables, an animal...whatever is NOT suppose to be there, the toes will find it. One of the reasons I am super careful moving furniture around.

The fact that there has not been a table in the middle of this room for 17 years may pose a problem for my toes.

To complete my vision, I would need the perfect chairs...not a huge deal because I see awesome chairs all the time at auctions. I may have to find a buffet for the wall...had one a few years ago and I kind of liked having a place for a little "fluff." And then there is the whole window, wall, rug, trim detail thing...hum. 

Regardless of what I do in my own home, I know the table needs a little love and attention. So that was the project this week...give this little table a makeover as if it were going into my own home. Then if I decide to actually move forward with my vision for the dining room, I have the table...if not, someone else will get a beautiful antique dining table!

I easily stripped the top using this process...not a lot of finish left on this old beauty but it did have dark "water rings." 

Several months ago a very wise reader commented on another table project and suggested using oxalic acid on water rings. I have never tried it and always just "embraced" the imperfections on antique pieces since nothing I tried worked well. But I did order the acid and had it on hand.

WOW!!!! Just wow. Worked like a charm. I made a paste with the acid crystals and water, dabbed it on the ring, and within 30 minutes, gone! I was a little miffed at first because it "bleached" the wood, but I scrubbed it with my 1/2 and 1/2 mixture and that disappeared as well!

I stained the top and applied three coats of tung oil finish...my favorite! I painted the base with homemade chalk paint, distressed a bit and sealed with polycrylic.

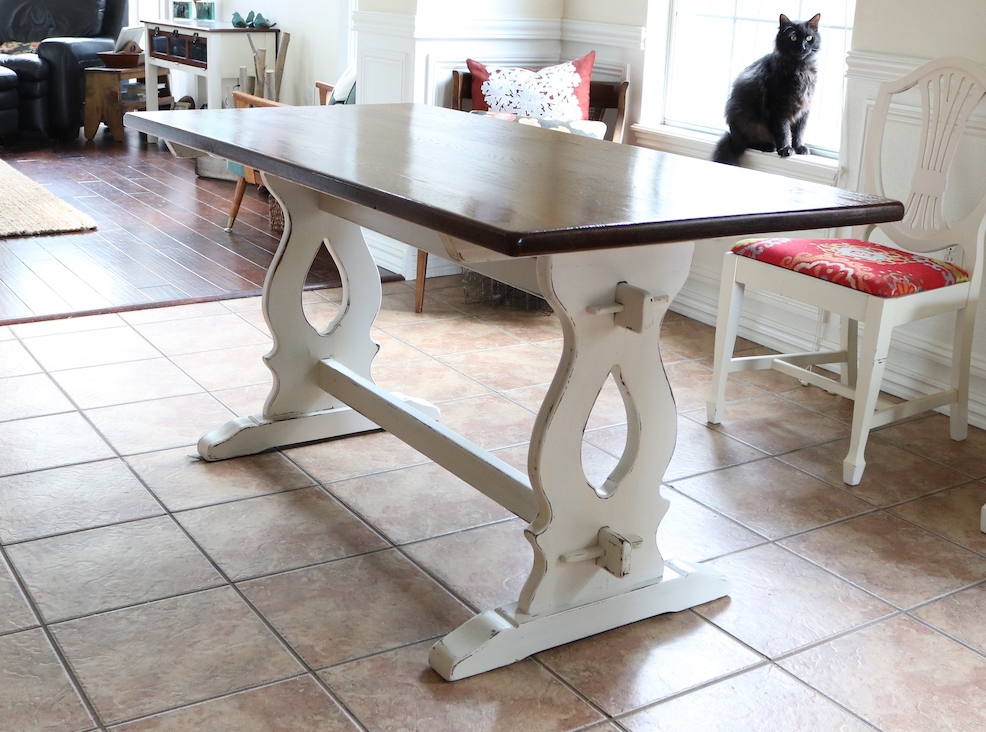
Just beautiful....for now I am going to take my daughter's advise...set it in place and mull it over. Maybe see how many times my toes find it!!!! No harm in letting it hang out for the time being (except for maybe a few toes!)

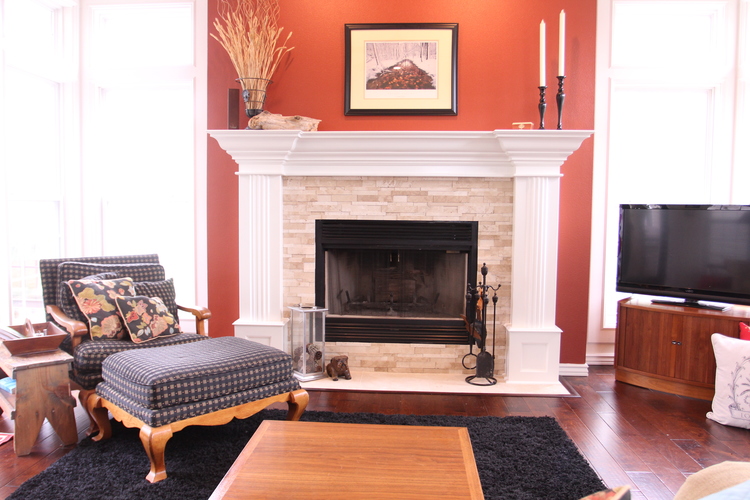
Right now my den is in disarray and I am trying to decide what I want to do. I gave my couch to my daughter so now I have no choice but to buy a new couch...part of the "den makeover" plan that started several years ago (remember, if you can't "see" it, get rid of what is there and live with a blank slate for a time) Since the reveal, the club chair has been reupholstered and moved to the living room to make room for Brian's big leather chair. The coffee table is laying on Mitchell's bed because we needed more room for Cleo and our grandpuppy, Zoey, to wrestle! There is a new rug...

The jury is still out on it...doesn't seem to be wearing well and not real comfy...hum. I like the look, just not sure I like THIS rug!

So taking on a dining room makeover just isn't on my priority list right now. I know if I am ever going to do it, I should probably hang onto this table since they cost a pretty penny new. But I also know that if I take the plunge I will have a sizable project on my hands...and my hands are pretty full right now.

Maybe it can just hang out for the time being! Never know when a bug attack!

Until next week....

Bee Box Shelf....

Sometimes things get "stored" in my garage and I spend a few years kicking them around. 

My daughter started raising bees several years ago. She would occasionally bring home old "bee boxes" to paint. 

One has been hanging out in my garage for...oh, I would say at LEAST two years. Waiting to be painted. Never happened.

In my quest to "organize" my mess of a garage I decided to purge a few things...but it is always hard for me to toss anything wood. One of my few "hoarding" tendencies.

An old bee box...scrap pieces of bead board from another project...old dresser drawer pieces...hum....what to do, what to do!?

Yep...a "bee box" shelf.

I used one side of an antique dresser drawer as the shelf and the scrap bead board for the back. A little glue...a few nails. I sanded the box and the shelf to clean them up a bit. (I could actually smell the honey!)After sanding and assembling I sprayed the entire piece with a clear coat just to seal the "chippy" paint.

Easy, peasy. 

Not my style so of course it will be sold, but just a quick reminder that you can turn any old "scraps" into something pretty and functional with just a little imagination...this didn't take too much time or any expensive tools...just a saw to cut the shelf, a hammer and a little sand paper. 

Next week I'll share the project that produced all the scrap bead board...another "repurposing" project! 

Until then....

A new bed frame!

The last time I shared my master bedroom I had just finished the laminate flooring!

In this post I shared the "before and after" of my bedroom furniture.....

The bed was just so big and heavy and dark! Painting helped a bit, but it was still pretty big and "scrolly"...and I was just never really fond of it. For the record, I was madly in love with the entire set when I paid a fortune for it 16 years ago...but not so much these days.

It is no secret that in my OWN home, I have been slow to embrace the "country" style in large scale...mostly because I am afraid it will be a "passing fad." Not as bad as the chevron and burlap "fad" of 2014, but I worry enough about it that I am not going to start dragging my prized furniture to the garage and slathering it in chalk paint. (And for the record, it is another reason I am a HUGE advocate of sealing chalk paint with poly rather than wax...when the fad fades, you can easily repaint the pieces without having to strip the wax! And yes, you will have to strip the wax!)

What I have done is be very selective about incorporating the style into my home decor with a few pieces that I won't be too torn up about when the "fad" fades and I have to restyle them or dispose of them. 

To me, that is the secret to decorating. Incorporate the latest trends in less expensive ways...decorative pillows and curtains, wall decor, small furniture, wall paint. 

It is one reason I have not jumped on the painted white cabinet train...it is a HUGE undertaking...both financially and physically, and when the trend fizzles in a few years, there are going to be a lot of people not so happy with a kitchen filled with expensive painted cabinets. (For the record, I am NOT opposed to painting some kitchen cabinets...just not mine...yet!)

"But white cabinets never go out of style" you say. Well I say you obviously don't remember "honey oak" or "cherry furniture." EVERYTHING goes out of style. So be selective and proceed with caution when shelling out big bucks and Herculian effort to follow the trends! Do what you love, but think very carefully before taking on a massive Pinterest project!

Sooooo...back to the big, heavy and still too "dark" bed frame. 

Since I have not been "in love" with this piece of furniture for many years, and since I have made an effort to TRY to fall in love with it again, and failed, it is time to make a change.

And here is how I did it....

Now, before you think "OMG, she bought an expensive country style bed frame," let me tell you how I did a little horse trading to get this piece without breaking the bank.

First, I bought an entire bed room set at an auction. I didn't take pictures of the bed frame, but this is the matching dresser and nightstand...

Honey oak...EEEECKKK! My least favorite wood and color. And it is certainly "not my style." But stay with me!

So it came with a mattress and boxsprings...I didn't need them so the auctioneer resold those for me...deduction number one. Then I sold my old bed frame...deduction number two. At this point, I am at "break even." The dresser and bedside tables are getting a makeover and will be sold. The frame got a little makeover for my room.

This is how I justify incorporating the latest trend in my bedroom...it didn't cost me anything but a little time and paint.

Am I madly in love with it? Umm...not really but I like that I have incorporated the latest trend with little expense and effort.

I like that it is not as big and dark and hulking as my other bed frame...simpler, smaller, different. 

I do LOVE the fact that when the "country faze" finally fizzles, I will not beat myself up for disposing of an expensive piece of "trendy" furniture! 

Adding elements of the current "decor craze" doesn't always entail making a big financial commitment.

Case in point....

A few little projects....

I finally finished MOST of the projects piled in my garage...so what do I do? I go buy more!!!

Now you can barely walk through the mess. So in the next few weeks, I will have LOTS of projects to share!

This week I thought I would share a few little projects I finished up...and promptly sold. But they are good examples of taking something pretty much worthless and easily turning them into something worth having in your home...trash to treasures!

I have shared this little project in a previous post! I thought they were so cute I have been on the lookout for tripods ever since...tough to find but I did manage to score a few at auctions.

They are super simple to make and cute as a bug's ear!

I bought this little "whatever" for a song and decided to turn it into a little tv table....

The top was a "formica" kinda thing and not really worth salvaging. I had a wood top from an old table I found at the apartments, so I cut it down to fit, attached it, and then gave the entire piece a little KTSP treatment....super cute and perfect for a flat screen tv!

Ever so often I cruise through Goodwill. On one trip I found this ugly little wall clock.

I removed the metal doo-dads, puttied the holes, chalk painted and distressed the wood frame, and....

Perfect for someone's "farmhouse decor." 

Stay tuned...there are some nifty projects lurking in my garage I hope to share in the coming weeks! 

Until then....

Practicality beats heirloom...

It certainly doesn't happen often. If you have been around awhile you know I will take heirloom over just about anything.

This stool was my great grandfather's drafting stool and I featured it here.

It is oak and it really isn't "my style." (whatever that might be!) But because it was an heirloom piece I carefully refinished it and recovered the seat.

But when it came right down to it, the little guy just wasn't very practical. First, it was kind of heavy and difficult to move around...truth is, if you lift up the seat it comes right off. Second, there is a good chance the thing was going to kill me! Since popping my cabinets up, I often need a little boost to reach the upper cabinets. The top of this stool spins and more than once I found myself dang near snapping a limb just to get to a spare can of coffee when I tried to use it as a "step stool!"

It was my great grandfathers and I seriously love it...but it just wasn't functional for the kitchen! 

I have been on the lookout for an old "cosco" type step stool. I found several, but all were too tall...so every time I would need to open a drawer I would have to move the stool...again, not practical! 

I FINALLY found the perfect stool...and naturally it was a mess!

Covered in paint, ripped vinyl seat, and minor rust spots on the legs. 

NO BIGGY!!! Fortunately the paint was latex so I was able to scrub MOST of that off with a little detergent and elbow grease. I have found that 0000 steel wool and mineral spirits will take rust spots right off of metal...then I just wipe it down with vinegar to neutralize any lurking rust. I recovered the little seat with some fabric I had on hand, and.....

Not sure I am a huge fan of the olive green step, but the fabric has a little olive green in it so for now it will do! 

But the awesomest thing about this stool is it's size...perfect fit for the corner of my kitchen and perfect height for a little boost when I need it!

I'm a little bummed that I had to give up my heirloom piece in the kitchen, but I will no doubt find a functional use for it somewhere, sometime!

Settee makeover...

As you probably know by now, upholstery is one of my least favorite things to do. One, because it requires me to do my VERY least favorite thing...sew.

Second, it hurts. Seriously after a day of pulling old fabric, staples and nails, my hands are killing me. Which is why it usually takes me weeks to complete a project.

A few weeks ago I shared a club chair I reupholstered for my living room.

I hardly had time to recover from that before I started on this Eastlake chair, and then it was time to tackle this camelback settee!

This thing was seriously hideous. But it had really good "bones" and well, it was free!

This little piece is exactly why I have vowed (time and again) to NEVER take on upholstery projects...just too much work. But how could I pass up such a neat little piece. I'm sick I tell ya! 

So I decided to pace myself and tackle a bit at a time.

First, a day of stripping stinky old fabric and a few billion staples and nails.

Then I made a few minor repairs. Then I chalk painted and distressed the little bit of wood that was showing. Then I covered the entire thing with fresh new padding and batting. Then I made the cushion covers. Then I spent 2-3 days recovering the frame. All in all, this "simple" little project took me a good week to finish.

AGAIN, I could give you a blow by blow tutorial on upholstery. But AGAIN, there are a billion really good tutorials online and your best bet is to find a piece similar to the one you want recovered.

Then be smart and take it to your local upholstery shop and don't complain about how much they charge you...trust me, it is worth every dime!!!

Course I say this EVERY time I reupholster a piece...and next thing you know I am hauling home another battered and abused couch or chair. This strange illness I have may explain why I keep hauling home abandoned cats...who knows.

I just know that occasionally I see a piece that is so different and my vision for what it COULD be is so clear, I can't help myself. 

When it was all said and done, it really was a little gem....

I threw in a few pillows I made several years ago for my den.... it sold the day after I took it to 410 Vintage. The fact that someone will love it and use it makes all the aches and pains worth it! 

Fortunately, as much as I love these pieces when they are done, I have a venue to sell them. 

The cats...well, that's another story!

Eastlake chair makeover....

A few weeks ago I questioned the need to paint an antique....seriously, is it a cardinal sin?

Most "purists" would never take a paint brush to a walnut chair or mahogany dresser...I get it...I was one of them. 

But sometimes I have to bite the bullet and go with the flow! 

I bought two Eastlake chairs at an auction a few months ago. Naturally, I neglected to take good "before" pictures because, again, I am a bad blogger.

One had arms, usually referred to as the "caption's chair"...you can get a peek of it next to the old couch (finished the couch last week...hope to share soon!) 

The other does not have arms. It has been at 410 Vintage since I bought them. 

I decided to give the caption's chair a little makeover, knowing that a true "antique purist" would stroke. But my general rule is...if changes will enhance the piece and give it another life, go for it! Keep in mind, I always do as much research as I can to make sure I am not slathering paint on a valuable piece. Eastlake pieces have some value, but right now the market in their original condition are pretty slim in our area. (Now MCM pieces...that's another story!) 

These two old chairs didn't have much of a life as they were, so...

I chalkpainted the frame....

....distressed it a tad to highlight the Eastlake detailing, applied a clear coat, reupholstered the seat and back with drop cloth and added a little graphic from The Graphic's Fairy for a touch of whimsey!

The seat of the chair was in pretty good shape, but the back needed new upholstery weaving and padding. And as with most old chairs the arms needed to be glued and clamped. No biggy, but again, ALWAYS make needed repairs before investing your time and money on paint and upholstery!

It sold the day I took it in.

I've decided to give the other chair a makeover as well....fortunately warmer weather is just around the corner!


"Repurposed" oak dresser....

So many little projects happening...a tv console, a thrift store wall clock, an old love seat, some Eastlake chairs.

But today I want to share another "Trash to Treasure." As I have mention, I often find discarded, abused pieces of furniture at the apartments. They either get left behind in a unit or thrown on the trailer I keep out back for bulk trash. 

Someone had tossed this oak chest skeleton onto the trailer....

It wasn't in terrible shape but it was missing all the drawers. I hated to just toss it in the dumpster...I knew I could do something with it, just wasn't sure what. I brought it home and waited for inspiration to hit.

I did have to do a little bit of structural repair...nothing major...glue and clamps!

I decided to turn it into a little shelf....kitchen, bath, bedroom...wherever someone might need some extra storage for dishes, towels or even shirts...maybe add some cute baskets or boxes. 

I cleaned it up, chalkpainted and distressed the "skeleton," added some stained plywood shelves, and....

I thought about painting the inside but decided to let it be what it is...and old oak dresser repurposed. 

Sometimes less is more.

Club Chair Makeover...

For those of you who are old enough to remember 45 records, you know what it is like to buy a record for the "A" side, only to find you love the song on the "B" side.

That is basically what I did when I found the perfect upholstery for my big club chair and ottoman....

No I did not find inspiration in a song. I brought home 4-5 fabric samples I thought I might like. IIICKKKK! They were all awful so I tossed them on the chair, only to find exactly what I wanted on the flip side of one of my selections!

Magnolia Fabric Lemuel Mushroom

I knew I needed a lighter fabric...anything dark would just be too "heavy" for the space since the addition of the brown leather couch (reasons for the hulking brown leather couch here.) "Light" is kind of a problem in a house with a dog that sheds like a dead pine tree and thinks ALL the furniture in the house is for her comfort. You think kids are a mess...HA! 

So I really couldn't go with anything "off white" but I desperately needed a fabric that was "light" and would go with any color.

This chair is really "not my style." It is oak...strike one. It is "queen anneish"...strike two. But what keeps it in the game is the comfort...this chair is soooo comfortable. I bought it 26 years ago and this is it's second makeover, the last being 16 years ago. I have read many books in this chair, watched many movies in this chair, and even spent a few restless nights in this chair!

Originally it was in the den....

...but when the "combining of the households" went down, it was moved into the living room to make room for Brian's leather chair and ottoman!

I still love the black and gold fabric but again, big brown couch! Major "dark and dank!"

Since I knew it would be a major chore to makeover, I wanted to make sure I picked a fabric that I really love, could handle a lot of wear and use and one that would stand the test of time! 

I think this fabric fits the bill...super durable, not too light and not a "fad." It coordinates with any accent color I throw at it...teal, red, black, white, whatever!

And more importantly, I really do love it! 

First I removed all the old fabric and set it aside to use as patterns for the new fabric.

To mask the "oakiness" I stripped the old finish using this process and then stained it with gel stain. I used a gel stain to ensure I would get a deep, rich color. I actually layered several different colors to finally get the look I wanted...one of the reasons I advocate using a stain without a sealer! A few coats of tung oil finish and it was ready to reupholstery.

Again, I could give you a long-winded tutorial...but every chair is different and I really think you can find a perfect tutorial just by searching for a chair/couch/bench very similar to what you have! 

In my opinion, the hardest part of upholstery is stripping the old fabric and pulling the million plus nails and staples. But it is important to remove ALL the old nails and staples! Also, don't forget...NOW is the time to make repairs...wobbly leg...glue and clamp...broken frame...glue and clamp. If it needs new springs or batting or cushions...do it NOW!

I added a little fresh batting and tightened the strapping in the ottoman...but other than that, it was pretty solid!

Make the PROPER repairs before you start upholstering! If you don't know how to fix it, google it! I promise you will find a tutorial to fix anything! 

Now that the chair is done, the other things I want to change are all the more apparent...the window seat cushions and a few accent pillows...and of course the flooring and wall color. IT NEVER ENDS!!!

As I mentioned in an earlier post, I told Brian to just take me shopping if I EVER mentioned reupholstering a piece again. But the truth is, I love this chair...not the oak, not the style...just "the chair." And now that it is recovered in a fabric I really love, I love the chair even more! So I guess the two weeks of hell was all worth the effort...

...I think!

Waterfall armoire makeover....

This week's project is a classic example of "OMG, can I really paint an antique!!!???"

This is a pretty little vintage waterfall armoire I picked up at an estate auction a few weeks ago. It wasn't in terrible shape, but it really didn't have a lot going for it aesthetically...kind of plan and boring!

It did have some really pretty bakelite hardware, which is classic on waterfall pieces. The problem was the condition of the hardware. One was completely missing the bakelite, and the other three were broken and chipped....pretty much unsalvagable! 

The "design" on the top drawer was not a true inlay...and the general construction was pretty simplistic. I did a little research online to make sure it wasn't something of great value! Sometimes, when there are no makers marks, you just have to make a judgment call on the value as a "restored antique." 

In the end, I decided to give the piece a little KTSP treatment and give it a new life. Hopefully it will make a perfect little dresser/storage cabinet for someone! 

I removed all the hardware, taped and papered the drawers and insides and sprayed it down with Kilz. Since one of the pulls was toast, I puttied the holes so I could add a single pull. After sanding it smooth and wiping it down with tack cloth, it was time to paint.

Unfortunately, it is that time of the year when temperatures don't always cooperate. So I had to haul everything into my dining room and use a brush and roller instead of spray paint. 

No biggy IF you do it properly...make sure you use a quality brush, a 4" foam roller and add Floetrol to your latex paint! (Penetrol for oil based) The additive will give your paint a longer dry time and more time to "level," eliminating brush and roller marks. 

I found a pretty blue and tried it on the drawers..ummmm...no. Too babyish. So I mixed a little black in some green and came up with a greyish-green I kind of liked.

I removed the broken bakelite from the pulls and sprayed them with metal primer then sprayed them with gold paint. Kind of pretty!

All in all, it turned out kind of cute. While it was a nice "vintage" piece, I think the paint and new hardware gave it a nice little "update" and a chance at a new and useful life....

If you are certain a piece is not a valuable antique, don't be afraid to give it a little face lift! 

As I mentioned last week, I have been working on reupholstering the club chair and ottoman in the living room. Unfortunately I had to order a little more fabric so HOPEFULLY I can finish it up this week and share next week! 

Until then....