Solid oak coffee table before and after...

Another "apartment" find....one someone left behind! Every so often I find a little diamond in the rough in all the garbage that gets left behind! 

A solid oak coffee table. It was in pretty rough shape cosmetically, but structurally sound and solid.

I am always amazed that people will leave behind solid wood furniture...but honestly, most are pretty hideous unless you work a little magic on them.  Okay, so it's not really magic...more like scrubbing, glueing, clamping, sanding, cursing, scrapping, staining, painting, more cursing.

I use to cringe at the thought of painting solid wood.  But it is "all the rage" right now so I don't mind painting pieces I feel can be enhanced. But you know me...always have to have my little "stain fix."

This oak coffee table was stained a very dark (very dated) color.  Of course I didn't take a picture until after I had already stripped the top. Since it had a poly finish, I had to use stripper and then a lot of sanding. It is not a big deal to sand solid pieces as long as you are careful not to get over zealous with the sander...remember, start with a higher grit (120/220) and work your way down to a heavier grit (60-80), then finish with a 220 before applying the stain.  

I didn't strip the base since I planned on painting it.

The table is solid and has great "bones."  It has neat little drop sides and would be perfect for a smaller living space!

If a piece has a solid wood top, I strip it and apply an "updated" finish.  Right now java stains are pretty popular. So I strip and stained the top with the java gel stain and gave the base a "plaster paint" finish with distressing.Then a little clear coat!

Very pretty!  Not my "style" but someone will love this!!!

UPDATE:  I put this piece in my booth Thursday...it sold Friday!  Amazing!

Installing a new light fixture...easier than you think!

I am a relatively impatient person when it comes to "remodeling." I want it done and I want it all done right now.

One of the things I wanted to do in my laundry room was install a new light fixture. 

The old one is a "boob light."  Boob light you ask?  Look at it closely....

But I wasn't quite sure what I wanted. I just knew I didn't want to spend a lot of money.  I thought I might like a little chandelier fixture...but they are pretty pricey.  I bought two "modern" semi-flush mount lights several months ago but they didn't put off a lot of light so I put them in the hall and my master closet. 

Today, as with most days, I was at Lowe's picking up paint and supplies.  As usual, I cruised through the lighting isle and spotted this really nifty fixture on the clearance table!

It was a special order that was originally $137 but was marked down to $48 (or so it says). I'm not real keen on the bright chrome finish, but I like the "bones" and I knew I could paint it!  It takes 3 40W halogen bulbs, so it is pretty much equivalent to what I have in the boob light!

It didn't have any of the installation hardware, but Lowe's has pretty much anything you need to install fixtures.

Installing a new light fixture is not hard at all!  Just be warned, if you replace a fixture with one with a smaller "base" than what you have, there is a good chance you might have to paint your ceiling.  I was able to wipe away the ring the old fixture left, but if I look closely, I can see where the old was. 

Anywho, I want to make something clear.  I AM NOT AN ELECTRICIAN!!! And if you honestly have absolutely NO idea what you are doing when it comes to electrical, or if you live in a older home that has funky electrical, I would strongly suggest you call an electrician.  Seriously, the cost will be minimal if you have your fixture on hand and it would be worth the money if you are clueless! I can do minimal electrical...in my opinion, this is "minimal." 

That being said, the first thing you want to do ANY time you mess with electrical is TURN OFF THE POWER!! Now honestly, you can turn the switch off at the wall and the power will be off to the fixture.  But I strongly suggest you shut the power off at the power box! 

Once the power is off, you will need to remove the old fixture.  With the boob light, I just removed the glass globe by unscrewing the little decorative nut on the bottom of the globe.  Then I removed the bulbs and located the two little screws that are holding the base to the ceiling...

I just loosened the two screws a tad and twisted the base...it drops right down, exposing the electrical wiring from the ceiling box to the fixture. 

IMG_1137.JPG

Remove the little "wire nuts" (the little yellow plastic things...your's may not be yellow) ...remember, lefty losey, righty tighty....so to loosen them, turn them to the left, or counter-clockwise.  Keep in mind, once you remove the wire nuts, the fixture is coming down!

Now you should have a black wire, a white wire and a bare copper wire.  You will see the mounting bracket. It will be secured to the box with two screws.

If your new light fixture installs like the old, skip this step and move on to wiring the light fixture!

Some light fixtures mount with a threaded bolt in the center of the bracket, some with two screws with the screw heads down (like shown) and some with two screws with the threaded end of the screw sticking down.  

This would also be a good time to refer to the new fixture's instructions.

My new fixture mounted with two screws with the threads down, so I had to remove the bracket from the box and change the screws.  To remove the bracket, just unscrew the two screw securing it to the box. 

After turning the mounting screws around so that the thread side is down, I reinstalled the bracket on the box. Make sure your bracket is securely anchored to the light box!

After reinstalling the bracket, you can wire the new fixture.

Most fixtures will have 1 black, 1 white and 1 green (neutral).  Some may have 2-3 of each if it has 2-3 "bulb sockets" that were not wired together inside the light fixture .  No biggy...just twist all the like colors together. Then twist the fixture wires and the wires from the box together (black to black, white to white) and twist on the wire nuts (clockwise). You can test to see if they are secure by "tugging" on the wires.  If they all stay securely in the wire nut, you should be good to go.  If one comes loose, untwist the wire nut, twist the wires together, and again screw on the wire nut.

The green/bare wires are the ground wires.  You do not have to secure them with a wire nut, but they should be "looped" together securely.  Or you can attach the green/bare wire from the fixture onto the little green screw that is on the bracket.

Once you have reconnected the wires securely, shove them up into the box and "mount" you new fixture.  

My fixture had two little holes in the base that the two mounting screws in the bracket (the ones I switched so the threads are down) protruded through.  I screwed little decorative round "nuts" tightly onto the screws, securing the fixture flush against the ceiling. 

Now you can turn the power on and make sure your fixture works.  Mine did not.  But before I went to all the trouble of turning the power back off and taking the fixture down to check the wiring, I replaced the bulbs. Thankfully it was just bad bulbs...ALL THREE OF THEM!!!! And these little suckers aren't cheap!

I had a tenant call me one day...her light fixture was bad.  I went in and changed the light bulb.  Seems the NEW bulbs she had were bad.  It happens!

Regardless, I like the fixture.  I might paint it...I might not.  The hardware in the laundry room is brushed nickel, so I probably shouldn't leave this fixture bright chrome...but honestly, I kind of like it.  Maybe if I ever get around to painting the ceiling, I'll paint the fixture.

I also picked up a few stems of Gerber daisies while I was at the craft store last week...

I like the little pop of color!

signature.jpg

Painted throw pillows....

Some days I am determined to get my sewing projects completed.  And then this....

IMG_1101.JPG

How am I suppose to get any work done when they do this!? 

But I did...I actually made a few pillows, including these darling painted throw pillows.  Check out the tutorial here! (I can not currently get the link thingy to work...just click on "Trash to Treasures Tutorials" above!)

Due to the "cat delay" I wasn't able to get my couch cushion made.  Darn. Oh well, I've lived without for a year...guess it can wait another day or two...lol!

Laundry room reveal! UPDATED!

My laundry room is basically a "walk-thru" from the garage to the house. Pretty ho-hum.

Even with my family dwindling, it still gets a lot of use.  So it is important that it be functional AND appealing!

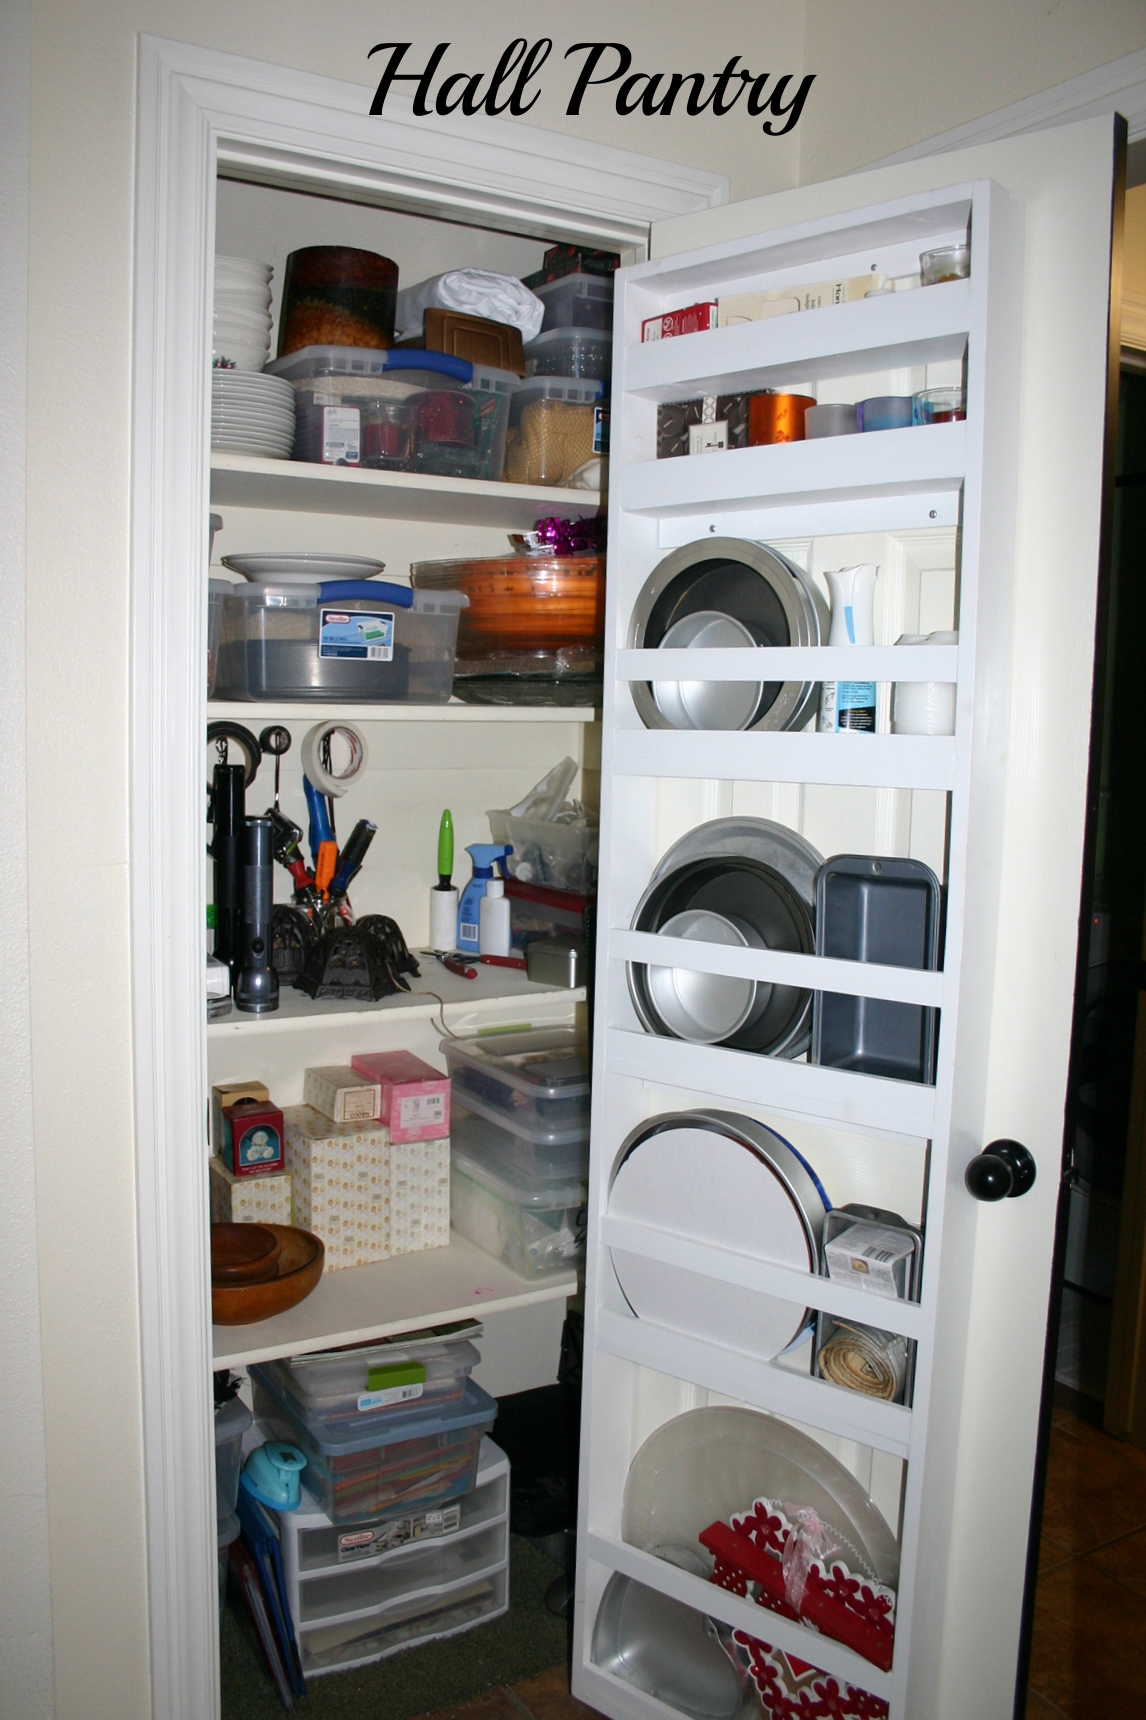
Years ago I knocked out a wall in the laundry room to open the space under the stairway into the laundry room. I put up a wall to create a pantry in the hallway.  Originally, the door in the hallway just opened up to a deep "storage" space under the stairs...not very functional at all.  But the "cubby" I created in the laundry room and the hall pantry with shelving gave me a great deal of functional storage space! You can see the closet door shelving I constructed here.

IMG_0940.JPG

Over the years, I have done a few little things here and there to the laundry room...paint, a little basket for dryer sheets, a storage cabinet and new flooring in the cubby, a broom/mop hanger, painted the doors black. Just little things that helped a tad but never really gave me warm fuzzies.

Some of you may ask...why the blue cubby and green walls.  Well let me tell you...this is a good example of using resources you have on hand. The blue is paint leftover from my mom's bedroom remodel and the green is from my daughter's room...the one she "hated."  Funny thing is, I really like the "celery" green...unfortunately I had added some white to the original green to lighten it so finding the "right" green again was a chore (as you can see from the pictures below, I went through several mixes before I found one I liked)

I seriously envy some of the laundry rooms on Pinterest.  If I could design and build my ideal laundry room it would have tons of counter space for "projecting," large operating windows to flood the room with light and fresh air, a "doggy" sink and tons of storage space for stuff that I currently store in my master closet and highboy...office supplies, sewing supplies, scrap book materials, etc.   

But since that isn't happening, I decided to make due with what I have and make it function a tad better while improving the look and feel of the space.

Keep in mind, I still only want what I NEED or will use in each and every room...that includes the laundry room! So while some of the elements of this makeover enhanced the "look and feel" of the room, they must all still serve a function or purpose.

One thing I have debated doing for sometime is painting the cabinets.  Now if you have been around for awhile, you know that pretty much goes against everything in me. I love my cabinets!  And I love stained wood! But as small as this space is, I knew painted cabinets would look so much better and really open up the space.

Before I painted the cabinets, I wanted to "pop" them up to the ceiling. As you can see from the picture, the top of the cabinet did little but gather dust...just not "functional." I knew it would make the top shelves too high for every day items, but okay for things I only use occasionally. Popping them up gave me room underneath for open shelving above the washer and dryer that would be functional.

Most prefab cabinets (prebuilt then attached to the wall) are attached to the wall with a few screws...usually a couple in the top and a few in the underside. 

Since I have done this a thousand times, I can remove and move cabinets by myself.  But I HIGHLY recommend you have a second set of hands and muscle before you take on this chore least you find yourself flat on your back under the cabinet! 

I would also recommend removing the doors and shelving before removing them...just to lighten the load and make it easier to wrangle them.  I did remove the doors because I was painting them, but didn't think to do it BEFORE I killed myself moving the cabinets...duh! 

TIP: If the cabinets have been painted or the walls were painted around the cabinet, take a sharp utility knife and run it along the joint between the cabinet and wall. This will  "score" any paint or caulk that may cause the cabinet to stick to the wall and eliminate the possibility of the paint "peeling" off the wall when you remove the cabinet. 

Some installers (like mine!) may add a tad of construction adhesive between the cabinet and wall...so you might have to "tug" a tad.  If it still won't come loose, there is a good chance you have missed a screw.  One screw can hold a cabinet tight! Just remember, the minute you remove the last screw, it is coming down...have a grip!!!  If there is construction adhesive stuck to the wall after you remove the cabinet, just take a flat putty knife or dull chisel and scrap it off!

Then it is just a matter of moving the cabinet to where you want it (make sure it is level!) and reinstalling the screws.  I would suggest using new screws but you can use the existing screw holes!  My top screws were on the outside top of the cabinet, and since I was placing the top of the cabinet flush against the ceiling, I had to drill new holes on the inside of the cabinet...no biggy!  I always locate a stud in the wall, mark that distance on my cabinet, "predrill" my holes and set the screws BEFORE I put the cabinet in place.  

Once I reinstalled my cabinets flush against the ceiling, I removed the doors, caulked between the wall/ceiling and cabinets (super important!), taped and papered and then sprayed them with Kilz.  I set the doors on saw horses in the garage and sprayed them with Kilz as well. TIP: if you are painting wood, always caulk, prime, sand and use tack cloth prior to painting!

I did not paint the inside of the cabinets so I made sure to tape and paper well!  Since I was painting the walls, I didn't mind getting Kilz on the wall, but I honestly don't want to paint the ceiling until I can find a new light fixture (some day...I'm looking!!!)  

I used my oil-based trim paint on the cabinets. Remember, if you will store your paint in the house, out of the cold and heat, it will keep for years! Swiss Coffee (my favorite "white") is actually a Valspar color but I have it mixed in Sherwin Williams ProClassic...just personal preference.  

As I have mentioned, I prefer oil-based paint on cabinets, doors and trim. TIP: The trick to painting with oil based paint is a good brush, a sponge roller for flat surfaces, proper temperatures and Penetrol!  This additive makes the paint easy to work with and allows the paint to "level" prior to drying and gives it a nice smooth finish without brush or roller strokes!

When painting doors, always paint the "back side" first...that way, when you turn them over, it won't be so bad if you scratch or ding it! 

TIP: You can wrap your brushes and rollers with plastic wrap and put them in the freezer between coats (I've actually frozen mine for months!) Oil based paints usually take a good day to dry so it is important to carefully wrap and freeze the brush and roller or clean them between uses! And remember, oil based paints have to be cleaned up with mineral spirits...NOT soap and water.

While the cabinets were drying I did a little wall repair needed after moving the cabinets and a few other little things.  

After the paint dried on the cabinets, I removed all the paper and tape and painted the walls.  I also repainted the base trim!  I did that the last time I painted the walls, but it needed touch up again!

I reinstalled the doors, reinstalled the hanging rod, (I have to have space to hang clothes out of the dryer...a must) and installed new hardware! I used these in my master bath and had a few extra so I put them on my cabinet doors. Gives them a little "modern" flair.

Now for the "little touches" that make a laundry room a little more appealing! 

My birds...LOVE!  I featured these here before the actual reveal!  I just thought they were so darling! And I can not stress enough how much a simple little mural can dress up a room...and soooo easy!

I added a shelf...not a biggy but provides a little space for a little "decorating."  I am not a big knick-knack person, so all the jars and boxes have a "utility purpose." 

The glass jars are perfect for holding detergent packets, oxy clean, powdered detergent, etc.  

I love the colored mason jars, and I buy quite a few at auctions for my booths, but never found much use for them in my decorating scheme. But they are pretty and I was able to use one as a change jar...I just punched a little slit in the lid.

I'm not quite sure what I am going to do with the humungus jar ($15 at an auction!)  During the holidays it was a great place to display ornaments!!  But it is a  "non utility knick-knack"  and I really don't want something that big that serves no real purpose!

So I pulled one of the ironstone pitchers from my flea booth...it's simple and pretty.  And I think it will look pretty with some Gerber daisies...a little splash of color!  We'll see....

I found another little Lane Cedar box (absolutely LOVE....$9 at a flea market), stripped and refinished it with tung oil....it is perfect for dryer sheets.  It is originally from a local furniture store so it is neat to have one from our area!

I found a really cool "geometric" mirror at TJMaxx "as is."  it was "as is" because the frame was scratched up pretty good...but I disliked the finish and knew I was going to paint it so I was happy to pay $10 for a $60 mirror! Mirrors are a great addition to any room and I had intended to hang it between the two cabinets...behind the hanging rod.  But I just don't know...and right now it is freezing outside, so there won't be any painting any time soon.

Since I moved my ironing board into the cubby I was able to move the washer and dryer over a tad which gave me a little space in the middle.  I built a custom shelf and put it on castors so I can roll it in and out.  Great for storing extra detergent, dryer sheets, the iron, the sewing machine and such.  

I honestly don't think I like that the front sticks out so far. I would rather it "recess" between the washer and dryer a tad...but for now, until it warms up enough for me to get out and cut it down, it will have to do!! It was a fairly easy project and one I will eventually feature!

IMG_0883.JPG

Redoing the laundry room forced me to clean things out a bit and organize everything.  I bet my ironing board cover was 20 years old...time for a new one!!!  The cubby provides great storage for my ironing board and step stool, dirty clothes, the triple crock pot I only use during holidays, extra leafs for my dining table, pillow forms and stuffing and paint for the house. The new shelf between the washer and dryer frees up a lot of space in my little storage cabinet...I was originally going to use it to store my sewing stuff, but the machine is just a tad to large for the cabinet. With all the couponing I do, it won't take long to fill it up!

Just a reminder...while you have your laundry room in disarray, take time to do a little maintenance on your washer and dryer.  I had NEVER cleaned out the drain filter on my washing machine...OMGosh!!! You can't imagine.  A couple of dollars in change, a few bra underwires, bolts and some serious ewwwww! 

I had to google where and how, and my SIL helped me...but seriously, if you have a front loader, clean out your washing machine drain filter.  

And at least once a year you should clean your dryer vent...remove the vent hose from the back of the dryer and the wall and clean out the inside of the dryer AND the vent to the outside.  Seriously, I found some kind of critter nest in back of my dryer...probably from when I didn't have a good cover on the outside...I don't even want to think about it!!!! Critters aside, it can be a fire hazard!!!

Just a few more little things I need to do. Mainly, I would like to add a new light fixture if I can ever find one I like...which of course will entail painting the ceiling...all in good time! (UPDATE:  I found a new fixture and even posted a little tutorial to help you install your own!  See here!)

Not a huge change but enough to make this room just a tad more appealing and functional...and that was my goal!

IMG_0632.JPG

Home tour....

I am finally getting around to posting a "Home Tour" page.  It is a "process" so it will change from time to time. You can check it out by clicking on the "Home Tour" link above!

A great "meal in one" recipe!!!!

You would think after 2 months of holidays and non-stop cooking, I would be "over" cooking.  But It is just too cold to "project" so I thought this would be a good time to expand my Cooking 101 section a bit.  Besides, everyone needs easy, oven-warming recipes this time of the year!!!

So check out Cooking 101...I am sharing my FAVORITE and super simple quiche recipe!!

Indoor projects...

I need a heated shop!  The high yesterday was 21 so there will be little "projecting" around here!!

I mentioned earlier that this is the time of year to do indoor projects.  So for the next couple of weeks, when weather doesn't permit much else, try doing a few little things inside that will make your life easier and a little more enjoyable.

Like this......

IMG_8739.JPG

Happy INDOOR projecting!

This week I am linking up with OneProjectCloser.com's Creativity Unleashed Party!  I love looking at all the other links...soooo many creative people out there and link parties are the perfect place to find inspiration!  

HAPPY NEW YEAR!!!!

Well, I ALMOST made it.  I watched the Duke vs. A&M game and didn't get to bed til after 11.  But that was it!  As much as I would love to ring in the New Year, I prefer being hangover and sleep-deprivation free New Year's Day!

Unfortunately the "strep bug" has hit my house and I am feeling a little iffy this morning. I'm hoping it is just post-Christmas fatigue.  Katie has been in bed with it since this past weekend and my grandson had it the week before they came for the holidays.  So who knows.

But just in case, I started taking my Christmas decorations down this morning.  That is an all day (sometimes 2 day) job and the last thing I want to do IF I get sick is sit and stare at work that needs to be done.

I doubt I am the only mom in the world that goes in to overdrive if I think I am getting sick.  I clean the house, throw something in the crock pot and make sure my sheets are washed JUST IN CASE!!!   It's like company is coming, only it is in the form of a nasty bug or virus! 

Fortunately I am a pretty healthy work horse so the worst that happens is I feel like crap for a day or two....I've come to the conclusion that it is probably from the all cleaning and the stress from the THOUGHT of getting really sick. 

Anywho...here is my resolution for the year.  Don't make any resolutions.

Just live in the day and enjoy every minute of it.  Know that some days are going to be rough but don't let those cloud the great days.

HAPPY NEW YEAR!  I hope your year starts out wonderful and gets better every day!!

And don't forget your ham, black-eyed peas and greens!  Not sure I really believe in the nonsense, but who wants to take the chance...besides, it is an easy meal ;)


'Twas the week after Christmas...

...and all through the house, not a creature was stirring...

Except mom because WOW what a mess!!!!

Wrapping paper under couches, leftover food in the fridge, molding bread in the cabinet, dust bunnies breeding under the tv cabinet!  

How does the house go from this...

...to total chaos in just a few hours!!!  

IMG_5865.JPG

A lot transpires between the early peaceful hours Christmas morning and mid morning when all are in full swing!!!  

First stockings...always fun stuff like screaming monkeys, toys for the little guys, makeup and lotion for the girls and mildly "inappropriate" gag gifts for the older boys! Then breakfast and primping because as I posted earlier, we all shower and primp, put our PJs back on and take family pictures!!  It is usually the only time of the year when I get my entire family in one place at one time and I want a picture!!!

I have TONS of pictures to share, but for some reason my son's camera was set on some kind of format that won't let you pull them into Photoshop or any other program...so I have to wait for him to convert them to jpegs.  (Keep in mind I am still waiting on the video from LAST Christmas!)  But after he does, I will share a few pictures of the family all dolled up in the pjs!!! 

Sarah and family came in Sunday.  There is always last minute shopping to do, baking to be done and cookies to decorate. Mitchell got in early Monday after pulling an all nighter from Phoenix.  

Christmas Eve we made our annual trip to see Santa, which always fun!!!

I do all my holiday prepping and baking two days before Christmas.  Our Christmas day meal consists of meat and cheese trays, dips and chips and lots of desserts...so Christmas day cooking is at a minimum for me...just a lot of setting out and cleaning up!!! And waaaaay too much eating!!!

Sarah and the family went home Christmas day this year so I was able to clean up a little and relax Christmas night for the first time in a week! 

Even with all the hard work, long days and total chaos, I really do enjoy the holiday!  I love that all my kids are "back in the nest." Even if it is just for a short time!

I usually take the Christmas decorations down the week between Christmas and New Years.  But Mitchell won't be leaving until the weekend after the first and he wants it to stay up...so up it will stay!  It just seemed to go by so fast this year due to the late Thanksgiving so another week of "the spirit" is fine with me!

I was thinking the other day that after the holidays there really isn't much to do for the next few months but "hunker down" and wait on spring to arrive!  Even though I will be celebrating a milestone birthday next month, it just seems that January and February are "human hibernation" months.  Honestly, if it weren't for bowl games and the Super Bowl (and of course that horrible need we all have to earn a living) I might just curl up in my bed with a stack of books and not get up until the first daffodil blooms! That is my sign to start prepping flower beds and planning my spring projects!!!

I hope all had a wonderful Christmas holiday and have a fun and safe New Year!