Antique dresser makeover....

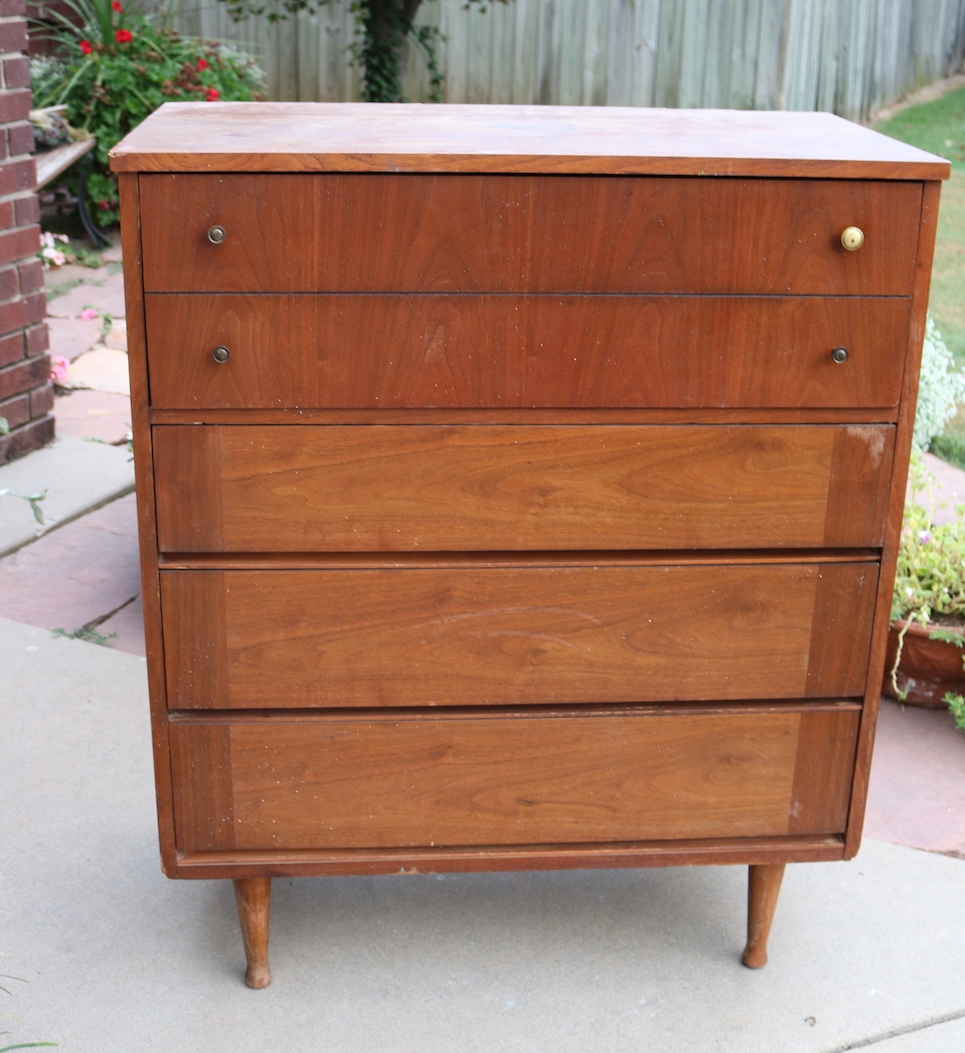
It’s no secret that this antique dresser is really not “my style.” But I knew it could be beautiful with just a little work…

Okay, so it needed A LOT of work!

One of the first things I do when I buy an old piece like this is really examine it and figure out what, if anything, needs repairs and what is “salvageable.”

It would have been super easy to just slather the whole thing in paint, but I love the combination of paint and wood tones…and if I can salvage any of the wood by refinishing rather painting, I’m going to.

The drawers were in excellent condition…they were intact and they did not “stick.” The only real issue was the missing veneer on the front of the cabinet….a little wood filler and sanding fixed it right up.

The top was in relatively good condition…it did have a few “blemishes.” I have “fixed” blemishes using oxalic acid and it works wonders on solid wood surfaces. But this top is a wood veneer and I haven’t had as much luck on veneers…so I just “embraced” the blemishes and let it be what it is…an old piece with a history.

The drawer fronts were in mint condition…just super yucky. The top and drawer fronts were easily stripped using the 1/2 acetone and 1/2 lacquer thinner mixture. I scrubbed them with #2 steel wool and the mixture, wiping with old rags from time to time. After all the old finish was removed, I “washed” them with mineral spirits and applied three coats of tung oil finish, rubbing with 0000 steel wool and tack cloth between each coat. No stain, just a clear finish!

Rather than refinish the “cabinet” I chalk painted it with homemade chalk paint. My recipe for chalk paint is 5 tablespoons of Plaster of Paris and 3 tablespoons of water, mixed well. Then I add 2 cups of flat paint. I painted two coats and distressed, then sealed it with polyurethane. Again, I do not wax over chalk paint…I just don’t think it is a durable finish.

I was SUPER pumped that ALL the original hardware was there…even the top drawer knobs. They had been replaced but the original knobs were in the drawers…major score! They are just so unique and authentic!

Often the stain is mixed into whatever finish is applied. They did this to make the piece look “uniform.” When you strip the original finish, there is a good chance you are going to strip the original stain color…you WILL see the wood grain and there is a good chance the “color” of the piece will be different. For example, the drawer fronts on this piece were a different tone than the top when all the old finish was stripped away…personally I LOVE this look! But if you want that “uniform” look you need to be prepared to stain the piece…and since different woods stain differently, I would suggest using a gel stain application…that is the only way to ensure a “uniform” look. Or in this case, you could paint the top and only leave the drawers original. To each his own!

This is just one of many I shared on Instagram…and there are even more that aren’t pictured here. Over the next few weeks I will share how each dresser’s makeover!

Each one required a different process to bring it back to life!

Stay tuned!

A mid century chest of drawers makeover...Part one!

While my master bathroom remodel is still progressing (yea!) I finally found time to tackle an amazing mid century dresser I found!

This chest of drawers was pretty shady. Nasty finish, chipped veneers, busted veneers, mismatched hardware…just not something you really want in your home!

It had many of the problems you may encounter with old pieces so it is the perfect project to share a little “step-by-step” tutorial on turning a trashed dresser into something you will want front and center in your home!

First, there was a busted drawer! (Which reminds me, ALWAYS number your drawers on the underside as you take them out!)

This is NOT a huge issue.

I can not stress enough the importance of making proper repairs to any piece before you start making it pretty. Glue and clamps people…NOT silicone, not screws, not nails…just plain ole’ wood clue and clamps.

This one really wasn’t too bad…there have been some I had to completely tear apart and rebuild!

One drawer was missing the wood slide like this one…

Kinda necessary if you want your drawer to not be all whomper jomped. Again, no biggy. You can buy slides online but I used some scrap 1/4” plywood and scrap trim to make one. Again, glue and clamps and good as new!

TIP: If you have a drawer with wood slides that seems to be difficult to pull out, try rubbing a wax candle on the wood slide. If you have a metal slide, make sure it isn’t bent…if it is, just take a pair of pliers and manipulate the metal.

Also, if you find the drawers to be a tad smelly, first wipe them down with ammonia and water, then spritz them with vinegar water and let them sit. Truthfully, I have found a few that smelled no matter how well I cleaned them….in that case I taped off the fronts and painted the interior and exterior of the drawer with Kilz and latex paint (here is an example!)…sometimes you have no choice!

Next up chipped and scratched veneer.

A lot of the older furniture is veneered. If it is chipped or scratched, take the time to remove any loose veneer and repair it with a little wood filler.

The first few coats don’t have to be pretty…you just want to make sure you fill all the boo-boos well. Don’t rush this process…it may take two or even three coats to get a smooth repair!

In this case it took two coats (sand between each coat) and a lot of sanding with a fine grit paper (220) to get a smooth repair, but in the end it will be worth all the effort!

I have found that after I prime and sand, I can often see how well the “patch” will look and can add more filler and do more sanding if needed. If it looks and feels rough after priming, it’s going to look bad with paint…so do a little more work on it after the primer if needed!

My plan originally was to strip and oil the top since it is a walnut veneer, but I did a number on it dragging it out of my truck…so repair and paint it is.

I would like to stress (again!) the importance of sanding and FEELING! You want it smooth to the touch. If you can feel it, you will see it when you paint it! So sand it smooth.

The veneer on the drawer fronts were in mint condition…the finish just looked old and “muddy.” I removed the mis-matched hardware and then stripped the old finish (using this process). It took me less than 30 minutes to strip all four drawers.

The two on the right have been stripped…the two on the left have not…as you can see, they weren’t THAT bad, but this quick step brightens the color and really allows the grain to shine.

On veneers it is important to use chemical stripping as opposed to sanding. Veneers can be very thin and if you sand through the veneer there is no salvaging it…you will have to putty and paint!

After stripping them I applied three coats of Formby’s tung oil finish. I love this stuff and it is my “go-to.” No stain, just a clear finish!

(It was pointed out to me by a kind reader that the original Lane Acclaim tables came with a “toned lacquer” finish….true of many mid century pieces. That may be the case but again, this is the process that works for me and the one I prefer…do your research and do what works for YOU! I prefer the “easy to wipe on and freshen in the future” tung oil finish over lacquer)

I also stripped and oiled the legs since they were in pretty good condition. Same process, same finish.

If your drawer fronts have MINOR chipping like this one did, I would suggest carefully removing or glueing any “loose” veneer (I use a toothpick to slide a bit of glue under any loose veneer and wipe the glue residue with mineral spirits) and then apply the finish. As my daddy use to say, you will never notice it on a passing train! Any time I can salvage and feature a beautiful walnut veneer, I do!

Again, my apologies…this will have to be one of those “to be continued” posts. We had rain and a cold front roll in (yea! it really is fall now!) and since I don’t have a nice cozy shop I am at the mercy of the elements.

Priming, paint and reveal will have to wait until next week!

This process may SEEM daunting and time consuming but in the end it is all worth the time and effort to bring these sturdy old pieces back to life!

Take your time and do it right and you will have a piece fit for another lifetime of use! Hopefully next week you will get to see the results of all this prep work!


Armoir makeover....

Occasionally I find a piece I really love. This armoire is one of those pieces.

I obviously don't have room for it in my home, but it is a very unique piece that could serve a number of purposes in a home...dresser, kitchen pantry, tv cabinet or even bathroom storage! 

In it's original condition it wouldn't have been difficult to over-look. But this is one of those times one has to look beyond the years of neglect and abuse and know that it can be made beautiful and useful again! 

Again, I have to have my "wood fix" so I decided to strip and refinish the top. I stripped it using this process and then topped it with tung oil finish. I love how removing all the old "muddy" finish revealed a very unique and beautiful walnut veneer! Seriously, this took minutes...don't miss out on uncovering a piece of "art" just because you think this will be a difficult task and do not use the wrong process (like sanding!) 

I had originally planned to paint the inside, but after stripping the drawers I decided the mahogany was just too beautiful to slather in paint so I decided to strip and oil it as well.

The veneer doors and sides weren't anything to write home about. A little "chalk paint and distress" treatment brightened the piece and gave it a much needed "update." This "farmhouse" look isn't exactly my style but it really brought this cabinet into the 21st century!

In the end, a simple makeover made all the difference! 

This week has been "project" week for me. Usually I take inventory of what needs to be done and then make a plan for how and when....again, I use an "assembly line" process when I have a lot to work on!  Tuesday was sand, repair, build and prime day. Can't paint when saw dust is flying all over the place. Today I will sand the primed pieces and chalk paint a few. I like to let the chalkpaint cure a few days before I sand...I have found that the paint "distresses" rather than peels when it has cured well!  

Off to work I go!!!!

Another mid-century dresser makeover...

If you have followed along for any amount of time, you know I have a "thing" for mid-century furniture...and walnut. 

I just love the clean lines of the pieces and how sturdy they are. You can not buy furniture today that is as durable and sturdy as many of these 50-60 year old pieces. Well, I guess you can, but you will pay a pretty penny for them! 

And walnut? Well, in my opinion, there isn't a more beautiful wood grain out there. 

A few months ago I featured a beautiful mid-century dresser I refinished and put in "Mitchell's room."  I knew it was a tad big for the room, but I just could not resist.

As strange luck would have it, I was cruising Craigslist and found the matching chest. It just so happens that the people who owned the flea market where I originally purchased the dresser were selling the matching chest. Wow. What are the odds!

I actually ended up paying a tad more for the chest than I did the dresser...and it was in a little rougher shape structurally. 

One of the big "boo-boos" on this piece was some pretty substantial chipping on the veneer of the top drawer corners....

Several of the drawers had missing or broken bottom "glides" and one had been VERY poorly repaired! (Hence, THIS rant!) And one of the legs was a little whomper-jomped. (Technical term for loose and wobbly)

I can not stress enough how important it is to make proper repairs. People, wood glue and clamps are your friend! I could do a tutorial a day on properly repairing furniture, but truth be told, there are a billion outstanding tutorials online for every imaginable repair. No, DO NOT use nails to secure dislocated dove joints. No, do not use silicone to try to put a drawer back together. No, do not put sheetrock screws in the leg of a dresser that originally had a bolt and clamp. If you don't know how to properly fix it, GOOGLE IT! (or email me...I love telling people what to do!) Seriously, it isn't hard to repair furniture, but if you do it wrong, I promise it won't last...and all the paint and refinishing you did to make the piece "pretty" will be a waste of time! 

So, the first thing I had to do was repair and rebuild a few drawer glides. Then I had to fix the leg which required removing the old bolt, filling the hole with wood and glue and then replacing the bolt. Then I had to figure out what to do with the chipped drawer fronts.

Since I had refinished the drawers on the dresser, I really wanted to refinish this piece to match. Since there is really no good way to "rebuild" veneer and then stain it to match, I decided to remove the damage by creating a little "radius" on the corners. Probably not the best thing to do on a style known for it's clean, straight lines. I contemplated just cutting the corners at a 45 degree angle...but naaaaaa. 

My goal was to improve the aesthetics a  tad and also prevent further damage to the veneer in the future. 

I used a paint can to draw a "radius" on the corner....

...then I used my mouse sander with 220 grit paper to carefully sand away the damage and round the corners. This is what I call "sculpting" a piece and it takes time and patience. When sanding, always start with a very smooth grade of sand paper (220-330) and only use a rougher grit if it is absolutely necessary. And ALWAYS sand with the grain!

Other than the chipping, the veneer was in pretty go shape and still intact. If I had used a rougher grit, I risked chipping or damaging the veneer further.

When it was all said and done, it turned out pretty well. 

After making all the repairs, I stripped the top, drawers and legs using 1/2 acetone and 1/2 lacquer thinner and steel wool. I knew I wanted to paint the "cabinet" like I did the dresser, so I taped and papered off everything that was going to be left "natural" and sprayed it will Kilz, sanded smooth, wiped it down with a tack cloth, and sprayed it with my favorite spray paint. 

The top, drawer fronts and legs were left natural. I didn't apply a stain because I love the look and color of walnut with nothing but clear oil. 

I used the same process I use on all stained or natural wood. First I hit it with 0000 steel wool (always WITH the grain) just to smooth it a bit. Then I applied 3-4 coats of Formby's tung oil finish, rubbing it with 0000 steel wool and a tack cloth between each coat. 

In all honestly, I really do not need two large dressers in this room. It is just the "guest room" now. But I really can't part with either of these pieces! They are just too beautiful! 

Don't turn your nose up at old pieces that need a little time and attention. In the end, if you do it right, they will be well worth it!