Pretty in Pink...

If you “came of age” in the 80’s chances are you saw a John Hughes film. If you haven’t, you are missing out! “Pretty in Pink” was one of my favorites! Check them out…you won’t be disappointed and I can’t think of one that isn’t “kid friendly.”

Which brings me to pink…a color I have always loved but have never really used in my home decor. I must have gotten a “pink bug” because all of a sudden I can’t seem to get enough of it….and since next week is Valentine’s Day, this is a great time to infuse a little pink into my home decor under the guise of “decorating for the holiday.”

I found this little bench in 410 Vintage…the tag said it is walnut but I really think it is mahogany. I used this process to refinish the frame and recovered the seat with the same pink velvet I used for the club chair pillow (makeover here).

Several years ago I refinished a little piano bench to set by the closet so I would have a place to sit and put my shoes on.

In one of my “purging” marathons I moved it out but in all honesty I kinda missed it…so this little bench is a perfect little replacement!

I love my office…a simple room that is really multi purpose…a “thoroughfare” from the living spaces to the master bedroom, a “dressing room,” and of course, an office.

I featured the desk here.

I have seen a few desks over the years that peaked my interest but I still love this desk…it is perfect! Prime example of “buy what you TRULY LOVE and you will never tire of it!”

My office chair looks a lot like a Marcel Gascoin C-chair….I can’t find a picture of this exact chair so I don’t know for certain! Again, I don’t buy pieces like this for their potential value…but because I LOVE them.

I bought it years ago and share it’s little makeover here. Again, still love it!

I have replaced the dresser several times over the years but I LOVE this one! Shared the makeover here and while I loved the dresser that was here before, this one is MORE better!

The little bookcase…just adorbs!

I digress…off to the living room … I found the cutest pink pillows…

…and a yummy smelling pink candle!

The little white pillow was kind of plain so I decided to add some cute pink pom-poms I made out of “furry” yarn. I just tacked them on so they can easily be taken off when I tire of the pink.

The pink pillows will go well with the little bit of Easter decorating I do!

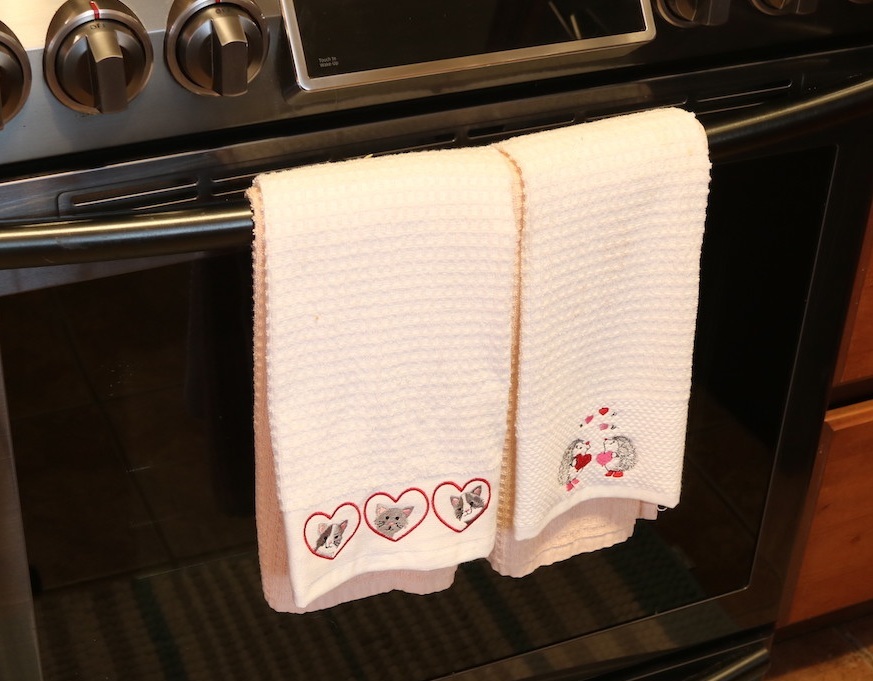
While digging around TJMaxx for pink pillows and candles I found a few other things I thought would be fun for the holiday….cute hedgehog mugs and fun little Valentine’s hand towels!

You don’t have to (or need to) spend a lot of money dressing your home for Valentine’s Day…but it is fun to infuse a little fun and color into an otherwise “drab” time of year!

Funny…I was wearing my pink tennis shoes and a pink vest when I was buying all this pink stuff…the check out lady remarked that I sure must like my pink…lol!

Turns out, I really do! It is so dreary and “wintery” outside and the pink just seems to brighten things up a bit!

I have some leftover pink velvet from the bench makeover…just enough for a few more pink pillows! Now if I can just being myself to sew them…eck!

And another campaign dresser makeover...

I shared the "before" of this Dixie campaign dresser here....

A very desirable piece that I knew needed the perfect makeover.

I spent hours cleaning the brass hardware. One of the little doodad brackets was missing so I had to order two on Etsy....they didn't match the original hardware exactly but as my Daddy use to say "You'll never notice it on a passing train!"

A few minor repairs but all in all, it was in outstanding condition for a 50+ year old piece!

A KTSP treatment...kilz, sand, tack cloth and a high gloss oil based paint!

Gorgeous!

This was a tough one to let go! I took it to 410 Vintage at around 3:00 Tuesday afternoon and they texted me at 5:00 that it was sold....I'm so glad someone else loved it as much as I did!

These vintage pieces can be brought back to life with a little elbow grease...if you can find one, don't let the grungy old finish and dingy hardware deter you! You won't be disappointed!


The hardware sets the tone...dresser makeovers!

We have been pretty busy this past month so I haven't been able to go to too many auctions. I was forced to scrounge around on Craigslist and online garage sale sites to find a few pieces to work on..

They did not disappoint!

As usual, I am drawn to the "nobody wants me because I am totally ugly" pieces of furniture.

I like different and unusual.

This chest and side table checked off all the boxes...kinda ugly and unusual.

The ugly part is pretty obvious but they do have nice "bones." Solid and sturdy!

The unusual part was the hardware. I love unusual hardware. Sometimes the hardware dictates what direction I go with a piece.

In this case the heavy black handles pushed me towards blue/gray. A friend asked me what paint color I used. Well, let's see...I had some blue, I threw in some black...too dark, so I added some white. 

So I have no idea what color it is....blue/gray!

They had some detailing so I decided to do a chalk paint and distress treatment. I usually save that for pieces that have good detailing that will "pop" when I distress it. 

Two coats of chalk paint, a little distressing and sealed with poly. The hardware just needed a little cleaning and it was good to go!!!

Hardware can be a booger when it is missing. I picked up a campaign dresser last week and the brass hardware was amazing. The only problem was it was missing one handle and they are next to impossible to replace.

I really wanted to stay "true" to the style of this dresser...a mid century campaign. But the old finish was pretty dark and dated. (did I take a before picture like a good blogger...um...no!) 

Very similar to this little side table I recently refinished. 

I decide to shine up the brass hardware and give the piece a sleek new look with gloss white paint.

The missing handle, however, posed a real challenge!

I knew I was going to have to scale back to one handle on each of the top drawers but I couldn't just patch little screw holes because the handles actually "inset" into the face of the drawer. 

The thickness of the hardware was 1/4"...so I bought 1/4" pieces of craft board....

....cut out a hole big enough for the hardware to sit in and then attached the boards to the face of the drawers with wood glue to cover the existing cut outs! 

KSTP (Kilz, sand, tack and paint!) treatment, reinstalled the spiffed up hardware and.....

Perfect! Obviously someone else thought it was perfect because it sold the day I took it in!

Until next week....

MCM dresser makeover AGAIN!

I featured my personal dresser make over here!

I really love this dresser but as I mentioned in the original post, I have always regretted painting the drawer fronts. They have a little slant and as you can see in the linked post, they have a little "inlay" detail! Looking back, I wish I had stripped the drawer fronts, oiled them and just painted the cabinet and top....kind of like what I did with this dresser!

I guess I could have rolled up my sleeves and taken on the task of stripping the fronts...but honestly, you can't go back and easily undo what has been done...or can you?

If you find the exact same dresser, YES YOU CAN!!!

I happen to be driving down the street this past weekend and spotted a dresser and chest of drawers sitting out in a driveway. It just so happens they were the EXACT same style I have. I couldn't stop fast enough (annoying to the person behind me since I was hauling my 14' trailer) but was disappointed when told someone was coming to pick them up later that evening. I asked them to call me if they weren't picked up...that is when I found out they were GIVING them away...would I be willing to PAY for them? YOU BET YOUR BAZOOKA!!!! I couldn't get them in my truck fast enough. Do I feel a tad guilty that someone showed up later that evening to pick up their free furniture...only to find it gone...naaaaaa...okay just a tad.

So this is what the dresser looks like in it's original glory! A "Ward Furniture Manufacturing" dresser. It is identical to my blue one before I gave it a little makeover.

Hardly a scratch on it and the veneer was all intact and in good condition. I am always amazed when a 50 year old piece of furniture is in such amazing condition...I wish this 53 year old had faired as well!

I removed all the drawers and stripped the fronts using this process...never fails and a pretty quick process! Even though the finish was near perfect, old finishes "muddy" and "amber" over time and just removing the old finish really brings out the beauty of the piece!

TIP! When you remove drawers from a chest or dresser, make sure you label each drawer (I mark them on the underside with a pencil!) 

The drawers may look identical, but truth is they may not fit properly in a different place...age and wear can make drawers "stick" if they aren't put back where they were originally! 

I gave the cabinet a little KSTP treatment...Kilz, sand, tack and paint! I applied 4 coats of tung oil finish to the drawer fronts and legs...sanding (with 0000 steel wool) and tack between each coat. 

I. LOVE. WALNUT. AND I. LOVE. MID CENTURY! 

And now I. LOVE. THIS. DRESSER! 

I didn't "dislike" the original dresser, but again, I did regret that I didn't restore the drawer fronts. Now...perfect! 

As much as I would love to keep the matching chest, it will be sold. Can't keep every piece and since these aren't "valuable" MCM pieces, I don't feel too bad letting it go!  

Painting dressers today so until next week....